Action Electronics 9R3ODM21011 Digital Audio Video Player User Manual ADVEXL10 IB preparation
Action Electronics Co.,Ltd. Digital Audio Video Player ADVEXL10 IB preparation
UserManual.wiki
>
Action Electronics
>
9R3ODM21011 User Manual
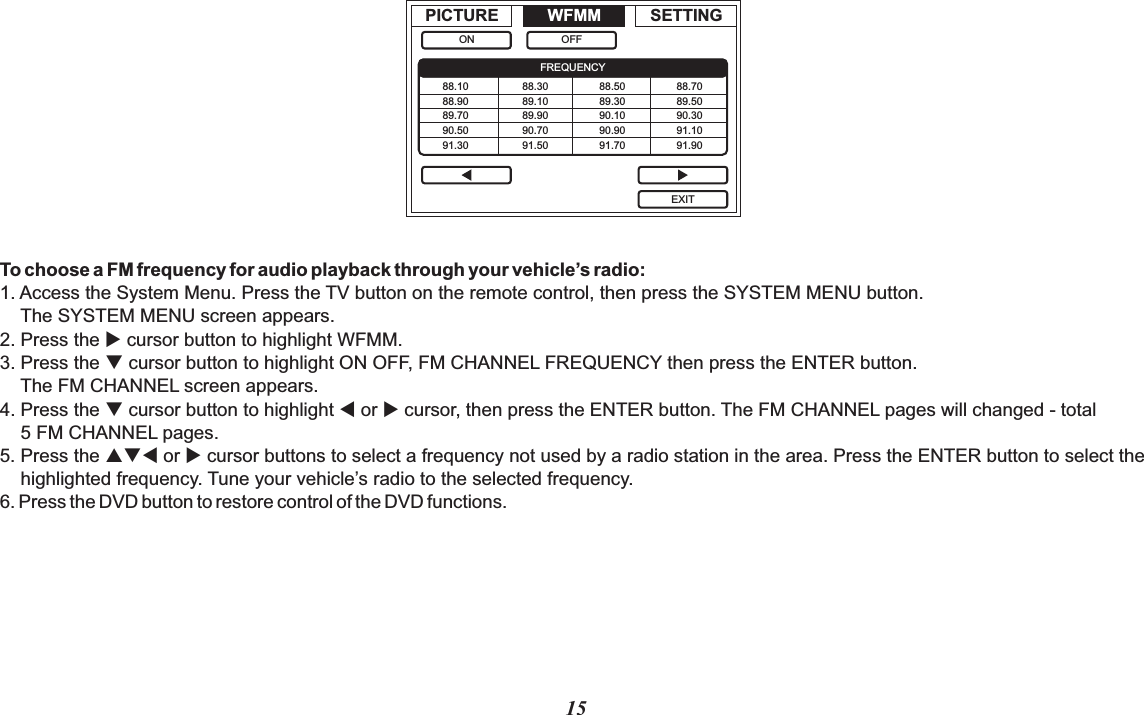
Users Manual
Navigation menu
Upload a User Manual
Namespaces
Wiki Guide
HTML
PDF
Info
Views
User Manual
Discussion / Help
Navigation