Actiontec Electronics WPB3000 Powerline Wireless Network Adapter User Manual Manual
Actiontec Electronics Inc Powerline Wireless Network Adapter Manual
UserManual.wiki
>
Actiontec Electronics
>
WPB3000 User Manual
Manual
Navigation menu
Upload a User Manual
Namespaces
Wiki Guide
HTML
PDF
Info
Views
User Manual
Discussion / Help
Navigation
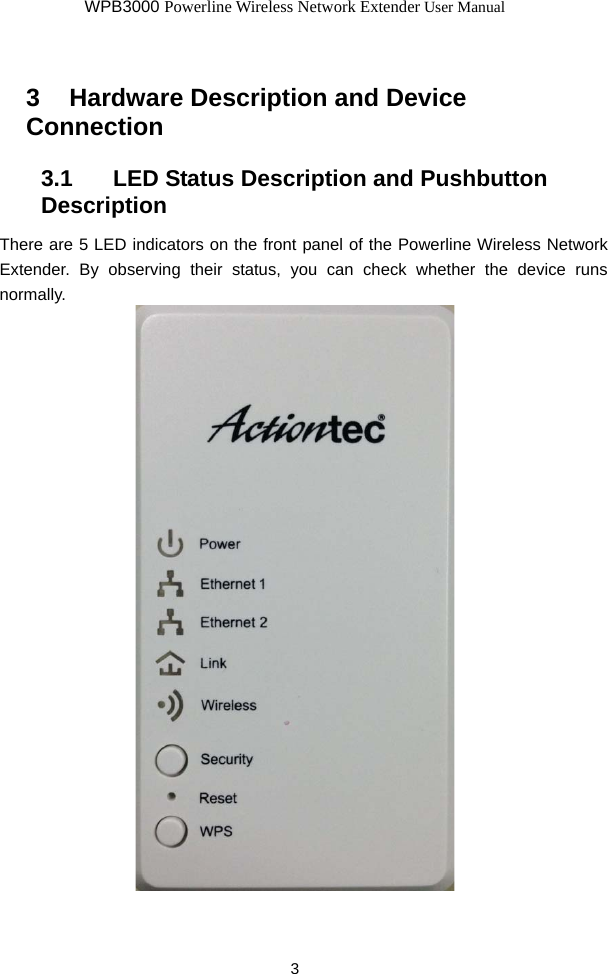
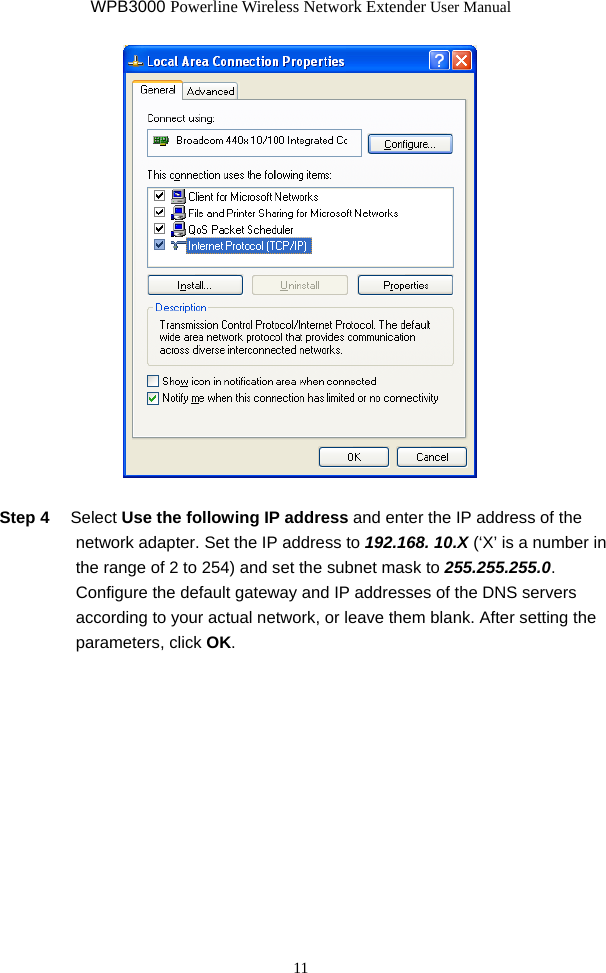
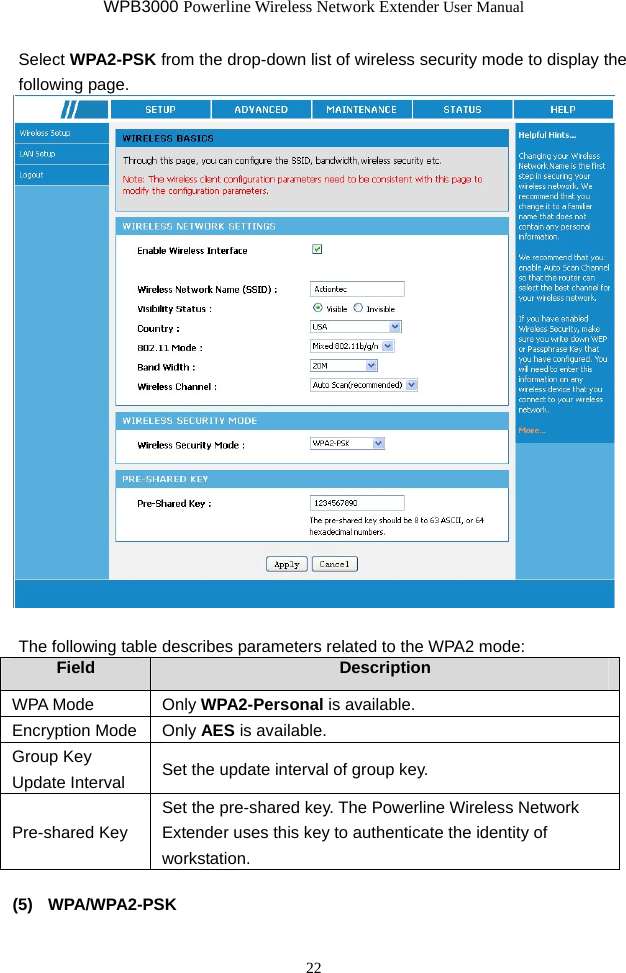
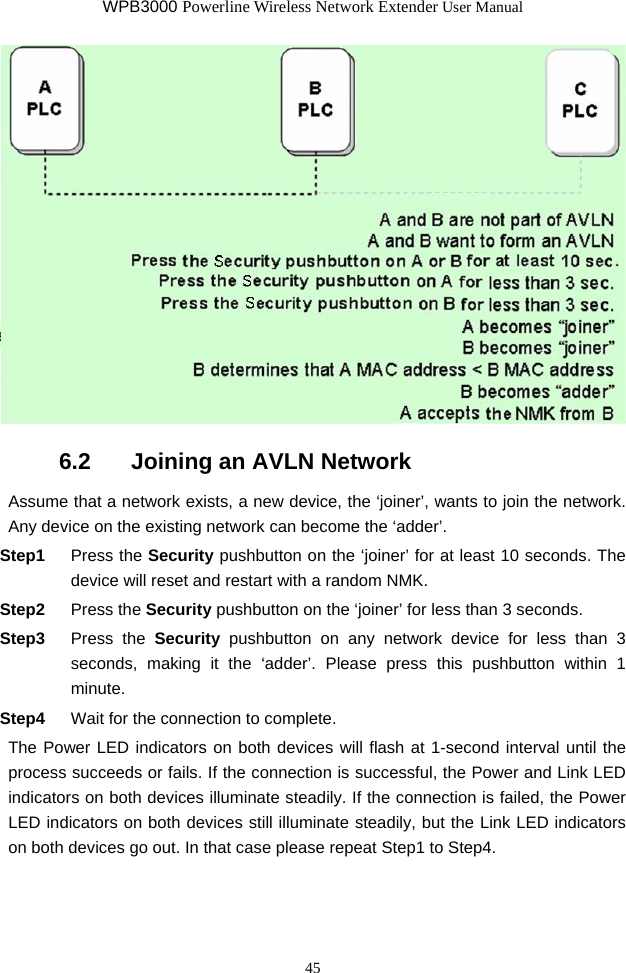
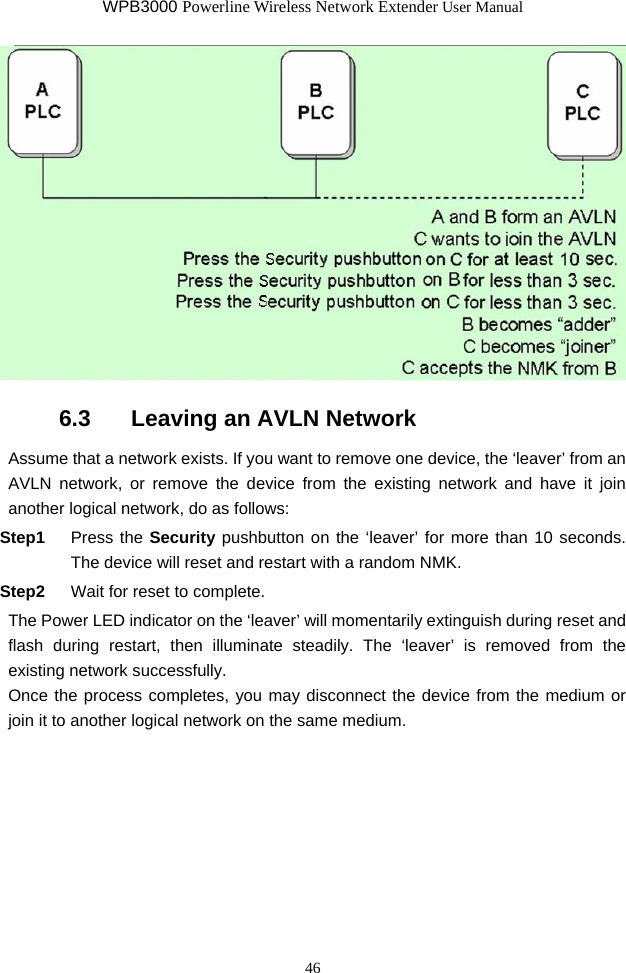
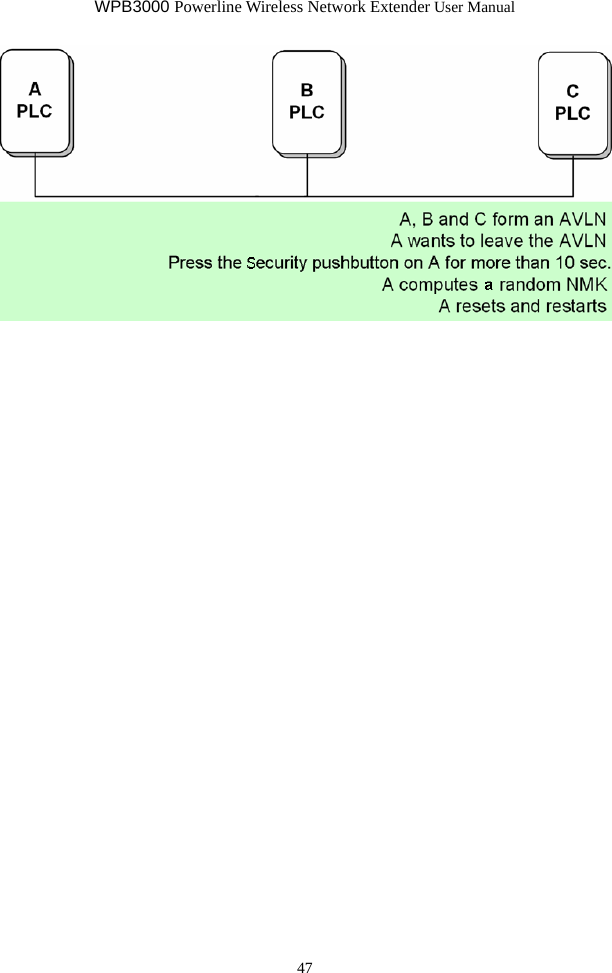
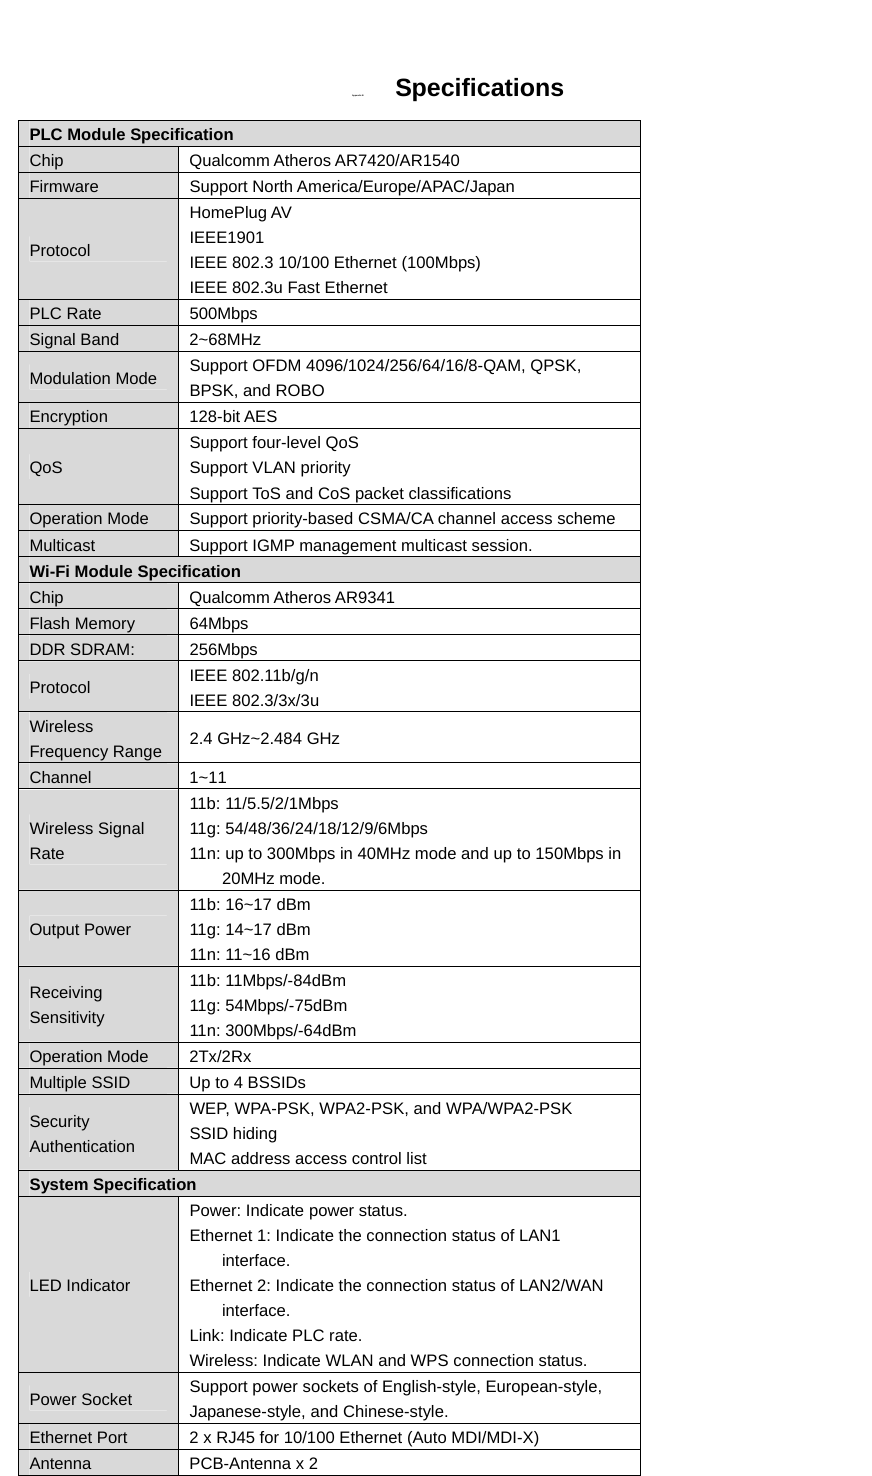
![WPB3000 Powerline Wireless Network Extender User Manual 4 The following table describes the status of LED indicators on the front panel: LED Indicator Color Description Solid green System runs normally. Green System is in the process of password synchronization. Power Off Device is powered off or system is down. OffEthernetcablenotconnectedFlashinggreenfastPacketsarereceivedortransmittedEthernet 1 OnEthernetcableisconnectedOffEthernetcablenotconnectedFlashinggreenfastPacketsarereceivedortransmittedEthernet 2 OnEthernetcableisconnectedOffUnabletojoinpowerlinenetworkSolidgreenPowerlinenetworkrateisgreaterthan40mbpsSolidOrangePowerlinenetworkrateisbetween5and40mbpsSolidRedPowerlinenetworkrateislessthan5mbpsLink Flashing[color]fastPacketsarereceivedortransmittedOffWirelessdisabledOnWirelessenabledFlashingorangeslowlyWPSconfigsyncinprocessWireless FlashingorangeWPSconfigsyncsuccess](https://usermanual.wiki/Actiontec-Electronics/WPB3000/User-Guide-2094050-Page-9.png)