Actiontec Electronics ZCHAV1 Home Automation Adapter User Manual Rev 1
Actiontec Electronics Inc Home Automation Adapter Users Manual Rev 1
Contents
- 1. User Manual
- 2. Users Manual Rev 1
Users Manual Rev 1
USER MANUAL
zControl
Introduction III
Introduction
This manual will guide you through the setup of your ActionTec
zControl, the breakthrough system that will make your home con-
trol and home monitoring easy and enjoyable!
Please make sure you read all instructions before proceeding with
the installation.
Your package contains the following items:
(1) ActionTec zControl
(1) Power supply
(1) Stand for putting the zControl in a vertical position
(1) Ethernet cable
(1) Accompanying CD (includes complete User Manual)
(1) Quick Start Guide
It may also contain any or all of the following items:
(1) Panasonic BL-C10A, BL-C20A, or other IP Camera
(1) Z-Wave Appliance module
(1) InTouch occupancy sensor CA9000
(2) Z-Wave Lamp modules
(1) Intermatic Wireless Handy Remote Controller
Now it’s time to activate and register your ActionTec zControl, get familiar with the User Interface, and learn how
to configure your home control and home monitoring devices.

Table of ContentsIV
Table of Contents
3 Accessing the User Interface
1 Inspecting Your zControl
4 Overview: Basic UI Features and Elements
2 Connection, Registration, and Activation
3.1 UPnP Access
1.1 Inspecting the Ports on Your zControl
4.1 Administrator Mode
2.1 Connecting to the Internet
4.5 Scenes
3.2 IP Address Access (Advanced)
3.3 Mobile Device Access
1.2 Inspecting the LEDs on Your zControl
4.2 Settings
2.2 Registration
4.6 Schedules
4.3 Devices
2.3 Activation
4.7 Monitor
4.4 Rooms
4.8 Dashboard
4.9 Mobile UI
5
1
8
2
5
1
8
2
9
6
6
1
8
2
9
9
4
9
9
9
10

Table of Contents V
5 Managing Z-Wave Devices
7 Advanced UI Features
8 Suggestions
9 Troubleshooting
6 Installing Home Monitoring Devices
9.1 Unable to Register with Portal Server
9.5 zControl Becomes Unresponsive or Online LED Is Not Solid Green
5.1 Adding Z-Wave Devices
7.1 Device Management
9.2 Unable to Access zControl UI
9.6 Unable to Control My Z-Wave Appliance Module
5.2 Adding Z-Wave Devices (UI method)
5.3 Removing Z-Wave Devices
7.2 Rooms, Scenes, and Schedules
7.3 Monitoring
7.5 Messages
7.6 Controlling Multiple zControls
7.4 Triggers
6.1 Installing Motion/Occupancy Sensors
6.2 Installing UPnP Cameras
6.3 Installing non-UPnP Cameras
9.3 Unable to Control Device
9.7 Unable to Control My Z-Wave Lamp Module
9.4 Browser Becomes Unresponsive
9.8 Motion detector Is Not Being Detected
14
18
27
28
16
28
29
14
18
28
29
14
15
18
22
24
25
23
16
16
17
28
29
29
30

Table of ContentsVI
9.9 Motion Detector Takes Too Much or Too Little Time to Return to “No motion” State
10.1 Preparing the zControl to Use the Remote Controller
9.10 Unable to Access my Panasonic IP Camera
10.2 Setting Up the Intermatic CA-09 Remote Controller
9.11 Unable to View My Panasonic IP Camera Video
10.3 Programming the zControl to Use the Remote Controller
9.12 Why Do I Have an Upgrade Notification Message on My zControl Interface?
9.13 Cannot Add New Z-Wave Devices to My zControl
9.14 Understanding the LEDs
30
33
30
33
30
34
31
31
32
10 Appendix A - Remote Controllers (Advanced Setup) 33
1
Inspecting Your zControl
1 Inspecting Your zControl
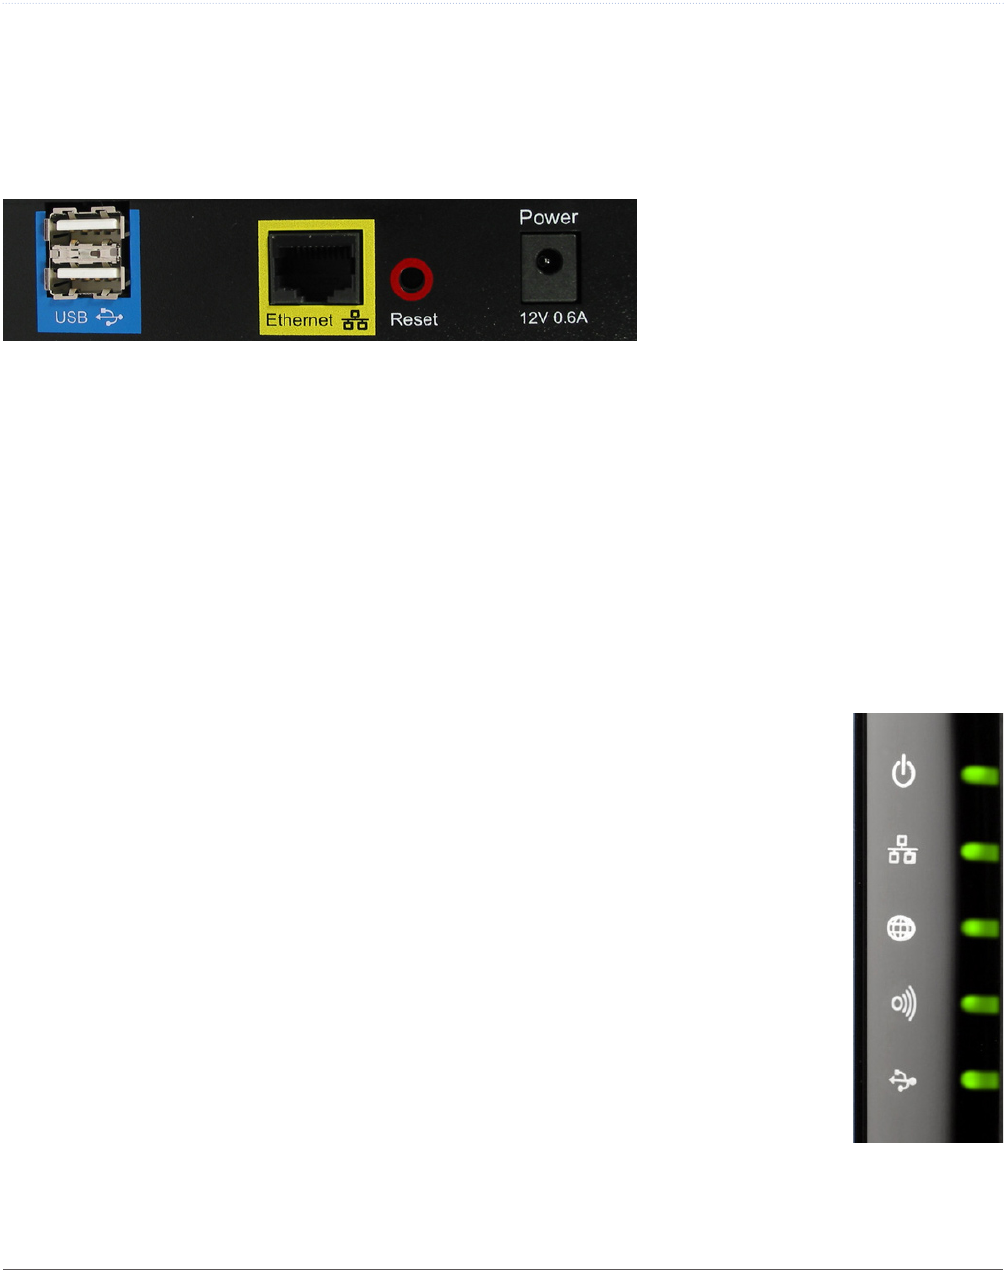
1.1 Inspecting the Ports on Your zControl
Let’s take a look at the back of your zControl to see all of the ports and their uses.
(2) USB ports – reserved for your future USB devices; the USB ports can be used for external, local storage ›
such as an external hard drive or memory stick
Ethernet port – connects the zControl to your network (for example, to an Ethernet hub or directly to your ›
gateway/router) by means of the included Ethernet cable
Reset button – restarts your zControl ›
WARNING: Normal functionality will be interrupted until the zControl has fully restarted
12VDC 1.4A – connects to your power supply ›
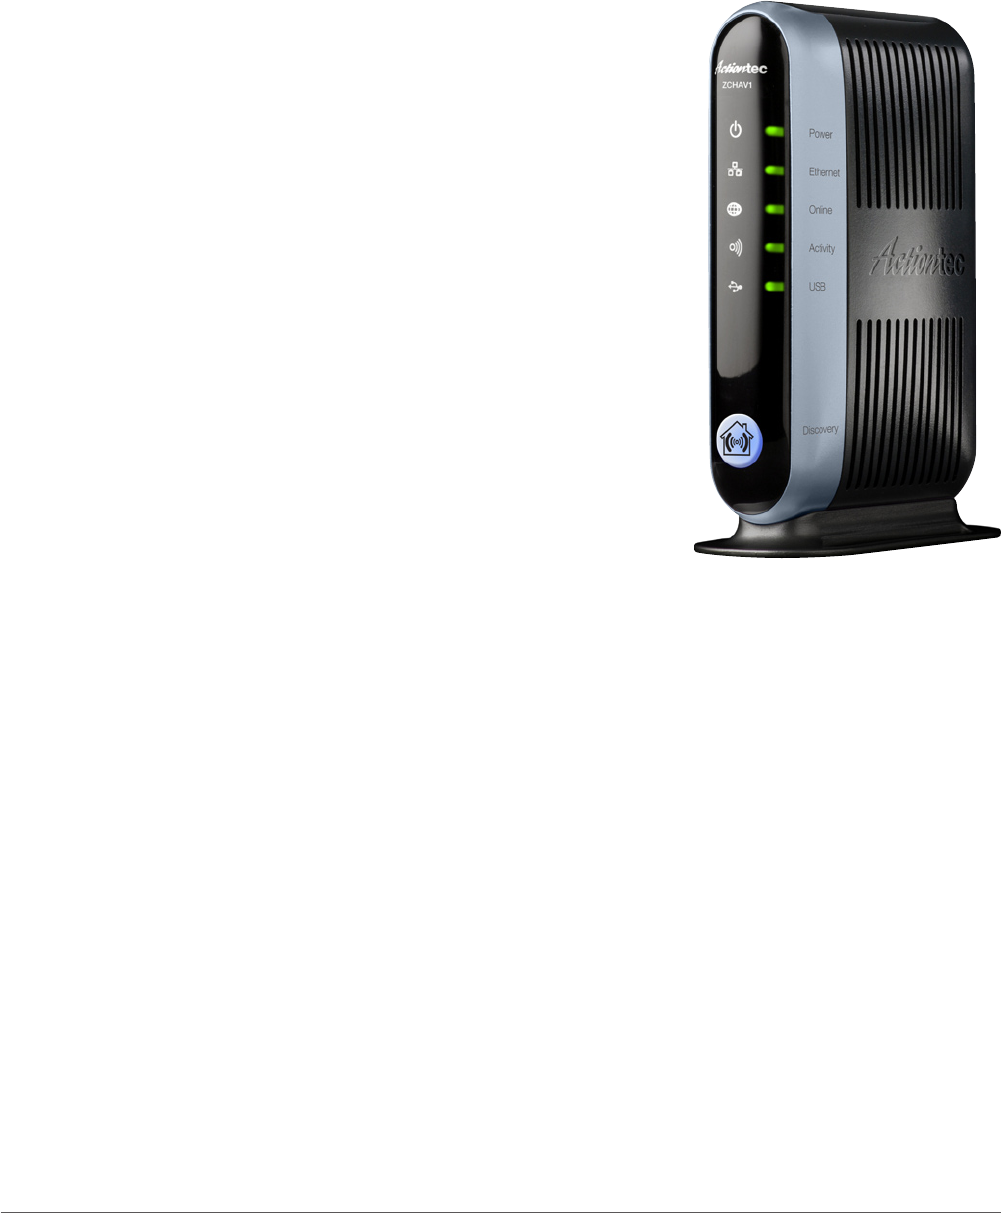
1.2 Inspecting the LEDs on Your zControl
You’ll notice several LEDs on the front of your zControl.
These LEDs provide information on the zControl’s status. In general, when you see green,
everything is working correctly. When choosing a location for your zControl, remember to
make sure that the LEDs are easily visible. For more information on the LEDs, consult the
LED matrix on the last page of this manual.
Connection, Registration, and Activation2
2 Connection, Registration, and Activation
2.1 Connecting to the Internet
Plug one end of the provided Ethernet cable into the 1. Ethernet port of your zControl, and the other end into
your router
Plug one end of the power cable into the 2. 12VDC 1.4A port of your zControl and the other end into a wall socket
or power strip. The Power LED on the front of the zControl will turn solid green
The 3. Ethernet LED on the front of the zControl will blink green until the zControl has obtained an IP address,
at which point the Ethernet LED will turn solid green. This can take up to two minutesNOTE: Your zControl is
pre-configured to receive IP address automatically via the DHCP mechanism used in most home networks. If
no DHCP server is present on the network, your zControl will default to the IP address 192.168.1.55.
Once the zControl is connected to the local network, it will connect to the Internet automatically. You’ll know it’s
connected when the Online LED on the front of the zControl starts blinking green.
You’ll need the zControl to have Internet connectivity so that you can Activate and Register it online. Once you’ve
successfully Registered and Activated your zControl, the Online LED will turn solid green.
2.2 Registration
Now that your zControl is on, connected to your local network, and has Internet connectivity, it’s time to Register
with the Portal Server.
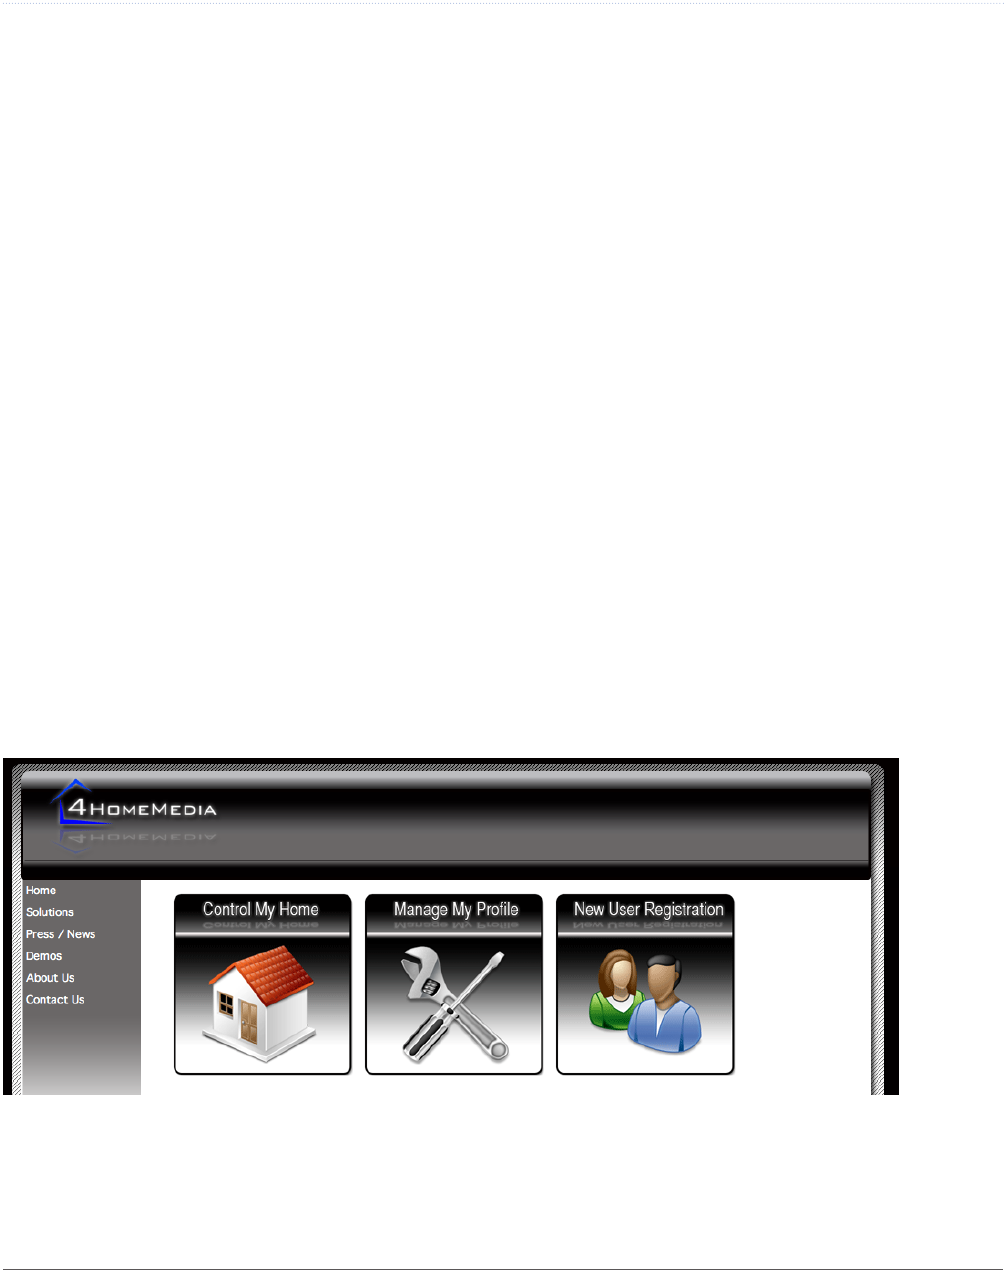
Open your preferred web browser and go to http://digitalgardeneronline.com/zControl. You’ll see this screen:
3
Connection, Registration, and Activation
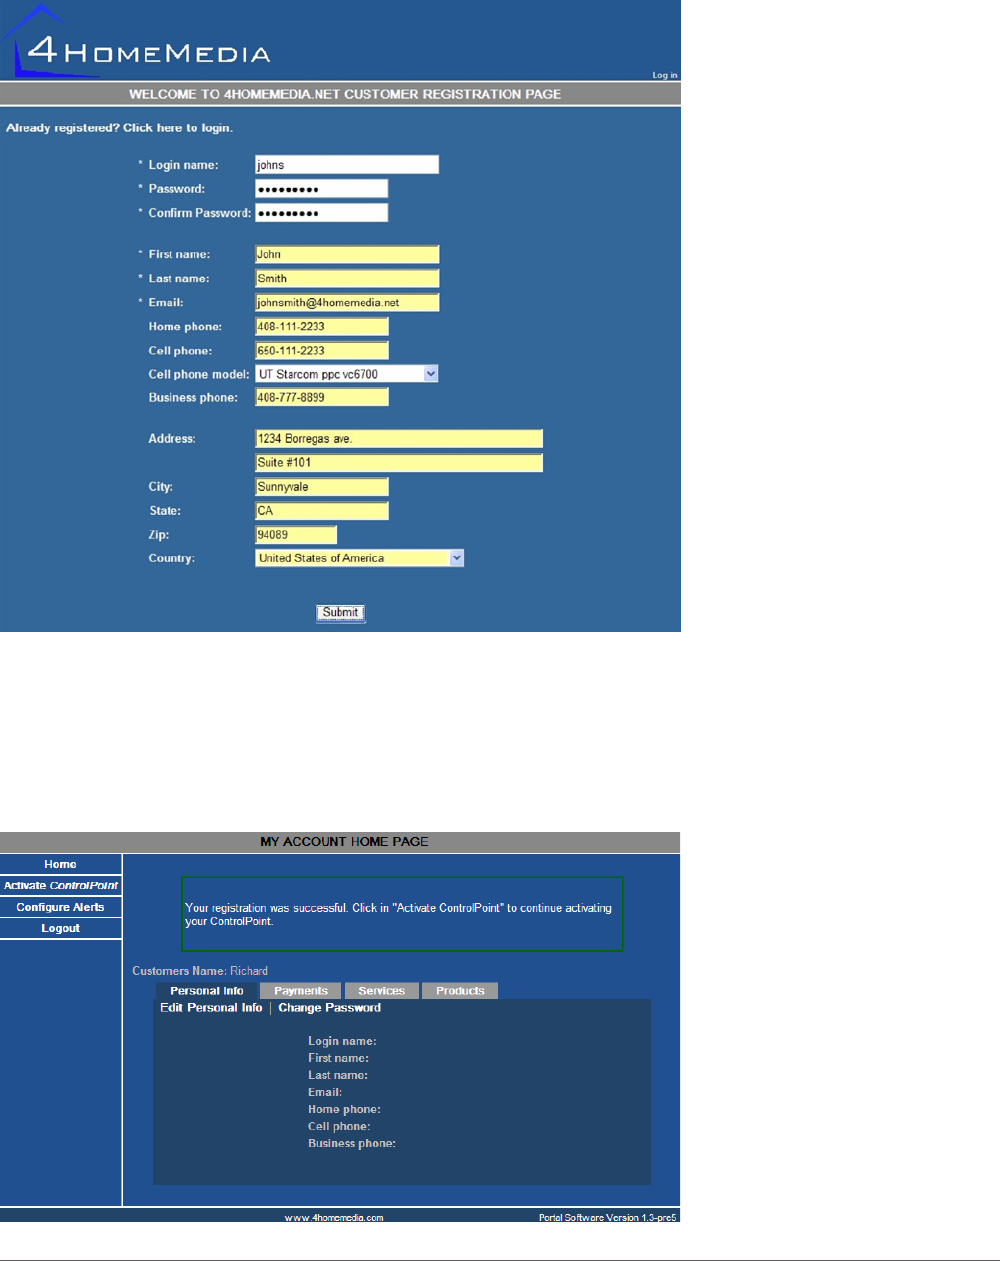
Click on New User Registration. You’ll see a screen like this one:
Provide all of the required information and whatever optional information you like.
NOTE: Make sure you write down your login name and password in a safe place.
Upon successful Registration, you should see the following screen:
Connection, Registration, and Activation4
2.3 Activation
Activation will allow you to start using your zControl, access your zControl User Interface, and receive upgrades
and new services as they become available.
Open a browser window and go to http://digitalgardeneronline.com/zControl again, click on Manage My Prole,
and log in. From the menu on the left side of the screen, click on the Activate ControlPoint option. On that screen,
you’ll need to provide
A friendly name that you want to use to identify your zControl (note: underscores are not allowed). We recom- ›
mend giving your zControl a unique and distinctive name.
For example: “John Smith’s ControlPoint”
Your zControl’s MAC address, which can be found on the label on your zControl ›
For example: 00:06:D3:A8:00:15 OR 0006D3A80015
Your time zone (note: you’ll need this to be correct to take advantage of zControl’s ›Schedule feature)
For example: PST if you live in the Pacific Time Zone
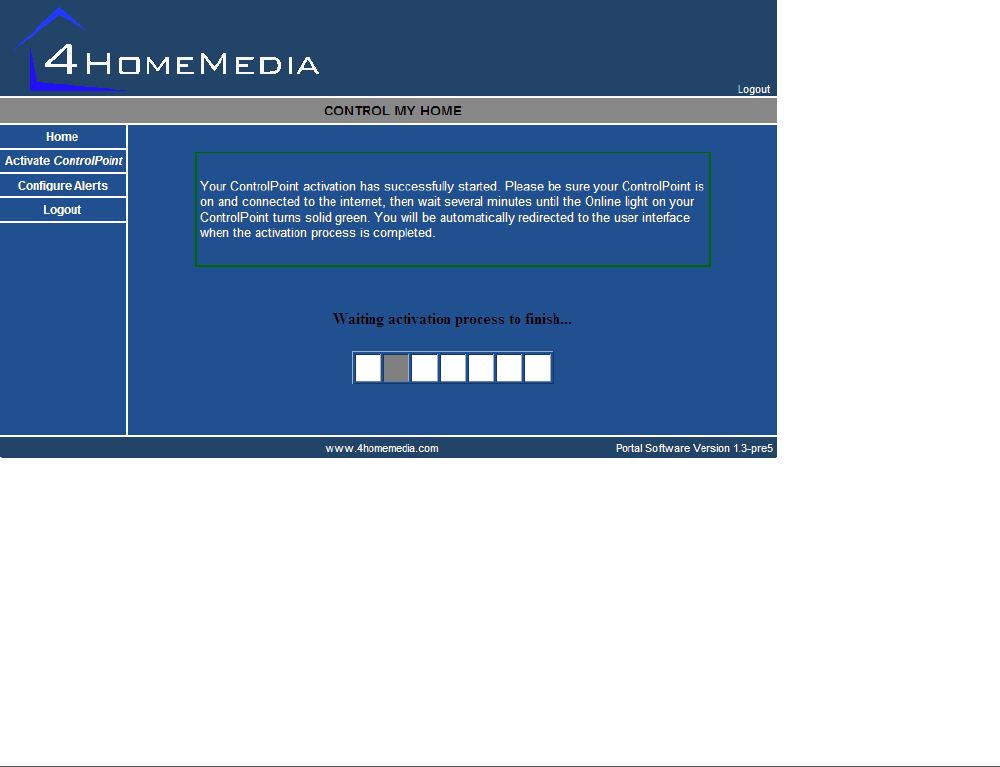
After you click Continue, you’ll see this screen:
Once the Activation process is complete, your browser will be automatically redirected to the User Interface. We
recommend that you add the User Interface to your Bookmarks/Favorites.
NOTE: Some browsers will do this automatically.
5
Accessing the User Interface
3 Accessing the User Interface (UI)
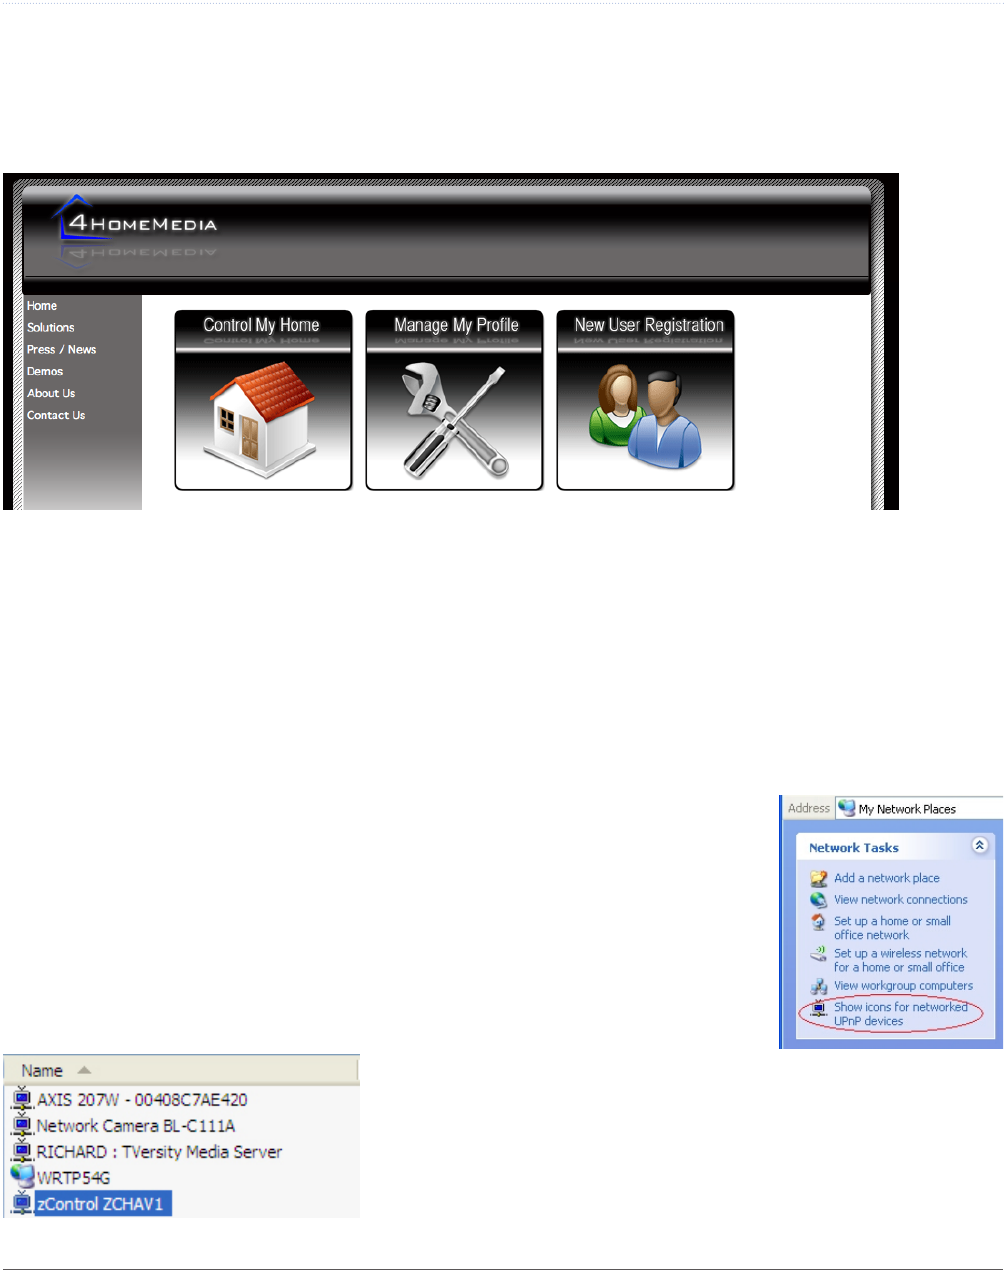
The best and easiest way to access the User Interface is to open a browser window and go to http://digitalgarden-
eronline.com/zControl where you’ll see this screen again:
Once there, click on Control My Home. You can use this method to access your zControl UI from any computer --
at home, at work, abroad -- anywhere!
For your convenience, there are also several other ways to access the UI.
3.1 UPnP Access
Once your zControl is turned on and connected to your network, you should be
able to see it automatically as a UPnP (Universal Plug-and-Play) device. In order to
confirm that UPnP is enabled on your Windows PC, open My Network Places via the
Start menu or the associated icon on your desktop. If the text in the left panel says
“Show icons for networked UPnP devices” (circled in red on the right), click on it.
With UPnP enabled, the zControl will show up in the list as zControl ZCHAV1
(higlighted on the screenshot below):
Accessing the User Interface6
Simply double-click on the zControl ZCHAV1 icon to access the User Interface (UI). Your default browser will
launch automatically and display the zControl UI.
3.2 IP Address Access (Advanced)
Advanced users: you can obtain your zControl’s IP address by looking at your router’s list of attached devices. If
you know your zControl’s IP address, you can enter it into your browser’s address bar to access the UI from any
computer on your network. Note that if the zControl obtains its IP address dynamically, its IP address may change
each time the zControl or the DHCP server is restarted.
3.3 Mobile Device Access
3.3.1 Downloading the UI to your Mobile Device
Any Smartphone running the Windows Mobile operating system with Adobe Flash Lite 2.1 can access the UI. To
set up the UI on your mobile device, open a browser (on that device or any computer) and go to http://digitalgar-
deneronline.com/zControl. Then click Manage My Prole and log in.
NOTE: If you did not enter your cell phone number when you were Registering, you must do so now in order
to download the UI onto your mobile device. Simply click Edit Personal Info and type the number into the Cell
phone: field, then click Update.
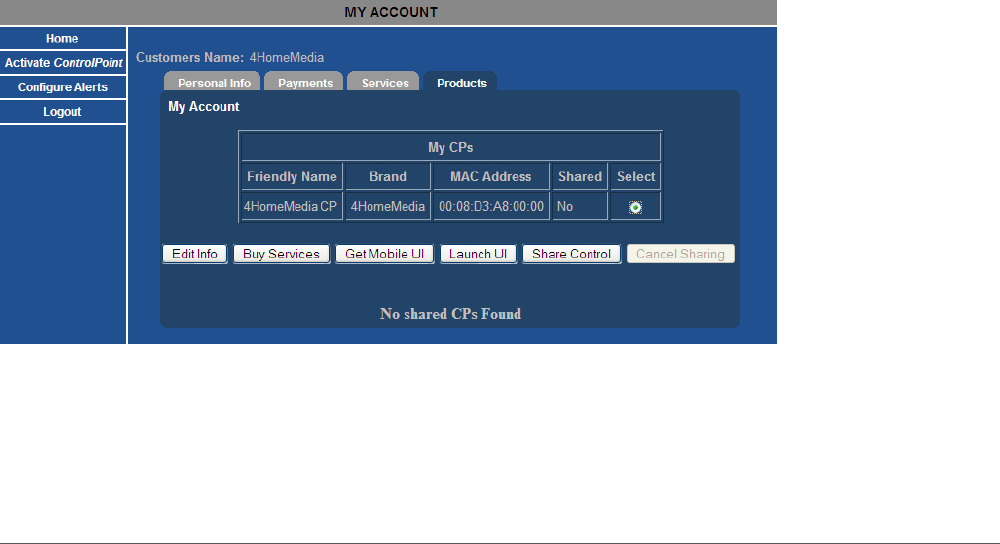
You’ll see a screen like this one:
Click on the Products tab. Click the radio button for your zControl, then click Get Mobile UI.
Click OK when asked for permission to send an SMS message to the cell phone number you entered earlier.

7
Accessing the User Interface
When you receive the SMS message (this may take several minutes), it will contain a download link. Open the link
on your mobile device and the UI will be downloaded automatically. If Adobe Flash Lite 2.1 is not installed, it will
also be downloaded automatically. Depending on your mobile device, you may have to confirm/okay the installation
steps.
Whenever a mobile UI upgrade is available, your mobile device will receive another SMS message with a download
link. Just open the link and the UI will be upgraded automatically.
3.3.2 Accessing the Mobile UI
An icon labeled Hydrogen will be added automatically to your main screen. Opening it will activate the mobile UI.
You will be prompted to enter your login name and password.
Overview: Basic UI Features and Elements8
4 Overview: Basic UI Features and Elements
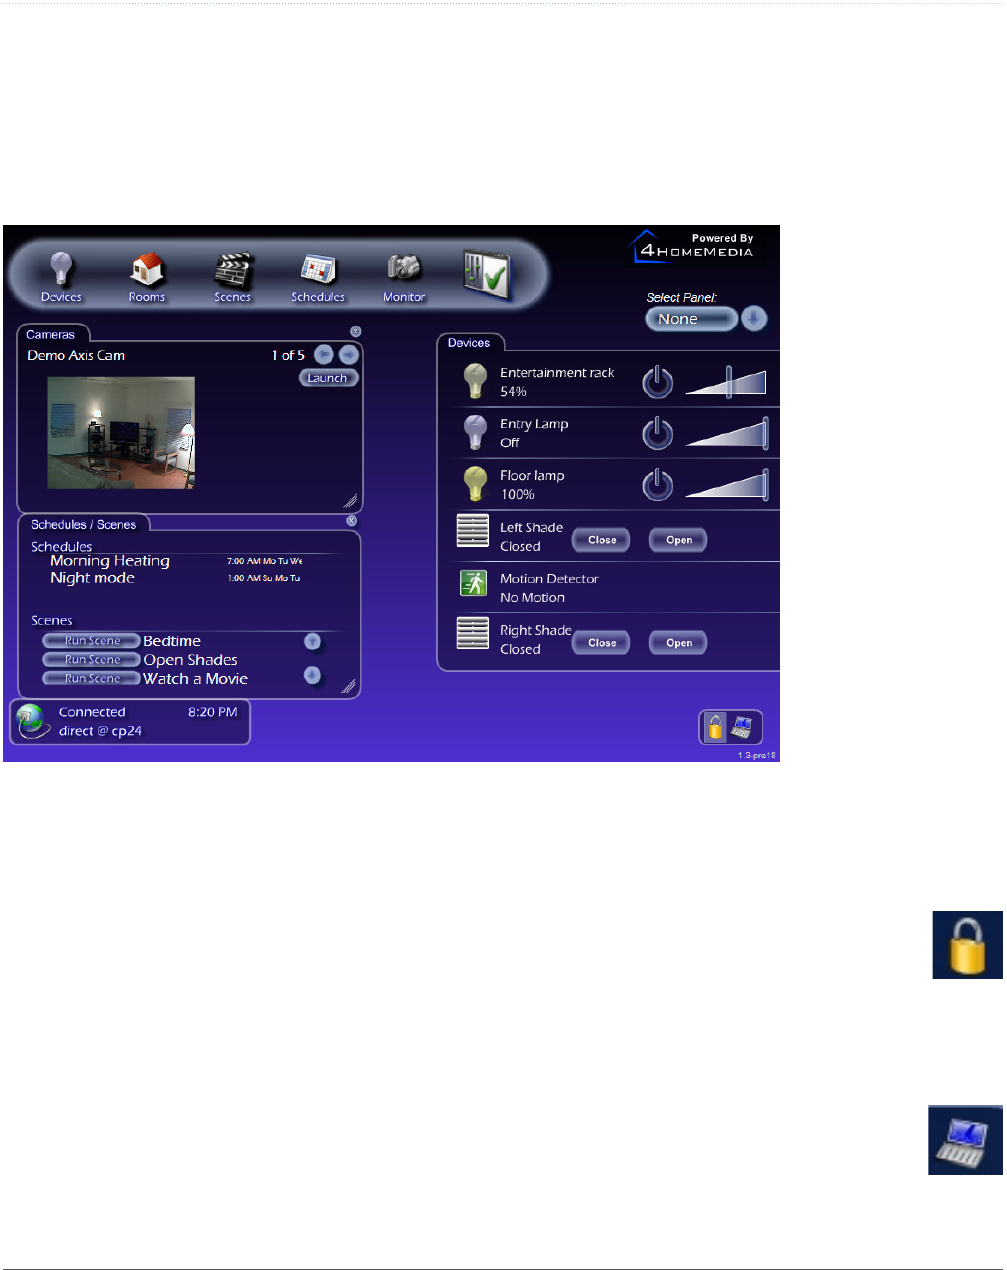
Let’s take a minute to get familiar with the basic elements of the UI and what they do. We’ll get into more detail
later, after several devices have been configured. The first thing you see when you access your UI will be this
screen. Until you’ve configured some devices, all of those panes will be empty. They may also be different sizes --
you can resize them at any time by clicking on and dragging the bottom-right corner of any pane.
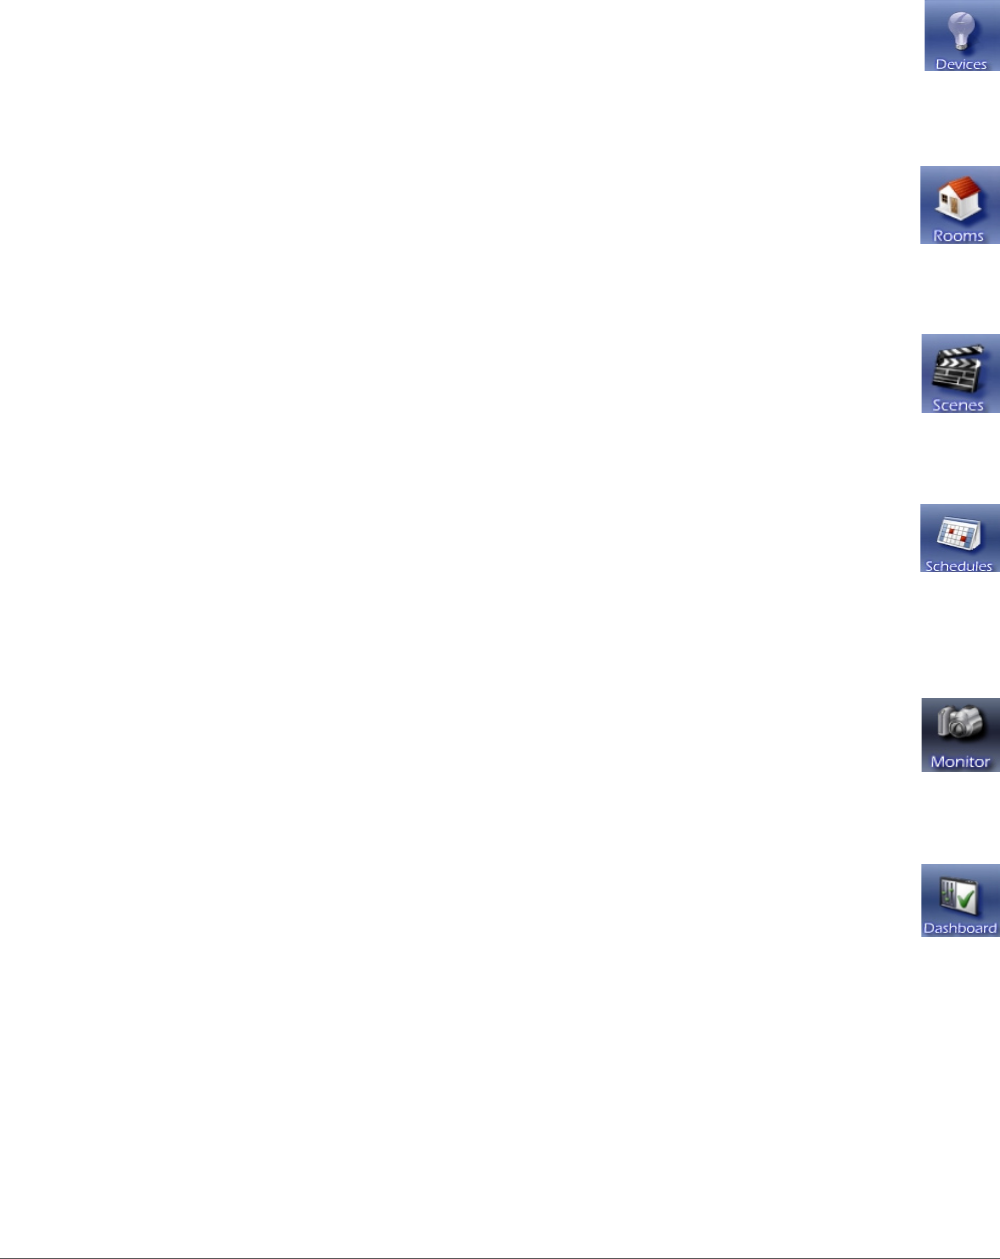
4.1 Administrator Mode
In the bottom-right corner of the UI, you’ll find two icons. Clicking on the lock icon prompts you
to enter your PIN (or set your PIN, if one has not been set). Entering the correct PIN will turn on
Administrator Mode. You will need to be in Administrator Mode to configure and take advantage of
many of the UI’s advanced features.
4.2 Settings
Next to the lock icon, you’ll see an icon that looks like a laptop. Clicking on it will let you choose the
language in which the UI is displayed and to choose Celsius or Fahrenheit for temperature displays.
Clicking on the Settings icon while in Administrator Mode will allow you to make more changes.
9
Overview: Basic UI Features and Elements
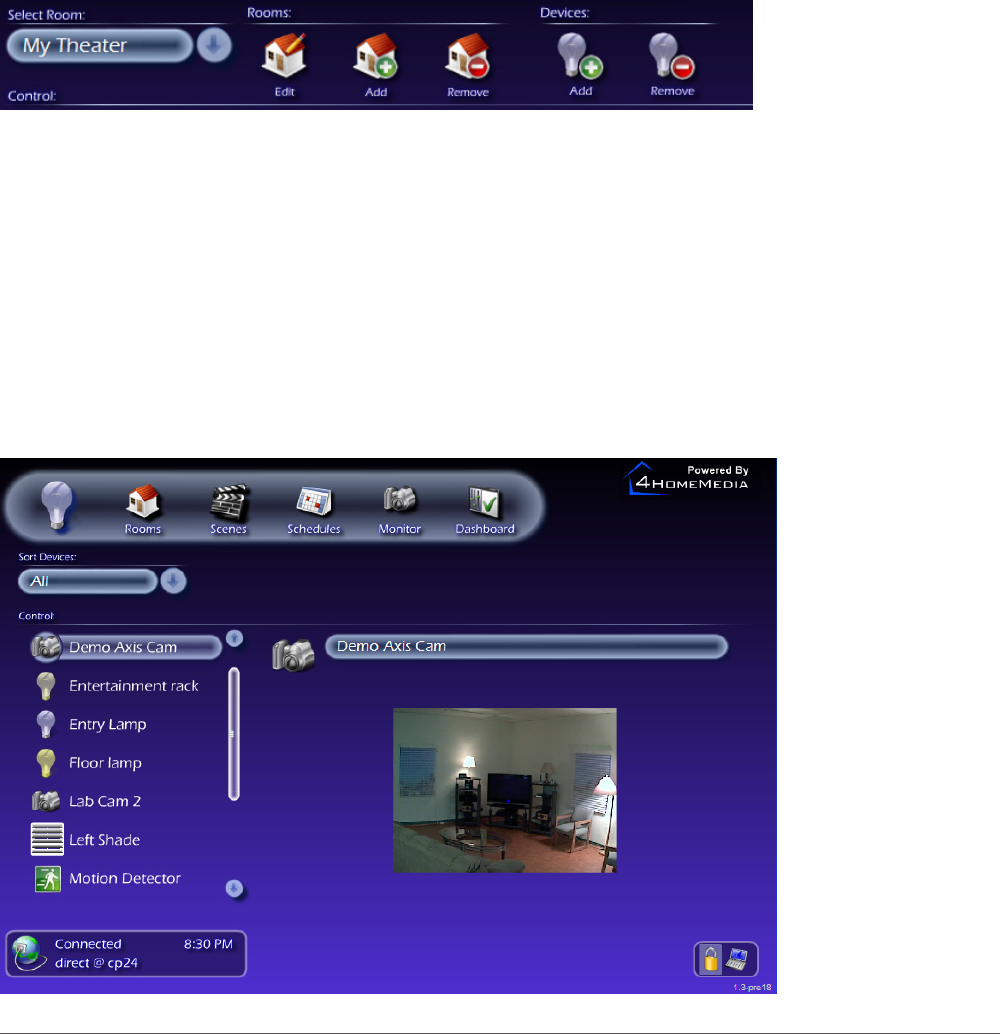
4.3 Devices
Near the top of the UI, you’ll see a row of 6 icons that form the main menu. The leftmost icon
is labeled Devices. Clicking on it will bring you to a listing of all of the devices the zControl has
discovered. We haven’t configured any devices yet, so this list should still be empty.
4.4 Rooms
Next, you’ll find the Rooms icon. Like the list of devices, the list of rooms will be empty. After some
devices have been configured, clicking on Rooms will allow you to organize those devices into groups
according to their locations.
4.5 Scenes
Next, you’ll find the Scenes icon. Like the lists of rooms and devices, the list of scenes will be
empty. Scenes are an advanced feature which allows you to control groups of rooms and devices
simultaneously.
4.6 Schedules
Next, you’ll find the Schedules icon. Like the lists of devices, rooms, and scenes, the list of
schedules will be empty. Schedules are an advanced feature which allows you to automate your
home control. For instance, you can have the zControl automatically turn on the lights in the living
room at 6 o’clock every evening.
4.7 Monitor
Next, you’ll find the Monitor icon. After you’ve installed one or more cameras, clicking the Monitor
icon will allow you to view and control your camera(s). It will also allow you to create, watch, and
delete recordings.
4.8 Dashboard
All the way on the right of the main menu is the Dashboard icon. The Dashboard allows you to see
and control Devices, Rooms, Scenes, Schedules, and Cameras on a single screen. In addition, the
Messages pane is visible from the Dashboard. Messages keep you informed about changes in the
status of the zControl as well as attached devices. Note that you can select Cameras from the pull-
down menu multiple times to open multiple Camera panes.
Mobile UI Features10
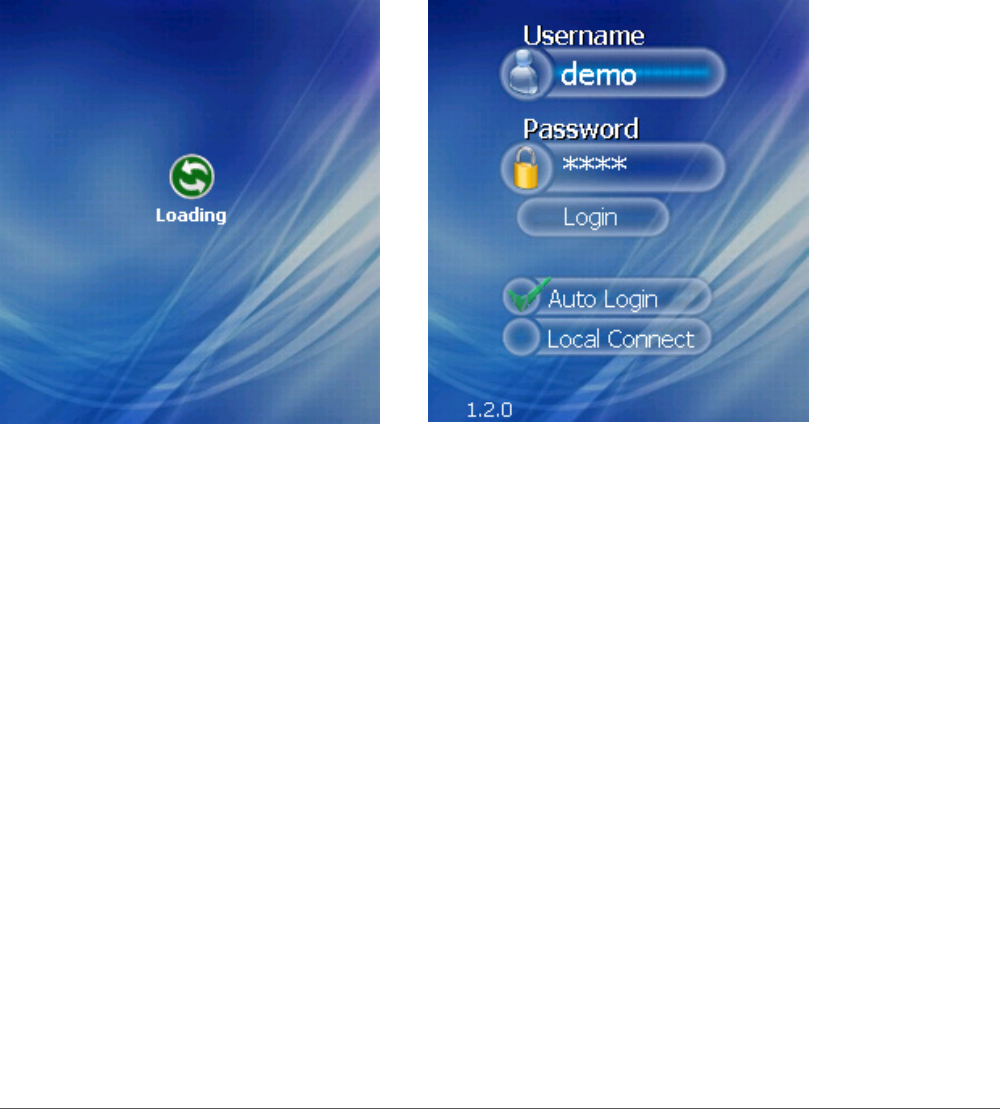
4.9 Mobile UI Features
When you load the mobile UI, you will be asked to enter your username and password.
If you would like to have your credentials memorized so you can login automatically, check the “Auto Login”
checkbox by using the select button on your Smartphone.
The functions and controls in the Mobile UI are very similar to the zControl UI and include the following options:
Devices › – view and control your devices
Rooms › – view and control your rooms
Scenes › – view and run configured Scenes
Schedules › – view configured Schedules
Messages › – view received messages and alerts
Switch CP › – if you use or own more than one zControl
Settings › – manage your preferences
Logout › – log out of the Mobile UI
11
Mobile UI Features
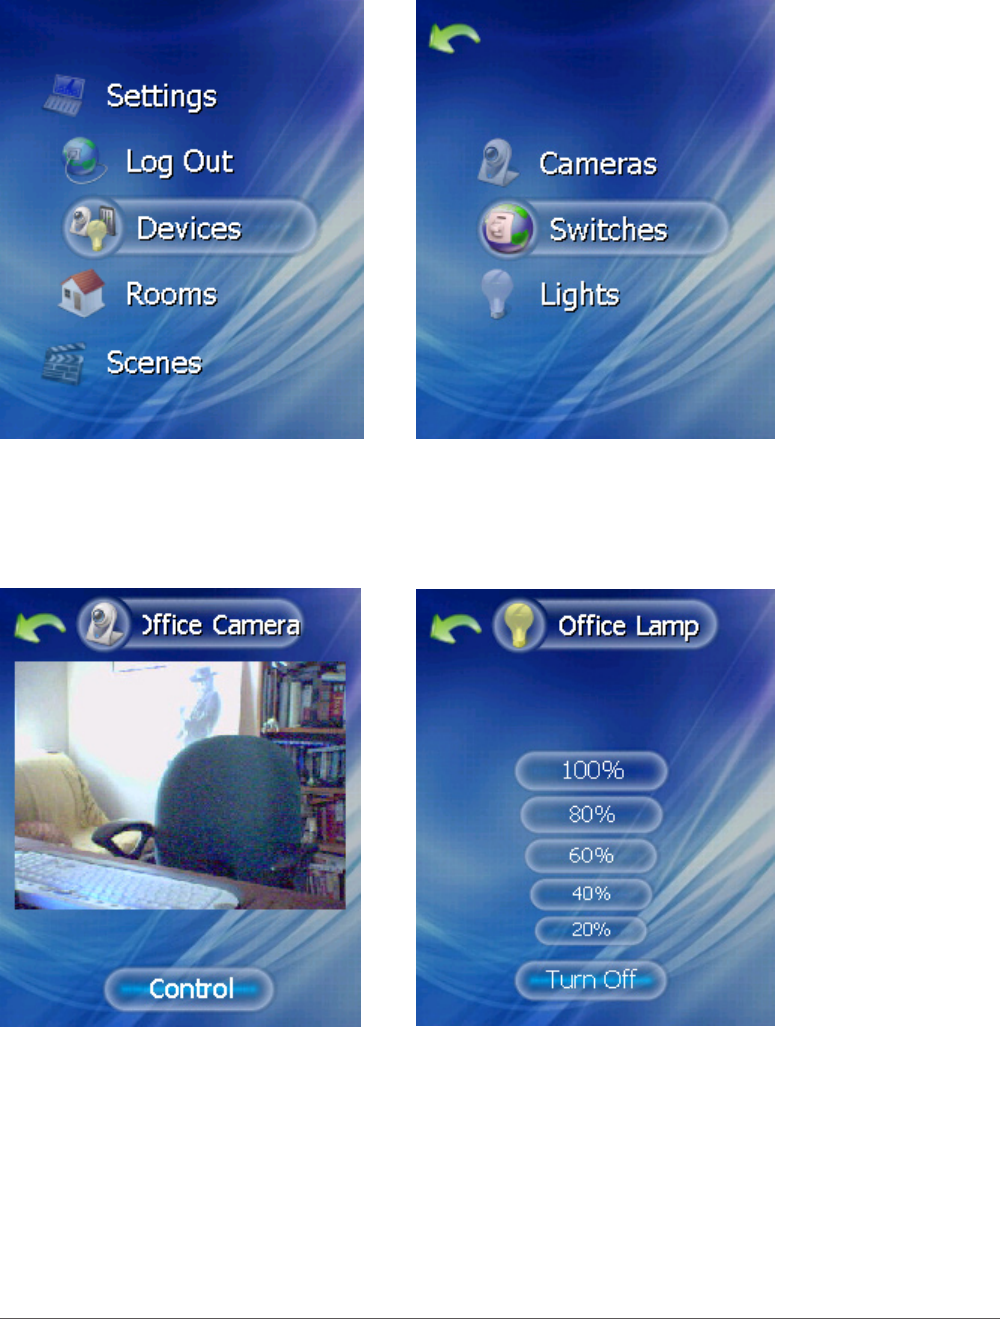
All devices are detected automatically and show up in exactly the same way as in the zControl UI. They are
grouped by the device class: “Cameras”, “Switches”, “Lights”, etc.
The Cameras view allows you to monitor and control your cameras in real-time. In order to switch to “Control”
mode you have to click the button at the bottom to change to “Controlling”. This means that now you can use
right, left, up and down controls on your Smartphone keyboard to move the camera to a desired position.
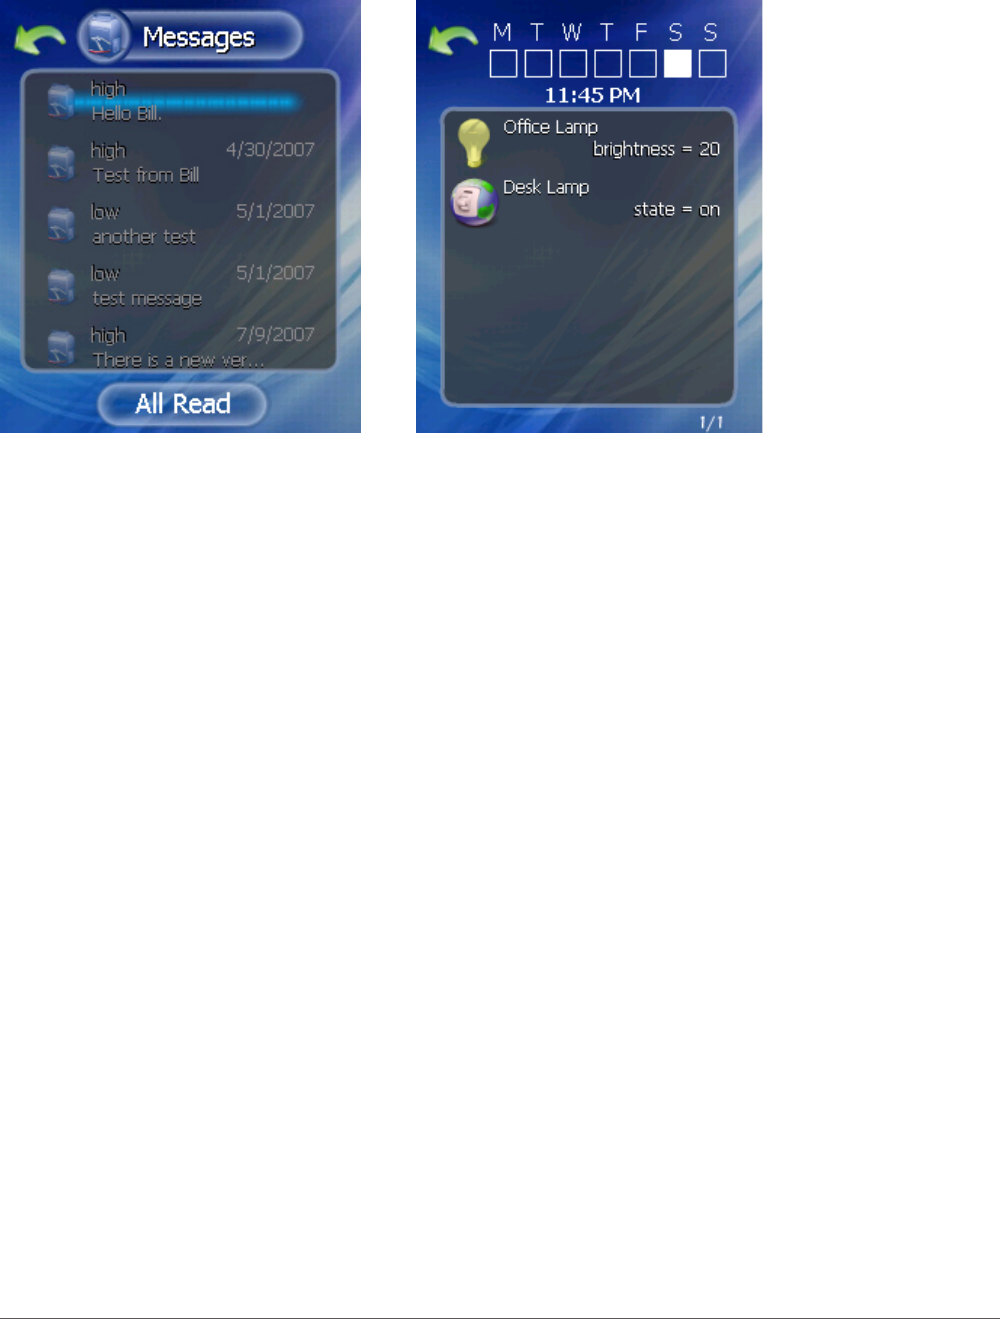
Mobile UI Features12
The Messages view allows you to read the messages and see their timestamps.
Message / Alerts of high importance will pop-up in Mobile UI automatically as they might need your immediate
attention. Examples of such events might be:
Your front door is open ›
Important message from the management system ›
The Schedules view allows you to see schedules configured for your ControlPoint.
The Scenes view allows you to see and run the scenes created for your ControlPoint.
4.9.1 Settingsandcongurationoptions
The Mobile UI connection to the Portal is primarily done via the Smartphone’s data connection. It is also possible
to establish a direct (LAN) connection to your ControlPoint if your Smartphone supports WiFi connectivity. In this
case you need to do the following:
Ensure your WiFi connection is up (per configuration options in your Smartphone) ›
On the Hydrogen login screen chose ›“Local Connect” option.
A new field will open up, type in the IP address of your controlpoint. ›
Click on the ›“Login” button to connect to the ControlPoint.
Other configuration options are available in the “Settings” menu.
In Release 1.2 they include:
Language selection: English and Spanish. ›
NOTE: It is important to understand that only 4Homemedia menu options and messages will be presented in

13
Mobile UI Features
the selected language. All customer-created names will not be affected by this selection. (e.g., if you named
your device “Floor lamp”, it will be displayed as a “Floor lamp” regardless of the language selected in the UI.)
Temperature display: allows you to choose between Fahrenheit and Celsius scales. ›
Managing Z-Wave Devices14
5 Managing Z-Wave Devices
5.1 Adding Z-Wave Devices
There are many different kinds of Z-Wave devices. These include lamp modules, thermostats, motion/occupancy
sensors, blinds/shades, fans, appliance modules, and so on. There is one simple installation procedure for all of
these devices:
Plug in the Z-Wave device within six feet of the zControl1.
Push the blue 2. Z-Wave button on the front of the zControl. The Activity LED will begin blinking green slowly
Push the button on the Z-Wave device (it will be labeled 3. On/Off, Service, Program, or something similar)
When the 4. Activity LED turns solid green or starts blinking green rapidly, the Z-Wave device has been success-
fully added
If the 5. Activity LED blinks red slowly three times, the Z-Wave device has not been successfully added. Go back
to step 1 and repeat the procedure
Repeat steps 1 through 5 for each Z-Wave device6.
Unplug your Z-Wave devices and plug them into their intended places in your home7.
Open your zControl User Interface8.
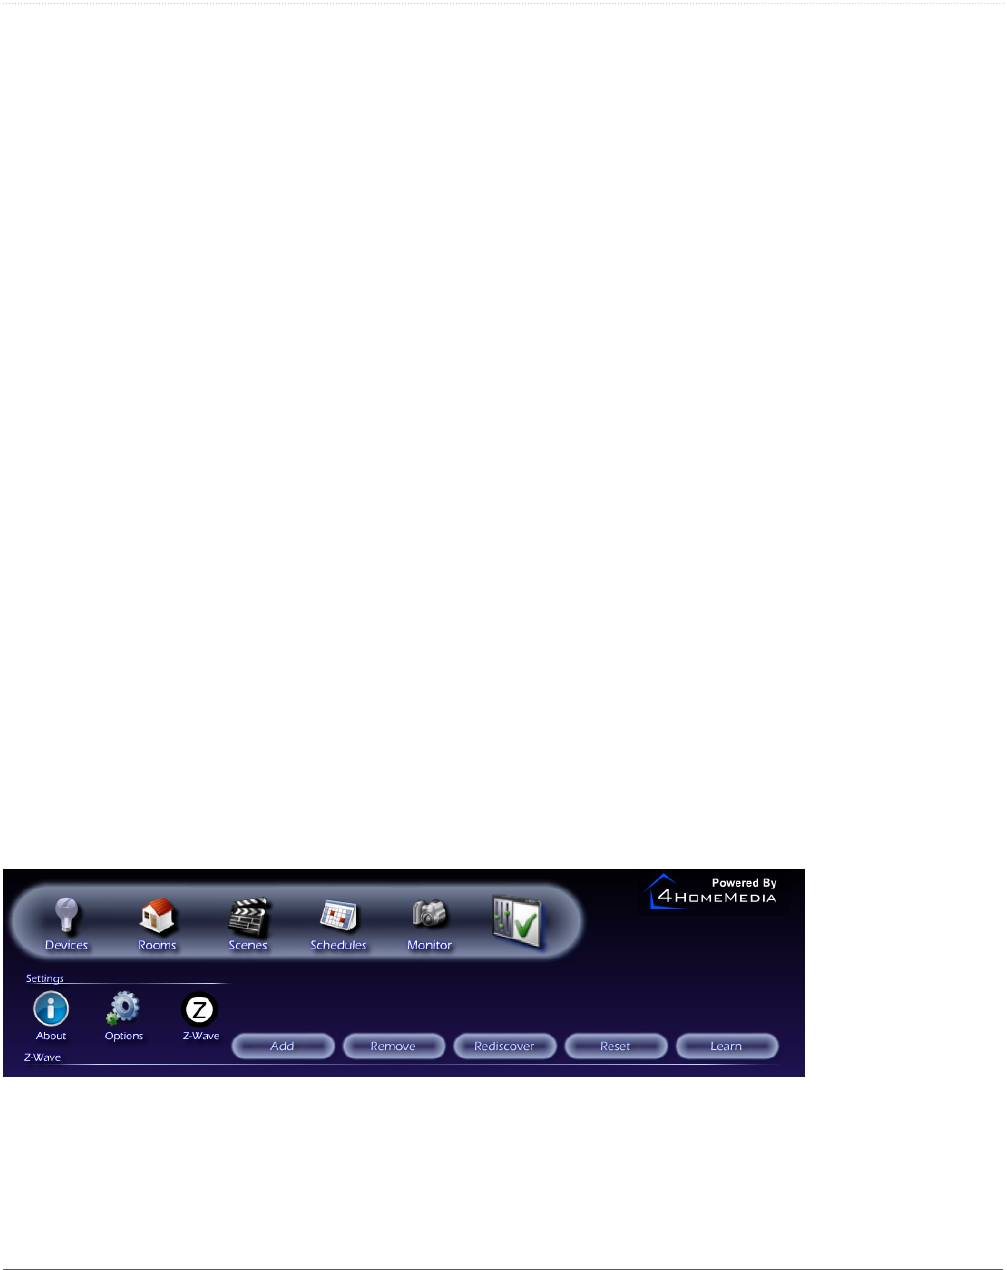
Turn on 9. Administrator Mode and then click on the Settings icon in the bottom-right corner
Click on the 10. Z-Wave icon
Click on the 11. Rediscover button
Click on 12. Devices. The list should now include the new Z-Wave devices
NOTE: If you unplug a Z-Wave device (to move it to another location, for example) after completing this proce-
dure, you will need to Rediscover it. If this does not work, you may need to repeat the installation procedure
for that device starting from step 1.
5.2 Adding Z-Wave Devices (UI method)
Open your zControl User Interface1.
Turn on 2. Administrator Mode and then click on the Settings icon in the bottom-right corner
Click on the 3. Z-Wave icon

15
Managing Z-Wave Devices
Click on the 4. Add button. The Activity LED will begin blinking green slowly
Push the button on the Z-Wave device (it will be labeled 5. On/Off, Service, Program, or something similar)
When the 6. Activity LED turns solid green or starts blinking green rapidly, the Z-Wave device has been success-
fully added
If the 7. Activity LED blinks red slowly three times, the Z-Wave device has not been successfully added. Go back
to step 4 and repeat the procedure
Repeat steps 4 through 7 for each Z-Wave device8.
Unplug your Z-Wave devices and plug them into their intended places in your home9.
Click on the 10. Rediscover button
Click on 11. Devices. The list should now include the new Z-Wave devices
NOTE: If you unplug a Z-Wave device (to move it to another location, for example) after completing this proce-
dure, you will need to Rediscover it. If this does not work, you may need to repeat the installation procedure
for that device starting from step 1.
5.3 Removing Z-Wave Devices
Open your zControl User Interface1.
Turn on 2. Administrator Mode and then click on the Settings icon in the bottom-right corner
Click on the 3. Z-Wave icon
Click on the 4. Remove button
Push the button on the Z-Wave device (it will be labeled 5. On/Off, Service, Program, or something similar)
There will be a visible notification in the UI when the device has been successfully removed6.
Click on 7. Devices to ensure that the list no longer includes the removed Z-Wave device
Installing Home Monitoring Devices16
6 Installing Home Monitoring Devices
6.1 Installing Motion/Occupancy Sensors
To install a motion/occupancy sensor, simply follow the above instructions for installing Z-Wave devices. Once the
motion/occupancy sensor is installed, it may be necessary to push the button on the front of the device one more
time to activate it.
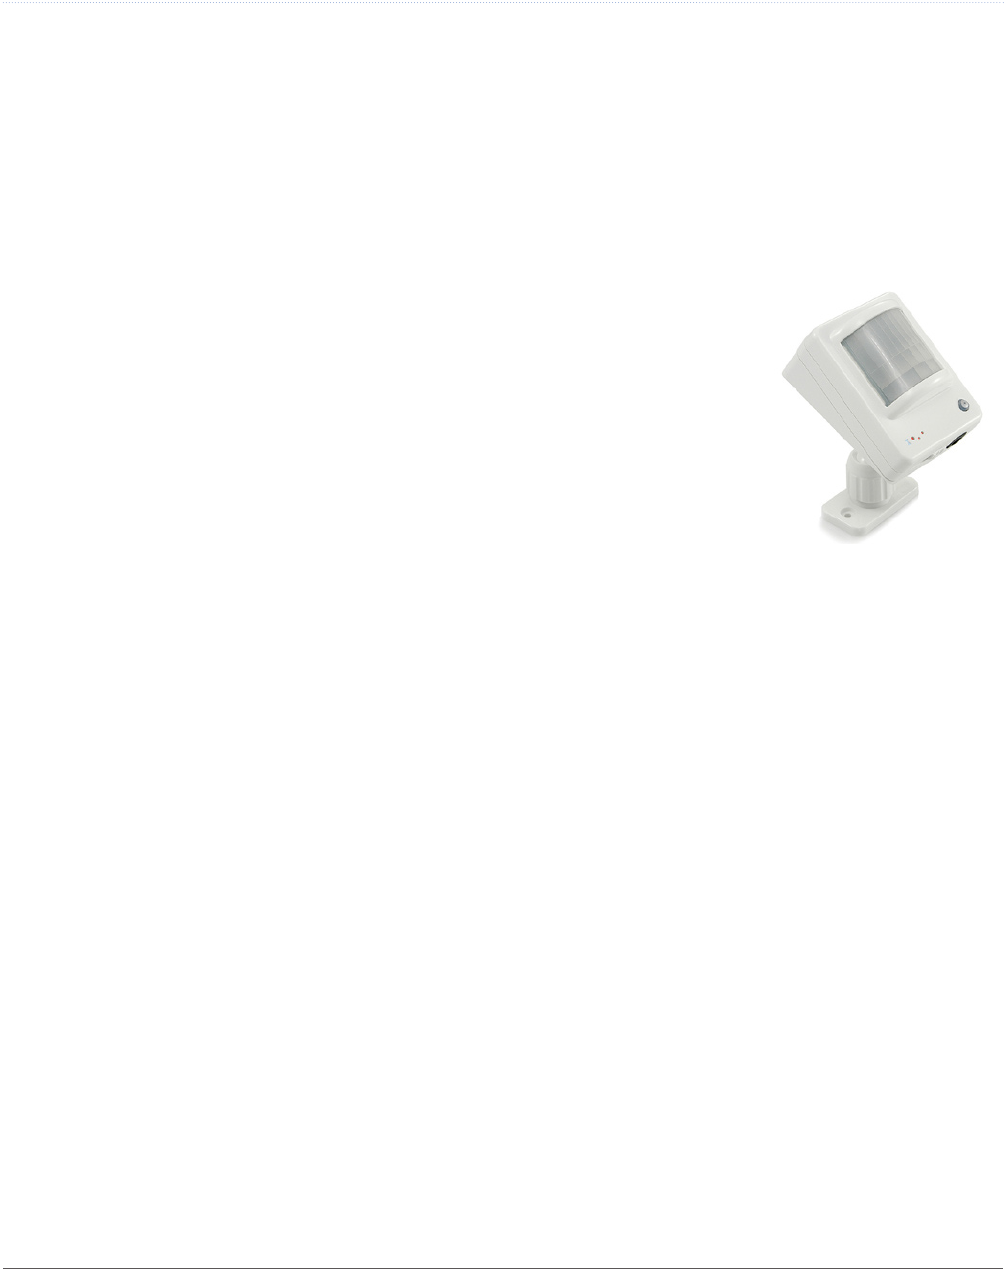
6.1.1 Setting Up the CA9000
The CA9000 sensor has a 5-position switch along its bottom side that deter-
mines how quickly it responds to the absence of motion/occupancy. Setting the
switch into the position closest to the power connector jack will put the CA9000
into “manual off mode.” In “manual off mode,” the CA9000 will turn on when it
detects motion/occupancy and remain in its on state until manually turned off.
Moving the switch away from the power connector jack will put the CA9000 into
15 minute delay, 10 minute delay, 5 minute delay, and “pulse mode,” respec-
tively. In “pulse mode,” the CA9000 will turn off approximately 5 seconds after it
stops detecting motion/occupancy. “Pulse mode” is recommended.
6.2 Installing UPnP Cameras
UPnP (Universal Plug-and-Play) cameras will be automatically detected by the zControl once they are on the
network. Consult your camera’s documentation to learn how to set it up and configure it for network access. It will
appear in your device listing as well as the Cameras pane on your Dashboard.
6.2.1 Panasonic BL-C10A, BL-C1A, BL-C111A, BL-C131A Camera Setup Notes
Although these cameras are UPnP-capable, they typically ship with UPnP turned off. To set them up, you will need
to do the following:
Plug in the camera‘s power and Ethernet cables. If 20 minutes have passed since you plugged in the camera 1.
and you have not continued to step 2, unplug it and plug it in again
With a pen or pencil, press the 2. Factory Default Reset button on the bottom of the unit
Insert the CD that came with the camera into a computer on the same network as the camera. The 3. Setup.exe
program on the CD should auto-launch
Press the 4. Camera Setup button. After a moment, an Easy Setup dialog will pop up
Select the entry in the 5. Easy Setup dialog and press the Execute button
Click on the 6. Automatic Setup option. Your browser will open to the Security: Administrator page
Choose an administrator name and password for the camera. Press 7. Save. You may see a Windows dialog
asking for the camera’s username and password. Enter them, select Remember my password, and press OK
Your browser will now open to the camera’s UI. You should see the camera image8.

17
Installing Home Monitoring Devices
Click on the 9. Setup tab at the top of the page, then click on DHCP. At the bottom of the DHCP page, press Save
Close all setup software, including your browser, and restart the camera by unplugging it and plugging it back in10.
6.3 Installing non-UPnP Cameras
To install a non-UPnP camera, consult its documentation to learn how to assign it an IP address and configure it
for network access. Once it is on the network, it will be detected automatically by the zControl and appear in your
device listing as well as the Cameras pane on your Dashboard.
NOTE: Some cameras require the user to enter a username and password. Consult the documentation of
such cameras to learn how to set them to allow anonymous access. Once they’ve been set to be accessible
anonymously (without entering a username and password), they will appear in your device listing as well as
the Cameras window on your Dashboard.
Advanced UI Features18
7 Advanced UI Features
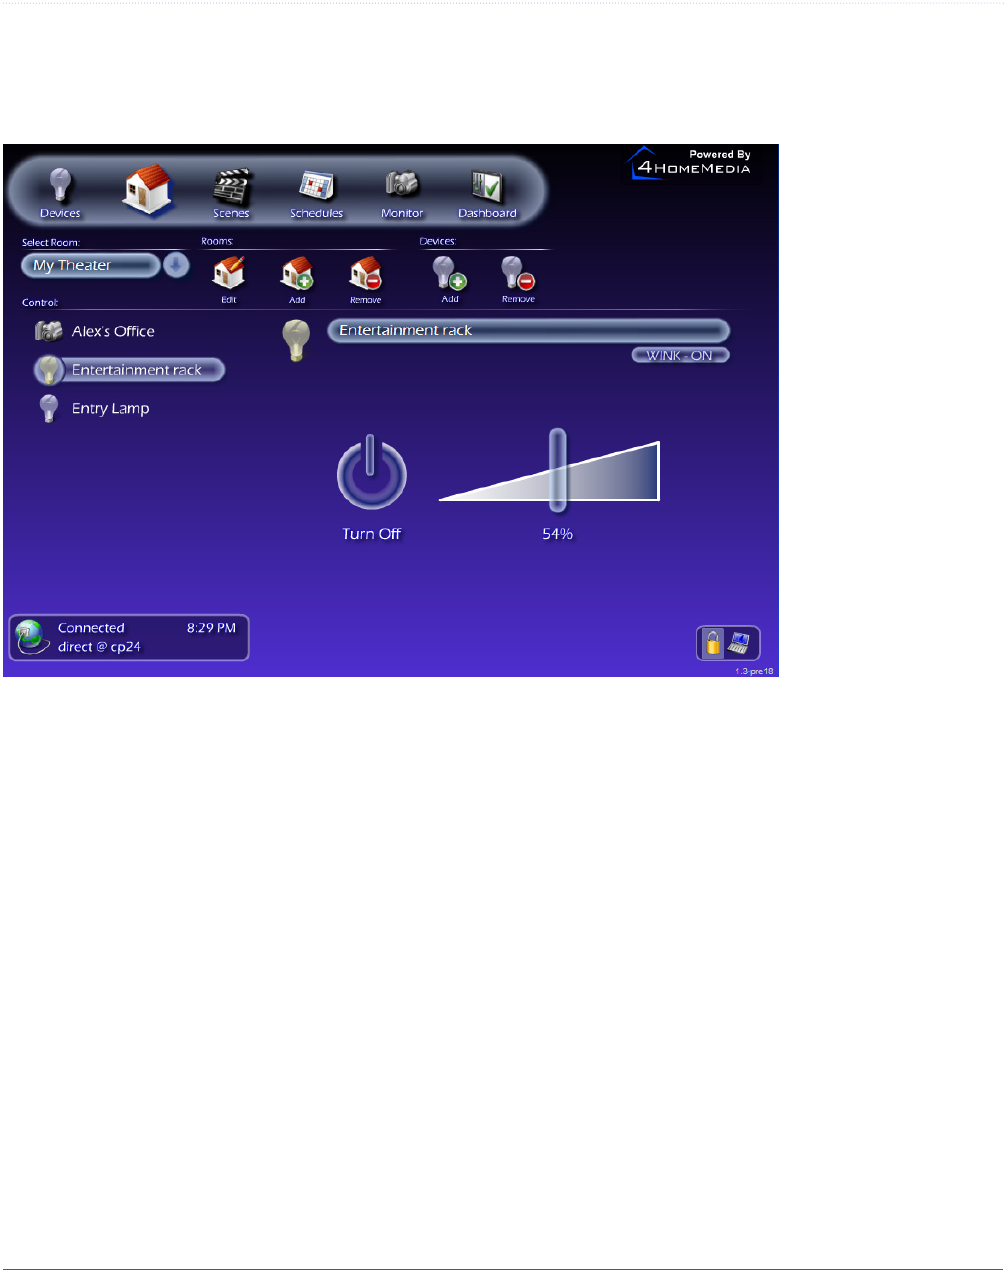
7.1 Device Management
Now that you have some devices set up, open your UI and click on the Devices icon. Clicking on any device in the
listing will let you focus on that device. If you’re in Administrator Mode, you can also rename it (we recommend
giving your devices unique and distinctive names) and also use the Wink feature. Wink will turn on and off the
specified lamp/appliance module at 3 second intervals, which is useful to help you identify Z-Wave devices in your
home. Simply press Wink again to disable.. Focusing on a device brings up a different set of options depending on
what kind of device it is. For example,
Focusing › on a lamp lets you turn it on or off, and also to set its brightness level from 0-100 percent
Focusing › on a thermostat lets you turn the temperature up or down
Focusing › on a camera lets you see what the camera sees and, depending on the camera model, control other
features such as pan, tilt, and zoom
Focusing › on a motion/occupancy sensor lets you set up event triggers
7.2 Rooms, Scenes, and Schedules
Rooms, Scenes, and Schedules are some of the most useful and powerful features of the zControl. They allow you
19
Advanced UI Features
to control devices in your home by location, by situation, and by time.
7.2.1 Rooms
By organizing your devices into Rooms, you can make it easier to find exactly the device you want to control. To
create a Room, you’ll need to do the following:
1. Turn on Administrator Mode
2. Click the Rooms icon. A new set of buttons will appear under the main menu:
3. Click the Rooms: Add icon and type in the Room’s name
4. Click the Devices: Add icon and select at least one device from the list
You can use the pull-down menu to display only one type of device at a time ›
You can use ›<CTRL>-click or <SHIFT>-click to select multiple devices at once
When you add a device to a Room, that device will appear in the listing under the Room name. Clicking on any device
in the listing will let you focus on that device. Note that if you are in Administrator Mode, you can Add or Delete a
Room, Edit a Room’s name, or Add more devices to a Room at any time. Once you’ve set up two or more Rooms, you
can choose which Room to display from the pull-down menu. When you’re done, it’ll all look a lot like this:
Advanced UI Features20
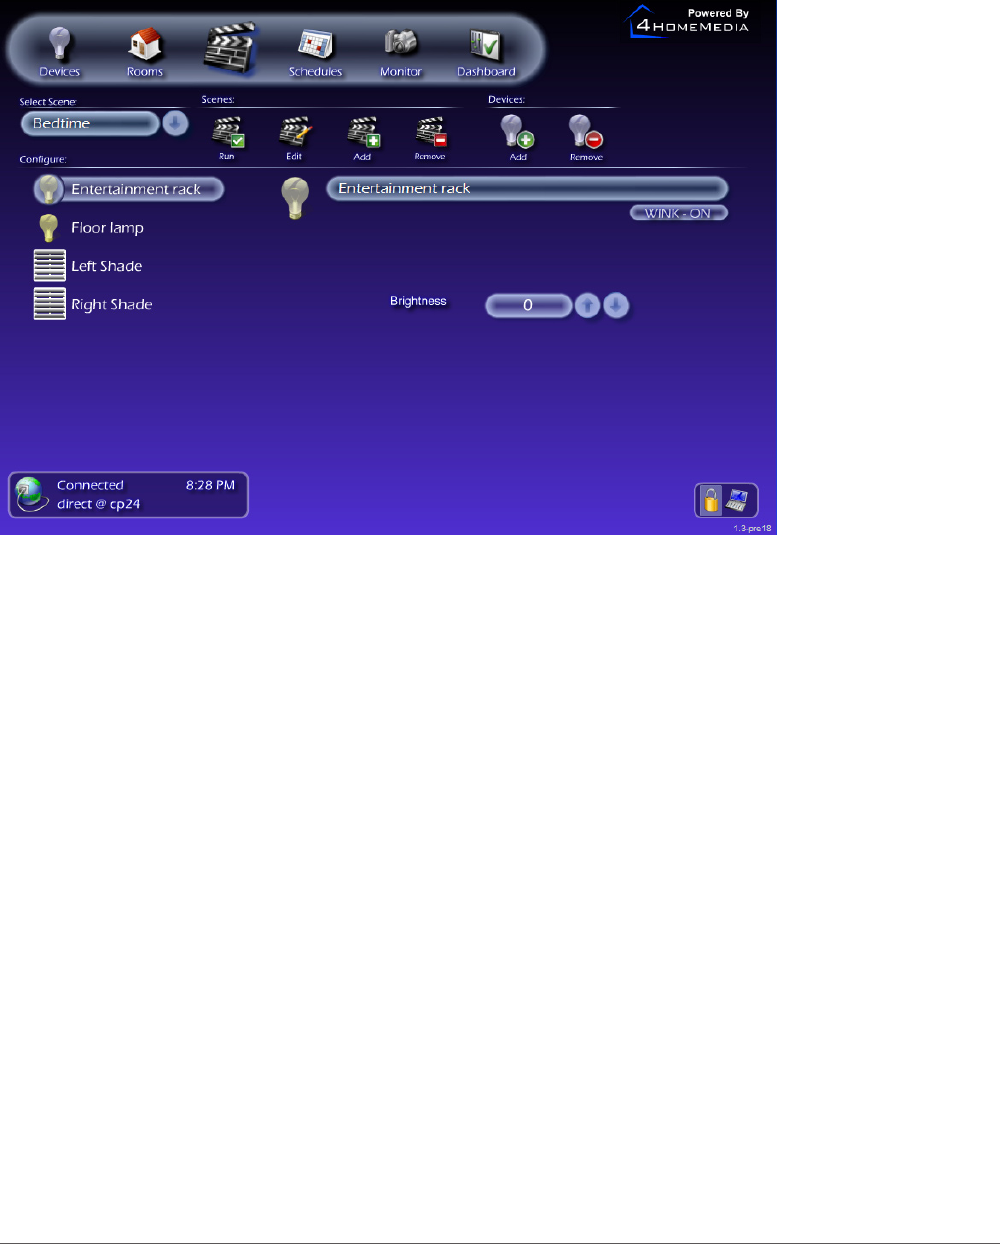
7.2.2 Scenes
By creating Scenes, you can control whole Rooms and groups of devices with the push of a button. To create a
Scene, you’ll need to:
1. Turn on Administrator Mode
2. Click the Scenes icon. A new set of buttons, just like the ones for Rooms, will appear under the main menu
3. Click the Scenes: Add icon and type in the Scene’s name
4. Click the Devices: Add icon and select at least one device from the list
You can select a ›Room to add all of the devices in it to the Scene
You can use the pull-down menu to display only ›Rooms or only one type of device at a time
You can ›<CTRL>-click or <SHIFT>-click to select multiple devices or Rooms at once
When you add a device to a Scene, that device will appear in the listing under the Scene name. Clicking on any
device in the listing will let you focus on the device. Rather than allowing you to control a device’s current state,
focusing on a device while editing a Scene allows you to set its Scene state. When a Scene is Run, all devices in
that Scene immediately switch to their Scene states.
For example, you’ve created a Scene named “Wake up!” You’ve also added to it all of the devices in Bobby’s room,
set the Scene states of all of the lights to 100 percent brightness, and set the Scene state of the radio to On. Now
you can open your UI at any time, click the Scenes icon, select “Wake up!” from the pull-down menu, and click
Run. When you do, all of the lights in Bobby’s room will turn on at maximum brightness and the radio will turn on.
Hopefully, this will be enough to wake him in time for school.

21
Advanced UI Features
You can Run a Scene at any time. Note that you must be in Administrator Mode if you want to Add or Delete a
Scene, Edit a Scene’s name, or Add more devices to a Scene.
7.2.3 Schedules
By creating Schedules, you can set the Scenes you’ve already created to be automatically Run at a time of your
choice. A Schedule is essentially a Scene that Runs at a preset time. To create a Schedule, you’ll need to
1. Turn on Administrator Mode
2. Click the Schedules icon. A new set of buttons, just like the ones for Rooms and Schedules, will appear un-
der the main menu
3. Click the Schedules: Add icon
4. Type in the Schedule’s name and set the days and time when it should Run
5. Click the Devices: Add icon and select at least one device from the list
You can select a ›Scene to add all of the devices in it; adding a Scene will automatically import the Scene
states of all of the devices in it
You can use the pull-down menu to display only ›Scenes or only one type of device at a time
You can ›<CTRL>-click or <SHIFT>-click to select multiple devices or Scenes at once
As in a Scene, you can change a device’s Scene state by focusing on it from the listing under the Schedule name.
As before, you must be in Administrator Mode if you want to Add or Delete a Schedule, Edit a Schedule’s name or
time settings, or Add more devices or Scenes to a Schedule. You can also click Run to test the Schedule’s behav-
ior.
Advanced UI Features22
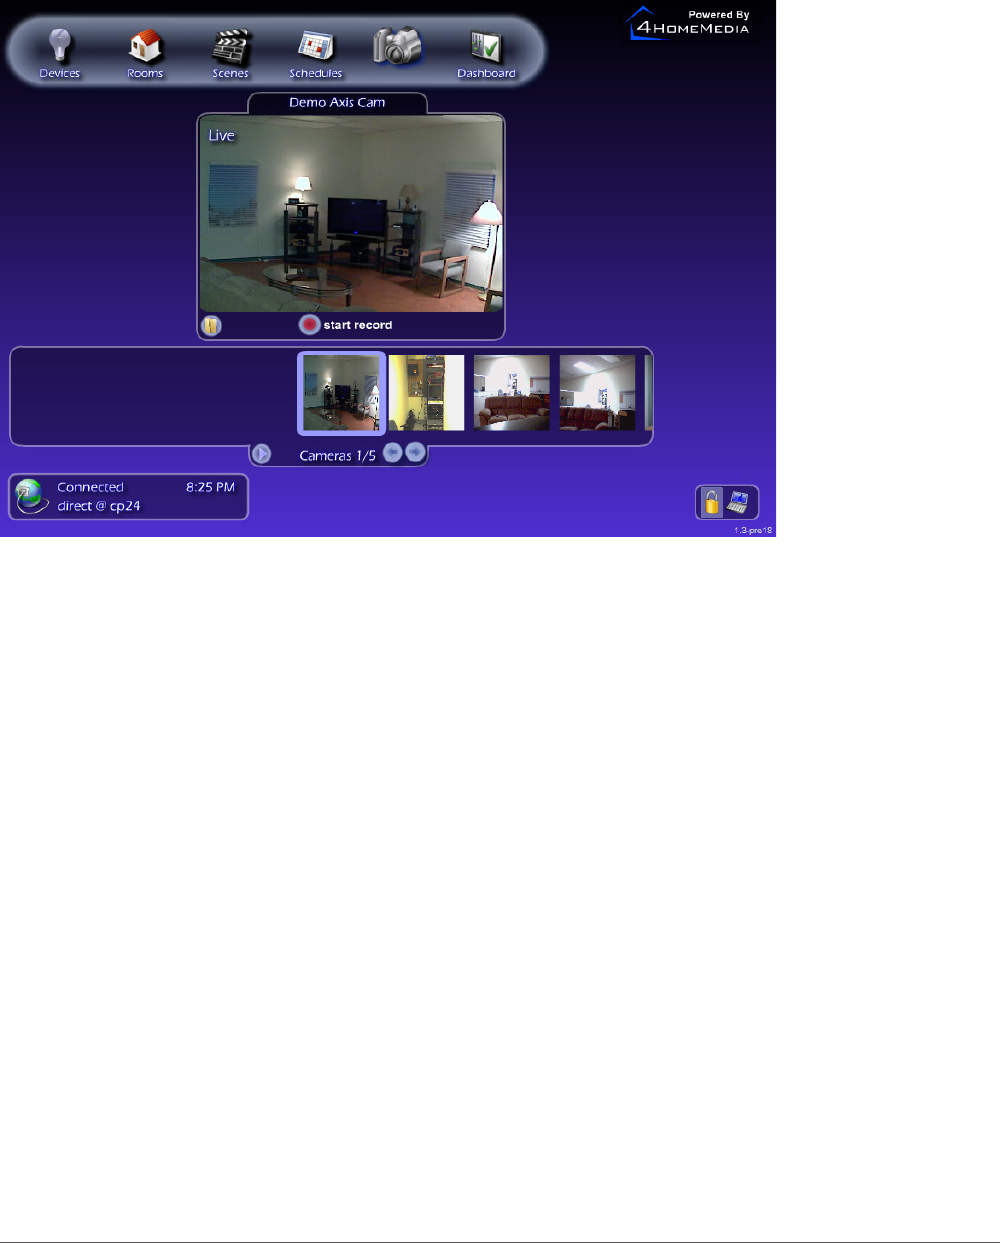
7.3 Monitoring
Clicking on the Monitor icon in the main menu will bring up two panes. The top one will display whatever the se-
lected camera “sees” and is labeled “Display.” The bottom one shows thumbnails of what each camera “sees” and
is labeled “Filmstrip.”
7.3.1 The “Filmstrip” Pane
Clicking on any thumbnail in the Filmstrip pane will select that camera and display that camera’s feed in the
Display pane. At the bottom of the Filmstrip pane, you’ll find three buttons: a left arrow, a right arrow, and a Play
button. Clicking the left or right arrow will select the thumbnail next to the one you currently have selected. Click-
ing the Play button will automatically cycle through your camera displays until you click the Pause button.
7.3.2 The “Display” Pane
At the bottom of the Display pane, you’ll find a red Record button and, in the bottom-left corner, the Archives
button. If you do not have a memory stick or other external storage device connected to one of the USB ports of
your zControl, these buttons will do nothing. If you do have such a device, then clicking the Record button on a
camera’s display will record video from the camera directly to your storage device. Clicking the Archives button
will open a third pane (labeled “Archives”) which will contain a full list of your recorded videos. You can view these
recordings at any time through the Archives pane. If you’re in Administrator Mode, you can also delete recordings.
If the selected camera has features like pan, tilt, presets, and zoom, you can control those features from the Dis-
play pane.
23
Advanced UI Features
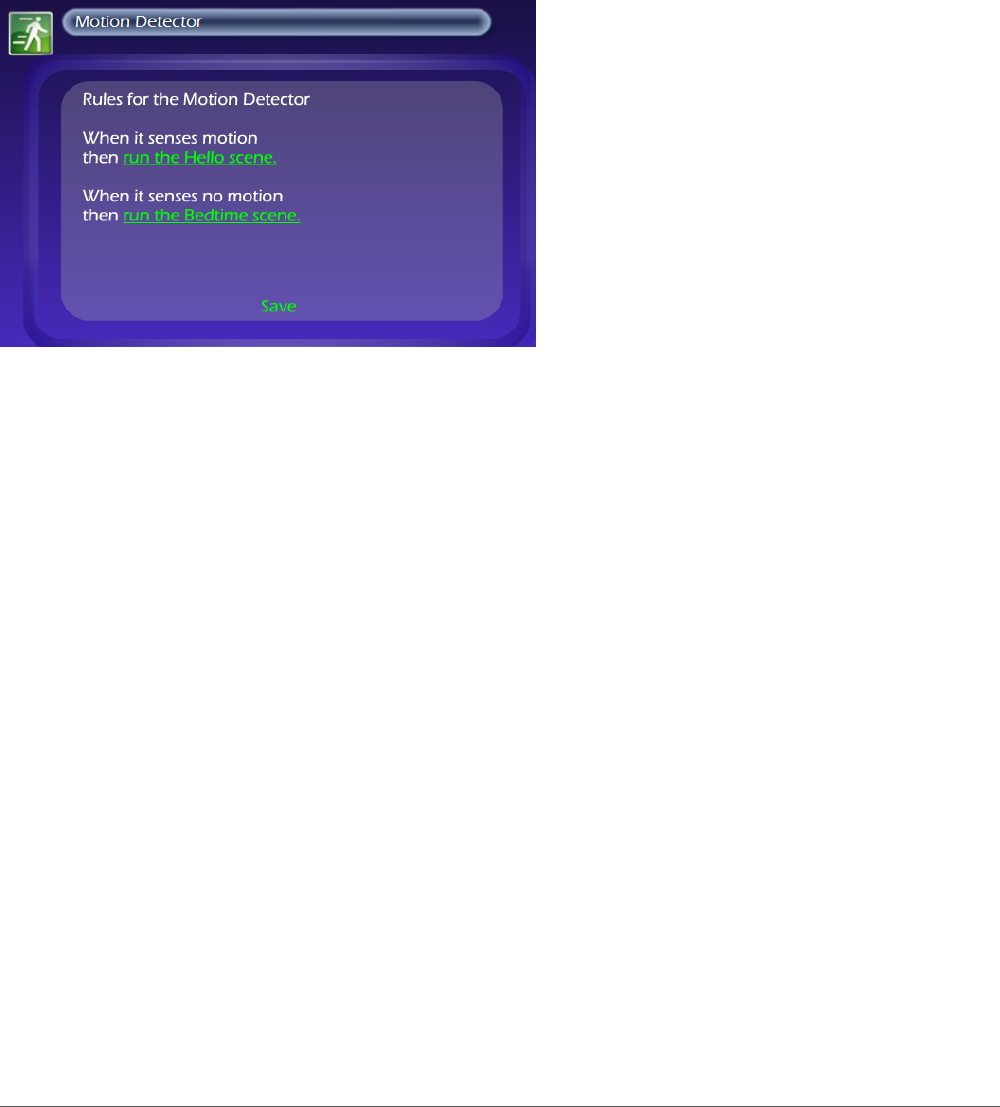
7.4 Triggers
Triggers are one of the most powerful features of the zControl. Setting up triggers allows changes in a motion/oc-
cupancy sensor’s state to “trigger” many of the zControl’s other functions. For example, a light can be set to turn
on whenever motion/occupancy is detected in the room. To set up a trigger, you’ll need to focus on a motion/occu-
pancy sensor through the device listing. A pane will appear with two Rules listed. It looks like this:
To edit a Rule, turn on Administrator Mode and click on it. A Rule consists of two parts:
The first part is the trigger. A motion/occupancy sensor has two possible states, “motion/occupancy detected 1.
and “no motion/occupancy detected.” Each of these states can act as a trigger
The second part is the triggered behavior. A triggered behavior is a 2. Scene being Run
If you want motion/occupancy in a room to trigger both the light turning on and the blinds opening, for ›
example, you’ll need to create a Scene in which the light’s Scene state is on and the blinds’ Scene state is
open
It is often a good idea to create two “opposite” ›Scenes. For example, if you’ve created one Scene that
turns on a lamp and is Run whenever motion/occupancy is detected, you may also want to create another
Scene that turns off the lamp and is Run whenever no motion/occupancy is detected
Whenever the motion/occupancy sensor reports motion/occupancy, the first Rule is triggered and the associated
Scene is Run. Whenever the sensor reports no motion/occupancy, the second Rule is triggered and the associated
Scene is Run.
Advanced UI Features24
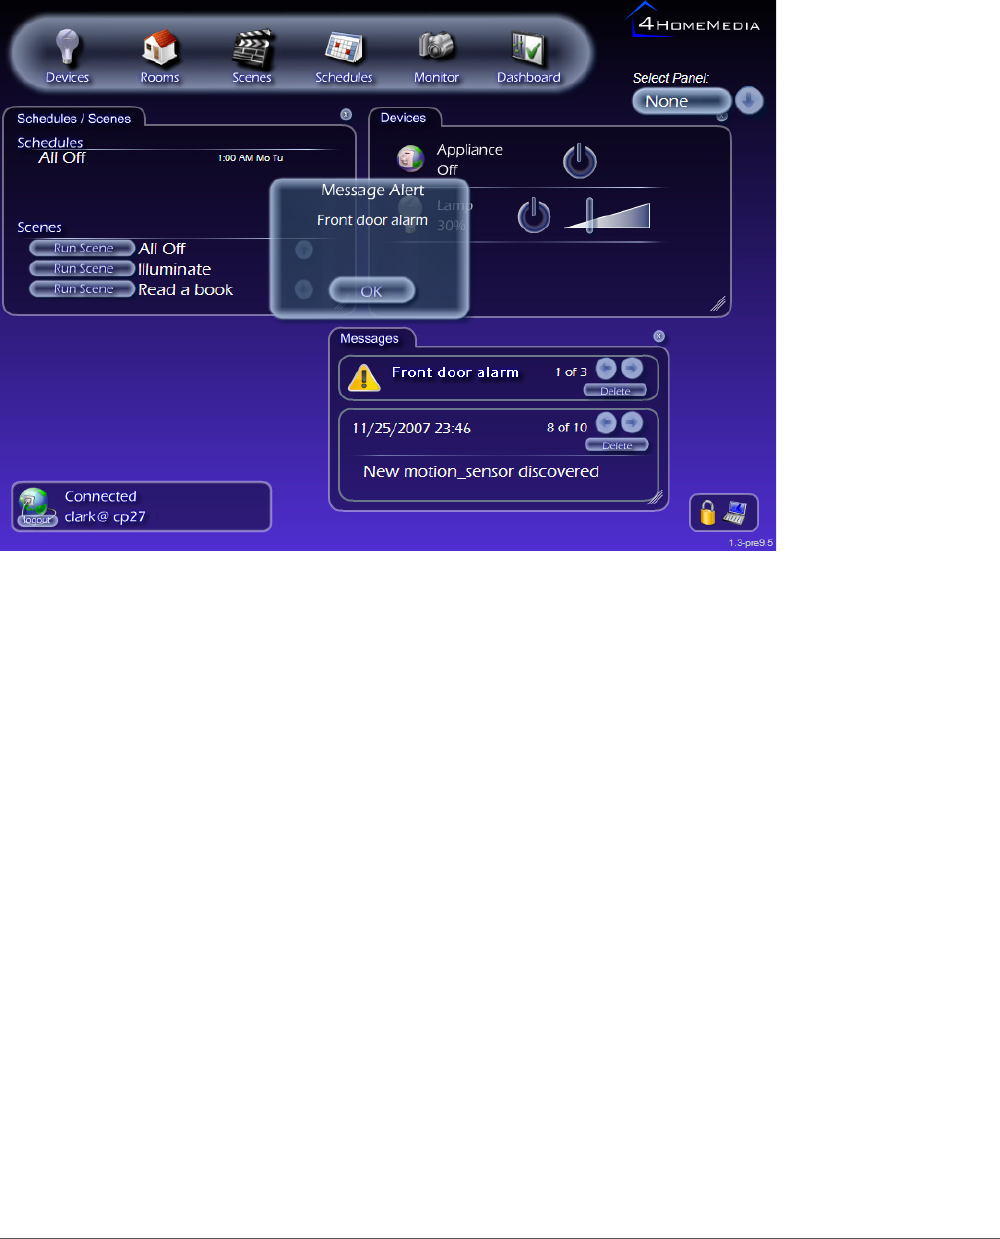
7.5 Messages
You can see the Messages pane by selecting Messages from the pull-down menu on your Dashboard. The Mes-
sages pane is divided into two parts, one (marked with an exclamation point) for Alerts, and one for Messages.
7.5.1 Messages
Most Messages you receive will inform you about your zControl discovering an additional device. You can scroll
through Messages by clicking on the left and right arrows. You can also delete Messages by clicking on the delete
button.
7.5.2 Alerts
Alerts are essentially important or time-sensitive Messages. Typically, Alerts will be sent by your service provider
to inform you about upgrades, new features becoming available, and so on.
When you receive an Alert, a small “popup” will appear in your UI. If you don’t have the UI open when you receive
an Alert, the “popup” will appear next time you access the UI. You can scroll through and delete Alerts in the same
ways as Messages.
25
Advanced UI Features
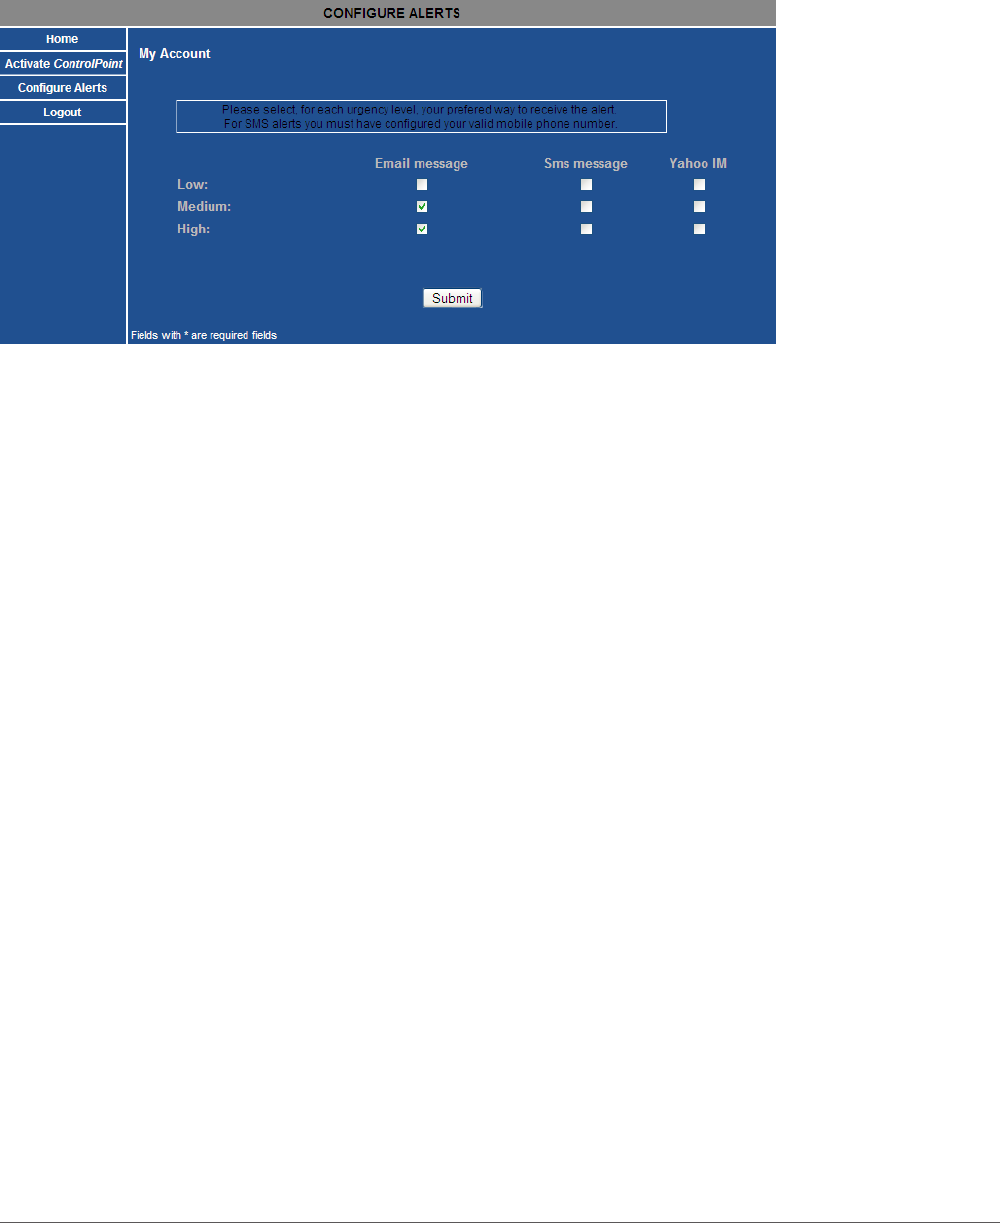
Note that you can go to http://digitalgardeneronline.com/zControl and click on Congure Alerts from the left
menu to set Alerts and/or Messages to be delivered to your email address, mobile device, or online chat client.
7.6 Controlling Multiple zControls
Before you can start controlling additional zControls, you must Activate them online.
7.6.1 Activating Additional zControls Online
If you’d like to Activate an additional zControl, simply open a browser window and go to
http://digitalgardeneronline.com/zControl, then click on Manage My Prole. Enter the username and password
that you used when Registering to access your profile. Click Activate ControlPoint in the menu on the left, then
enter your new zControl’s information.
After you’ve Activated additional zControls, they’ll all be accessible by going to http://digitalgardeneronline.com/
zControl and clicking Control My Home.
All Activated zControls will automatically appear on their local networks. If you have multiple zControls on one
network, all of them will appear in the list of UPnP devices. They will also all be accessible by typing their unique
IP addresses into your browser’s address bar.
NOTE: If your local network does not have a DHCP server, every additional zControl will default to the same IP
address (192.168.1.55). Because two devices on one network cannot have the same IP address, you will need
to assign each zControl a different IP address before Activating another.
If you have multiple zControls on multiple networks (for example, one in your home and another in your office),
only the ones on the local network will appear in the list of UPnP devices and be accessible by typing their IP ad-
dresses into a browser’s address bar. All of them will always be accessible by going to
http://digitalgardeneronline.com/zControl and clicking Control My Home.

Advanced UI Features26
7.6.2 Choosing Which zControl to Control
When you go to http://digitalgardeneronline.com/zControl and click on Control My Home, you may be prompted
to enter your username and password. After you’ve done so, a window will appear with a list of all of the zControls
that you have Activated. Click on the one you’d like to control and then click the Select button. If you’d like to start
controlling a different zControl, just open a new browser window and access it in the same way. You don’t even
have close the window you currently have open!
If you have multiple zControls on one network and are accessing the UI through the list of UPnP devices, just
double-click the one you’d like to control.

27
Suggestions
8 Suggestions
The ActionTec zControl is a powerful and flexible tool for monitoring and controlling your home. What follows is
a list of some obvious and not-so-obvious ways of applying that power and flexibility towards simple and effective
home control.
For home security, set up a trigger that will turn on the lights in a room when motion/occupancy is detected ›
Create a ›Schedule that will turn on your coffee-maker or electric teakettle so that it’s ready by the time you
get up or come home from work
To conserve energy, create a ›Schedule that will turn off all of the lights and devices in your home after you
normally go to bed in case you forget to turn them off yourself
For home security, create some ›Schedules to turn your lights on and off at various times while you’re away to
create the impression that someone is home
Turn off your kids’ computer or television to help them get their homework done on time ›
Check in on your home, even while you’re away or at work. Have they sat down for dinner yet? Has Bobby ›
finished his vegetables?
Set up a zControl in the home of an elderly family member. This gives them the freedom to live independently ›
while providing you with peace of mind and the knowledge that you can always check up on them without be-
ing intrusive
Set up a camera and light in your nursery so you can check up on your baby quickly, easily, and quietly ›

Troubleshooting28
9 Troubleshooting
9.1 Unable to Register with Portal Server
Symptom: Unable to Register with the Portal Server
Solution:
Make sure that your network connection is working properly. You should see the ›Power and Ethernet LEDs
showing solid green and the Online LED blinking green
Ensure you have Internet connection, e.g. go to a known trusted website ›
Verify that you are using correct URL: ›http://digitalgardeneronline.com/zControl
Once logged in – make sure you provide all of the required information ›
9.2 Unable to Access zControl UI
Symptom: Cannot access zControl UI
Solution:
Confirm that UPnP is enabled ›
If no DHCP server is present on the local network, the zControl will default to the IP address 192.168.1.55. Try ›
typing the default IP address into your browser’s address bar
Remember that once you’ve ›Registered online and Activated your zControl, you can always access the user
interface remotely through http://digitalgardeneronline.com/zControl. If this does not work, there is probably
a problem with your router, internet connection, or zControl unit
9.3 Unable to Control Device
Symptom: Device intended for control does not show up in the UI
Solution:
Make sure that device is properly plugged into the wall outlet ›
Ensure that the Z-Wave device is associated with the zControl; run the ›Rediscover procedure again
Plug in the Z-Wave device within three feet of the zControl. Access your User Interface. Turn on ›Administrator
Mode, click the Settings icon in the bottom-right corner, then click the Z-Wave icon. Click the Remove but-
ton, then push the button on your Z-Wave device. Wait 30 seconds, then repeat the Z-Wave device installation
procedure from step 1 for that device

29
Troubleshooting
9.4 Browser Becomes Unresponsive
Symptom: Browser freezing or locking up
Solution:
Close and restart the browser. If unresponsive, you may need to access your ›Task Manager by simultaneously
pressing the <CTRL>, <ALT>, and <DELETE> keys once. In the Task Manager, select your browser and click
End Task or End Process
Restart the browser and access the zControl User Interface to control your devices ›
9.5 zControl Becomes Unresponsive or Online LED Is Not Solid Green
Symptom: zControl not responding to commands from the UI
Solution:
Restart the zControl by unplugging it, waiting for 10 seconds, then plugging it back in ›
Wait for the ›Online LED to turn solid green, then try controlling your devices through the zControl UI
9.6 Unable to Control My Z-Wave Appliance Module
Symptom: Appliance module cannot be controlled from the zControl or wall switch
Solution:
Repeat the procedure in section ›5.1 Adding Z-Wave Devices
Make sure that the device is properly plugged into the wall outlet ›
You may have to press the button on the appliance module to activate it ›
9.7 Unable to Control my Z-Wave Lamp Module
Symptom: Lamp module cannot be controlled from the zControl or wall switch
Solution:
Repeat the procedure in section ›5.1 Adding Z-Wave Devices
Make sure that the device is properly plugged into the wall outlet ›
You may have to press the button on the lamp module to activate it ›

Troubleshooting30
9.8 Motion Detector Is Not Being Detected
Symptom: The CA9000 Motion detector does not show up in the UI
Solution:
Check the batteries. If using a power supply, check the connections ›
You may have to press the button on the motion detector to activate it ›
If neither of the above steps solves the problem, you will need to ›Remove the motion detector by completing
the procedure in section 5.3 Removing Z-Wave Devices. After you’ve done so, repeat the procedure in section
5.1 Adding Z-Wave Devices
9.9 Motion Detector Takes Too Much or Too Little Time to Return to “No motion” State
Symptom: After the CA9000 motion detector is triggered, it does not return to “No motion” state when I desire
Solution:
You can configure the motion sensor waiting time after activation by using the slider switch at the bottom of ›
the motion sensor. Please refer to section 6.1.1 Setting Up the CA9000.
9.10 Unable to Access my Panasonic IP Camera
Symptom: I cannot see my IP camera in the Dashboard, Monitor, or Devices list
Solution:
Check the cable connections to the IP Camera (power, Ethernet) and also its connection to the router ›
Verify that the IP camera has UPnP enabled. You should be able to see it in your list of UPnP devices. See ›
section 3.1 UPnP Access to learn how to enable UPnP on your computer
If it is a new camera, you will need to consult the camera’s manual to enable UPnP access and anonymous/ ›
guest access for the zControl to use it. Refer to section 6.2: Installing UPnP Cameras
9.11 Unable to View My Panasonic IP Camera Video
Symptom: I can see my IP camera in the Dashboard, Monitor, or Devices menu, but I cannot see any video
Solution:
Check the connections to the IP Camera (power, Ethernet) and also its connection to the router ›
Try refreshing your browser screen and clicking on the camera device again ›
Unplug the power to the IP camera and plug back in. Wait for it to restart (this may take up to a minute) and ›
try accessing it from the zControl UI again
31
Troubleshooting
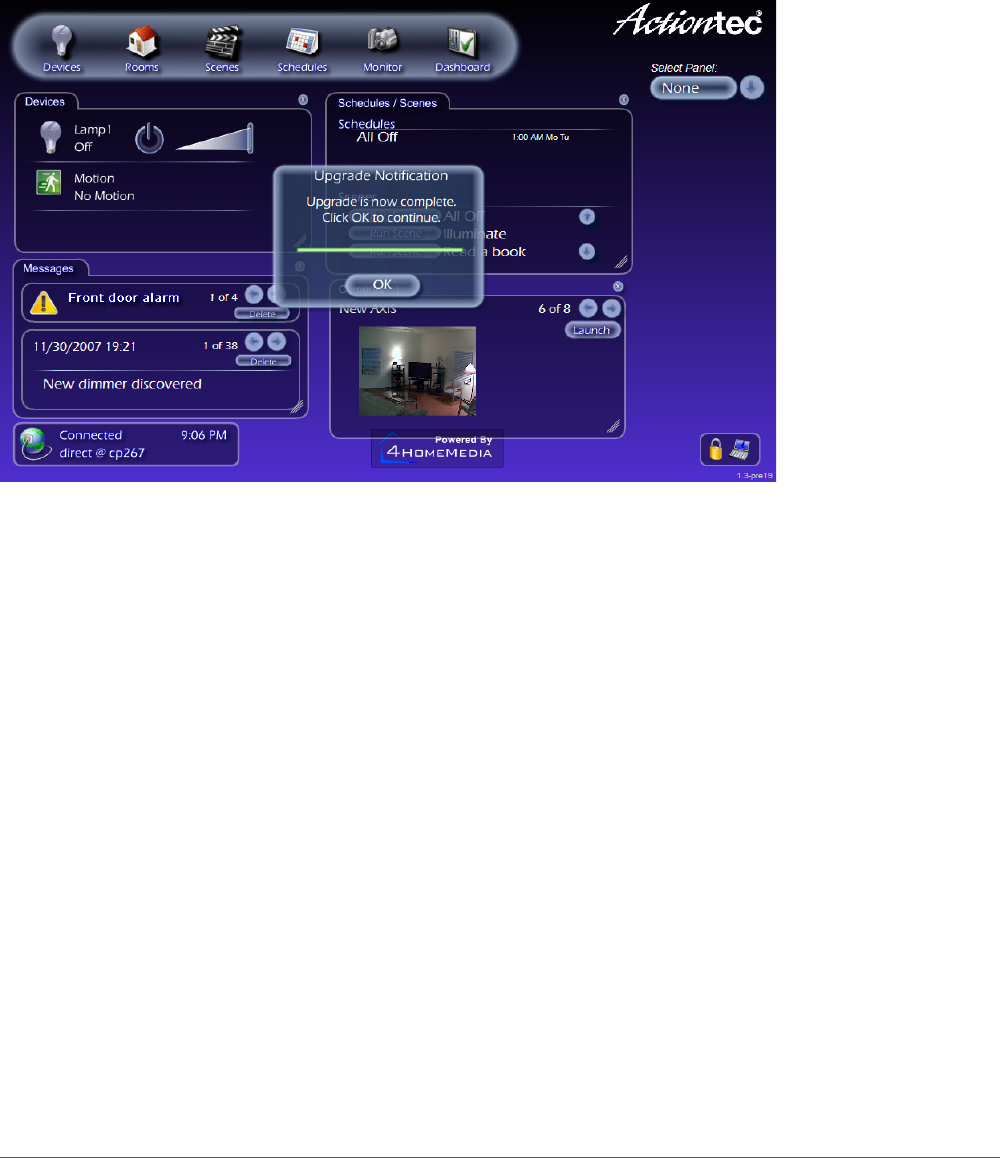
9.12 WhyDoIhaveanUpgradeNoticationMessageonMyzControlInterface?
Occasionally, your zControl may receive a software upgrade with additional features. When it does, you’ll see a
notification like this one:
Simply press the OK button and you will be able to continue using your zControl while taking advantage of the new
features.
9.13 Cannot Add New Z-Wave Devices to My zControl
Symptom: I am unable to add a new Z-Wave device to my zControl
Solution:
Are you using a remote controller? ›
The remote controller is typically setup as the primary controller, while the zControl is set up as the sec- ›
ondary controller. Only primary controllers can add and remove Z-Wave devices.
Please add your Z-Wave devices using the remote controller (refer to Appendix A – Remote Controllers ›
and the Intermatic Remote Controller manual for details)
If you are not using a remote controller, you can try adding your Z-Wave device using the Blue Z-Wave but- ›
ton on the front of the zControl, or use the zControl Interface under Administration Mode. Please follow the
instructions for Installing Z-Wave devices in this manual.
Troubleshooting32
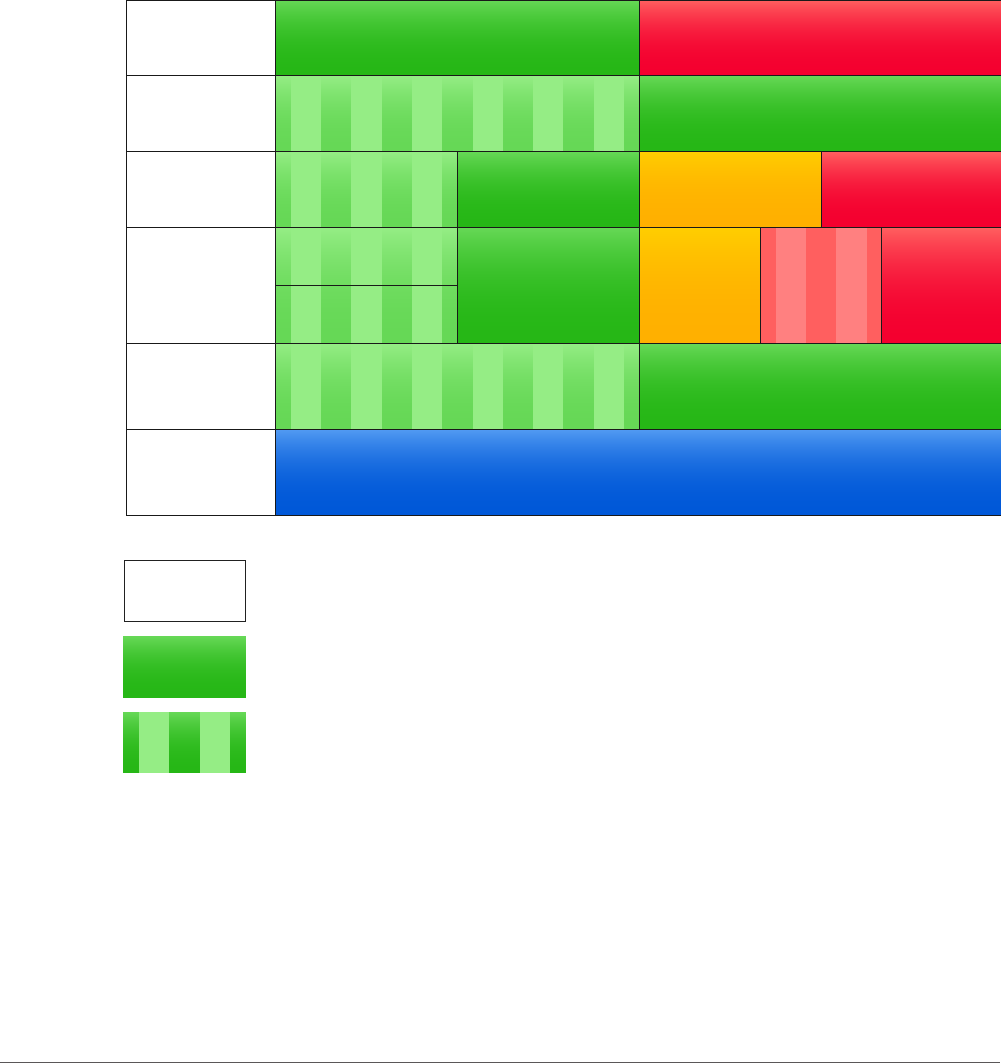
9.14 Understanding the LEDs
When the Activity and Online LEDs show solid orange or red, DO NOT turn off or restart your zControl as this may
damage it. While a software or firmware download or upgrade is in progress, normal zControl functionality may be
suspended.
Please refer to the following chart to guide you through LED messages.
Major error:contact technical supportThe ControlPoint Lite is on
The ControlPoint Lite is obtaining
an IP adress
Communicating with USB device At least one USB device detected
At least one Z-Wave device detected
Trying to connect to
the Portal Server
No powerPOWER
ETHERNET
ONLINE
ACTIVITY
USB
Z-WAVE
No Ethernet
connection
No Internet
connection
No Z-Wave
devices
connected
Not currently
adding a
Z-Wave device
No USB devices
attached
Slow: waiting for
Z-Wave device
Rapid: communicating
with the Z-Wave device
Connected to
the Portal Server
Software or
firmware download
Software or
firmware upgrade
Software or
firmware
upgrade
Software or
firmware
download
No Z-Wave
device found
1 or more Z-Wave
devices connected
The ControlPoint Lite has obtained
an IP adress
White: LED Off
Color: Solid (non-blinking) LED of the corresponding color
Stripes: Blinking LED of the corresponding color

33
Appendix A - Remote Controllers
10 Appendix A – Remote Controllers (Advanced Setup)
Your zControl starter kit may include a remote controller or one can be purchased separately from your service
provider.
The Intermatic CA-09 Wireless Remote Controller is an optional accessory that enables you to control your devices
from a remote controller as well as from the zControl Interface. If you would like to control your devices with this
remote controller, please follow these steps to configure your home network and zControl to use this remote.
NOTE: Once the remote controller is configured to control your Z-Wave devices, you will no longer be able to add
devices using the Z-Wave button on the front of the zControl or using the Add button in the zControl Interface. The
remote controller will act as the primary controller in your home and additional devices will be added using the
remote controller.
10.1 Preparing the zControl to use the Remote Controller
Open your zControl Interface. ›
Turn on Administrator Mode and then click on the Settings icon in the bottom-right corner ›
Click on the Z-Wave icon ›
You must manually remove each Z-Wave device previously added to your zControl by using the ›Remove but-
ton, followed by the Program button on the Z-Wave device. Wait for confirmation that the device is removed.
Repeat this step for each device in your home before proceeding to the next step.
10.2 Setting Up the Intermatic CA-09 Remote Controller
Now you must add control for each Z-Wave device module on the remote control and assign a channel number for
each device. (Full instructions can be found in your remote controller manual)
Adding Z-Wave modules to the network:
Press the ›INCLUDE button on the remote and verify that the green LED is flashing.
Press the program button on the Z-Wave module you wish to learn and the green LED should turn SOLID ›
indicating that it successfully learned the device.
Associating Z-Wave modules to a channel on the remote controller:
Press the ON and ›OFF buttons together for 5 seconds for the desired channel on the remote you wish to set
up until both Red and Green LEDs are blinking.
Press and hold the ›INCLUDE button and while holding, press the Program button on the Z-Wave device until
the LED flashes and turns SOLID green.
The device has been successfully associated to the channel you selected. ›
You can confirm by pressing the ›ON / OFF button and verify that your device turns on and off.

Appendix A - Remote Controllers34
Repeat these steps for each Z-Wave device in your home until you have successfully added all your modules.
(Make sure to assign a different channel number for each device, otherwise you could end up turning on more
than one device together)
10.3 Programming the zControl to Use the Remote Controller
Open your zControl Interface. ›
Turn on Administrator Mode and then click on the Settings icon in the bottom-right corner ›
Click on the Z-Wave icon ›
Now using the remote, press and Hold the ›INCLUDE button for 5 seconds. Both Red and Green LEDs will
flash. Release the INCLUDE button.
Press and release › Channel 2 ON/DIM on the remote. The Green LED will flash to indicate “Transmit All infor-
mation”.
Press the ›LEARN button on the Z-Wave Admin page on the zControl Interface
Your zControl should now be able to control your new devices.
If the Learn fails, please repeat these steps again as the remote controller may have timed out the “Transmit All
Information”.
NOTE: Each time you add/remove new Z-Wave devices to the remote control, you must complete this step to
Learn the new devices on the zControl).

Copyright Notice
All materials contained in this document including artwork, images, and text are protected by United States
copyright law and are property of ActionTec and/or 4HomeMedia. The materials may not be published, redis-
tributed, or altered without explicit permission from their respective owners.
Regulatory Compliance Notices
Class B Equipment
This equipment has been tested and found to comply with the limits for a Class B digital device, pursuant to
Part 15 of the FCC Rules. These limits are designed to provide reasonable protection against harmful inter-
ference in a residential installation. This equipment generates, uses, and can radiate radio frequency energy
and, if not installed and used in accordance with the instructions, may cause harmful interference to radio
communications. However, there is no guarantee that interference will not occur in a particular installation.
If this equipment does cause harmful interference to radio or television reception, which can be determined
by turning the equipment off and on, the user is encouraged to try to correct the interference by implementing
one or more of the following measures:
Relocate the unit and antenna (built-in) ›
Increase the separation between the equipment and receiver ›
Connect the equipment to an outlet on a circuit different from that to which the receiver is connected. ›
Consult the dealer or experienced radio/TV technician for help ›
Modications
The FCC requires the user to be notified that any changes or modifications made to this device that are not
expressly approved by Actiontec Electronics, Inc., may void the user’s authority to operate the equipment.
Declaration of conformity for products marked with the FCC log – United States only.
This device complies with Part 15 of the FCC Rules. Operation is subject to the following two conditions:
This device may not cause harmful interferences, and1.
This device must accept any interference received, including interferences that may cause unwanted 2.
operation