User Manual
800-20879 Rev. A, 5/2015
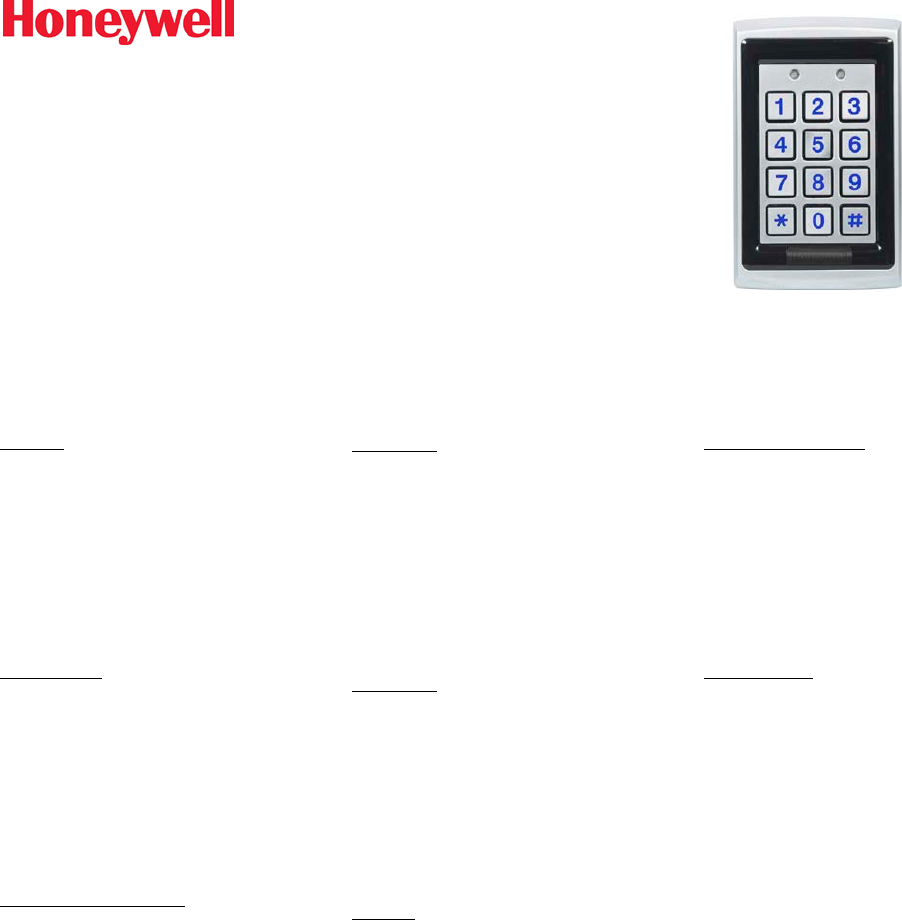
OmniProx OP-95 Rev. S Installation Guide
Guía de instalación / Guide d’installation / 安装指南 / Instalační průvodce /
Installationsanleitung / Guida all’installazione / Installatiegids
Parts List
Quantity Description
1 OmniProx OP-95 Rev. S Reader
1 Installation Manual
1 Adhesive Mounting Template
2 Mounting Screws
2 Screw Anchors
1 PIN Torx Security Screw
1 Phillips Head Screw
1 PIN Torx Key Tool
Lista de piezas
Cantidad Descripción
1 Lector OmniProx OP-95 Mod. S
1 Manual de instalación
1 Plantilla de montaje adhesiva
2 Tornillos de montaje
2 Tacos
1 Tornillo de seguridad PIN Torx
1 Tornillo Phillips
1 Herramienta de llaves PIN Torx
Liste des pièces détachées
Quantité Description
1 Lecteur OmniProx OP-95 Rév. S
1 Manuel d’installation
1 Gabarit de montage adhésif
2 Vis de fixation
2 Ancrages de vis
1 Vis de sécurité Torx
1 Vis à tête Phillips
1 Embout de vis de sécurité Torx
零部件清单
数量 描述
1 OmniProx OP-95 Rev. S 读卡器
1 安装手册
1 胶粘安装模板
2 安装螺丝
2 螺旋丝
1 丝内梅花丝安全螺丝
1 十字槽螺丝
1 丝内梅花丝重要工具
Seznam dílů
Množství Popis
1 Čtečka OmniProx OP-95 Rev. S
1 Návod k instalaci
1 Přilnavá montážní šablona
2 Připevňovací šrouby
2 Závitová ukotvení
1 Torzní pojistný šroub PIN
1 Šroub s hlavicí Phillips
1 Torzní klíčový nástroj PIN
Teileliste
Menge Beschreibung
1 OmniProx OP-95 Rev. S Leser
1 Installationsanleitung
1 Klebstoff-Montagevorlage
2 Befestigungsschrauben
2 Schraubanker
1 PIN Torx Sicherheitsschraube
1 Kreuzschlitzschraube
1 PIN Torx Schraubenschlüssel
Elenco dei componenti
Quantità Descrizione
1 Lettore OmniProx OP-95 Rev. S
1 Manuale di installazione
1 Modello di montaggio adesivo
2 Viti di montaggio
2 Tasselli per viti
1 Vite di sicurezza torx pin
1 Vite con testa a croce
1 Cacciavite torx pin
Onderdelenlijst
Hoeveelheid Beschrijving
1 OmniProx OP-95
Rev. S-lezer
1 Installatiehandleiding
1 Zelfklevend
opbouwsjabloon
2 Bevestigingsschroeven
2 Schroefankers
1 PIN Torx-veiligheidsschroef
1 Phillips-hoofdschroef
1 PIN Torx-sleutel

OmniProx Rev. S
800-20879 Rev. A 2
Electrical Specifications
Especificaciones eléctricas / Spécifications électriques /
电气规范
/ Elektrické specifikace /
Elektrische Daten / Specifiche elettriche / Elektrische specificaties
Honeywell Model # and UL Listed Part #
N.° de modelo Honeywell y n.° de pieza en la lista UL
Nº de modèle Honeywell et nº de pièce répertoriée UL
霍尼韦尔型号及 UL 标准部件编号
Č. modelu Honeywell a číslo dílu uvedené v UL
Honeywell Modell-Nr. und UL-Listed Teile-Nr.
N. di modello Honeywell e N. componente UL in elenco
Honeywell-model # en UL-onderdeel #
OP-95
Power Supply Type
Tipo de suministro de energía
Type d’alimentation
电源类型
Typ zdroje napájení
Art des Netzteils
Tipo di alimentazione
Type stroomvoorziening
Linear type (recommended)
Tipo lineal (recomendado)
Type linéaire (recommandé)
线性电源(建议)
Lineární typ (doporučeno)
Linear (empfohlen)
Lineare (consigliato)
Lineaire type (aanbevolen)
Operating Voltage Range
Intervalo de voltaje de funcionamiento
Plage de tension de fonctionnement
工作电压范围
Rozsah provozního elektrického napětí
Betriebsspannungsbereich
Intervallo tensione di esercizio
Bedrijfsspanning
5–16 VDC
Absolute Maximum (non-operating)
Máximo absoluto (sin funcionamiento)
Maximum absolu (non fonctionnel)
绝对最大电压(非工作电压)
Absolutní maximum (neprovozní)
Absolutes Maximum (außer Betrieb)
Massimo assoluto (non operativo)
Absolute maximum (niet-bedrijfsspanning)
18 VDC
Current @ 12VDC
Corriente a 12 V CC
Courant à 12 V CC
12VDC 时的电流
Proud při 12 V DC
Stromstärke bei +12 VDC
Corrente a 12 VCC
Stroom @ 12VDC
Standby: 60 mA / Maximum: 120 mA
Reserva: 60 mA / Máximo: 120 mA
Veille : 60 mA / Maximum : 120 mA
待机电流:60 mA / 最大电流:120 mA
Pohotovostní režim: 60 mA / Maximum: 120 mA
Bereitschaft: 60 mA / Maximum: 120 mA
Standby: 60 mA / Massimo: 120 mA
Stand-by: 60 mA / Maximaal: 120 mA
Max Read Range*
Intervalo máx. de lectura*
Distance de lecture max.*
最大读数范围*
Max. rozsah čtení*
Max. Lesebereich*
Max intervallo lettura*
Maximaal leesbereik *
1.5"
(35 mm)
Green LED Ctrl Input
Entrada Ctrl de LED verde
Entrée de commande de DEL verte
绿色 LED 控制输入
Zelená LED, říd. vstup
Grüner LED-Strg-Eingang
Ingresso ctrl. LED verde
Groene LED Ctrl-invoer
Dry Contact, N.O.
Contacto seco, N.A.
Contact sec, N.O.
干式接触,常开
Suchý kontakt, N.O.
Trockenkontakt, Schließer
Contatto pulito, N.O.
Droog contact, N.O.

OmniProx Rev. S
3 800-20879 Rev. A
Red LED Ctrl Input
Entrada Ctrl de LED rojo
Entrée de commande de DEL rouge
红色 LED 控制输入
Červená LED, říd. vstup
Roter LED-Strg-Eingang
Ingresso ctrl. LED rosso
Rode LED Ctrl-invoer
Dry Contact, N.O.
Contacto seco, N.A.
Contact sec, N.O.
干式接触,常开
Suchý kontakt, N.O.
Trockenkontakt, Schließer
Contatto pulito, N.O.
Droog contact, N.O.
Hold Input
Entrada de retención
Entrée de retenue
保持输入
Přidržený vstup
Halteeingang
Ingresso di Hold
Hold-invoer
Dry Contact, N.O.
Contacto seco, N.A.
Contact sec, N.O.
干式接触,常开
Suchý kontakt, N.O.
Trockenkontakt, Schließer
Contatto pulito, N.O.
Droog contact, N.O.
EM Mode Input
Entrada de modo EM
Entrée de mode EM
EM 模式输入
Vstupní režim EM
EM-Modus-Eingang
Ingresso modalità EM
EM-modusinvoer
Dry Contact, N.O.
Contacto seco, N.A.
Contact sec, N.O.
干式接触,常开
Suchý kontakt, N.O.
Trockenkontakt, Schließer
Contatto pulito, N.O.
Droog contact, N.O.
Tamper Output
Salida tamper (antisabotaje)
Sortie de sabotage
防拆输入
Falešný výstup
Manipulationsausgang
Uscita tamper
Tamperuitgang
Open collector, active low, max sink current 16 mA
Colector abierto, baja activa, corriente absorbida máx. de 16 mA
Collecteur ouvert, actif bas, courant dissipé maximal 16 mA
开路集电极,低电平,最大灌电流 16 mA
Otevřená sběrnice, aktivní nízký, max. pokles proudu 16 mA
Offener Kollektor, aktiv niedrig, max. Senkstrom 16 mA
Collettore aperto, attivo basso, max corrente assorbita 16 mA
Open collector, actief-laag, max. stroomverlaging 16 mA
Cable Length
Longitud del cable
Longueur de câble
电缆长度
Délka kabelu
Kabellänge
Lunghezza cavo
Kabellengte
22 AWG – 500' / 150 m
24 AWG – 300' / 90 m
RF Modulation
Modulación de RF
Modulation RF
射频调制
Modulace RF
HF-Modulation
Modulazione RF
RF-modulatie
ASK / FSK, 125 kHz
* Actual operating distance will vary depending upon installation environment, proximity to metal, credential type and operating reader voltage used.
* La distancia de funcionamiento real variará dependiendo del ambiente de instalación, la proximidad al metal, el tipo de credencial y el voltaje del
lector en funcionamiento.
* La distance de fonctionnement réelle variera selon l’environnement de l’installation, la proximité à des objets métalliques, la nature du type de
dispositif d’authentification et la tension de fonctionnement du lecteur.
* 实际工作距离因安装环境、周围金属、凭证类型以及读卡器工作电压而异。
* Skutečná provozní vzdálenost se může lišit v závislosti na prostředí instalace, blízkosti kovů, typu přístupu a provozním napětí čtečky.
* Tatsächlicher Betriebsabstand hängt von der Installationsumgebung, Nähe zu Metall, Art der Anmeldedaten und Betriebsspannung des Lesers ab.
* La distanza operativa effettiva varierà in funzione dell’ambiente di installazione, della vicinanza di metalli, del tipo di credenziale e dalla tensione
operativa del lettore.
* Eigenlijke bedrijfsafstand varieert afhankelijk van omgeving van installatie, nabijheid van metaal, en type toegangscontrole en bedrijfsleesspanning.

OmniProx Rev. S
800-20879 Rev. A 4
Environmental Specifications
Especificaciones ambientales / Spécifications environnementales /
环境规范
/ Specifikace prostředí /
Umweltdaten / Specifiche ambientali / Omgevingsspecificaties
Honeywell Model
Modelo Honeywell
Modèle Honeywell
霍尼韦尔型号
Model Honeywell
Honeywell Modell
Modello Honeywell
Honeywell-model
OP-95
Operating Temperature
Temperatura de funcionamiento
Température de fonctionnement
工作温度
Provozní teplota
Betriebstemperatur
Temperatura di esercizio
Bedrijfstemperatuur
-31°C – 63°C (-25°F – 145°F)
Operating Humidity
Humedad de funcionamiento
Humidité de fonctionnement
工作湿度
Provozní vlhkost
Luftfeuchtigkeit (Betrieb)
Umidità di esercizio
Bedrijfsvochtigheid
0 – 95%
(non-condensing / sin condensación / sans condensation / 不凝结 / bez kondenzace /
nicht kondensierend / senza condensa / niet-condenserend)
Suitable for outdoor use / Adecuado para su uso en exteriors / Convient à l’utilisation à
l’extérieur / 适合室外使用 / Vhodné pro vnější použití / Geeignet für den Einsatz im
Freien / Adatto per l’uso all’aperto / Geschikt voor buitenshuis gebruik
Dimensions
Dimensiones / Dimensions /
尺寸
/ Rozměry / Maße / Dimensioni / Afmetingen
Reader
Lector
Lecteur
读卡器
Čtečka
Leser
Lettore
Lezer
Length
Longitud
Longueur
长度
Délka
Länge
Lunghezza
Lengte
Width
Ancho
Largeur
宽度
Šířka
Breite
Larghezza
Breedte
Diameter
Diámetro
Diamètre
直径
Průměr
Durchmesser
Diametro
Diameter
OP95
4.72" (120 mm)
3" (76 mm)
0.59" (15 mm)
OmniProx Rev. S
5 800-20879 Rev. A
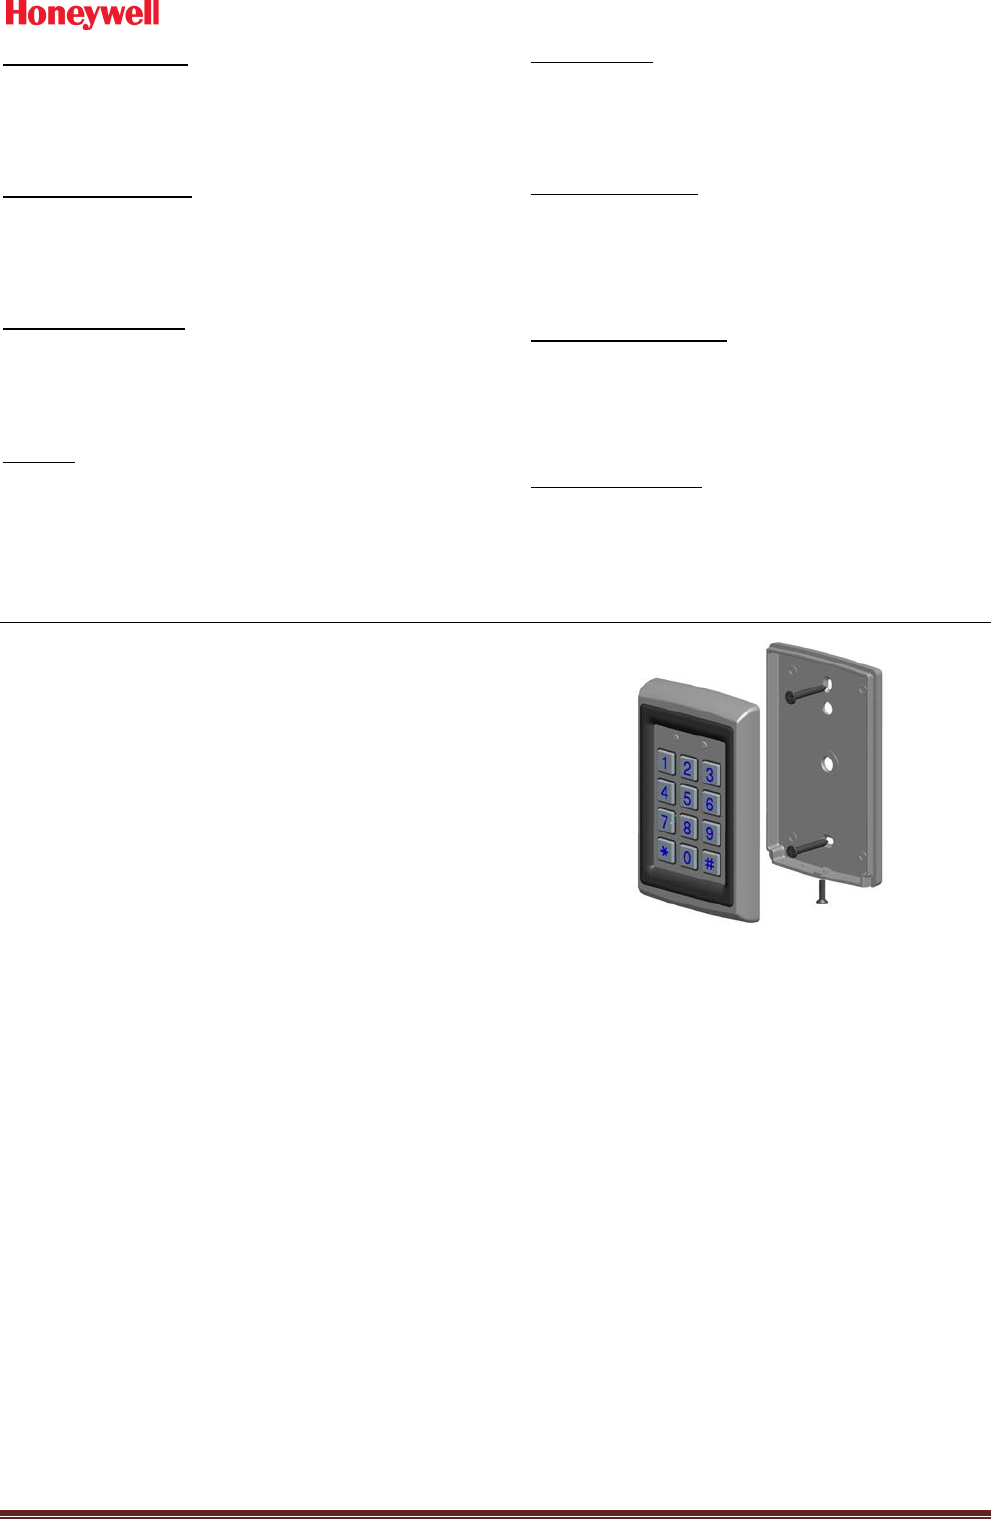
Mounting Instructions
The model OP95 uses a screw on the bottom of the reader to
secure the reader to its mounting base. Remove this screw
using a Philips head screwdriver. Then slide the mounting
base down slightly and then lift it up from the bottom.
Instrucciones de montaje
El modelo OP95 tiene un tornillo en la parte inferior del lector
para fijarlo a su base de montaje. Retire este tornillo con un
destornillador Philips. Luego, deslice la base de montaje
levemente hacia abajo y levántela de la parte inferior.
Instructions de montage
Le modèle OP95 utilise une vis à la base du lecteur pour fixer
le lecteur sur sa base de montage. Enlevez cette vis à l’aide
d’un tournevis à tête Phillips. Glissez ensuite la base de
montage légèrement vers le bas et puis levez-la par le bas.
安装说明
OP95 型号使用读卡器底部的螺丝将读卡器固定到安装底
座上。使用十字螺丝刀拆下螺丝。然后将安装底座稍微向
下滑动,再将它从底部提起来。
Montážní návod
Model OP95 používá šroub ve spodní části čtečky k připevnění
čtečky k montážní základně. Odstraňte tento šroub pomocí
šroubováku s hlavicí Phillips. Poté posuňte montážní základnu
mírně dolů a poté ji zdvihněte.
Montageanweisungen
Das Modell OP95 verfügt an der Unterseite des Lesers eine
Schraube zum Sichern des Lesers am Montagesockel. Diese
Schraube muss mit einem Kreuzschlitzschraubendreher
entfernt werden. Danach den Montagesockel etwas nach
unten schieben und dann von unten anheben.
Istruzioni per il montaggio
Il modello OP95 utilizza una vite sul fondo del lettore per
fissare il lettore stesso alla sua base di montaggio. Rimuovere
questa vite utilizzando un cacciavite a croce. Scorrere quindi la
base di montaggio lievemente verso il basso, poi sollevarla dal
fondo.
Bevestigingsinstructies
Model OP95 maakt gebruik van een schroef onderaan de lezer
om deze aan zijn bevestigingsbasis vast te maken. Verwijder
deze schroef met een kruiskopschroevendraaier. Schuif
vervolgens de bevestigingsbasis lichtjes naar beneden en dan
naar boven.
To surface mount the reader, perform the following:
1. Determine an appropriate mounting position for the
reader.
2. Peel off the back of the self-stick mounting label
template included with the unit and place at the
desired mounting position.
3. Using the template as a guide, drill two holes (hole
size and position is indicated on mounting template)
for mounting the reader to the surface.
4. Drill a 1/2" (13 mm) hole for the cable. If mounting
on metal, place a grommet or electrical tape around
the edge of the hole.
5. Route the interface cable from the reader and/or
power supply to the host. A linear type power
supply is recommended.
Para el montaje de superficie del lector, haga lo siguiente:
1. Determine una superficie de montaje adecuada
para el lector.
2. Despegue el reverso de la plantilla de etiqueta de
montaje autoadhesiva que se incluye con la unidad
y colóquela en la posición de montaje deseada.
3. Use la plantilla como guía para perforar dos orificios
(el tamaño y la posición de los orificios se indican en
la plantilla de montaje) para montar el lector en la
superficie.
4. Perfore un orificio de 1/2" (13 mm) para el cable. Si
lo monta sobre metal, coloque un ojal o cinta
aislante alrededor del borde del orificio.
5. Pase el cable de interfaz del lector o del suministro
de energía hasta el host. Se recomienda usar un
suministro de energía de tipo lineal.
Pour le montage en surface du lecteur, procédez comme suit :
1. Établissez une position adéquate de montage du
lecteur.
2. Enlevez l’endos de l’étiquette de montage
autoadhésive incluse avec le dispositif et placez-la à
la position de montage désirée.
3. En vous guidant sur le gabarit, percez deux trous (la
taille et la position des trous sont indiquées sur le
gabarit de montage) afin de monter le lecteur sur la
surface.
4. Percez un trou de 1/2 po (13 mm) pour le câble. Si le
dispositif est monté sur une surface métallique,
placez un passe-fil ou du ruban électrique sur le
rebord du trou.
5. Acheminez le câble d’interface du câble et/ou de
l’alimentation vers l’hôte. Une alimentation de type
linéaire est recommandée.
1

OmniProx Rev. S
800-20879 Rev. A 6
如要将读卡器安装在表面,方法如下:
1. 确定合适的读卡器安装位置。
2. 撕下装置中包含的自粘式安装标签模板的背部,
放在要安装的位置。
3. 按照模板上的指南钻两个孔(安装模板上说明了
孔的大小和位置),以便将读卡器安装在表面。
4. 钻一个 1/2" (13 mm) 大小的孔,以便安装电缆。
如要安装在金属上,则在孔的边缘装一个索环或
者粘一圈电气胶带。
5. 将读卡器和/或电源的接口电缆接到主机。建议使
用线性电源。
Při montáži čtečky na povrch postupujte následovně:
1. Určete vhodnou montážní polohu pro čtečku.
2. Odloupněte zadní samolepicí montážní štítek
šablony včetně jednotky a umístěte do požadované
montážní polohy.
3. Šablonu použijte jako vodítko. Vyvrtejte dva otvory
(velikost otvoru a poloha je označena na montážní
šabloně) pro montáž čtečky na povrch.
4. Pro kabel vyvrtejte otvor o velikosti 1/2" (13 mm).
Pokud budete montáž provádět do kovu, umístěte
okolo okraje otvoru průchodku nebo elektrikářskou
pásku.
5. Veďte kabel s rozhraním od čtečky a/nebo zdroje
napájení k hostitelské jednotce. Doporučujeme
lineární typ zdroje napájení.
Montage des Lesers an einer Oberfläche:
1. Eine geeignete Montagestelle für den Leser
bestimmen.
2. Den Abdeckstreifen der selbstklebenden Montage-
Vorlage abziehen, die mit dem Leser mitgeliefert
wurde, und diese an der gewünschten
Montagestelle anbringen.
3. Mithilfe der Vorlage zwei Löcher (Lochgröße und
-position sind auf der Montage-Vorlage angegeben)
zur Montage des Lesers auf der Oberfläche bohren.
4. Ein Loch mit 1/2 Zoll (13 mm) Durchmesser für das
Kabel bohren. Bei der Montage an einer Metallwand
eine Tülle oder Isolierband um die Kante des Lochs
kleben.
5. Das Schnittstellenkabel vom Leser und/oder Netzteil
zum Host verlegen. Es wird ein lineares Netzteil
empfohlen.
Per montare il lettore su una superficie, seguire i seguenti
passi:
1. Individuare una posizione di montaggio adeguata
per il lettore.
2. Eliminare il rivestimento di protezione dal retro del
modello di montaggio autoadesivo in dotazione con
l’unità, e disporlo nella posizione prescelta per il
montaggio.
3. Utilizzando il modello come guida, praticare due fori
(la dimensione e la posizione sono indicati sul
modello di montaggio) per montare il lettore sulla
superficie.
4. Praticare un foro da 1/2" (13 mm) per il cavo. Se la
superficie di montaggio è metallica, applicare una
guarnizione o del nastro isolante attorno al bordo
del foro.
5. Stendere il cavo di interfaccia dal lettore e/o
dall’alimentatore all’host. Si consiglia un
alimentatore di tipo lineare.
Doe het volgende voor het opbouwen van de lezer:
1. Leg een geschikte opbouwpositie vast voor de lezer.
2. Pel de achterkant van het zelfklevende
opbouwsjabloon af, dat bij de eenheid zit en
positioneer de gewenste opbouwpositie.
3. Boor, aan de hand van het sjabloon, twee gaten
(grootte en positie zijn aangeduid op het
opbouwsjabloon) om de lezer aan het oppervlak te
bevestigen.
4. Boor een gat van 1/2" (13 mm) voor de kabel. Bij
bevestigen aan metaal, plaats een doorvoertule of
isolatietape rond de rand van het gat.
5. Geleid de interfacekabel van de lezer en/of
stroomvoorziening naar de host. Een linair type
stroomvoorziening is aanbevolen.
Wiring Instructions
1. Prepare the controller cable by cutting its jacket
back 3 cm (1-1/4") and strip the insulation from the
wires about 1.2 cm (1/2").
2. Splice the reader’s pigtail wires to the
corresponding controller wires (as indicated in table
below) and cover each joint with insulating tape.
Wire Color
Function
Red
5–16 VDC
Black
GND
Green
Data 0 / Data
White
Data 1 / Clock
Orange
Green LED
Brown
Red LED
Blue
Hold
Purple
Tamper
Yellow
Buzzer
Grey
EM Mode
Note: When using a separate power supply for the reader,
the reader, power supply, and host must have a
common ground.
Instrucciones de cableado
1. Para preparar el cable del controlador, corte 3 cm
de la parte posterior de la envoltura y quite el
aislante de los cables alrededor de 1,2 cm.
2. Una los cables flexibles de conexión del lector con
los cables correspondientes del controlador (como
se indica en la tabla a continuación) y cubra cada
unión con cinta aislante.
Color del cable
Función
Rojo
5 a 16 V CC
Negro
Tierra
Verde
Dato 0 / Dato
Blanco
Dato 1 / Reloj
Naranjo
LED verde
Café
LED rojo
Azul
Retención
Morado
Tamper
Amarillo
Zumbador
Gris
Modo EM
Nota: Cuando use un suministro de energía diferente para
el lector debe haber una conexión a tierra común
para el lector, el suministro de energía y el host.
2

OmniProx Rev. S
7 800-20879 Rev. A
Instructions de câblage
1. Préparez le câble du contrôleur en coupant sa gaine
de 30 mm et dénudez l’isolation des fils sur 12 mm
environ.
2. Épissez les amorces du lecteur aux fils du contrôleur
correspondants (conformément au tableau ci-
dessous) et recouvrez chaque connexion de ruban
isolant.
Couleur du fil
Fonction
Rouge
5–16 V CC
Noir
Terre
Vert
Données 0 / données
Blanc
Données 1 / horloge
Orange
DEL verte
Marron
DEL rouge
Bleu
Retenue
Violet
Sabotage
Jaune
Signal sonore
Gris
Mode EM
Remarque : Si le lecteur utilise une alimentation distincte, le
lecteur, le bloc d’alimentation et l’hôte doivent
avoir une mise à la terre commune.
接线说明
1. 准备控制电缆,将电缆护套划开一道 3 cm 的口
子,剥开电线的绝缘层 1.2 cm。
2. 将读卡器的超软细股线与相应的控制器电线接合
(如下表说明),使用绝缘胶带封住接合口。
电线颜色
功能
红色
5–16 VDC
黑色
接地
绿色
数据 0/数据
白色
数据 1/时钟
橙色
绿色 LED
棕色
红色 LED
蓝色
保持
紫色
防拆
黄色
蜂鸣器
灰色
EM 模式
注意:
读卡器单独使用电源时,读卡器、电源和主机必
须使用同一根接地线。
Pokyny k připojení
1. Připravte si kabel ovladače odříznutím 3 cm a
stažením izolace z vodičů, přibližně 1,2 cm.
2. Odřízněte konec vodičů čtečky, aby odpovídal
vodičům ovladače (dle označení v tabulce níže) a
každý spoj zakryjte izolační páskou.
Barvy vodičů
Funkce
Červený
5–16 V DC
Černý
GND
Zelený
Data 0 / Data
Bílý
Data 1 / obvod
Oranžový
Zelená LED
Hnědý
Červená LED
Modrý
Hold
Fialový
Tamper
Žlutý
Bzučák
Šedý
Režim EM
Poznámka: Při použití odděleného zdroje napájení pro čtečku
musí mít čtečka, zdroj napájení a hostitelská
jednotka společné zemnění.
Verkabelungsanweisungen
1. Das Controller-Kabel vorbereiten, indem der Mantel
am Kabelende 30 mm lang entfernt und die Kabel
ca. 12 mm lang abisoliert werden.
2. Die Kabelanschlusslitzen mit den zugehörigen
Controller-Kabeln verspleißen (wie in der Tabelle
unten dargestellt) und die Anschlusstellen mit
Isolierband abkleben.
Kabelfarbe
Funktion
Rot
5–16 VDC
Schwarz
GND
Grün
Daten 0 / Daten
Weiß
Daten 1 / Takt
Orange
Grüne LED
Braun
Rote LED
Blau
Halten
Violett
Manipulation
Gelb
Summer
Grau
EM-Modus
Hinweis: Bei Verwendung eines eigenen Netzteils für den
Leser, müssen Leser, Netzteil und Host eine
gemeinsame Erdung haben.
Istruzioni per il cablaggio
1. Preparare il cavo del controller tagliandone la
guaina per 3 cm, quindi spelare l’isolante dai fili per
circa 1,2 cm.
2. Collegare i fili del cavo del lettore ai corrispondenti
fili del controller (come indicato nella seguente
tabella) e proteggere ogni giunzione con del nastro
isolante.
Colore del filo
Funzione
Rosso
5–16 VCC
Nero
GND
Verde
Dati 0 / Dati
Bianco
Dati 1 / Orologio
Arancio
LED verde
Marrone
LED rosso
Blu
Hold
Viola
Tamper
Giallo
Buzzer
Grigio
Modalità EM
Nota: Quando per il lettore si utilizzi un alimentatore
separato, lettore, alimentatore e host devono avere
una terra comune.
Bedradinginstructies
1. Bereid de regelkabel voor door zijn omhulsel op
3 cm af te knippen en de isolatie 1,2 cm weg te
trekken.
2. Sluit de pigtail-draden van de lezer aan op de
overeenkomstige regeldraden (zoals aangeduid in
onderstaande tabel) en bedek elke aansluiting met
isolatietape.
Kleur draad
Functie
Rood
5–16 VDC
Zwart
Aarden
Groen
Data 0 / data
Wit
Data 1 / klok
Oranje
Groene LED
Bruin
Rode LED
Blauw
Hold
Paars
Sabotage
Geel
Zoemer
Grijs
EM-modus
Opmerking: Wanneer u een afzonderlijke stroomvoorziening
gebruikt voor de lezer, dan moeten de lezer, de
stroomvoorziening en de host een
gemeenschappelijke aarding hebben.

OmniProx Rev. S
800-20879 Rev. A 8
Testing the Reader
1. Upon power up the reader will flash and beep three
times during self test and then the LED will turn red
indicating the reader has entered standby mode.
2. Apply a card to the reader, the reader will flash and
beep once indicating the card has been read
successfully.
Prueba del lector
1. Cuando encienda el lector, este parpadeará y
emitirá un pitido tres veces durante la
autocomprobación y luego, el LED se volverá rojo, lo
que indicará que el lector ha ingresado al modo de
espera.
2. Aplique una tarjeta al lector, el cual parpadeará y
emitirá un pitido lo que indicará que ha leído la
tarjeta exitosamente.
Essai du lecteur
1. À la mise sous tension, le lecteur clignote et émet
trois tonalités durant l’autotest et puis la DEL rouge
s’allume indiquant que le lecteur est en mode de
veille.
2. Appliquez une carte contre le lecteur; le lecteur
clignote et émet une tonalité indiquant la réussite
de la lecture de la carte.
读卡器测试
1. 接通电源后,读卡器将闪烁,并发出三次蜂鸣声,
表示正在进行自检测试,然后,将亮起红色 LED
灯,表示读卡器已进入待机模式。
2. 将一张卡插入读卡器中,读卡器将闪烁,并发出
一次蜂鸣声,表示读卡成功。
Testování čtečky
1. Po spuštění napájení čtečka aktivuje světelnou
signalizaci a třikrát během autotestu pípne. Poté se
LED rozsvítí červeně, což označuje, že je čtečka v
pohotovostním režimu.
2. Vložte kartu do čtečky, čtečka blikne a jednou pípne.
To označuje, že karta byla úspěšně načtena.
Testen des Lesers
1. Nach dem Einschalten des Lesers wird dieser
während des Selbsttests drei Mal blinken und drei
Signaltöne abgeben. Dann leuchtet die LED rot, was
den Bereitschaftsmodus des Lesers anzeigt.
2. Eine Karte vor den Leser halten; der Leser blinkt und
gibt einen Signalton ab, wenn die Karte erfolgreich
gelesen wurde.
Test del lettore
1. All’accensione, il lettore lampeggerà ed emetterà un
impulso sonoro per tre volte, durante il test
automatico; poi il LED diventerà rosso, per indicare
che il lettore è in modalità standby.
2. Applicare una carta al lettore: il lettore lampeggerà
ed emetterà un impulso sonoro (una sola volta) per
indicare che la carta è stata letta correttamente.
De lezer uitproberen
1. Na het inschakelen zal de lezer oplichten en
driemaal piepen als zelf-test en daarna zal de LED-
lamp rood oplichten om aan te duiden dat de lezer
in stand-bymodus staat.
2. Bij het inlezen van een kaart zal de lezer oplichten
en eenmaal piepen om aan te duiden dat de kaart
met succes werd gelezen.
3

OmniProx Rev. S
9 800-20879 Rev. A
Operating the Reader
Card Reading – The reader can read both HID ProxTM (FSK) and
EM 410x (ASK) cards.
• When a HID ProxTM card is read, the reader will
output the ID data in Wiegand according to the bit
format of the card up to 85-bits.
• When an EM card is read, the reader will output the
ID data either in Wiegand or Clock & Data format as
per the selected EM Mode. Wiegand EM ID data is
always sent as 26-bits. Clock & Data EM ID data is
always sent as 40-Bits.
EM Mode Line – For EM Cards the EM Mode Line selects if the
EM ID data is sent in Wiegand or Clock & Data format. When
the Mode Line is open, the EM ID data is sent as Wiegand.
When the Mode Line is pulled to GND, the EM ID data is sent
as Clock & Data format.
Hold Line – The hold line is active low. When active and a card
is read, no card data is sent on the Wiegand lines; however,
the reader will continue to buffer the last card ID read and will
send that ID data when the hold line is released.
Keypad Entry – The reader supports nine keypad formats for
use with various controllers. The default keypad format is
Single Key, Wiegand 4-Bit. For Honeywell panels, a
termination key (#) must be pressed after the PIN is entered
so that the panel knows the PIN code has been fully entered.
Keypad Programming Mode – The keypad on the readers is
pre-programmed with default settings for standard use.
Changing the settings is done via the keypad driven
programming menu.
Men
u
Setting
Default
1
Selecting Keypad Transmission Format
Option #
Keypad Transmission Format
1
Single Key, Wiegand 6-Bit (Rosslare
Format)
2
Single Key, Wiegand 6-Bit with
Nibble + Parity Bits
3
Single Key, Wiegand 8-Bit, Nibbles
Complemented
4
4 Keys Binary + Facility code,
Wiegand 26-Bit
5
1 to 5 Keys + Facility code,
Wiegand 26-Bit
6
6 Keys Binary-Coded Decimal
(BCD) and Parity Bits, Wiegand 26-
Bit
7
Reserved
8
1 to 8 Keys BCD, Clock & Data
9
Single key, Wiegand 4-Bit
*
2
Changing the Programming code
1234
3
Changing the Facility code
0
4
Selecting the Keypad Backlight Setting
Option #
Keypad Backlight Setting
1
Always off
2
Always on
*
3
10 sec. backlight after key press
otherwise off
4
10 sec. backlight after key press
otherwise dimmed
0
Return to Factory Default Settings
To enter programming mode press “#” four times and enter
the programming code. The default programming code is
1234. While you are in programming mode you can exit at
anytime by pressing “#”.
• Keypad transmission format
To select a keypad transmission format, enter
programming mode, press “1”, then enter the
Option # for the Keypad Transmission format you
wish to select.
Note: For Option 8 an additional entry is required,
for further details please refer to the format guide.
• Changing the programming code
To change the programming code, enter
programming mode, press “2”, then enter the new
four digit programming code.
Note: For new reader installations it is advisable for
security reasons to change the programming code
upon installation of the reader.
• Changing the facility code
This facility code is only used in Keypad
Transmission formats 4 and 5. To change the facility
code, enter programming mode, press “3”, then
enter the new three digit facility code. The facility
code must be between 000 and 255.
• Selecting the keypad backlight setting
To change the keypad backlight setting, enter
programming mode, press “4”, then enter the
Option # for the keypad backlight setting you wish
to select.
• Return to Default Settings
To return to default settings, enter programming
mode, press “0”, then enter the programming code.
Replacing a Lost Programming Code
In the event that the Programming code is forgotten:
1. Remove power from the reader.
2. Activate the tamper by removing the reader from
the wall or removing the reader’s case.
3. Apply power to the reader and within the next 10
seconds you can enter programming mode using the
factory default Programming code 1234.
4. You can now change the programming code or
return the reader to its default settings.
4

OmniProx Rev. S
800-20879 Rev. A 10
Funcionamiento del lector
Lectura de la tarjeta: El lector puede leer tanto tarjetas
HID ProxTM (FSK) como tarjetas EM 410x (ASK).
• Cuando se lee una tarjeta HID ProxTM, el lector
entregará los resultados de los datos de
identificación en Wiegand, de acuerdo con el
formato de bit de la tarjeta, hasta 85 bits.
• Cuando se lee una tarjeta EM, el lector entregará los
datos de identificación, ya sea en formato Wiegand
o en banda magnética, según el modo EM
seleccionado. Los datos de identificación EM de
Wiegand siempre se envían como 26 bits. Los datos
de identificación EM en banda magnética siempre
se envían como 40 bits.
Línea en modo EM: Para las tarjetas EM, la línea de modo EM
selecciona si los datos de identificación EM se envían en
formato Wiegand o en banda magnética. Cuando la línea de
modo está abierta, los datos de identificación EM se envían en
formato Wiegand. Cuando la línea de modo está conectada a
tierra, los datos de identificación EM se envían en formato de
datos en banda magnética.
Línea de retención: La línea de retención es baja activa.
Cuando está activa y se lee una tarjeta, no se envía ningún
dato de tarjeta en las líneas Wiegand; sin embargo, el lector
continuará almacenando en buffer la última lectura de
identificación de la tarjeta y enviará los datos de identificación
cuando se libere la línea de retención.
Entrada de teclado: El lector es compatible con nueve
formatos de teclado para usarlo con varios controladores. El
formato de teclado predeterminado es Tecla única, Wiegand
de 4 bits. Para los paneles Honeywell, se debe presionar una
tecla de finalización (#) después de ingresar el PIN, de modo
que el panel sepa que el código PIN se ha ingresado
completamente.
Modo de programación del teclado: El teclado en los lectores
viene programado previamente con la configuración
predeterminada para uso estándar. El cambio de
configuración se hace mediante el menú de programación
manejado por el teclado.
Menú
Configuración
Predeterminado
1
Selección del formato de transmisión del
teclado
N.° de
opción
Formato de transmisión del
teclado
1
Tecla única, Wiegand de 6 bits
(Formato Rosslare)
2
Tecla única, Wiegand de 6 bits
con cuarteto + bits de paridad
3
Tecla única, Wiegand de 8 bits,
complementado con cuarteto
4
4 teclas binarias + código de
ubicación, Wiegand de 26 bits
5
1 a 5 teclas + código de
ubicación, Wiegand de 26 bits
6
6 teclas en decimales codificados
binariamente (BCD) y bits de
paridad, Wiegand de 26 bits
7
Reservado
8
1 a 8 teclas en BCD, datos en
banda magnética
9
Tecla única, Wiegand de 4 bits
*
2
Cambio del código de programación
1234
3
Cambio del código de ubicación
0
4
Selección de la configuración de luz de
fondo del teclado
N.° de
opción
Configuración de luz de fondo del
teclado
1
Siempre apagada
2
Siempre encendida
*
3
10 s de luz de fondo después de
presionar la tecla, de lo contrario
permanece apagada
4
10 s de luz de fondo después de
presionar la tecla, de lo contrario
permanece tenue
0
Volver a la configuración predeterminada
de fábrica
Para ingresar al modo de programación, presione “#” cuatro
veces e ingrese el código de programación. El código de
programación predeterminado es 1234. Mientras se
encuentre en el modo de programación, puede presionar “#”
para salir en cualquier momento.
• Formato de transmisión del teclado
Para seleccionar un formato de transmisión del
teclado, ingrese al modo de programación, presione
“1” y luego, ingrese el n.° de opción para el formato
de transmisión del teclado que desea seleccionar.
Nota: Para la opción 8, se requiere una entrada
adicional; para obtener más detalles, consulte la
guía de formato.
• Cambio del código de programación
Para cambiar el código de programación, ingrese al
modo de programación, presione “2” y luego,
ingrese el nuevo código de programación de cuatro
dígitos.
Nota: Por motivos de seguridad, para instalaciones
de nuevos lectores es aconsejable cambiar el código
de programación después de la instalación del
lector.
• Cambio del código de ubicación
Este código de ubicación solo se usa en los formatos
de transmisión de teclado 4 y 5. Para cambiar el
código de ubicación, ingrese al modo de
programación, presione “3” y luego, ingrese el
nuevo código de ubicación de tres dígitos. El código
de ubicación debe ser entre 000 y 255.
• Selección de la configuración de luz de fondo del
teclado
Para cambiar la configuración de luz de fondo del
teclado, ingrese al modo de programación, presione
“4” y luego, ingrese el n.° de opción para la
configuración de luz de fondo del teclado que desea
seleccionar.
• Volver a la configuración predeterminada
Para volver a la configuración predeterminada,
ingrese al modo de programación, presione “0” y
luego, ingrese el código de programación.
Reemplazo de un código de programación perdido
En caso de haber olvidado el código de programación:
1. Desconecte la energía del lector.
2. Retire el lector de la pared o la carcasa del lector
para activar el tamper.

OmniProx Rev. S
11 800-20879 Rev. A
3. Conecte el lector a la energía y dentro de los
próximos 10 segundos, usted puede ingresar al
modo de programación con el código de
programación predeterminado de fábrica: 1234.
4. Ahora puede cambiar el código de programación y
regresar el lector a su configuración
predeterminada.
Fonctionnement du lecteur
Lecture de carte : le lecteur peut lire les cartes HID ProxTM
(FSK) et EM 410x (ASK).
• Si une carte HID ProxTM est lue, le lecteur transmet
les données d’identification au format Wiegand
conformément au format de bits de la carte, jusqu’à
85 bits.
• Si une carte EM est lue, le lecteur transmet les
données d’identification au format Wiegand ou au
format horloge et données selon le mode EM
sélectionné. Les données d’identification EM au
format Wiegand sont toujours transmises à 26 bits.
Les données d’identification EM horloge et données
sont toujours transmises à 40 bits.
Ligne de mode EM : pour les cartes EM, la ligne de mode EM
sélectionne si les données d’identification EM sont envoyées
au format Wiegand ou au format horloge et données. Lorsque
la ligne de mode est ouverte, les données d’identification EM
sont envoyées au format Wiegand. Lorsque la ligne de mode
est envoyée à la terre, les données d’identification EM sont
envoyées au format horloge et données.
Ligne de retenue : la ligne de retenue est active à basse
tension. Lorsqu’elle est active et qu’une carte est lue, aucune
donnée de carte n’est envoyée aux lignes Wiegand. Le lecteur
continue toutefois à tamponner la dernière carte
d’authentification lue et envoie ces données d’identification
lorsque la ligne de retenue est libérée.
Clavier de saisie : le lecteur prend en charge neuf formats de
clavier pour l’utilisation avec divers contrôleurs. Le format de
clavier par défaut est Wiegand à touche simple de 4 bits. Pour
les panneaux Honeywell, une touche de terminaison (#) doit
être enfoncée après la saisie du NIP afin que le panneau
sache que le NIP a été complètement entré.
Mode de programmation de clavier : le clavier sur le lecteur
est préprogrammé avec les paramètres par défaut pour
l’utilisation normale. La modification des paramètres est
réalisée à l’aide du menu de programmation commandé par le
clavier.
Menu Paramètre
Valeur par
défaut
1
Sélection du format de transmission du
clavier
Nº
d’option
Format de transmission du clavier
1
Touche simple, Wiegand 6 bits
(format Rosslare)
2
Touche simple, Wiegand 6 bits
avec bits de quartet et de parité
3
Touche simple, Wiegand 8 bits,
quartets complémentés
4
4 touches binaires + code
d’installation, Wiegand 26 bits
5
1 à 5 touches + code
d’installation, Wiegand 26 bits
6
6 touches décimal codé binaire
(DCB) et bits de parité, Wiegand
26 bits
7
Réservé
8
1 à 8 touches DCB, horloge et
données
9
Touche simple, Wiegand 4 bits
*
2
Modification du code de programmation
1234
3
Modification du code d’installation
0
4
Sélection du paramètre de rétroéclairage
du clavier
Nº
d’option
Paramètre de rétroéclairage du
clavier
1
Toujours éteint
2
Toujours allumé
*
3
Éteint sauf allumé 10 secondes
après l’activation d’une touche
4
Atténué sauf allumé 10
secondes après l’activation
d’une touche
0
Retour aux paramètres par défaut de
l’usine
Pour entrer en mode de programmation, appuyez sur « # » à
quatre reprises et entrez le code de programmation. Le code
de programmation par défaut est 1234. Il est possible de
quitter le mode de programmation en tout temps en
appuyant sur « # ».
• Format de transmission du clavier
Pour sélectionner un format de transmission du
clavier, entrez en mode de programmation, appuyez
sur « 1 » et puis entrez le numéro d’option du
format de transmission du clavier que vous voulez
sélectionner.
Remarque : Pour l’option 8, une saisie
supplémentaire est requise. Pour plus de détails,
consultez le guide des formats.
• Modification du code de programmation
Pour modifier le code de programmation, entrez en
mode de programmation, appuyez sur « 2 » et
entrez ensuite le nouveau code de programmation à
quatre chiffres.
Remarque : Pour les nouvelles installations de
lecteur, il est conseillé pour des raisons de sécurité
de changer le code de programmation à
l’installation du lecteur.
• Modification du code d’installation
Ce code d’installation est utilisé seulement avec les
formats de transmission du clavier 4 et 5. Pour
modifier le code d’installation, entrez en mode de
programmation, appuyez sur « 3 » et entrez ensuite
le nouveau code d’installation à trois chiffres. Le
code d’installation doit être entre 000 et 255.
• Sélection du paramètre de rétroéclairage du clavier
Pour modifier le paramètre de rétroéclairage du
clavier, entrez en mode de programmation, appuyez
sur « 4 » et puis entrez le numéro d’option du
paramètre de rétroéclairage du clavier que vous
voulez sélectionner.
• Retour aux paramètres par défaut de l’usine
Pour revenir aux paramètres par défaut, entrez en
mode de programmation, appuyez sur « 0 » et
entrez ensuite le code de programmation.

OmniProx Rev. S
800-20879 Rev. A 12
Remplacement d’un code de programmation perdu
Dans l’éventualité où vous avez oublié le code de
programmation :
1. Coupez l’alimentation au lecteur.
2. Activez la violation en déposant le lecteur du mur ou
en enlevant le boîtier du lecteur.
3. Mettez le lecteur sous tension et dans les 10
secondes suivantes, vous pouvez entrer en mode de
programmation en utilisant le code de
programmation par défaut de l’usine 1234.
4. Vous pouvez alors modifier le code de
programmation ou remettre le lecteur aux
paramètres par défaut.
读卡器操作
读卡—读卡器可以读取 HID ProxTM(FSK)和 EM 410x
(ASK)卡。
• 读取 HID ProxTM 卡时,读卡器将根据卡的位格式
(最高 85 位)输出 Wiegand 的 ID 数据。
• 读取 EM 卡时,读卡器将输出 Wiegand 或时钟与
时间格式的 ID 数据,具体取决于所选的 EM 模
式。Wiegand EM ID 数据始终发送为 26 位。
Wiegand EM ID 数据始终发送为 40 位。
EM 模式行—如果是 EM 卡,EM 模式行选择以 Wiegand 或
时钟与时间格式发送 EM ID 数据。模式行为开放时,以
Wiegand 格式发送 EM ID 数据。模式行为接地时,以时钟
与时间格式发送 EM ID 数据。
保持行—保持行为低电平有效。低电平有效的情况下读取卡
时,没有卡数据发送到 Wiegand 行上。但是,读卡器会缓存
上一张卡的 ID 读数,以便解除保持行后发送该 ID 数据。
键盘输入—本读卡器支持九种键盘格式,可用于多种控制
器。默认键盘格式为单键,Wiegand 4 位。对于霍尼韦尔
面板,输入个人识别码(PIN)后必须按下终结键(#),面
板才能识别个人识别码已经输入完成。
键盘编程模式—读卡器上的键盘已经过预编程,默认设置
为标准使用状态。通过键盘驱动编程菜单更改设置。
菜单
设置
默认
1
选择键盘传输格式
选项
编号
键盘传输格式
1
单键,Wiegand 6 位(Rosslare 格式)
2 单键,
Wiegand 6
位,带半字节与校验
位
3
单键,Wiegand 8 位,半字节补充
4
4键二进制+功能代码,Wiegand 26 位
5
1至5个键+功能代码,Wiegand 26 位
6
6
键二进制编码十进制(
BCD
)与校验
码,Wiegand 26 位
7
保留
8
1至8个键 BCD,时钟与数据
9
单键,Wiegand 4 位
*
2
变更程序代码
1234
3
变更功能代码
0
4
选择键盘背光设置
选项
编号
键盘背光设置
1
始终关闭
2
始终开启
*
3
按键后背光亮 10 秒,否则关闭
4
按键后背光亮 10 秒,否则变暗
0
恢复出厂设置
输入编程模式,请按“#”键四次,然后输入程序代码。默认
程序代码为 1234。在编程模式下,随时可以按“#”退出。
• 键盘传输格式
选择键盘传输格式,请输入编程模式,按“1”,然
后输入希望选定的键盘传输格式的选项编号。
注意:对于选项 8,还需要额外输入,详细情况
请参考格式指南。
• 变更程序代码
变更程序代码,请进入编程模式,按“2”,然后输
入新的四位程序代码。
注意:对于新读卡器安装,出于安全考虑,建议
安装时更改程序代码。
• 变更功能代码
功能代码仅用于键盘传输格式 4和5。变更功能
代码,请进入编程模式,按“3”,然后输入新的四
位功能代码。功能代码必须在 000 和255 之间。
• 选择键盘背光设置
选择键盘背光设置,请输入编程模式,按“4”,然
后输入希望选定的键盘背光的选项编号。
• 恢复默认设置
恢复默认设置,请进入编程模式,按“0”,然后输
入程序代码。
替换丢失的程序代码
如果忘记程序代码:
1. 请给读卡器断电。
2. 将读卡器从壁上取下或者取下读卡器卡套,从而
激活防拆开关。
3. 给读卡器通电,在 10 秒内,可以通过出厂默认
程序代码 1234 输入编程模式。
4. 然后即可变更编程模式或者将读卡器恢复默认设
置。

OmniProx Rev. S
13 800-20879 Rev. A
Provoz čtečky
Čtení karty – Čtečka může načítat karty HID ProxTM (FSK) a EM
410x (ASK).
• Při načtení karty HID ProxTM bude výstupním
formátem ID data v Wiegand v souladu s bitovým
formátem karty do 85 bitů.
• Při načtení karty EM, bude výstupním formátem ID
data v Wiegand nebo Clock & Data podle zvoleného
režimu EM. ID data Wiegand EM jsou vždy odesílány
jako 26 bitů. ID data Clock & Date jsou vždy
odesílány jako 40 bitů.
Linka režimu EM – Pro karty EM je vybrána linka režimu EM,
pokud jsou ID data EM odesílána ve formátu Wiegand nebo
Clock & Data. Pokud je linkový režim otevřený, jsou ID data
EM odesílána jako Wiegand. Pokud je linkový režim připojený
k GND, jsou ID data EM odesílána jako formát Clock & Data.
Linka Hold – Linka Hold je aktivní nízká. Pokud je linka aktivní
a načtená karta, nejsou na linkách Wiegand odesílána žádná
data z karty. Nicméně čtečka nepřestává načítat ID data karty
do mezipaměti a odešle je, jakmile se linka Hold uvolní.
Zadávání klávesnicí – Čtečka podporuje devět formátů
klávesnice pro použití s různými ovládači. Přednastavený
formát klávesnice je jednotlivá klávesa, Wiegand 4 bity. U
panelů Honeywell se po zadání PIN musí stisknout klávesa
ukončení (#), aby panel věděl, že byl zadán celý PIN.
Programovací režim klávesnice – Klávesnice na čtečkách je
předprogramovaná s přednastaveními pro standardní použití.
Změna nastavení se provádí pomocí programovacího menu,
ovládaného klávesnicí.
Nabídka
Nastavení
Přednastavení
1
Volba přenosového formátu
klávesnice
Možnost
číslo
Formát přenosu klávesnicí
1
Jednotlivá klávesa,
Wiegand, 6 bitů (formát
Rosslare)
2
Jednotlivá klávesa,
Wiegand, 6 bitů s bity
nibble a parita
3
Jednotlivá klávesa,
Wiegand, 8 bitů, nibble
doplněn
4
4 klávesy binární + kód
zařízení, Wiegand, 26 bitů
5
1 až 5 kláves + kód
zařízení, Wiegand, 26 bitů
6
6 kláves s bity binárně
kódované decimální (BCD)
a parita, Wiegand, 26 bitů
7
Rezerva
8
1 až 8 kláves BCD, Clock &
Data
9
Jednotlivá klávesa,
Wiegand, 4 bity
*
2
Změna programovacího kódu
1234
3
Změna kódu zařízení
0
4
Volba nastavení podsvětlení
klávesnice
Možnost
číslo
Nastavení podsvětlení
klávesnice
1
Vždy vypnuto
2
Vždy zapnuto
*
3
Po stisknutí klávesy
podsvětlení na 10 sekund,
jinak vypnuté
4
Po stisknutí klávesy
podsvětlení na 10 sekund,
jinak ztlumené
0
Návrat na přednastavení z výroby
Ke vstupu do režimu programování stiskněte čtyřikrát „#“ a
vstoupíte do režimu programování. Přednastavený kód
programování je 1234. Když jste v režimu programování,
můžete z něj kdykoli vystoupit stisknutím „#“.
• Formát přenosu klávesnicí
K volbě přenosového formátu klávesnice vstupte do
režimu programování, stiskněte „1“, pak zadejte
číslo volby pro přenosový formát klávesnice, který
chcete zvolit.
Poznámka: U volby 8 se vyžaduje další zadání,
ohledně dalších podrobností viz průvodce formáty.
• Změna programovacího kódu
Ke změně programovacího kódu vstupte do režimu
programování, stiskněte „2“ a pak zadejte nový
čtyřmístný kód programování.
Poznámka: Při instalaci nové čtečky se z
bezpečnostních důvodů doporučuje změnit kód
programování hned po instalaci čtečky.
• Změna kódu zařízení
Tento kód zařízení se používá jen u přenosových
formátů klávesnice 4 a 5. Ke změně kódu zařízení
vstupte do režimu programování, stiskněte „3“ a pak
zadejte nový třímístný kód zařízení. Kód zařízení
musí být mezi 000 a 255.
• Volba nastavení podsvětlení klávesnice
Ke změně nastavení podsvětlení klávesnice vstupte
do režimu programování, stiskněte „4“ a pak zadejte
číslo volby nastavení podsvětlení klávesnice, které
chcete mít.
• Návrat na původní přednastavení
K návratu na původní přednastavení vstupte do
režimu programování, stiskněte „0“ a pak zadejte
kód programování.
Náhrada ztraceného kódu programování
V případě zapomenutého kódu programování:
1. Odpojte čtečku od napájení.
2. Aktivujte možnost změny odsunutím čtečky od
stěny nebo sundáním jejího krytu.
3. Přiveďte do čtečky proud a do 10 sekund můžete
vstoupit do režimu programování pomocí z výroby
přednastaveného kódu programování 1234.
4. Nyní můžete změnit kód programování nebo vrátit
čtečku na její původní přednastavení.

OmniProx Rev. S
800-20879 Rev. A 14
Bedienung des Lesers
Kartenablesungen – Der Leser kann sowohl Karten vom Typ
HID ProxTM (FSK) als auch EM 410x (ASK) lesen.
• Wenn eine HID ProxTM-Karte gelesen wird, gibt der
Leser die ID-Daten in Wiegand-Format gemäß dem
Bit-Format der Karte bis zu 85 Bits aus.
• Wenn eine EM-Karte gelesen wird, gibt der Leser die
ID-Daten entweder in Wiegand- oder Takt- und
Datenformat aus, das im ausgewählten EM-Modus
festgelegt ist. Wiegand EM ID-Daten werden immer
als 26-Bit-Daten gesendet. Takt- und Daten EM
ID-Daten werden immer als 40-Bit-Daten gesendet.
EM-Modusleitung – Für EM-Karten wählt die EM-
Modusleitung aus, ob die EM ID-Daten im Wiegand- oder
Takt- und Datenformat gesendet werden. Wenn die
Modusleitung unterbrochen ist, werden die EM ID-Daten im
Wiegand-Format gesendet. Wenn die Modusleitung mit GND
verbunden ist, werden die EM ID-Daten im Takt- und
Datenformat gesendet.
Halteleitung – Die Halteleitung ist im niedrigen Zustand aktiv.
Wenn sie aktiv ist und eine Karte gelesen wird, werden keine
Daten auf den Wiegand-Leitungen gesendet; der Leser wird
jedoch die zuletzt gelesene Karten-ID zwischenspeichern und
diese ID-Daten senden, wenn die Halteleitung freigegeben wird.
Tastenfeldeingabe – Der Leser unterstützt neun
Tastenfeldformate zum Einsatz mit verschiedenen
Controllern. Das Standardtastenfeldformat ist Eine Taste,
Wiegand 4-Bit. Für Honeywell-Panels muss nach der Eingabe
des PIN-Codes eine Abschlusstaste (#) gedrückt werden,
damit das Panel erkennt, dass der PIN-Code vollständig
eingegeben worden ist.
Tastenfeld-Programmiermodus – Das Tastenfeld der Leser ist
mit Standardeinstellungen für standardmäßige Verwendung
programmiert. Die Einstellungen werden über das Tastenfeld im
Programmiermenü geändert.
Menü
Einstellung
Standardwert
1
Auswahl des Tastenfeld-
Übertragungsformats
Optionsnr.
Tastenfeld-Übertragungsformat
1
Eine Taste, Wiegand 6-Bit
(Rosslare-Format)
2
Eine Taste, Wiegand 6-Bit mit
Nibble- + Paritäts-Bits
3
Eine Taste, Wiegand 8-Bit,
Nibbles-ergänzt
4
4 Tasten binär + Werkscode,
Wiegand 26-Bit
5
1 bis 5 Tasten + Werkscode,
Wiegand 26-Bit
6
6 Tasten binär codiertes
Dezimalformat (BCD) und
Parität-Bits, Wiegand 26-Bit
7
Reserviert
8
1 bis 8 Tasten BCD, Takt und
Daten
9
Eine Taste, Wiegand 4-Bit
*
2
Ändern des Programmiercodes
1234
3
Ändern des Werkscodes
0
4
Auswählen der Einstellung für die
Tastenfeld-Hintergrundbeleuchtung
Optionsnr.
Einstellung der Tastenfeld-
Hintergrundbeleuchtung
1
Immer aus
2
Immer ein
*
3
10 Sek.
Hintergrundbeleuchtung nach
Tastendruck, andernfalls aus
4
10 Sek.
Hintergrundbeleuchtung nach
Tastendruck, andernfalls
schwach
0
Zurück zu den werksseitigen
Standardeinstellungen
Zum Aufrufen des Programmiermodus vier Mal „#“ drücken
und den Programmiercode eingeben. Der Standard-
Programmiercode ist 1234. Der Programmiermodus kann
jederzeit durch Drücken von „#“ verlassen werden.
• Tastenfeld-Übertragungsformat
Zur Auswahl eines Tastenfeld-Übertragungsformats
den Programmiermodus aufrufen, „1“ drücken und
danach die Optionsnr. für das gewünschte
Tastenfeld-Übertragungsformat eingeben.
Hinweis: Für Option 8 ist eine zusätzliche Eingabe
erforderlich; weitere Einzelheiten sind in der
Formatanleitung zu finden.
• Ändern des Programmiercodes
Zum Ändern des Programmiercodes den
Programmiermodus aufrufen, „2“ drücken und dann
den neuen vierstelligen Programmiercode eingeben.
Hinweis: Bei neueren Leser-Installationen sollte der
Programmiercode nach der Installation des Lesers
aus Sicherheitsgründen geändert werden.
• Ändern des Werkscodes
Dieser Werkscode wird nur für die Tastenfeld-
Übertragungsformate 4 und 5 verwendet. Zum
Ändern des Werkscodes den Programmiermodus
aufrufen, „3“ drücken und dann den neuen
dreistelligen Werkscode eingeben. Der Werkscode
muss zwischen 000 und 255 liegen.
• Auswählen der Einstellung für die Tastenfeld-
Hintergrundbeleuchtung
Zur Auswahl der Einstellung für die Tastenfeld-
Hintergrundbeleuchtung den Programmiermodus
aufrufen, „4“ drücken und danach die Optionsnr. für
die gewünschte Einstellung für die Tastenfeld-
Hintergrundbeleuchtung eingeben.
• Zurück zu den Standardeinstellungen
Zum Zurückkehren zu den Standardeinstellungen
den Programmiermodus aufrufen, „0“ drücken und
dann den Programmiercode eingeben.
Wiederherstellung nach Verlust des Programmiercodes
Sollte der Programmiercode vergessen worden sein:
1. Den Leser stromlos schalten.
2. Die Manipulationssicherung aktivieren, indem der
Leser von der Wand oder aus dem Lesergehäuse
genommen wird.
3. Den Leser wieder mit Strom versorgen und
innerhalb der nächsten 10 Sekunden den
Programmiermodus durch Eingabe des
werksseitigen Standard-Programmiercodes 1234
aufrufen.
4. Nun kann der Programmiercode geändert oder der
Leser auf die Standardeinstellungen zurückgesetzt
werden.

OmniProx Rev. S
15 800-20879 Rev. A
Uso del lettore
Lettura delle carte – Il lettore è in grado di leggere carte sia
HID ProxTM (FSK) che EM 410x (ASK).
• Quando viene letta una carta HID ProxTM, il lettore
invierà in uscita i dati di identificazione in formato
Wiegand in funzione del formato di bit della carta,
fino a 85 bit.
• Quando viene letta una carta EM, il lettore invierà in
uscita i dati di identificazione in formato Wiegand
oppure orologio/dati, in funzione della modalità EM
selezionata. I dati di identificazione EM Wiegand
sono sempre inviati in formato di 26 bit. I dati di
identificazione EM orologio/dati sono sempre inviati
in formato di 40 bit.
Linea Modalità EM – Per le carte EM, la linea Modalità EM
seleziona se i dati di identità EM debbano essere inviati in
formato Wiegand oppure come orologio/dati. Quando la linea
Modalità EM è aperta, i dati di identità EM sono inviati in
formato Wiegand. Quando la linea Modalità EM impostata a
GND, i dati di identità EM sono inviati in formato
orologio/dati.
Linea di Hold – La linea è attiva se bassa. Se la linea è attiva e
viene letta una carta, nessun dato viene inviato sulle linee
Wiegand. Invece, il lettore continuerà a bufferizzare
l’identificatore dell’ultima carta letta e invierà tale
informazione una volta che la linea verrà rilasciata.
Inserimento da tastiera – Il lettore supporta nove formati
tastiera, utilizzabili con vari controller. Il formato tastiera
predefinito è Singolo tasto, Wiegand 4-Bit. Per le centrali
Honeywell è necessario che il PIN inserito sia seguito dal
tasto di terminazione (#), in modo che la centrale sappia che
il codice del PIN è stato interamente inserito.
Modalità programmazione tastiera – La tastiera sui lettori è
pre-programmata con impostazioni predefinite per l’utilizzo
standard. La modifica di queste impostazioni avviene
attraverso il menu di programmazione, azionabile dalla
tastiera.
Menu Impostazione
Valore
predefinito
1
Selezione del formato di trasmissione
della tastiera
Num.
opzione
Formato di trasmissione della
tastiera
1
Singolo tasto, Wiegand 6-Bit
(formato Rosslare)
2
Singolo tasto, Wiegand 6-Bit con
nibble + bit di parità
3
Singolo tasto, Wiegand 8-Bit,
nibble complementati
4
Binario 4 tasti + Codice struttura,
Wiegand 26-Bit
5
Da 1 a 5 tasti + Codice struttura,
Wiegand 26-Bit
6
6 tasti Binary Coded Decimal
(BCD) e bit di parità, Wiegand
26-Bit
7
Riservato
8
Da 1 a 8 tasti BCD, orologio e
data
9
Singolo tasto, Wiegand 4-Bit
*
2
Modifica del codice di programmazione
1234
3
Modifica del codice struttura
0
4
Selezione dell’impostazione di
retroilluminazione della tastiera
Num.
opzione
Impostazione di
retroilluminazione della tastiera
1
Sempre spenta
2
Sempre accesa
*
3
10 secondi di retroilluminazione
dopo aver premuto un tasto,
altrimenti spenta
4
10 secondi di retroilluminazione
dopo aver premuto un tasto,
altrimenti attenuata
0
Ritorno alle impostazioni di fabbrica
Per attivare la modalità di programmazione, premere “#”
quattro volte e inserire il codice di programmazione. Il codice
di programmazione predefinito è “1234”. È possibile uscire in
qualunque momento dalla modalità di programmazione
premendo “#”.
• Formato di trasmissione della tastiera
Per selezionare un formato di trasmissione della
tastiera, attivare la modalità di programmazione,
premere “1” e poi il numero di opzione del formato
di trasmissione che si intende selezionare.
Nota: Per l’opzione 8 è richiesto un ulteriore dato;
fare riferimento alla guida dei formati per ulteriori
informazioni.
• Modifica del codice di programmazione
Per modificare il codice di programmazione, attivare
la modalità di programmazione, premere “2” e
quindi inserire il nuovo codice di programmazione di
quattro cifre.
Nota: Per le installazioni di nuovi lettori, si consiglia
per ragioni di sicurezza di cambiare il codice di
programmazione durante l’installazione del lettore.
• Modifica del codice struttura
Il codice struttura è utilizzato solo nei formati di
trasmissione della tastiera 4 e 5. Per modificare il
codice struttura, attivare la modalità di
programmazione, premere “3” e quindi inserire il
nuovo codice struttura di tre cifre. Il codice struttura
deve essere compreso tra 000 e 255.
• Selezione dell’impostazione di retroilluminazione
della tastiera
Per modificare l’impostazione della
retroilluminazione della tastiera, attivare la modalità
di programmazione, premere “4” e poi il numero di
opzione del tipo di retroilluminazione che si intende
selezionare.
• Ritorno alle impostazioni predefinite
Per tornare alle impostazioni predefinite, attivare la
modalità di programmazione, premere “0” e quindi
inserire il codice di programmazione.
Sostituzione di un codice di programmazione smarrito
Qualora si perda il codice di programmazione:
1. Rimuovere l’alimentazione dal lettore.
2. Attivare il tamper rimuovendo il lettore dal muro o
rimuovendone il contenitore.
3. Applicare alimentazione al lettore e, entro i
successivi 10 secondi, è possibile inserire il codice di
programmazione utilizzando quello di fabbrica, pari
a “1234”.

OmniProx Rev. S
800-20879 Rev. A 16
4. È ora possibile modificare il codice di
programmazione o riportare il lettore alle sue
impostazioni predefinite.
De lezer bedienen
Kaarten lezen – De lezer kan zowel HID ProxTM (FSK)- als
EM 410x (ASK)-kaarten lezen.
• Wanneer een HID ProxTM-kaart wordt gelezen, zal
de lezer de ID-gegevens uitvoeren in Wiegand, in
overeenstemming met het bit-formaat van de kaart,
tot 85 bits.
• Wanneer een EM-kaart wordt gelezen, zal de lezer
de ID-gegevens ofwel in Wiegand, ofwel in Klok &
data-formaat uitvoeren, afhankelijk van de
geselecteerde EM-modus. Wiegand EM ID-gegevens
worden altijd als 26-bit verstuurd. Klok & data EM
ID-gegevens worden altijd als 40-bit verstuurd.
EM-moduslijn – Voor EM-kaarten selecteert de EM-moduslijn
of de EM ID-gegevens in Wiegand of Klok & data-formaat
worden verstuurd. Wanneer de moduslijn open is, dan
worden de EM ID-gegevens als Wiegans verstuurd. Wanneer
de moduslijn in aarden getrokken is, worden de EM ID-
gegevens als Klok & data-formaat gestuurd.
Hold-lijn – De hold-lijn is actief-laag. Wanneer actief, en een
kaart wordt gelezen, worden geen kaartgegevens via de
Wiegand-lijnen verstuurd. De lezer zal echter de laatste kaart-
ID die hij gelezen heeft blijven bufferen en zal deze ID-
gegevens versturen wanneer de hold-lijn vrijkomt.
Toetsenbordinvoer – De lezer ondersteunt negen
toetsenbordformaten die gebruikt kunnen worden met
verschillende controllers. Het standaard toetsenbordformaat
is Enkele toets, Wiegand 4-bit. Voor Honeywell-panelen moet
een beëndigingstoets (#) worden ingedrukt nadat de PIN is
ingevoerd zodat het paneel weet dat de PIN-code compleet
is ingevoerd.
Toetsenbordprogrammeringsmodus – Het toetsenbord op de
lezers is voorgeprogrammeerd met standaard instellingen
voor standaard gebruik. Wijzigen van de instellingen gebeurt
met behulp van het via het toetsenbord aangestuurde
programmeermenu.
Menu
Instelling
Standaard
1
Selecteren toetsenbordtransmissieformaat
Optie #
Toetsenbord transmissieformaat
1
Enkele toets, Wiegand 6-bits
(Rosslare-formaat)
2
Enkele toets, Wiegand 6-bits met
nibble + pariteitsbits
3
Enkele toets, Wiegand 8-bits,
nibbles gecomplementeerd
4
4 toetsen binair + faciliteitcode,
Wiegand 26-bits
5
1 tot 5 toetsen + faciliteitcode,
Wiegand 26-bits
6
6 toetsen binair gecodeerde
decimaal (BCD) en pariteitsbits,
Wiegand 26-bits
7
Gereserveerd
8
1 tot 8 toetsen BCD, klok & data
9
Enkele toets, Wiegand 4-bits
*
2
Wijzigen van de programmeercode
1234
3
Wijzigen van de faciliteitscode
0
4
Selecteren van de achtergrondverlichting
van het toetsenbord
Optie #
Instelling achtergrondverlichting
toetsenbord
1
Altijd uit
2
Always aan
*
3
10 sec. achtergrondverlichting na
indrukken toets en verder uit
4
10 sec. achtergrondverlichting na
indrukken toets en verder gedimd
0
Terug naar standaard fabrieksinstellingen
Druk viermaal op “#” om naar de programmeermodus te gaan
en voer de programmeercode in. De standaard
programmeercode is 1234. U kunt de programmeermodus op
elk gewenst moment verlaten door indrukken van “#”.
• Toetsenbordtransmissieformaat
Ga voor het selecteren van een
toetsenbordtransmissieformaat de
programmeermodus, druk op “1”, ga dan naar het
Optie # voor het toetsenbordtransmissieformaat dat
u wilt selecteren.
Opmerking: Voor Optie 8 is extra invoer nodig,
raadpleeg voor meer informatie de
formaathandleiding.
• Wijzigen van de programmeercode
Voor het wijzigen van de programmeercode, gaat u
naar de programmeermodus, drukt op “2”, en voert
vervolgens de nieuwe viercijferige
programmeercode in.
Opmerking: Bij nieuwe lezerinstallaties is het om
veiligheidsredenen raadzaam om de
programmeercode meteen bij de installatie van de
lezer te wijzigen.
• Wijzigen van de faciliteitscode
Deze faciliteitscode wordt alleen gebruikt bij de
toetsenbordtransmissieformaten 4 en 5. Voor het
wijzigen van de faciliteitscode, gaat u naar de
programmeermodus, drukt op “3”, en voert
vervolgens de nieuwe driecijferige faciliteitscode in.
De faciliteitscode moet liggen tussen 000 en 255.
• Selecteren van de instelling van de
achtergrondverlichting van het toetsenbord
Ga, voor het wijzigen van de achtergrondverlichting
van het toetsenbord naar de programmeermodus,
druk op “4”, druk dan op het Optie # voor de
instelling van de achtergrondverlichting die u wilt
selecteren.
• Terug naar standaard instellingen
Ga, om terug te keren naar de standaard
instellingen, naar de programmeermodus, selecteer
“0” en voer vervolgens de programmeercode in.
Vervangen van de programmeercode als deze kwijtgeraakt is
Als de programmeercode is vergeten:
1. Koppel de lezer los van de voeding.
2. Activeer de sabotagebeveiliging (tamper) door de
lezer van de muur te halen of de behuizing van de
lezer te verwijderen.
3. Sluit de stroom aan op de lezer en binnen 10
seconden kunt u naar de programmeermodus gaan
met de standaard fabrieksprogrammeercode 1234.
4. U kunt nu de programmeercode wijzigen of de lezer
terugzetten op de standaard instellingen.

OmniProx Rev. S
17 800-20879 Rev. A
FCC Statement
This device complies with part 15 of the FCC Rules. Operation
is subject to the following two conditions: (1) This device may
not cause harmful interference, and (2) this device must
accept any interference received, including interference that
may cause undesired operation.
Any changes or modifications not expressly approved by the
party responsible for compliance could void the user's
authority to operate the equipment.
Note: This equipment has been tested and found to comply
with the limits for a Class B digital device, pursuant to part 15
of the FCC Rules. These limits are designed to provide
reasonable protection against harmful interference in a
residential installation. This equipment generates uses and
can radiate radio frequency energy and, if not installed and
used in accordance with the instructions, may cause harmful
interference to radio communications. However, there is no
guarantee that interference will not occur in a particular
installation. If this equipment does cause harmful interference
to radio or television reception, which can be determined by
turning the equipment off and on, the user is encouraged to
try to correct the interference by one or more of the following
measures:
- Reorient or relocate the receiving antenna.
- Increase the separation between the equipment and
receiver.
- Connect the equipment into an outlet on a circuit different
from that to which the receiver is connected.
- Consult the dealer or an experienced radio/TV technician for
help.
IC Caution
This device complies with Industry Canada license-exempt RSS
standard(s).
Operation is subject to the following two conditions: (1) This
device may not cause interference, and (2) This device must
accept any interference, including interference that may
cause undesired operation of the device.
Le present appareil est conforme aux CNR d'Industrie Canada
applicables aux appareils radio exempts de licence.
L'exploitation estautorisée aux deux conditions suivantes:
(1) l'appareil ne doit pas produire de brouillage, et
(2) l'utilisateur de l'appareildoit accepter tout
brouillageradioélectrique subi, mêmesi le brouillage est
susceptible d'en compromettre le fonctionnement.