Ademco TH8321WF01 TH8321WF User Manual 33 00066EFS 03 Wi Fi VisionPRO 8000
Honeywell International Inc TH8321WF 33 00066EFS 03 Wi Fi VisionPRO 8000
Ademco >
User Manual
Wi-Fi VisionPRO® 8000
User Guide

33-00066EFS—03 1
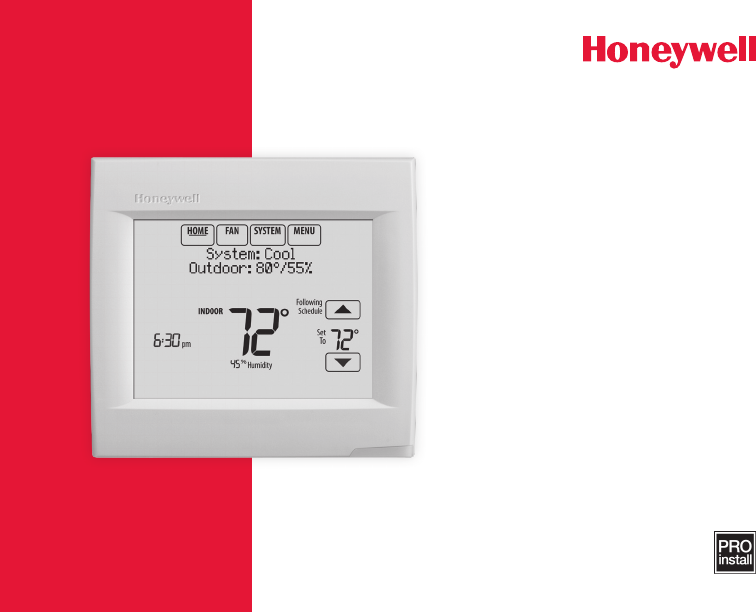
Features of your Wi-Fi VisionPRO thermostat
With your new thermostat, you can:
• Connect to the Internet to monitor and control your heating/cooling system.
• View and change your heating/cooling system settings.
• View and set temperature and schedules.
• Receive alerts via email and get automatic upgrades.
• View outdoor temperature and humidity.
• Download the free Total Connect Comfort app.
Need Help?
For assistance please visit http://yourhome.honeywell.com,
or call toll-free: 1-855-733-5465
GET IT ON
Download on
iTunes
Once connected to Wi-Fi and registered to Total Connect Comfort, you can control
your thermostat from anywhere through your laptop, tablet, or smartphone with the
Total Connect Comfort app. The Total Connect Comfort free app is available for Apple®
iPhone®, iPad® and iPod touch® devices at iTunes® or at Google Play® for all Android™
devices.
33-00066EFS—03 2
Programming and Operation
Quick reference ...........................................3
Connecting to Wi-Fi.....................................5
Registering your thermostat online ............. 8
Setting the time/date ................................. 12
Setting the fan ........................................... 13
Setting system mode ................................14
Preset energy-saving schedules ............... 15
Adjusting program schedules ....................16
Schedule overrides ...................................18
Menu Options
Viewing equipment status .........................20
Setting vacation, holiday, and events ........ 21
Setting holiday/event schedules:
commercial use .........................................22
Setting humidification and
dehumidification ........................................28
Setting ventilation ......................................31
Setting preferences ................................... 33
Cleaning the thermostat screen ................ 34
Security settings ........................................35
Viewing dealer information ........................36
Advanced features ....................................37
Disconnecting your Wi-Fi network ............38
Reconnecting your Wi-Fi network .............39
Unregistering your thermostat ..................40
Checking signal strength ...........................41
Unsuccessful connection ..........................42
Connecting to a hidden Wi-Fi network ......44
Appendices
Installer options .........................................46
Troubleshooting .........................................47
Regulatory information .............................. 49
Table of contents
33-00066EFS—03 3
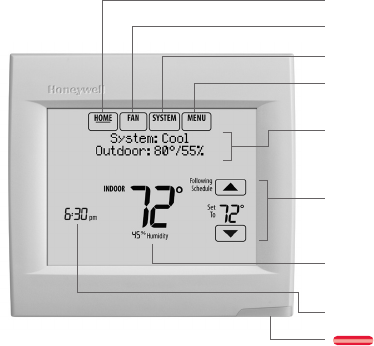
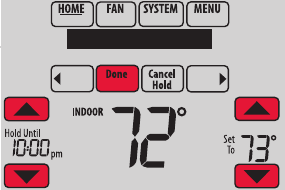
Quick reference: residential use
HOME. Touch to display Home screen.
FAN. Select fan mode.
SYSTEM. Select system mode (Heat/Cool).
MENU. Touch to display options. Start here to set
a program schedule.
Current status. Shows system mode (heat/
cool), outdoor temperature and humidity (with
optional outdoor sensor).
Current schedule. Touch an arrow to change
temperature setting and select a Temporary or
Permanent Hold.
Indoor conditions. Shows indoor temperature
and humidity.
Current time. Touch to set the current time/date.
Alert Light. On when alert message is
active or system is set to EmHeat.
The screen lights when you
press any button. It stays lit for
45 seconds after you complete
changes. Depending on how your
thermostat was installed, the
screen light may always be on.
4 33-00066EFS—03
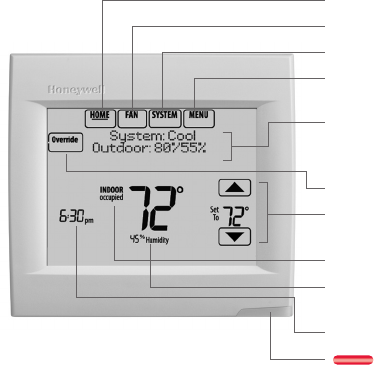
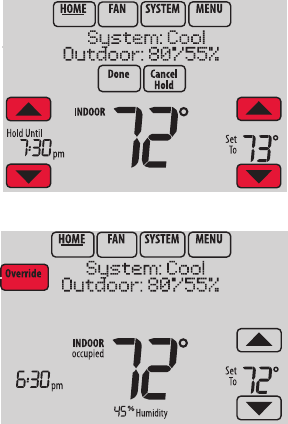
Quick reference: commercial use
HOME. Touch to display Home screen.
FAN. Select fan mode.
SYSTEM. Select system mode (Heat/Cool).
MENU. Touch to display options. Start here to set a
program schedule.
Current status. Shows system mode (heat/cool),
outdoor temperature and humidity (with optional
outdoor sensor).
Override. Touch to override program schedule.
Current schedule. Touch an arrow to change
temperature setting and set a temporary hold.
Current program status.
Indoor conditions. Shows indoor temperature and
humidity.
Current time. Touch to set the current time/date.
Alert Light. On when alert message is active
or system is set to EmHeat.
The screen lights when you
press any button. It stays
lit for 45 seconds after you
complete changes. Depending
on how your thermostat was
installed, the screen light may
always be on.
33-00066EFS—03 5
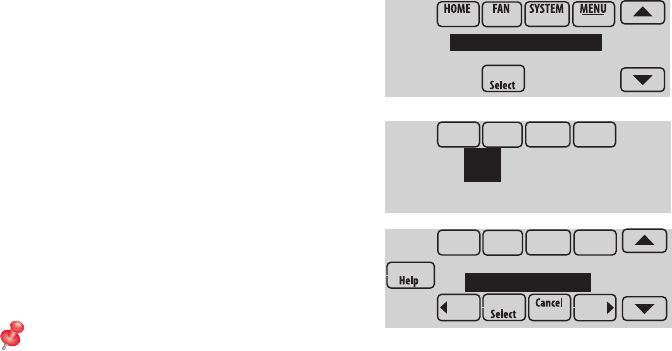
Connecting to Wi-Fi
1 Connect to the Wi-Fi network.
1.1 Touch MENU
1.2 Select
Wi-Fi Setup.
The thermostat will scan for
available Wi-Fi networks.
1.3 The screen displays “Finding
Networks Please Wait” after
which it displays a list of all Wi-Fi
networks it can find.
1.4 Find the name of the network you
want to use by pressing the arrow
buttons to scroll up/down or left/
right. Press the Wi-Fi network
name, then press Select.
NOTE: If the Wi-Fi network name is
hidden, see “Connecting to a hidden Wi-Fi network” on page 44.
M35347
Select Wi-Fi Network
Your Network
M35349
Finding Networks
Please Wait
DoaIol Inrol Madorl
Wi-Fi Setup
Installer Options
M35352
6 33-00066EFS—03
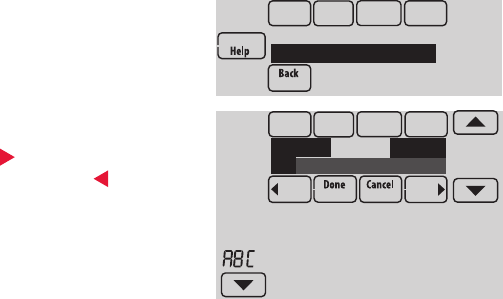
1.5 When prompted, press the
screen to edit the password (if
necessary).
1.6 Enter the password.
Press the s or t buttons to
change the letter or number.
Press the button to move to the
next character, or the button to
move to the previous character.
Use the s or t buttons at the
bottom to change letter case.
Press Done when complete.
Connecting to Wi-Fi
M35346
Delete Space
AC
M35350
Enter Password
Press Here to Edit
33-00066EFS—03 7
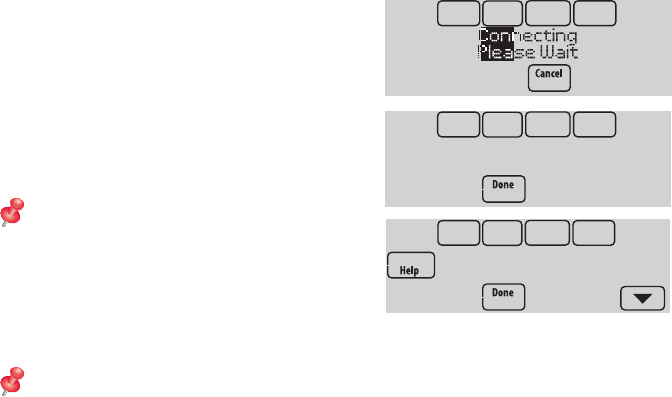
1.7 The screen will let you know when
the connection is successful.
Press Done when the connection
is successful.
If the connection is not successful,
the screen will explain why not.
See “Unsuccessful connection” on
page 42. Follow instructions on
the screen to try again.
NOTE: Press the t for more
information about an unsuccessful
connection.
1.8 If you want remote access to the
thermostat, you must set up an
account at
mytotalconnectcomfort.com and add the thermostat to the account.
NOTE: You will need the thermostat MAC and CRC IDs to add the thermostat.
They are on the screen under Menu, Wi-Fi Setup and on the Thermostat ID
Card packed with the thermostat.
To register your thermostat, follow the instructions beginning on page 8.
Connecting to Wi-Fi
M35351
Connection
Successful
M35360
M35361
Register at:
Honeywell.com/TCC

8 33-00066EFS—03
M31570
M31570
To view and set your Wi-Fi thermostat
remotely, you must have a Total Connect
Comfort account. Use the following steps.
1 Open the Total Connect Comfort web
site.
Go to mytotalconnectcomfort.com
Registering your thermostat online

33-00066EFS—03 9
Registering your thermostat online
2 Login or create an account.
If you have an account,
click Login
– or –
click Create An Account
2a Follow the instructions on the screen.
2b Check your email for an activation
message from My Total Connect
Comfort. This may take several
minutes.
Note: If you do not receive a response,
check your junk mailbox or use an alternate
e-mail address.
2c Follow activation instructions in
the email.
2d Log in.

10 33-00066EFS—03
Registering your thermostat online
3 Register your Wi-Fi thermostat.
After you are logged in to your Total
Connect Comfort account, register
your thermostat.
3a Follow the instructions on
the screen. After adding your
thermostat location, you must
enter the thermostat’s unique
identifiers:
• MAC ID
• MAC CRC
Note: These IDs are listed on the
Register Online screen or on the
Thermostat ID Card included in the
thermostat package. The IDs are not
case sensitive.
® U.S. Registered Trademark.
© 2012 Honeywell International Inc.
69-2723EFS—01 M.S. 04-12
Printed in U.S.A.
HONEYWELL MODEL: RTH8580WF
MAC ID: MAC CRC:
69-2723EFS-01
Thermostat ID Card
Use the MAC ID and CRC ID to register
this product at mytotalconnectcomfort.com
Carte d’identification de thermostat
Utilisez l’identication MAC et l’identication CRC pour
enregistrer ce produit à mytotalconnectcomfort.com
Tarjeta de identificación del termostato
Utilice la identicación MAC y la identicación CRC para
inscribir este producto en mytotalconnectcomfort.com
MAC ID MAC CRC
33-00066EFS—03 11
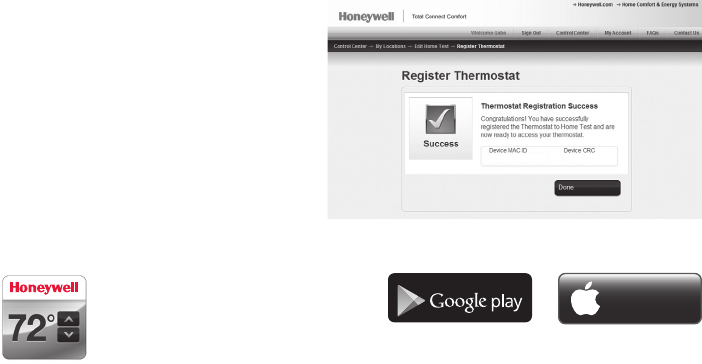
Registering your thermostat online
When the thermostat is
successfully registered, the Total
Connect Comfort registration
screen will display a SUCCESS
message.
You can now control your
thermostat from anywhere
through your laptop, tablet, or
smartphone.
GET IT ON
Download on
iTunes
Total Connect Comfort free
app is available for Apple®
iPhone®, iPad® and iPod
touch® devices at iTunes®
or at Google Play® for all
Android™ devices.
12 33-00066EFS—03
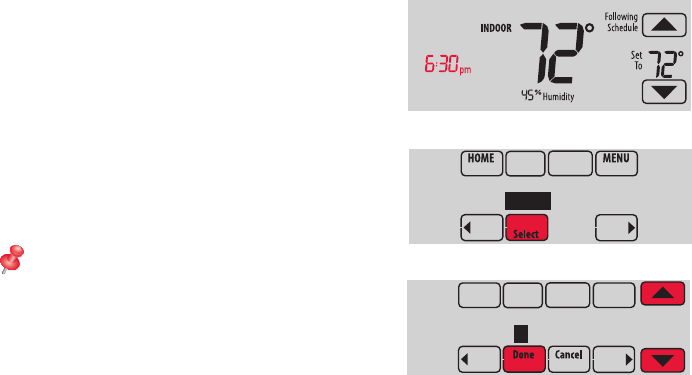
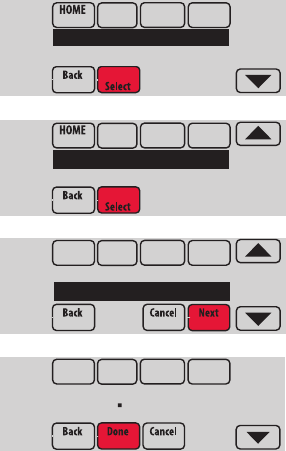
Setting the time/date
1 Touch the current time. The screen
displays Select Option.
2 Touch Time or Date, then touch Select.
3 Touch s or t until the proper time/date
is displayed.
4 Touch Done to save or Cancel to ignore
changes.
5 Touch Home to redisplay the Home
screen.
NOTE: When registered to Total Connect
Comfort, the thermostat automatically
sets the time and adjusts for Daylight
Saving Time.
MCR34092
MCR34155
Select Option
Time Date
MCR34094
Please Set Time
6 :30 PM
33-00066EFS—03 13
Setting the fan
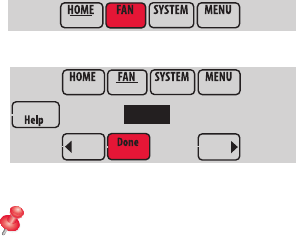
1 Touch FAN to display fan settings.
2 Touch On, Auto, Circ, or Follow Schedule.
3 Touch Done to save and exit.
On: Fan is always on.
Auto: Fan runs only when the heating
or cooling system is on.
Circ: Fan runs randomly about 35% of
the time (residential use only).
Follow Schedule: Fan controlled by
program (see pages
15
–
19
).
NOTE: In commercial use,
touch Auto or On to temporarily
override the programmed fan
schedule.
MCR34096
MCR34097
On Auto Circ
14 33-00066EFS—03
Setting system mode
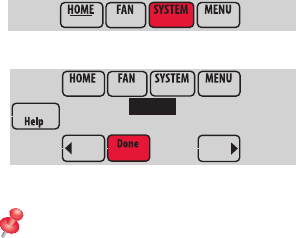
1 Touch SYSTEM to display system
settings.
2 Touch desired option:
Heat: Controls only the heating
system.
Cool: Controls only the cooling
system.
Off: Heating/cooling systems are off.
Auto: Selects heating or cooling
depending on the indoor temperature.
Em Heat (heat pumps with aux.
heat): Controls auxiliary/emergency
heat. Compressor is locked out.
3 Touch Done to save and exit.
NOTE: The Auto and Em
Heat system settings may not
appear, depending on how your
thermostat was installed.
MCR34099
Heat Cool Auto
Off
MCR34098

33-00066EFS—03 15
Preset energy-saving schedules
This thermostat uses default Energy Saver settings that can reduce your heating/cooling
expenses. To customize settings, see next page.
Wake 6:00 am 70° 78° 70° 78°
Leave 8:00 am 62° 85° 62° 85°
Return 6:00 pm 70° 78° 70° 78°
Sleep 10:00 pm 62° 82° 62° 82°
Cool
(Mon-Fri)Start time
Heat
(Mon-Fri)Period
Heat
(Sat-Sun)
Cool
(Sat-Sun)
Residential Use
Occupied 1 8:00 am 70° 75° On
Unoccupied 1 10:00 pm 55° 85° Auto
Occupied 2* 12:00 am 70° 75° On
Unoccupied 2* 12:00 am 55° 85° Auto
CoolStart time HeatPeriod Fan
Commercial Use
* Period 2 is cancelled by default. If you activate it, the values shown above are
default settings.
16 33-00066EFS—03
Adjusting program schedules
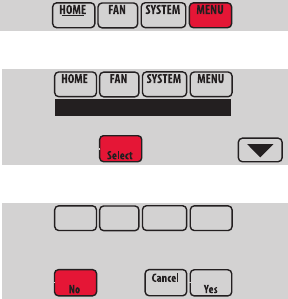
1 Touch MENU.
2 Select Edit Schedule to display Use
Scheduling Assistant?
• Touch Yes to create a schedule by
answering simple questions.
• Touch No to manually create a
program schedule. See page 17.
MCR34100
MCR34101
Edit Schedule
View Schedule
MCR34102
Use Scheduling
Assistant?
33-00066EFS—03 17
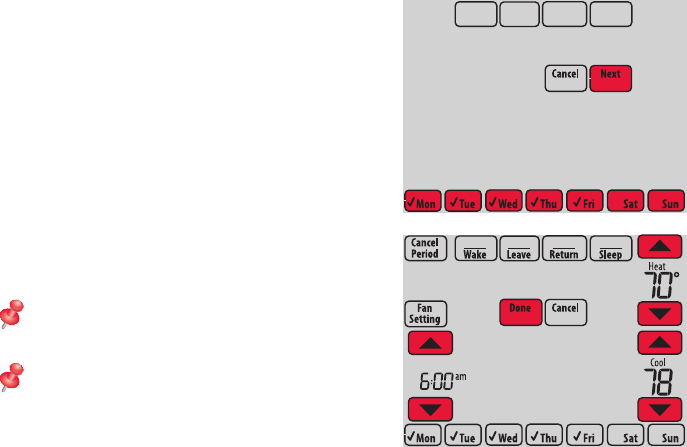
Adjusting program schedules (continued)
3 Select the days to schedule, touch Next.
4 Touch s or t to set your Wake time for
selected day(s).
5 Touch s or t to set Heat and Cool
temperatures for the Wake period.
6 Touch other time periods (Leave, Return,
Sleep) to set time and temperatures for
each.
7 Touch Done to save and exit (Touch Cancel
to exit without saving changes).
NOTE: Touch Cancel Period to eliminate
any unwanted time period.
NOTE: Touch Fan Setting to customize fan
settings for any time period.
MCR34151
Select the days
to schedule
MCR34152
Set Wake
time & temperature
18 33-00066EFS—03
Overriding schedules: residential use
1 Touch s or t to adjust the
temperature (right side of screen)
and the Hold Until time (left side). The
schedule will resume when the Hold
Until time expires.
2 Select Permanent Hold to keep the
same temperature until you change it
or resume the program schedule.
Touch Cancel Hold at any time to resume
the program schedule.
MCR34103
Temporary Hold
Permanent Hold
33-00066EFS—03 19
Overriding schedules: commercial use
Touch s or t to adjust the temperature.
It will be maintained until the hold time you
set.
• To change the hold time, touch the
Hold Until arrow buttons. This time
can be adjusted up to the maximum
time set by the installer.
• Touch Override to use a pre-set
occupied temperature if a person
uses the room during an unoccupied
period. The new temperature will be
maintained for 1 hour and can be
adjusted up to the maximum time set
by the installer.
The programmed schedule will resume
when the override timer expires. Touch
Cancel Hold at any time to resume the
program schedule.
MCR34169
MCR34106
20 33-00066EFS—03
Viewing equipment status
1 Touch MENU.
2 Select Equipment Status.
3 Touch s or t to view the status of
all the equipment your thermostat
is controlling. Depending on how
your thermostat was installed, the
Equipment Status screen can report
data about the following systems:
• Heating and cooling
• Fan
• Humidification
• Dehumidification
• Ventilation
• Maintenance reminders
• Thermostat information.
MCR34100
MCR34108
Equipment Status
Date/Time
MCR34109
Heat Stage 1: Off
Cool Stage 1: On

33-00066EFS—03 21
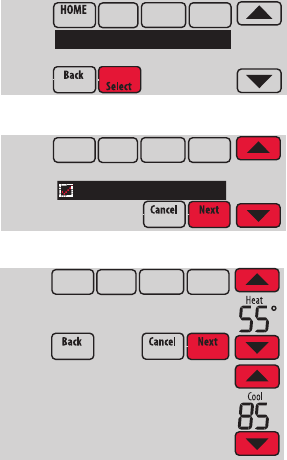
Setting vacation hold: residential use
This feature helps you save energy while
you are away, and restores comfortable
settings just before you return home.
1 Touch MENU.
2 Select Vacation Mode.
3 Touch s or t to select the date
you leave, then touch Next for further
scheduling details, including times of
day, temperature settings, return date,
and return settings.
4 Review your selections on the last
display, and touch Done to save your
settings. Touch Cancel to ignore the
changes.
MCR34100
MCR34110
Vacation Mode
Equipment Status
MCR34111
Date You Leave
Jul 17, 2012
MCR34112
Jul 25 - Jul 26
Heat: 72 Cool: 78
22 33-00066EFS—03
Setting holiday/event schedules: commercial use
This feature helps you conserve energy
when the workplace is unoccupied for
special events and holidays.
1 Touch MENU.
2 Select Holiday Schedule.
3 Select the item you want to schedule
and touch Next for further scheduling
details.
• Custom Events lets you set up
other days for special schedules.
• US and Canadian Holiday options
let you select from a list of holidays
commonly observed in each
country.
4 Make selections as prompted on each
screen. For more information, see next
two pages.
5 Touch Done to save your settings.
MCR34113
Holiday Schedule
Holiday Mode
MCR34114
Custom Events
US Holidays
MCR34100
33-00066EFS—03 23
Setting custom events: commercial use
This feature lets you customize temperature
settings to be maintained during a specific
event. You can set up an event for a specific
date or day in a month. The thermostat
resumes normal scheduling after the event.
1 Select Custom Events from the Holiday
Schedule menu.
2 Select Create New Event.
3 Select Specific Date or Month/Weekday.
• For Specific Date, you are prompted to
select the event’s start date, settings,
end date, and frequency.
• For Month/Weekday, you are prompted to
select the month, day of the week, week
of the month, settings, length of event,
and frequency for the event.
4 Review the settings and touch Done to save
them. Touch Cancel to ignore the changes.
MCR34114
Custom Events
US Holidays
MCR34117
Select Occurence
Specific Date
MCR34118
Schedule adjusted
to 62 in heating
MCR34116
Create New Event
24 33-00066EFS—03
Setting holiday schedule: commercial use
This feature lets you customize temperature
settings to be maintained on specified national
holidays. The thermostat resumes normal
scheduling between selected holidays.
1 Select US Holidays or Canadian Holidays from
the Holiday Schedule menu.
2 Select Add/Edit Holidays. A list of national
holidays is displayed.
3 Touch the check box next to each holiday for
which you want to maintain specific settings,
(Touch s or t to scroll through the holiday
list.) then touch Next.
Set the holiday schedule for Occupied
or Unoccupied temperatures, depending
whether the building will be in use.
4 Touch s or t to select the Heat and Cool
temperatures.
5 Review the settings and touch Done to save
them. Touch Cancel to ignore changes.
MCR34119
Add / Edit Holidays
MCR34120
Select US holidays
New Year’s Day
MCR34121
Temperature
During Holiday
33-00066EFS—03 25
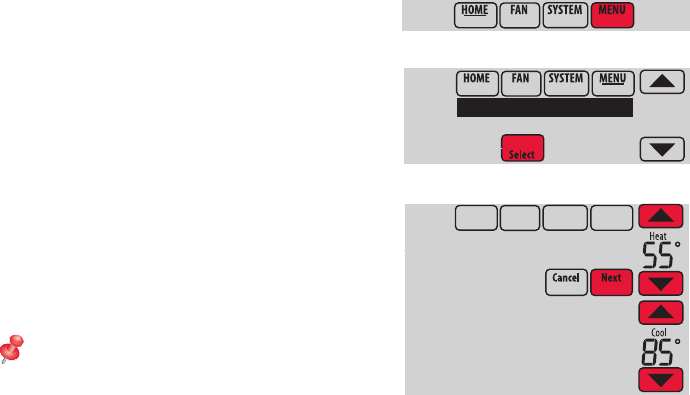
Setting holiday override: commercial use
This feature lets you customize temperature
settings to be maintained from now until
a specified date. The thermostat resumes
normal scheduling on the date you select.
1 Touch MENU.
2 Select Holiday Mode to display
Temperature While Away.
3 Touch s or t to select the Heat and
Cool temperatures, then touch Next to
select return date.
4 Review the settings and touch Done to
save them. Touch Cancel to ignore the
changes.
NOTE: The cool temperature can only be
set higher than the unoccupied program
setting and the heat temperature can
only be set lower than the unoccupied
program setting.
MCR34122
Holiday Mode
Equipment Status
MCR34123
Temperature
While Away
MCR34100