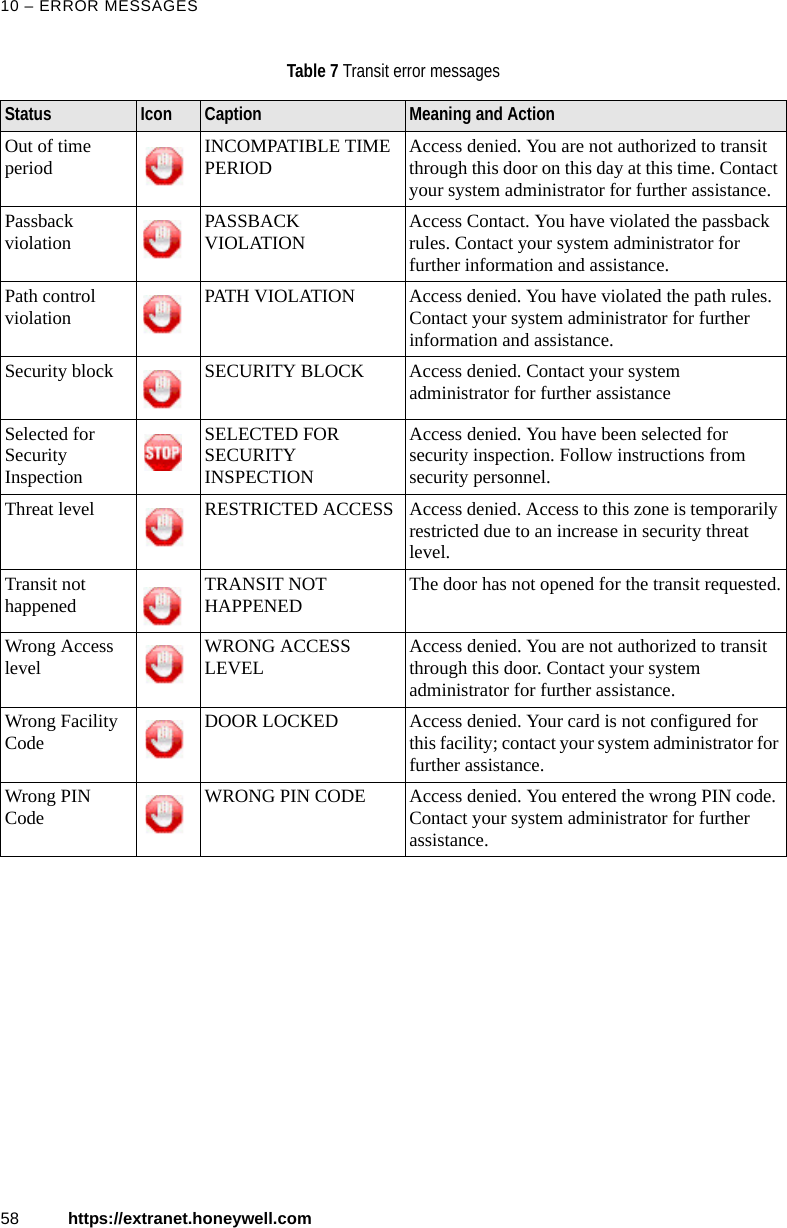
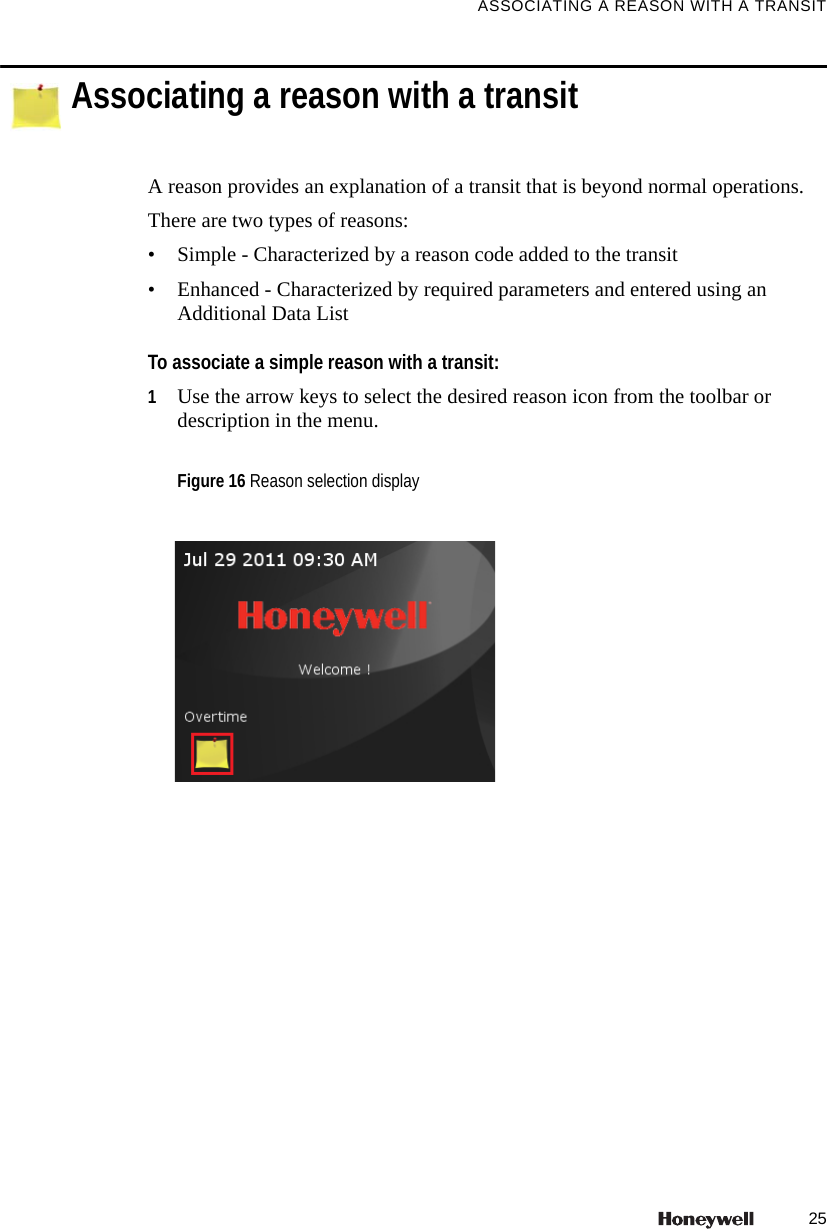
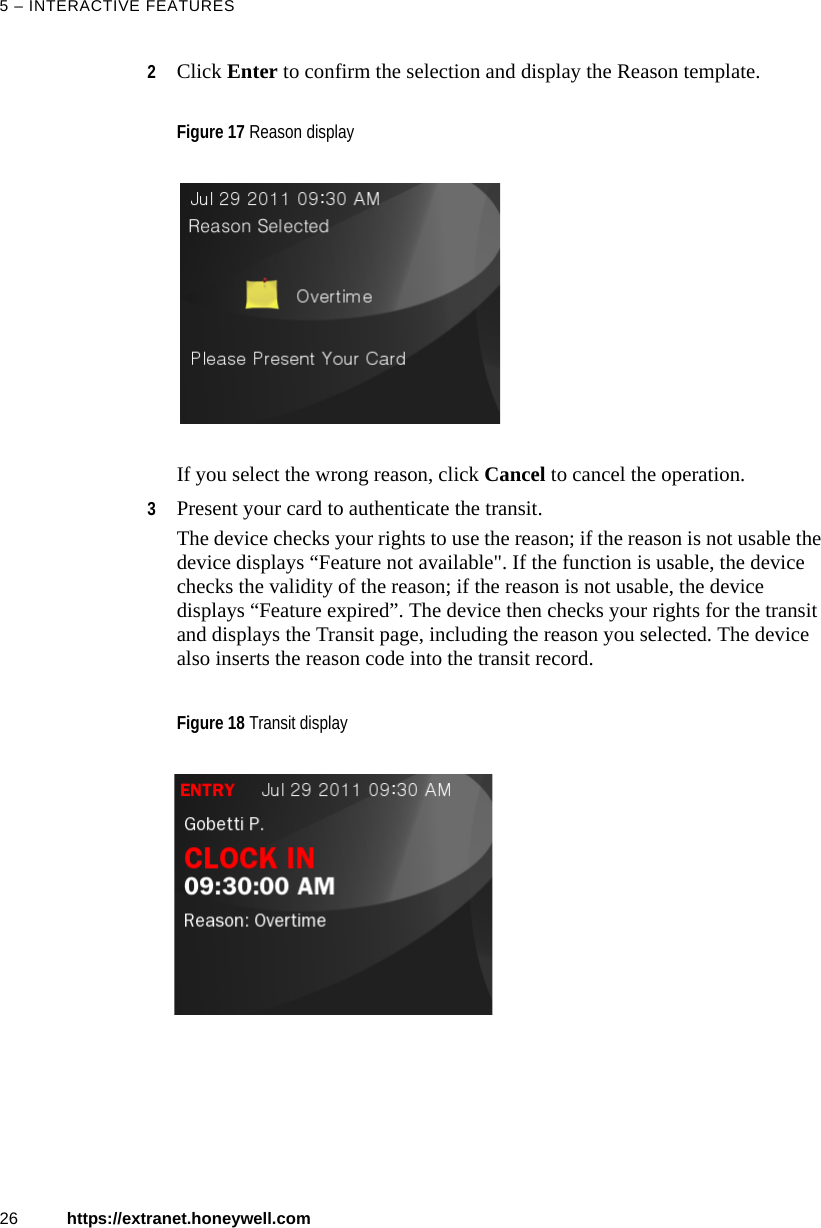
Ademco VCU-01 Tema-Voyager Compact User Manual Rev3
Honeywell International Inc Tema-Voyager Compact Rev3
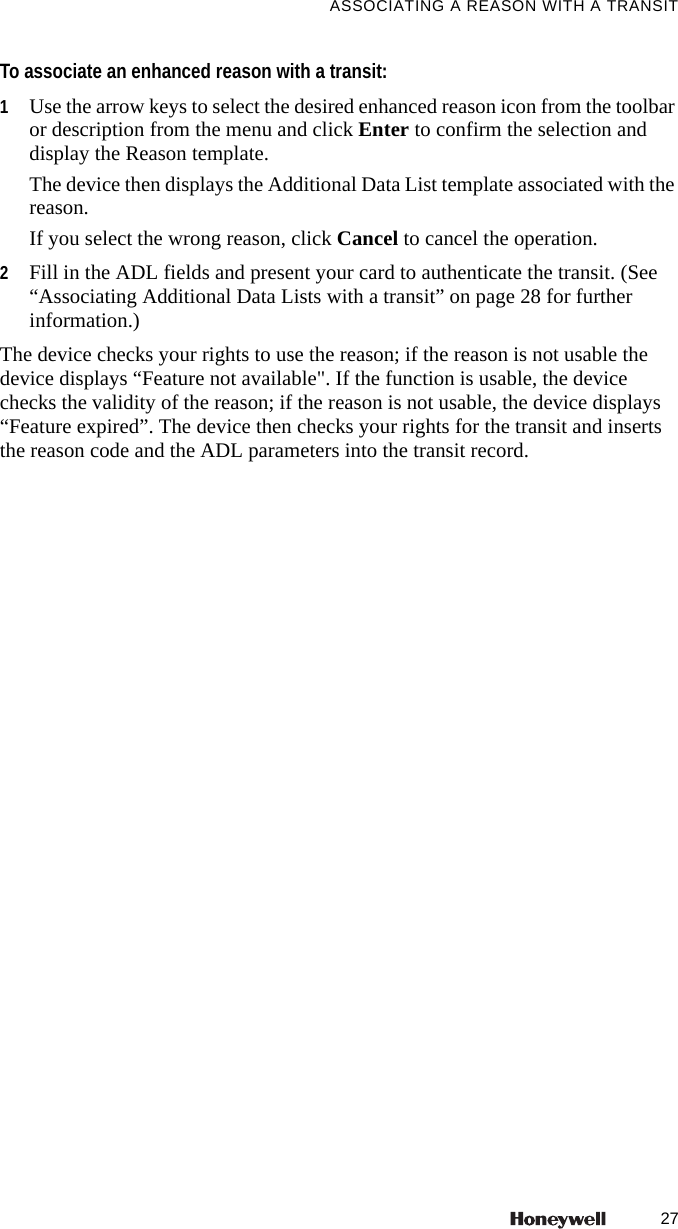
UserManual.wiki
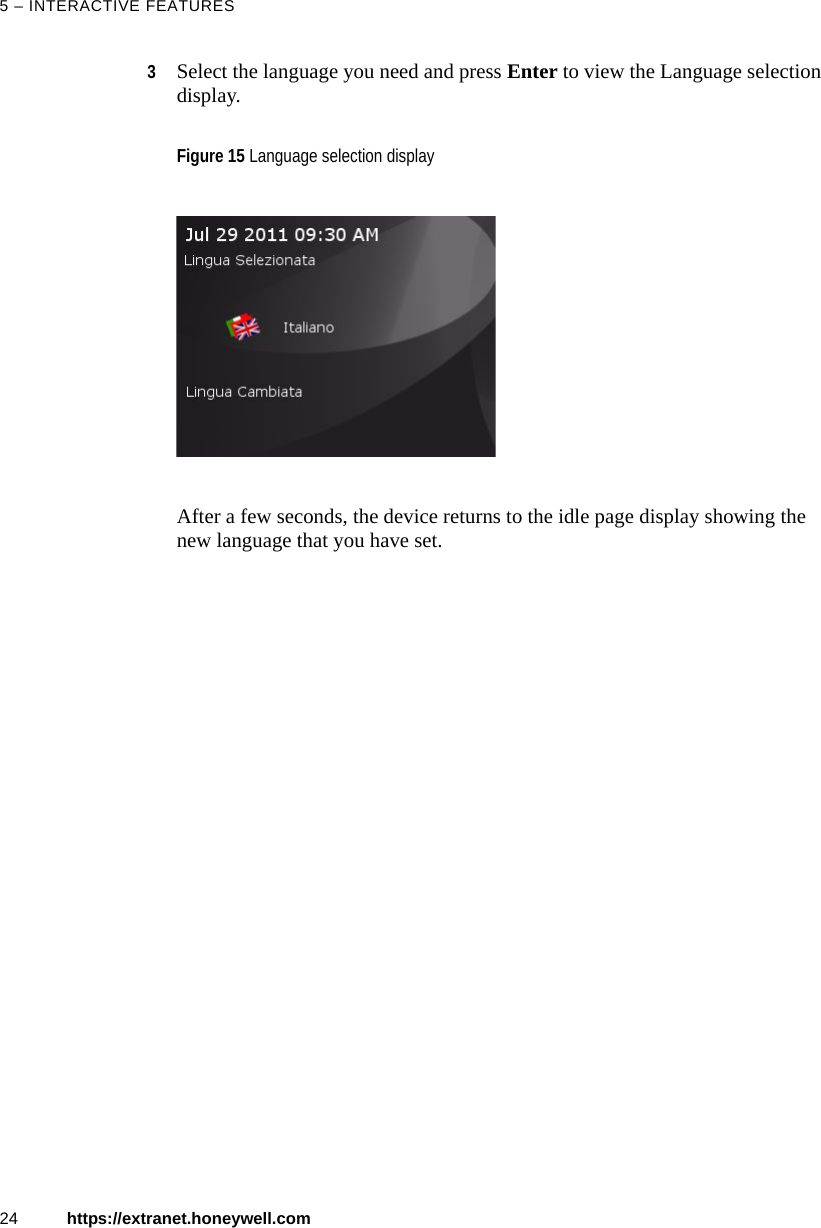
>
Ademco
>
VCU 01 User Manual
User Manual_Rev3
Navigation menu
Upload a User Manual
Namespaces
Wiki Guide
HTML
PDF
Info
Views
User Manual
Discussion / Help
Navigation


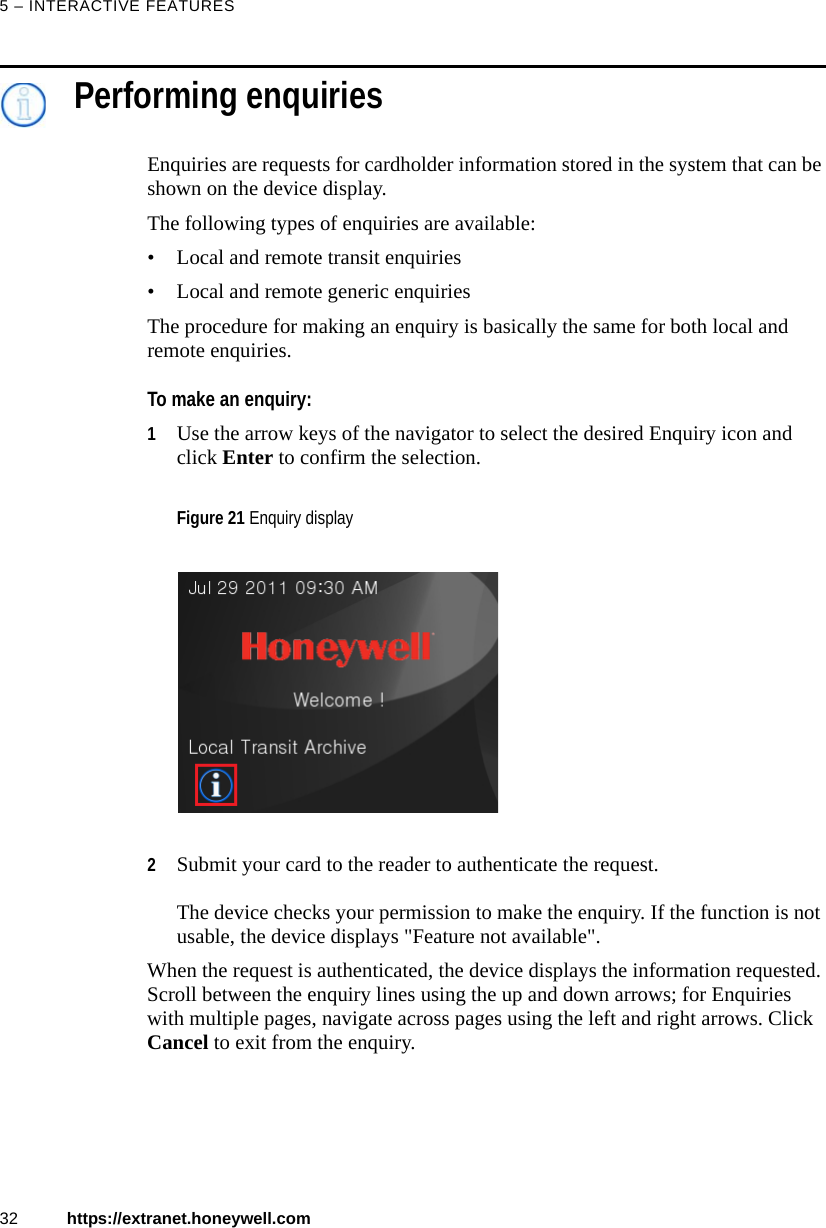

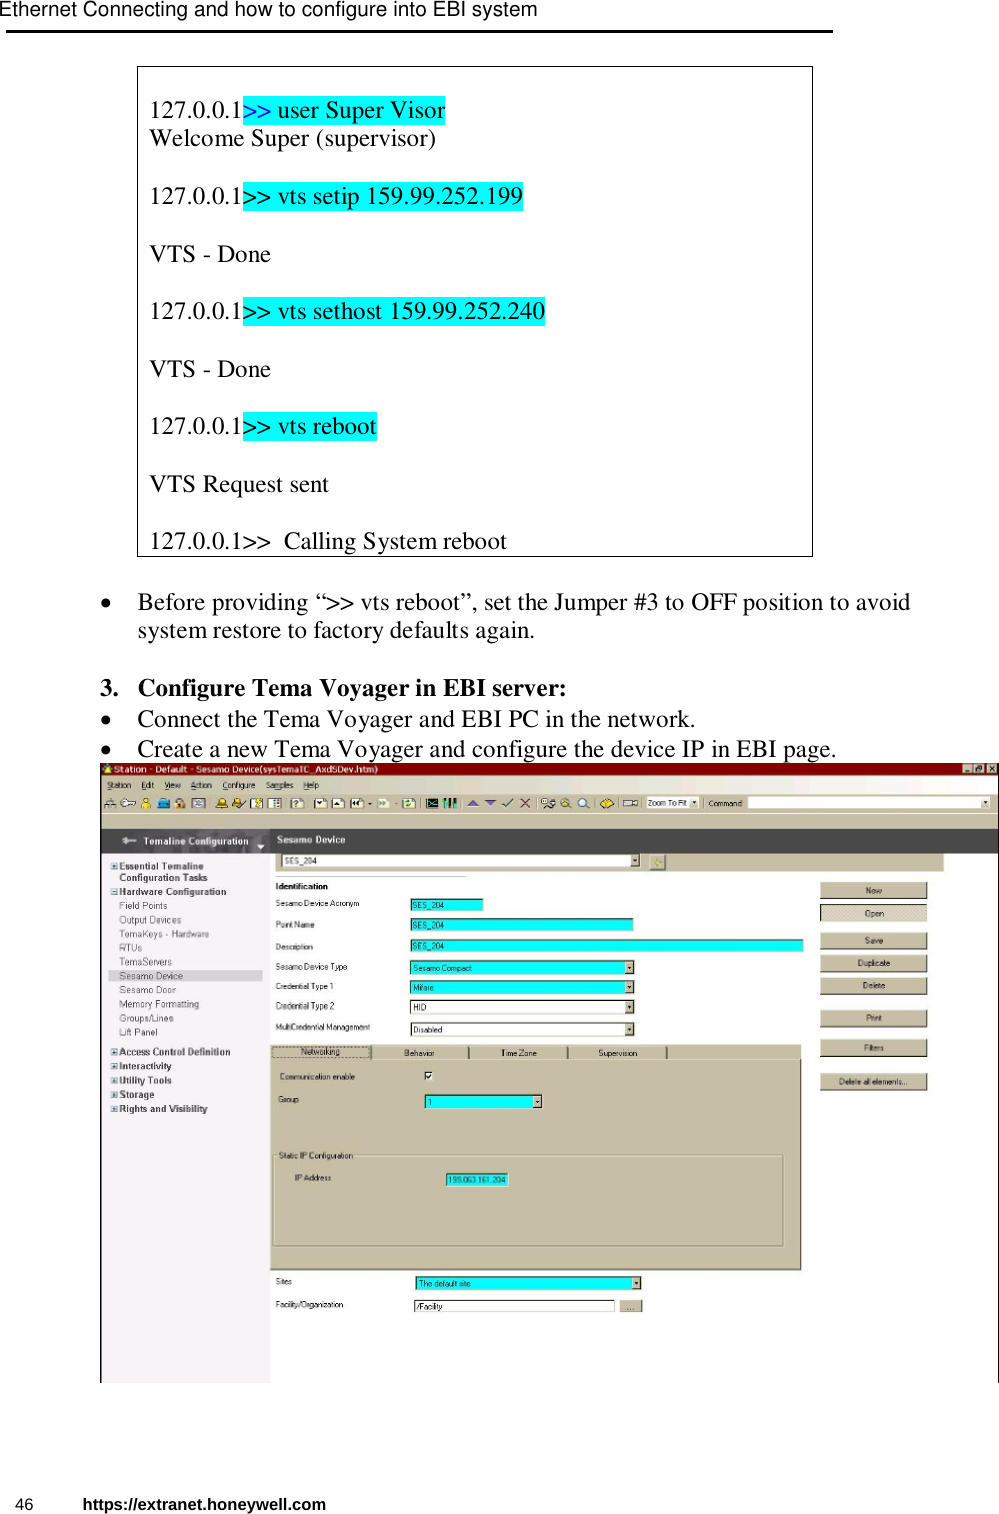
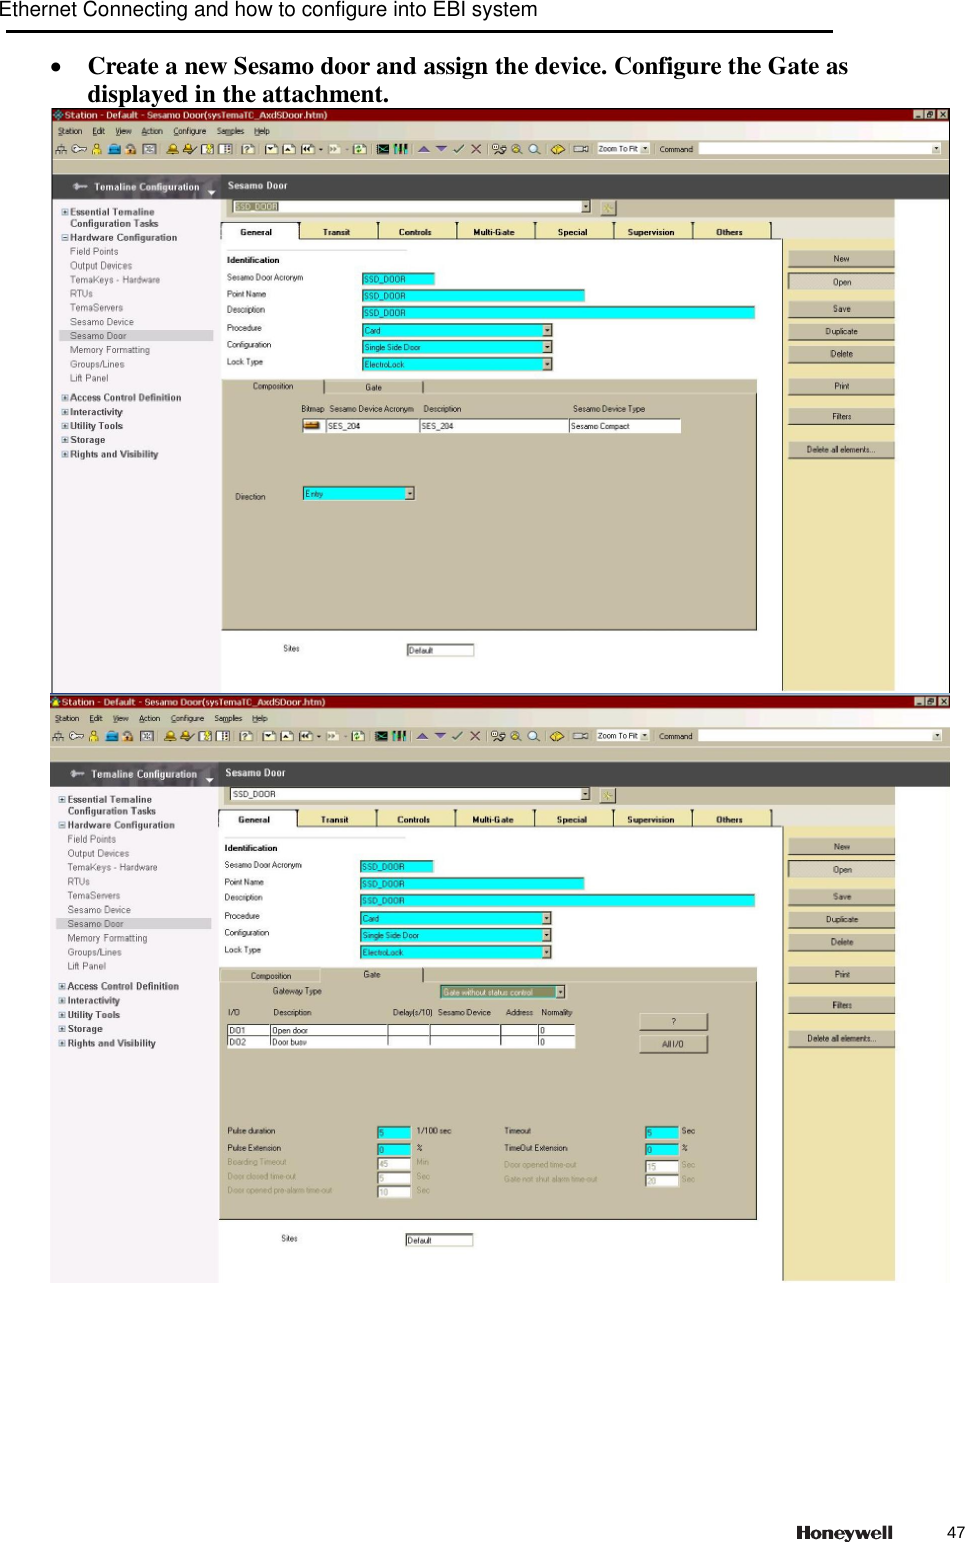
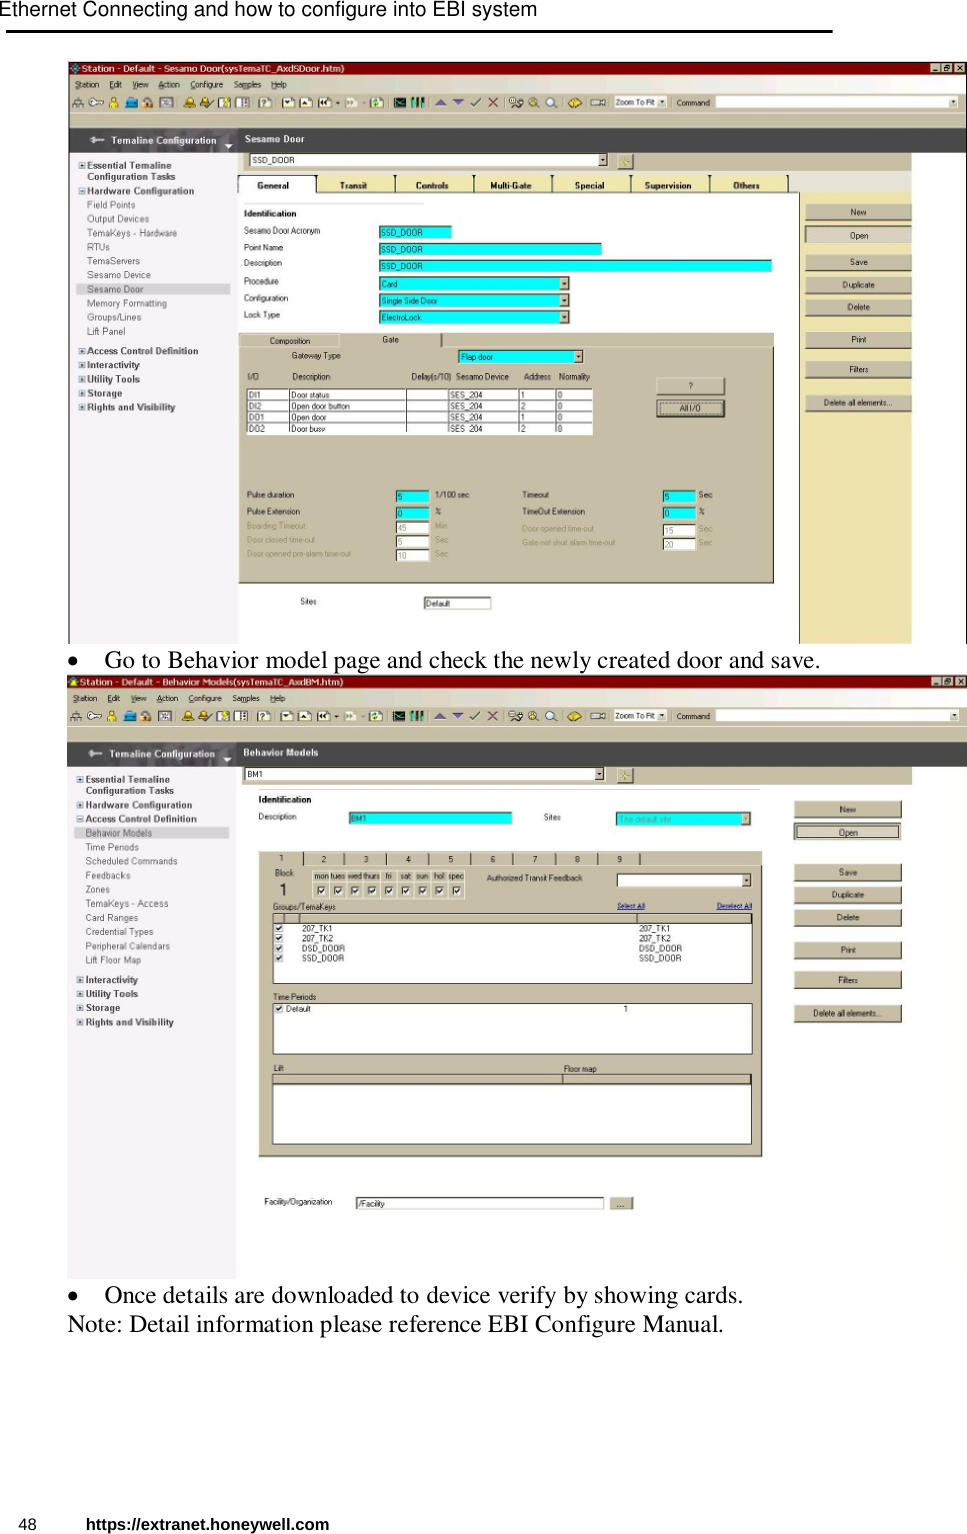
![7. Ethernet connecting and how to configure into EBI system 1. Connect EBI system using Ethernet port. 2. Steps to configure Team Voyager Pre-requsite: Conform is the MAC address of the devices are unique. Configure Tema Voyager: Using EBI server Telnet tools to telnet Team Voyager device. C:/telent IP Provide below command to set the device IP and host IP Vts setip – to configure the Sesamo device IP Vts sethost – to configure EBI PC IP in the device. Hon-SH-iMX27 login: root login[602]: root login on 'ttymxc0' root@i.MX27# telnet 127.0.0.1 Entering character mode Escape character is '^]'. TEMA Virtual Monitor, V2.0 ready (127.0.0.1) Ethernet Connecting and how to configure into EBI system745](https://usermanual.wiki/Ademco/VCU-01/User-Guide-1595826-Page-51.png)