ADTRAN 6304W EPON RG ONU User Manual Book1
Adtran EPON RG ONU Book1
UserManual.wiki
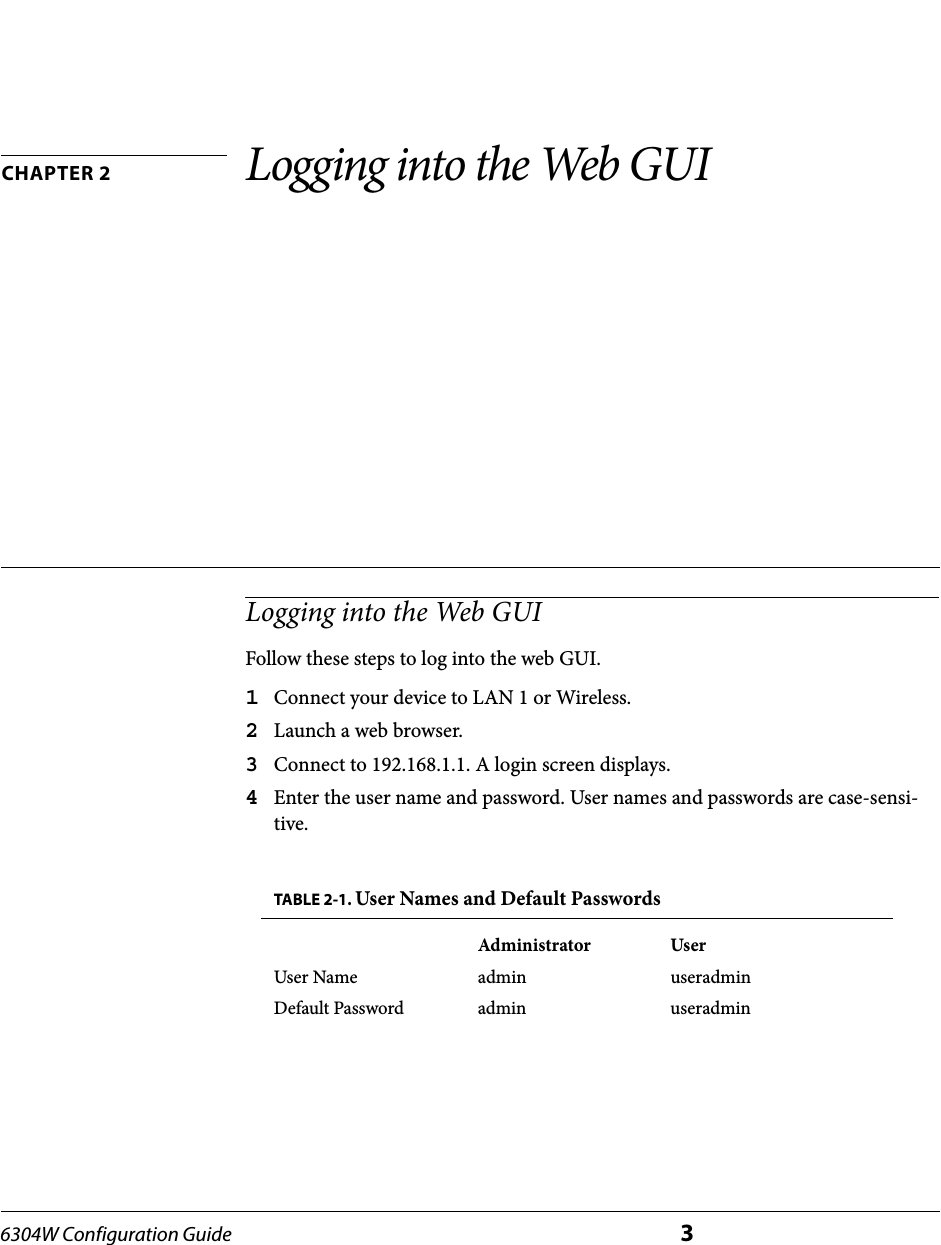
>
ADTRAN
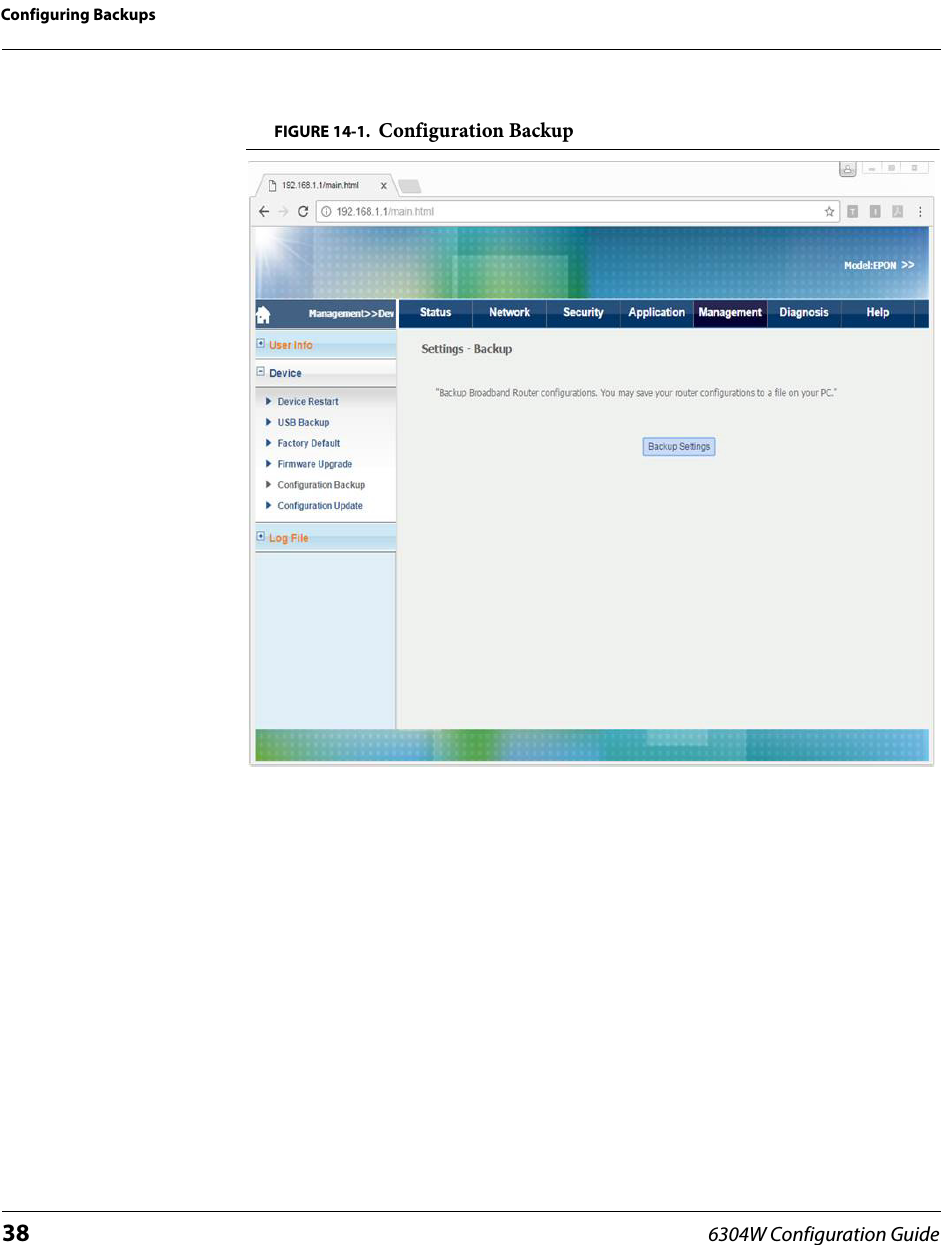
>
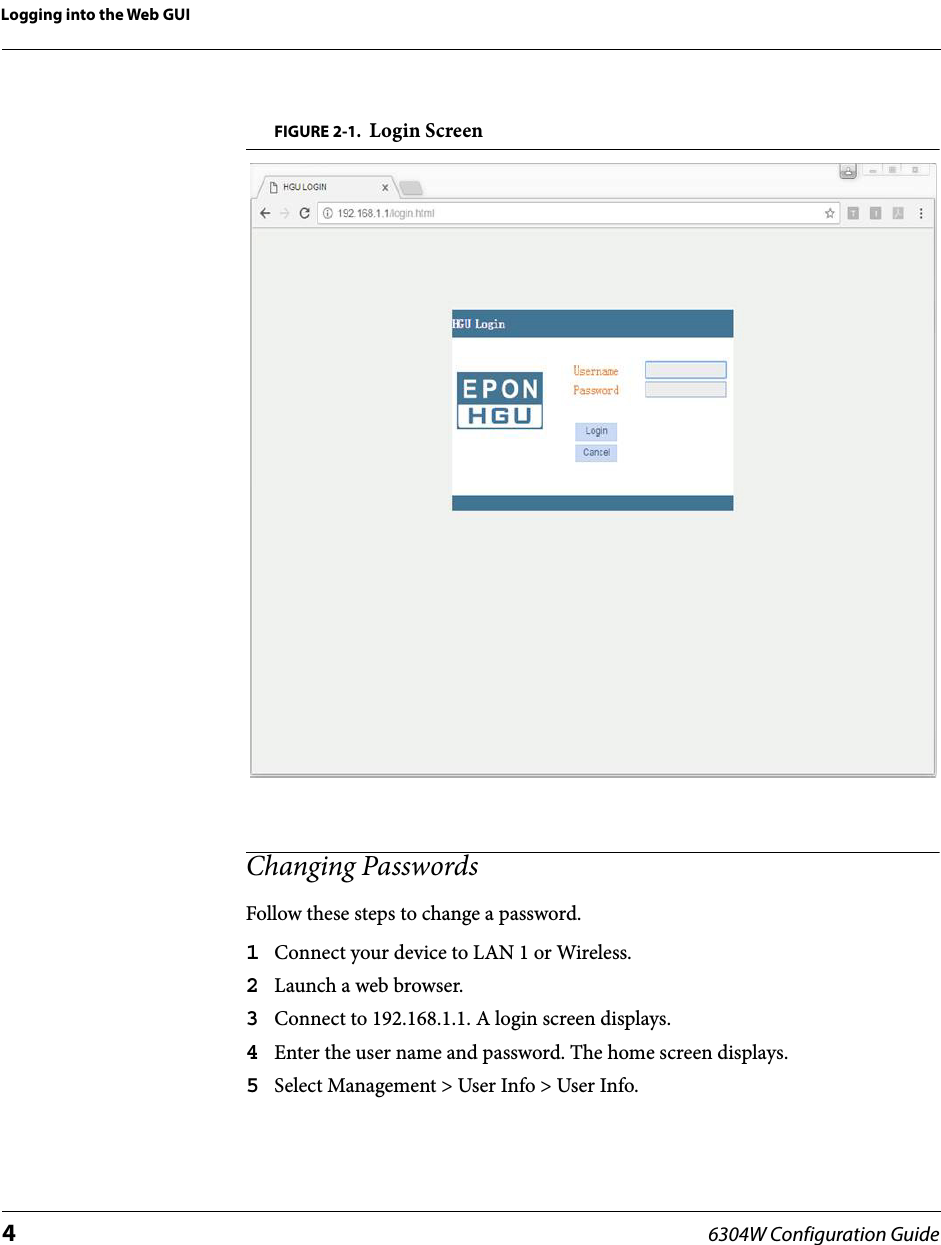
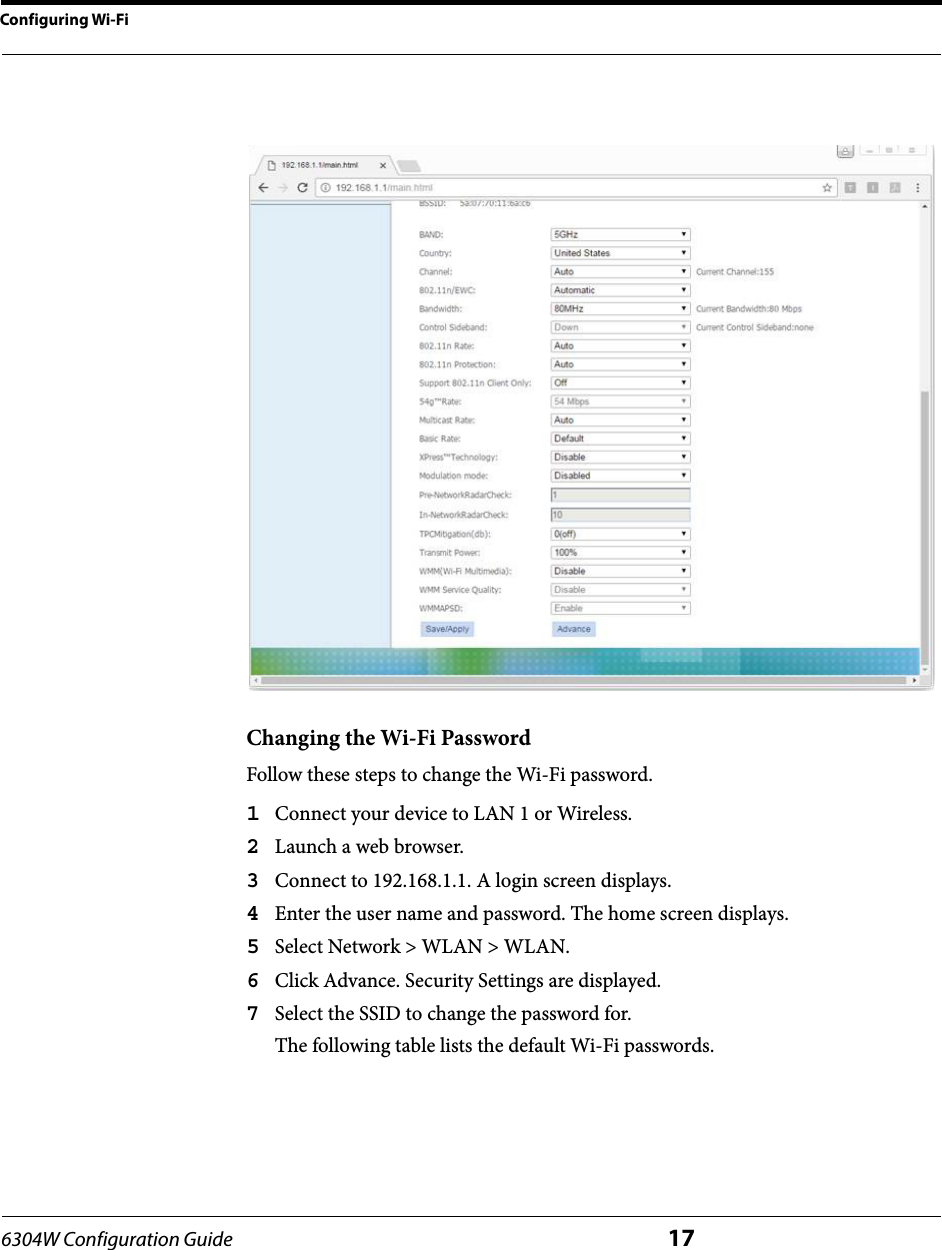
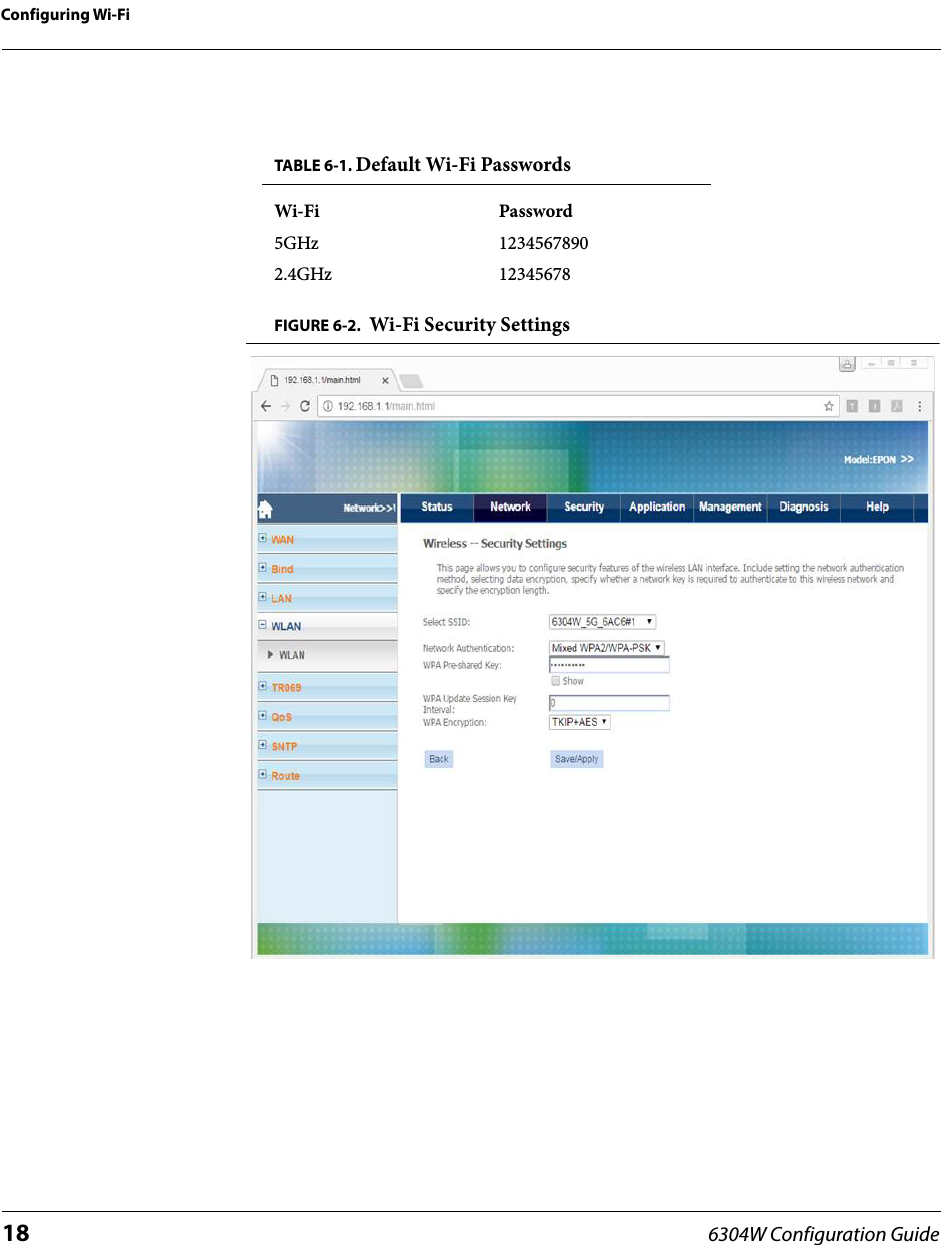
6304W User Manual
Users Manual
Navigation menu
Upload a User Manual
Namespaces
Wiki Guide
HTML
PDF
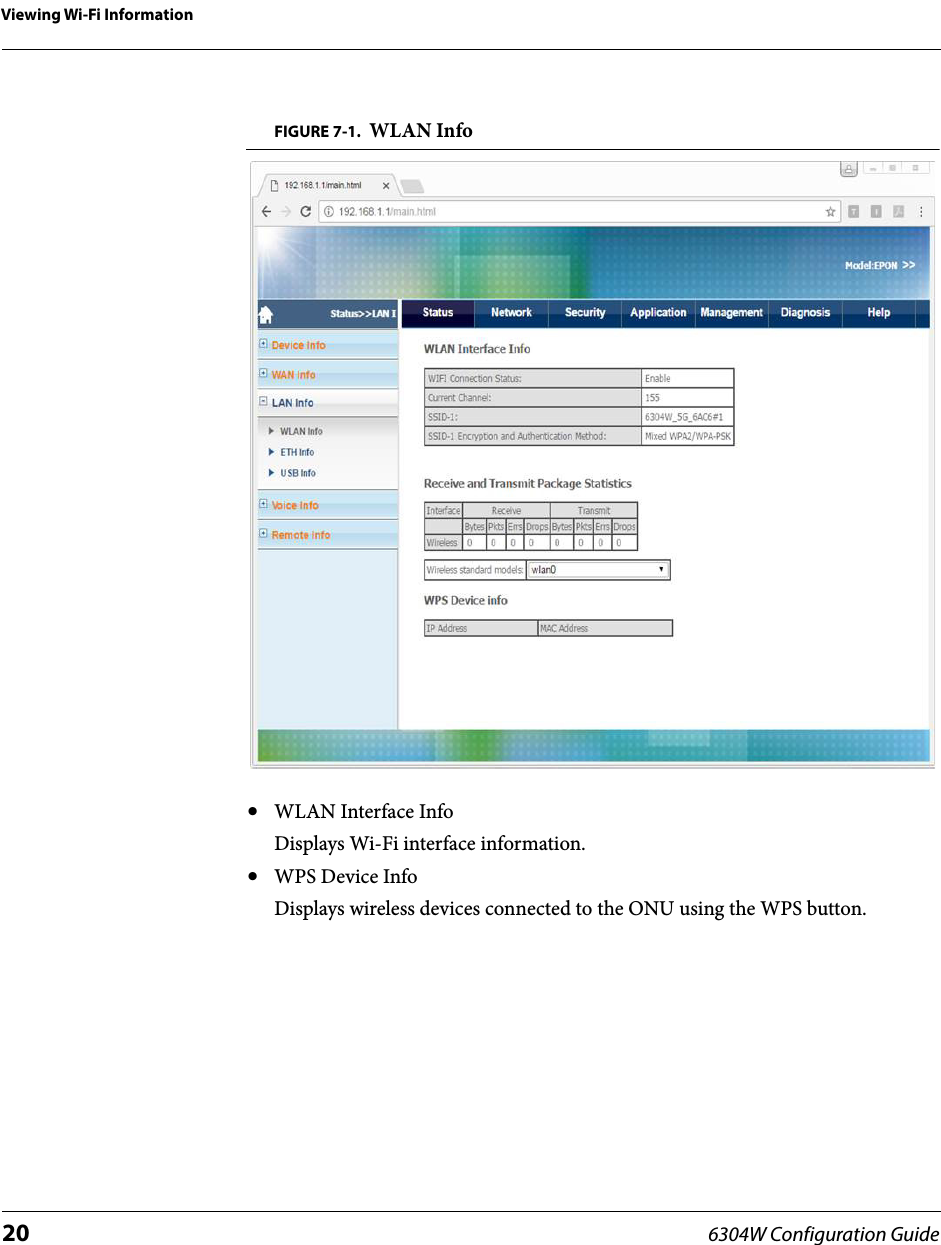
Info
Views
User Manual
Discussion / Help
Navigation


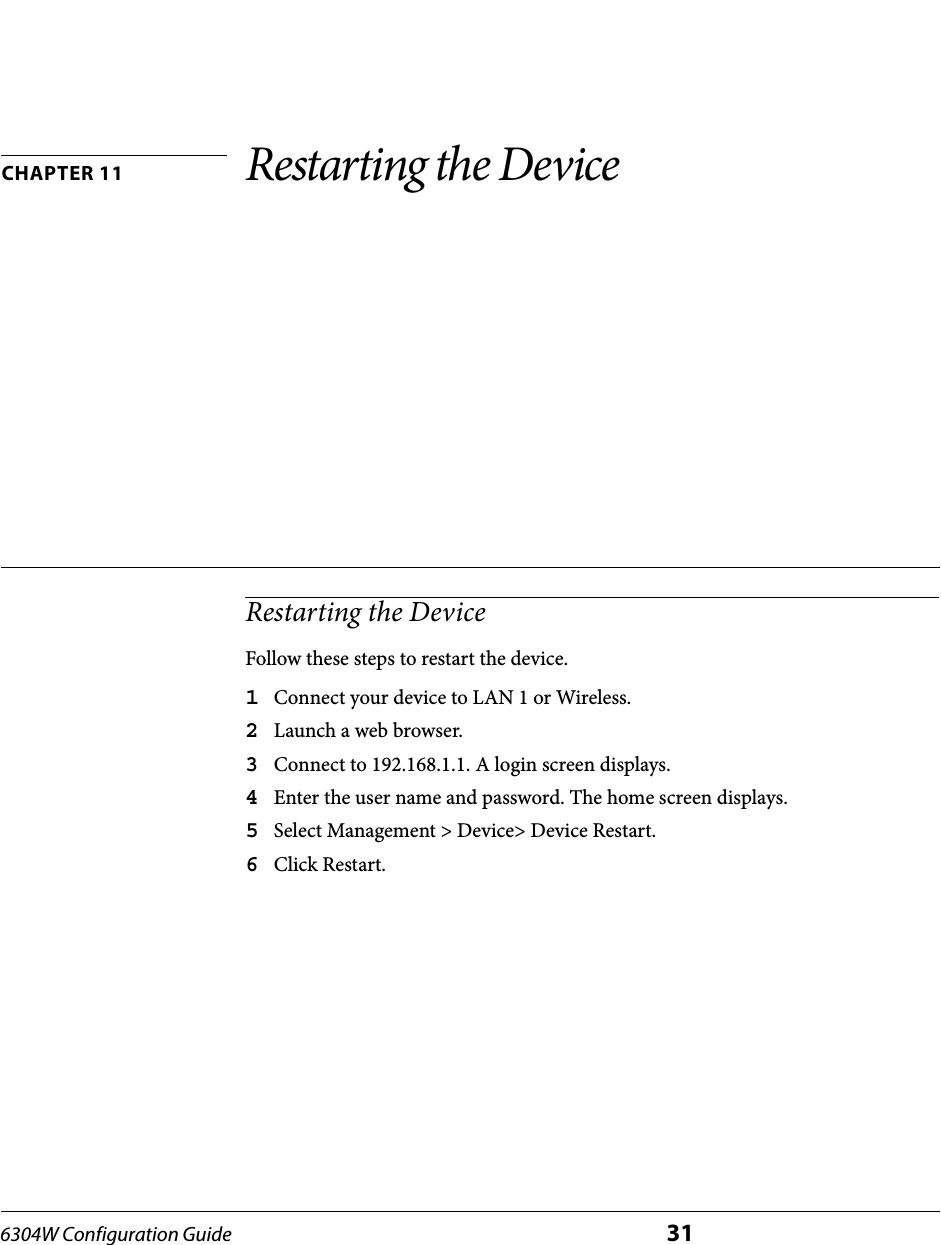


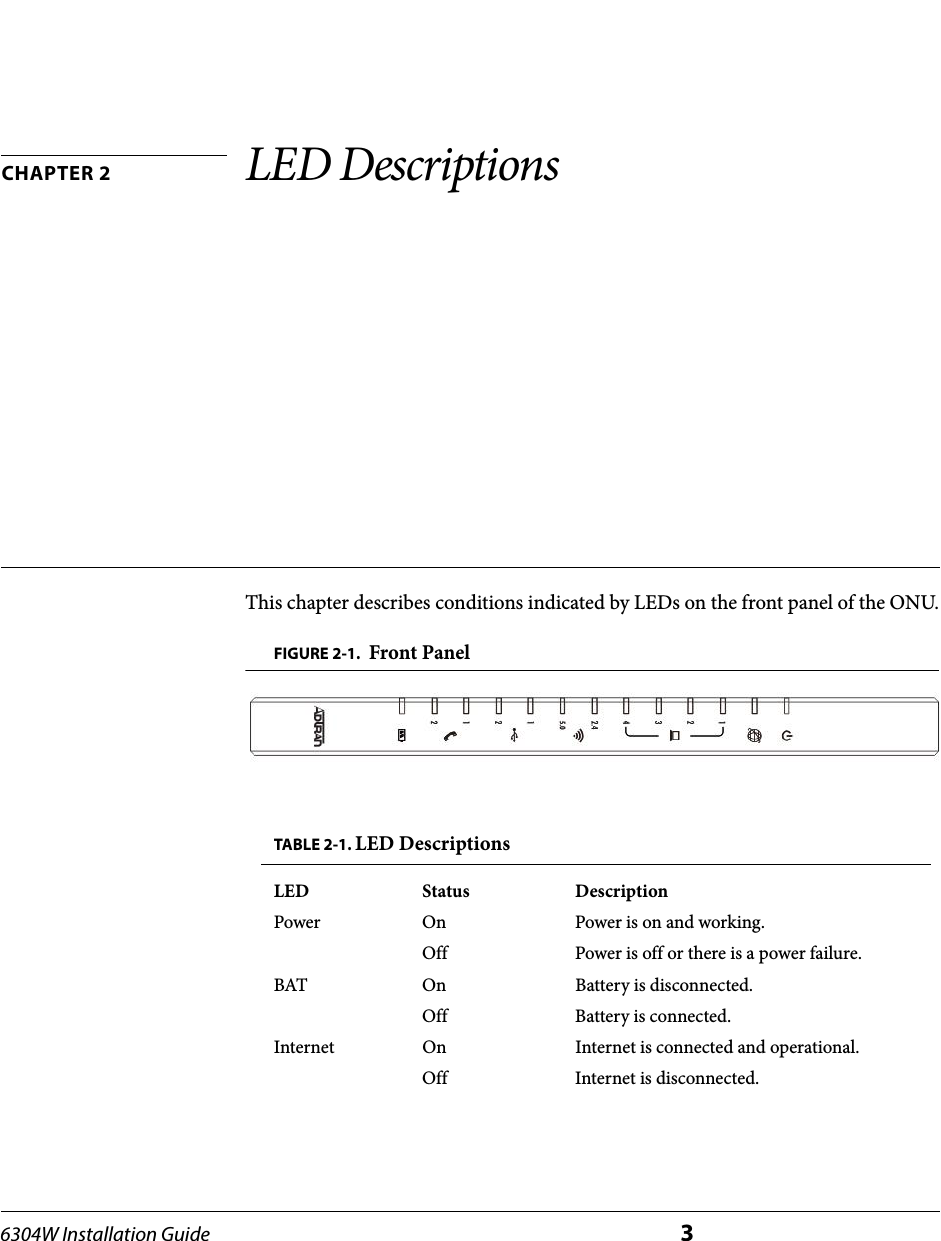
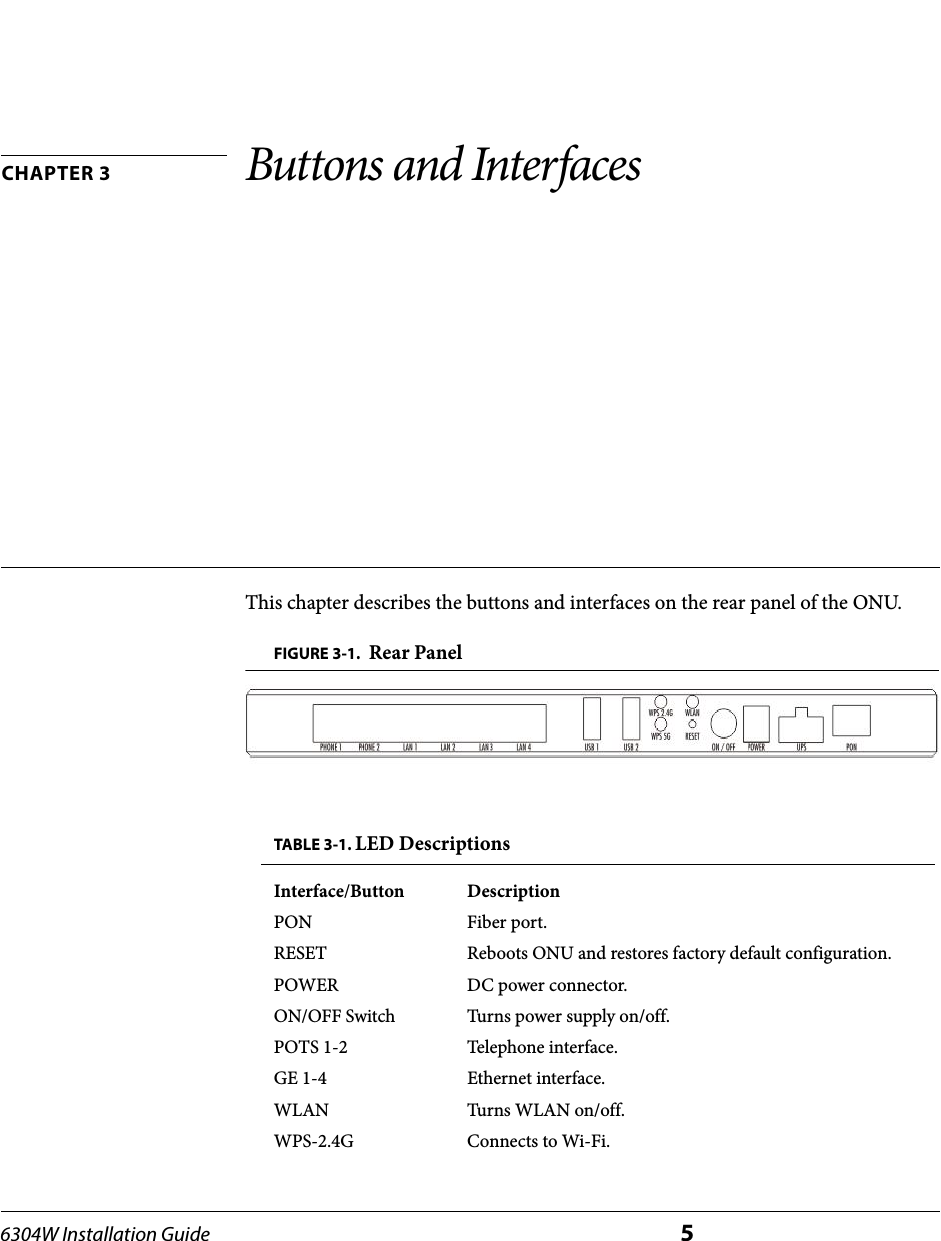
![6304W Installation Guide iContentsCHAPTER 1 Pre-Installation Considerations . . . . . . . . . . . . . . . . . . . . . . .1Electric Safety . . . . . . . . . . . . . . . . . . . . . . . . . . . . . . . . . . . . . . . . . . . . . . . . . . . . . . . . . 1Device Position . . . . . . . . . . . . . . . . . . . . . . . . . . . . . . . . . . . . . . . . . . . . . . . . . . . . . . . . 1Safety Cautions . . . . . . . . . . . . . . . . . . . . . . . . . . . . . . . . . . . . . . . . . . . . . . . . . . . . . . . . 2CHAPTER 2 LED Descriptions . . . . . . . . . . . . . . . . . . . . . . . . . . . . . . . . . .3CHAPTER 3 Buttons and Interfaces . . . . . . . . . . . . . . . . . . . . . . . . . . . . . .5CHAPTER 4 Installing the ONU . . . . . . . . . . . . . . . . . . . . . . . . . . . . . . . . .7Connecting the Fiber . . . . . . . . . . . . . . . . . . . . . . . . . . . . . . . . . . . . . . . . . . . . . . . . . . . 7Connecting the Power Adapter and Power Cord. . . . . . . . . . . . . . . . . . . . . . . . . . . . . 8Connecting the Ethernet Port . . . . . . . . . . . . . . . . . . . . . . . . . . . . . . . . . . . . . . . . . . . . 8Connecting the POTS Port . . . . . . . . . . . . . . . . . . . . . . . . . . . . . . . . . . . . . . . . . . . . . . 8CHAPTER 5 Configuring the ONU. . . . . . . . . . . . . . . . . . . . . . . . . . . . . .11Accessing the Internet . . . . . . . . . . . . . . . . . . . . . . . . . . . . . . . . . . . . . . . . . . . . . . . . . 11Setting up WLAN . . . . . . . . . . . . . . . . . . . . . . . . . . . . . . . . . . . . . . . . . . . . . . . . . . . . . 12Setting Security . . . . . . . . . . . . . . . . . . . . . . . . . . . . . . . . . . . . . . . . . . . . . . . . . . . . . . . 12Downloading to a USB. . . . . . . . . . . . . . . . . . . . . . . . . . . . . . . . . . . . . . . . . . . . . . . . . 13Managing the ONU . . . . . . . . . . . . . . . . . . . . . . . . . . . . . . . . . . . . . . . . . . . . . . . . . . . 13CHAPTER 7 Troubleshooting . . . . . . . . . . . . . . . . . . . . . . . . . . . . . . . . . .15[Problem 1] The Power LED does not light. . . . . . . . . . . . . . . . . . . . . . . . . . . . . . . . 15[Problem 2] The Link LED does not light.. . . . . . . . . . . . . . . . . . . . . . . . . . . . . . . . . 15[Problem 3] The Voice LED does not light. . . . . . . . . . . . . . . . . . . . . . . . . . . . . . . . . 16APPENDIX A Product Specifications . . . . . . . . . . . . . . . . . . . . . . . . . . . . .17](https://usermanual.wiki/ADTRAN/6304W/User-Guide-3494043-Page-48.png)


![6304W Installation Guide 15CHAPTER 7 TroubleshootingThis chapter lists some typical symptoms and check points.[Problem 1] The Power LED does not light.Check points:1Check whether the power cord is properly connected to the POWER connector and the outlet.2Check whether the proper power adapter is connected.[Problem 2] The Link LED does not light.Check points:1Check whether the ONU is authorized by the carrier.2Check whether the proper network cables are used.3Check whether the network cable connection is working.](https://usermanual.wiki/ADTRAN/6304W/User-Guide-3494043-Page-62.png)
![Troubleshooting16 6304W Installation Guide[Problem 3] The Voice LED does not light.Check points:1Check whether the telephone line connection is working.2Check whether the ONU is on.](https://usermanual.wiki/ADTRAN/6304W/User-Guide-3494043-Page-63.png)