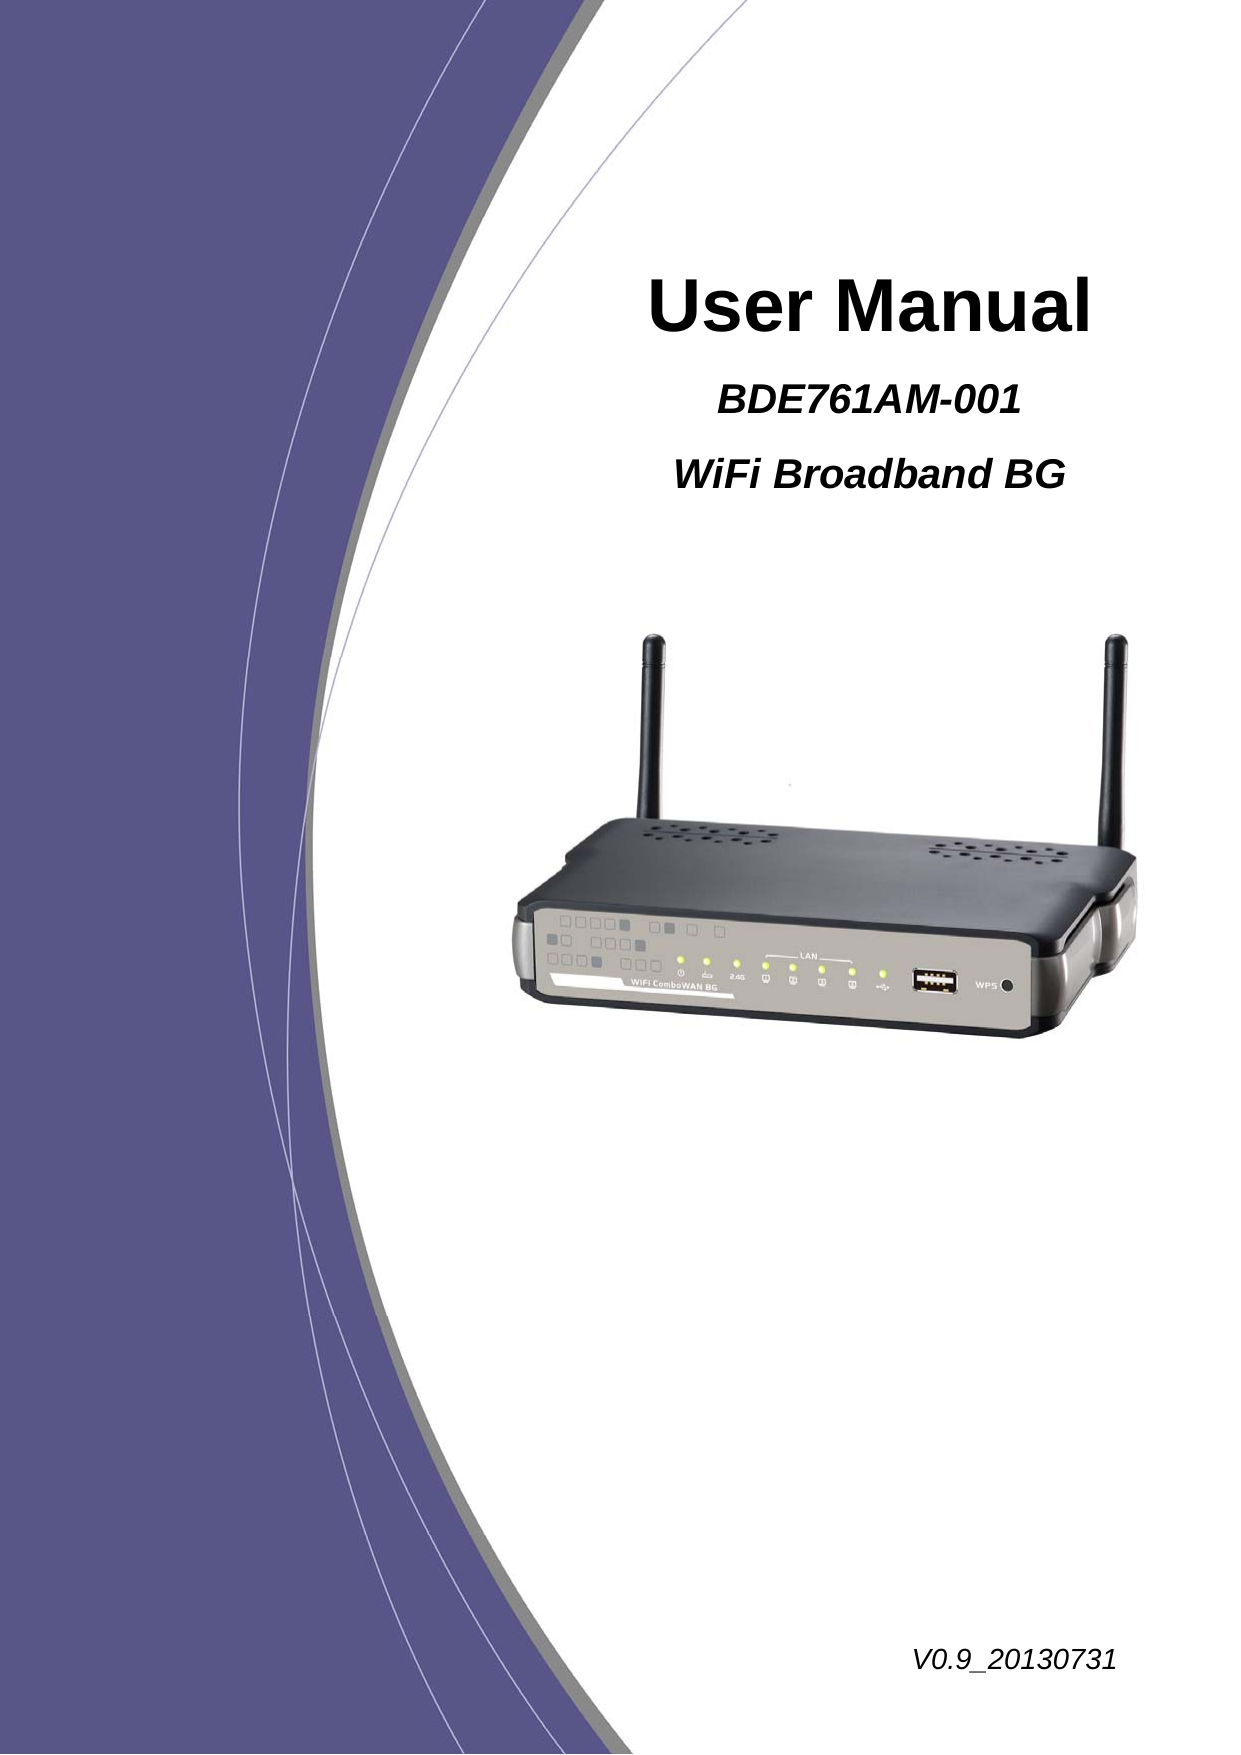
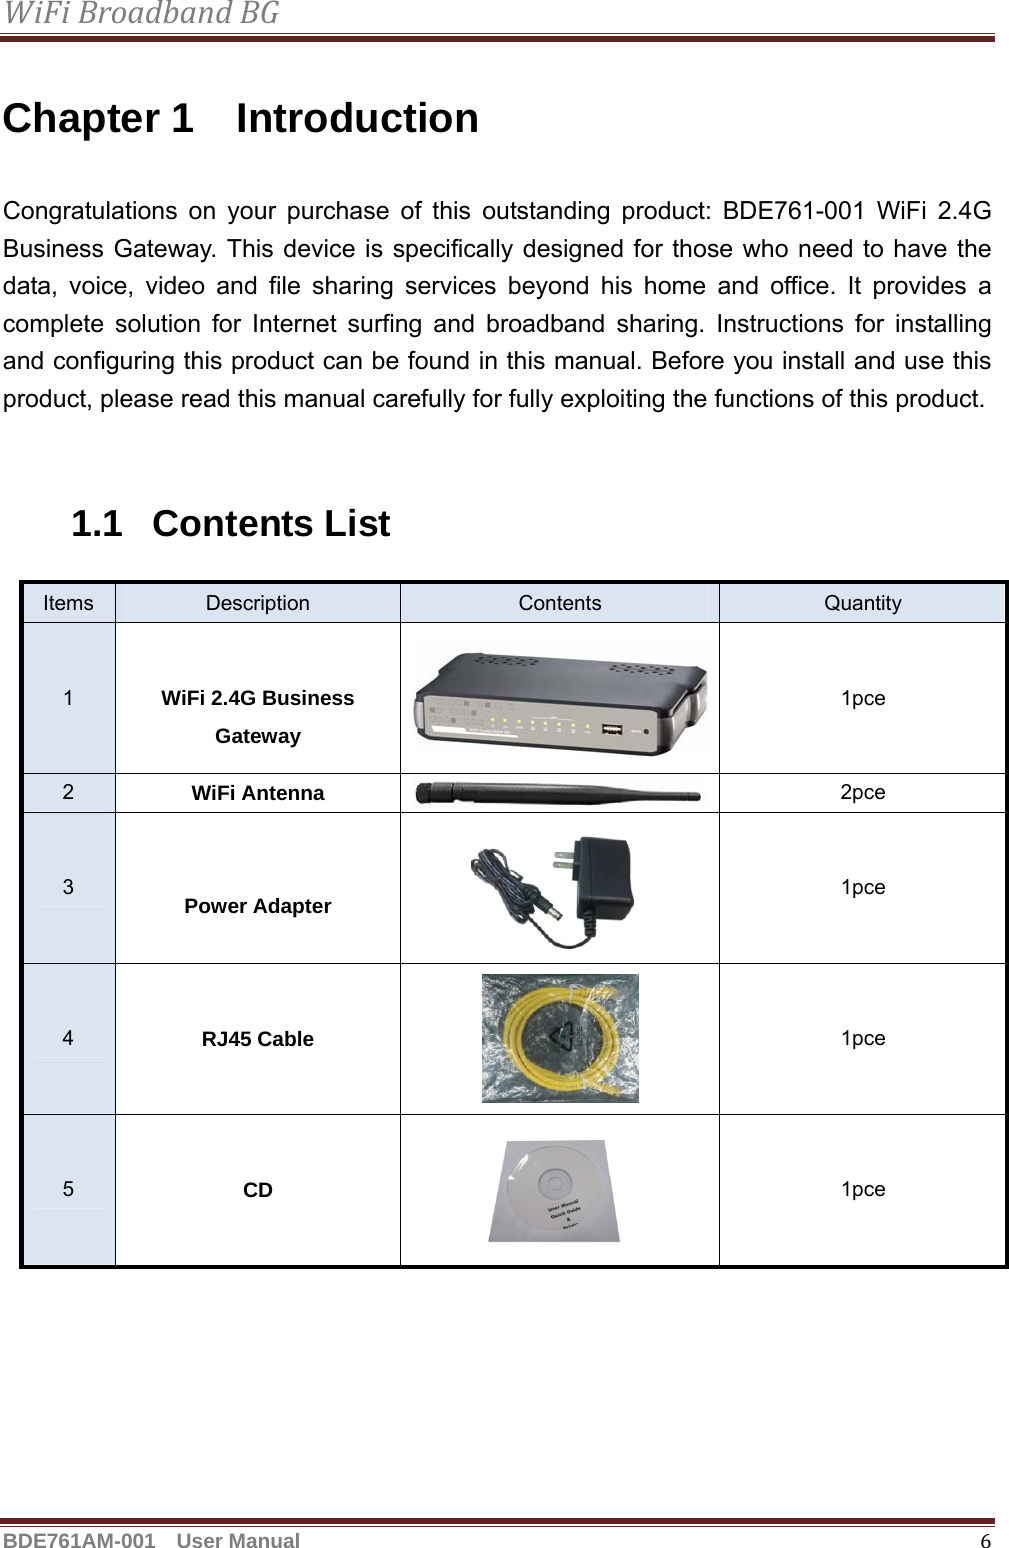
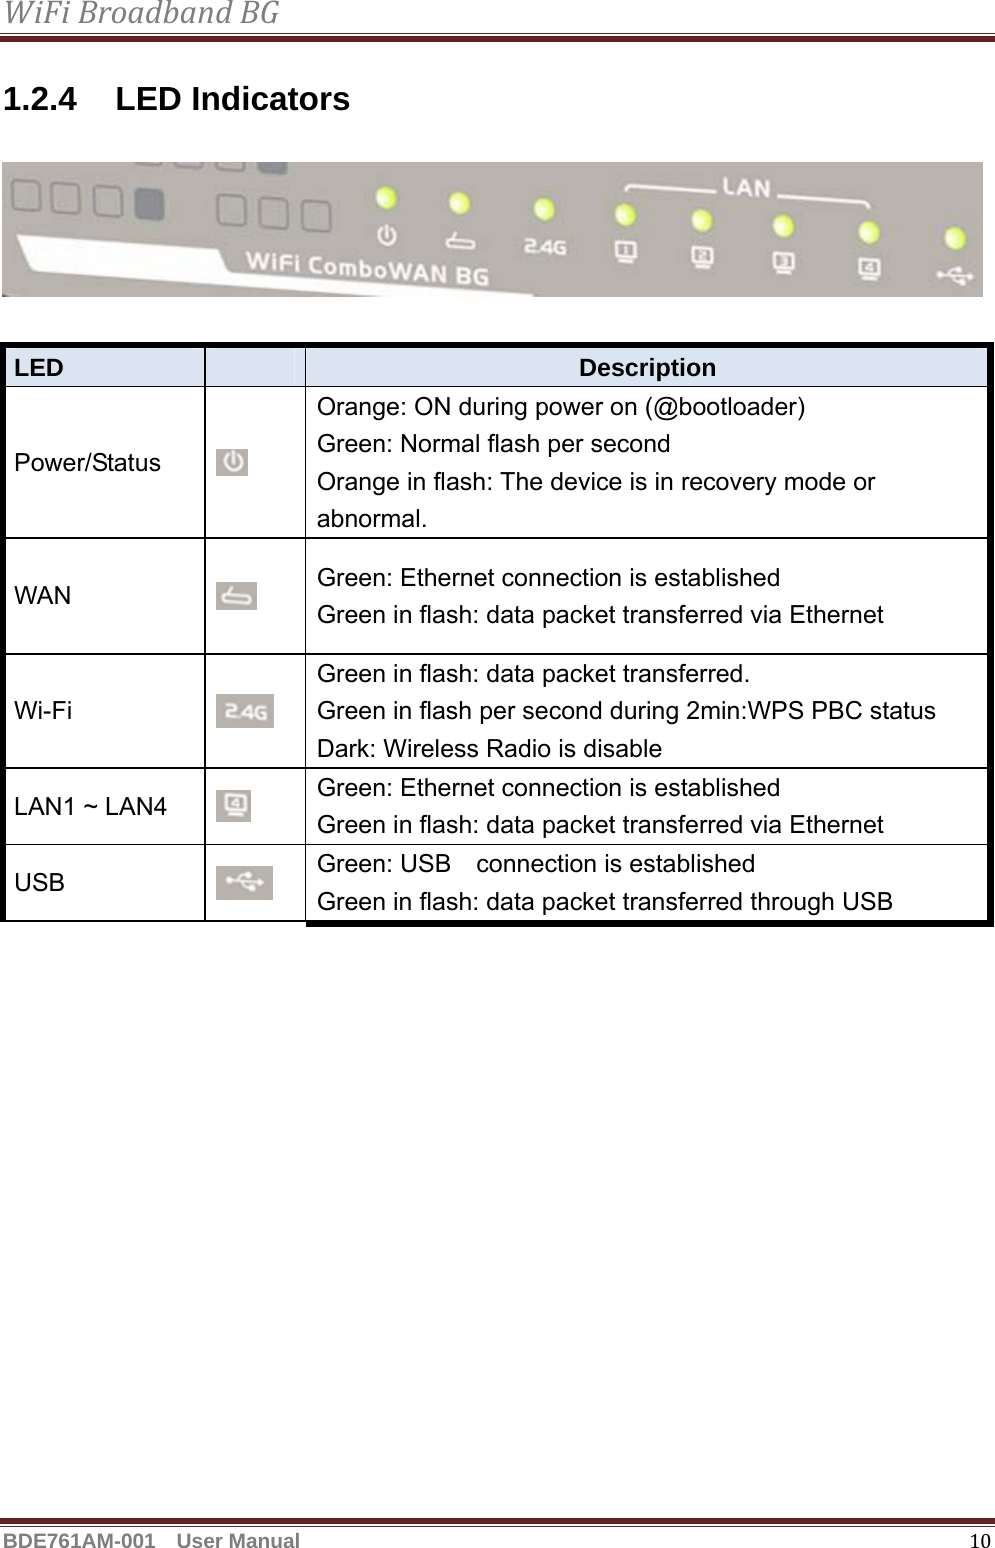
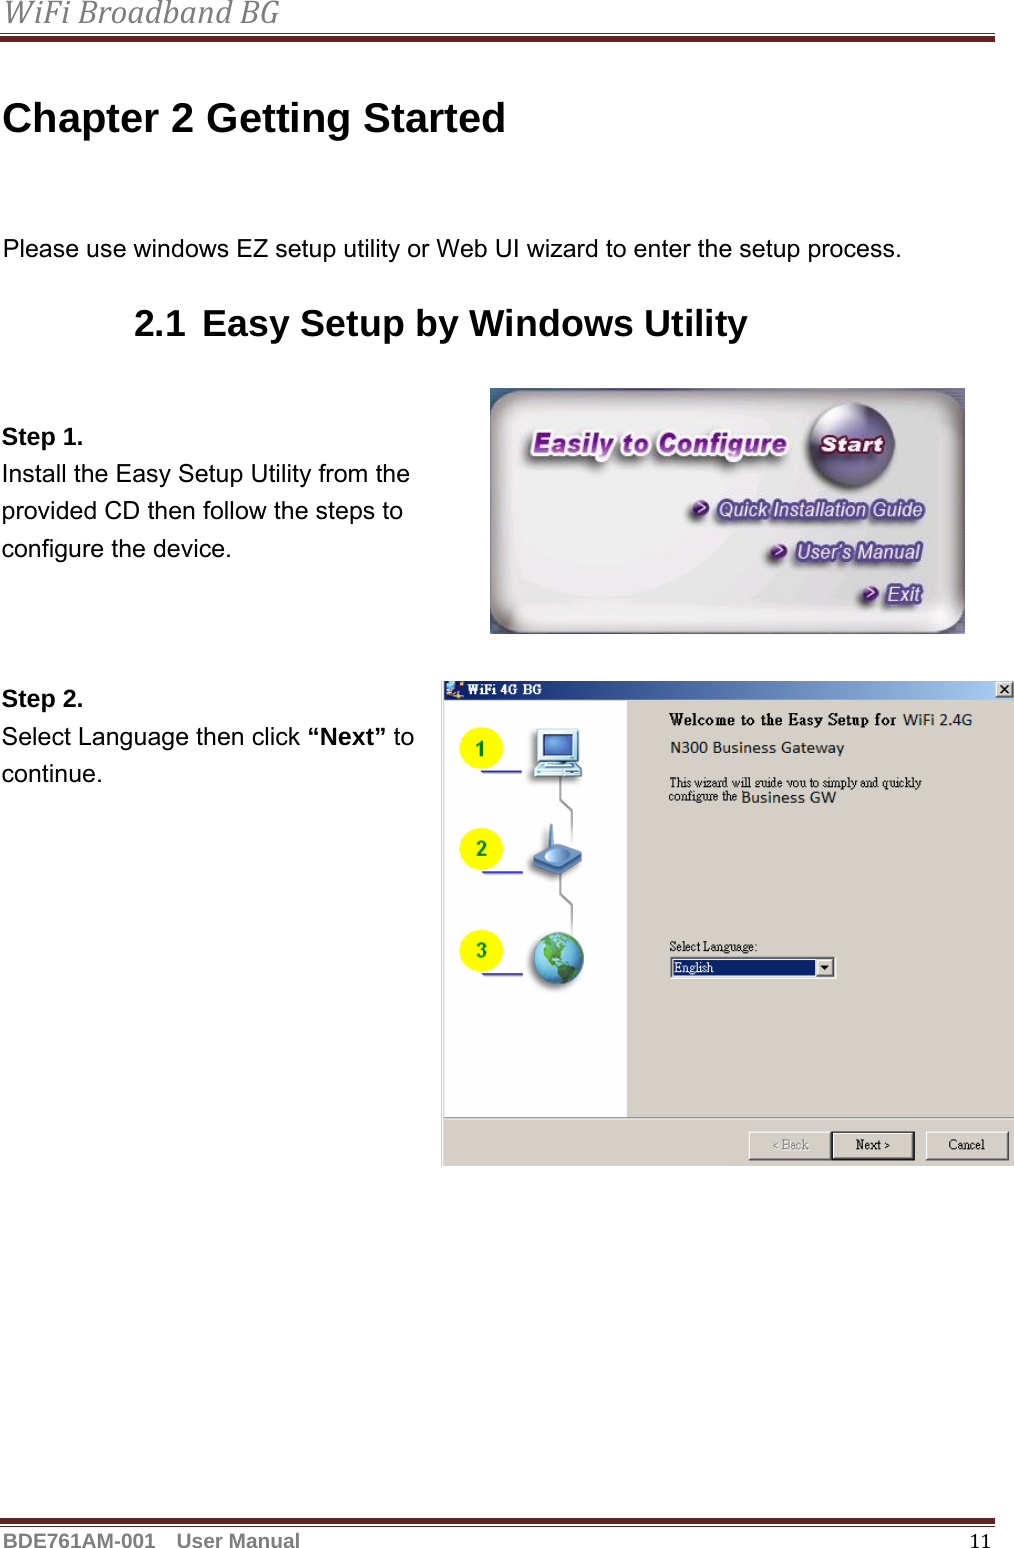
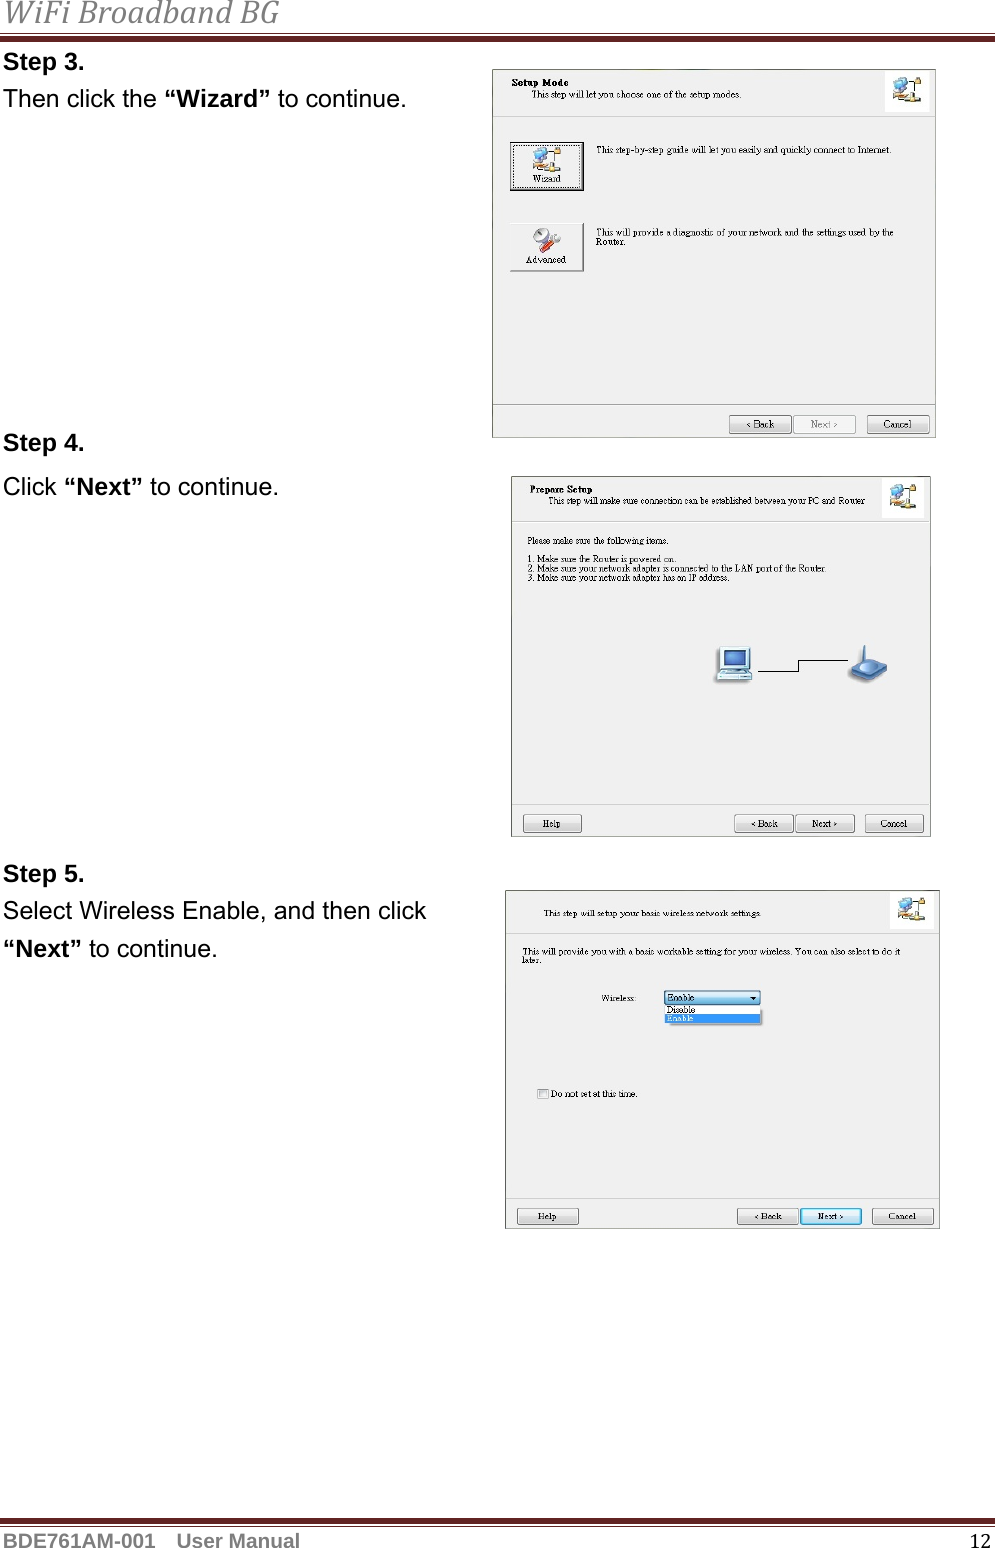
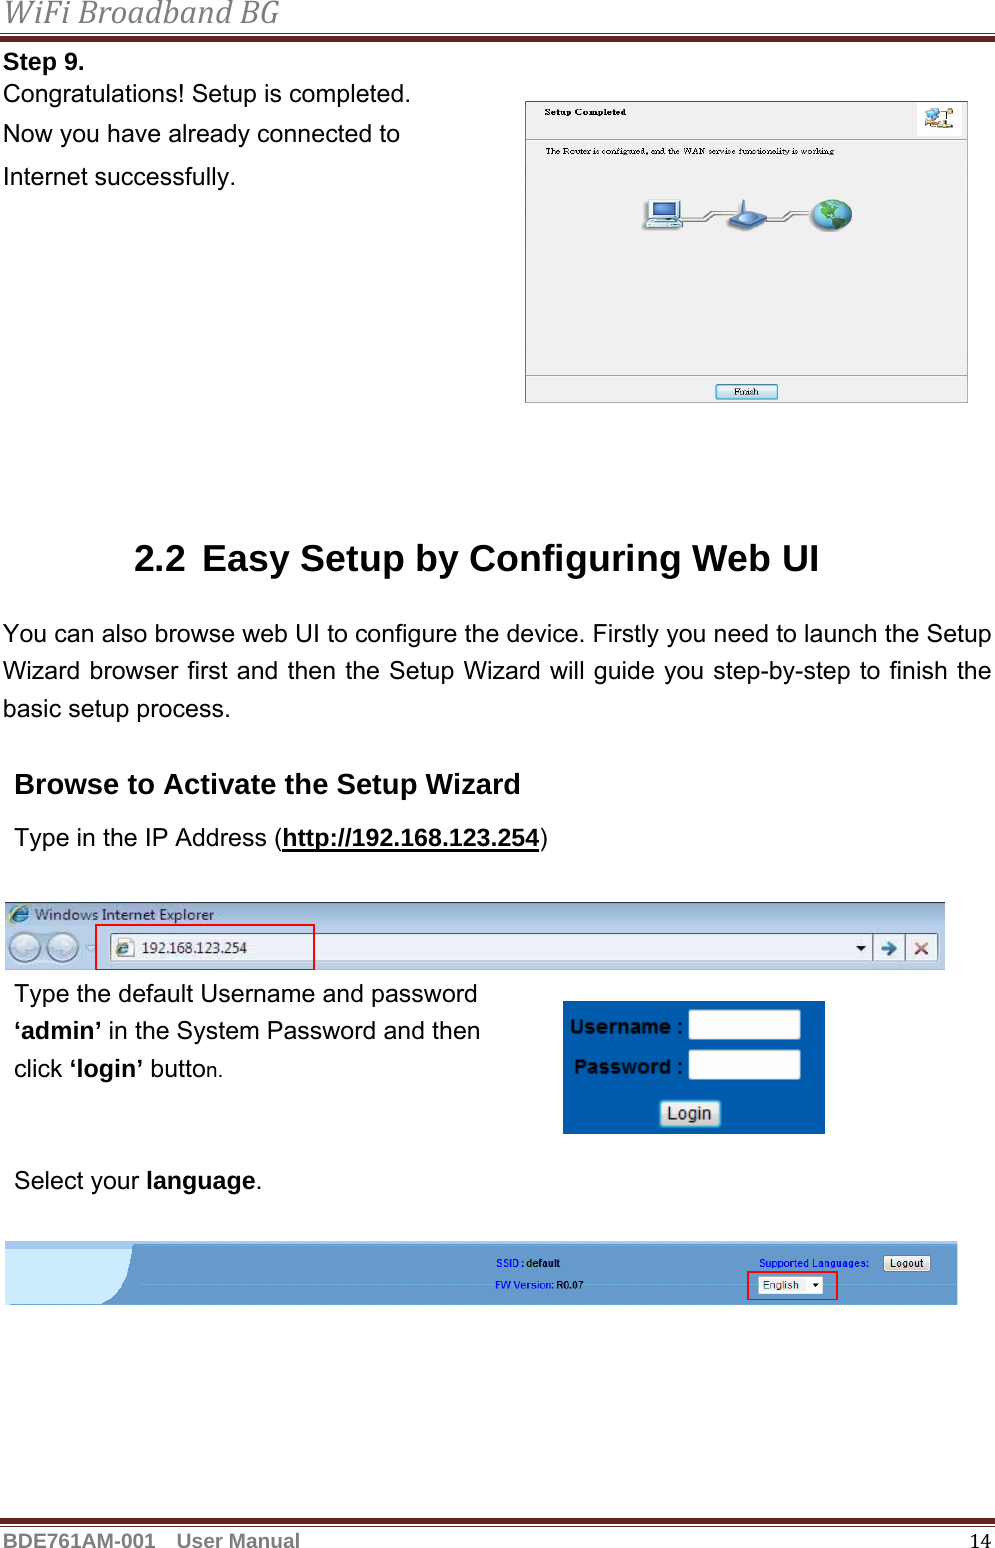
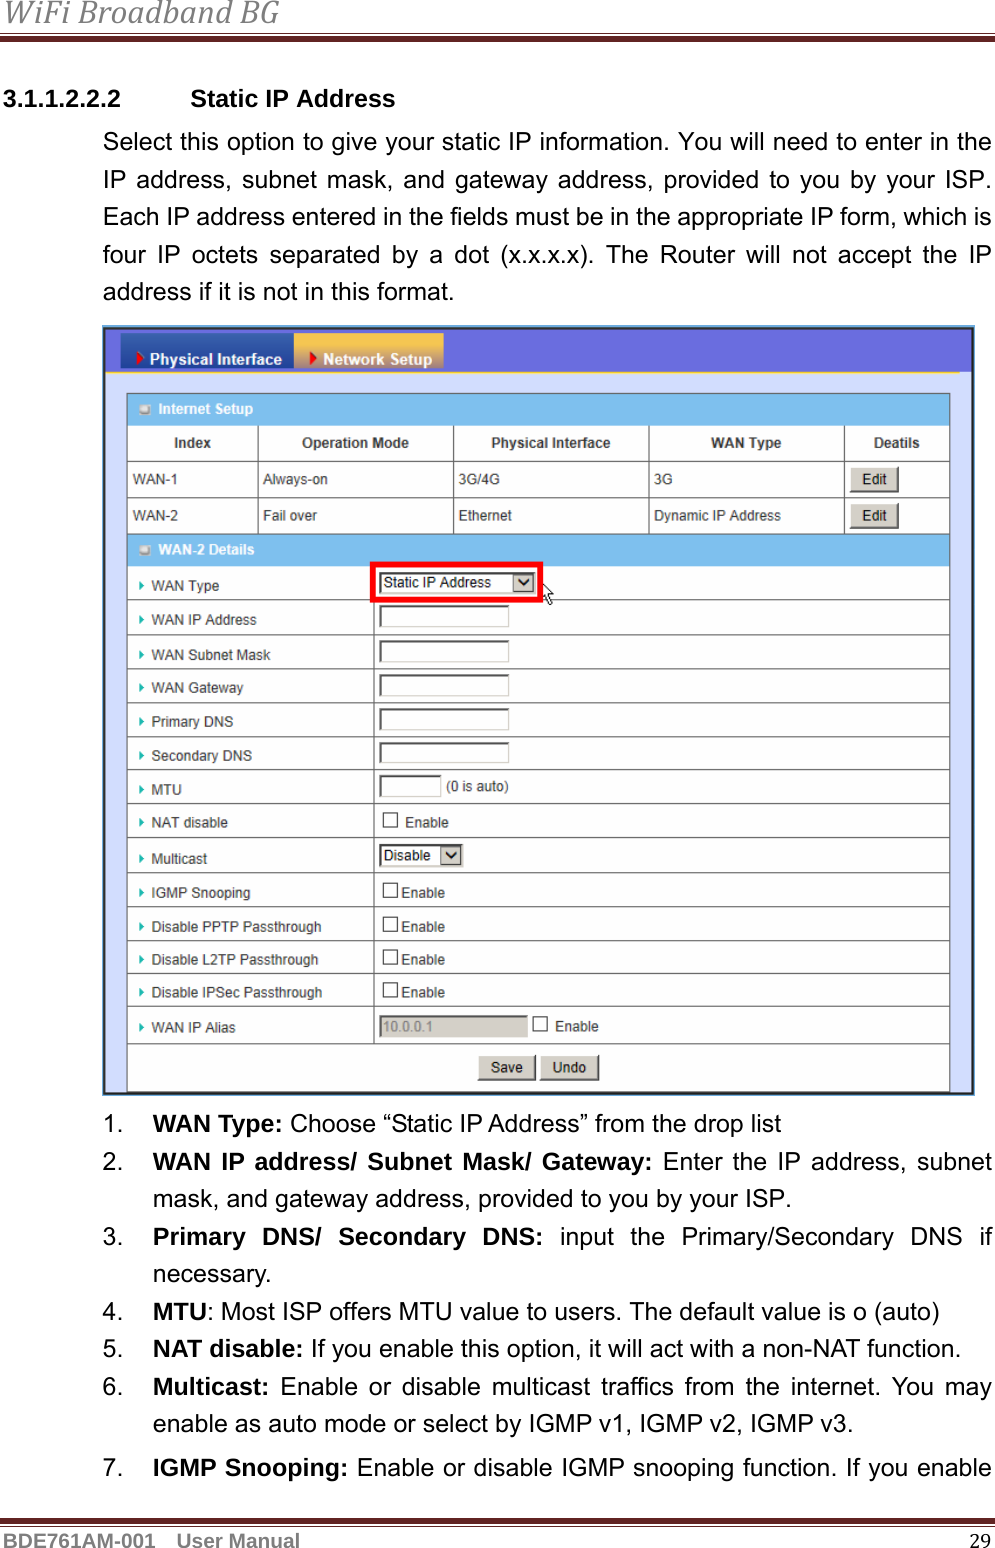
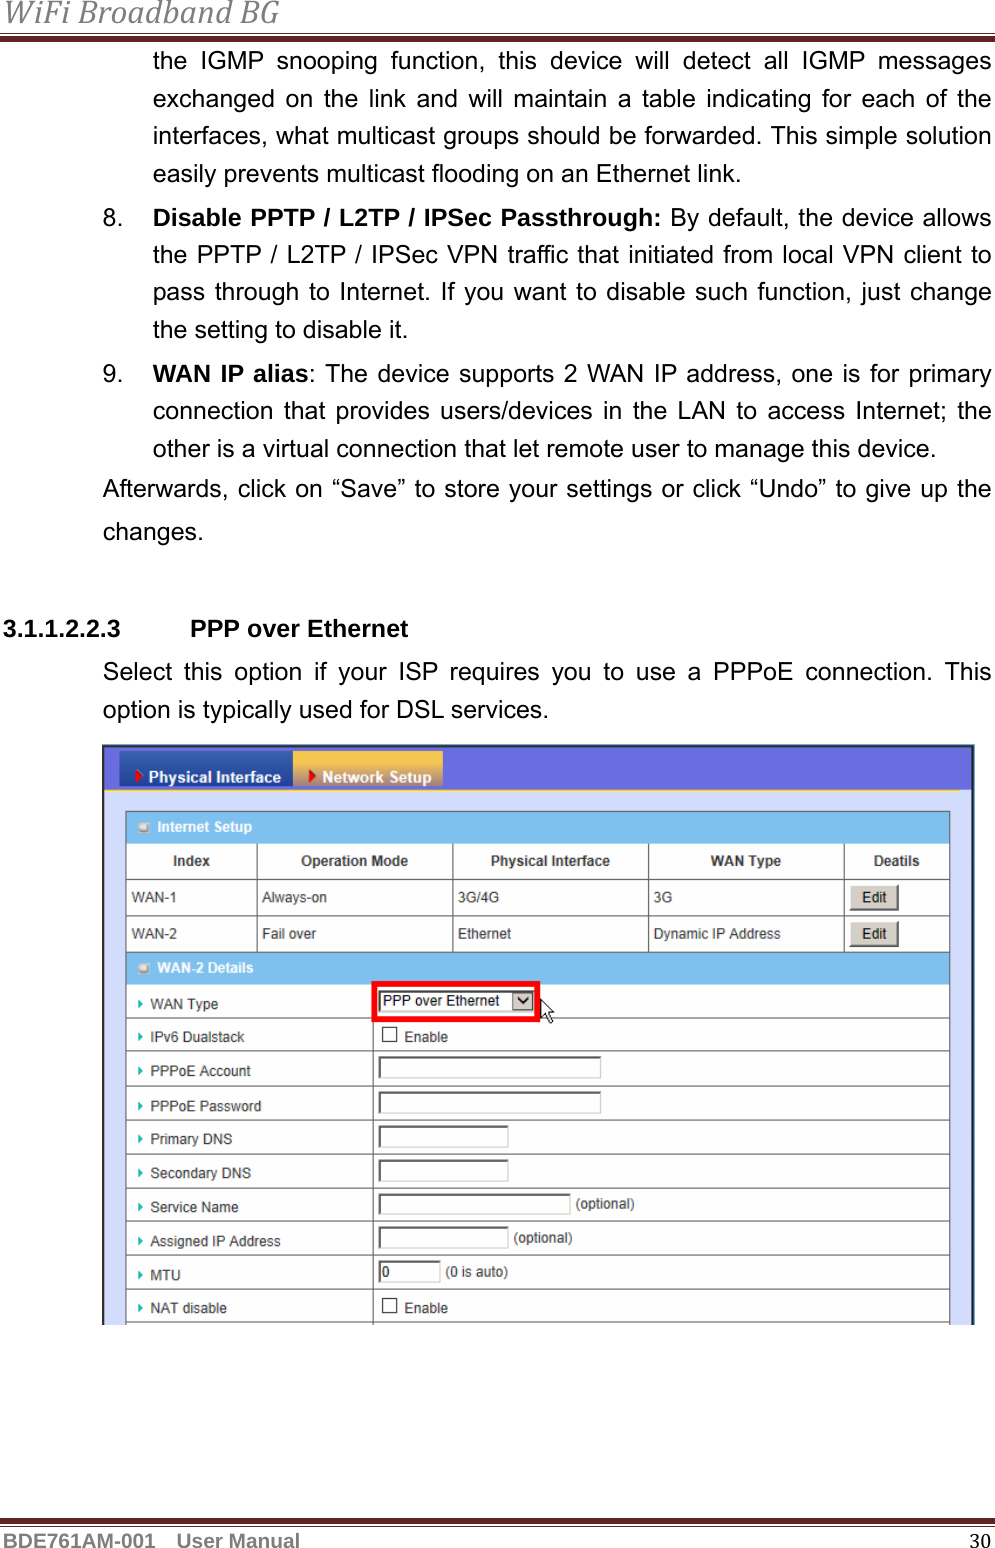
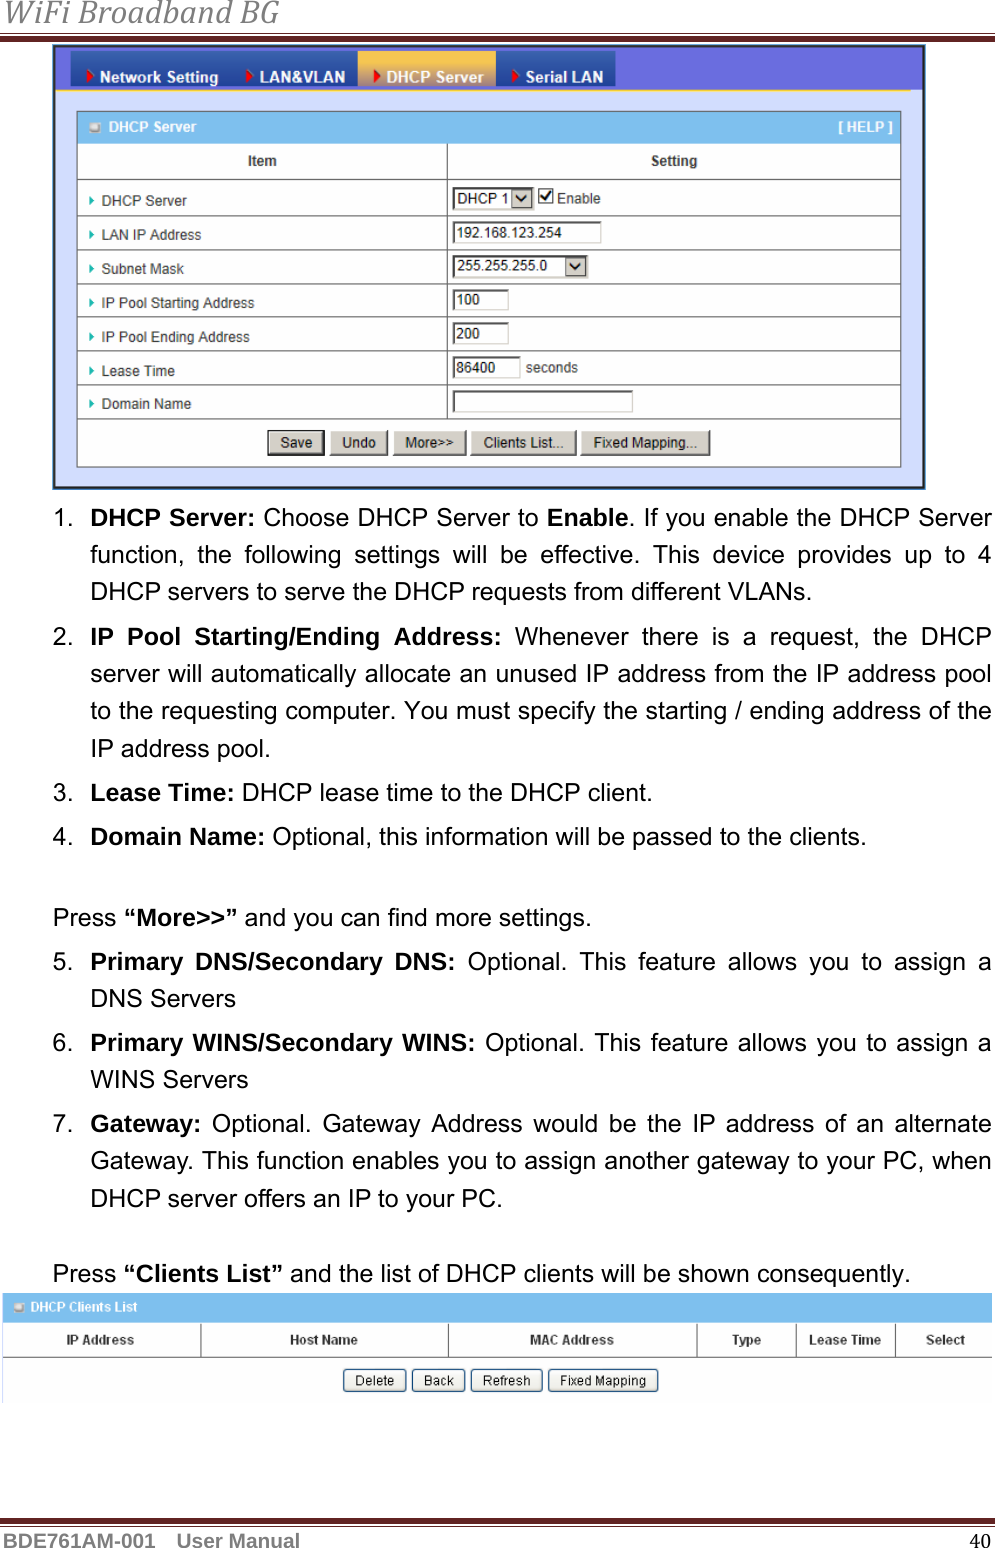
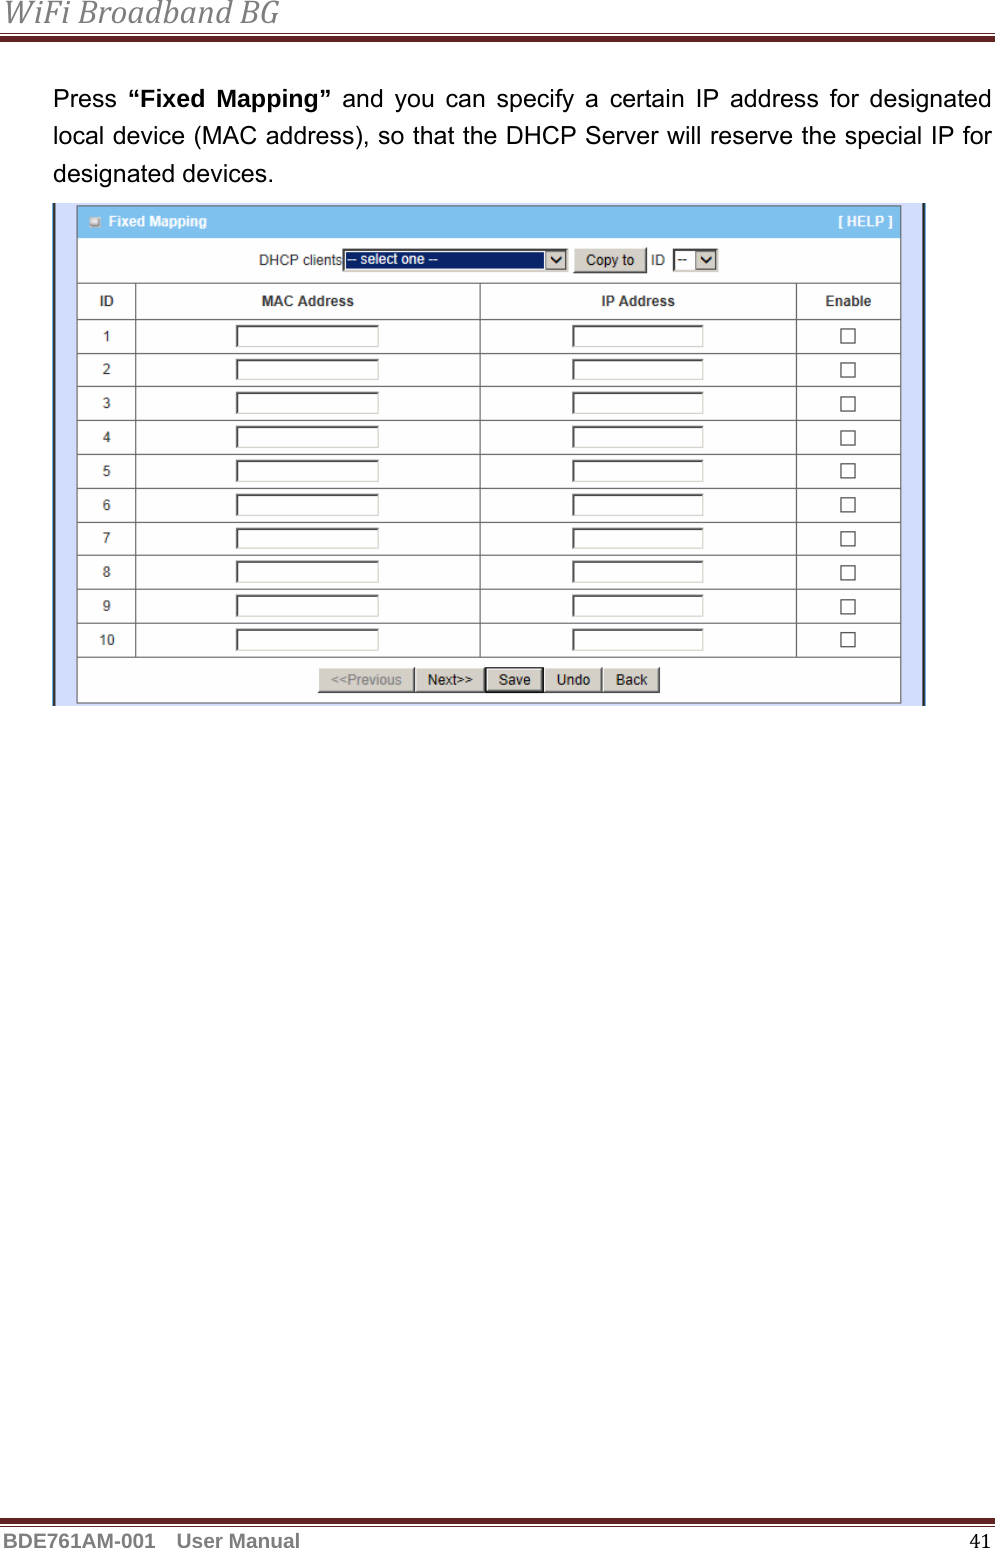
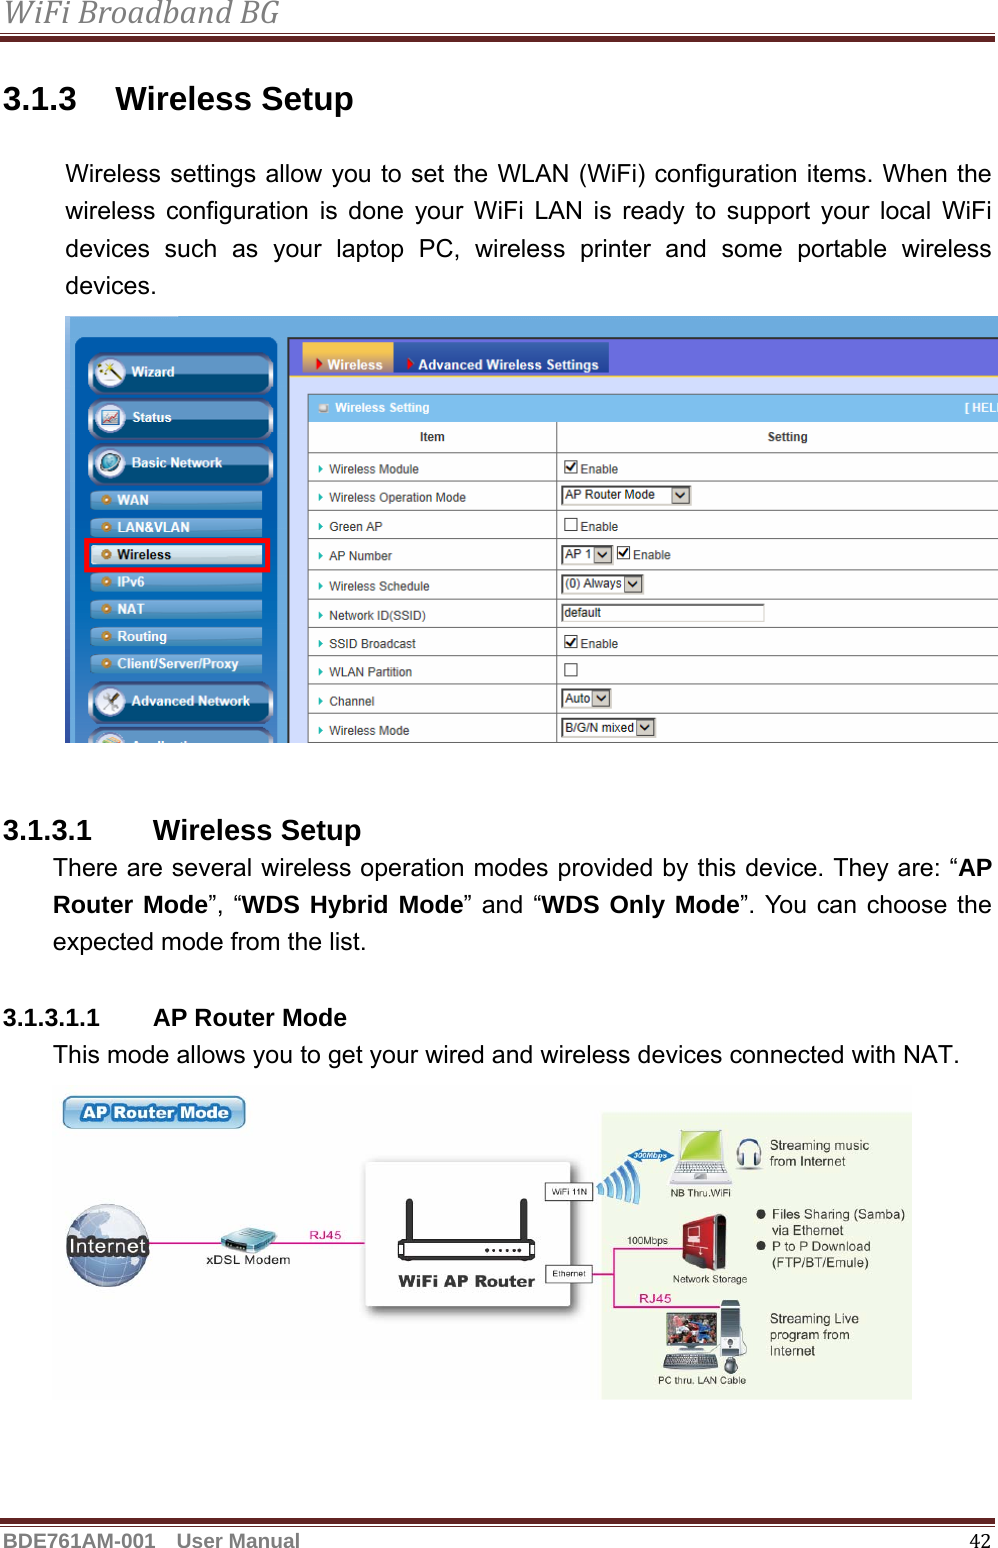
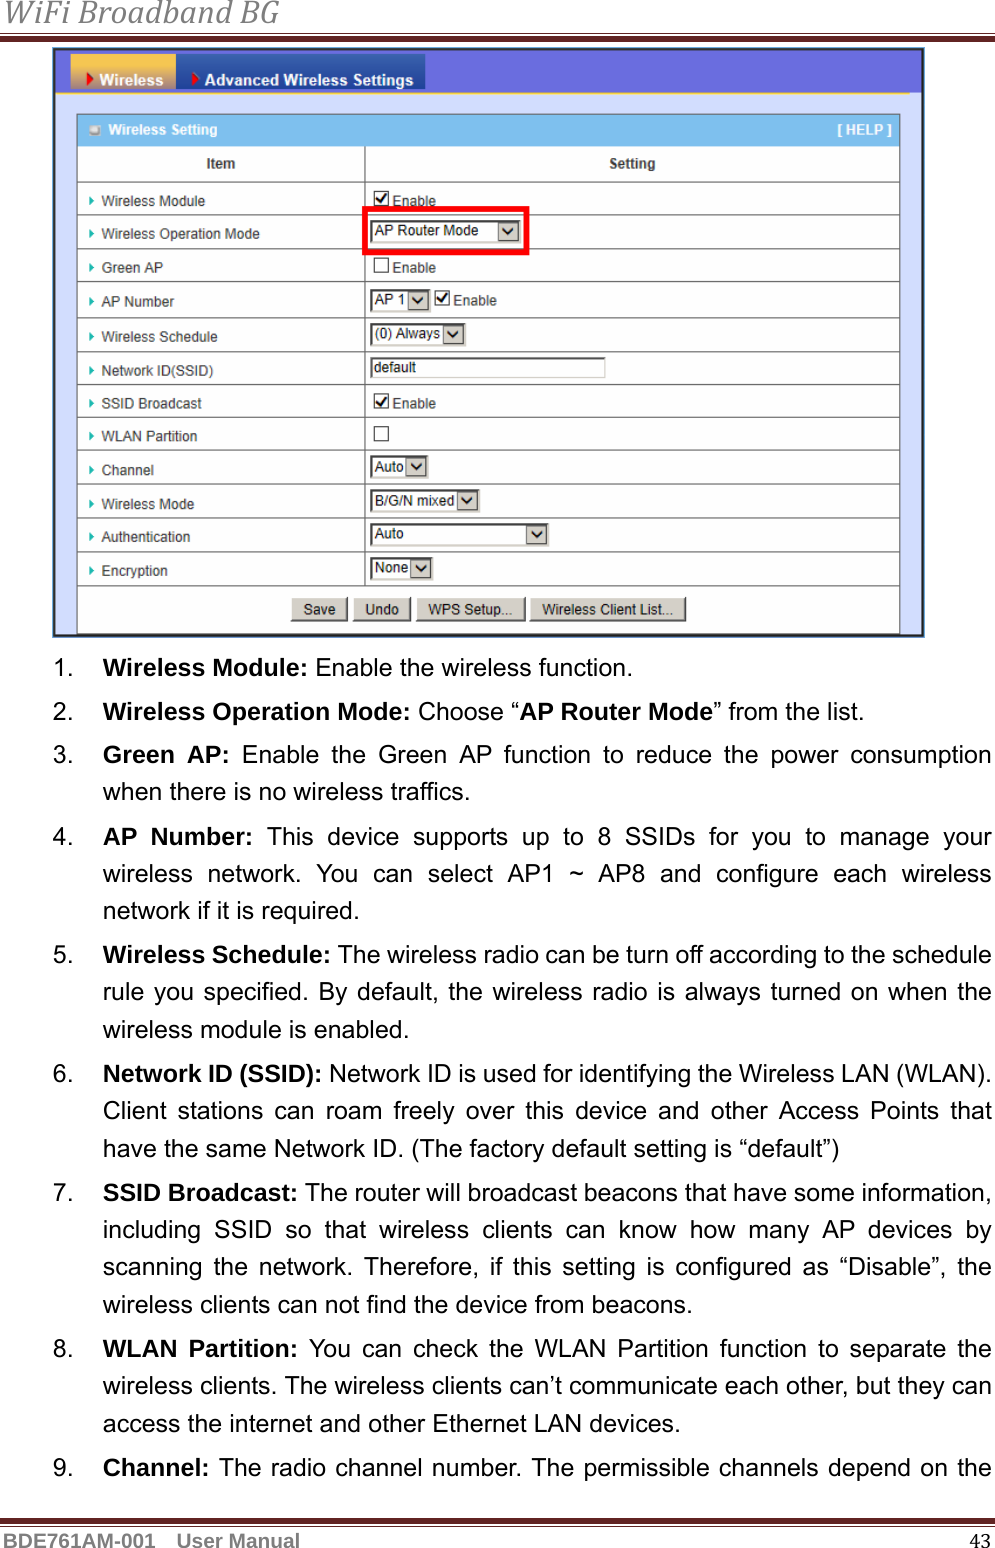
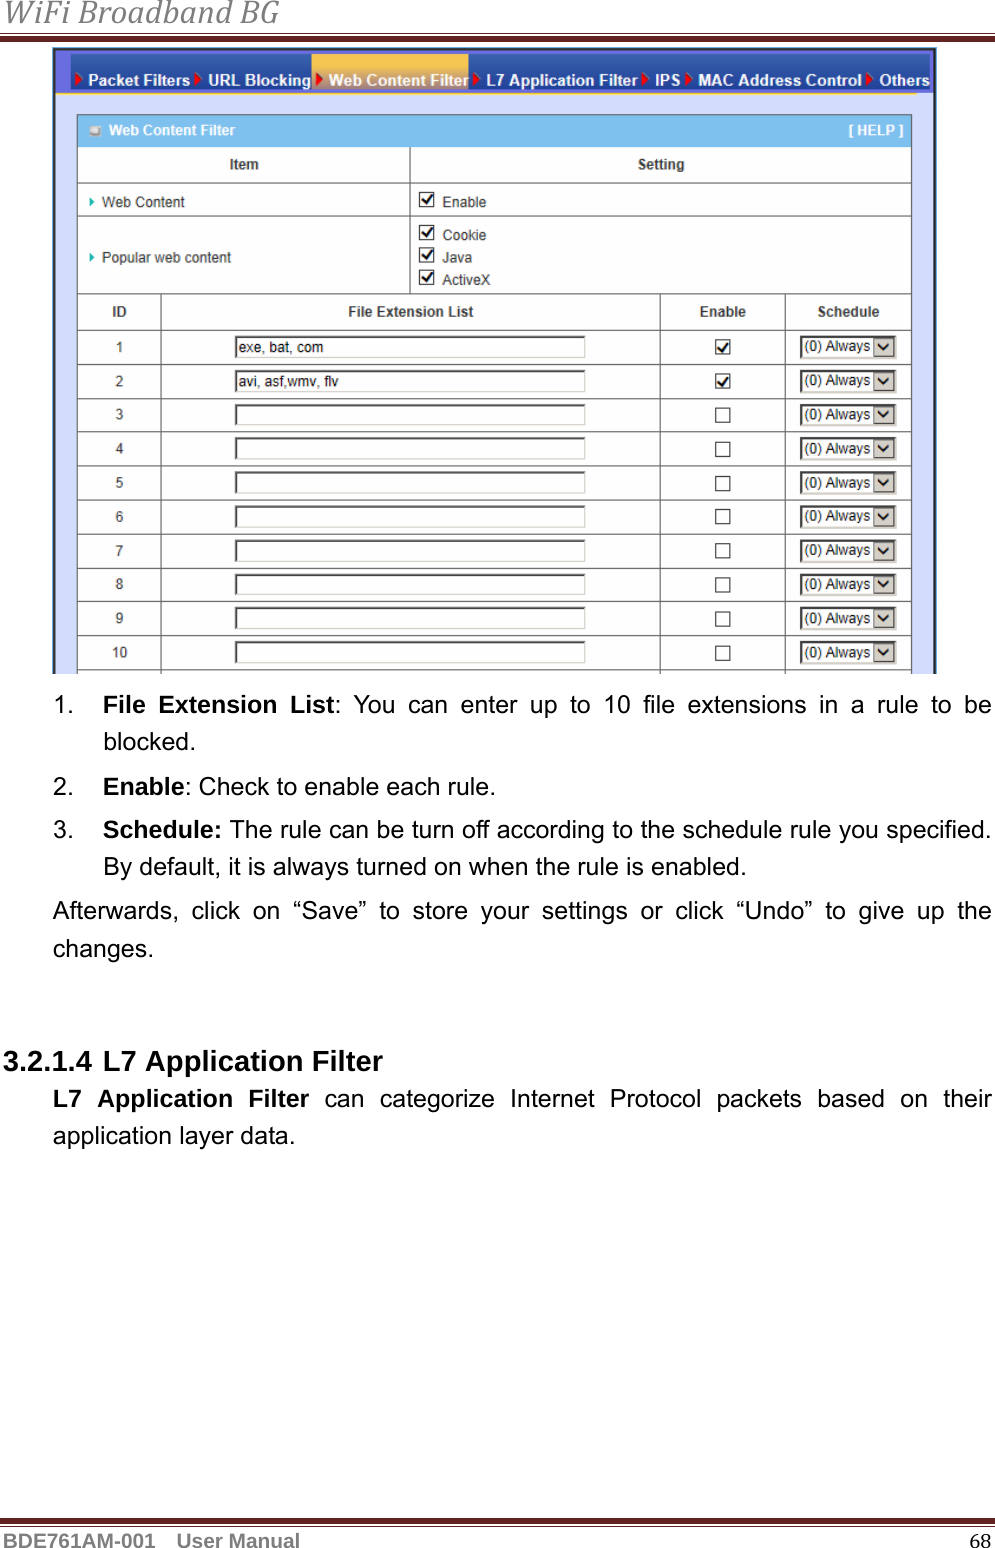
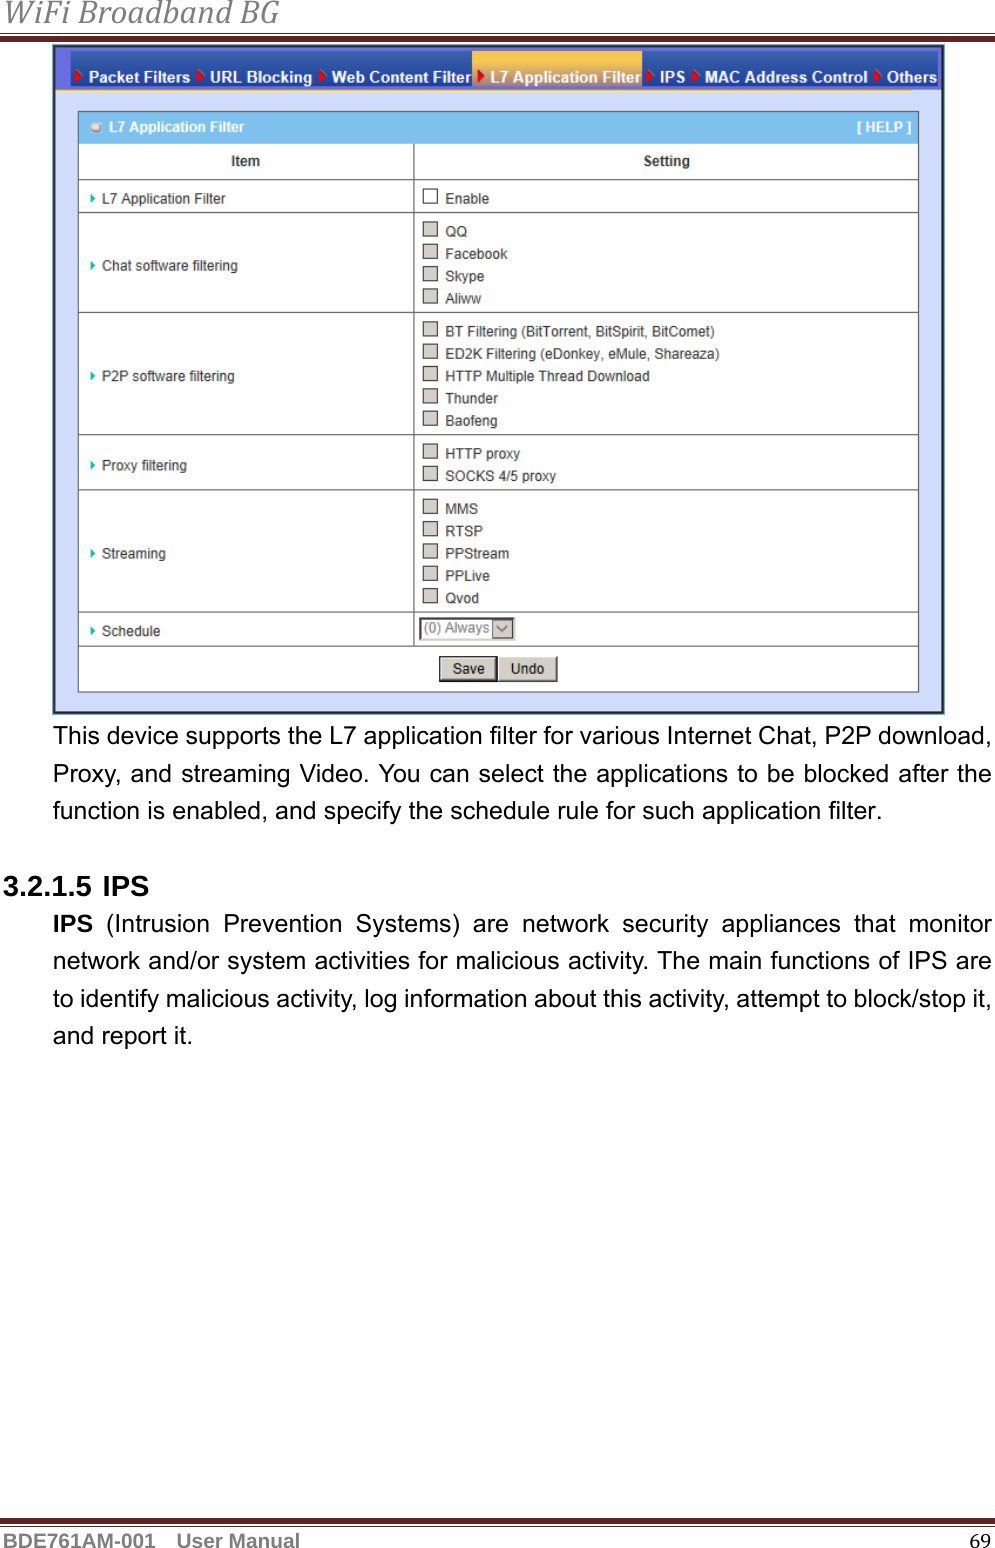
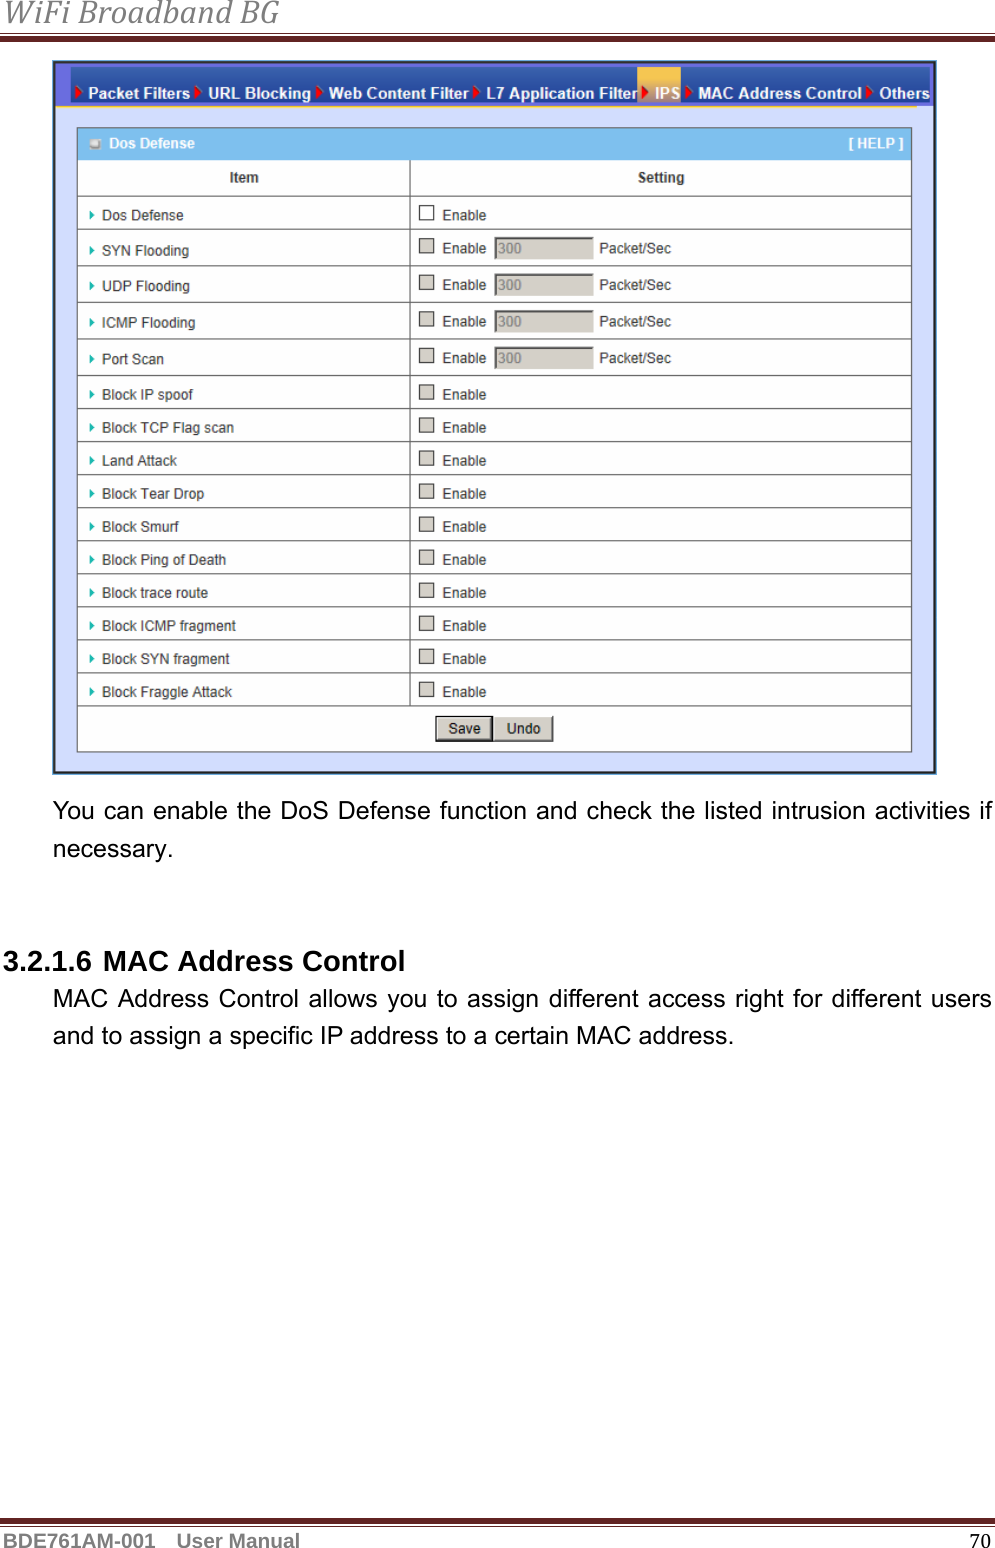
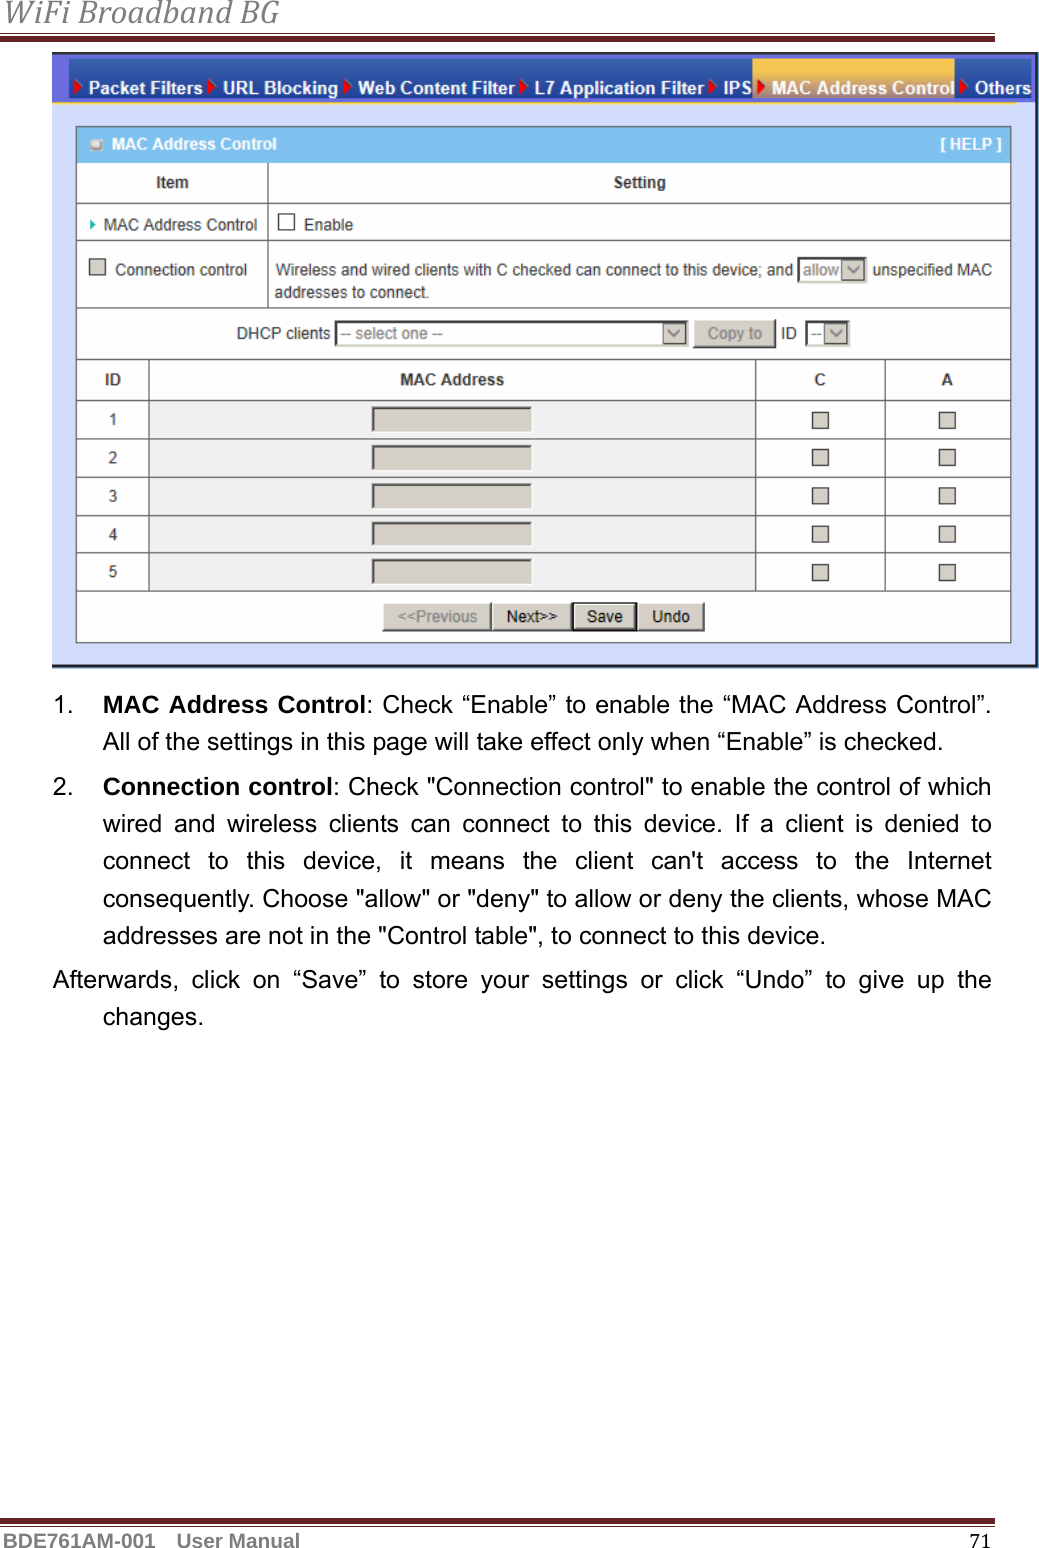
Advance Multimedia Internet Technology BDE761AM001 WiFi Broadband BG User Manual
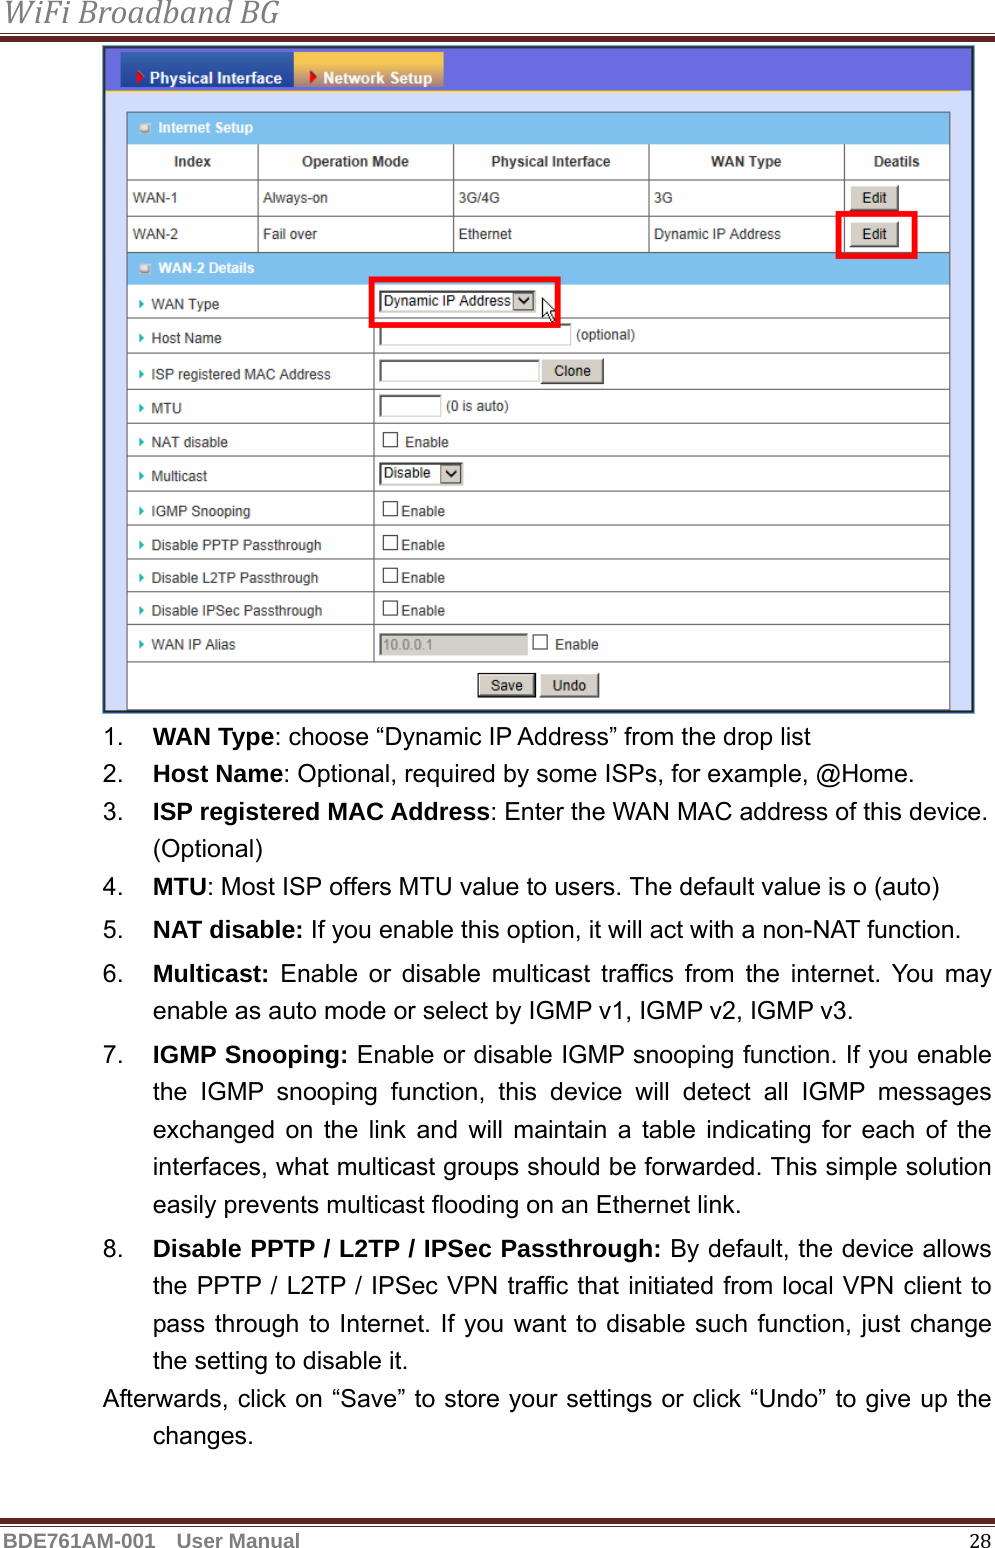
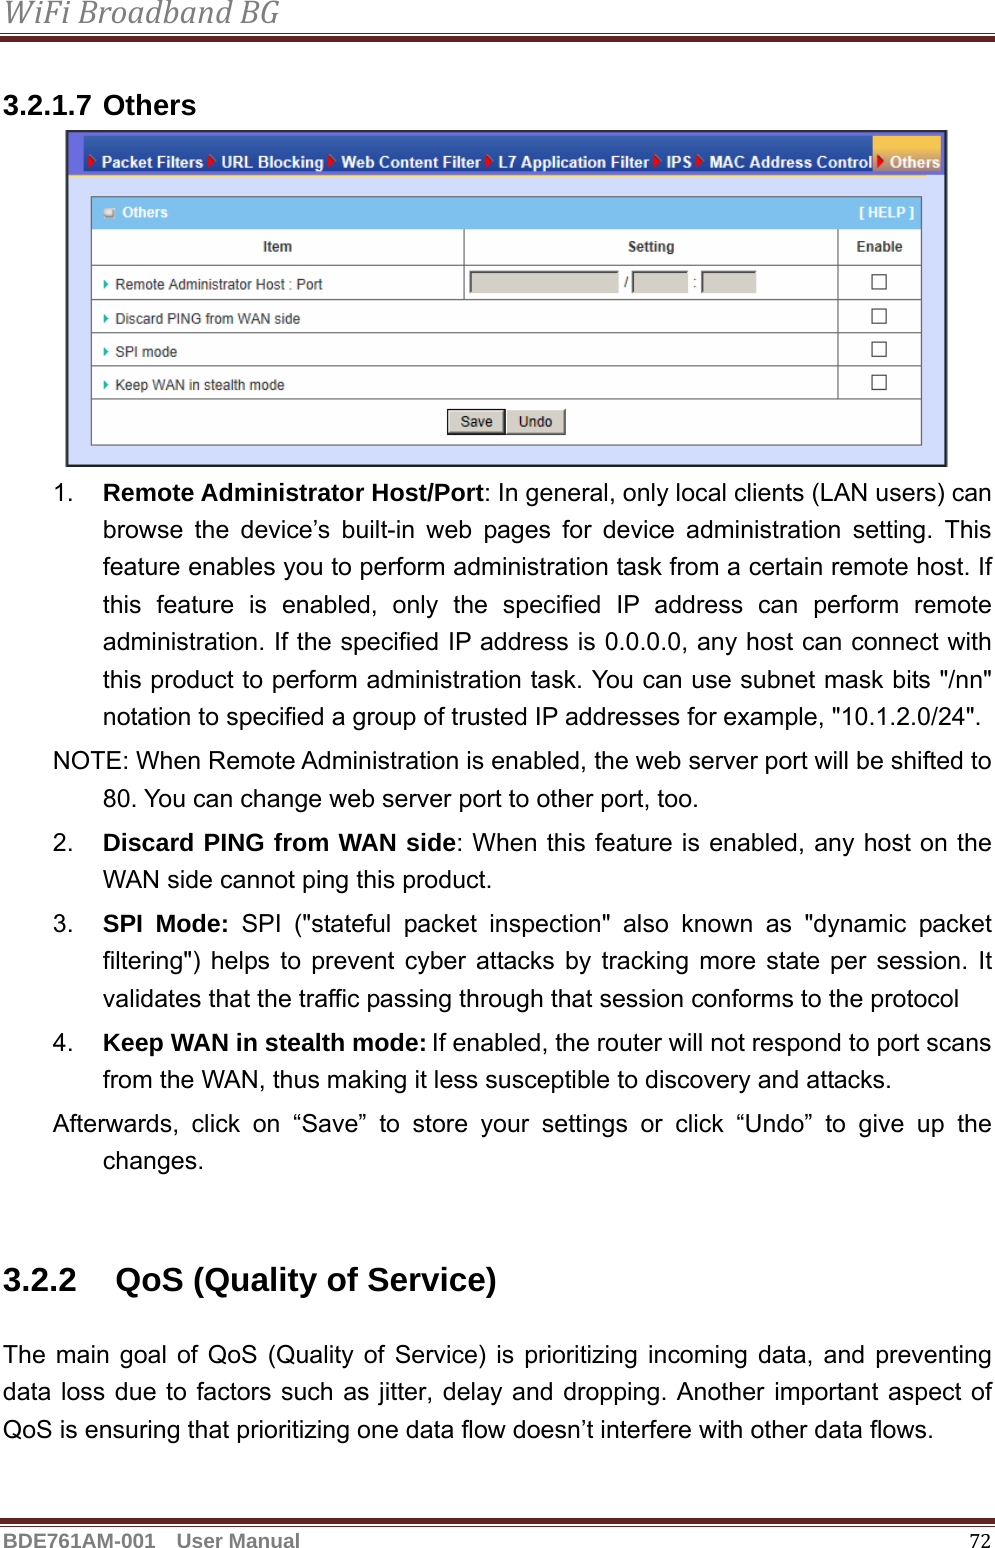
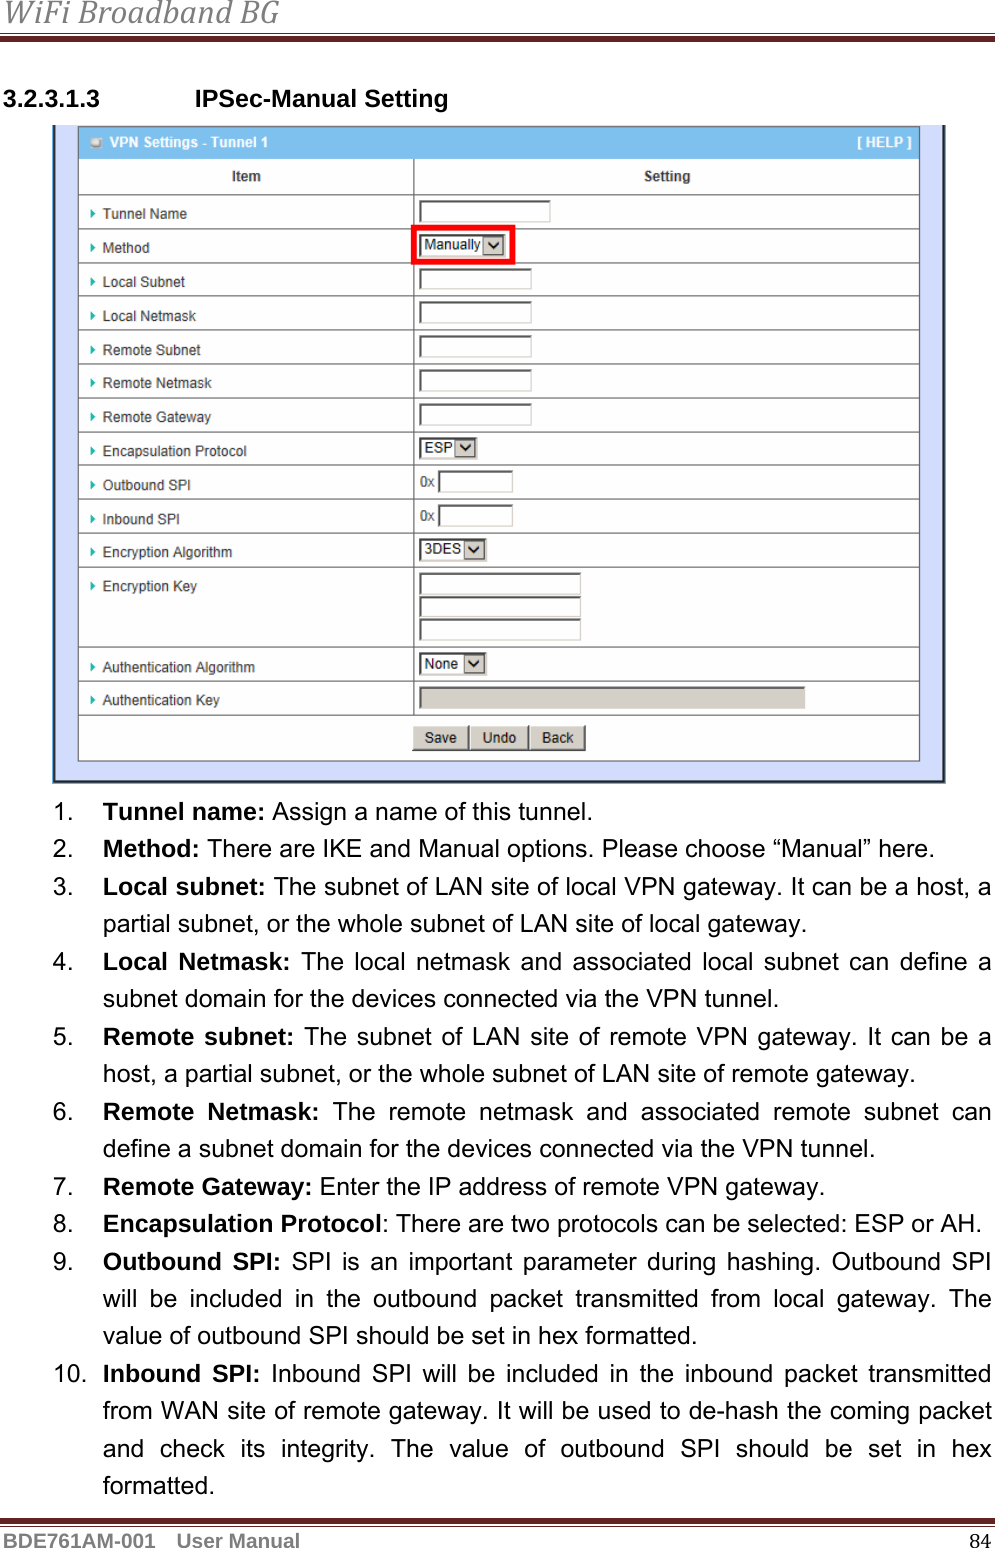
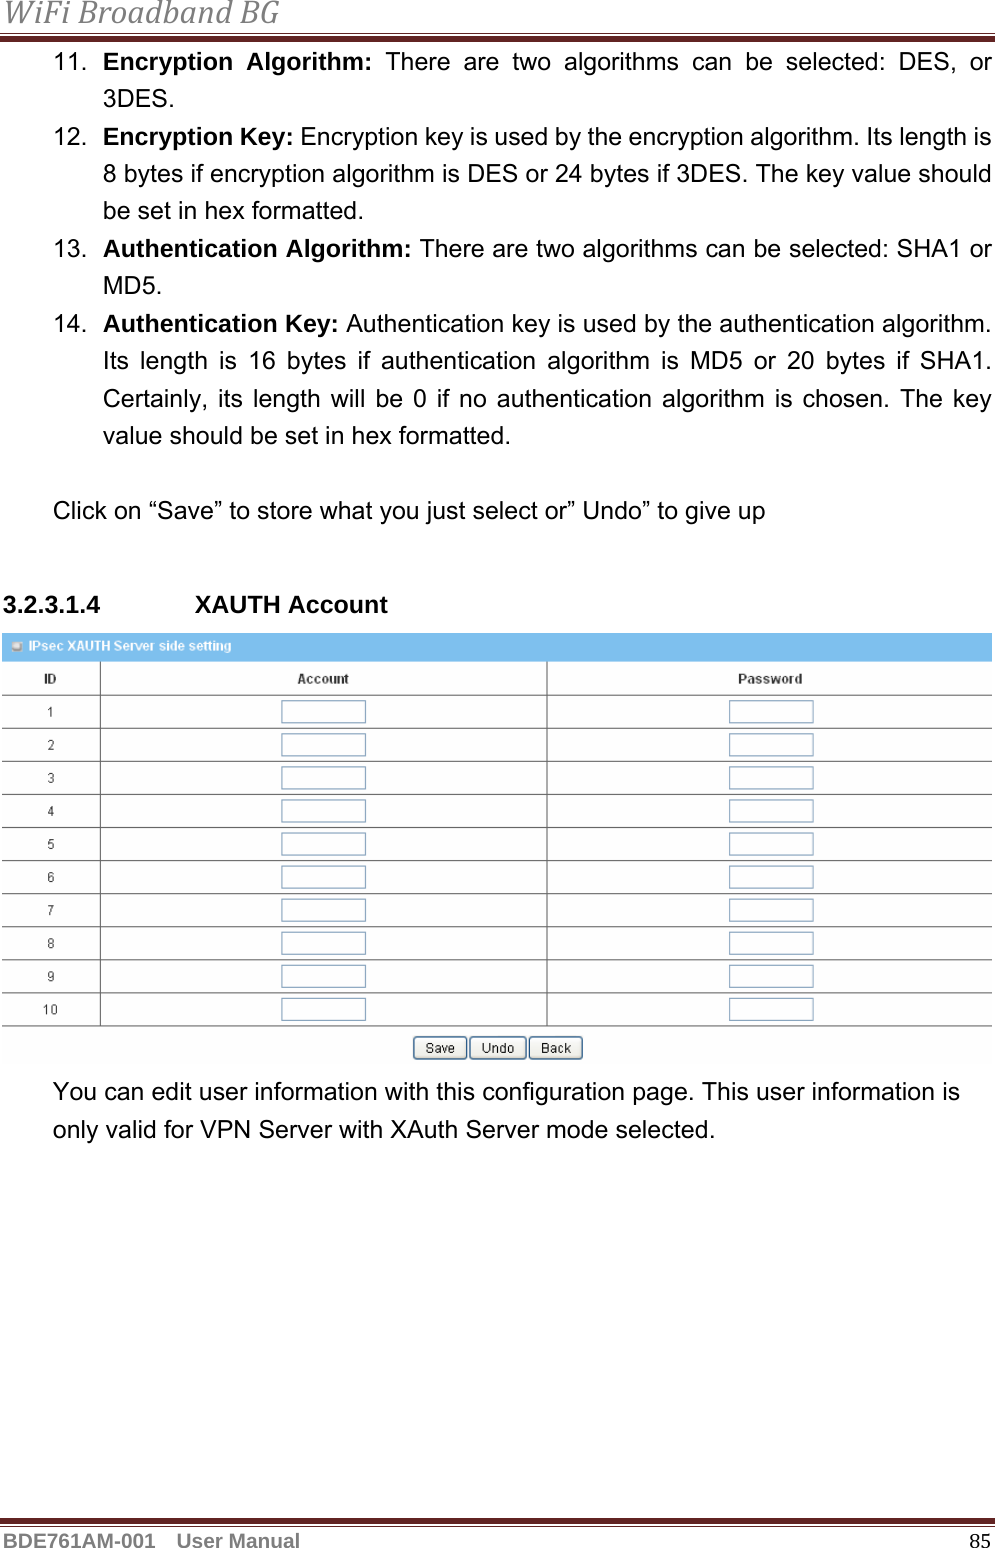
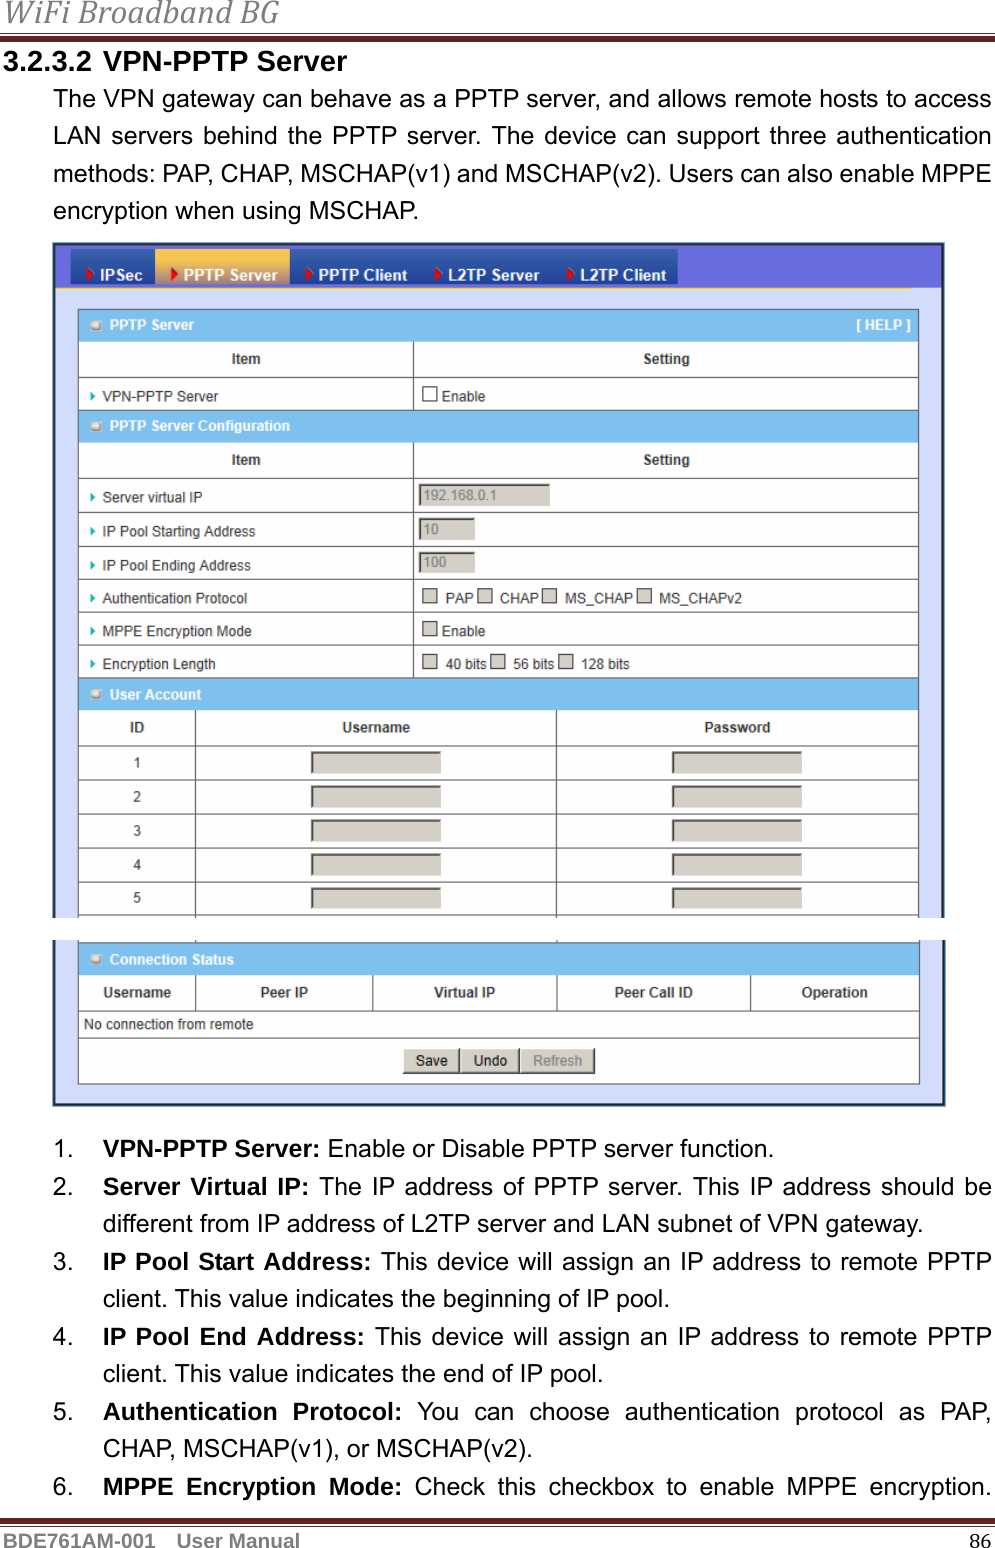
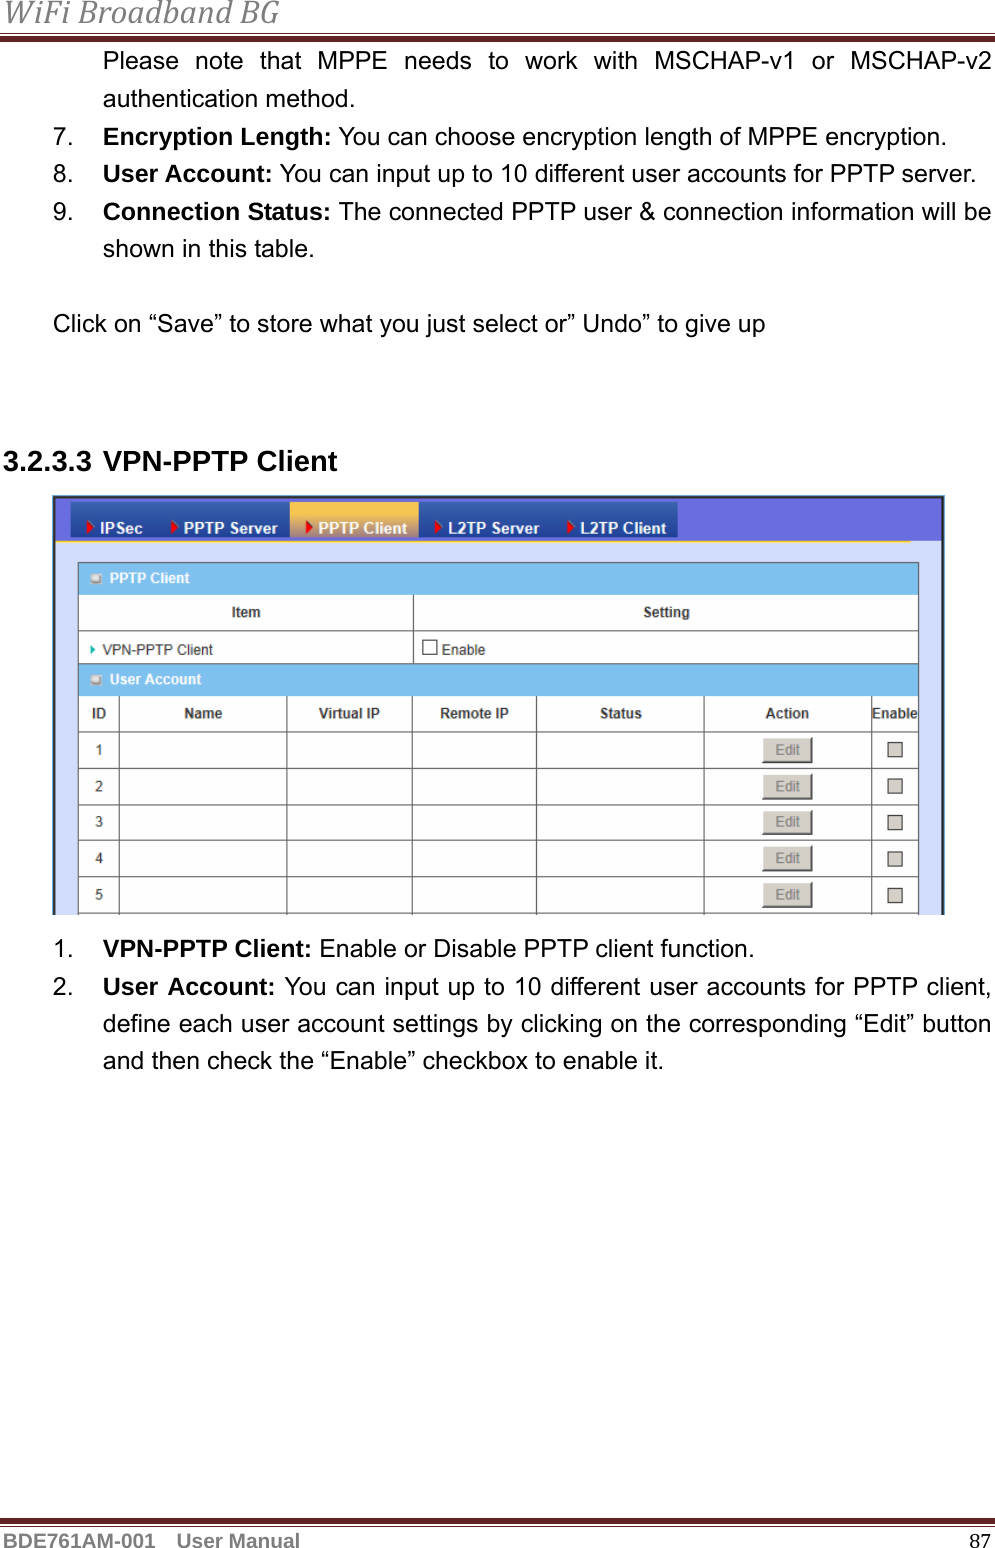
Advance Multimedia Internet Technology Inc. WiFi Broadband BG Users Manual
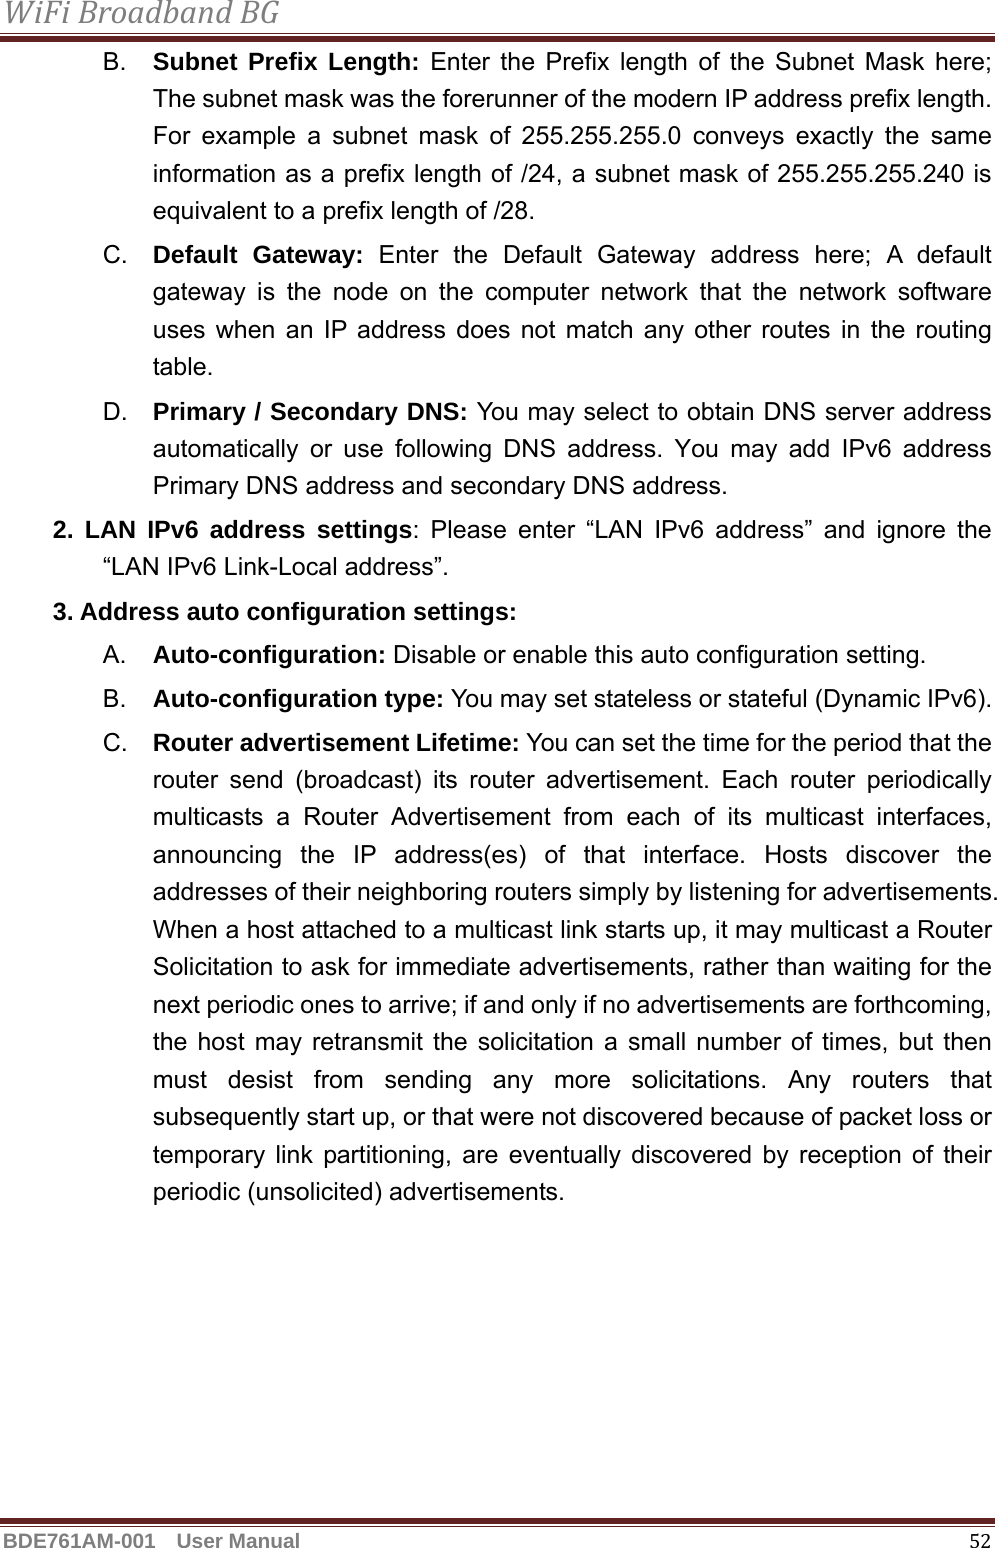
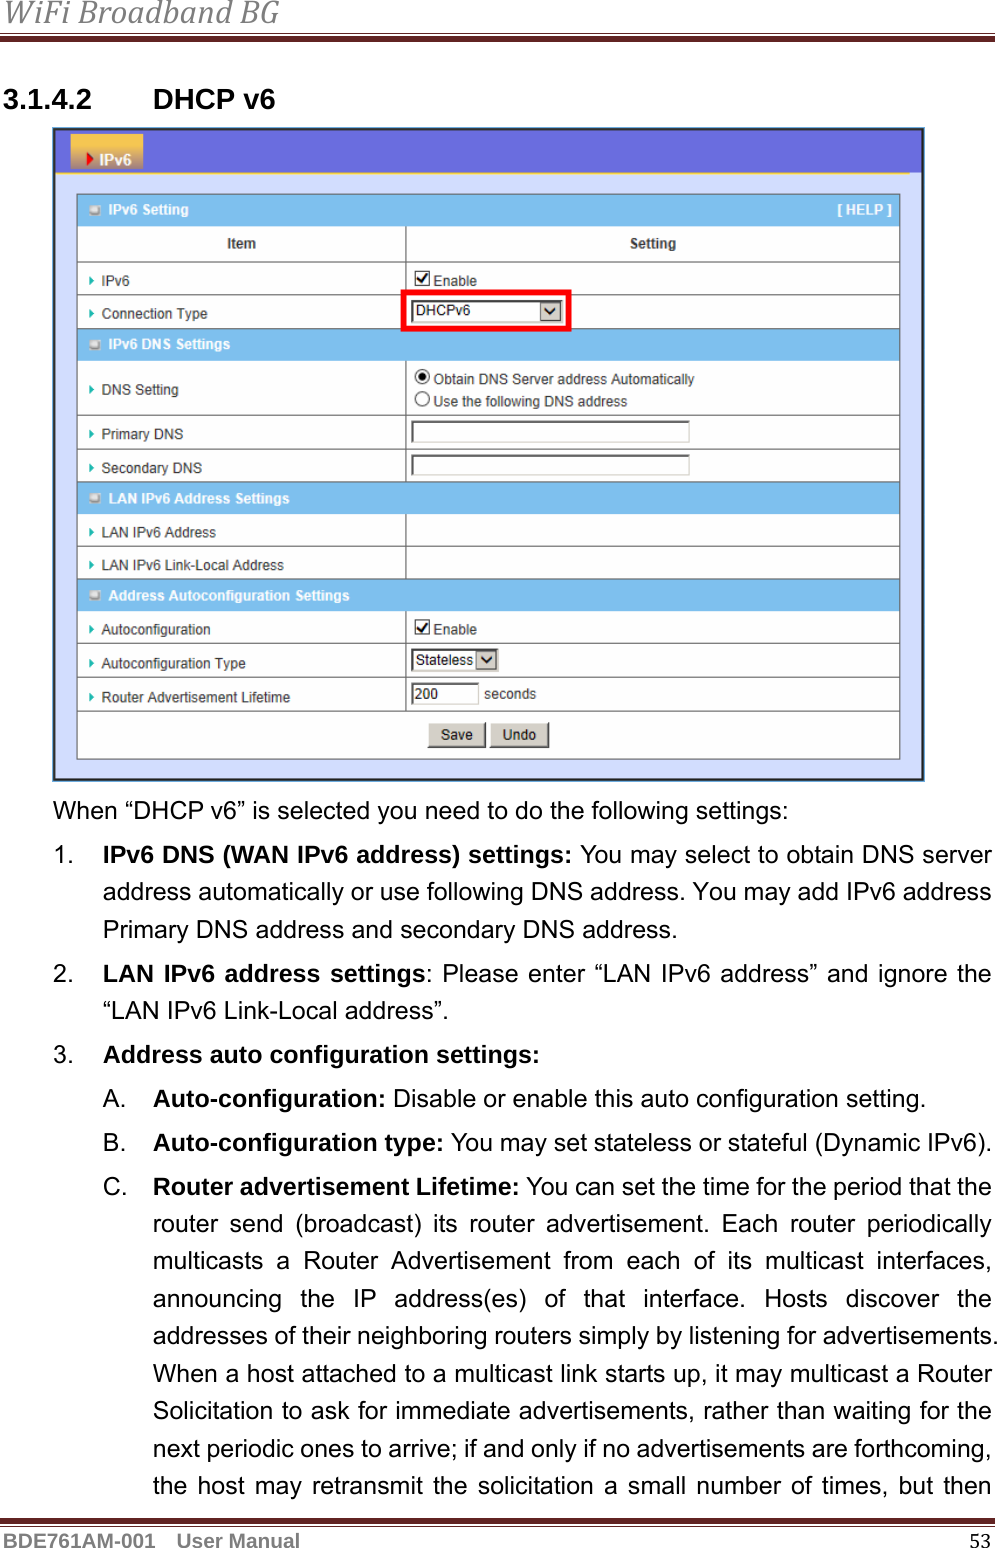
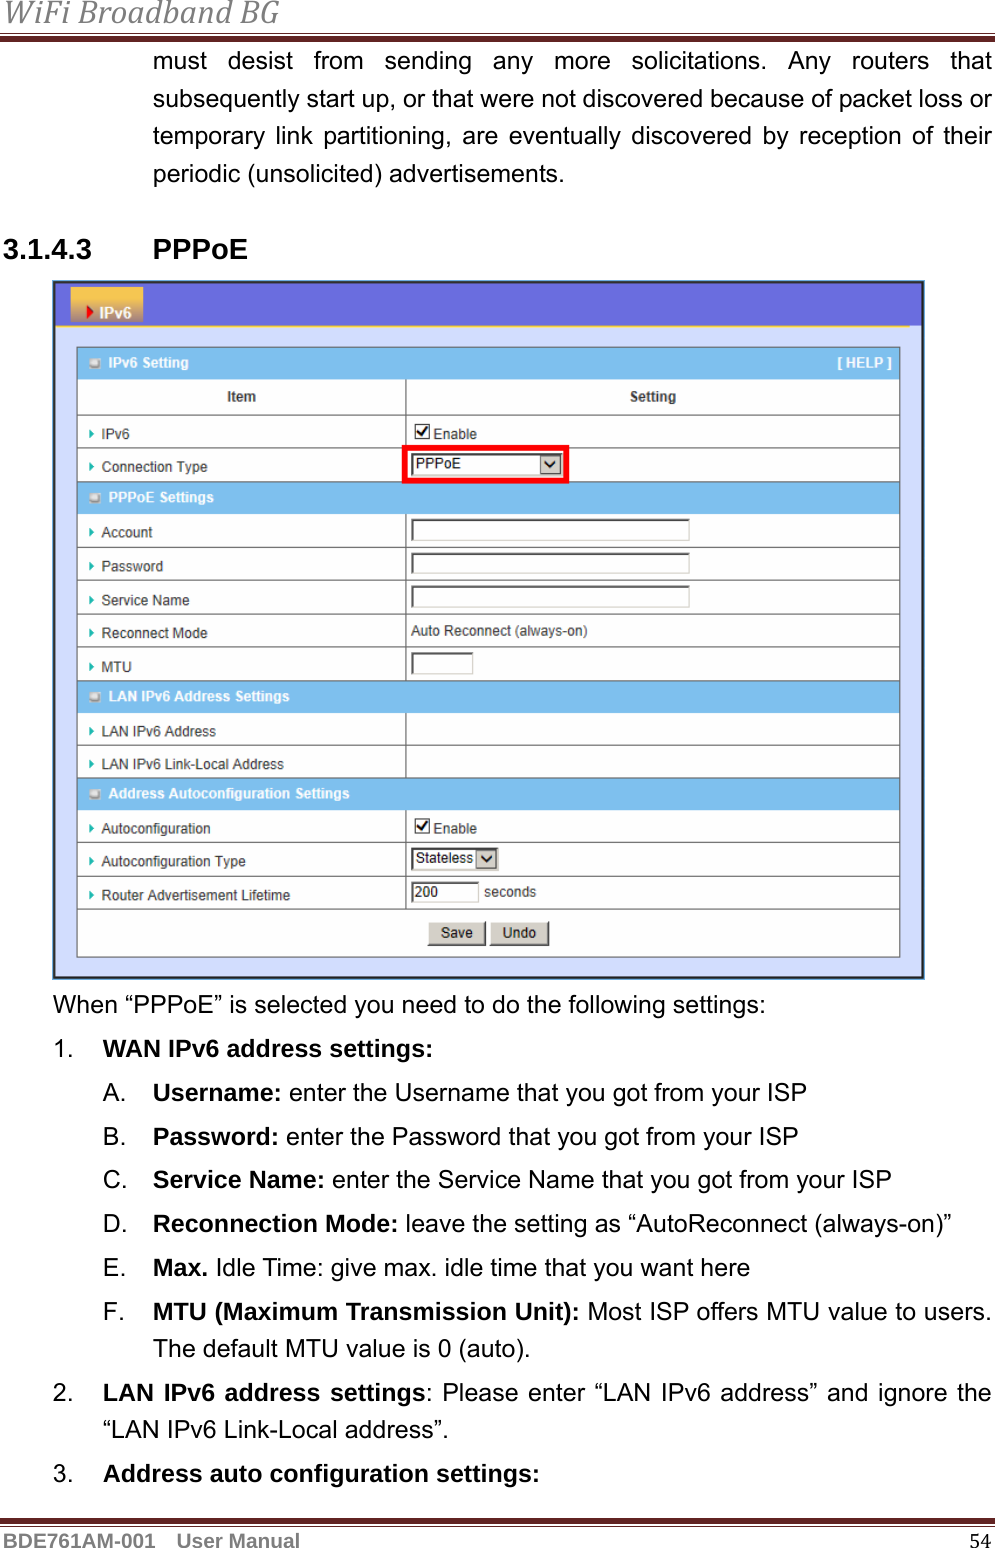
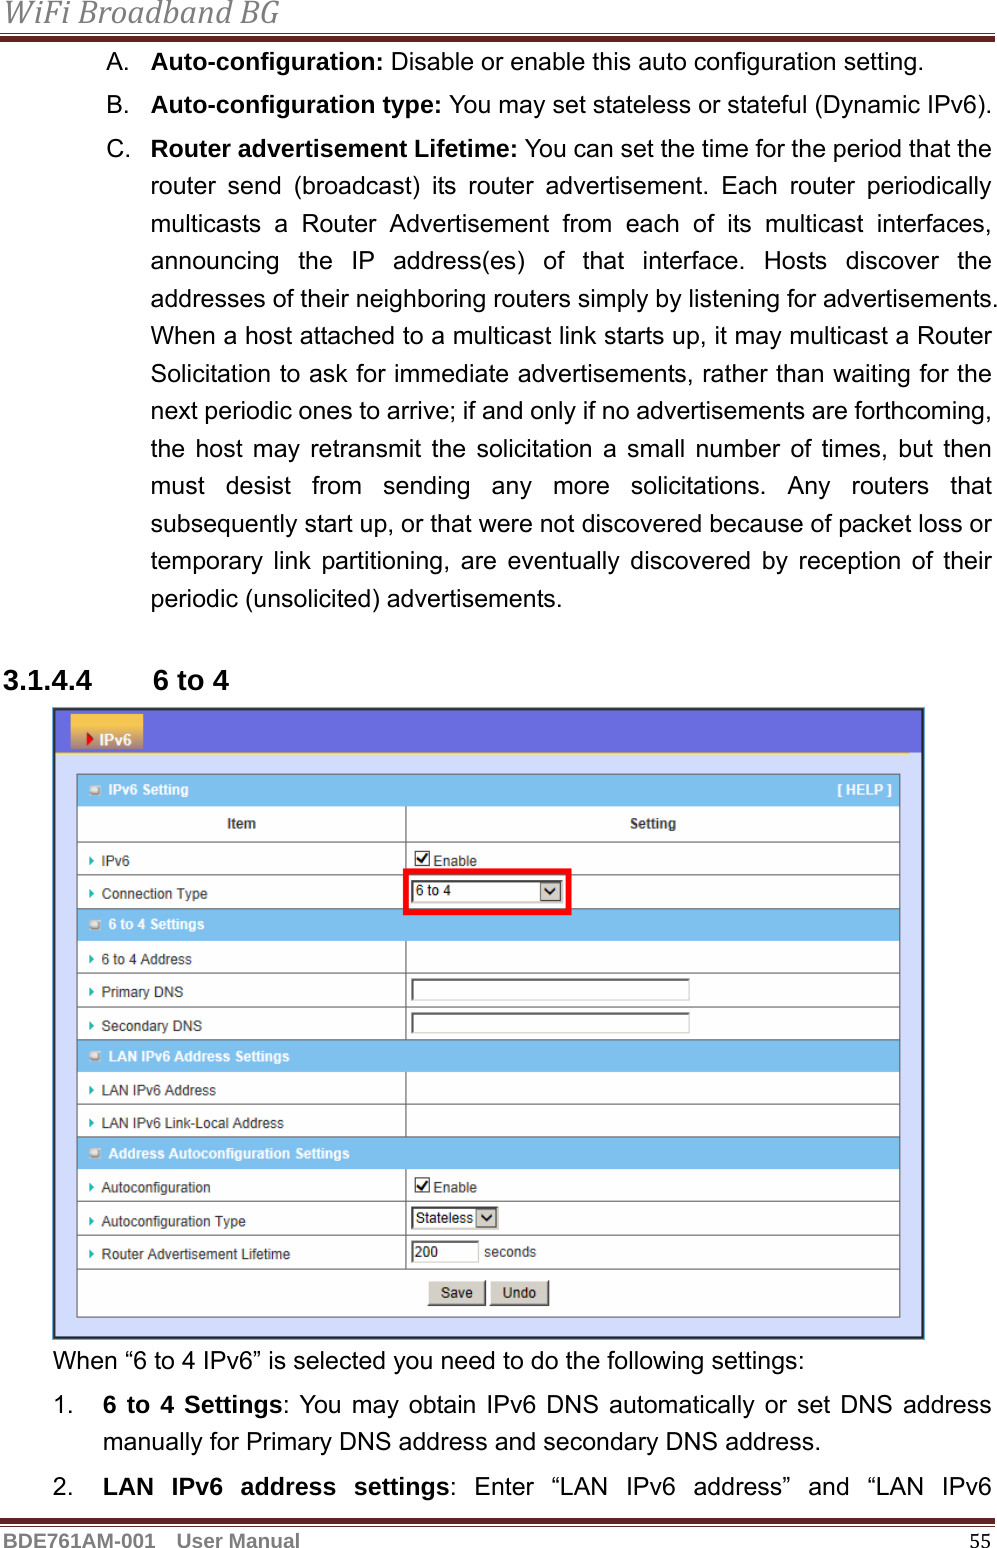
UserManual.wiki
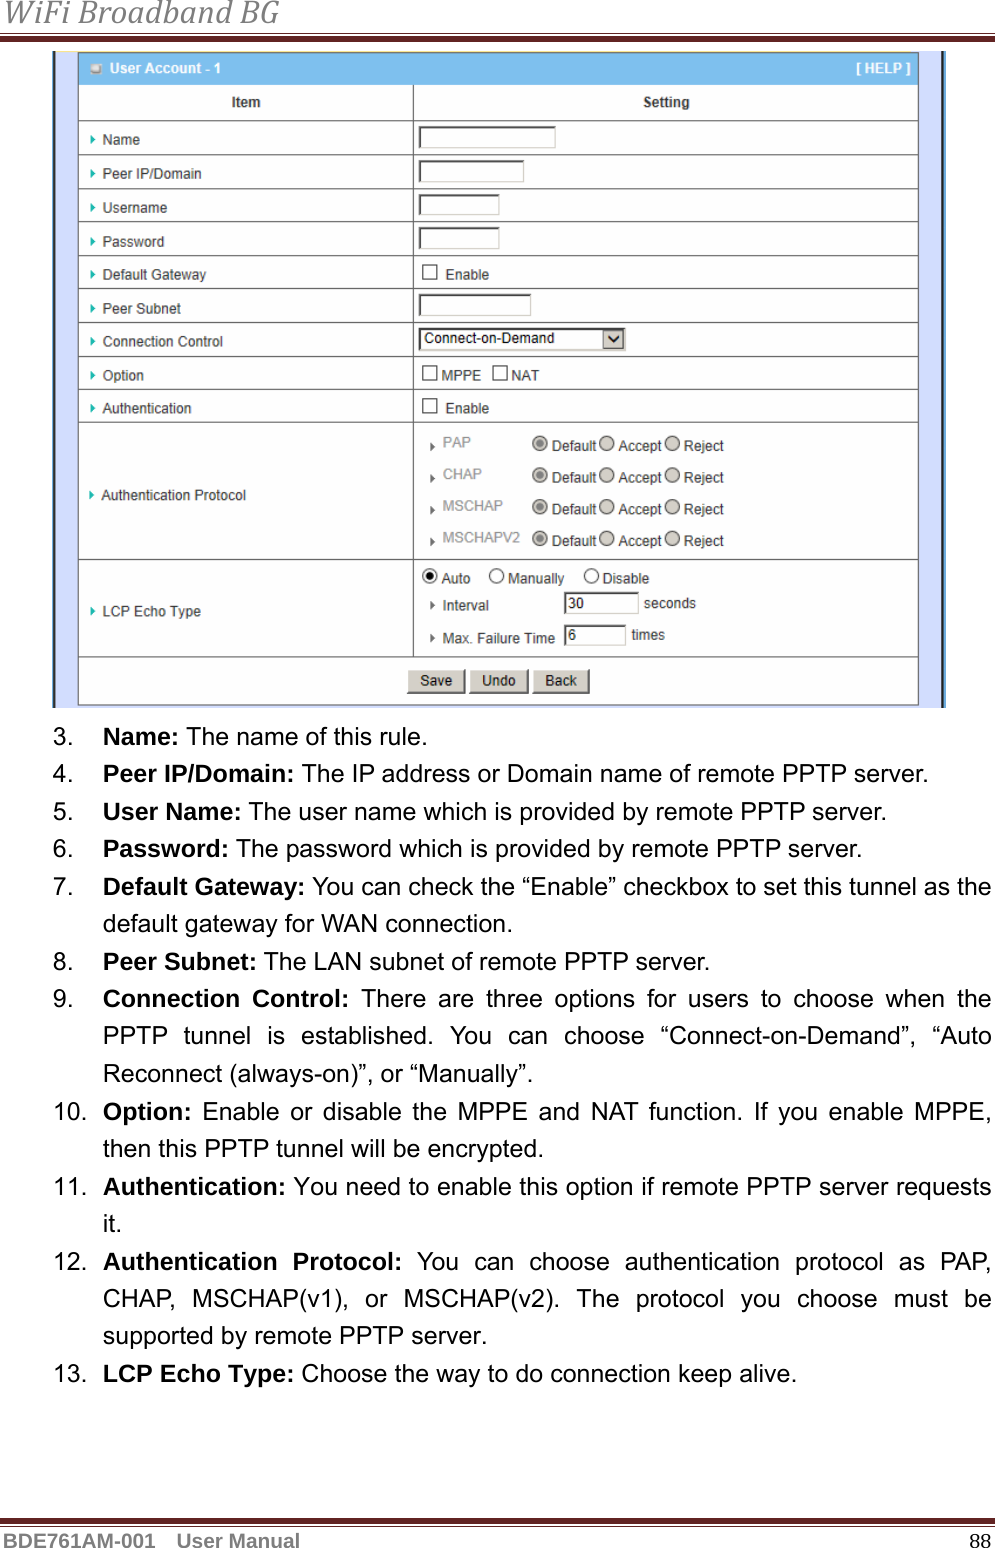
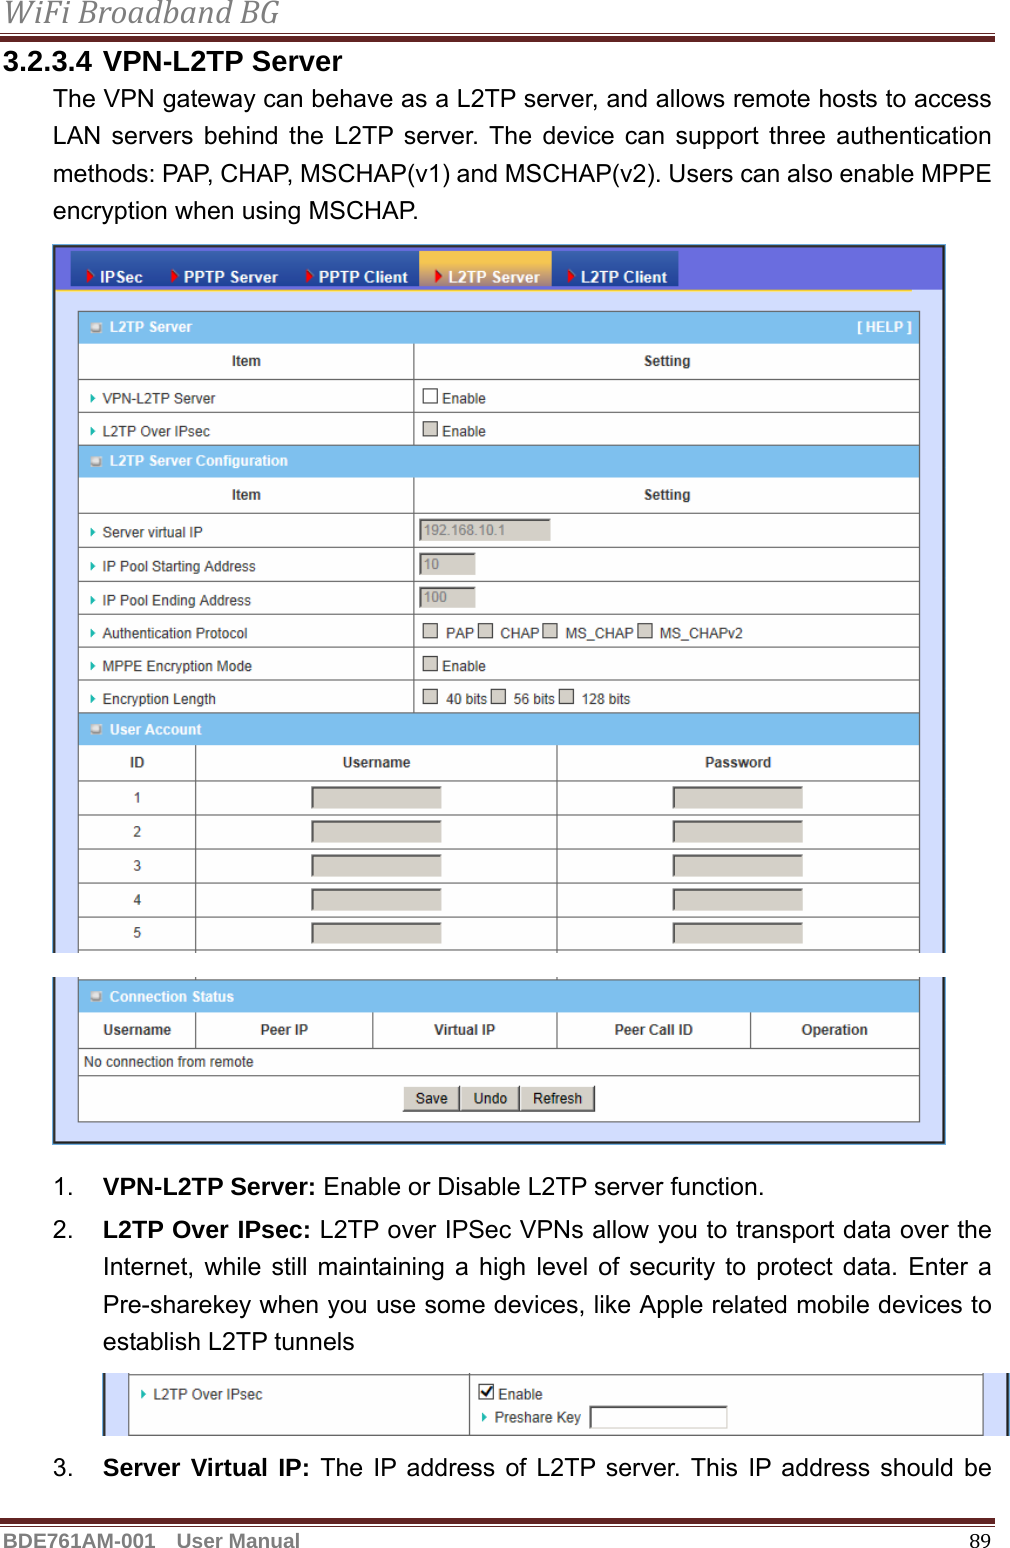
>
Advance Multimedia Internet Technology
>
BDE761AM001 User Manual
Users Manual
Navigation menu
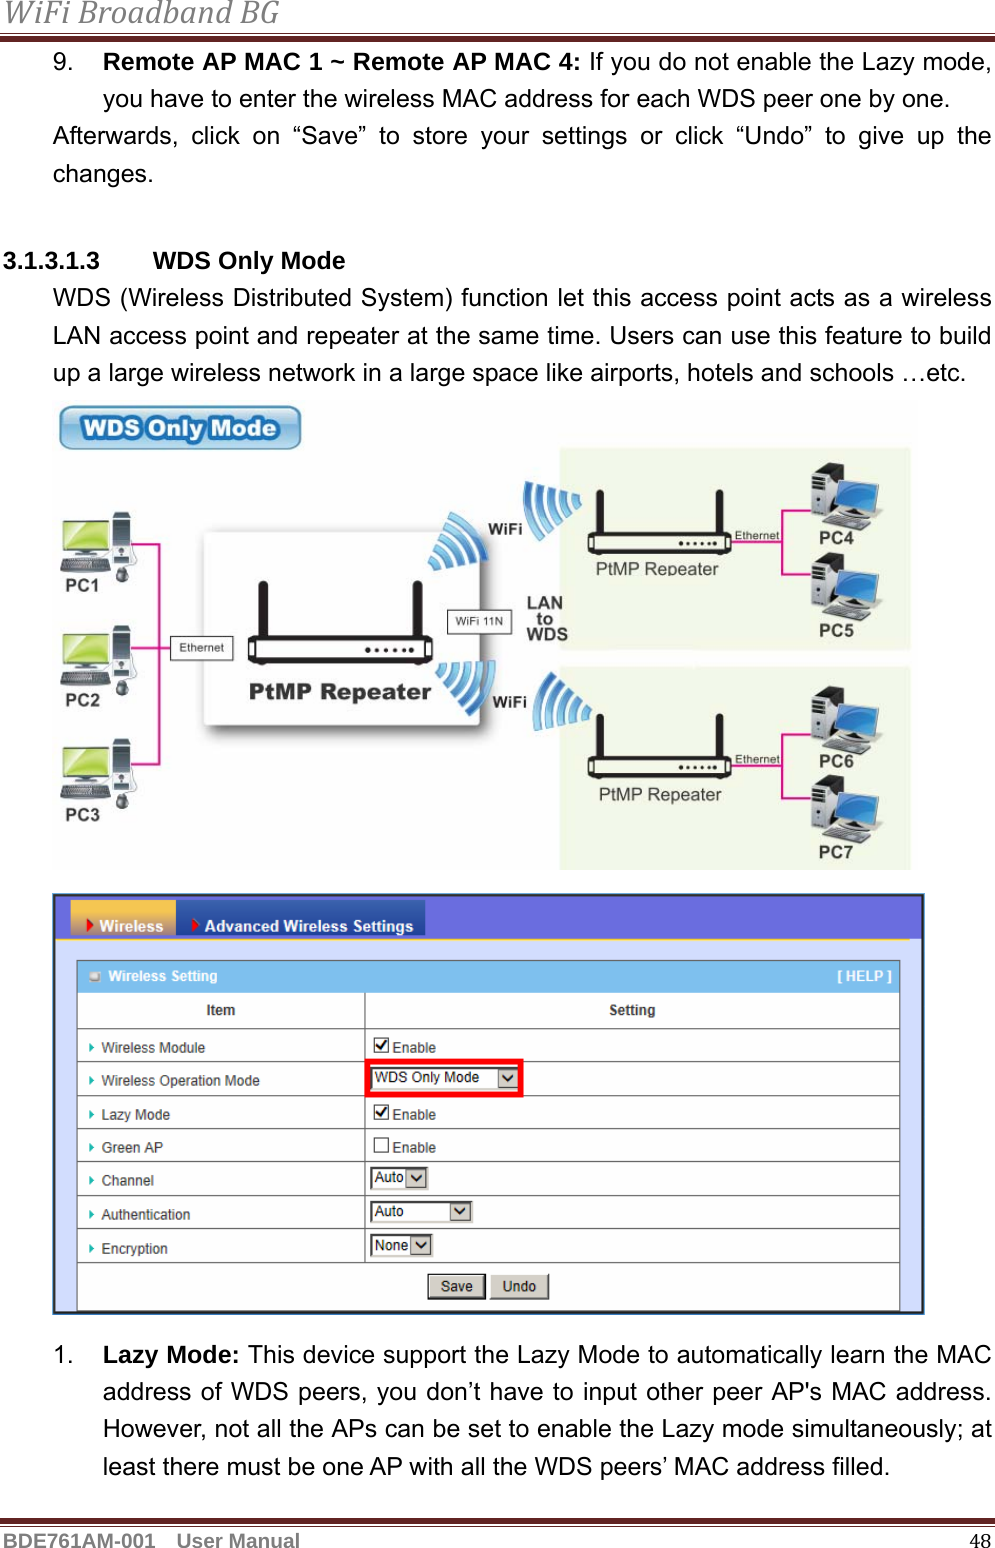
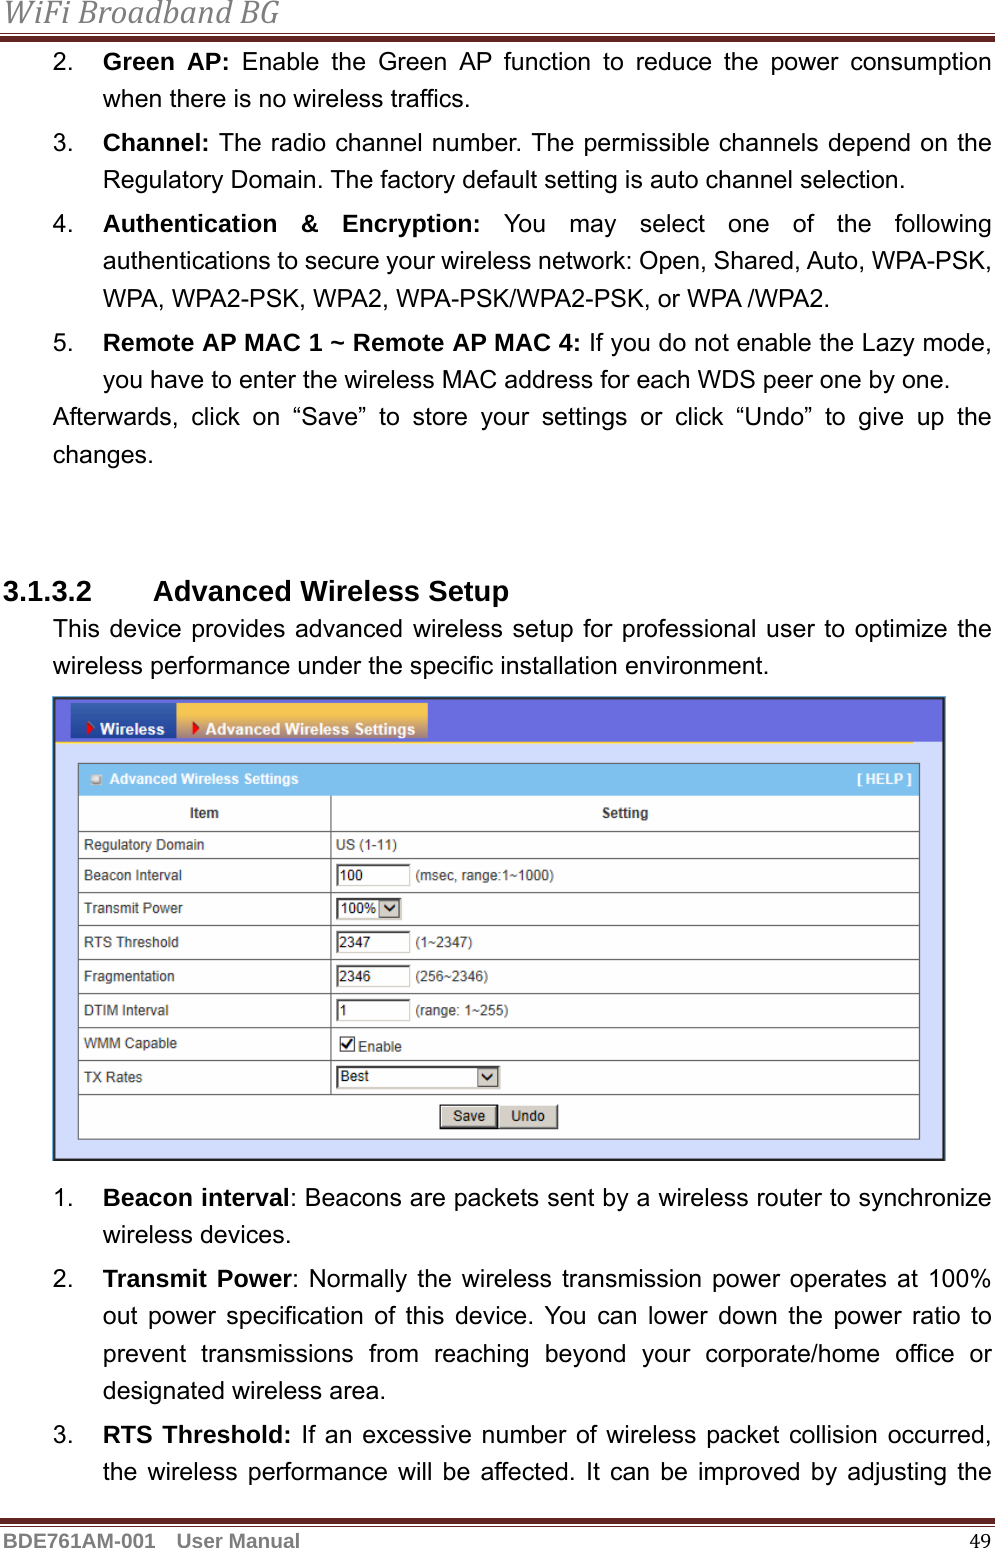
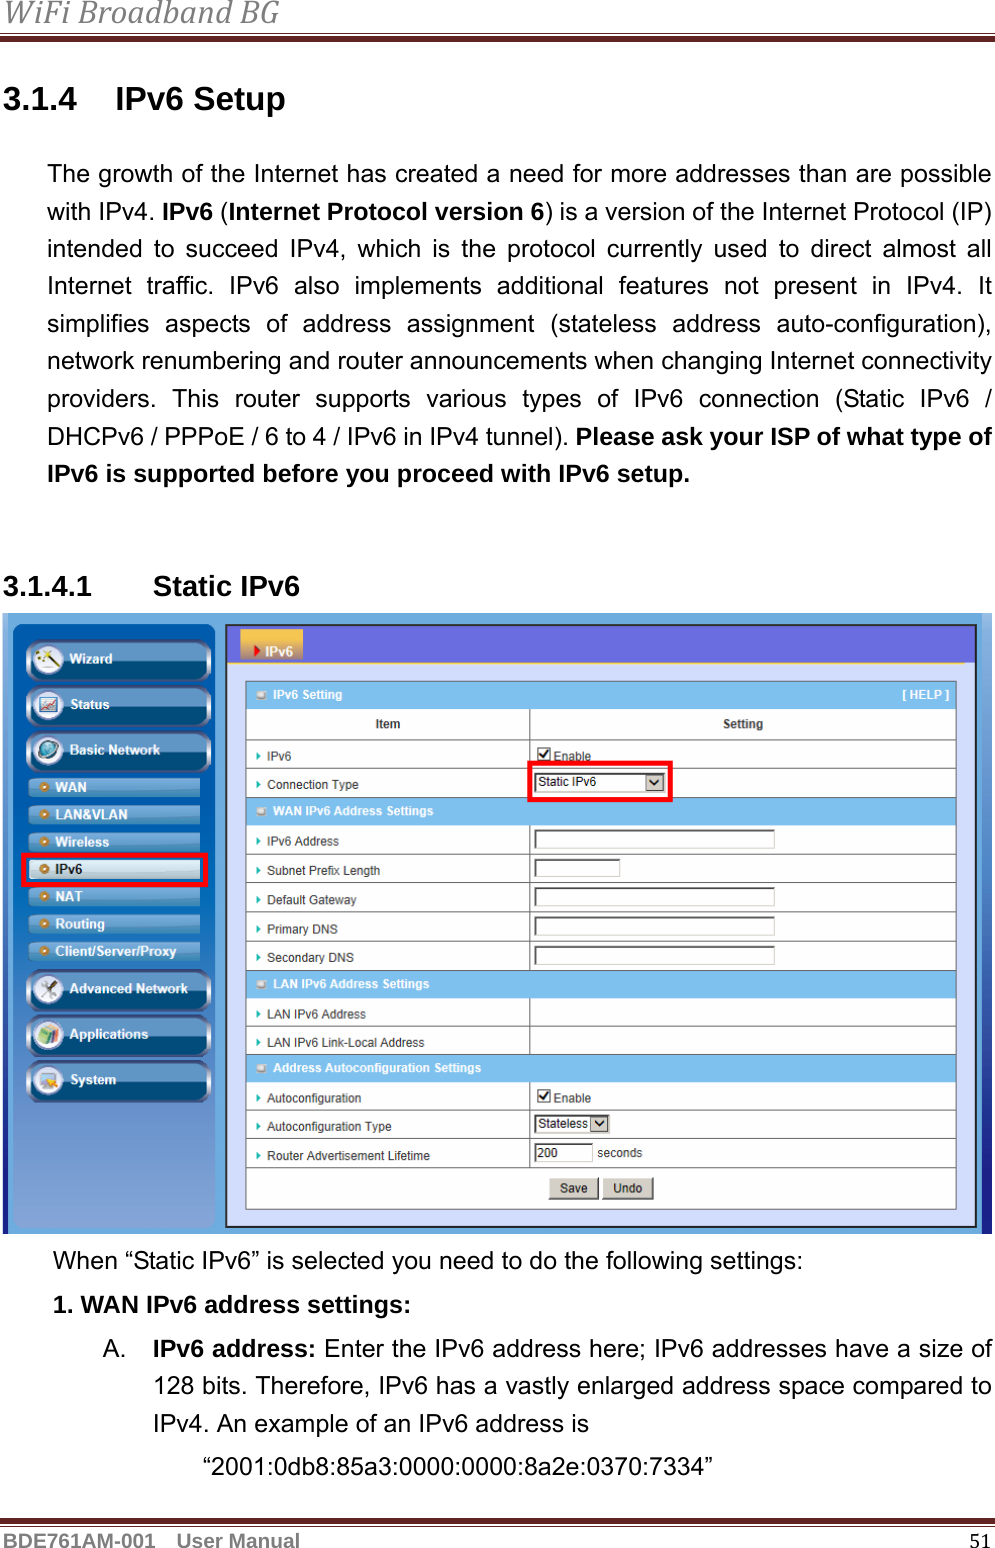
Upload a User Manual
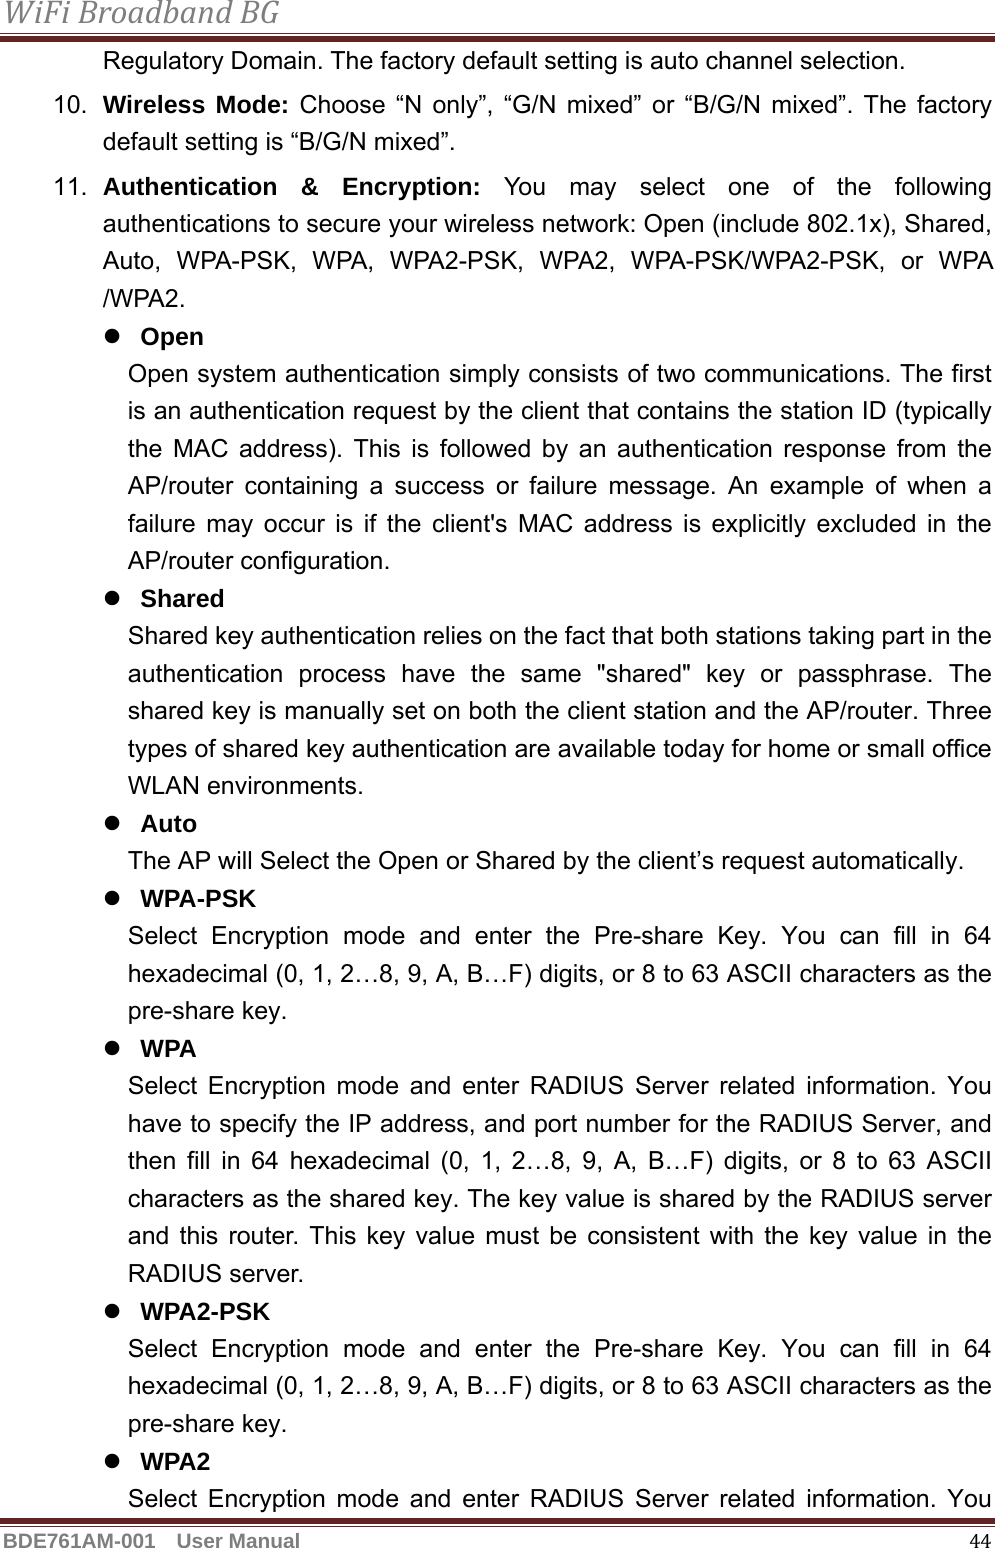
Namespaces
Wiki Guide
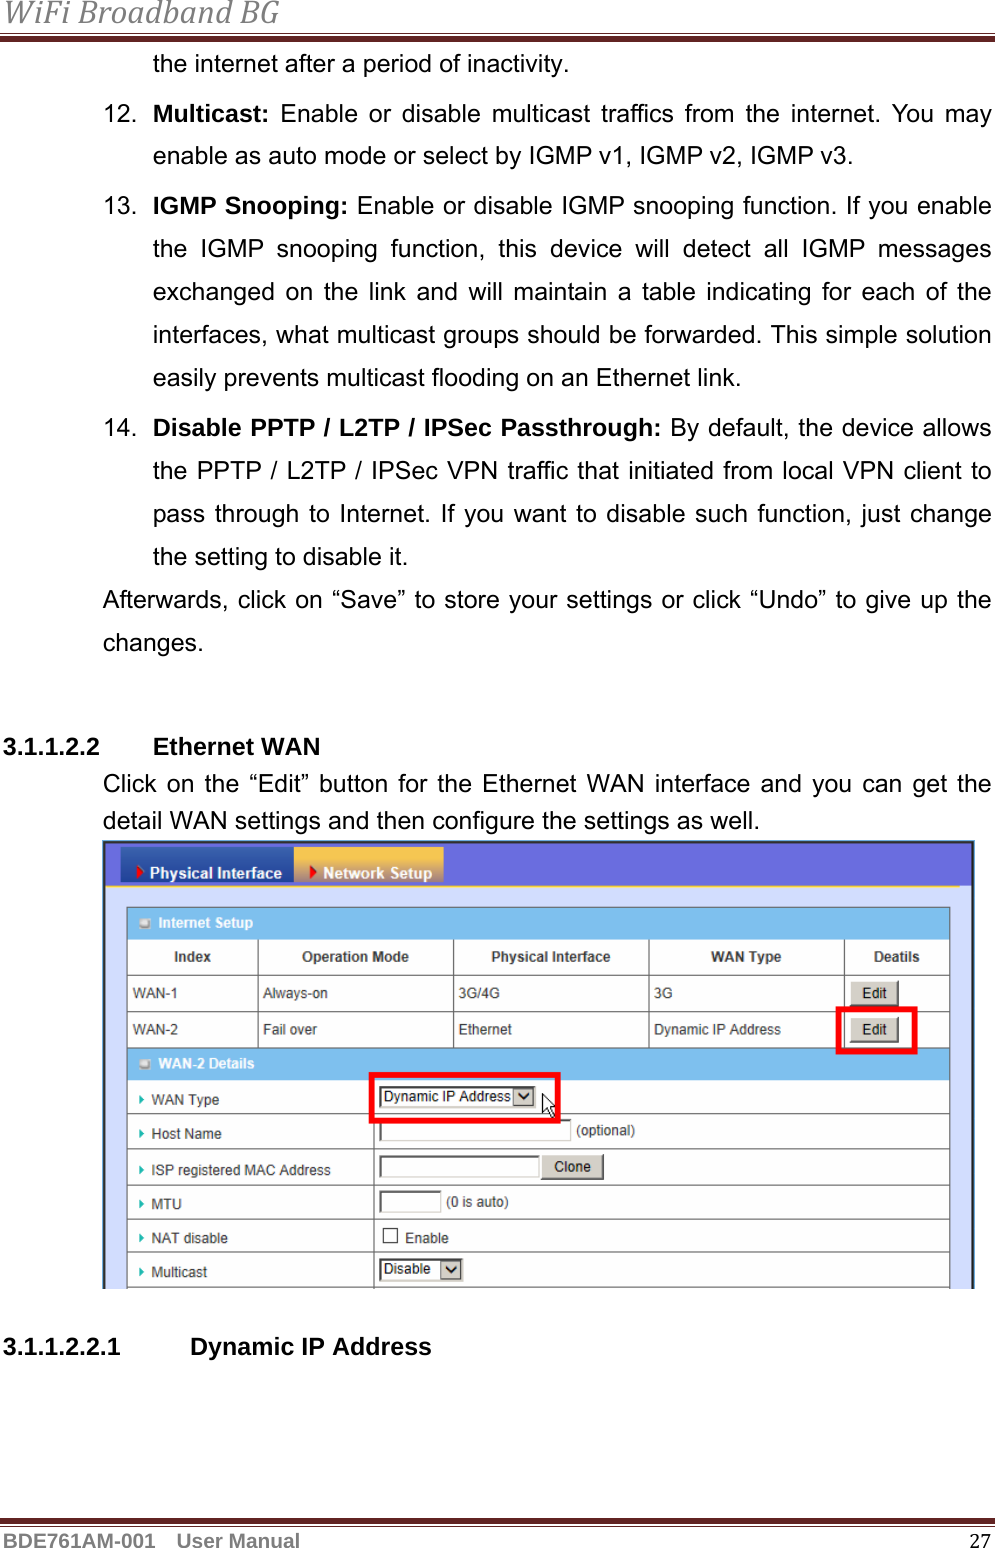
HTML
PDF
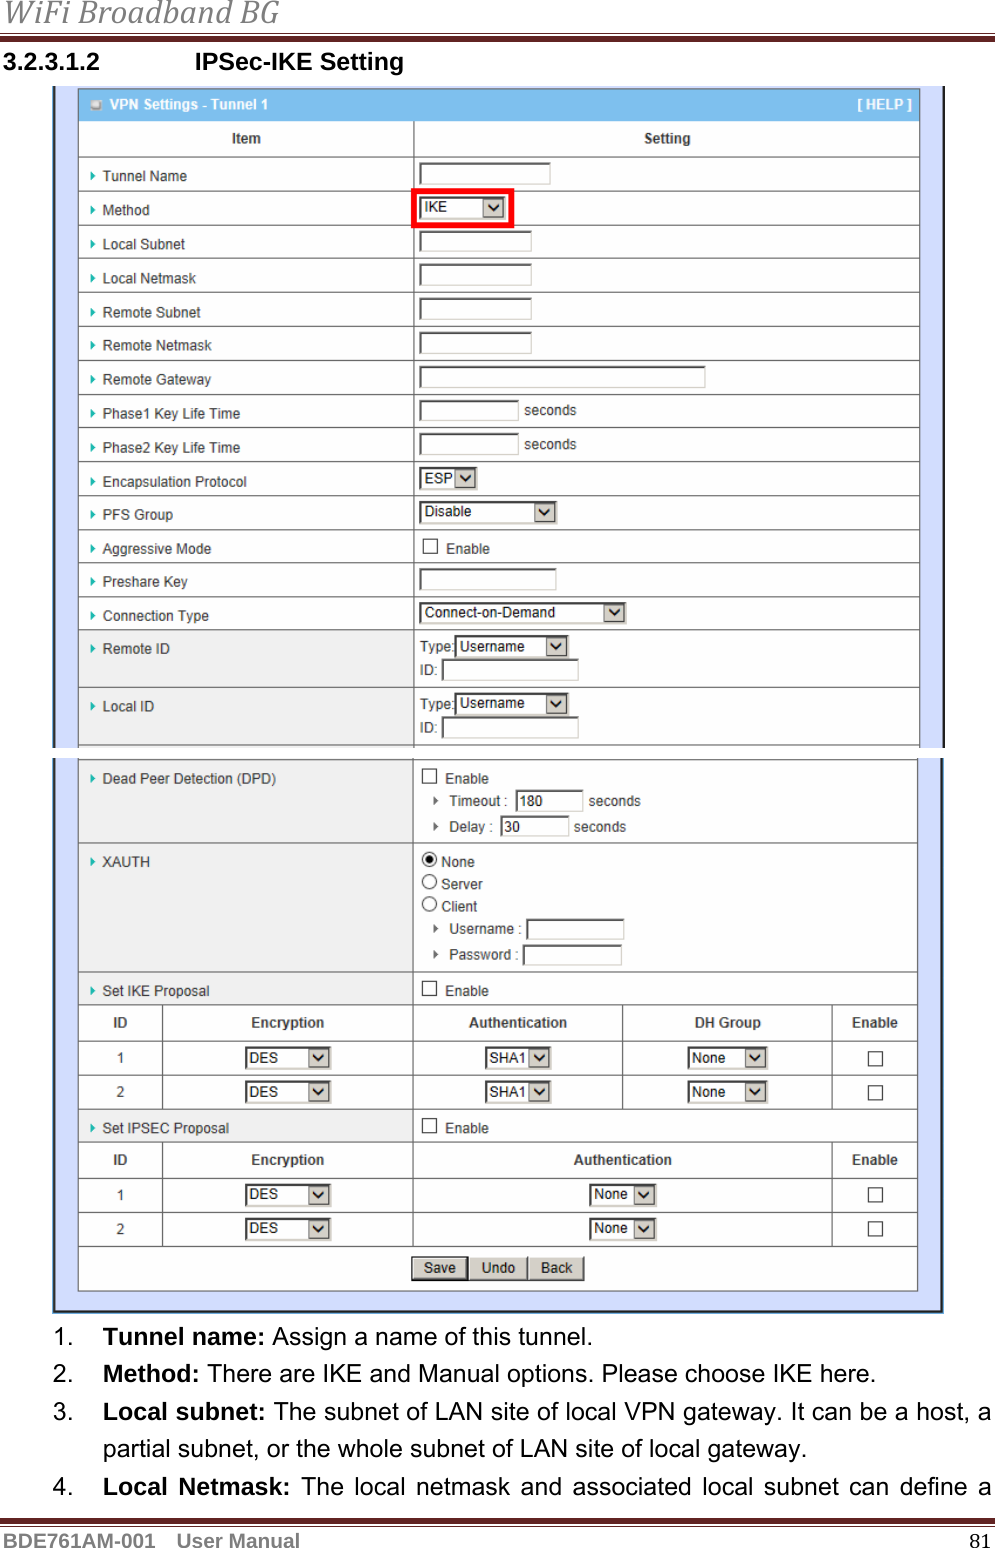
Info
Views
User Manual
Discussion / Help
Navigation