Advantech Co WISE1540 M2.COM Mesh Network IoT Node User Manual
Advantech Co Ltd M2.COM Mesh Network IoT Node
UserManual.wiki
>
Advantech Co
>
WISE1540 User Manual
Document-User Manual.pdf
Navigation menu
Upload a User Manual
Namespaces
Wiki Guide
HTML
PDF
Info
Views
User Manual
Discussion / Help
Navigation
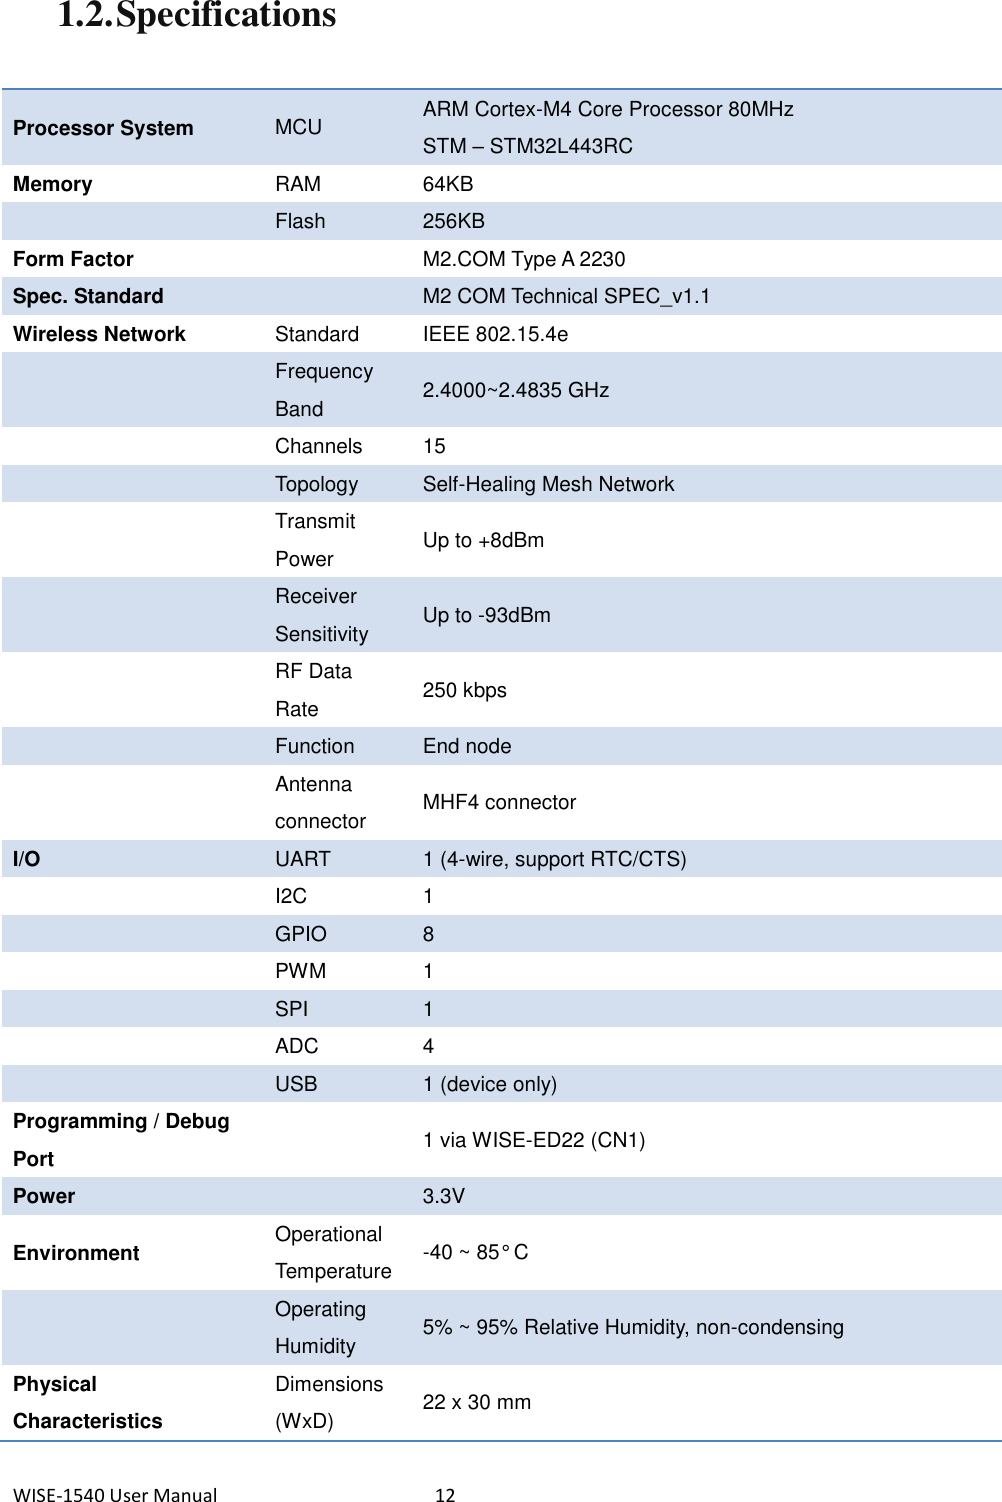
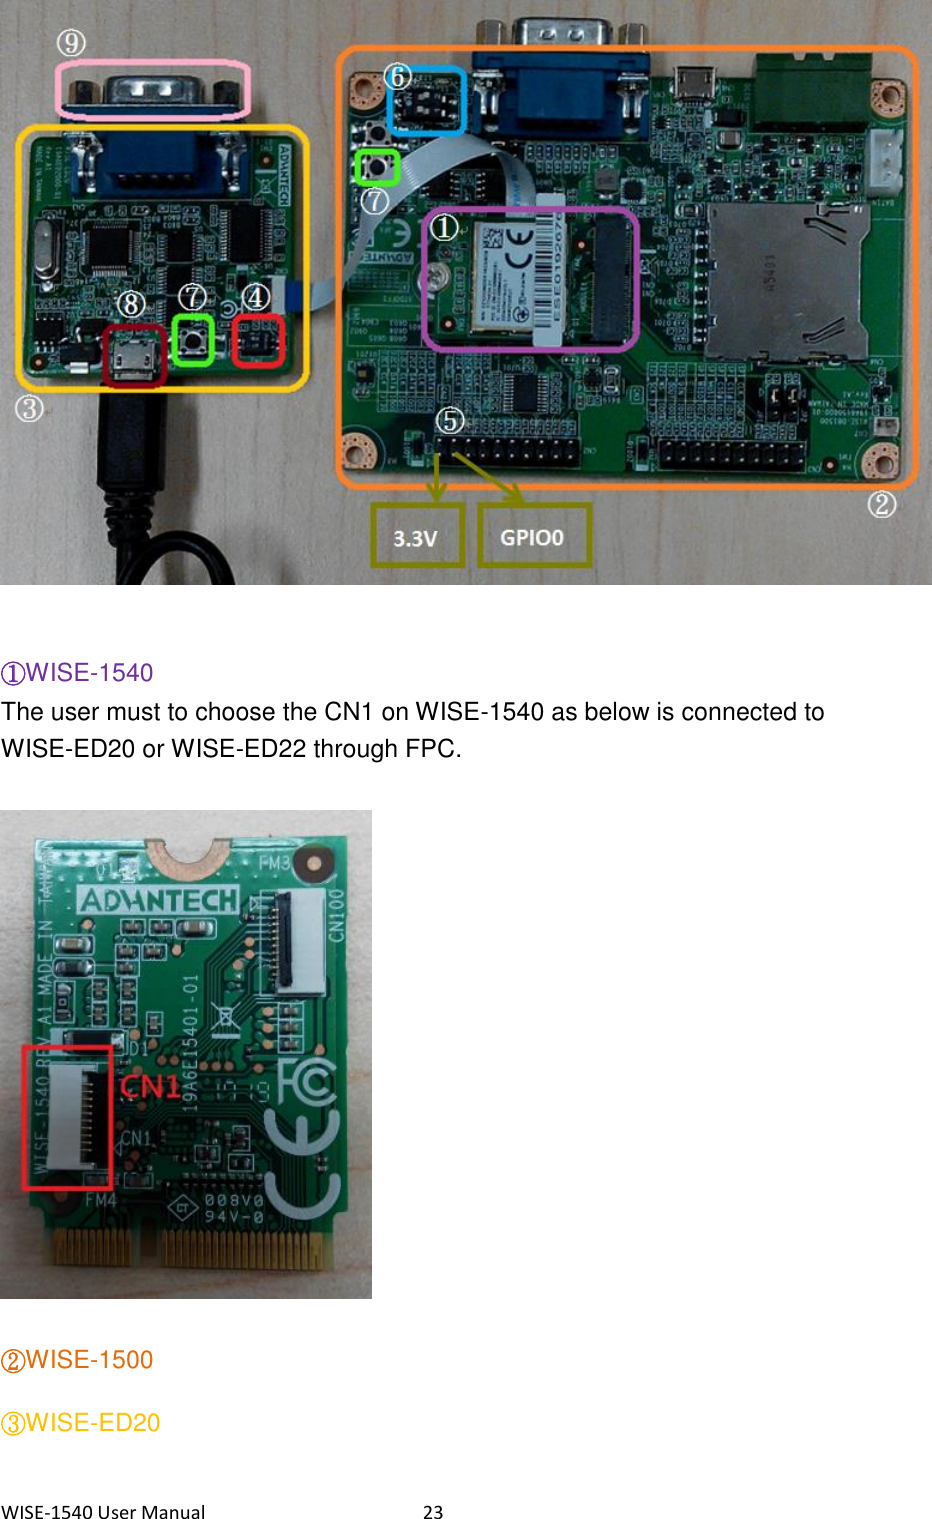
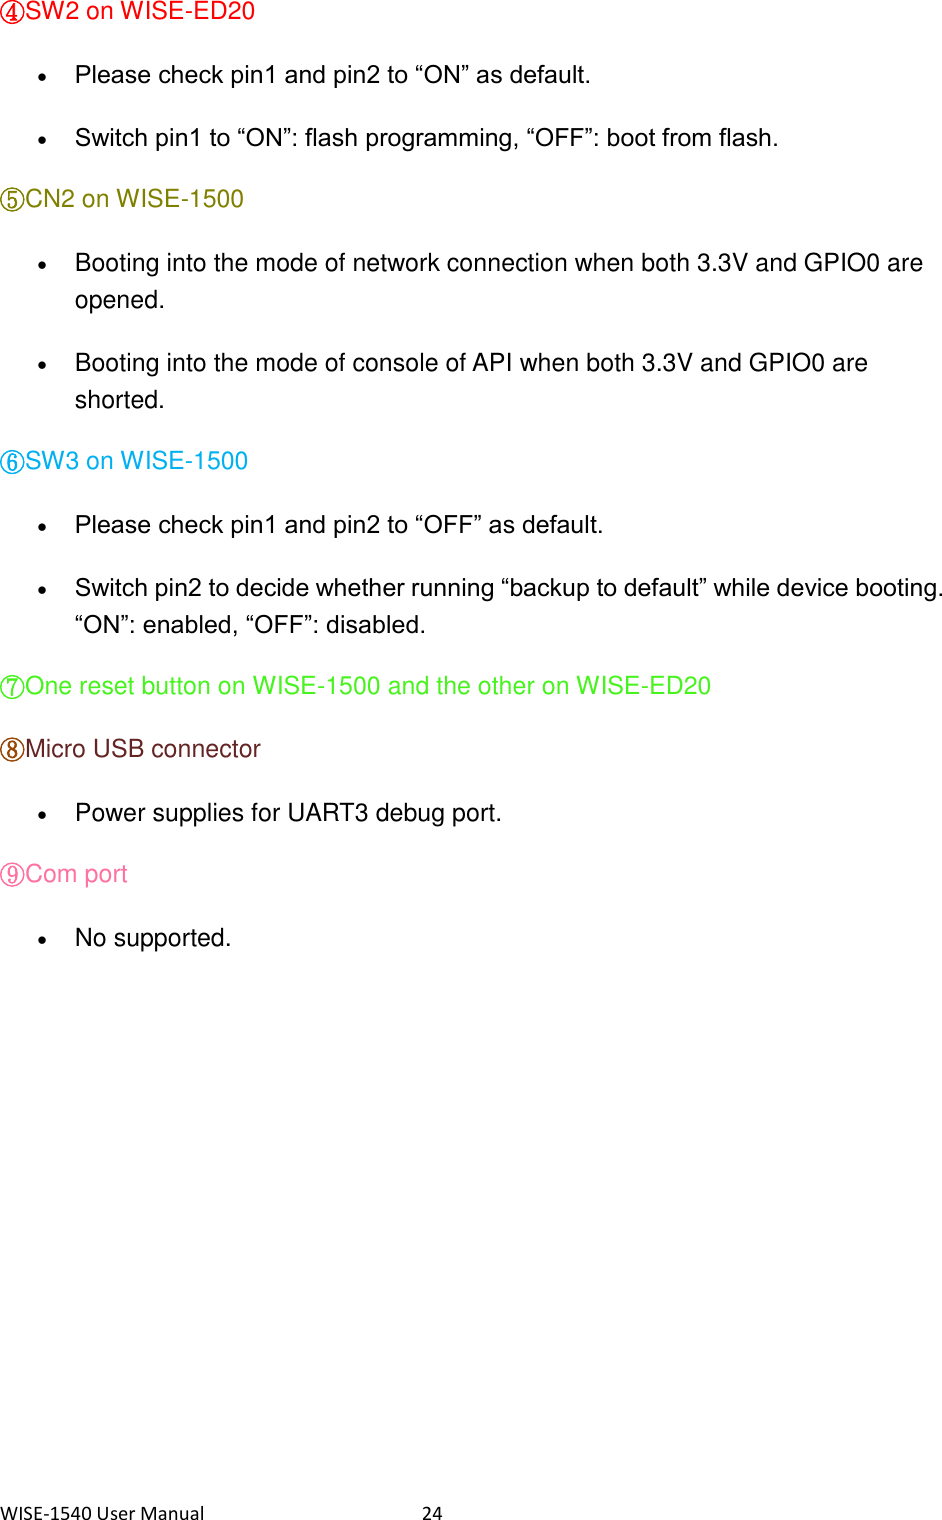
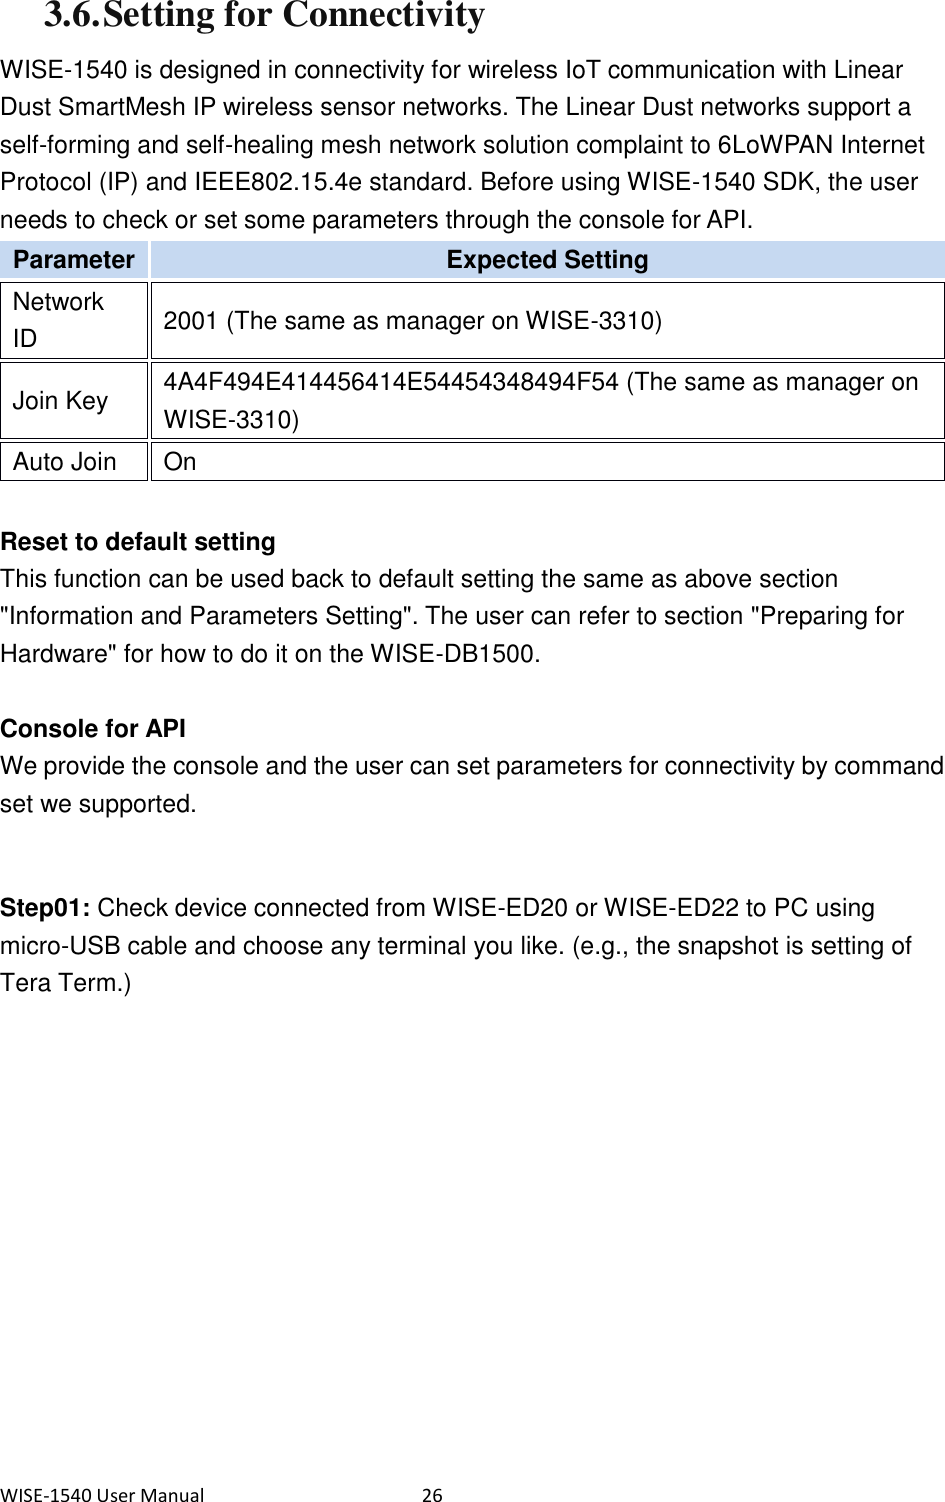
![WISE-1540 User Manual 22 https://docs.mbed.com/docs/mbed-os-handbook/en/latest/dev_tools/cli/ mbed CLI configuration GCC_ARM_PATH Set GCC_ARM_PATH to the binary directory of your GCC Arm installation $ mbed config -G GCC_ARM_PATH "/home/erick/gcc-arm-none-eabi-4_9-2015q3/bin" [mbed] /home/erick/gcc-arm-none-eabi-4_9-2015q3/bin now set as global GCC_ARM_PATH 3.4. Source Tree The user can find source tree as below from WISE-1540-SDK. (https://github.com/ADVANTECH-Corp/WISE-1540-SDK) Directory Description doc/ Documents about WISE-1540 SDK. inc/ Header files including examples, sensor driver and etc. lib/ Library. src/ Source files including examples, sensor driver and etc. tool/ Tools. 3.5. Setup Development Environment The user needs to prepare for hardware as following: For mote, WISE-1540, WISE-1500 and WISE-ED20 or WISE-ED22. For gateway, WISE-3310. PC running LINUX operating systems such as Ubuntu 16.04.1. Please refer to the following steps for setup a WISE series of boards before using WISE-1540 SDK. Step01: Please prepare boards as below.](https://usermanual.wiki/Advantech-Co/WISE1540/User-Guide-3653812-Page-23.png)