Aerohive Networks BR100 AP Router User Manual Installing the BR100 Branch Router
Aerohive Networks, Inc. AP Router Installing the BR100 Branch Router
Contents
- 1. User Manual
- 2. User Manual (Statements)
User Manual
©
2011 Aerohive Networks, Inc.
Aerohive® and HiveAP® are U.S. registered
trademarks of Aerohive Networks, Inc.
P/N 330057-01 Rev. A
Installing the BR100 Branch Router
This guide explains how to install your BR100 router. Your router has been
pre-configured by your IT admin to automatically connect to the Internet and
to your corporate network.
Simply follow the steps shown in the illustration. During the process (which
usually takes about 10 minutes) the status LED on the front of the BR100
cycles through the following states:
• Dark: There is no power or the status LED is disabled.
• Amber: The device has power and is establishing network connectivity. If the LED stays amber and does
not change to white, you should contact your IT admin. If the LED is flashing amber, it is very important not
to turn off the device because it is performing a firmware update.
• White: The device is connected and operating properly. To test the connection, try to reach the Internet and
your corporate network.
Toregister,getproductdocumentation,seecomplianceinformation,anddownload
softwareupdates,visitwww.aerohive.com/techdocs.
1
2
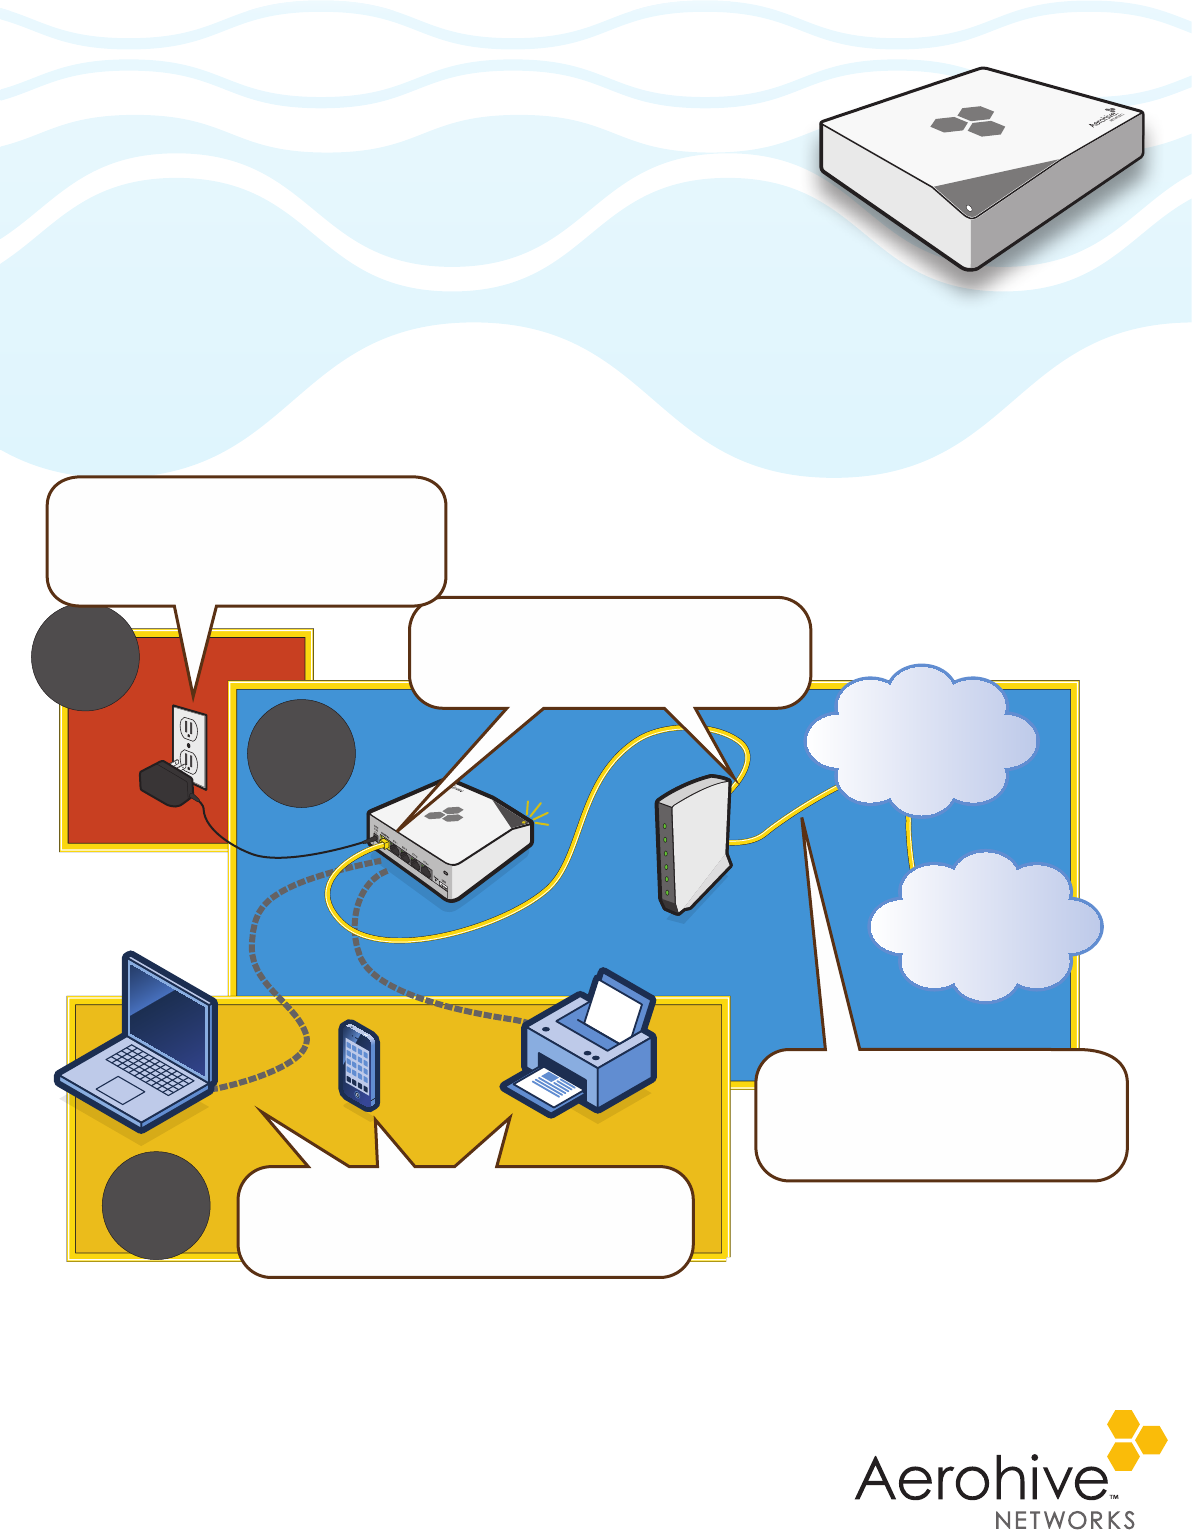
The BR100 automatically connects
to the Internet and, if configured to
do so, builds a VPN tunnel to
your corporate network.
Depending on how your BR100 is configured,
you can work wirelessly or connect devices
to ETH ports 1 - 4. Contact your IT admin
for more information.
Connect the Ethernet cable to the
yellow WAN/ETH 0 port and the
Ethernet port on your cable modem,
DSL router, or other Internet device.
3
Corporate
Network
Internet
Plug the BR100 into a power outlet. The
status LED glows amber during startup.
Do not turn your device off if
the LED is flashing amber