Ai Thinker Technology A100 Ai Light User Manual Instruction manual of Tuya App smart lamp add app
Shenzhen Ai-Thinker Technology co., LTD Ai Light Instruction manual of Tuya App smart lamp add app
User manual

Tuya
SmartLife
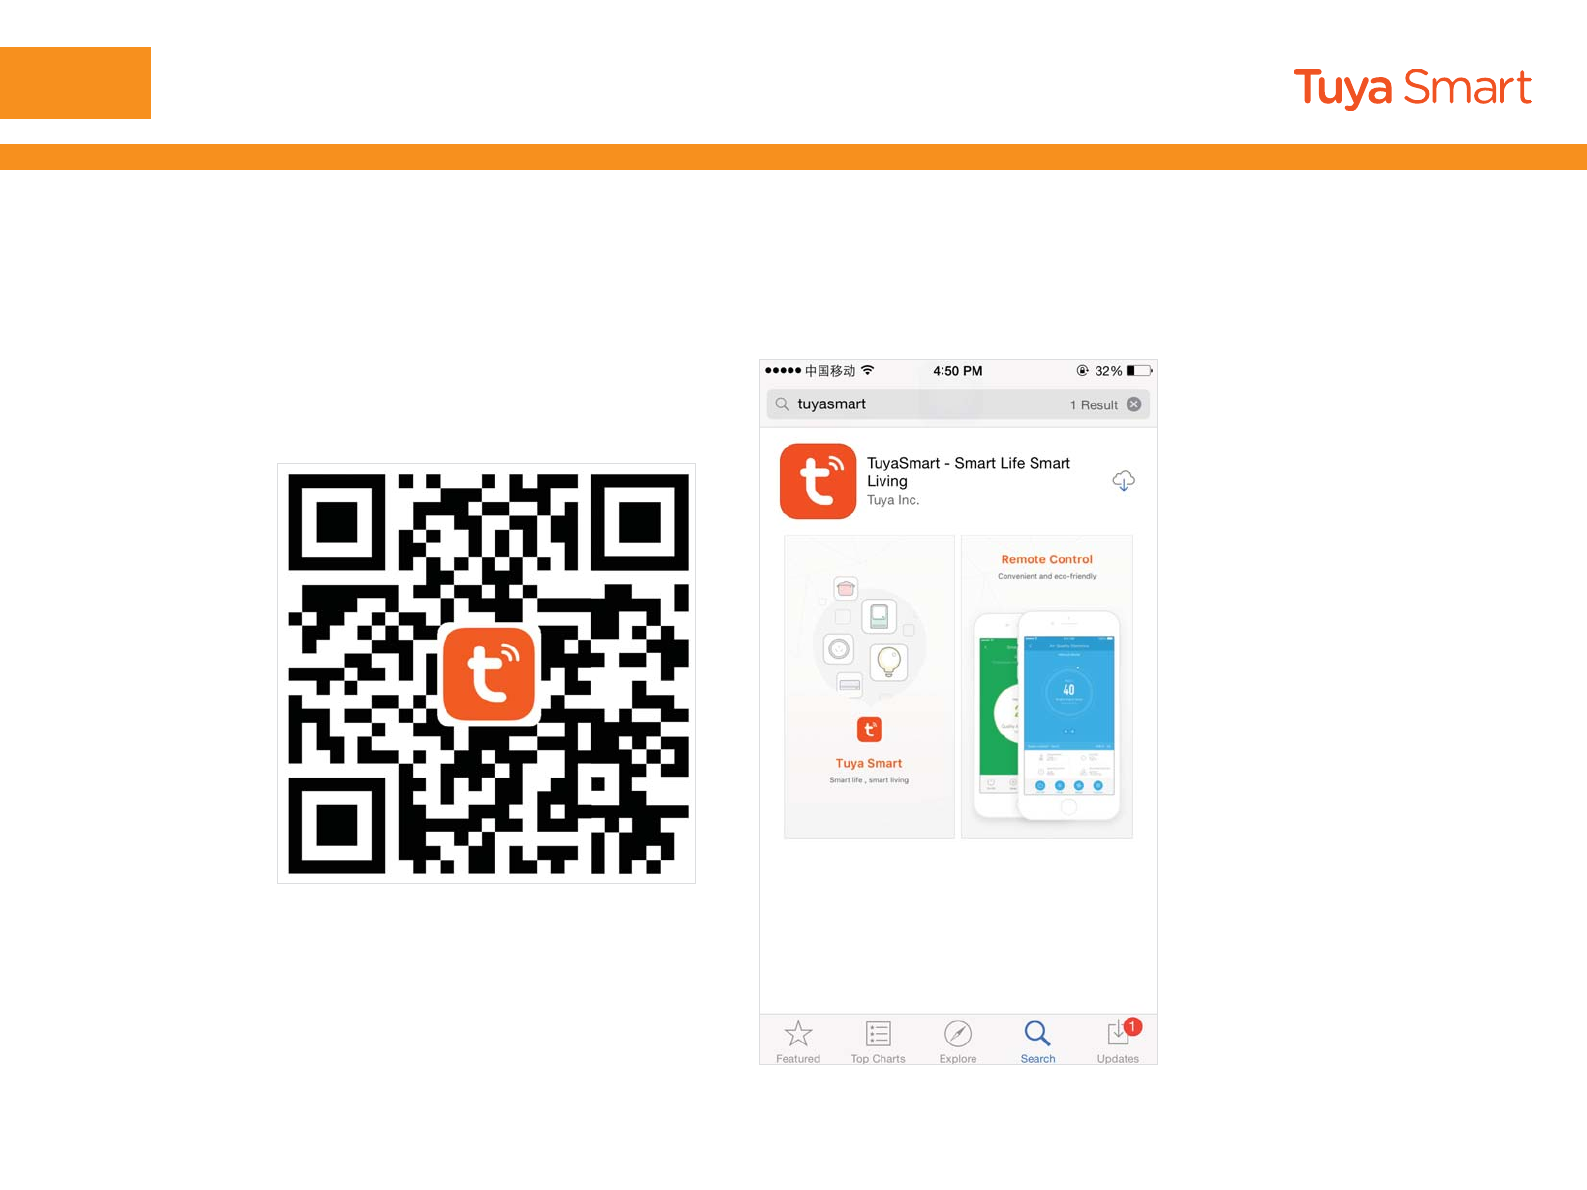
NO.1 Download and install Tuya App
NO.2 Register/Login/Request password
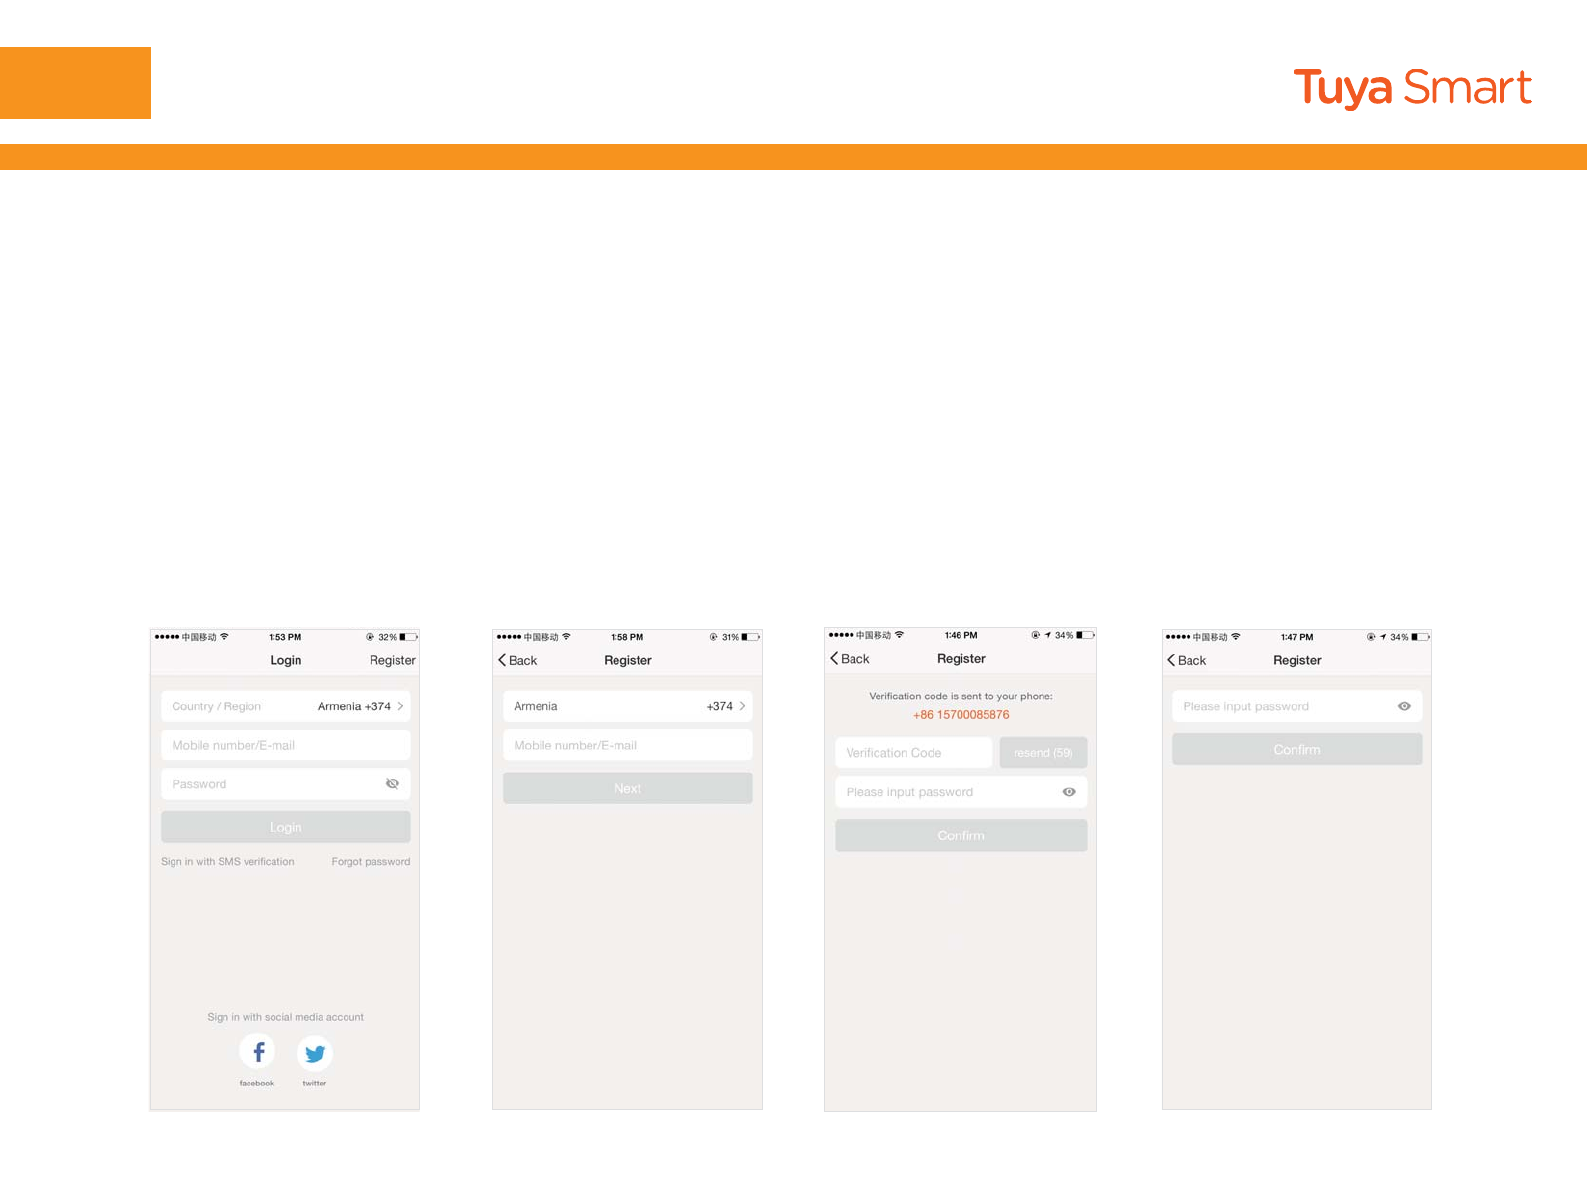
Register
If you don't have the account of Tuya Smart APP,register an account or sign in with cellphone number +
verification code.This page describes the Registration process.
1.Tap“Register”in the upper rightpic 1
2.The system automatically determines your country / area.You can also select your country code by yourself.
Enter the cellphone number/E-mail and tap “Next” pic 2
3.If you enter the mobile cellphone numberenter the verification code in the messagepic 3and enter
the passwordtap"Confirm" to finish your registration.
4.If you enter the E-mailenter the password pic 4tap”Confirm" to finish your registration.
Pic1 Pic2 Pic3 Pic4
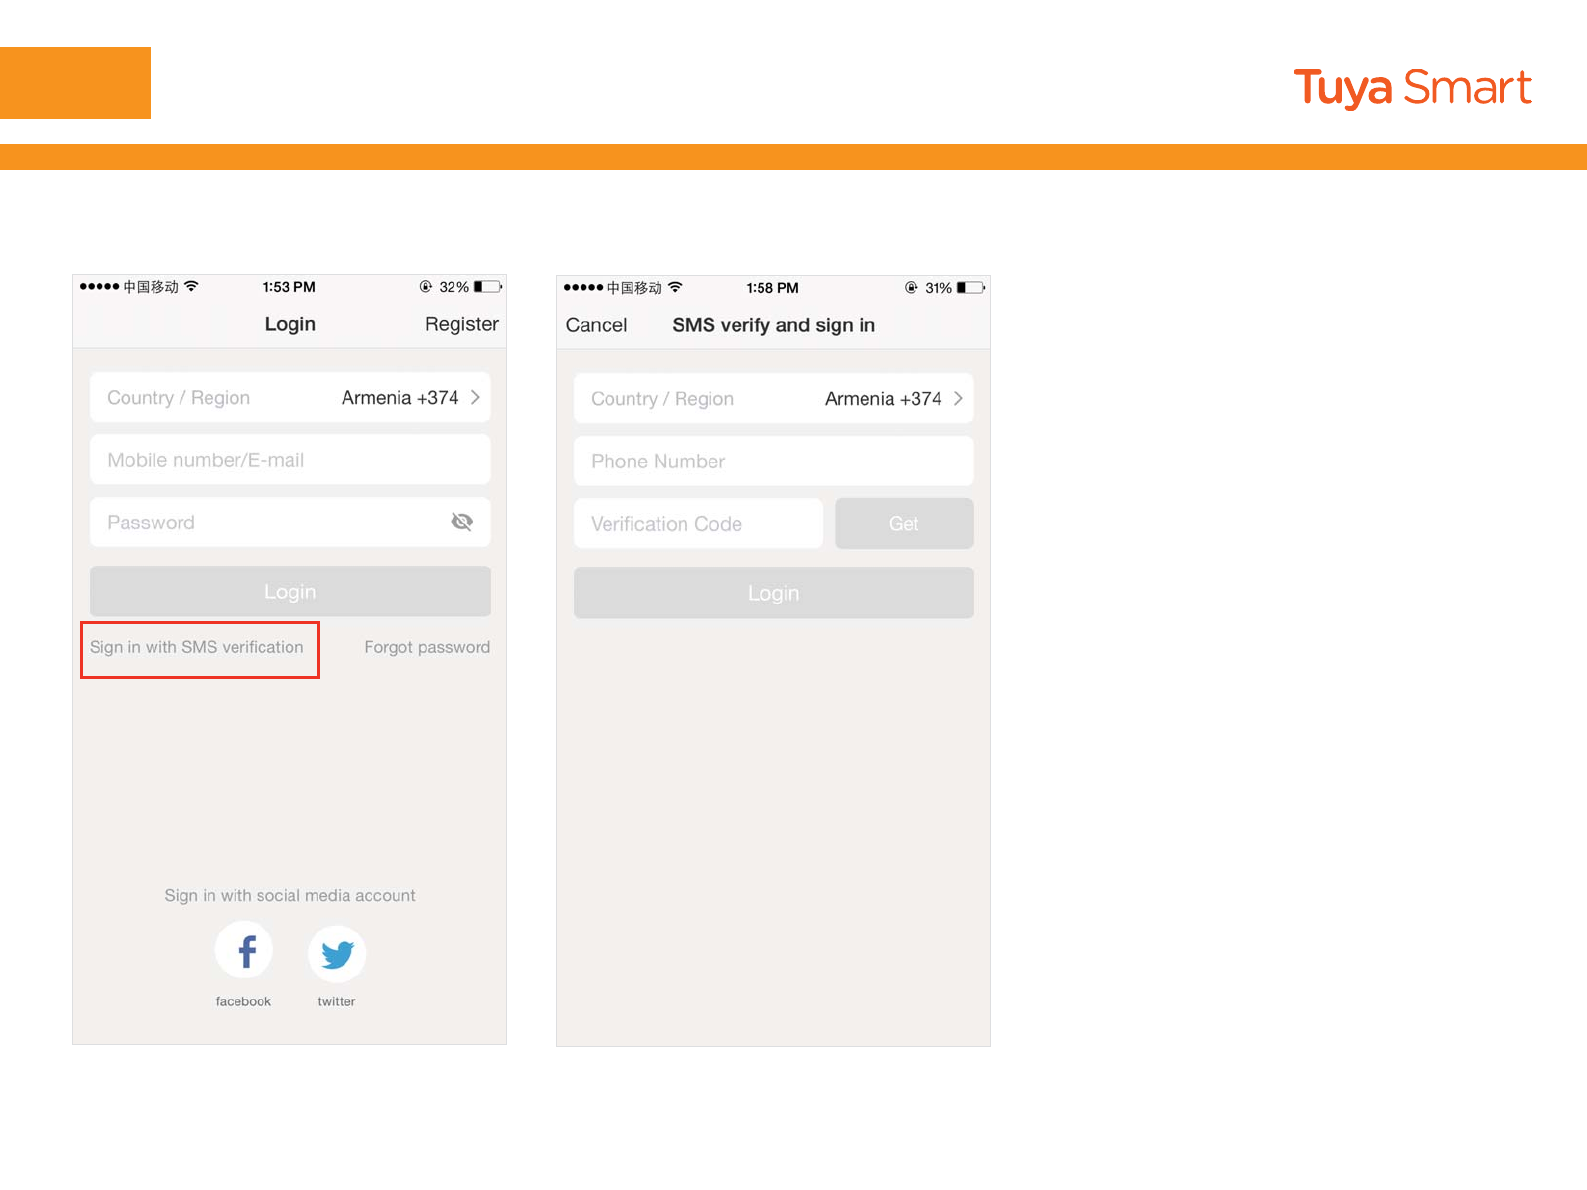
NO.2
Sign in with cellphone
number + verification
code
1.Tap“Sign in with SMS
verification”to new page
2.The system automatically
determines your country / area.
You can also select your country
code by yourself.
3.Enter the cellphone number
and tap “Get” to get a message
4.Enter the verification code in
the message and tap “Login” to
login the App
Register/Login/Request password
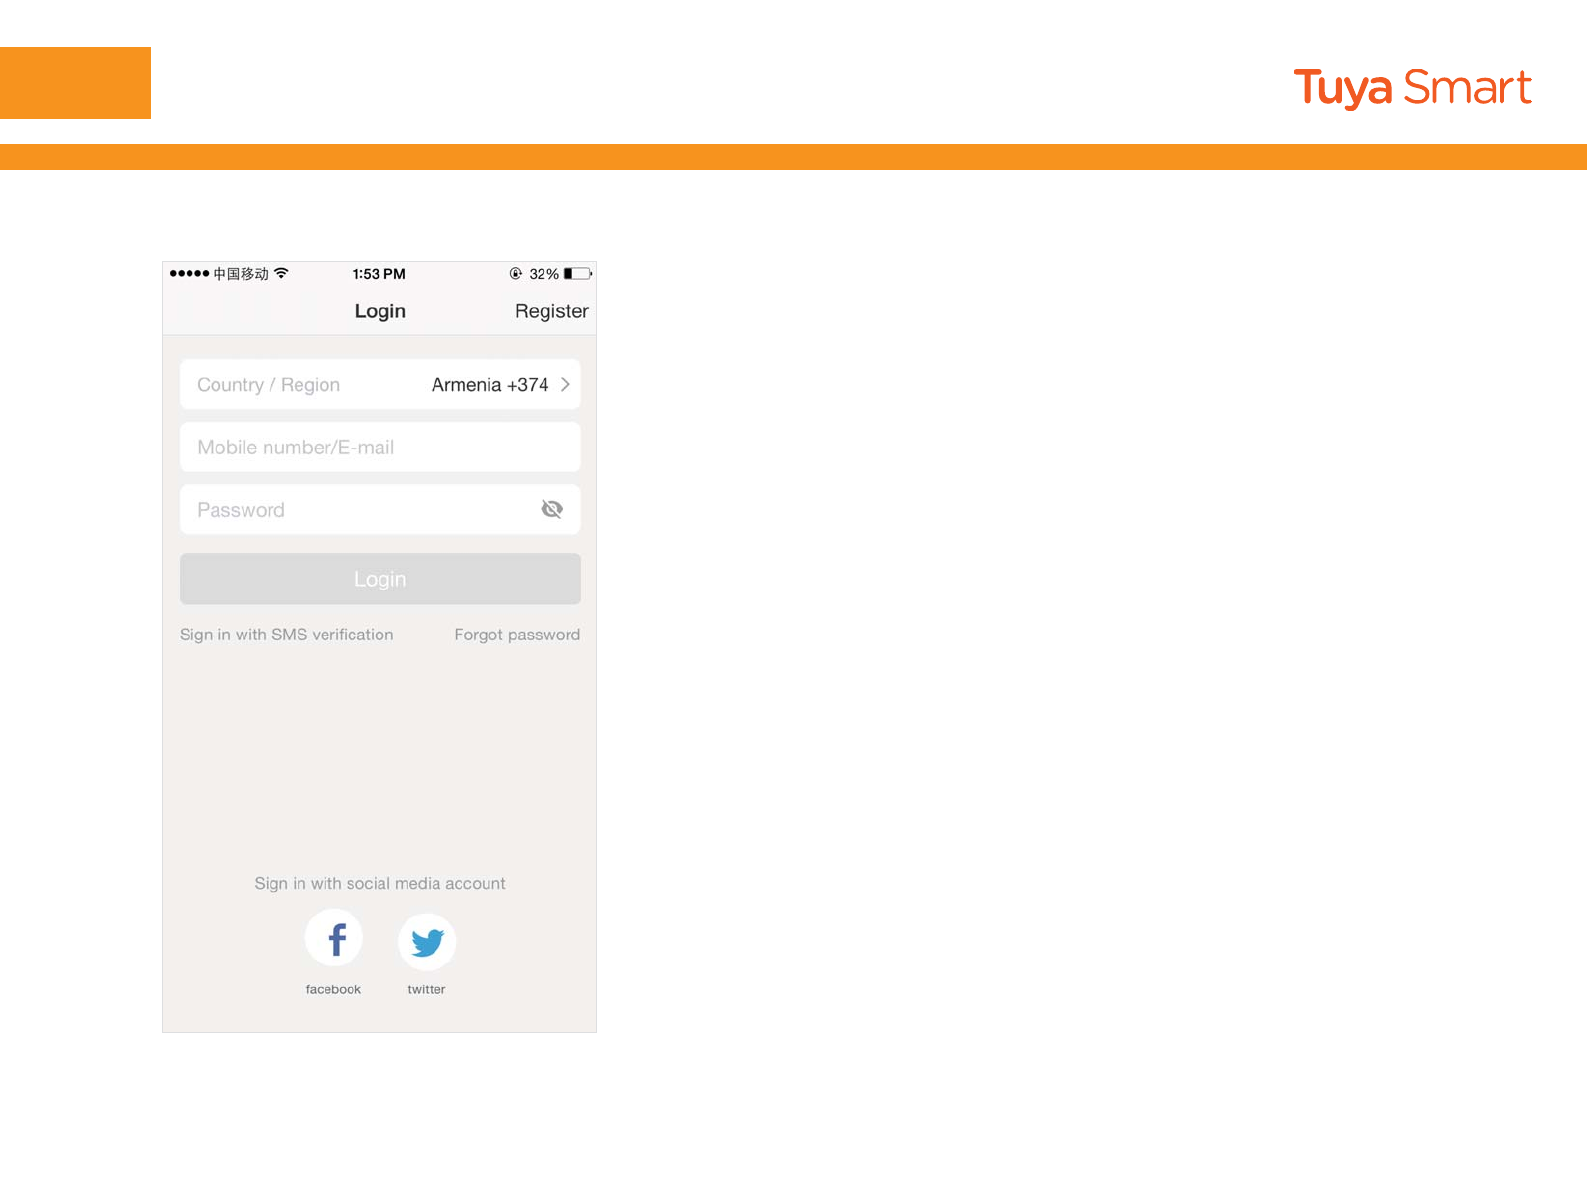
NO.2
Sign in with account number +
password
1.The system automatically determines your country /
area.
You can also select your country code by yourself.
2.Enter the registered cellphone number/E-mail and
password, then tap “Login” to login the App
Register/Login/Request password

NO.2 Register/Login/Request password
Forgot password
If you forgot your account of Tuya Smart APPyou can reset the account password by “Request
password”
1.Tap“Forgot password”as shown in the picture 1
2.The system automatically determines your country / area.You can also select your country code by
yourself.Enter the cellphone number/E-mail and tap “Next”,as shown in the picture 2
3.Enter the verification code in the message/E-mail , as shown in the picture 3and enter the new
passwordtap"Confirm" to finish.
Pic 1 Pic 2 Pic 3
NO.3 Add device
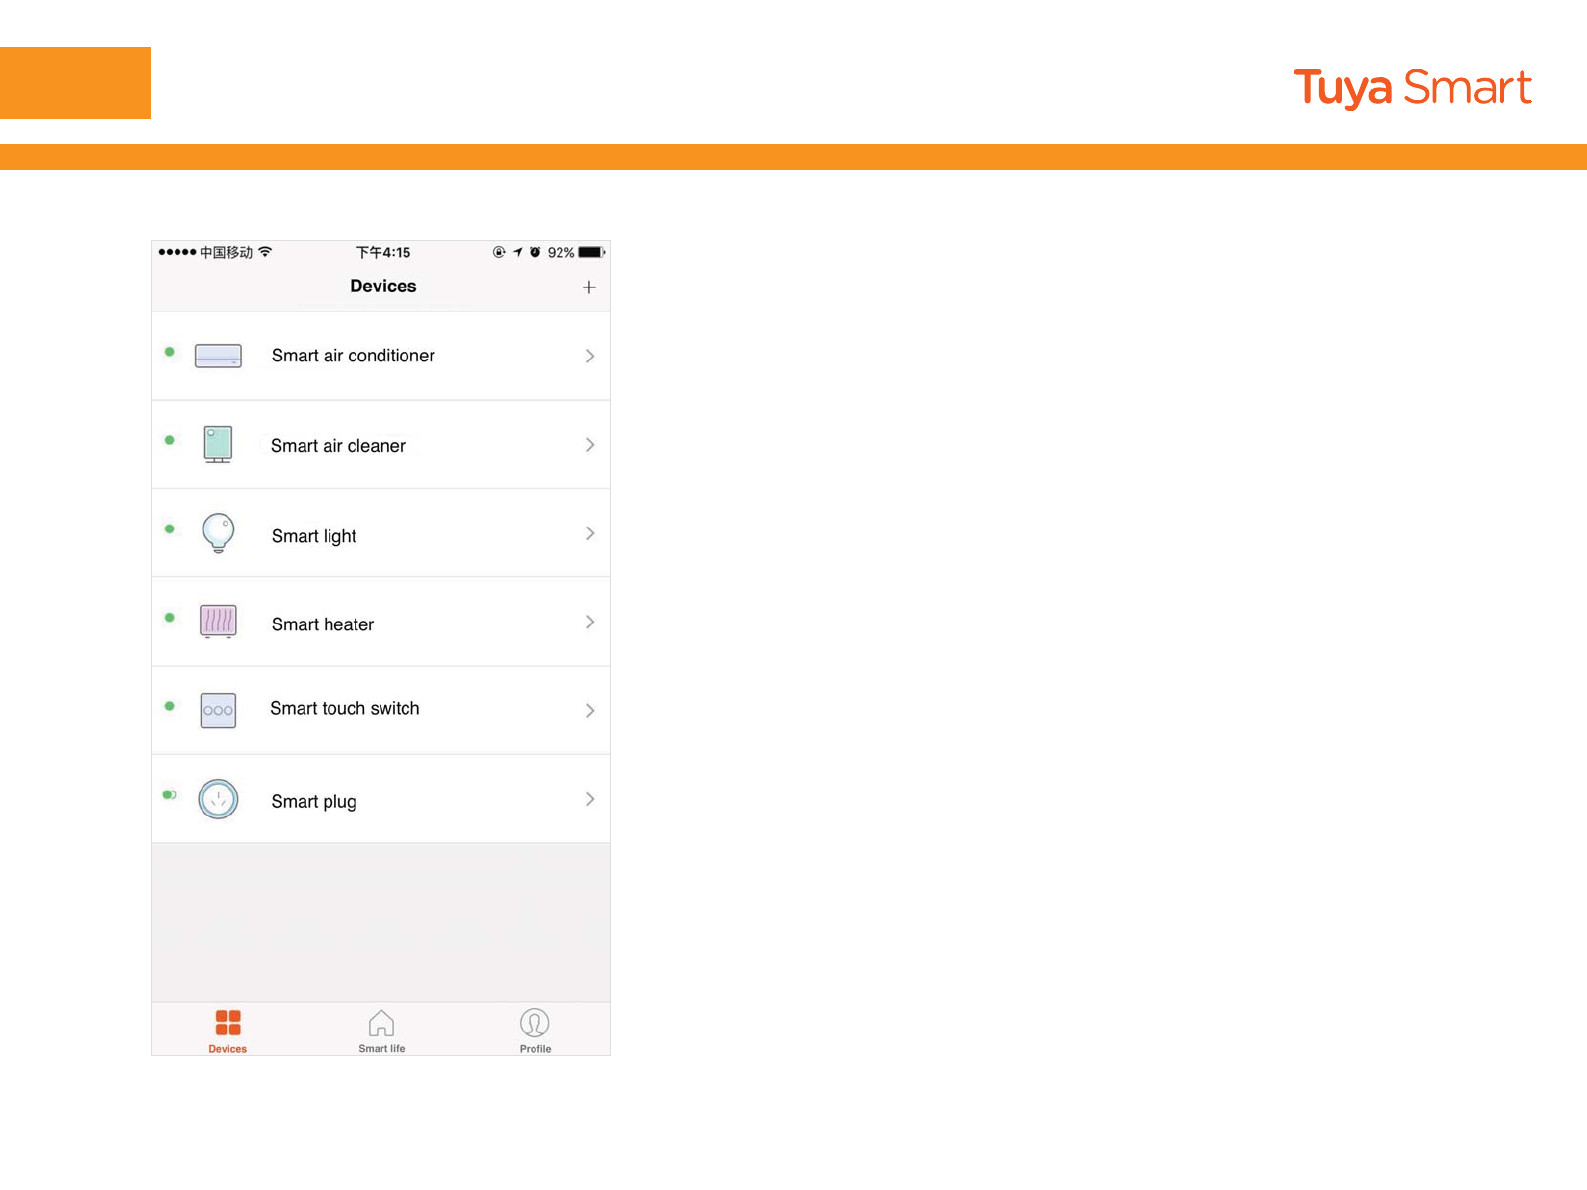
1.Go to the Appon“Devices(Prepare)”tap“+”in
the upper right of this page.to add deviceas
shown in the picture
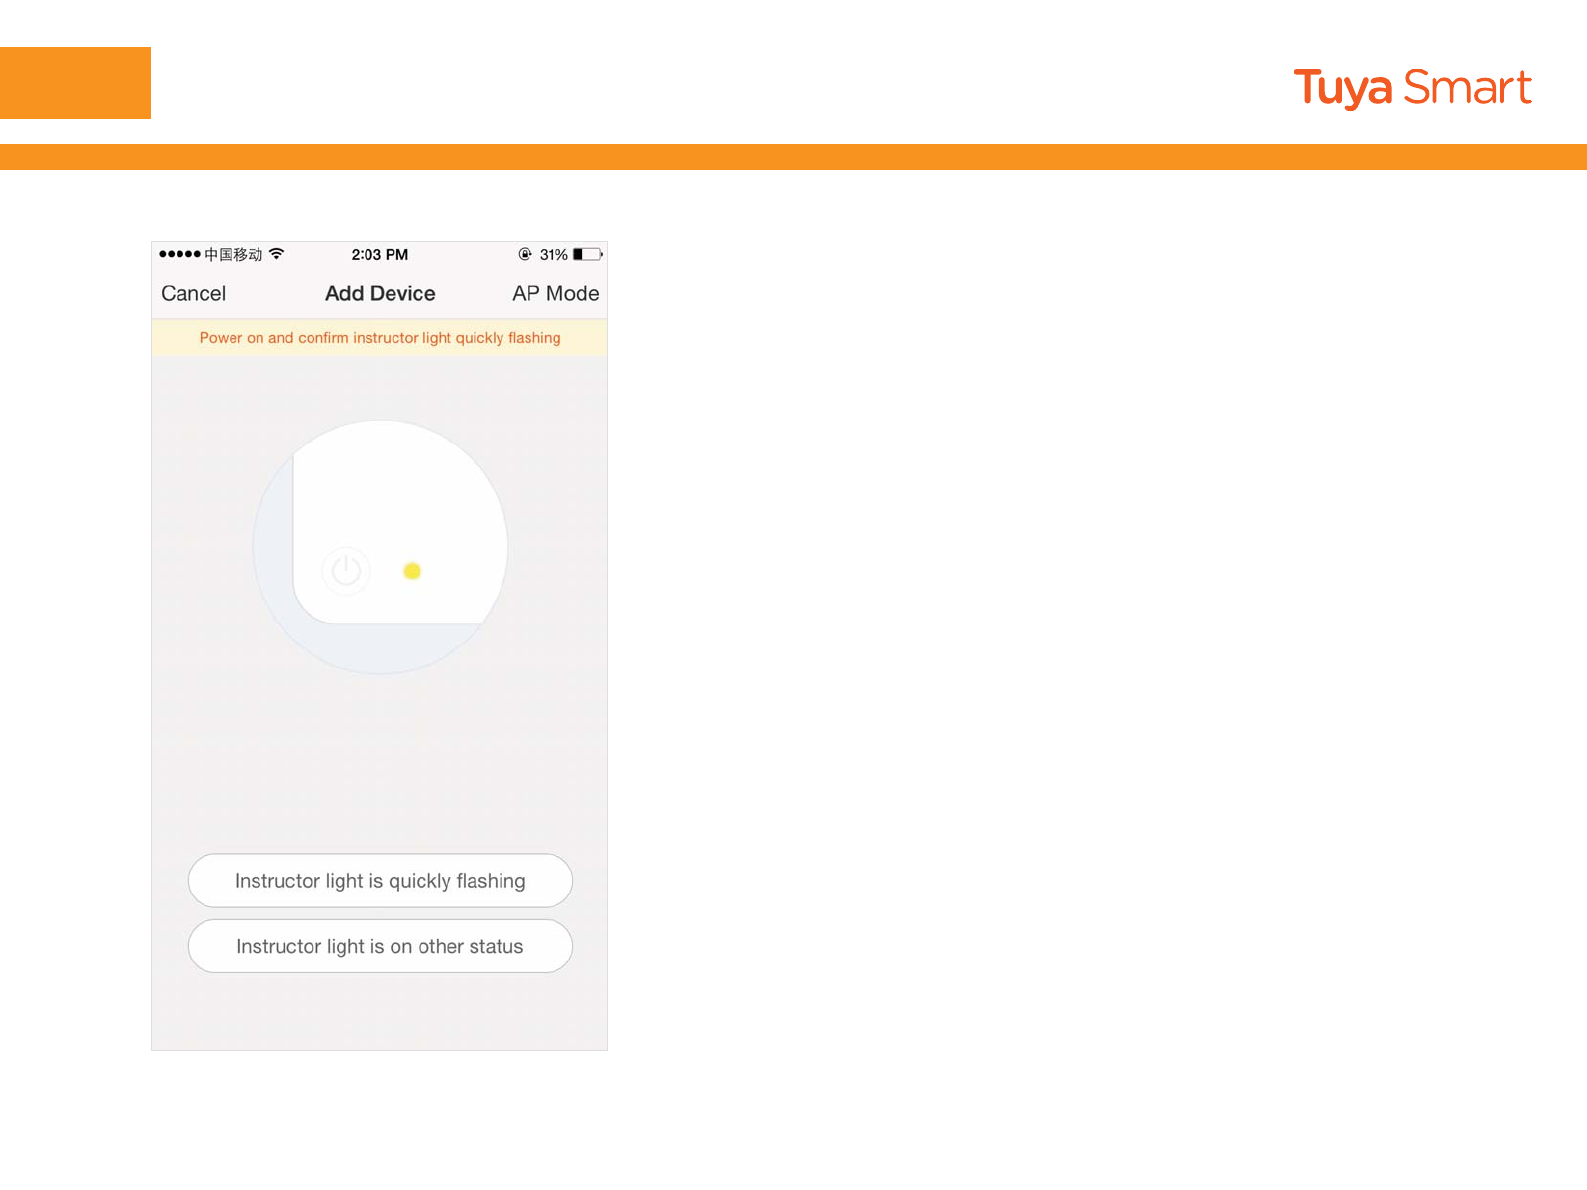
2.There are two connection methods for the App
(hotspot mode and quick connect mode). The
quick connect mode is the default mode. Users
could tap the upper right corner to switch the
connection method to hotspot mode.
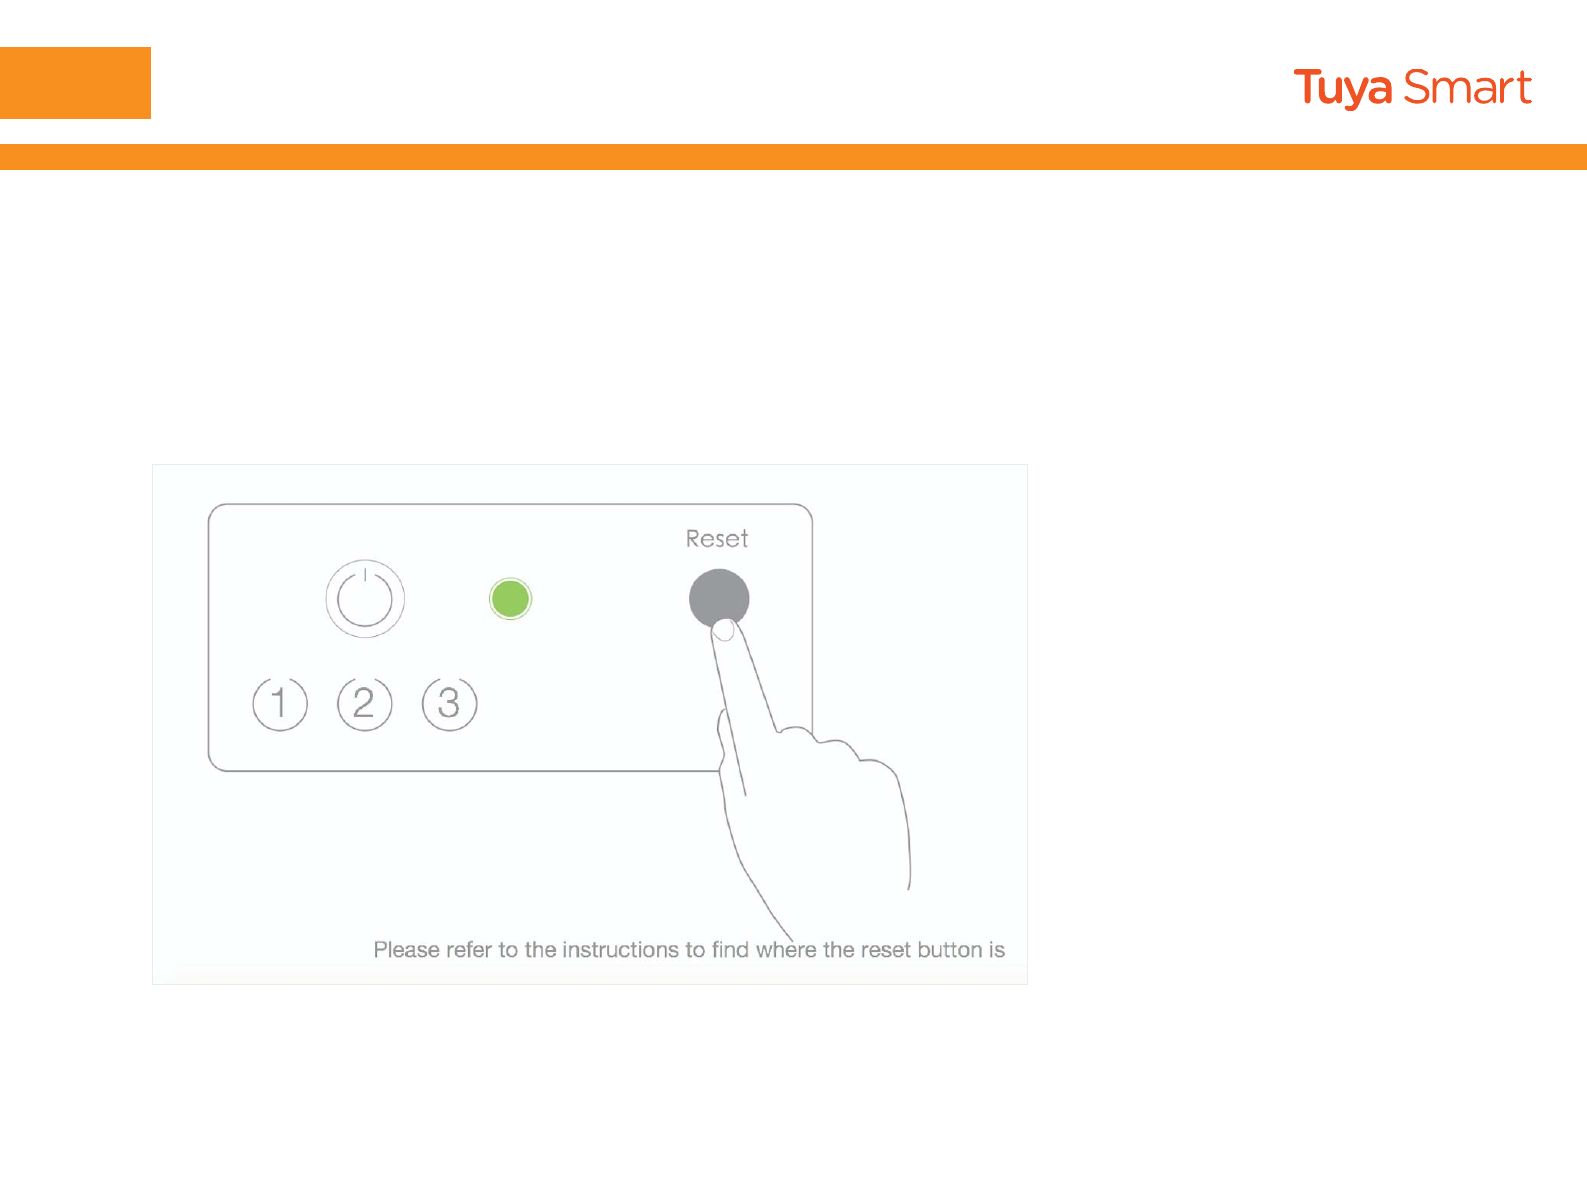
3.For quick connect mode, please make sure the
device’s instructor light quickly flashes,tap”
instructor light is quickly flashing”and go on to the
next step
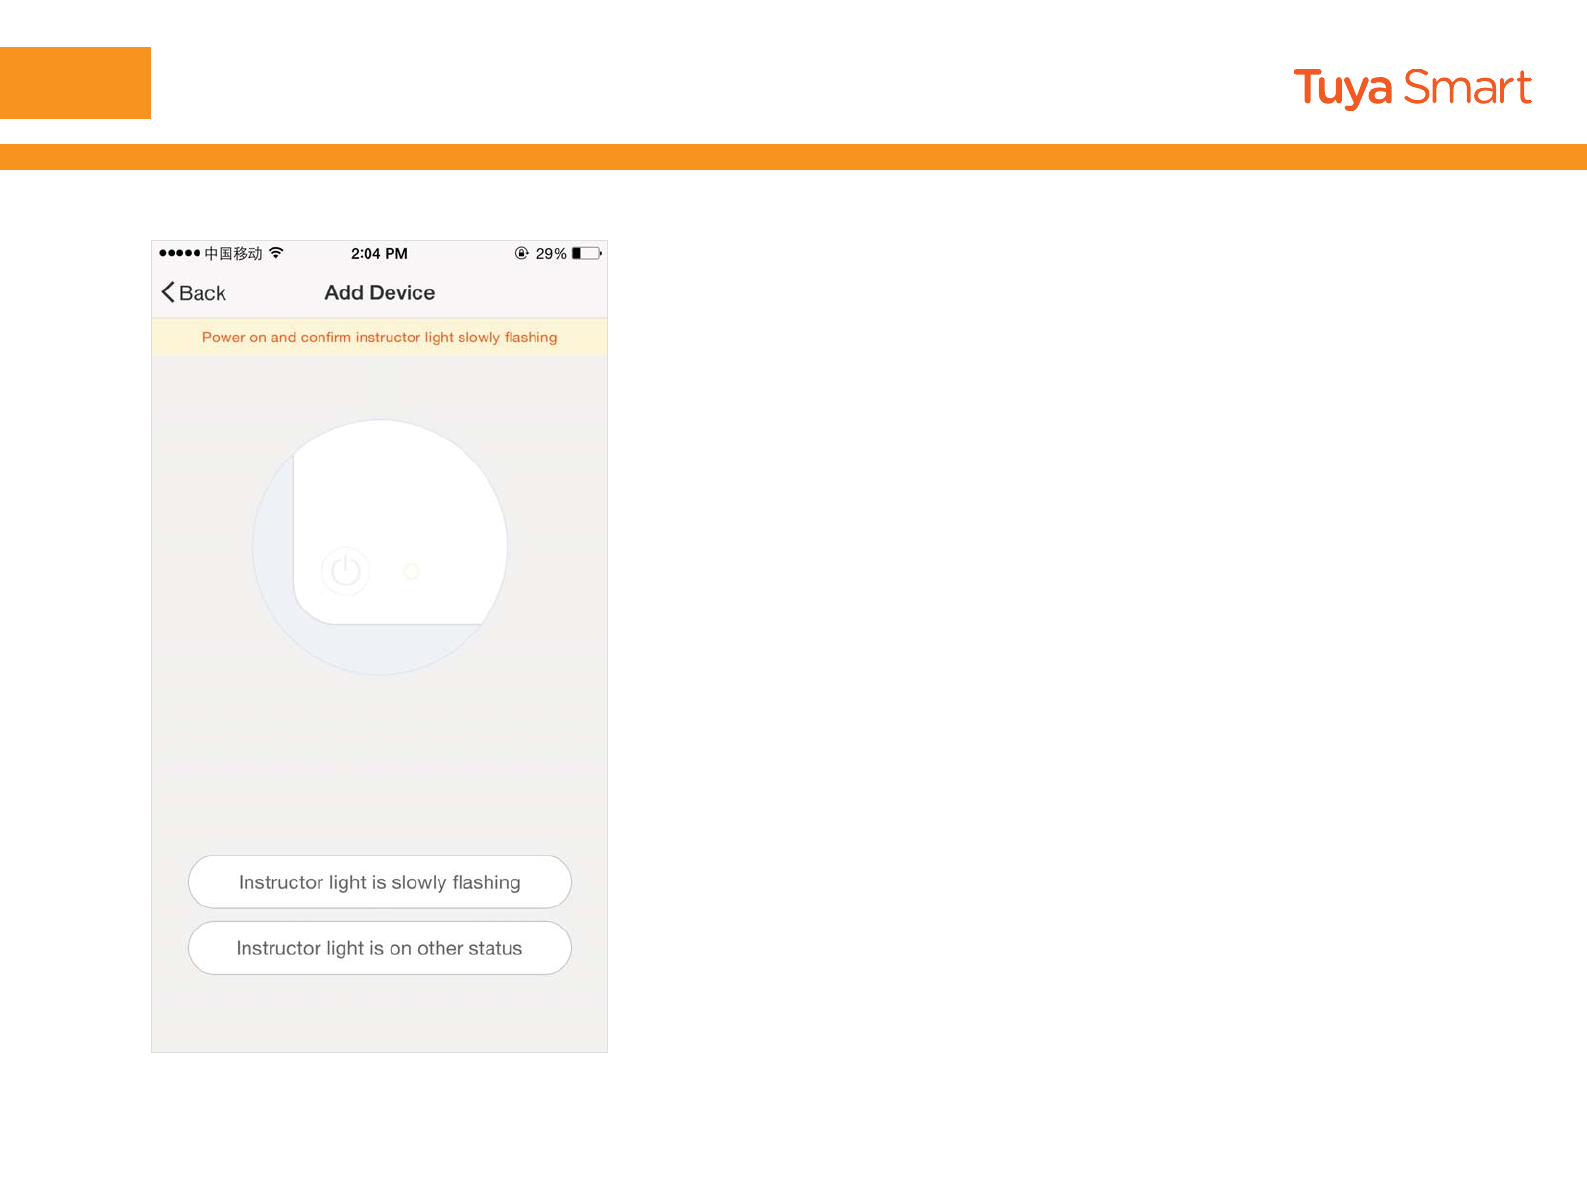
NO.3 Add device
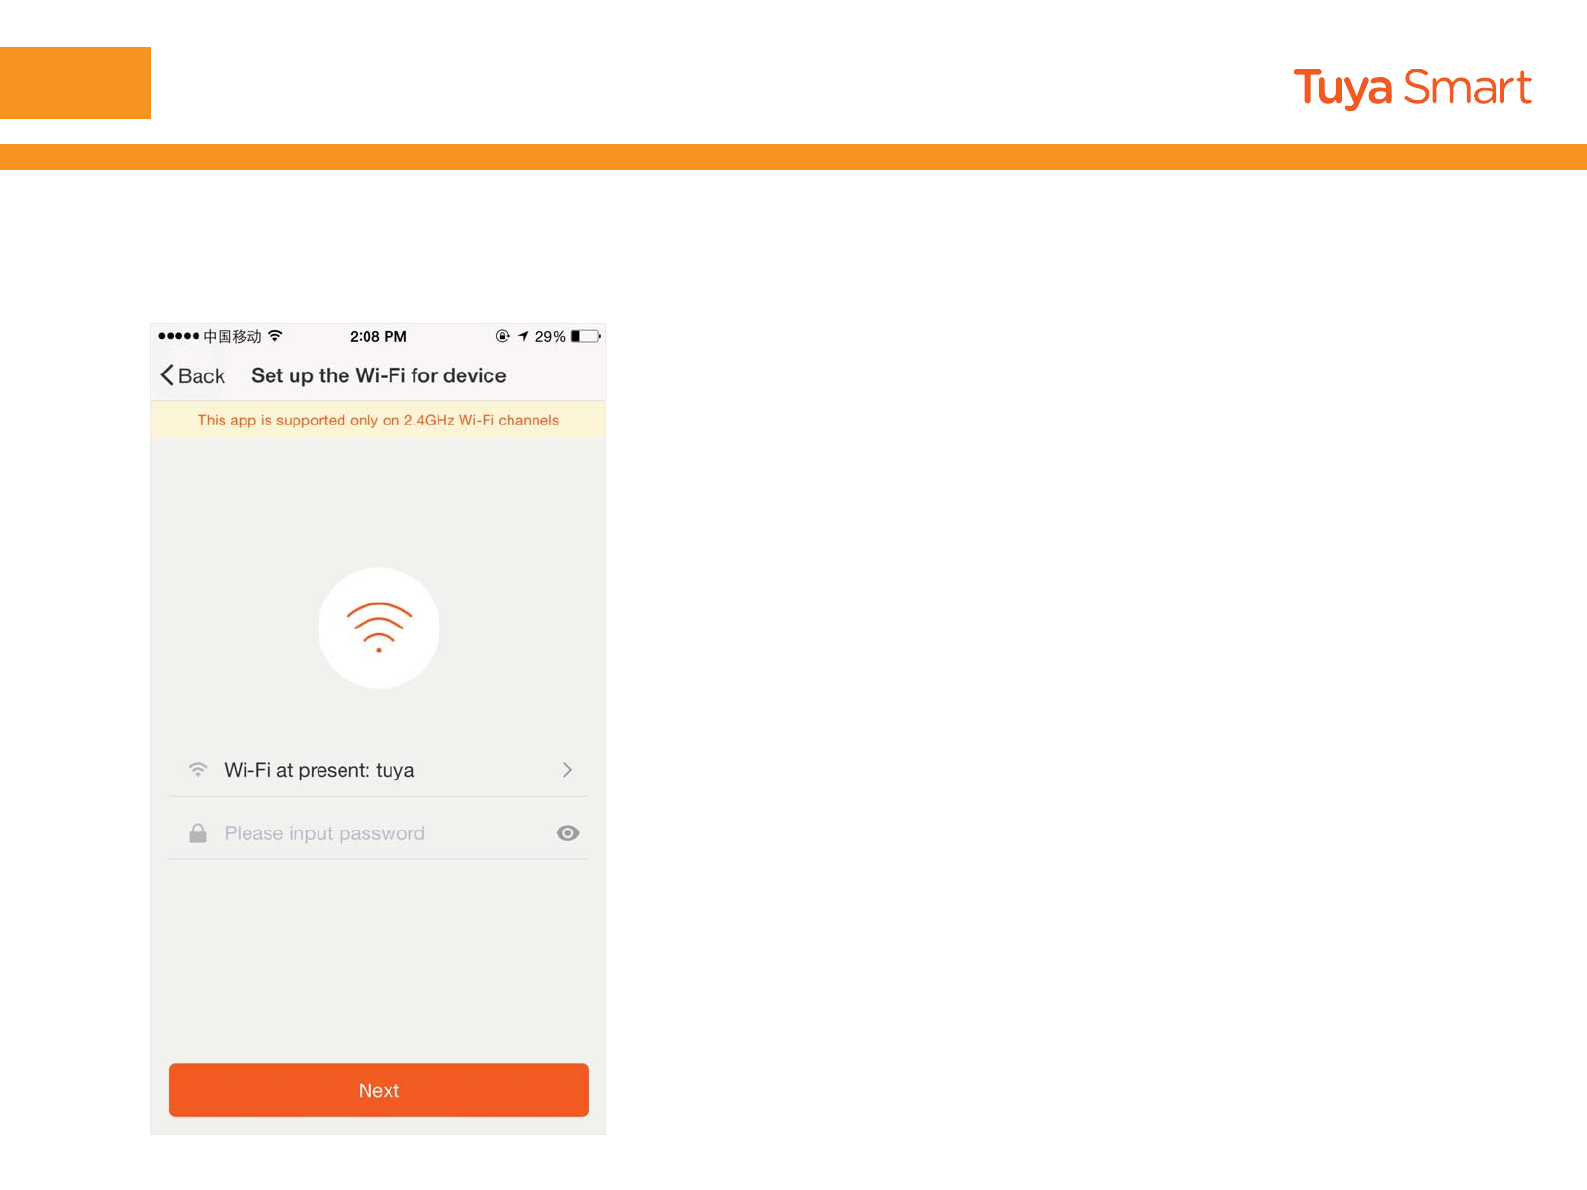
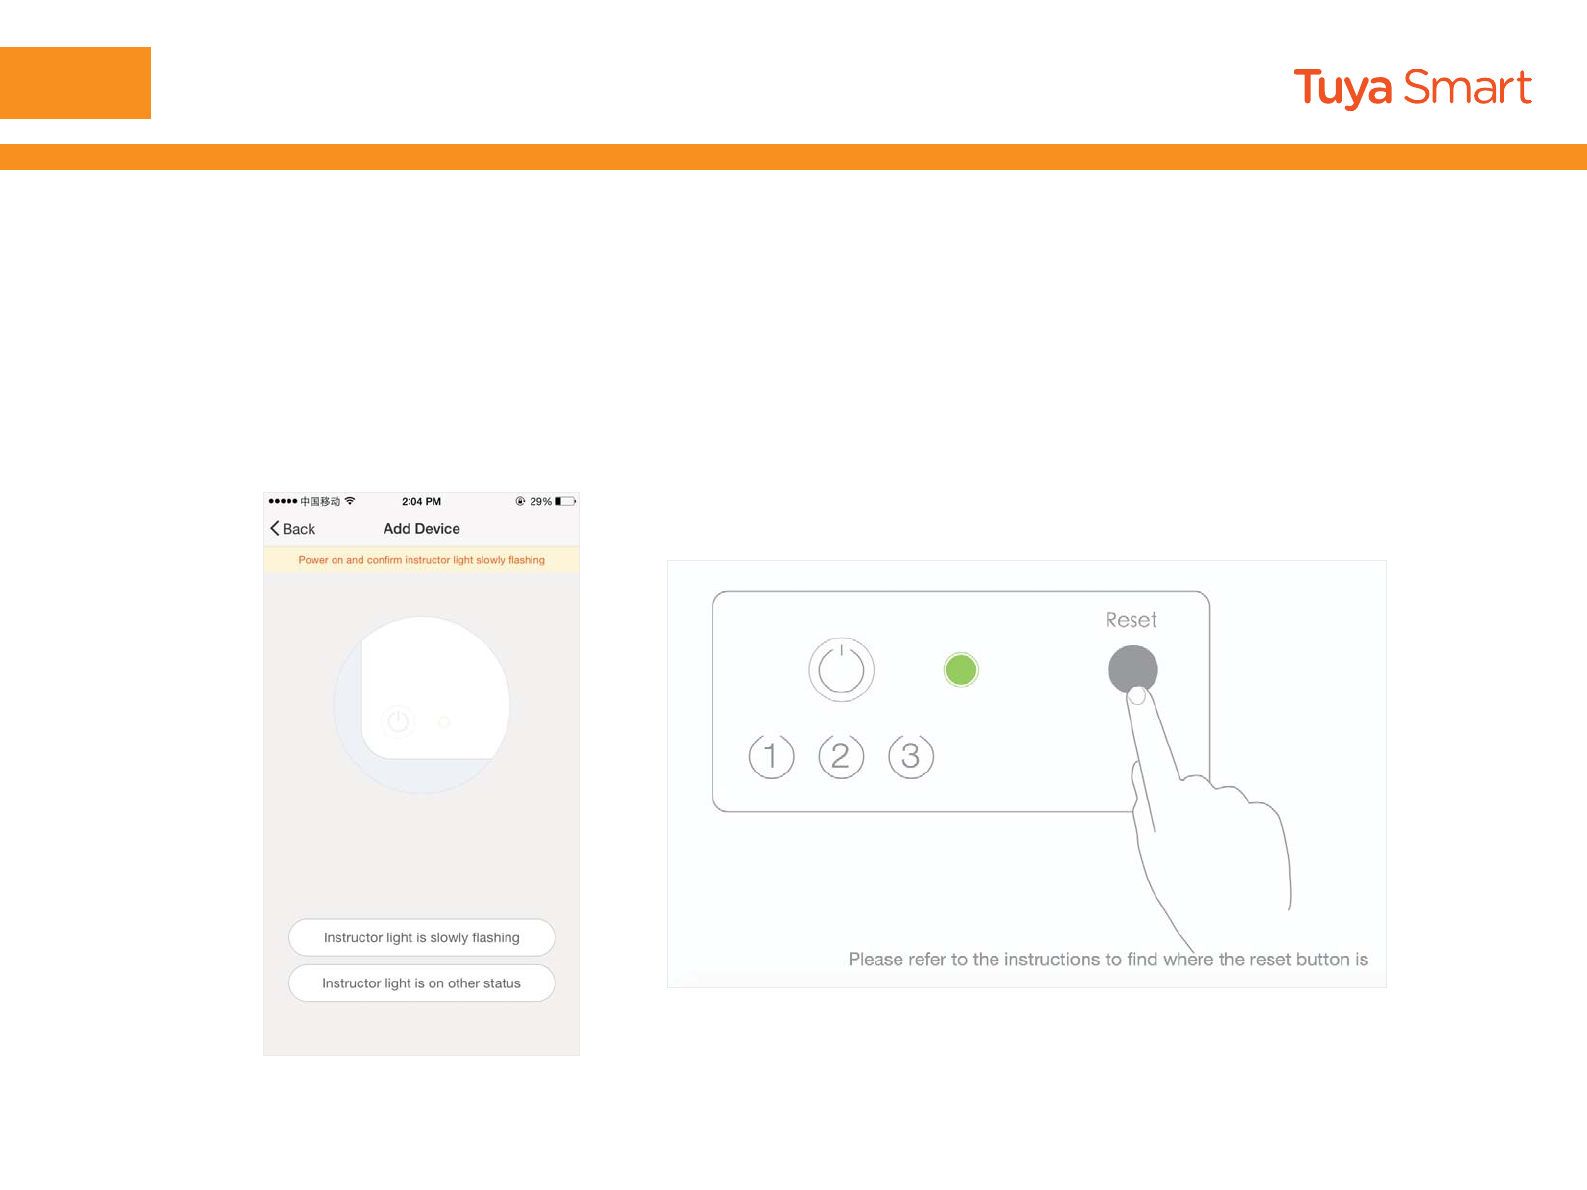
1.For hotspot mode, please make sure the
device’s instructor light slowly flashes,tap”
instructor light is on other status”and go on to the
next step
NO.3 Add device
NO.3 Add device
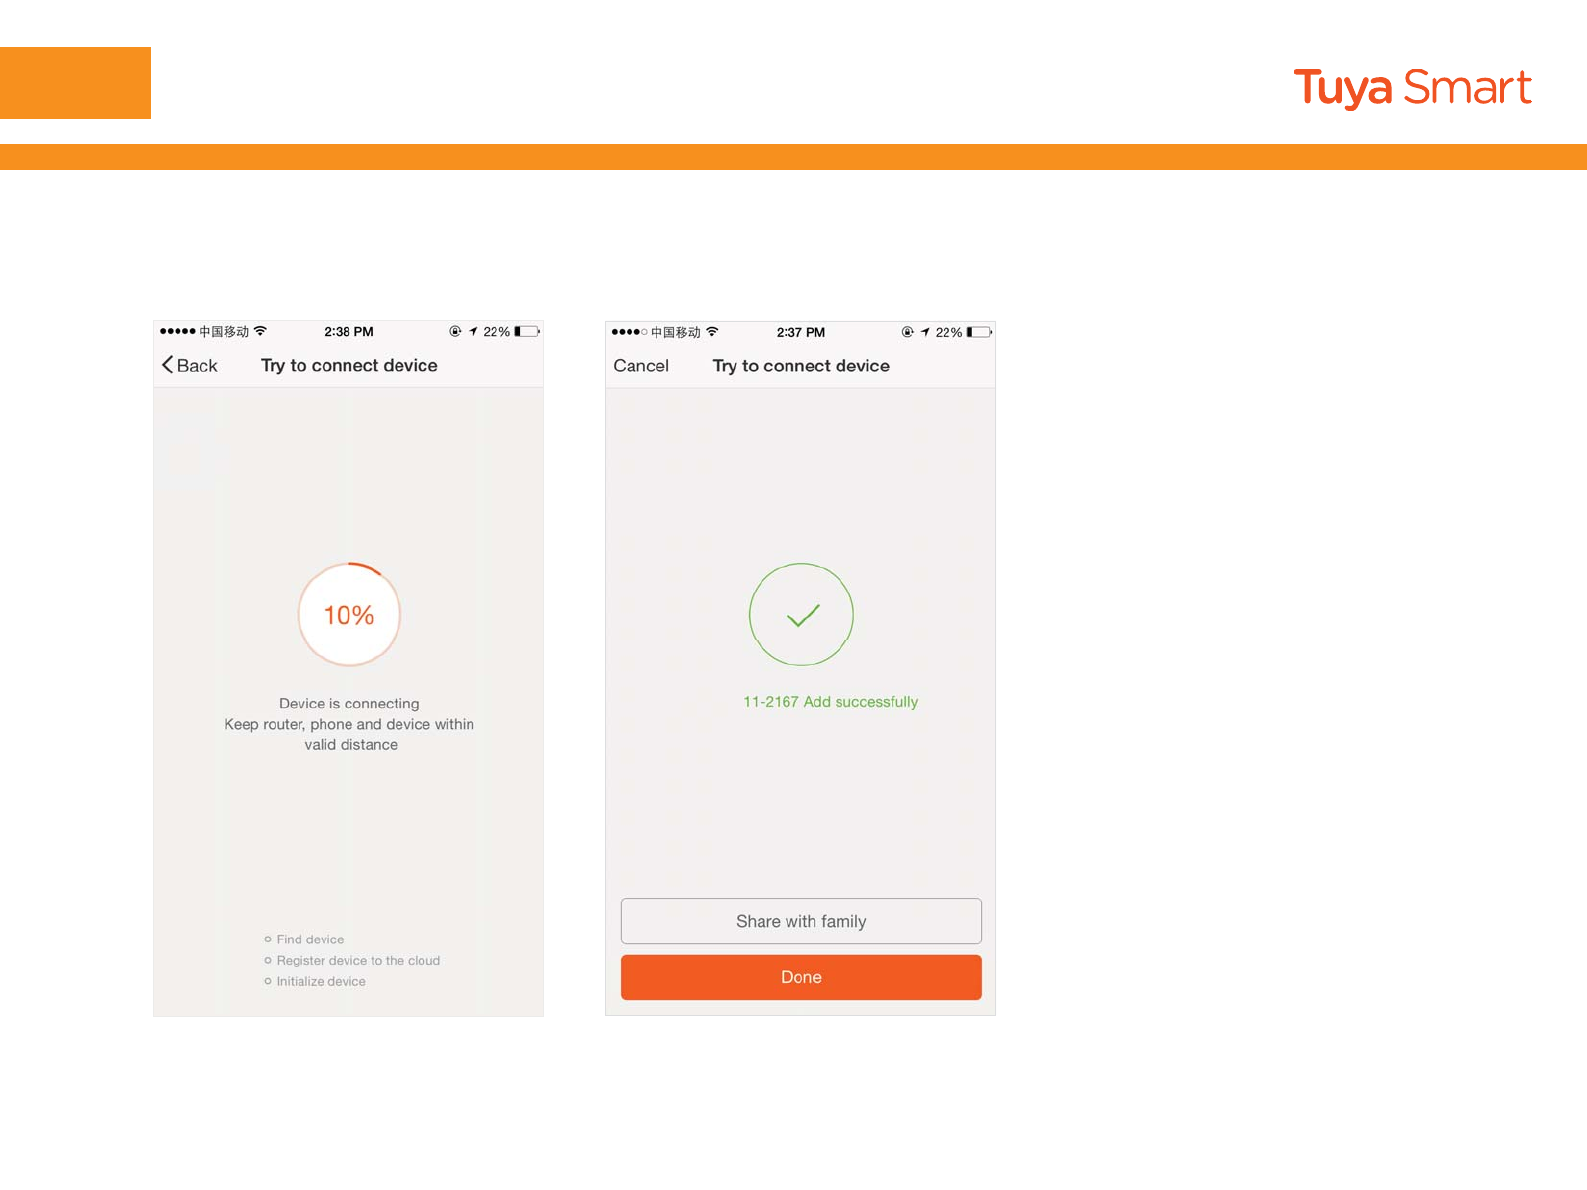
NO.3 Add device-Quick connect mode
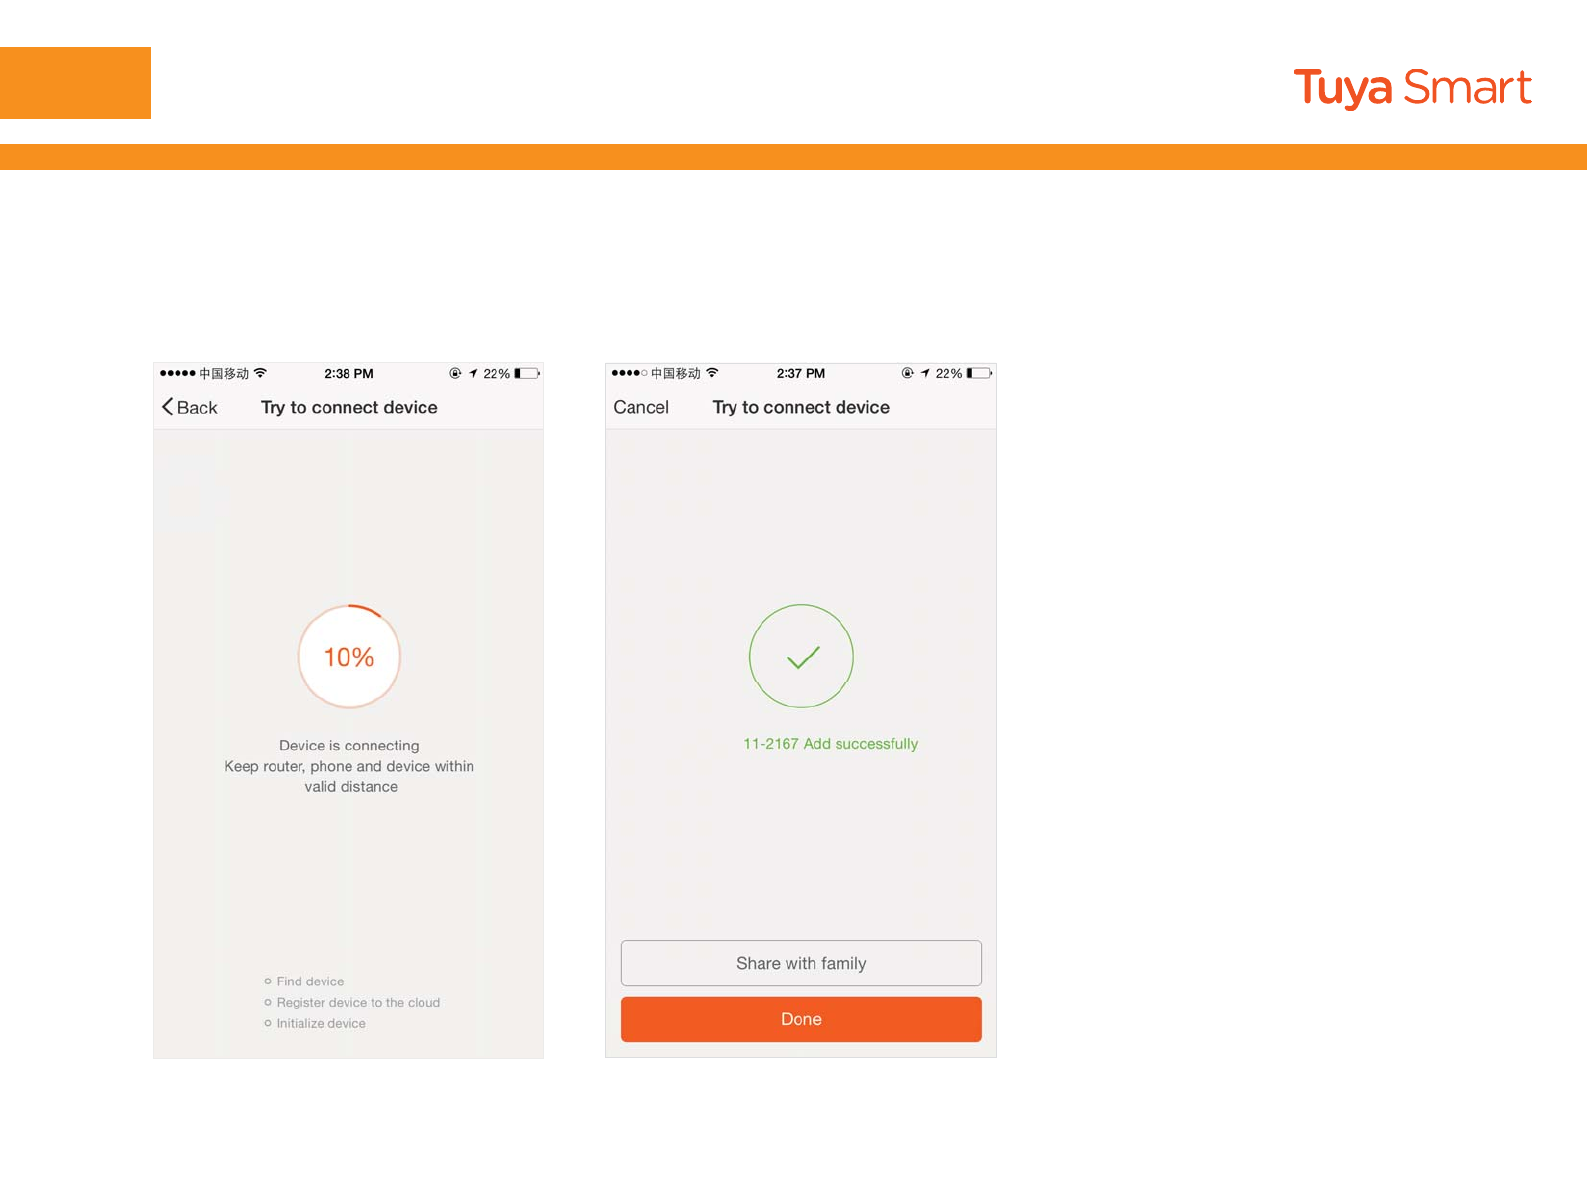
For quick connect mode, the App interface will go through the changes during the network
configuration process as shown in the picture 1. Picture 2 shows the interface when the device is
connected successfully
Pic 1 Pic 2
Pic 1 Pic 2
NO.3 Add device-Quick connect mode
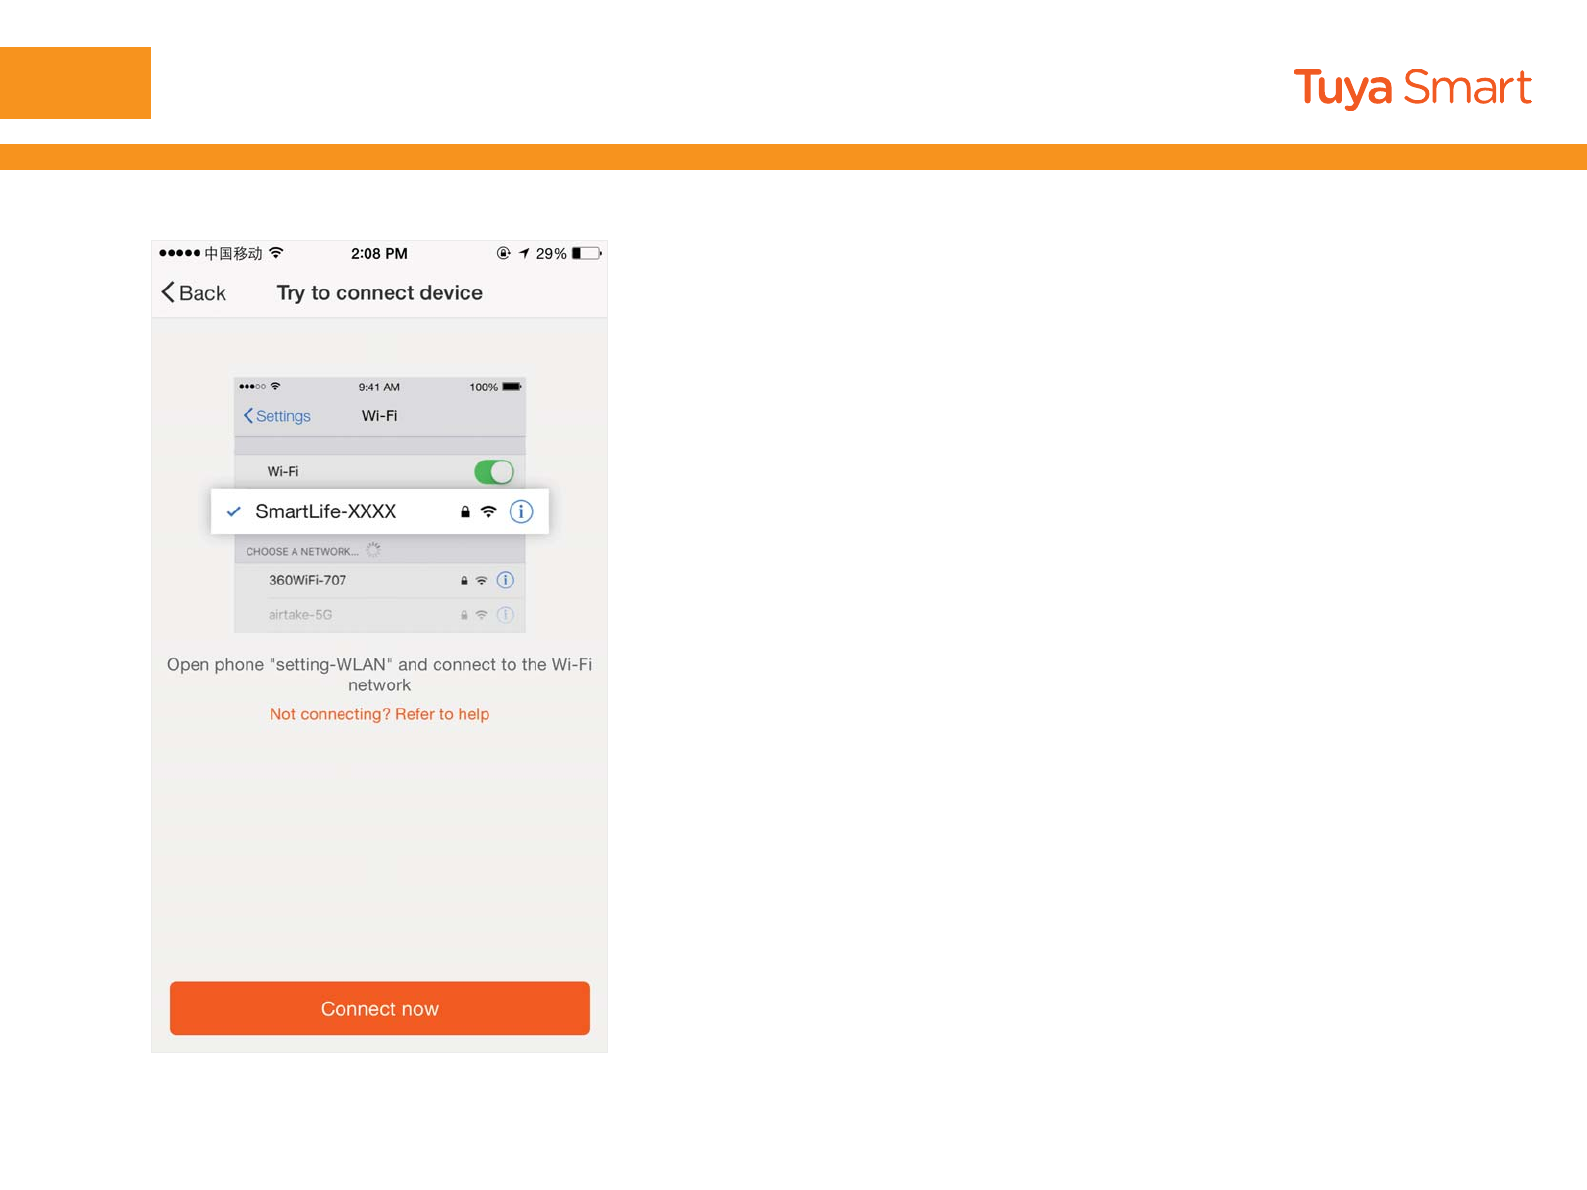
NO.3 Add device-Hotspot mode
NO.3
NO.3 Add device-Hotspot mode
Pic 1 Pic 2
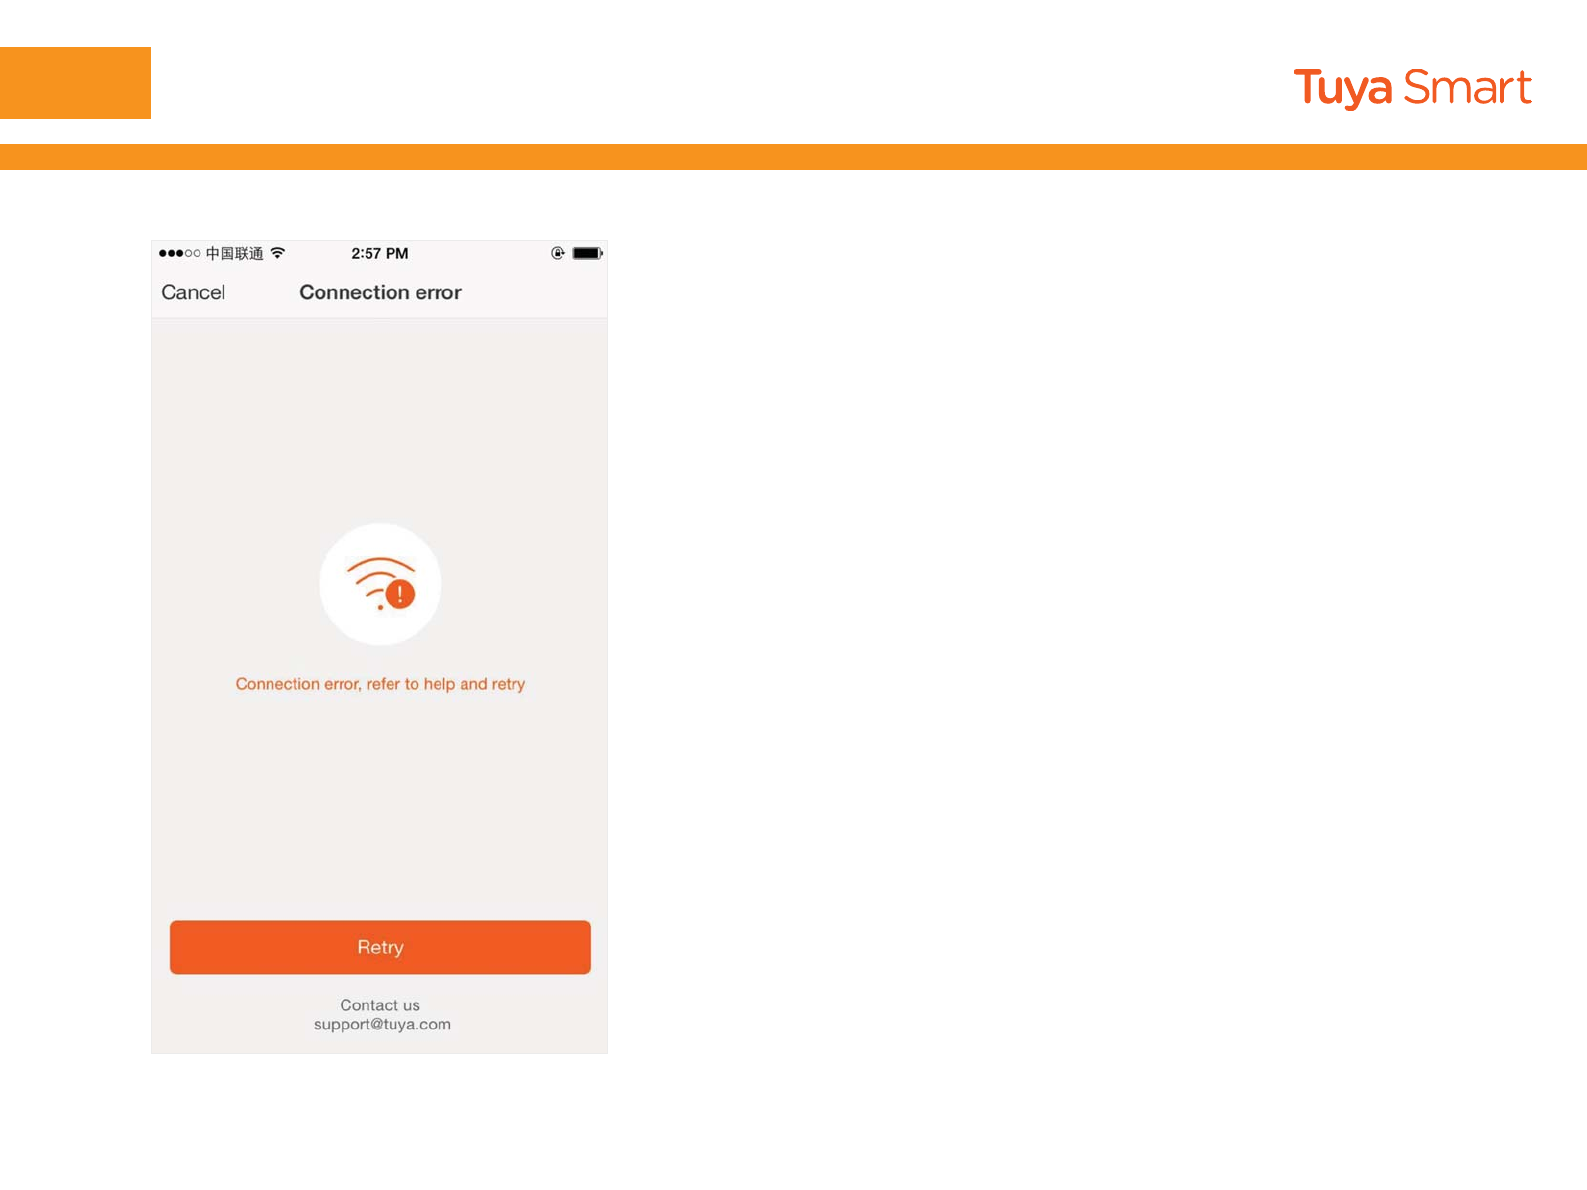
NO.3 Add device - Connection failure
NO.3
NO.4 Control device
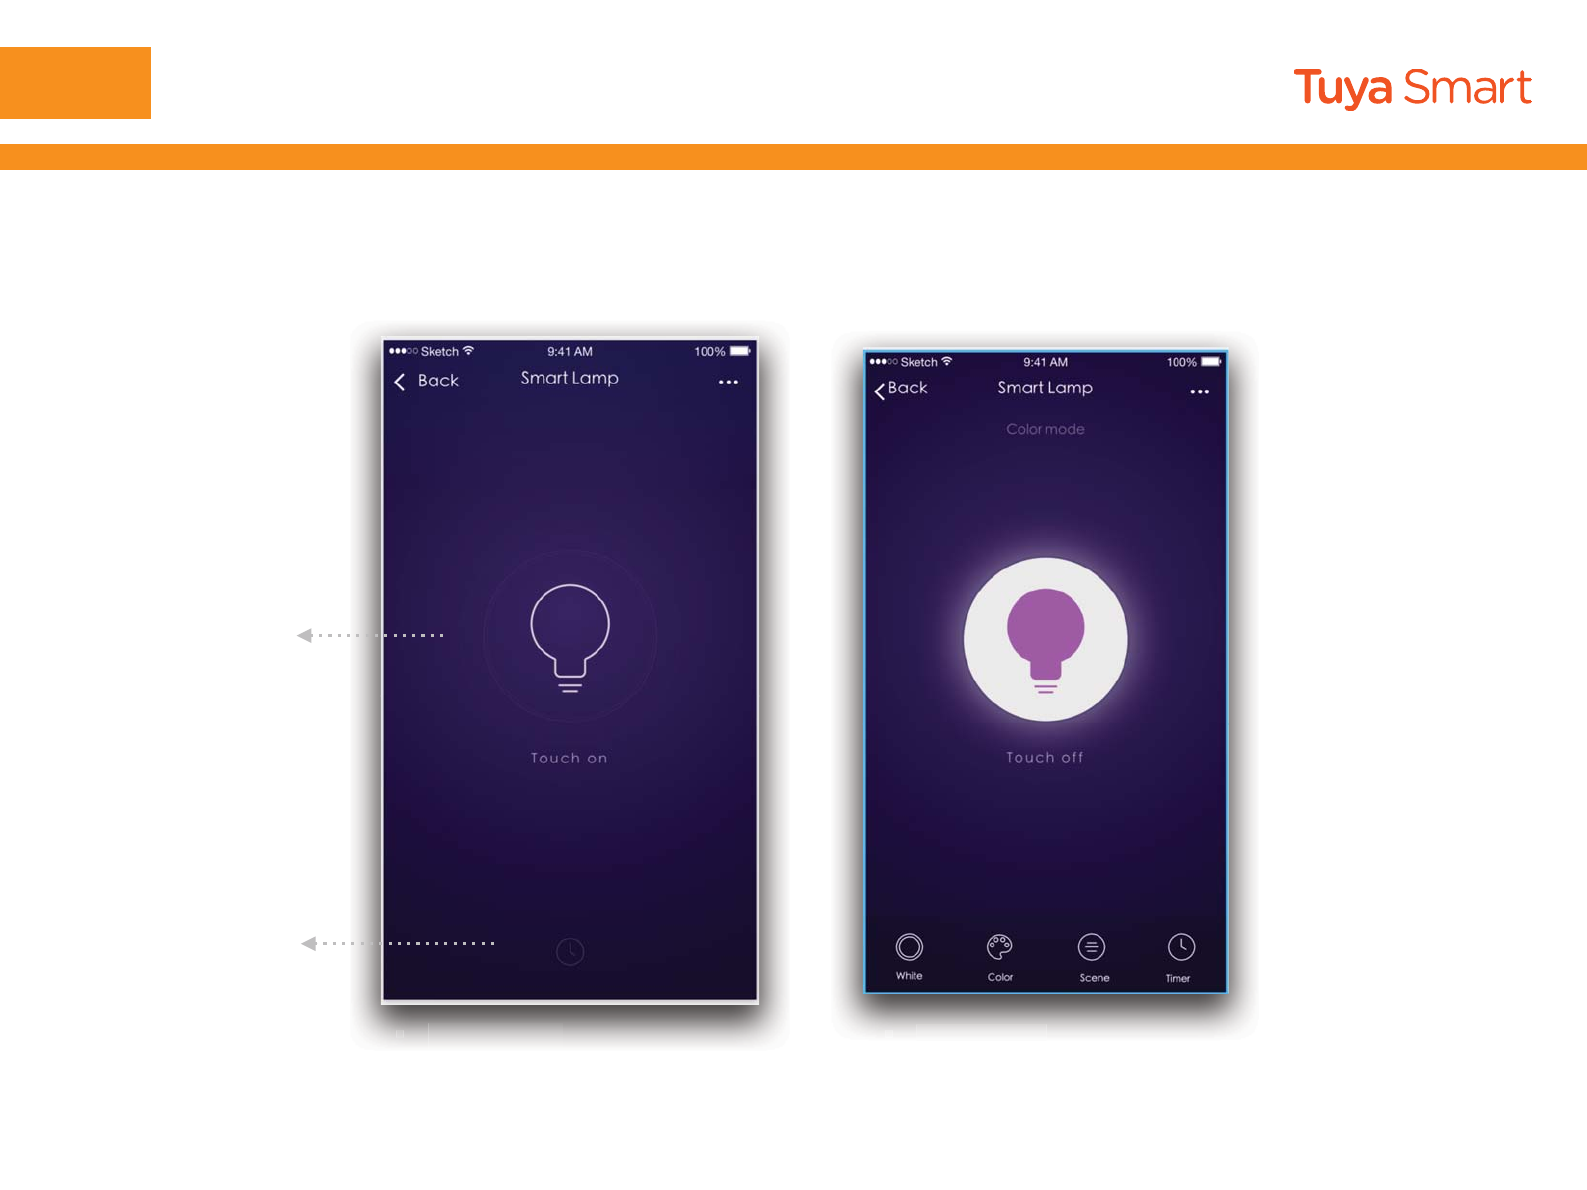
NO.4 Control device
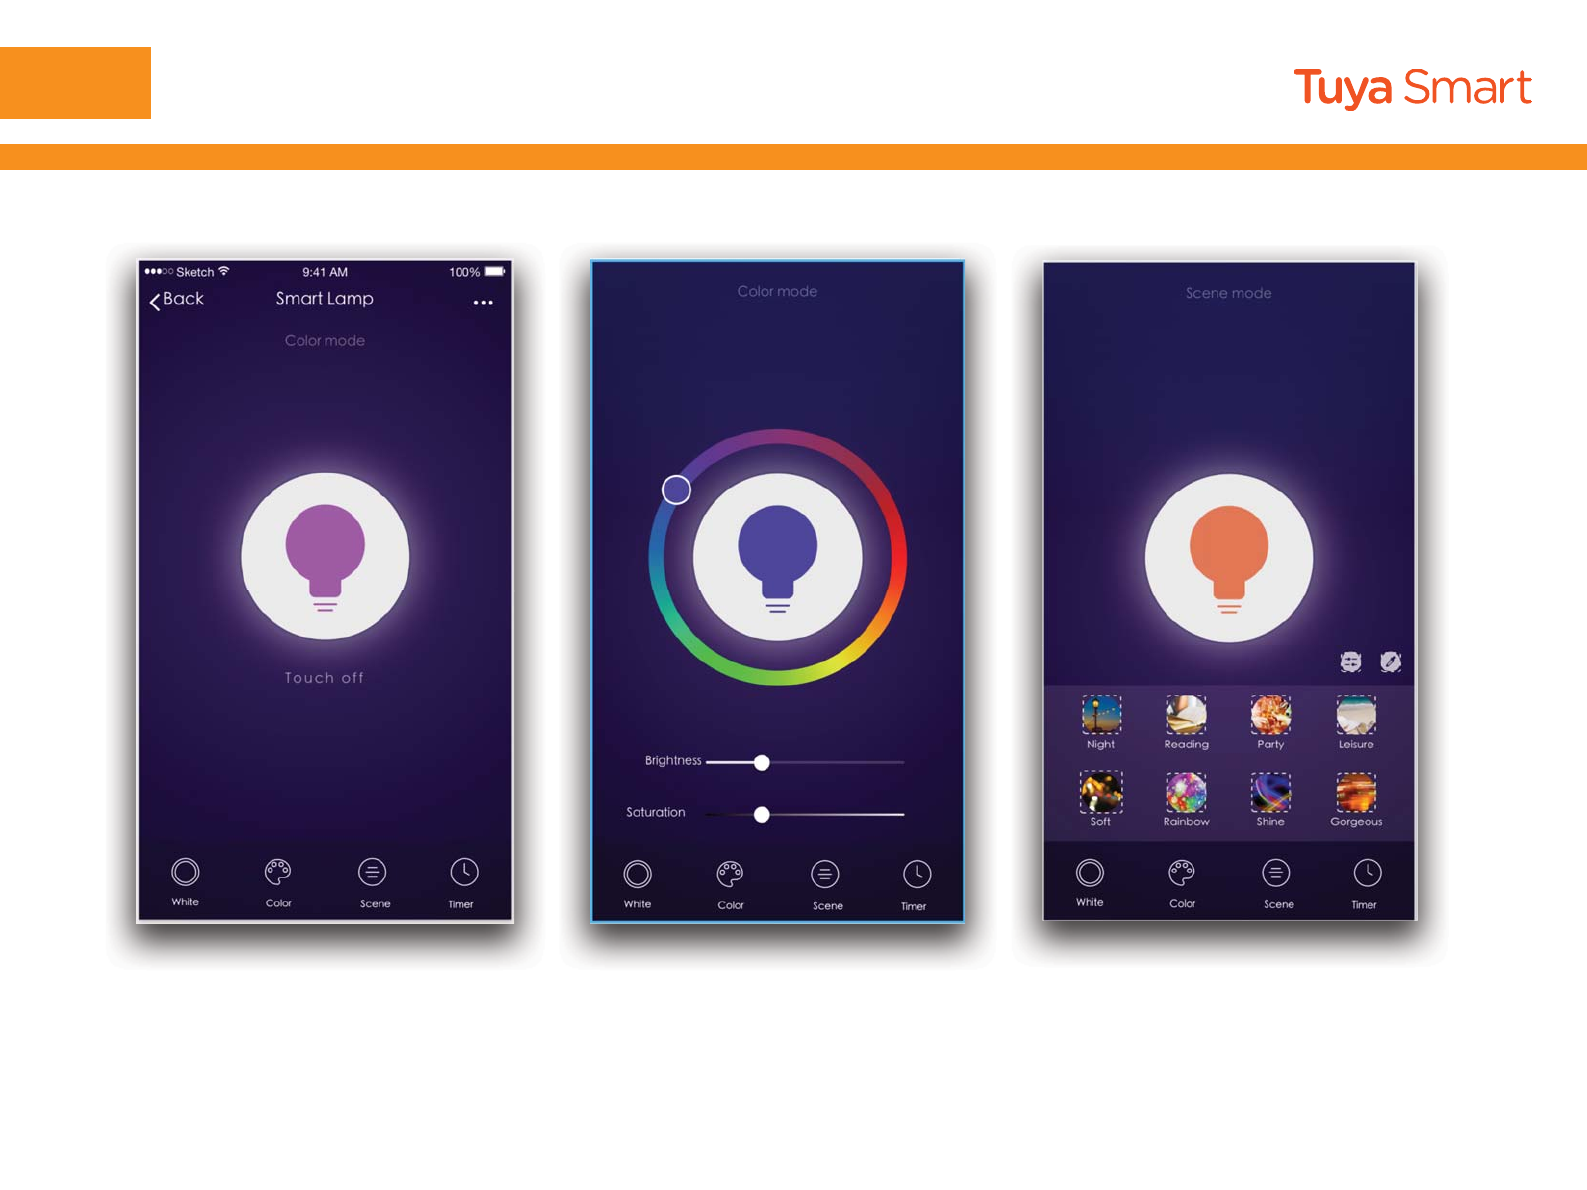
NO.4 Control device
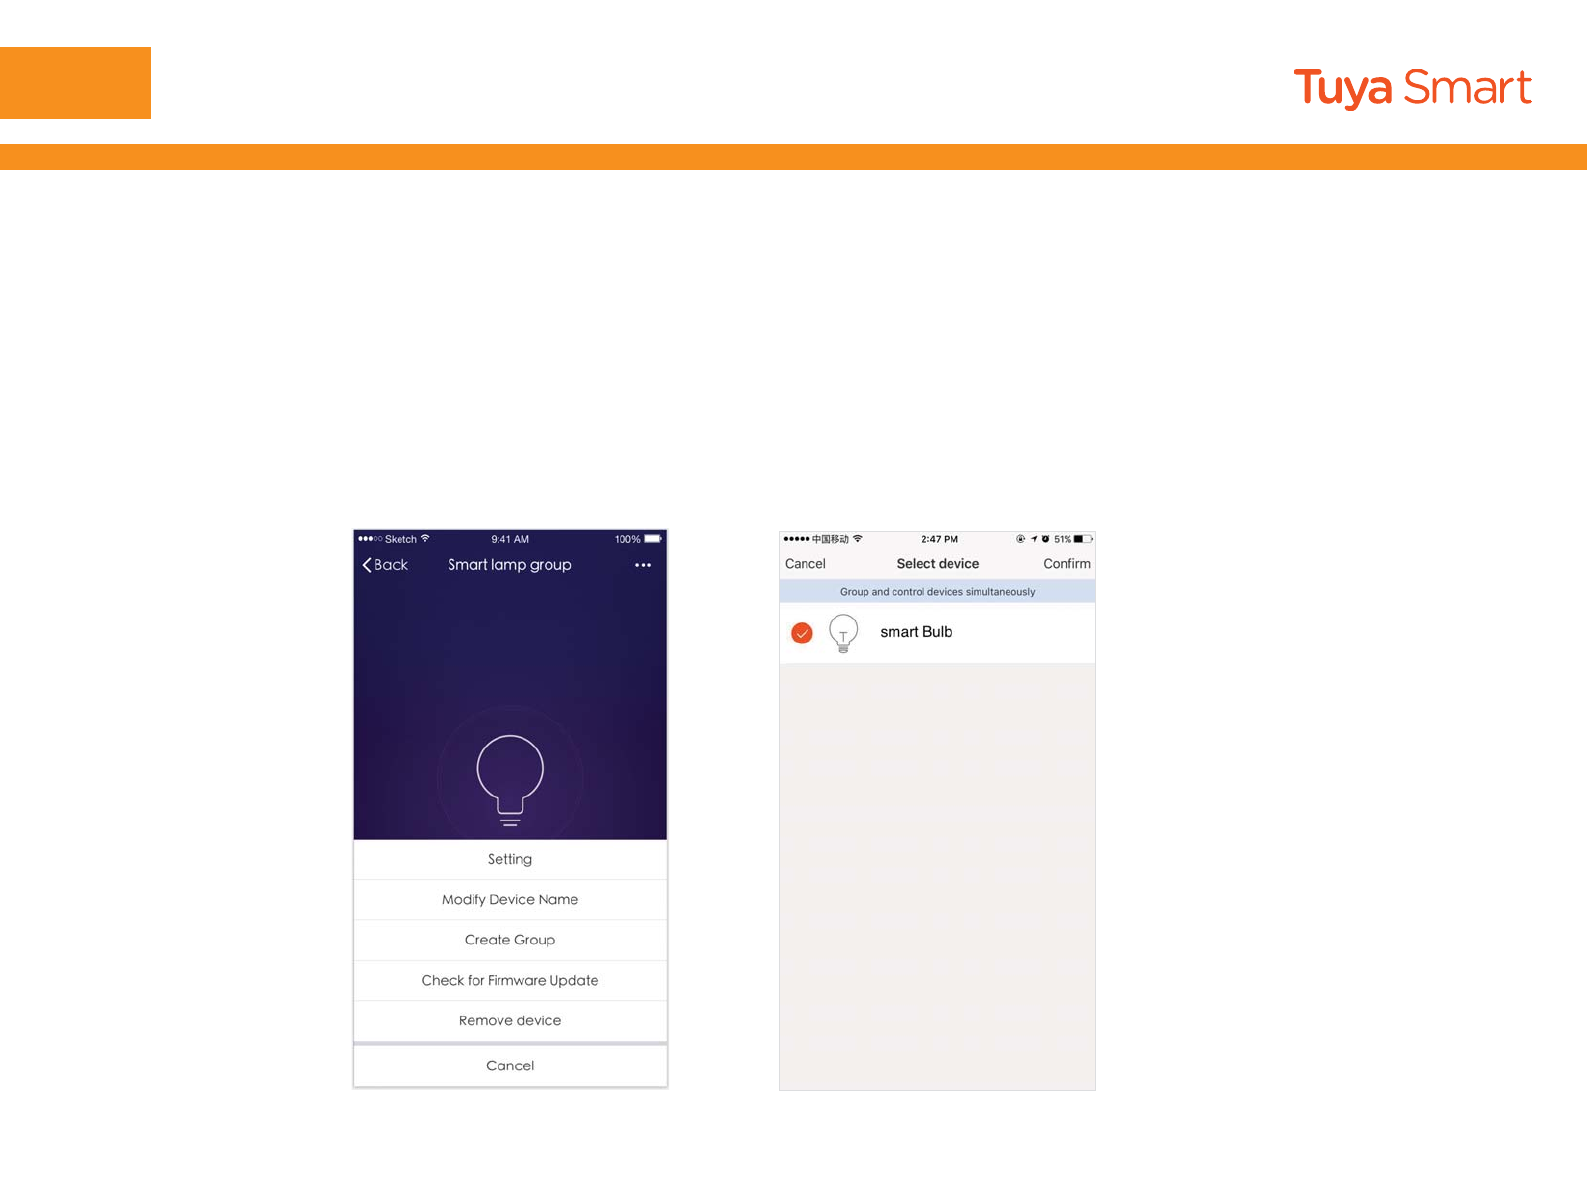
Pic 1 Pic 2
NO.4 Control device
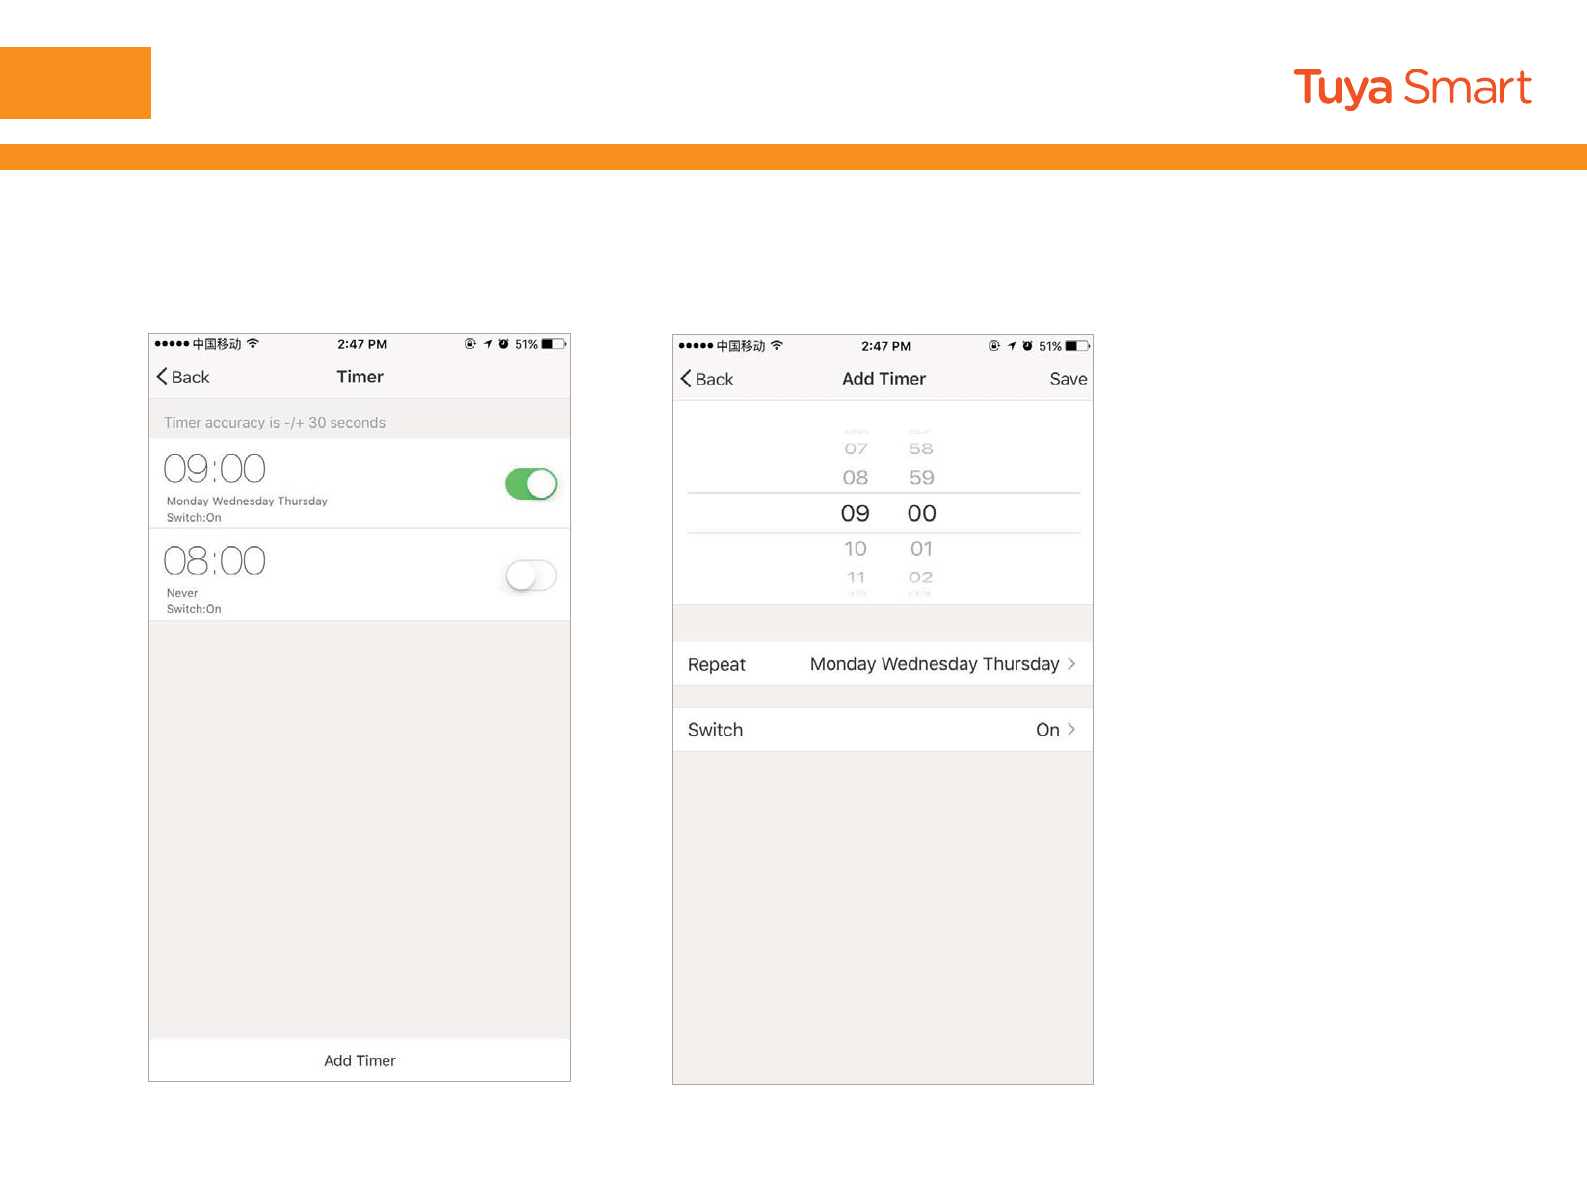
NO.4 Control device
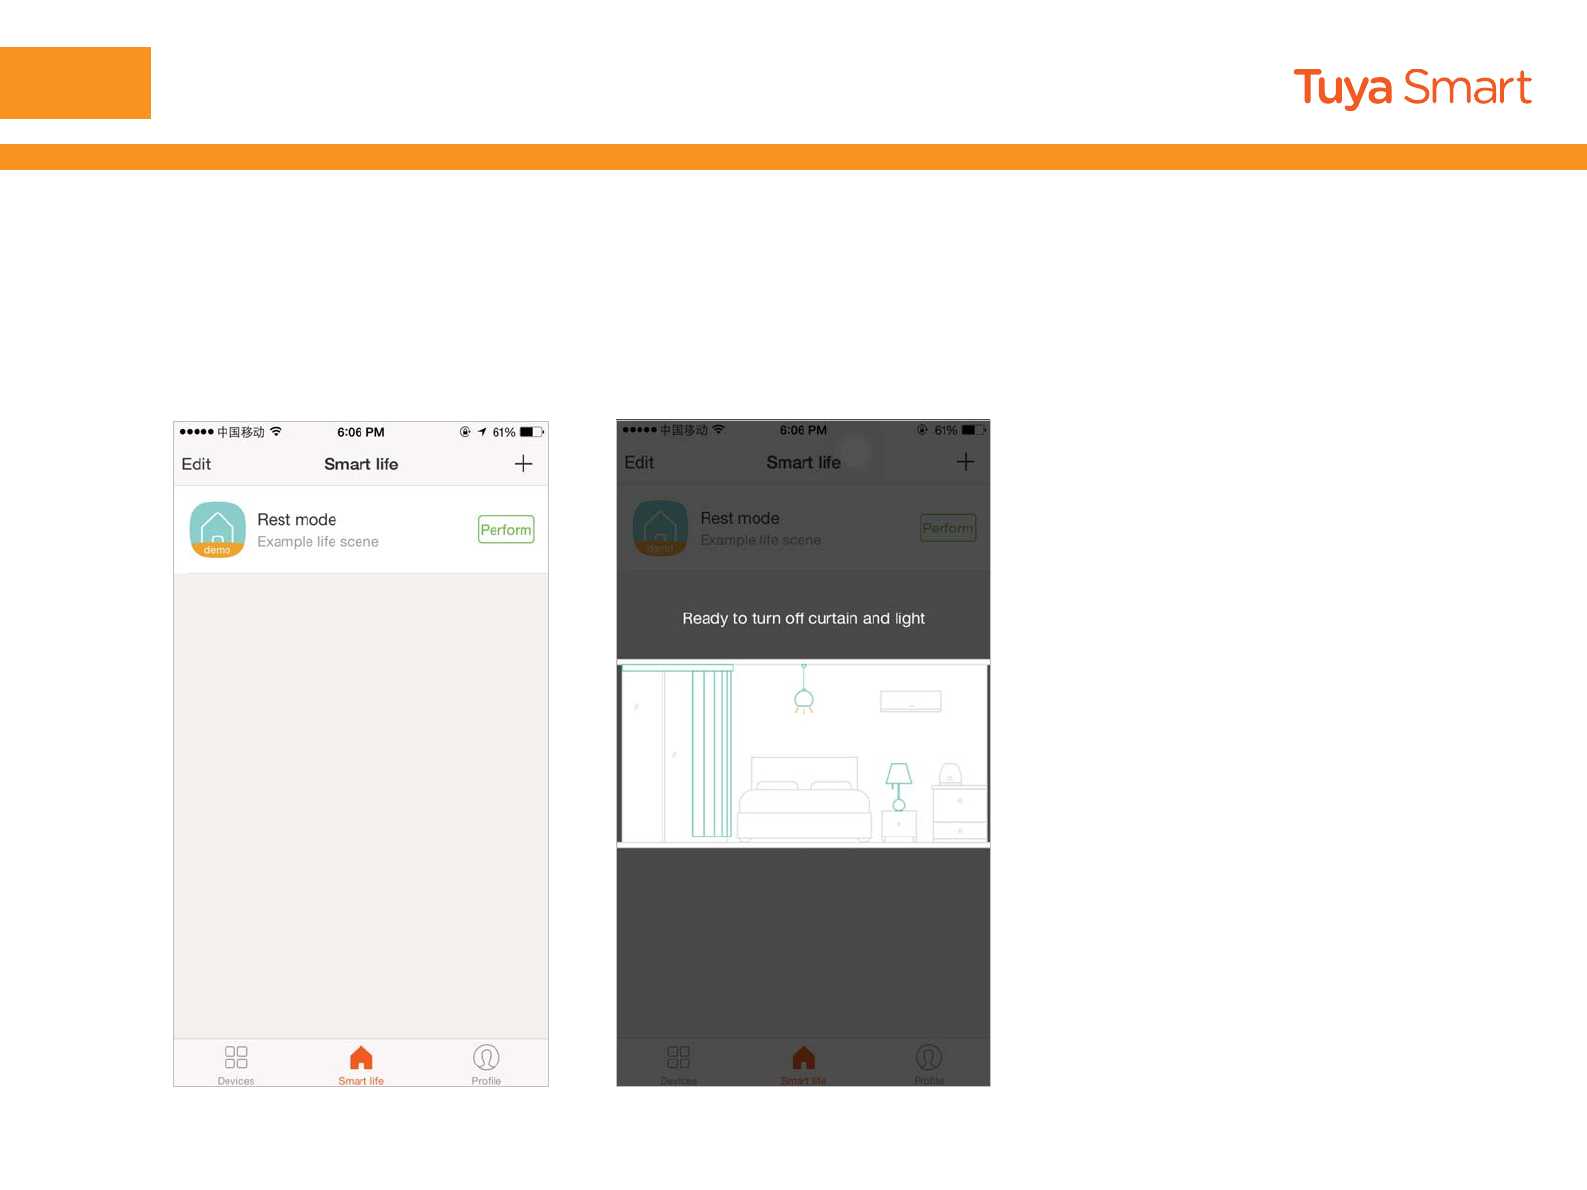
NO.5 Smart life scene
1.Users can Free-combine devices to do tasks in smart life scene.Enjoy a better experience of
intelligent products.
2.Tuya smart built for users Demo smart life scene (rest mode).Users can learn more about
smart life scene in the video tap “Perform” of Rest modeas shown in the picture 2
Pic1 Pic2
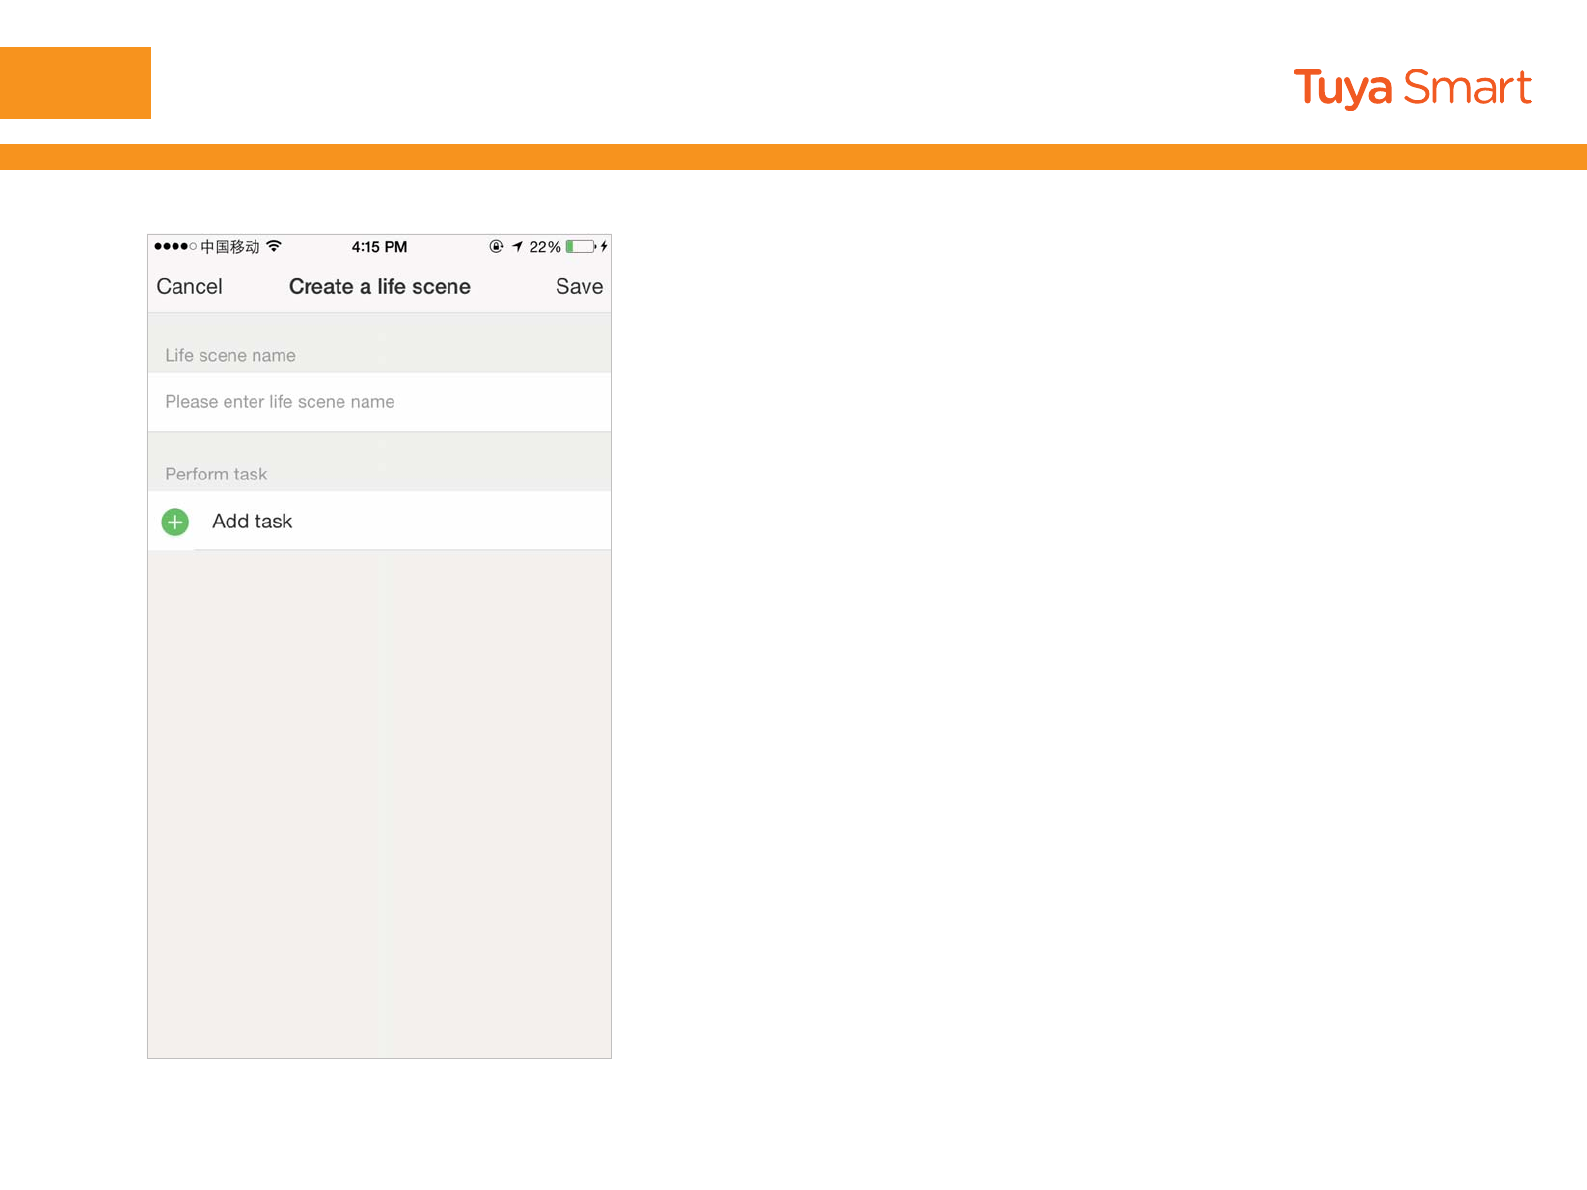
NO.5 Smart life scene
Create a life scene
1.Tap“+”in the upper right of the page to create a
new smart life scene
2.Enter life scene name,add task,tap
“Save”,as shown in the picture.A smart life scene
has been created.
3.You can also change the scene you have
already createdchange scene namechange
taskdelete smart life scene.
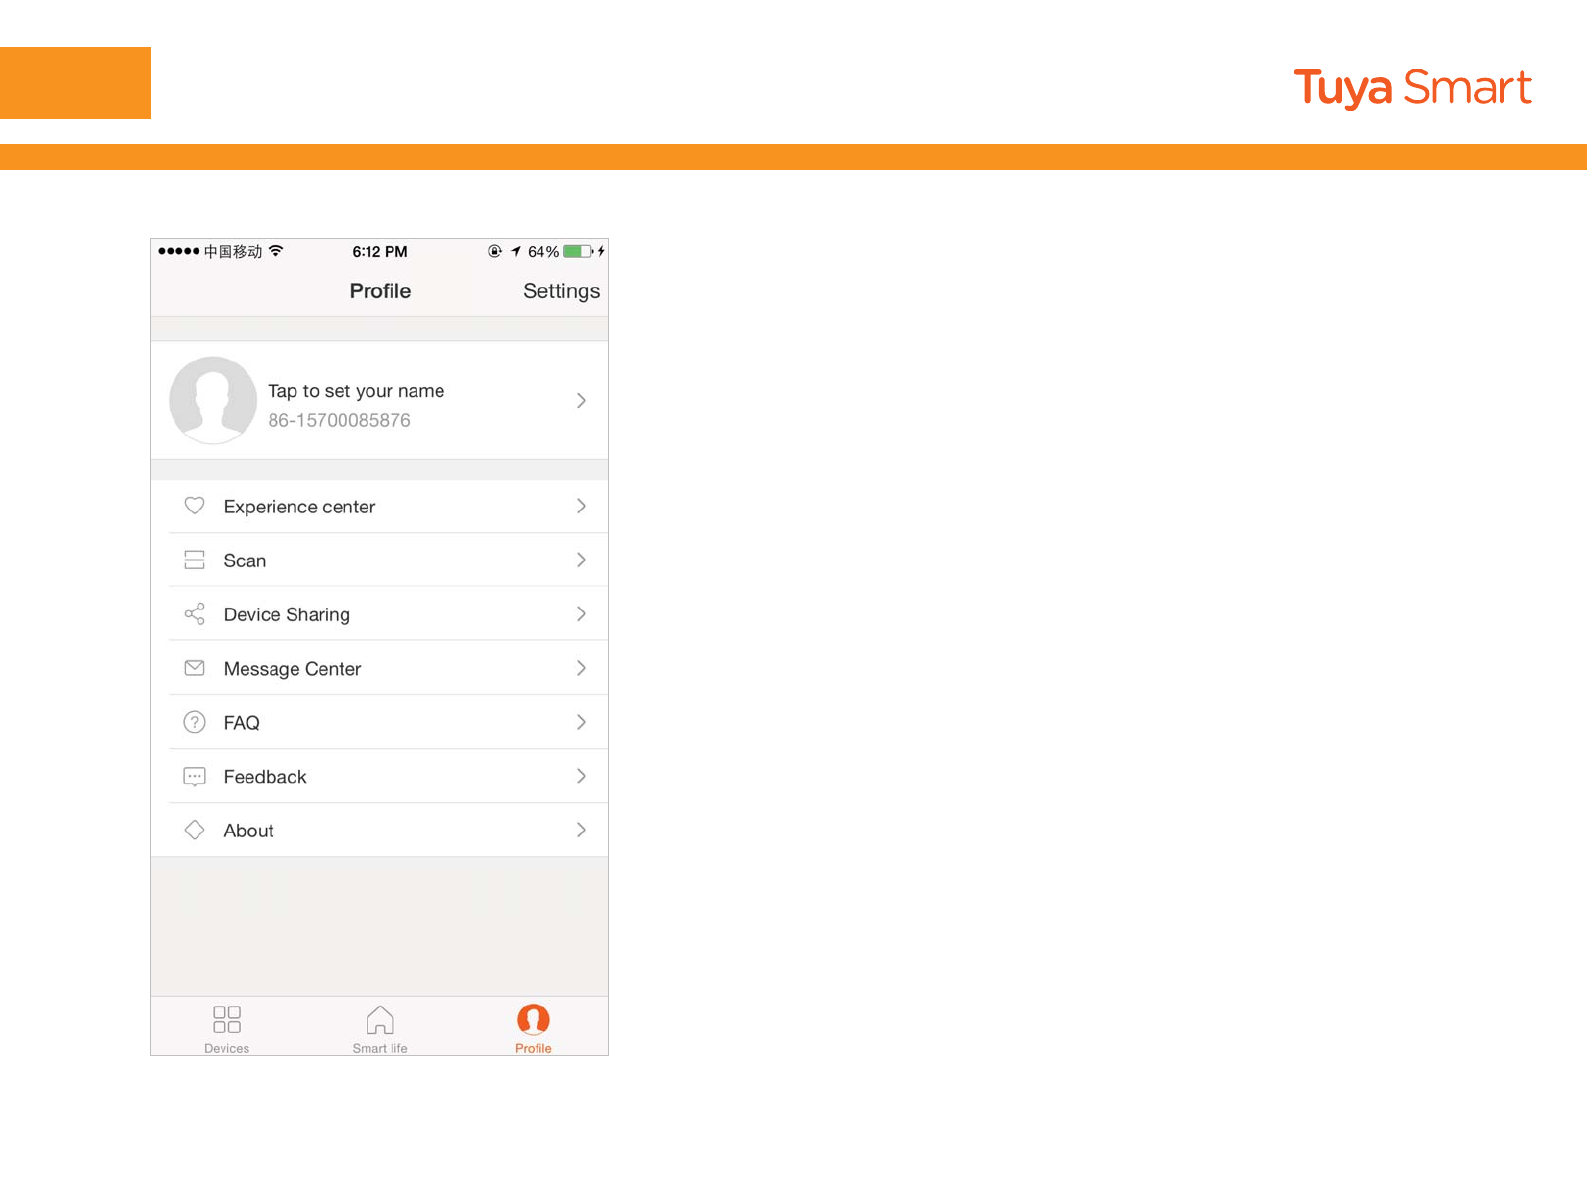
NO.6 Profile
1.Personal information
2.Experience centerDisplay demo equipment
3.ScanCooperate with Tuya Smart development
platform , starting the virtual equipment to view the
equipment control panel
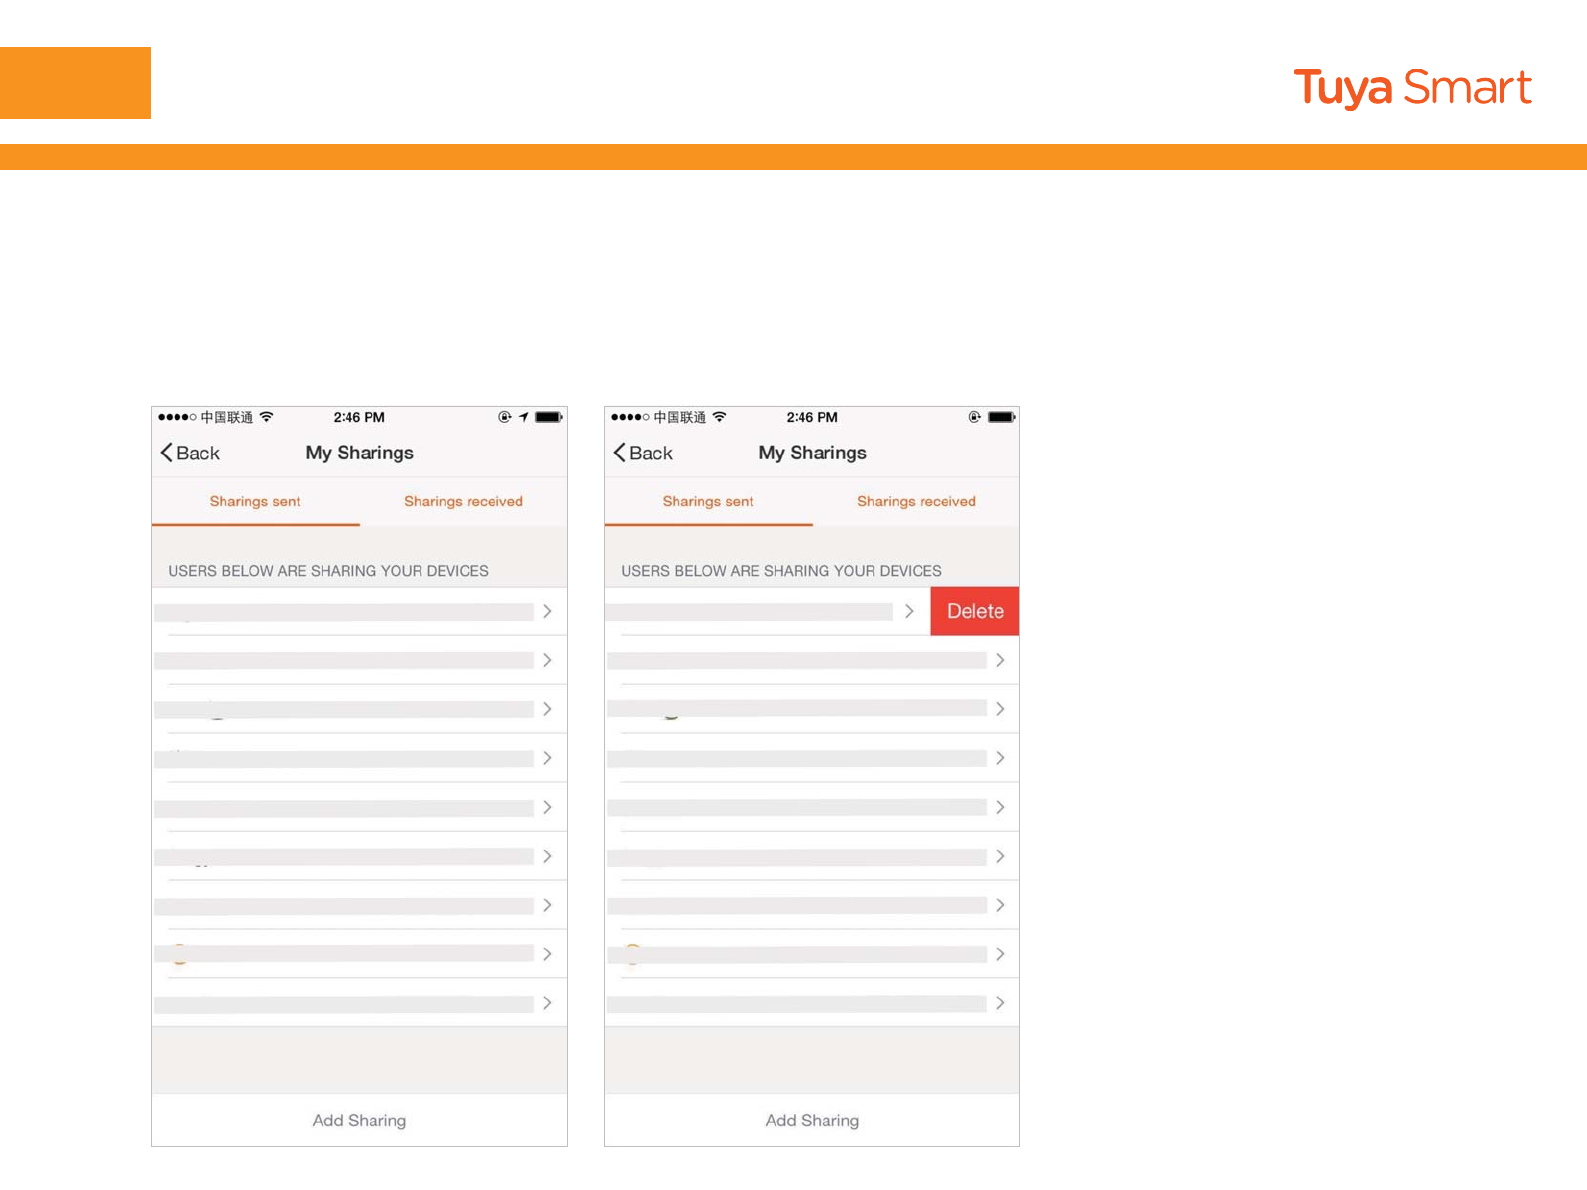
4.Device Sharingyour Information of shared
devices
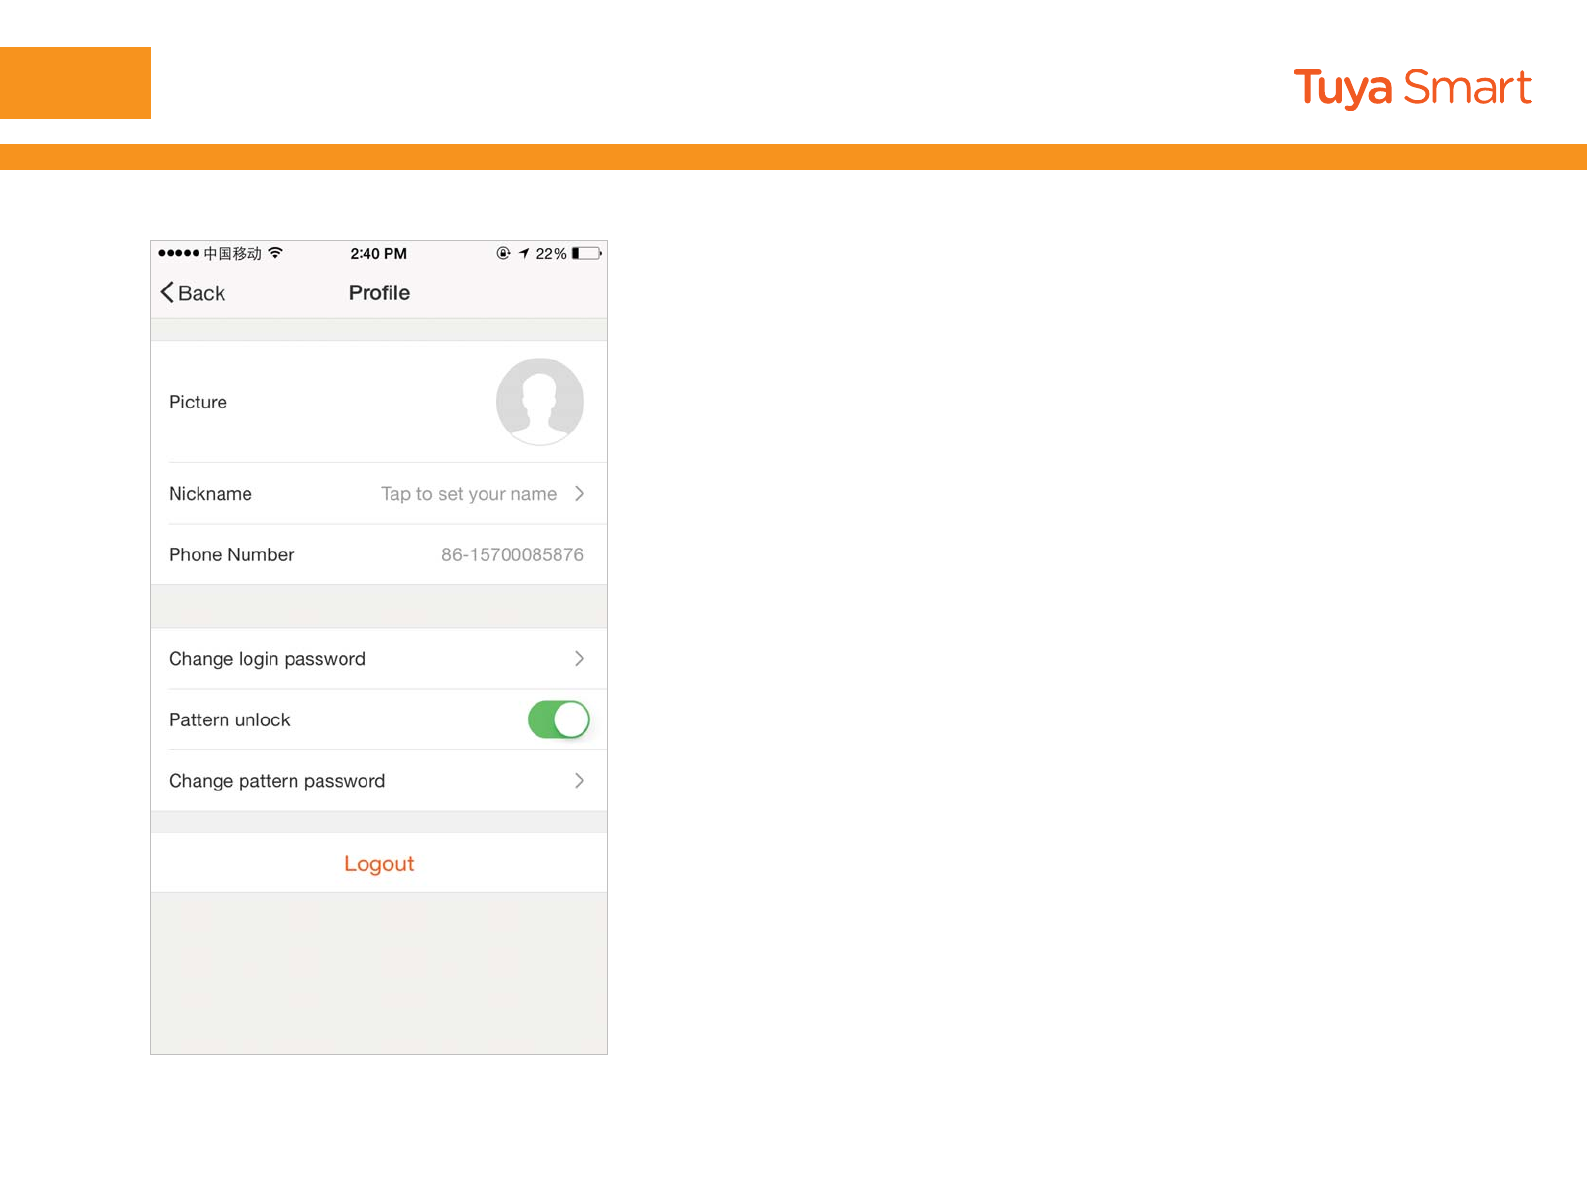
NO.6 Profile
“Profile” page for displaying personal account
information.You can change login password, bound
cellphone number,set pattern unlock on this page.
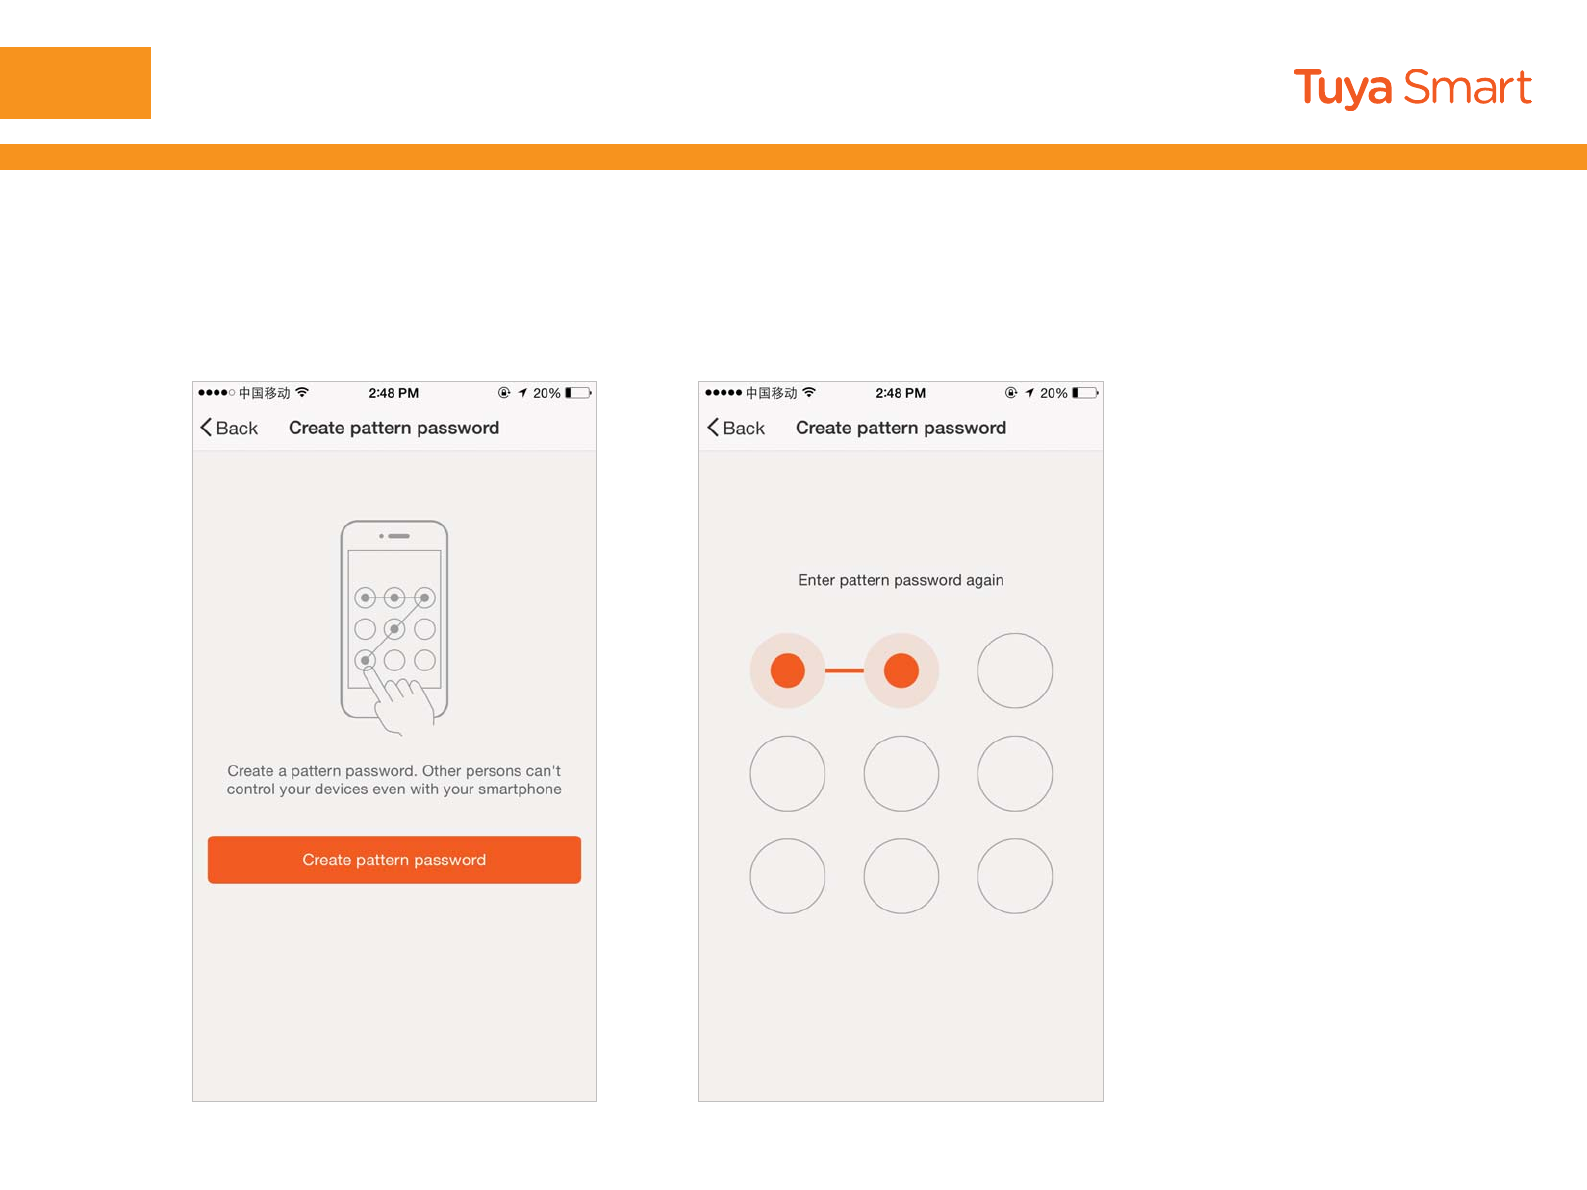
NO.6 Profile
Tap“Pattern unlock” to set your pattern password.After setup,you have to enter your
pattern password before using.
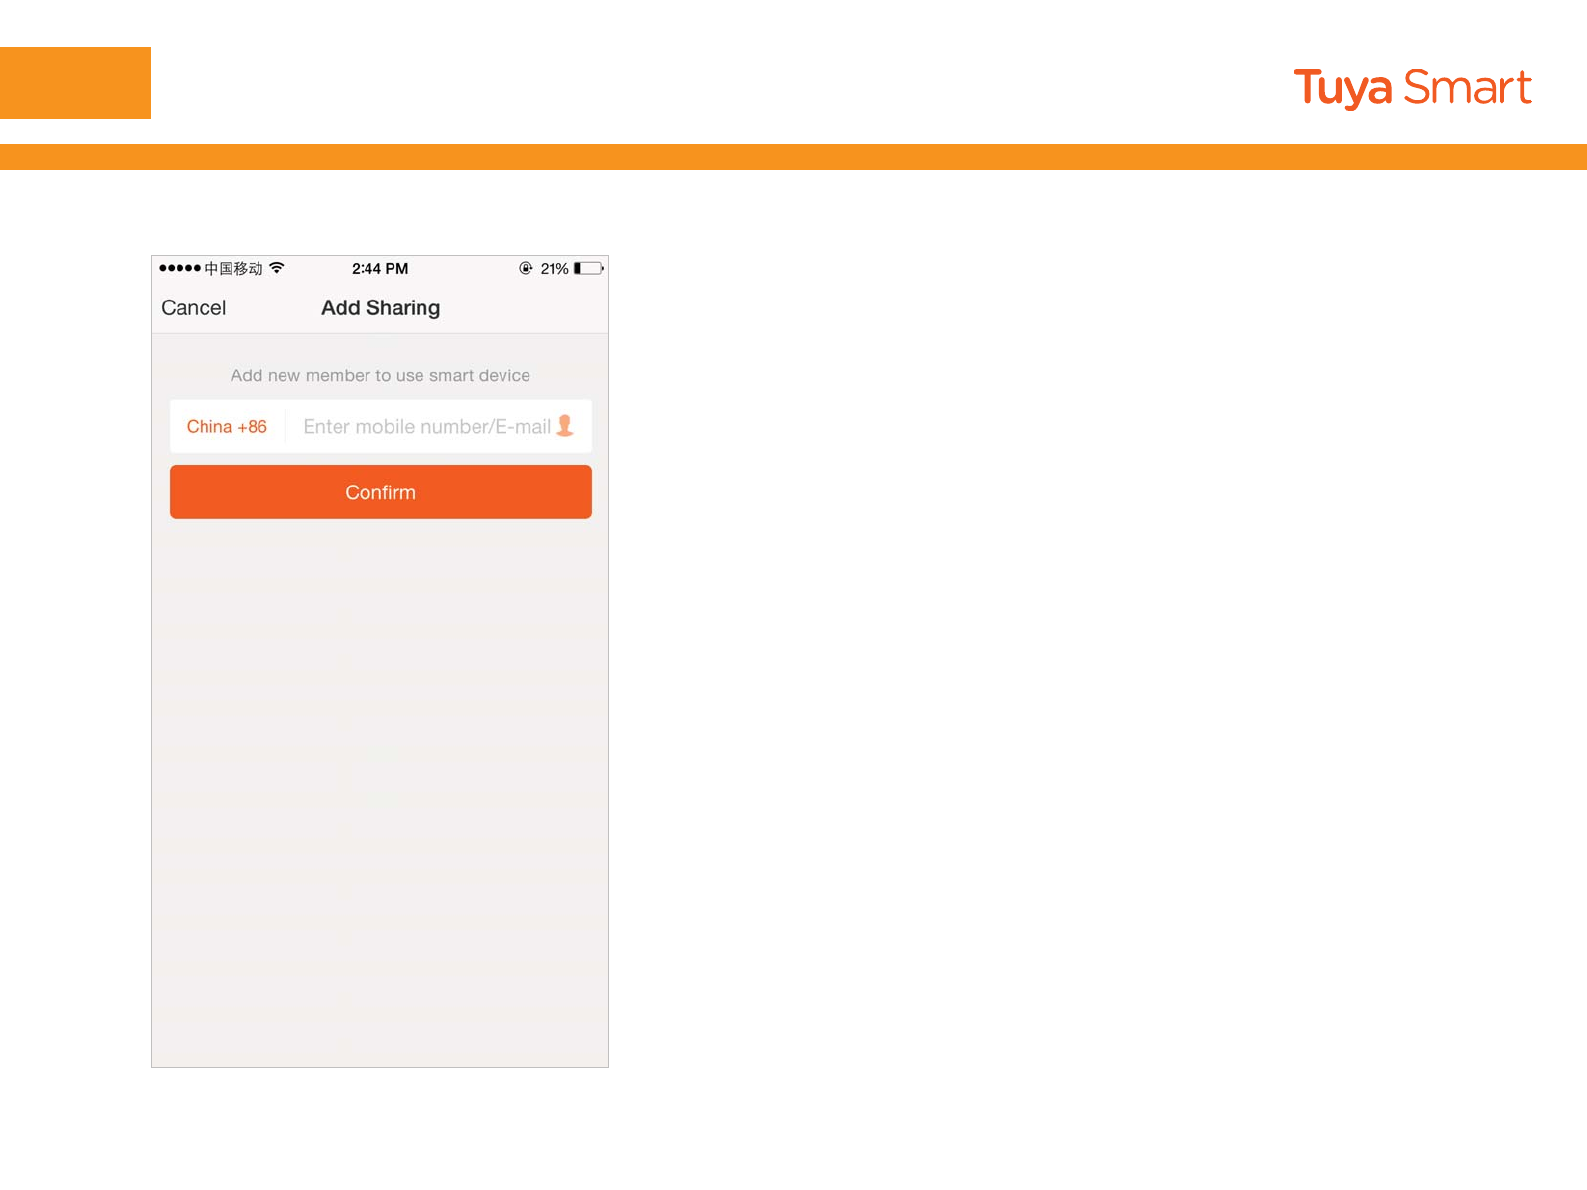
Add sharing: As shown in the picture, users could
type in a new member’s cellphone number and share
the device with him. The new member could control
the device with his own account.
NO.6 Profile
NO.6 Profile
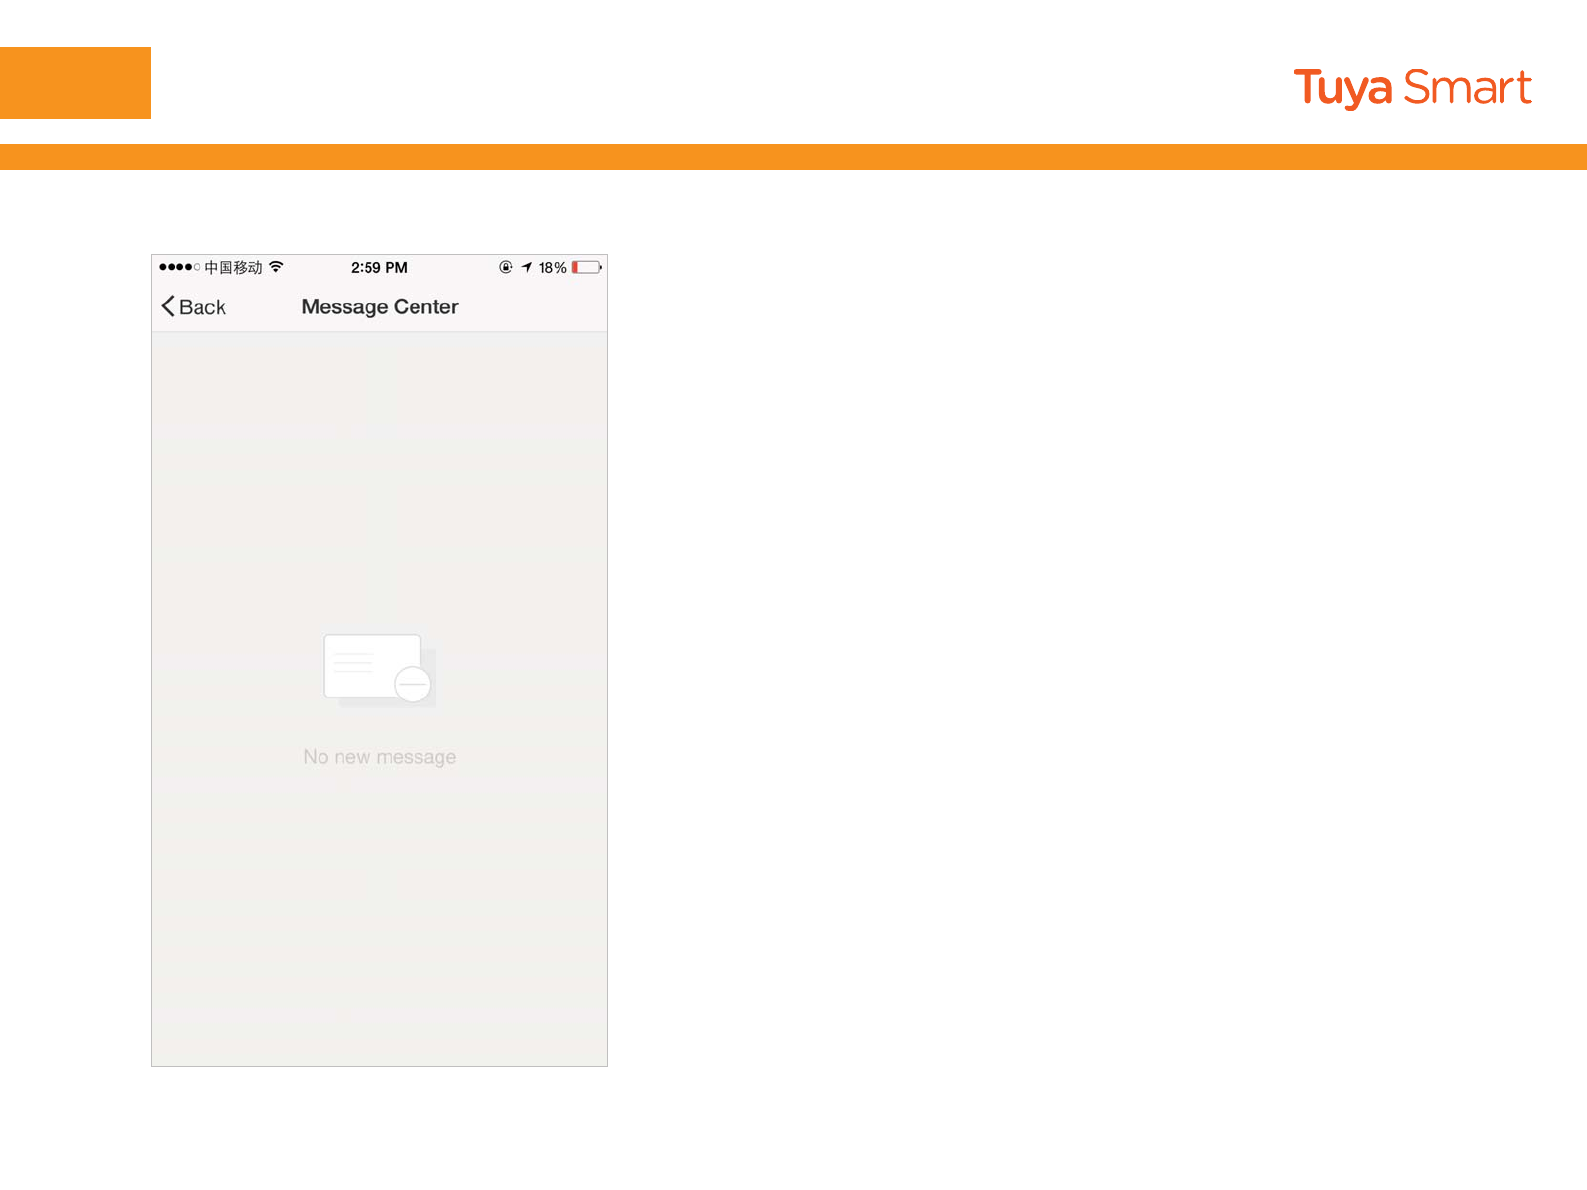
Message center: Including notifications of new device
and new sharing
NO.6 Profile
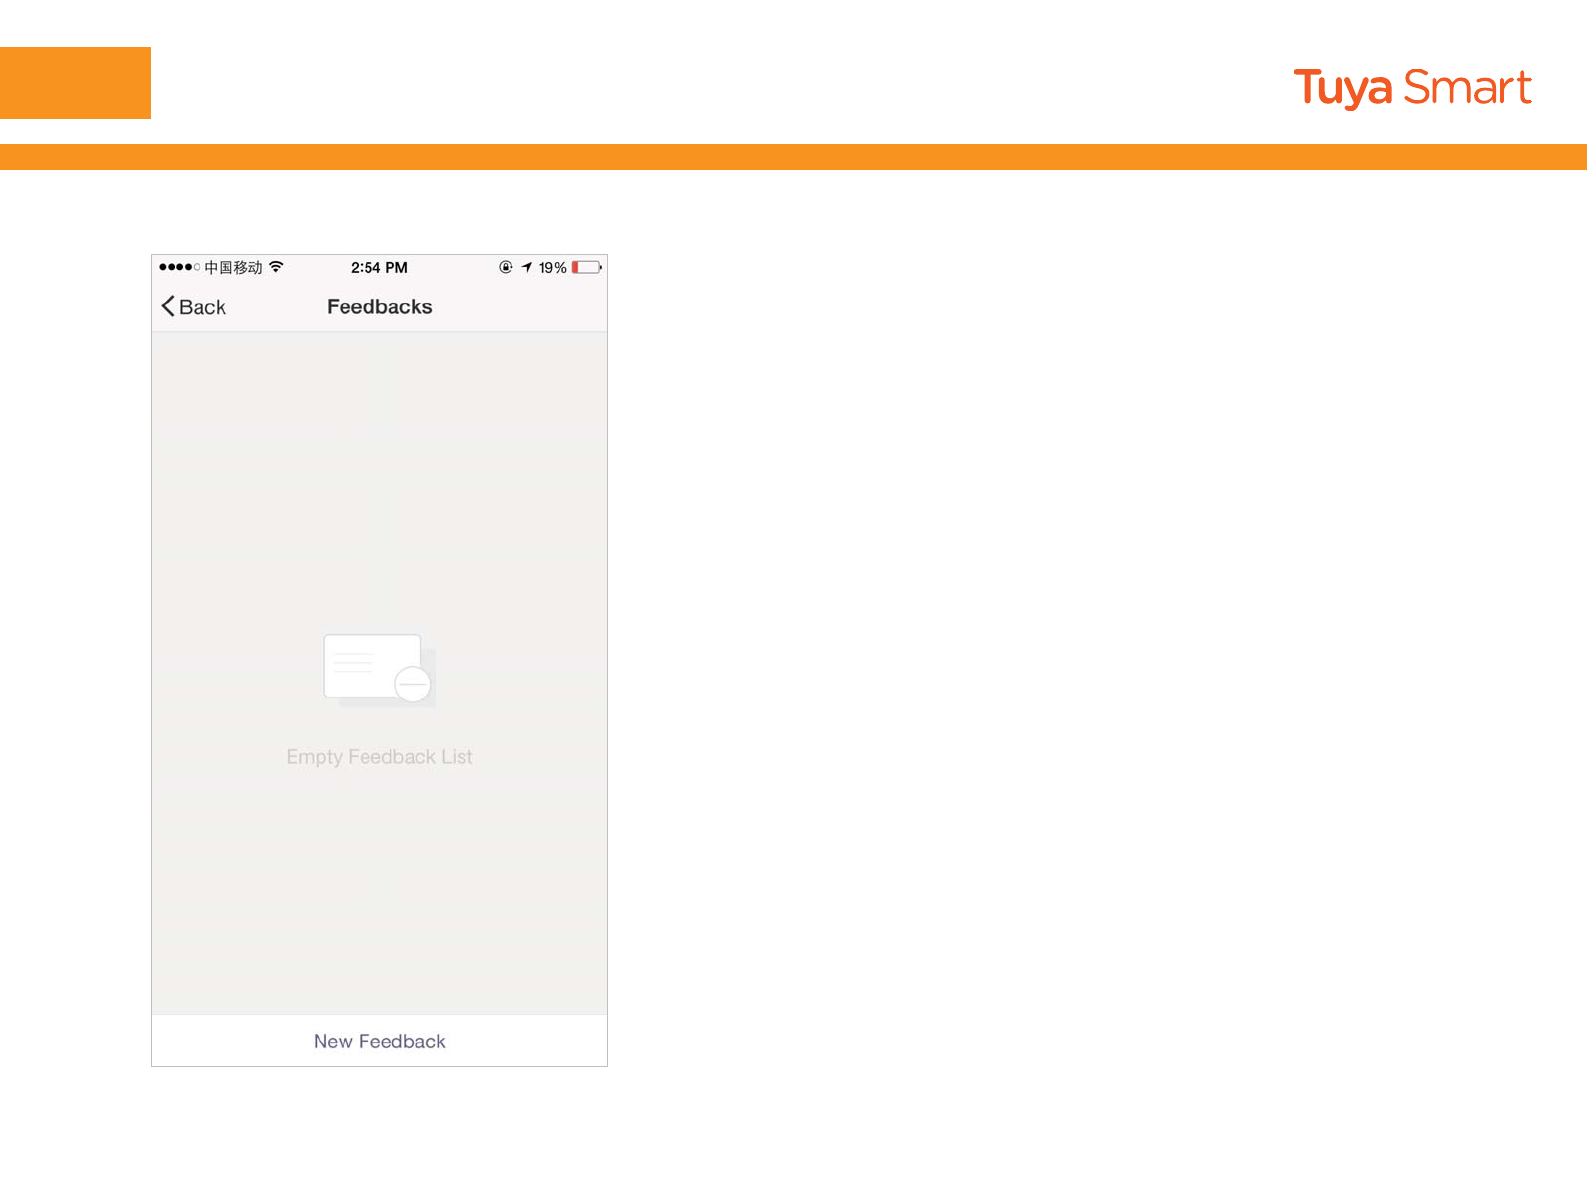
Feedback: Entry where users could submit their
feedback
NO.6 Profile
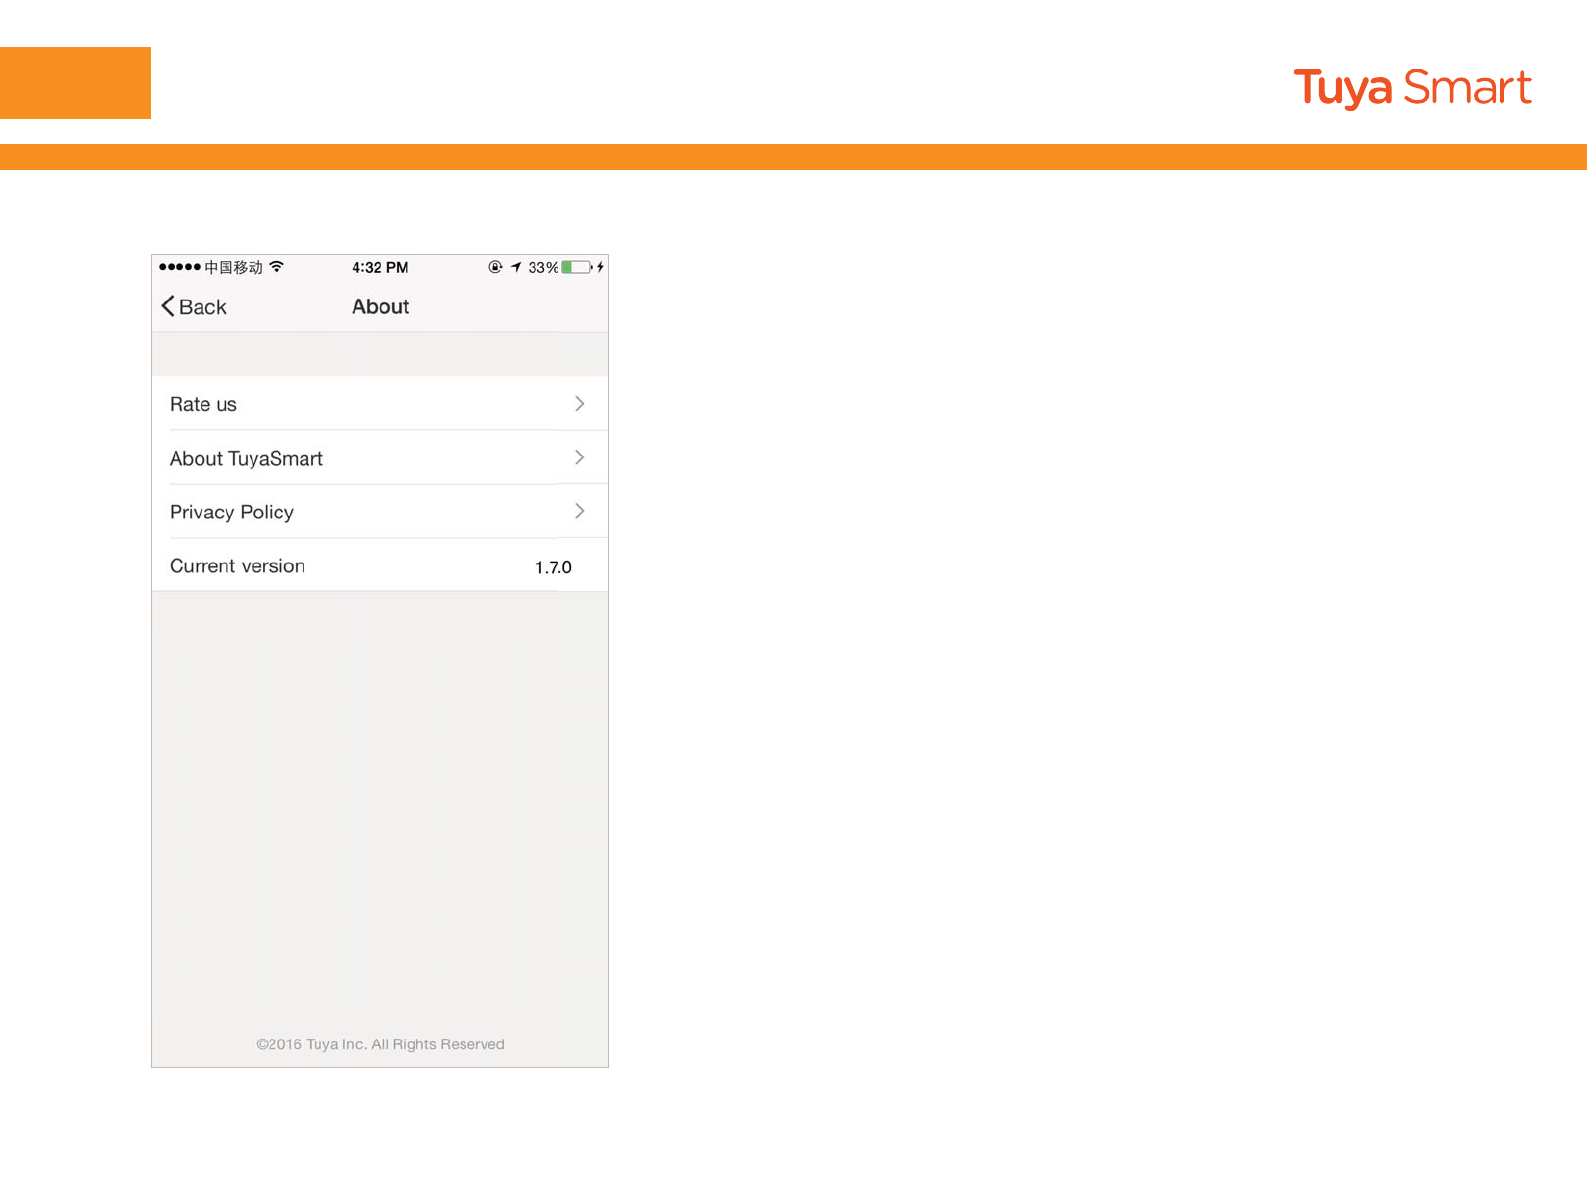
4.Tap“About TuyaSmart” , jumping to TuyaSmart
Official website
NO.6 Profile
FCC Caution.
This device complies with part 15 of the FCC Rules. Operation is subject to the following two
conditions: (1) This device may not cause harmful interference, and (2) this device must accept
any interference received, including interference that may cause undesired operation.
Any Changes or modifications not expressly approved by the party responsible for compliance
could void the user's authority to operate the equipment.
Note: This equipment has been tested and found to comply with the limits for a Class B digital
device, pursuant to part 15 of the FCC Rules. These limits are designed to provide reasonable
protection against harmful interference in a residential installation. This equipment generates
uses and can radiate radio frequency energy and, if not installed and used in accordance with the
instructions, may cause harmful interference to radio communications. However, there is no
guarantee that interference will not occur in a particular installation. If this equipment does
cause harmful interference to radio or television reception, which can be determined by turning
the equipment off and on, the user is encouraged to try to correct the interference by one or
more of the following measures:
-Reorient or relocate the receiving antenna.
-Increase the separation between the equipment and receiver.
-Connect the equipment into an outlet on a circuit different from that to which the receiver is
connected.
-Consult the dealer or an experienced radio/TV technician for help.
This equipment complies with FCC radiation exposure limits set forth for an uncontrolled
environment. This equipment should be installed and operated with minimum distance 20cm
between the radiator & your body.