Airspan Networks GWU-200 WiMAX USB dongle User Manual
Airspan Networks Inc WiMAX USB dongle
User Manual

GWU-310 User Manual
Version 0.6 Copyright © 2010 IGI Mobile, Inc.. All rights reserved. Page 1 of 19
Confidential and Proprietary
Subject to Non-Disclosure Obligations
GWU-300/310/320 User Manual
(Mobile WIMAX 2.3/2.5/3.5GHz USB Dongle Modem)
Document Number: IGIM0904WLSWUMWG005
Version: 0.6
Issued: April 12st, 2010

GWU-310 User Manual
Version 0.6 Copyright © 2010 IGI Mobile, Inc.. All rights reserved. Page 2 of 19
Confidential and Proprietary
Subject to Non-Disclosure Obligations
Revision History
Revision Date Description Author
0.1 2009.03.30 Original Draft
S.K. Park
0.2 2009.07.30 Modified a part of channel configuration and
authentication setting S.K. Park
0.3 2009.08.14 Modified miscellaneous things S.K. Park
0.4 2009.09.01 Change for New UI CM.
M.Y. Jung
0.5 2009.10.15 Authentication Settings
M.Y. Jung
0.6 2010.04.12 Modified to GWU-3XX
M.Y. Jung
Reproduction or use of editorial or pictorial content in any manner is prohibited without
written permission. Specifications and content may change without notice.
The IGI Mobile name and logo and other designated names, marks, and phrases are
trademarks or registered trademarks of IGI Mobile, Inc.

GWU-310 User Manual
Version 0.6 Copyright © 2010 IGI Mobile, Inc.. All rights reserved. Page 3 of 19
Confidential and Proprietary
Subject to Non-Disclosure Obligations
Table of Contents
1 Introduction ................................................................................................... 4
2 Appearance ................................................................................................... 5
2.1 Top View .................................................................................................. 5
2.2 Side View ................................................................................................. 5
3 Installation .................................................................................................... 6
3.1 GWU-310 CM (Connection Manager) Install ......................................................... 6
3.1.1 Language Select .................................................................................... 6
3.1.2 Welcome ............................................................................................. 6
3.1.3 Connect USB Modem .............................................................................. 7
3.1.4 Select Destination Folder .......................................................................... 7
3.1.5 Install Confirm ....................................................................................... 8
3.1.6 CM Installation ...................................................................................... 8
3.1.7 Device Driver Installation .......................................................................... 9
3.1.8 Install Finished ...................................................................................... 9
4 How to Use CM (Connection Manager) ............................................................... 10
4.1 Run Connection Manager Program .................................................................. 10
4.2 Channel Configuration ................................................................................. 11
4.3 Authentication Setting .................................................................................. 13
4.3.1 EAP-AKA ........................................................................................... 13
4.3.2 EAP-TLS , EAP-TTLS ............................................................................ 15
4.4 Connectting .............................................................................................. 17
4.5 Device Change .......................................................................................... 18
5 Internet Test ................................................................................................ 19
5.1 Internet Explorer ........................................................................................ 19
GWU-310 User Manual
Version 0.6 Copyright © 2010 IGI Mobile, Inc.. All rights reserved. Page 4 of 19
Confidential and Proprietary
Subject to Non-Disclosure Obligations
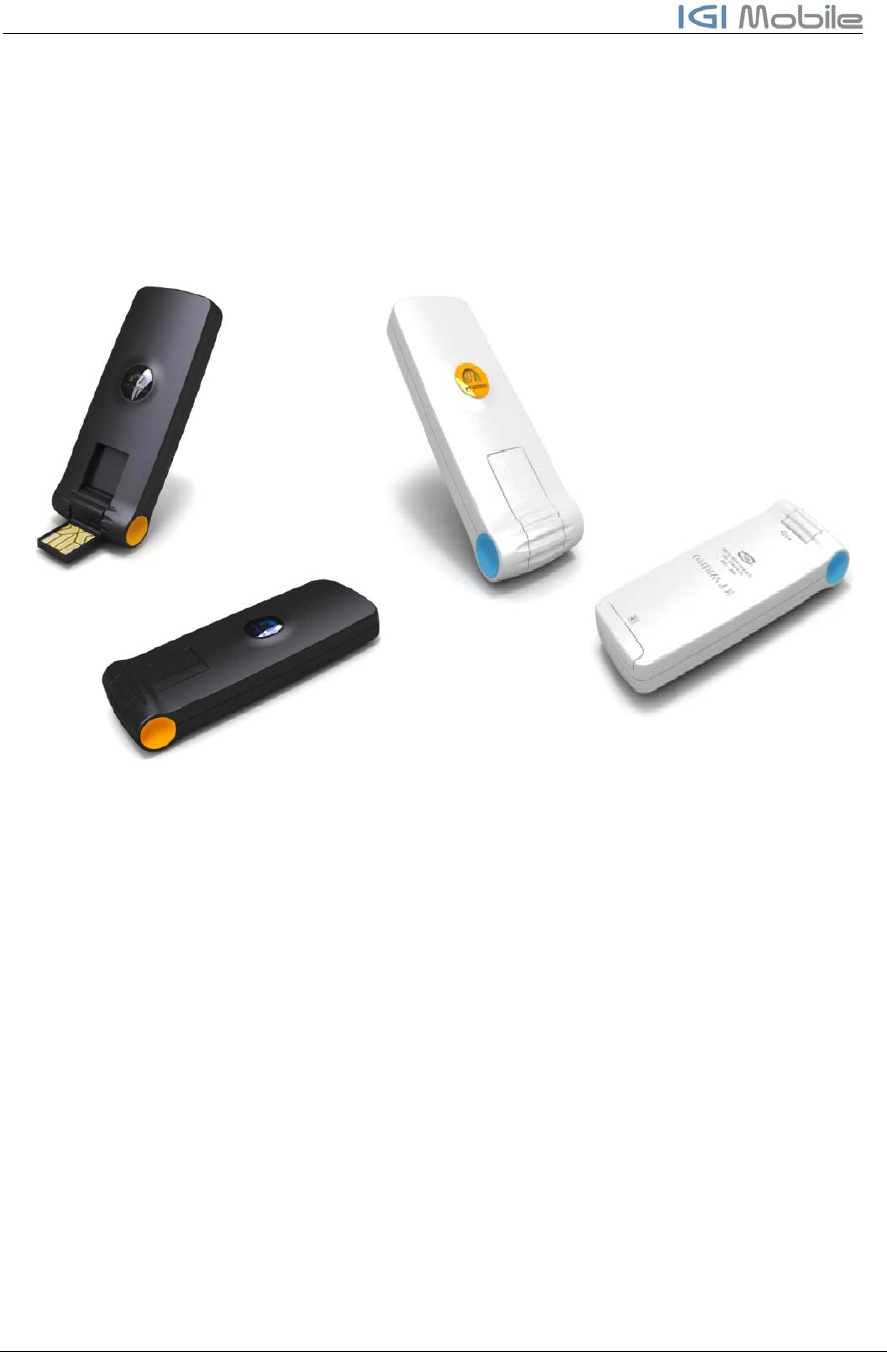
1 Introduction
This document let you know how to use and install device for mobile WIMAX USB
dongle modem. This device is USB dongle type modem for high speed mobile internet
access through mobile WIMAX network.
- Model : GWU-300/GWU-310/GWU-320
- Standard : Mobile WiMAX Wave2/MIMO, IEEE 802.16e
- Frequency : 2.3/2.5/3.5GHz
- Interface : USB 2.0
- Antenna : 2 internal diversity antenna
- Data Throughput : Downlink 33 Mbps, Uplink 16 Mbps
- O/S : Windows 2000, XP, VISTA, WIN7, MAC OS
- Dimension : 29 x 66 x 8 mm
- Weight : 14 g
GWU-310 User Manual
Version 0.6 Copyright © 2010 IGI Mobile, Inc.. All rights reserved. Page 5 of 19
Confidential and Proprietary
Subject to Non-Disclosure Obligations
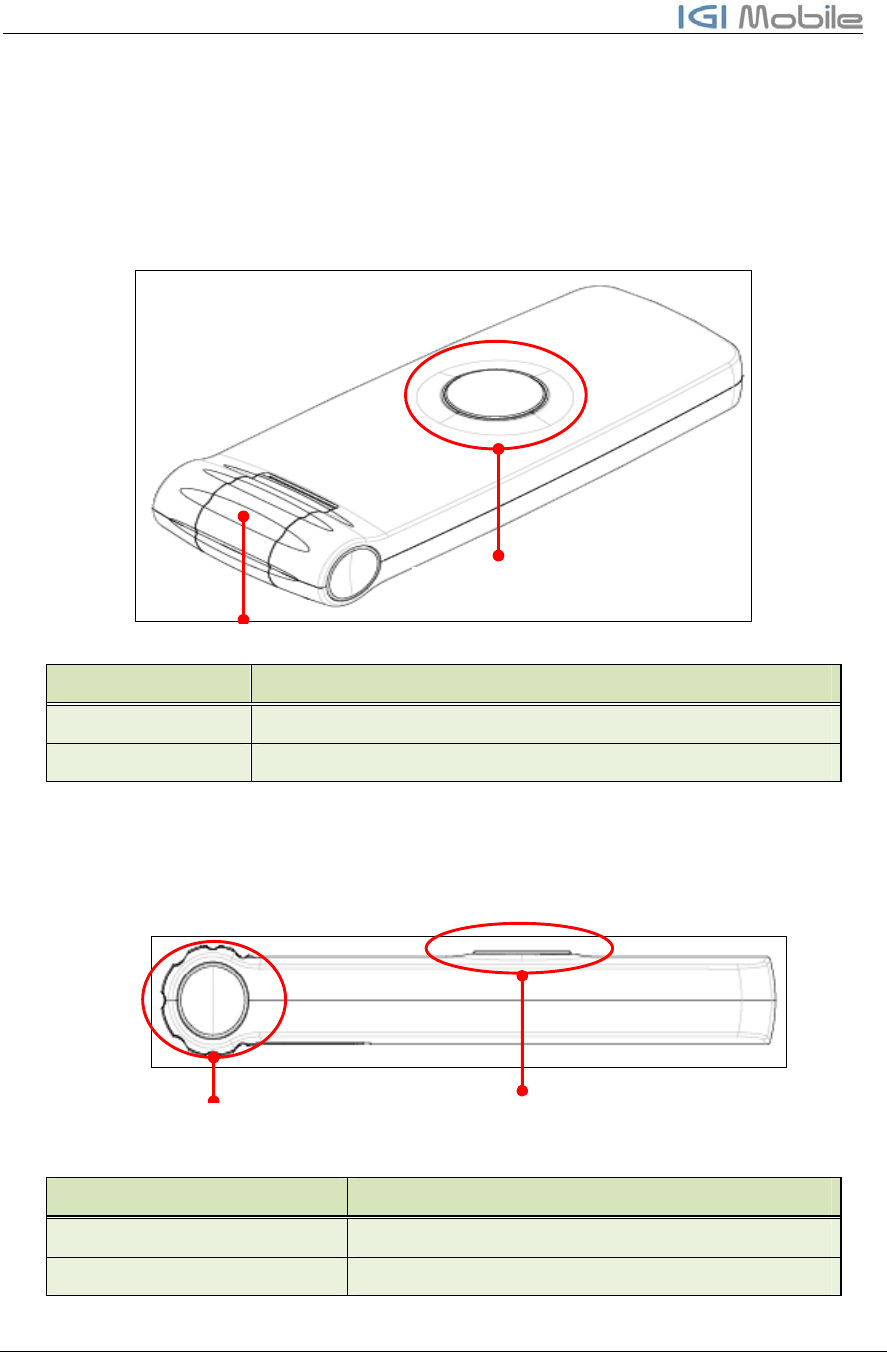
2 Appearance
2.1 Top View
External drawing of GWU-310 and components description
COMPONENT DESCRIPTION
USB CONNECTOR USB Connect
STATUS LED Status Display LED
2.2 Side View
External drawing of GWU-310 and components description
COMPONENT DESCRIPTION
USB CONNECTOR HINGE USB Connector hinge
STATUS LED GWU-310 RF status display LED
USB CONNECTOR
HINGE STATUS LED
USB CONNECTOR
STATUS LED
GWU-310 User Manual
Version 0.6 Copyright © 2010 IGI Mobile, Inc.. All rights reserved. Page 6 of 19
Confidential and Proprietary
Subject to Non-Disclosure Obligations
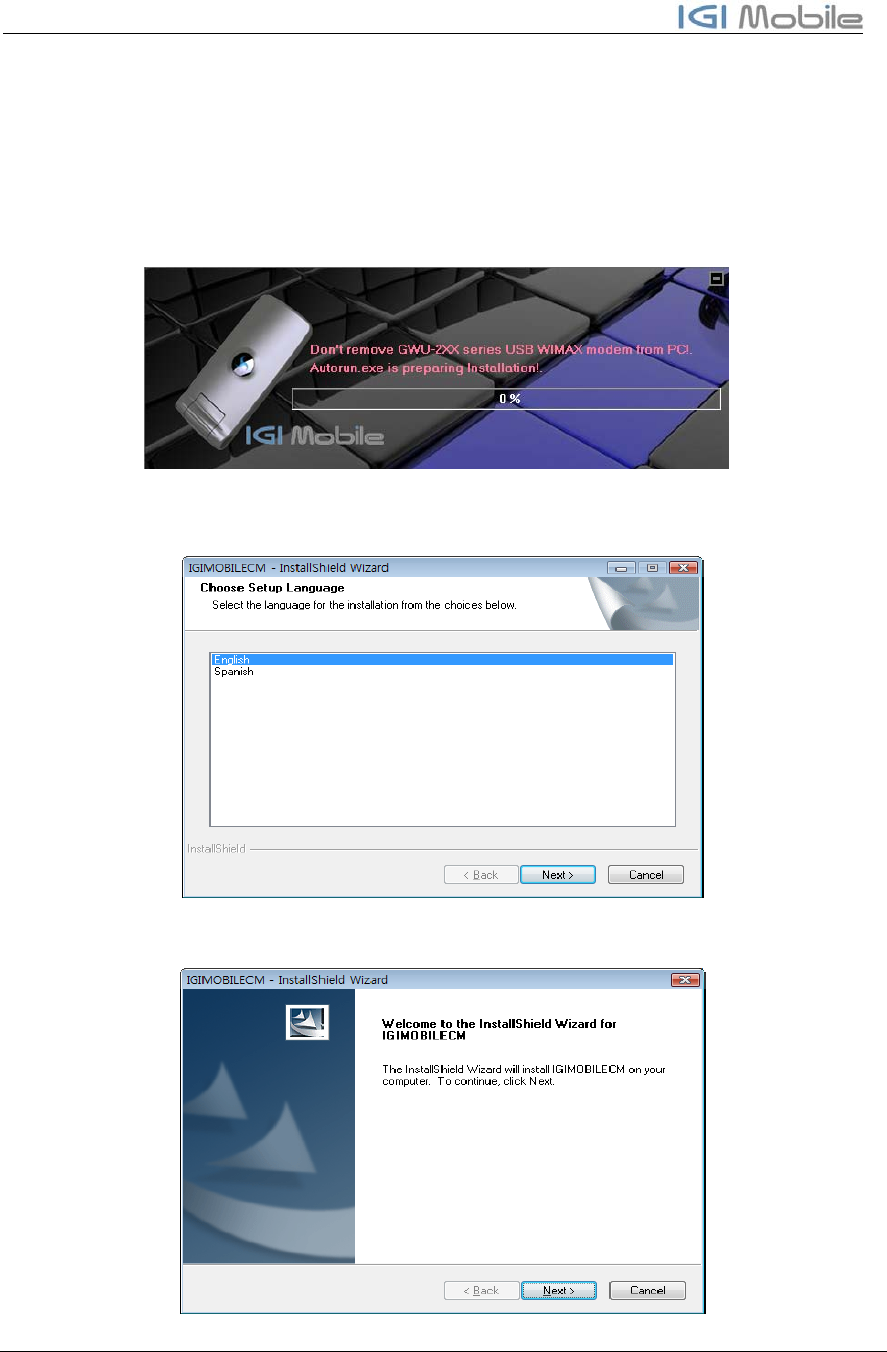
3 Installation
3.1 GWU-310 CM (Connection Manager) Install
Insert GWU-310 USB WIMAX Modem to your PC. After that, you can see the dialog
that is started automatically.
3.1.1 Language Select
GWU-310 CM supports English and Korean. Select language option and click “Next”.
3.1.2 Welcome
After you selecting language options, you can see a welcome view. Click “Next”.
GWU-310 User Manual
Version 0.6 Copyright © 2010 IGI Mobile, Inc.. All rights reserved. Page 7 of 19
Confidential and Proprietary
Subject to Non-Disclosure Obligations
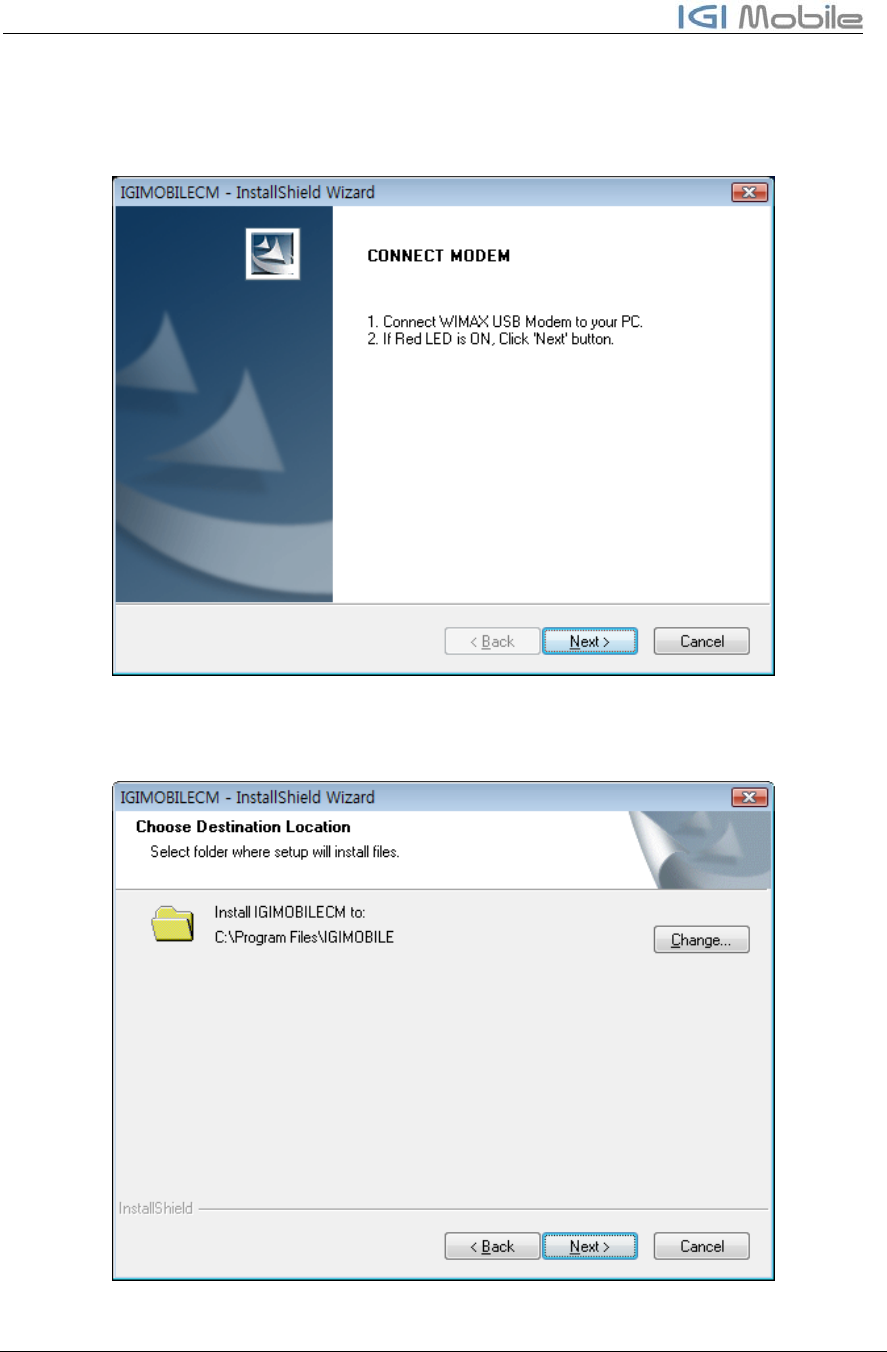
3.1.3 Connect USB Modem
If you select device type to USB Modem, you must connect USB Modem to PC for
installing device driver on your PC
3.1.4 Select Destination Folder
Select installation folder that you want.
GWU-310 User Manual
Version 0.6 Copyright © 2010 IGI Mobile, Inc.. All rights reserved. Page 8 of 19
Confidential and Proprietary
Subject to Non-Disclosure Obligations
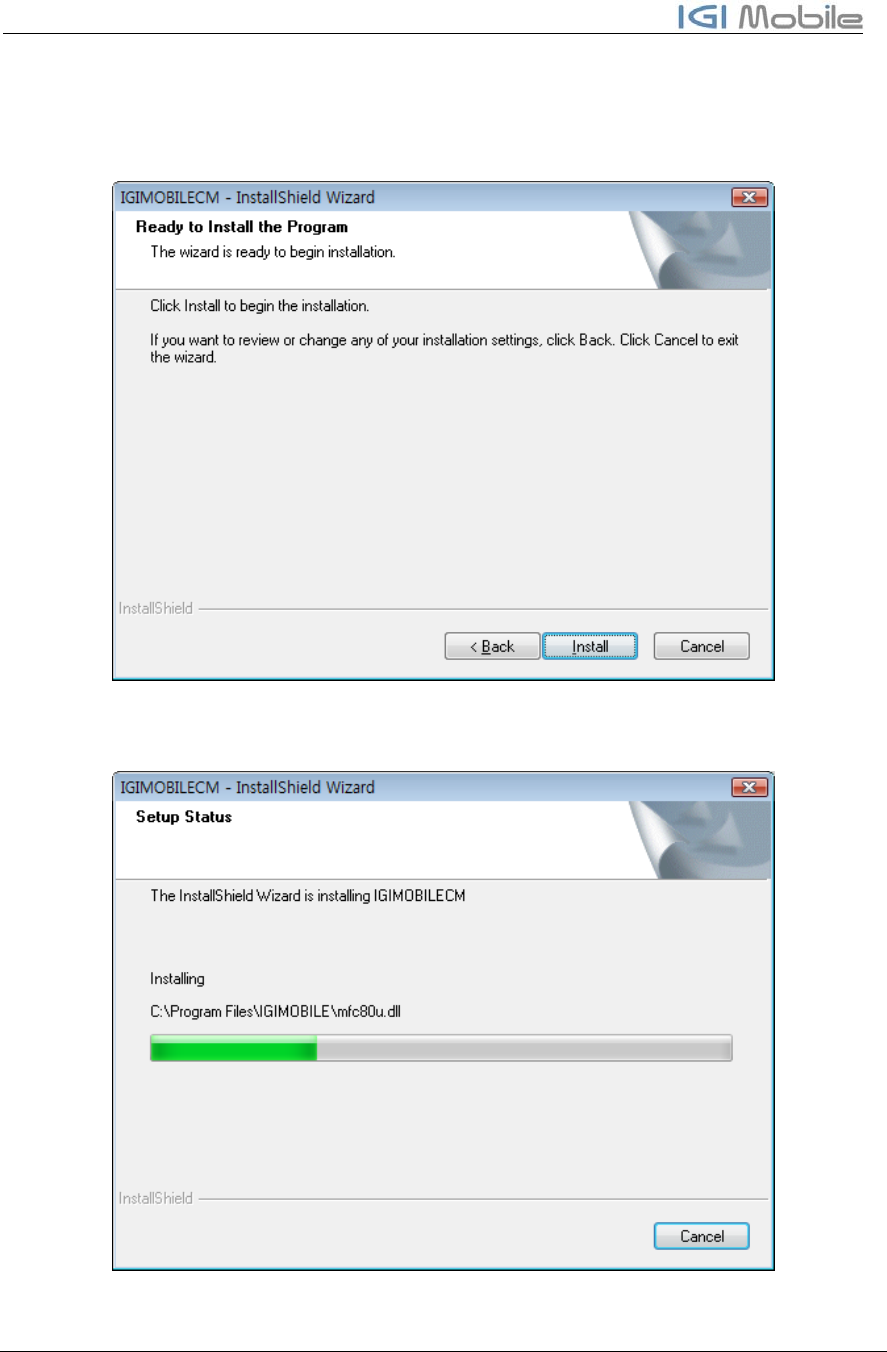
3.1.5 Install Confirm
If you finished selection install option, click “Next”. If you change option again, click
“Back” and change option.
3.1.6 CM Installation
GWU-310 CM Installation view.
GWU-310 User Manual
Version 0.6 Copyright © 2010 IGI Mobile, Inc.. All rights reserved. Page 9 of 19
Confidential and Proprietary
Subject to Non-Disclosure Obligations
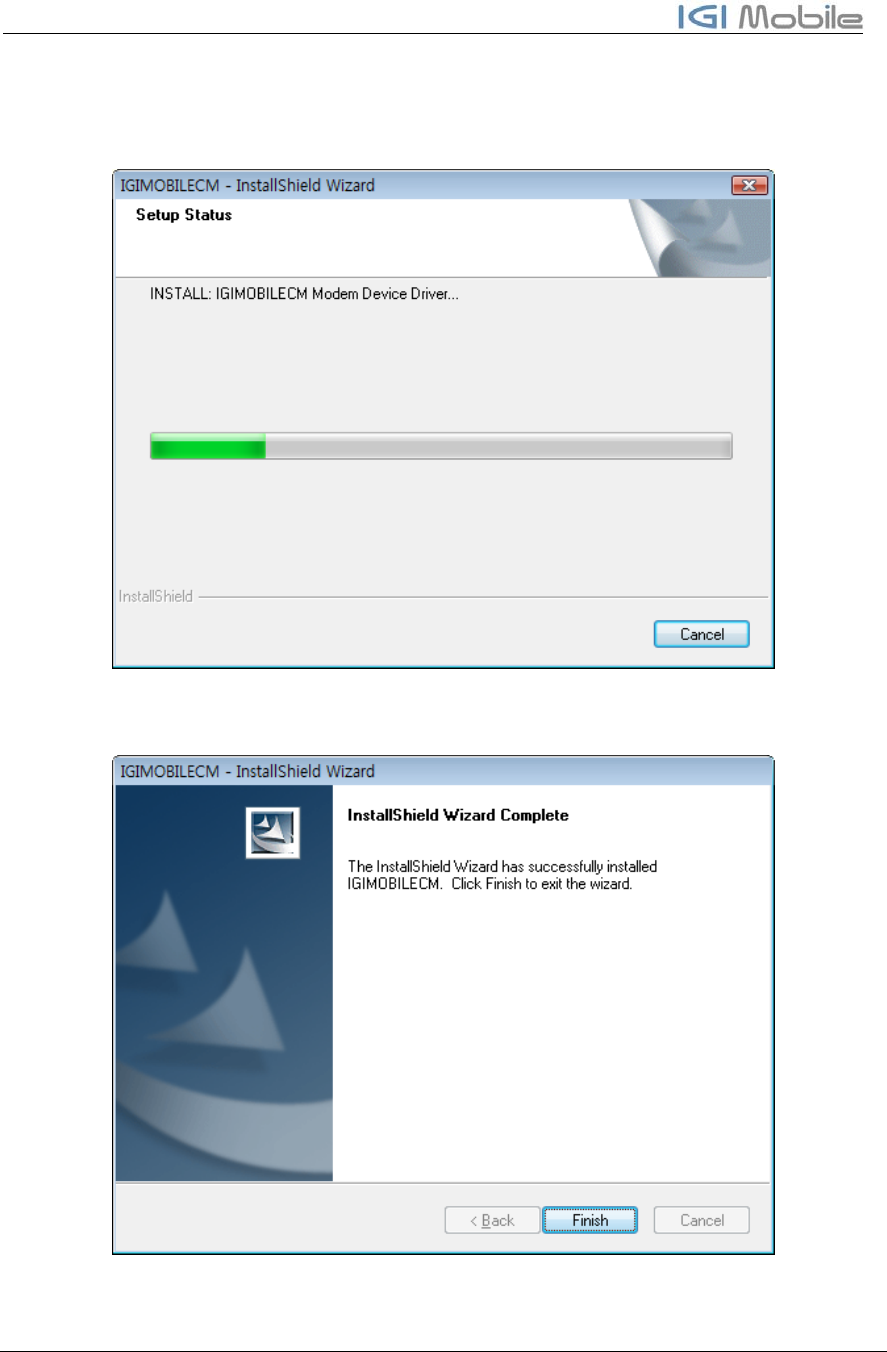
3.1.7 Device Driver Installation
GWU-310 CM Install wizard will install device driver and protocol driver automatically.
3.1.8 Install Finished
GWU-310 User Manual
Version 0.6 Copyright © 2010 IGI Mobile, Inc.. All rights reserved. Page 10 of 19
Confidential and Proprietary
Subject to Non-Disclosure Obligations
4 How to Use CM (Connection Manager)
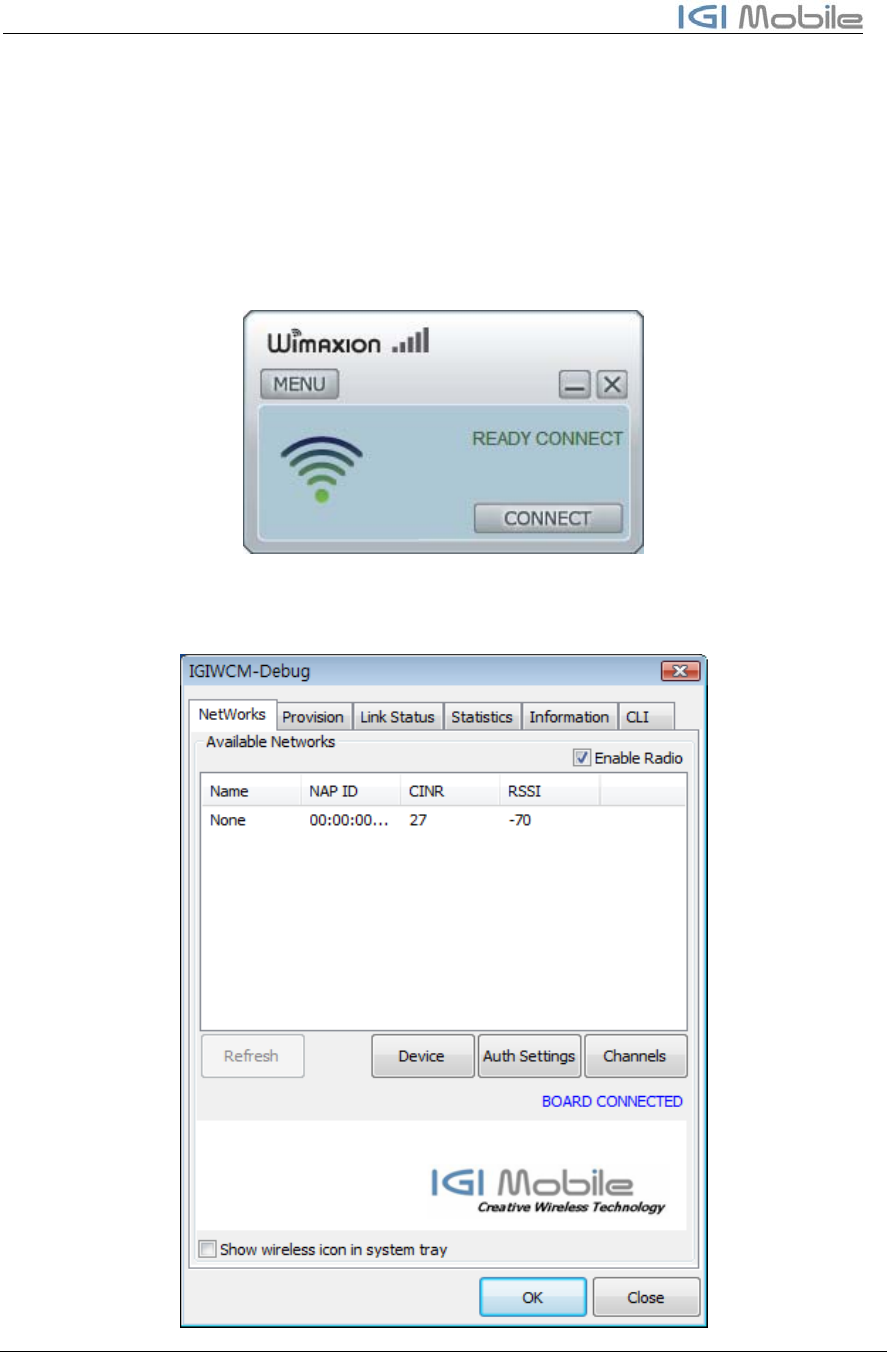
4.1 Run Connection Manager Program
After installation, IGIWIMAXCM will be started automatically. If it is started, it will find
our USB modem and will get information automatically like below.
UI for normal users.
UI for test engineers. (Click “Wimaxion” logo at above UI for users and
then type “igimobilecm” + “Enter Key”, Then you can see a debug view
like below!)
GWU-310 User Manual
Version 0.6 Copyright © 2010 IGI Mobile, Inc.. All rights reserved. Page 11 of 19
Confidential and Proprietary
Subject to Non-Disclosure Obligations
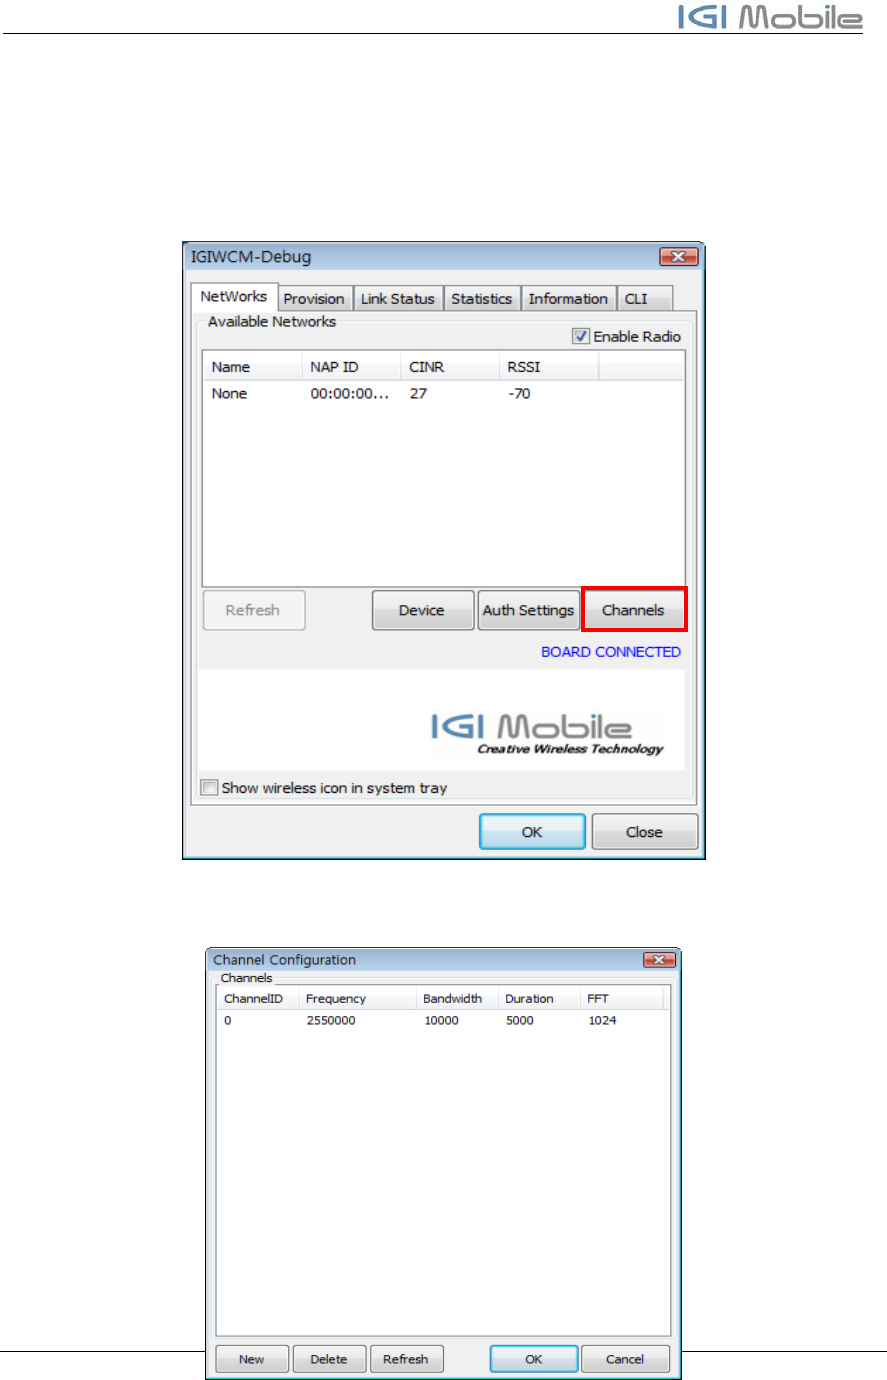
4.2 Channel Configuration
You can change channel configuration. Select “Networks “ menu. And then Click
“Channels…”.
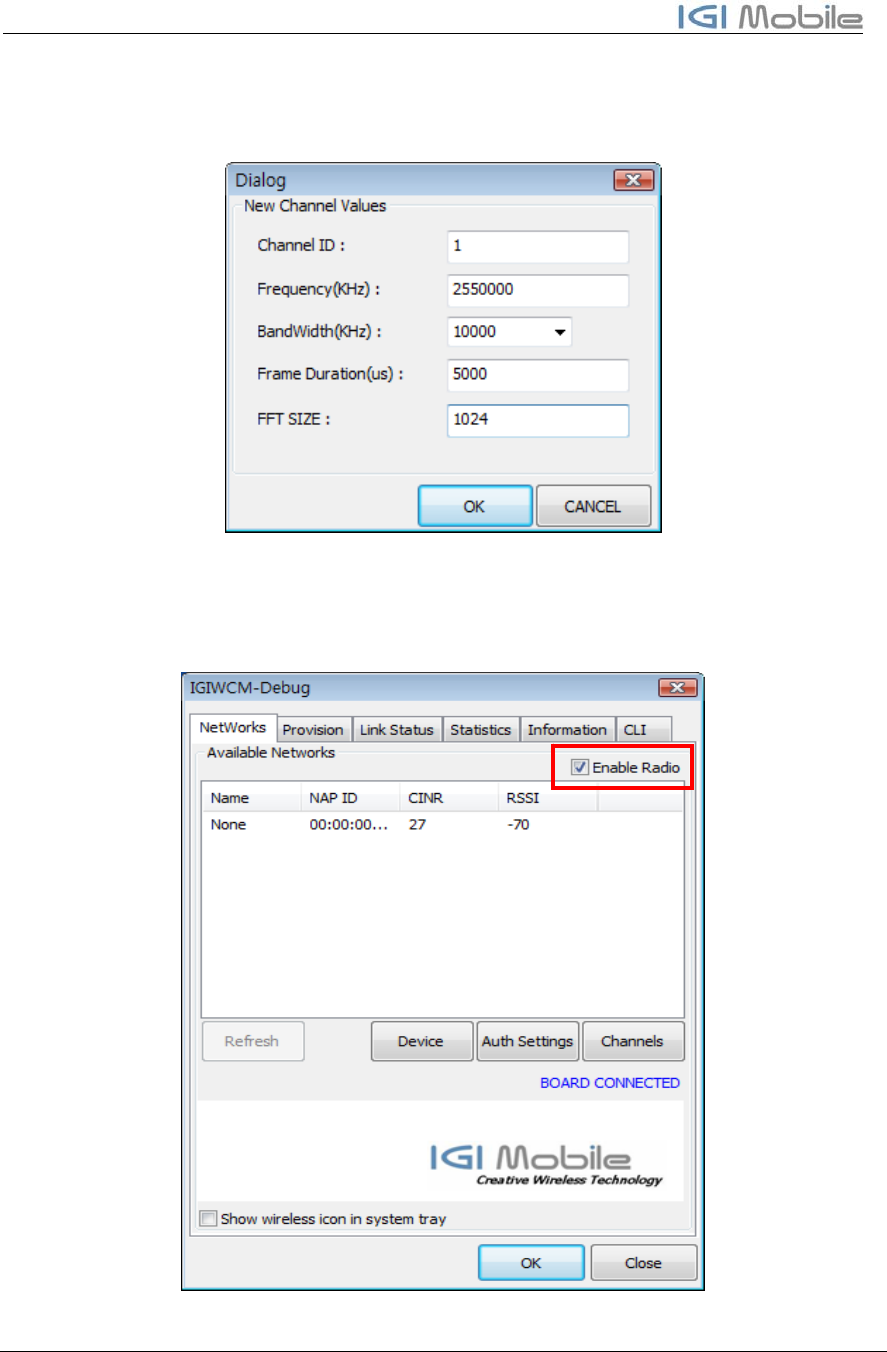
At this dialog box, you can add, remove and change the channels. For example, Click
“New” button, and then you may create below channel values.
GWU-310 User Manual
Version 0.6 Copyright © 2010 IGI Mobile, Inc.. All rights reserved. Page 12 of 19
Confidential and Proprietary
Subject to Non-Disclosure Obligations
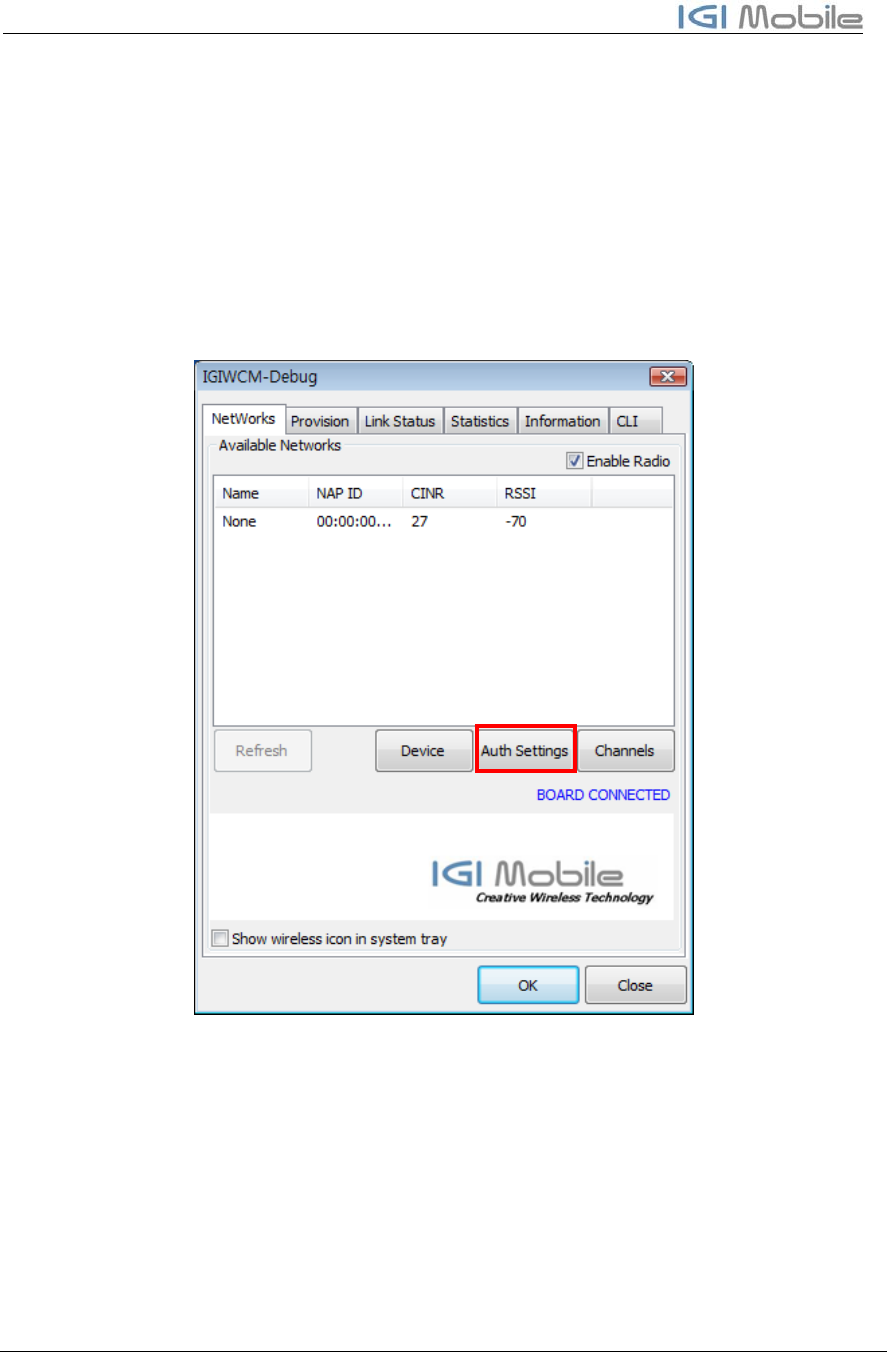
After setting channel values, if MS found WIMAX networks, you can see the BS
information at “Networks” menu. If MS does not find WIMAX networks, disable “Enable
Radio” and then enable “Enable Radio” again.
GWU-310 User Manual
Version 0.6 Copyright © 2010 IGI Mobile, Inc.. All rights reserved. Page 13 of 19
Confidential and Proprietary
Subject to Non-Disclosure Obligations
4.3 Authentication Setting
This Connection Manager supply various Authentication Setting function which are
supported EAP-TLS, EAP-TTLS and EAP-AKA.
4.3.1 EAP-AKA
Select “Networks” menu.
GWU-310 User Manual
Version 0.6 Copyright © 2010 IGI Mobile, Inc.. All rights reserved. Page 14 of 19
Confidential and Proprietary
Subject to Non-Disclosure Obligations
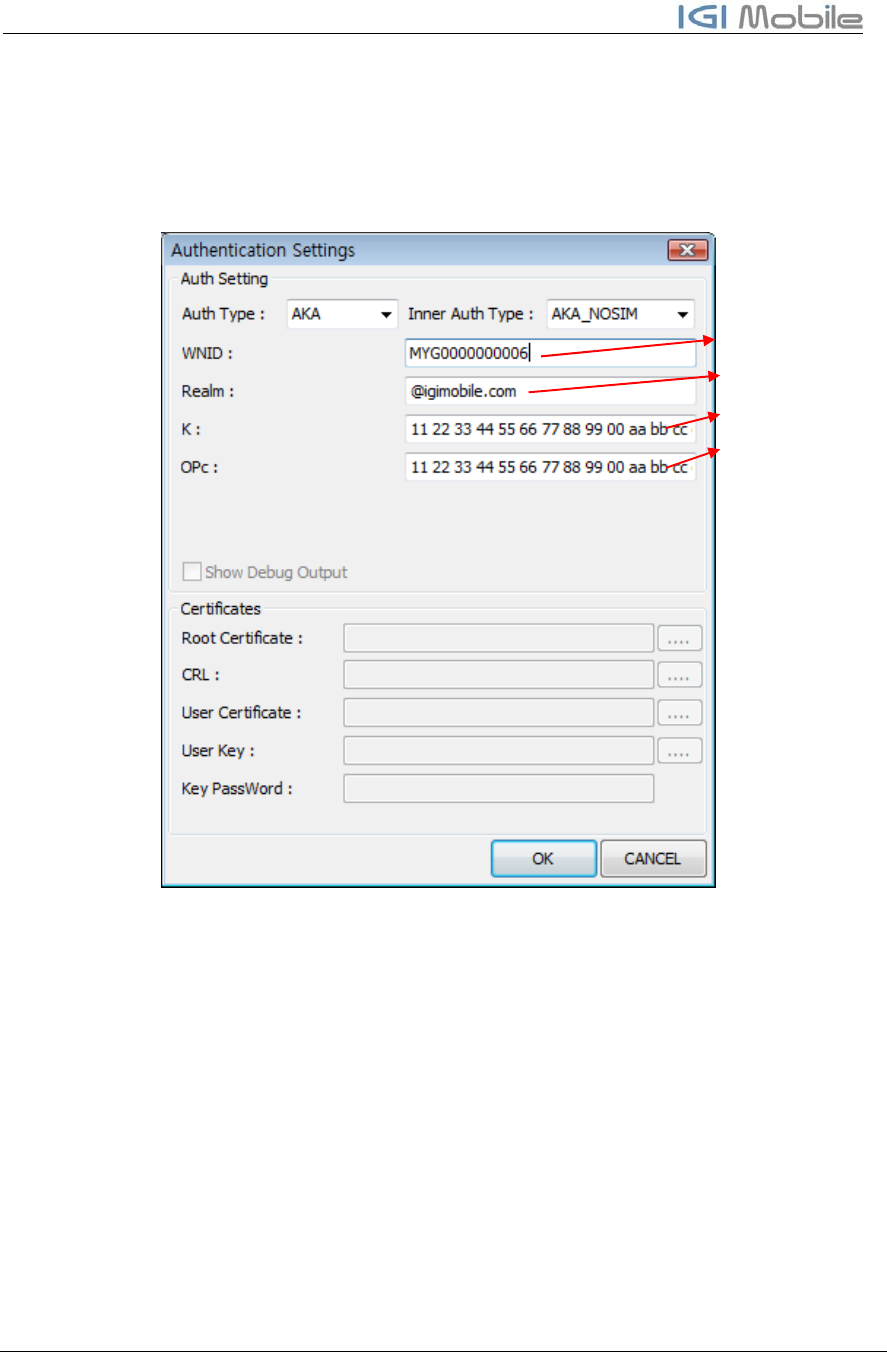
Click “Auth Settings” button, And then you may set the Authentication values as you
need in below Authentication settings dialog box.
For example, if you need EAP-AKA and AKA_NOSIM, you select “AKA” and then
“AKA_NOSIM”.
An then input the WNID in “WNID:” and REALM in “Realm:” and input K in “K:” and
input OPc in “OPc”.
If WNID is “MYG00000000006”, input the “MYG00000000006” in “WNID:”
If the Realm is “@igimobile.com” style, input the “@igimobile.com” in “Realm:”.
If the K is “11 22 33 44 55 66 77 88 99 00 aa bb cc dd ee ff” style, input the “11 22 33
44 55 66 77 88 99 00 aa bb cc dd ee ff” in “K:”. The number is separated by space.
If the OPc is “11 22 33 44 55 66 77 88 99 00 aa bb cc dd ee ff” style, input the “11 22
33 44 55 66 77 88 99 00 aa bb cc dd ee ff” in “OPc:”. The number is separated by space.
WNID
Realm
K
OPc
GWU-310 User Manual
Version 0.6 Copyright © 2010 IGI Mobile, Inc.. All rights reserved. Page 15 of 19
Confidential and Proprietary
Subject to Non-Disclosure Obligations
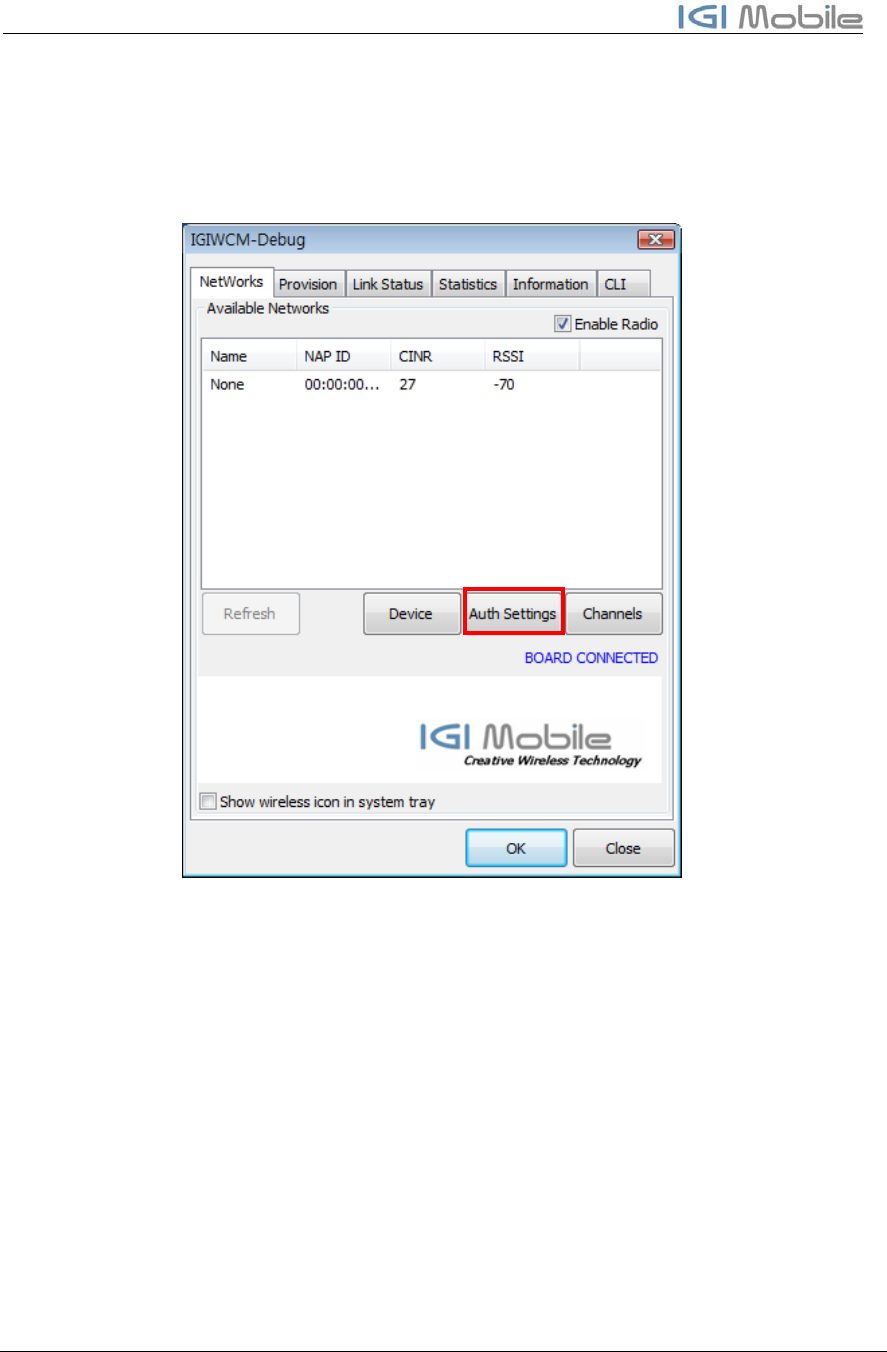
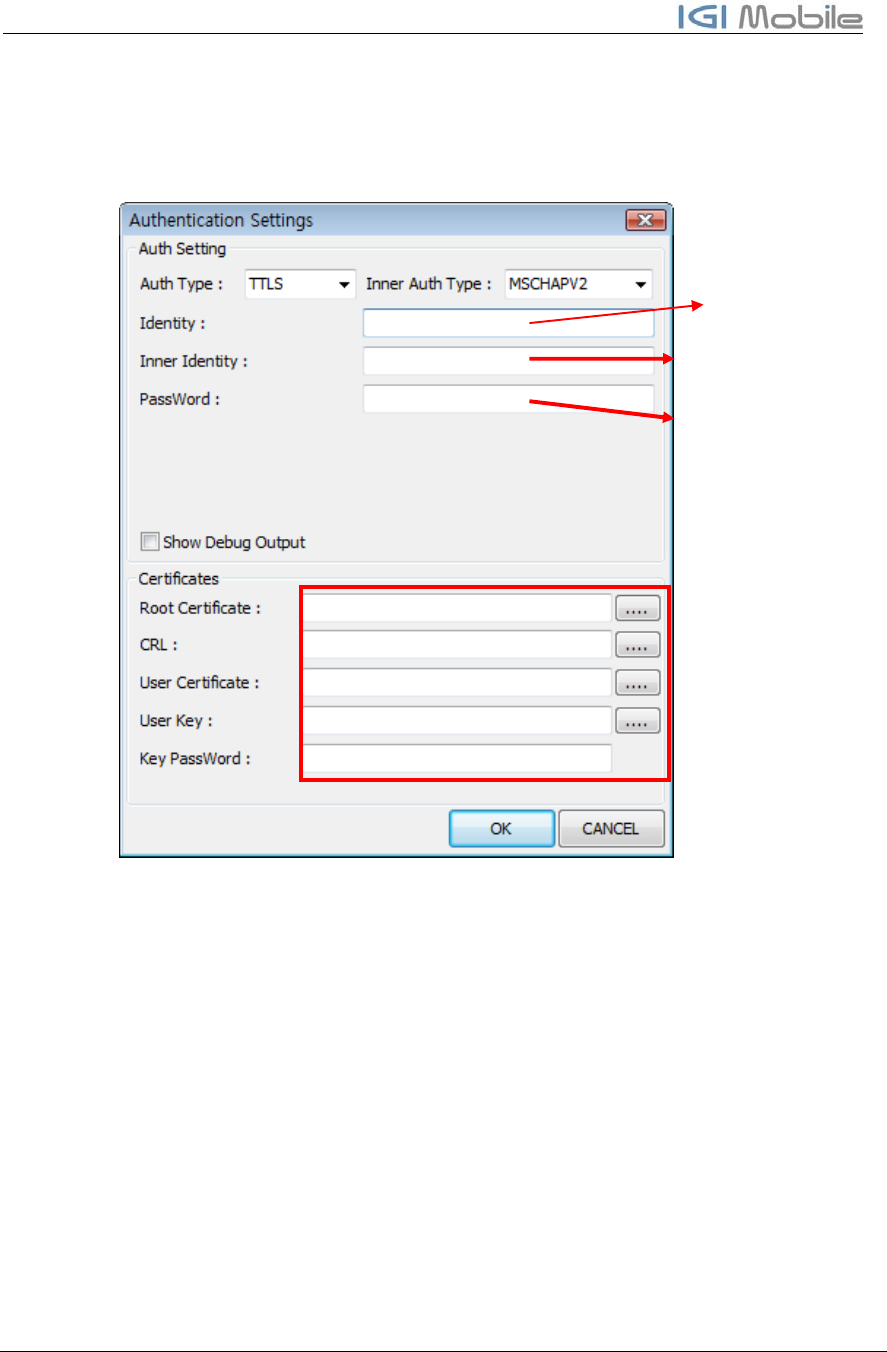
4.3.2 EAP-TLS , EAP-TTLS
Select “Networks” menu.
GWU-310 User Manual
Version 0.6 Copyright © 2010 IGI Mobile, Inc.. All rights reserved. Page 16 of 19
Confidential and Proprietary
Subject to Non-Disclosure Obligations
Click “Auth Settings” button, And then you may set the Authentication values as you
need in below Authentication settings dialog box.
For example, if you need EAP-TTLS and MSCHAPv2, you select “TTLS” and then
“MSCHAPV2”.
An then input the ID in “Inner Identity:” and the password in “Password:”.
If ID is “aaaa@xxxx.com” style, input the “aaaa@xxxx.com” in “Inner Identity:”
If the ID is “aaaa” style, input the “aaaa” in “Inner Identity:” , you don’t need input field
in “Identity:”. But, enter any string to “Indentity :” for test.
For the “Certificates”, you may select certification file in specific directory location.
Identit
y
Inner Identit
y
PassWord
Select Certificate Files
GWU-310 User Manual
Version 0.6 Copyright © 2010 IGI Mobile, Inc.. All rights reserved. Page 17 of 19
Confidential and Proprietary
Subject to Non-Disclosure Obligations
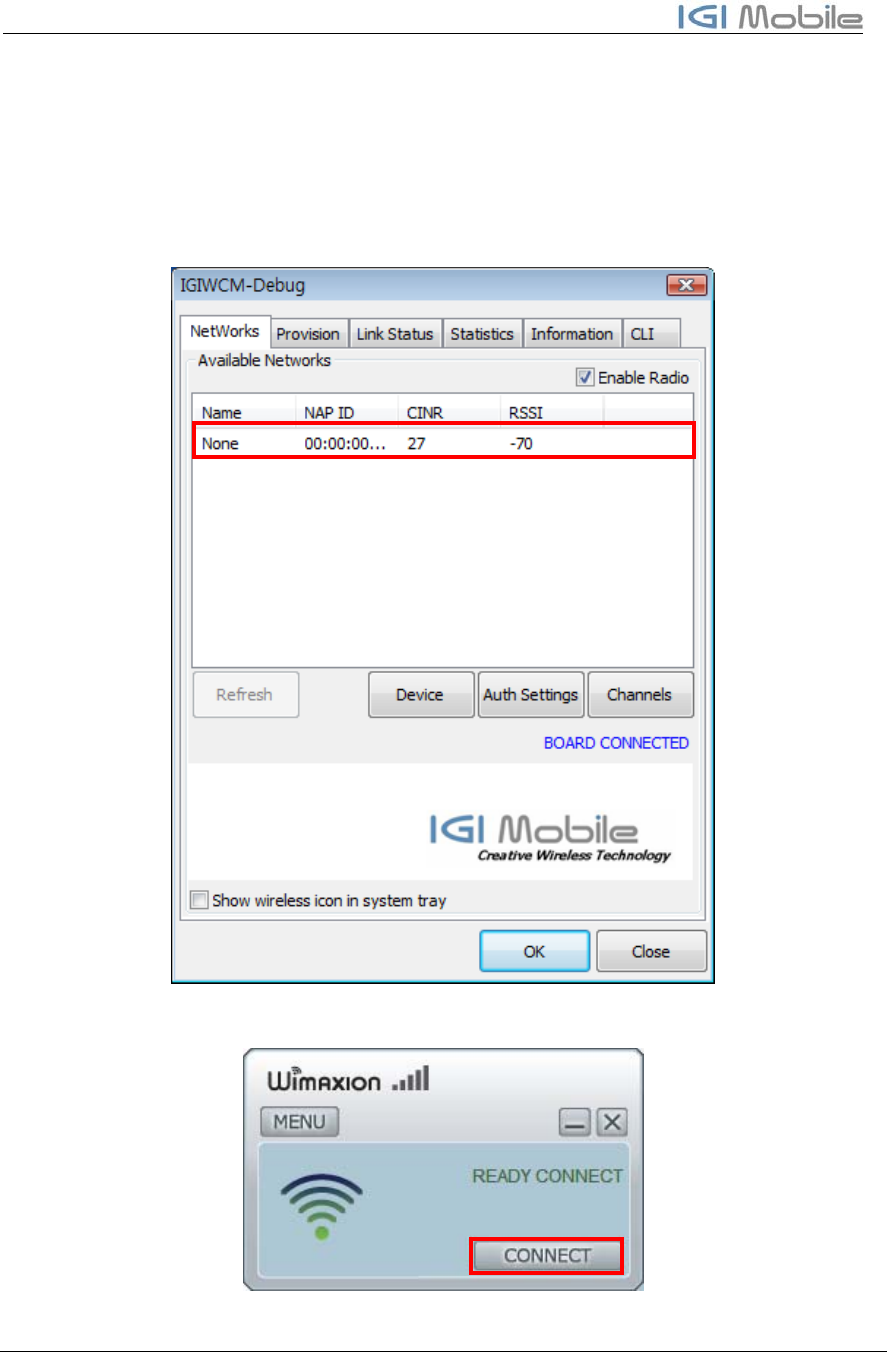
4.4 Connectting
If all above setting is finished, check if MS searched available networks or not at the
Newworks pannel like below. If there is notting to be displayed and If channels setting is
correct, then disable “Enalbe Radio” and then enable “Enable Radio” button again.
If there is available networks, then click “CONNECT” button at UI for normal users.
GWU-310 User Manual
Version 0.6 Copyright © 2010 IGI Mobile, Inc.. All rights reserved. Page 18 of 19
Confidential and Proprietary
Subject to Non-Disclosure Obligations
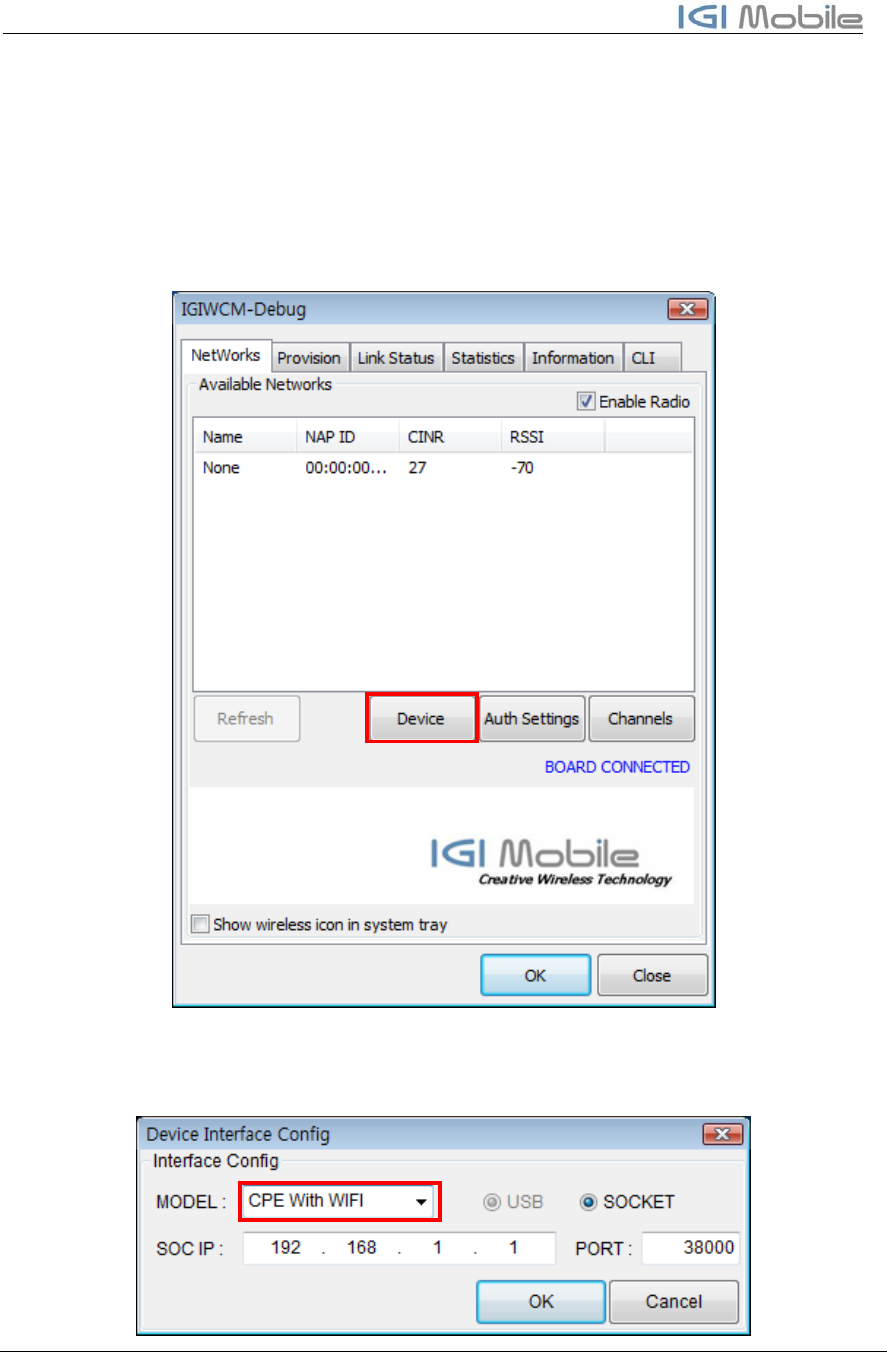
4.5 Device Change
IGIWIMAXCM is made for various type of our products. It can connect SIMPLE CPE, CPE
with WIFI and USB Modem.
If you want to user other types of product, you can change devcie type by clicking
“Device” like below.
Just click MODEL and change Model. All other configuration will be changed
automatically. After changing MODEL types, Restart CM. Then it will find device and
connect if available.
GWU-310 User Manual
Version 0.6 Copyright © 2010 IGI Mobile, Inc.. All rights reserved. Page 19 of 19
Confidential and Proprietary
Subject to Non-Disclosure Obligations
5 Internet Test
5.1 Internet Explorer
Start Internet Explorer on your PC and then use internet.