Alco Electronics CD6698 CD Stereo System User Manual
Alco Electronics Ltd CD Stereo System
User Manual

100 WATT
BLUETOOTH® CD STEREO SYSTEM
WITH MULTICOLOR BEAT-PULSING LED LIGHTS
PRODUCT GUIDE
Model: CD6698BL
EN
EN - 1
SAFETY PRECAUTIONS
* SEE MARKING ON REAR OF PRODUCT *
WARNING:
• TO PREVENT FIRE OR SHOCK HAZARD, DO NOT EXPOSE
THE UNIT TO RAIN OR MOISTURE.
• TO AVOID ELECTRICAL SHOCK, DO NOT OPEN THE
CABINET. REFER SERVICING TO QUALIFIED PERSONNEL
ONLY.
• THE APPARATUS SHALL NOT BE EXPOSED TO DRIPPING
OR SPLASHING AND THAT NO OBJECTS FILLED WITH
LIQUID, SUCH AS VASES, SHALL BE PLACED ON THE
APPARATUS.
FCC STATEMENTS
This device complies with Part 15 of the FCC Rules.
Operation is subject to the following two conditions:
(1) This device may not cause harmful interference, and
(2) This device must accept any interference received,
including interference that may cause undesired
operation.
This equipment has been tested and found to comply
with the limits for a Class B digital device, pursuant to Part
15 of the FCC Rules. These limits are designed to provide
reasonable protection against harmful interference in
a residential installation. This equipment generates,
uses and can radiate radio frequency energy and, if not
installed and used in accordance with the instructions,
may cause harmful interference to radio communications.
However, there is no guarantee that interference will
not occur in a particular installation. If this equipment
does cause harmful interference to radio or television
reception, which can be determined by turning the
equipment off and on, the user is encouraged to try to
correct the interference by one or more of the following
measures:
- Reorient or relocate the receiving antenna.
- Increase the separation between the equipment and
receiver.
- Connect the equipment into an outlet on a circuit
different from that to which the receiver is connected.
- Consult the dealer or an experienced radio/TV
technician for help.
WARNING: Changes or modifications not expressly
approved by the party responsible for compliance could
void the user’s authority to operate the equipment.
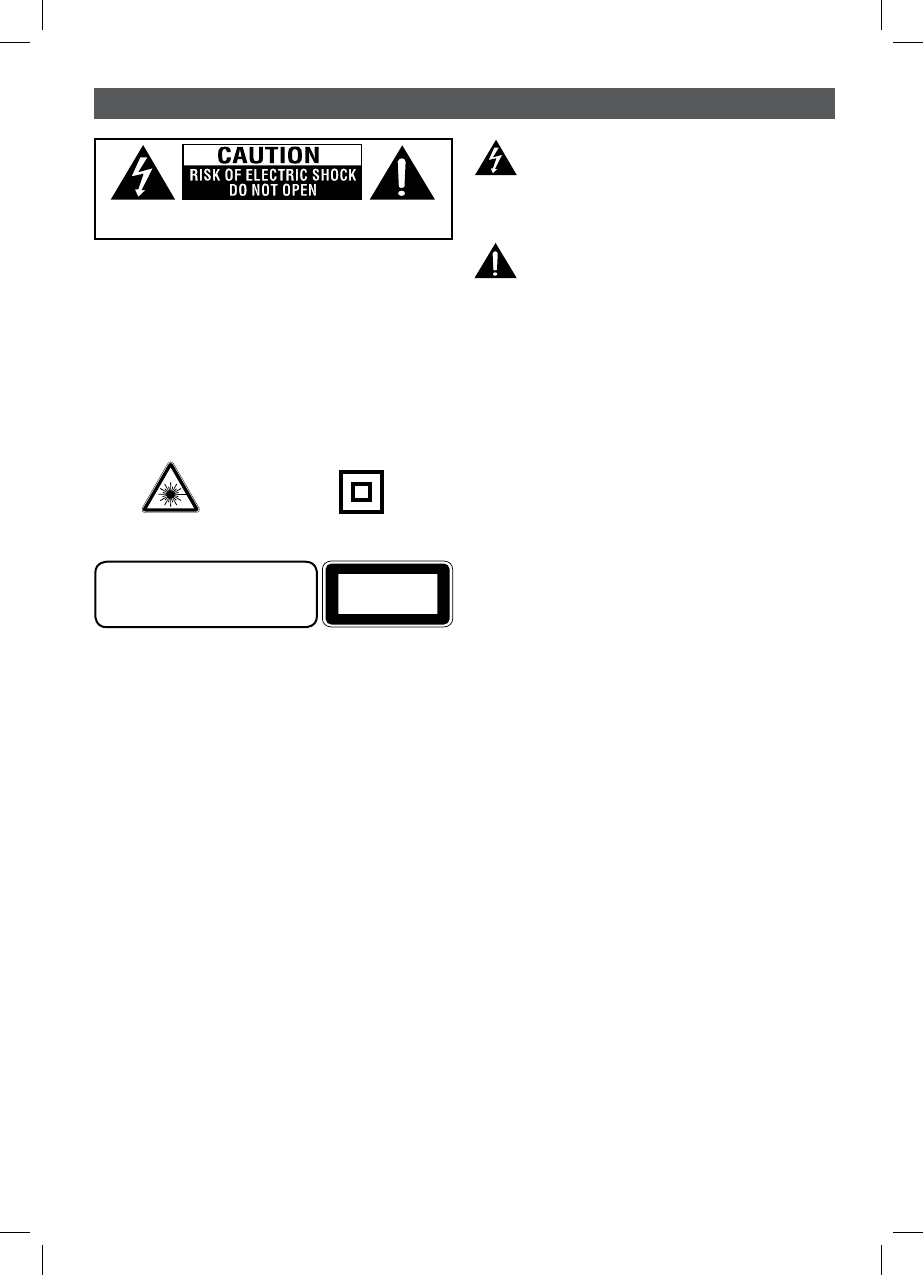
WARNING: SHOCK HAZARD-DO NOT OPEN
AVERTISSEMENT: RISQUE DE CHOC ÉLECTRIQUE-NE PAS OUVRIR
The lightning flash with arrowhead symbol,
within an equilateral triangle, is intended to
alert the user to the presence of uninsulated
“dangerous voltage” within the product’s enclosure that
may be of sufficient magnitude to constitute a risk of
electric shock to persons.
The exclamation point within an equilateral
triangle is intended to alert the user to
the presence of important operating and
maintenance (servicing) instructions in the literature
accompanying the appliance.
Warnings:
• The AC power plug is used as disconnect device and
it should remain readily operable during intended
used. In order to disconnect the apparatus from
the mains completely, the AC power plug should
be disconnected from the mains socket outlet
completely.
• The mains plug of apparatus should not be obstructed
OR should be easily accessed during intended use.
• Minimum 10 cm (4 inches) distances around the
apparatus for sufficient ventilations.
• The ventilation should not be impeded by covering the
ventilation openings with items such as newspaper,
table-cloths, curtains, etc.
• No naked flame sources such as lighted candles should
be placed on the apparatus.
On Safety
As the laser beam used in this compact disc player could
be harmful to the eyes, do not attempt to disassemble the
casing. Refer servicing to qualified personnel only.
• Do not put any foreign objects in the disc compartment.
If you do so, the laser beam interlock may be defeated
allowing the laser to remain on when the lid is opened.
• Should any objects or liquids fall into the unit, disconnect
the power supply and have the unit checked by qualified
personnel before any further operation.
On Operation
Since the CD system offers a wide dynamic range, the peaks
of the high level inputs are recorded with high fidelity, and
the noise level is very low. Do not turn up the volume while
listening to a part of the disc with no audio signals or very
low level inputs. If you do so, the speakers may be damaged
when the peak level of the sound is played. The lens of the
laser should be kept clean. Do not touch the lens. If you do
so, the lens may be damaged and the unit will not operate
correctly.
CAUTION
INVISIBLE LASER RADIATION
WHEN OPEN AND INTERLOCKS DEFEATED.
AVOID EXPOSURE TO BEAM.
CLASS 1 LASER
PRODUCT
This product contains a low
power laser device.
Double insulation when servicing
use only identical replacement parts.
On Use
Never use the unit where it would be subject to:
- Heat sources such as radiators or air ducts.
- Direct sunlight.
- Excessive dust.
- Moisture or rain.
- Mechanical vibration or shock.
- Uneven surface.
• Do not place any heavy objects on top of the unit.
• When the unit is used with an AC power plug, do not
wrap the unit in a cloth, blanket, etc. If you do so, the
temperature inside and outside the unit may rise
considerably, resulting in malfunctioning of the unit.
BWA17AA005_IB_r.indd 1 2017/1/17 14:42:05

EN
EN - 2
SAFETY PRECAUTIONS
1. Read these instructions.
2. Keep these instructions.
3. Heed all warnings.
4. Follow all instructions.
5. Do not use this apparatus near water.
6. Clean only with dry cloth.
7. Do not block any ventilation openings. Install in
accordance with the manufacturer’s instructions.
8. Do not install near any heat sources such as radiators,
heat registers, stoves, or other apparatus (including
amplifiers) that produce heat.
9. Do not defeat the safety purpose of the polarized
or grounding-type plug. A polarized plug has two
blades with one wider than the other. A grounding
type plug has two blades and a third grounding
prong. The wide blade or the third prong are provided
for your safety. If the provided plug does not fit into
your outlet, consult an electrician for replacement of
the obsolete outlet.
10. Protect the power plug from being walked on
or pinched particularly at plugs, convenience
receptacles, and the point where they exit from the
apparatus.
11. Only use attachments/accessories specified by the
manufacturer.
Portable
Cart
Warning
IMPORTANT SAFETY INSTRUCTIONS
12. Use only with a cart, stand, tripod, bracket,
or table specified by the manufacturer,
or sold with the apparatus. When a cart is
used, use caution when moving the cart/
apparatus combination to avoid injury from
tip-over.
13. Unplug this apparatus during lightening storms or
when unused for a long period of time.
14. Refer all servicing to qualified service personnel.
Servicing is required when the apparatus has been
damaged in any way, such as the power-supply cord
or plug is damaged, liquid has spilled or objects
have fallen into the apparatus, the apparatus has
been exposed to rain or moisture, does not operate
normally, or has been dropped.
• If the unit is brought directly from a cold to a warm
location, or is placed in a very damp room, the moisture
may condense on the lens inside the unit. Should this
occur, the unit will not operate. In this case, remove the
disc and leave the unit in a warm place for several hours
until the moisture evaporates.
• For the unit to operate at its best, it should not be
subject to temperatures below 41°F (5°C) or above 95°F
(35°C).
On Use
Never use the unit where it would be subject to:
- Heat sources such as radiators or air ducts.
- Direct sunlight.
- Excessive dust.
- Moisture or rain.
- Mechanical vibration or shock.
- Uneven surface.
• Do not place any heavy objects on top of the unit.
• When the unit is used with an AC power plug, do not
wrap the unit in a cloth, blanket, etc. If you do so, the
temperature inside and outside the unit may rise
considerably, resulting in malfunctioning of the unit.
• If the unit is brought directly from a cold to a warm
location, or is placed in a very damp room, the moisture
may condense on the lens inside the unit. Should this
occur, the unit will not operate. In this case, remove the
disc and leave the unit in a warm place for several hours
until the moisture evaporates.
• For the unit to operate at its best, it should not be
subject to temperatures below 41°F (5°C) or above 95°F
(35°C).
Additional safety information
• Apparatus shall not be exposed to dripping or splashing
and no objects filled with liquids, such as vases, shall be
placed on the apparatus.
• Always leave sufficient space around the product for
ventilation. Do not place product in or on a bed, rug,
in a bookcase or cabinet that may prevent air flow
through vent openings.
• Do not place lighted candles, cigarettes, cigars, etc. on
the product.
• Connect power plug only to AC power source as
marked on the product.
• Care should be taken so that objects do not fall into the
product.
• Do not attempt to disassemble the cabinet. This
product does not contain customer serviceable
components.
BWA17AA005_IB_r.indd 2 2017/1/17 14:42:07
EN
EN
EN - 3
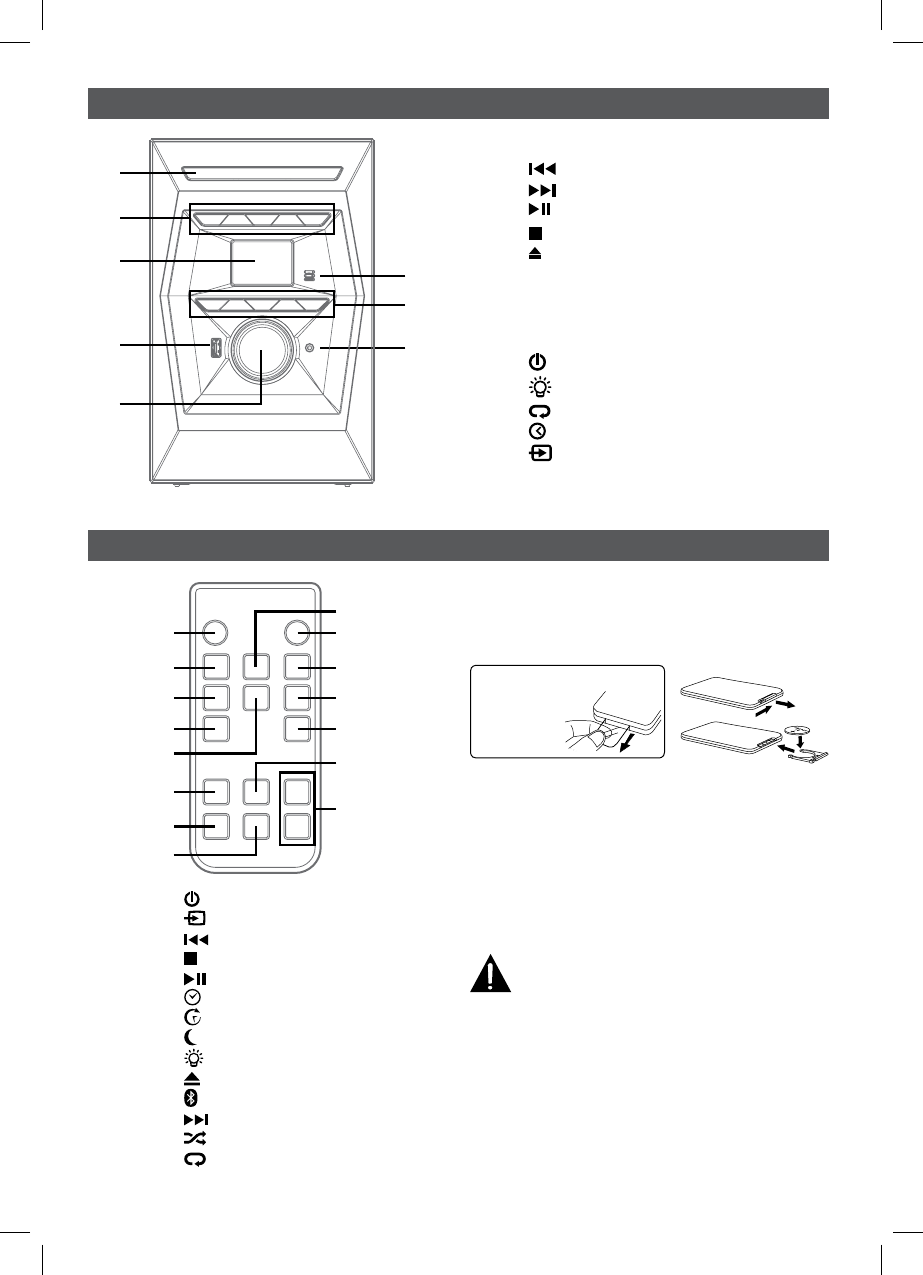
1. CD Door
2. / TUNE – button
/ TUNE + button
PLAY/PAIR button
STOP button
OPEN / CLOSE button
3. DISPLAY
4. USB port (for charging only)
5. VOLUME control
6. Remote sensor
7. STANDBY/ON button
/ PRESET EQ button
/ MEM.UP button
PROG/MEM button
SOURCE button
8. Line in / Aux jack
REMOTE CONTROL
BATTERY REPLACEMENT
When the battery becomes weak, the operating distance
of the remote control is greatly reduced and you will need
to replace it.
NOTE : If the remote control is not going to be used for a
long time, remove the battery to avoid damage caused by
battery leakage corrosion.
WARNING : Do not dispose of battery in fire; battery may
explode or leak.
Batteries should not be exposed to excessive heat such as
sunshine, fire or the like.
CAUTION : Danger of explosion if battery is incorrectly
replaced. Replace only with the same or equivalent type.
WARNING
DO NOT INGEST BATTERY. CHEMICAL BURN
HAZARD.
The remote control supplied with this product contains
a coin/button cell battery. If the coin/button cell battery
is swallowed, it can cause severe internal burns in just 2
hours and can lead to death.
Keep new and used batteries away from children. If the
battery compartment does not close securely, stop using
the product and keep it away from children.
If you think batteries might have been swallowed or placed
inside any part of the body, seek immediate medical
attention.
Remove the plastic sheet before
operating the remote
control.
1.
2.
LOCATION OF CONTROLS
1. ON/STANDBY button
2. SOURCE button
3. / TUNE – button
4. STOP button
5. PLAY/PAUSE button
6. / PROG/MEM button
7. TIMER button
8. zzz SLEEP button
9. / PRESET EQ button
10. OPEN/CLOSE button
11. PAIR button
12. / TUNE + button
13. RANDOM button
14. /MEM.UP button
15. VOLUME +/– buttons
1
2
3
4
6
5
7
8
10
9
11
12
13
15
14
1
2
3
4
5
6
7
8
BWA17AA005_IB_r.indd 3 2017/1/17 14:42:08
EN
EN - 4
SYSTEM CONNECTIONS
SPEAKER CONNECTIONS
Connect the speakers to the R terminal and the L terminal.
NOTE : Connecting speakers other than the speakers supplied with the unit may damage the unit.
CAUTIONS:
• Ensure that the power supply in your house complies with that indicated on the identification sticker located
on the back of your unit. (AC 120V ~ 60Hz).
• If you are not going to use the unit for a long time, disconnect the AC power plug from the wall outlet.
• This unit is designed for continuous use. Switching off the unit to standby mode does not disconnect it
from the power supply. To completely isolate the equipment, remove the plug from the wall outlet as some
components remain connected to the electrical supply.
• Topreventelectricalshock,matchwidebladeofplugtowideslotofwalloutlet,thenfullyinsert.
You can charge your smartphone/tablet through the USB socket with a USB cable (not supplied).
Connect a USB cable (not supplied) to the USB socket on the front of the unit and the dock connector on your
smartphone/tablet.
CHARGE YOUR SMARTPHONE/TABLET
LINE IN CONNECTION
You can connect audio devices such as your CD player or MP3 player to the unit via the LINE IN jack. To do this,
connect an audio cable from the line out or headphone out jack of the other audio device to the LINE IN jack on
the front of unit. Press the SOURCE button to switch to AUX mode.
Note : We recommend you unplug the device from the LINE IN jack when not in use.
Setting the clock can only be done in STANDBY mode.
• If the unit is plugged in with the supplied AC adapter and the unit is in standby mode.
1. Press and hold the /PROG/MEM button until the hour digits blink.
2. Press the or button to adjust the desired hours and press the /PROG/MEM button once to confirm,
then the minute digits blink.
3. Press the or button to adjust the desired minutes and press the /PROG/MEM button once to start
clock.
CLOCK SETTING
Press the SOURCE button to switch to TUNER mode.
Searching for a Station Automatically
• Press and hold the or button until the tuner starts searching for a station, then release. After tuning in
a station, the search stops.
Presetting Stations
1. Tune in to a desired station. Press the /PROG/MEM button.
2. The preset number will blink and the “MEM” indicator will be shown on the display.
3. Press the or button to select the preset number.
4. Press the /PROG/MEM button again to store it in memory.
Tuning in to a Preset Station
Press the /MEM.UP button to select a preset number.
Note : Fully unwind the wire antenna. Then extend the wire antenna and place it in the position that sounds best.
When the reception is good, the “ ” icon will appear on the display.
LISTENING TO THE RADIO
BWA17AA005_IB_r.indd 4 2017/1/17 14:42:09
EN
EN
EN - 5
PLAYBACK VIA BLUETOOTH® ENABLED DEVICES
RECONNECTING A BLUETOOTH® ENABLED DEVICE
Bluetooth® enabled devices must be reconnected when the device has been turned off or the unit has been
turned off.
1. Turn on the Bluetooth® device that has already been paired with the unit.
2. Press the SOURCE button to Bluetooth® mode and “ ” icon is shown on the display.
The “ ” icon flashes and starts flashing rapidly, and it auto searches for the last paired Bluetooth® device in
memory.
3. Depending on your Bluetooth® device, your device may automatically connect to the unit.
If the device does not automatically connect to the unit, press and hold the PAIR button on the remote
control for 3 seconds until the “ ” icon starts flashing rapidly, then search for the “Bluetooth” in its list of
your Bluetooth® devices and select it.
4. Once the “ ” icon light up, the Bluetooth® enabled device is paired and connected.
5. You can now enjoy audio from the unit.
PAIR AND CONNECT WITH ANOTHER NEW DEVICE
In order to pair the unit to a new device, you must first disconnect the currently paired and connected Bluetooth®
device from the unit.
1. On the currently paired and connected Bluetooth® device, select the “Bluetooth” from the list of currently
paired and connected devices, and disconnect it. Please refer to your Bluetooth® enabled device User’s Guide
for direction on how to disconnect a device.
Or turn off the Bluetooth® device.
2. Follow the Initial device pairing and connection instructions above.
INITIAL DEVICE PAIRING AND CONNECTION
In order to pair and connect your Bluetooth® device for the first time:
1. Press the SOURCE button to Bluetooth® mode and “ ”icon is shown on the display. The “ ” icon flashes
which means the unit is in Bluetooth® mode and ready to pair.
2. Turn on the Bluetooth® device you wish to pair and connect.
3. Press and hold the PAIR button on the remote control for 3 seconds. The “ ” icon will start flashing rapidly
which means it is pairing.
4. On your Bluetooth® enabled device, search for the “Bluetooth” in the list of discovered devices and select it.
It may take the unit and Bluetooth® enabled device a few seconds to pair.
5. When the “ ” icon lights up, the unit and the Bluetooth® enabled device are now paired and connected.
6. You can now enjoy audio from the unit.
Notes : If your Bluetooth device (e.g. Smart phone etc.) needs the PIN code while pairing, please enter 4-digit
number: 0000.
The unit can only be connected to one Bluetooth® device at a time.
CD PLAYBACK
1. Press the OPEN/CLOSE button to open the CD door. Place a disc in the center with the label side up and
then press the OPEN/CLOSE button to close the CD door.
2. Press the SOURCE button to CD mode. “ “ appears and “- -” blinks on the display. Then the total track
no. is shown on the display.
3. Press the PLAY/PAUSE button to start playing.
Repeat Current Track
Press the /MEM.UP button until “ ” blinks on the display. The current track will be played repeatedly.
Repeat the Entire CD
Press the /MEM.UP button until “ ” stops blinking and remains on. All tracks will be played repeatedly.
Cancel Playback Mode
Press the /MEM.UP button until “ ” disappears.
REPEAT PLAYBACK
BWA17AA005_IB_r.indd 5 2017/1/17 14:42:09
EN
EN - 6
A program of up to 20 tracks can be set to play in a preset order.
1. In CD stop mode, press the /PROG/MEM button and the “MEM” & “ ” will blink on the display.
2. Press the or button to select the desired track and press the /PROG/MEM button to store the track
in memory. To start playback, press the PLAY/PAUSE button.
PROGRAMMABLE CD PLAYBACK
All tracks on the disc can be played in random order (Using the remote control only).
Random Playback
Press the RANDOM button on the remote control until “ ” is shown on the display. All tracks will be played
randomly. To cancel, press the RANDOM button on the remote control until “ ” disappears.
RANDOM PLAYBACK
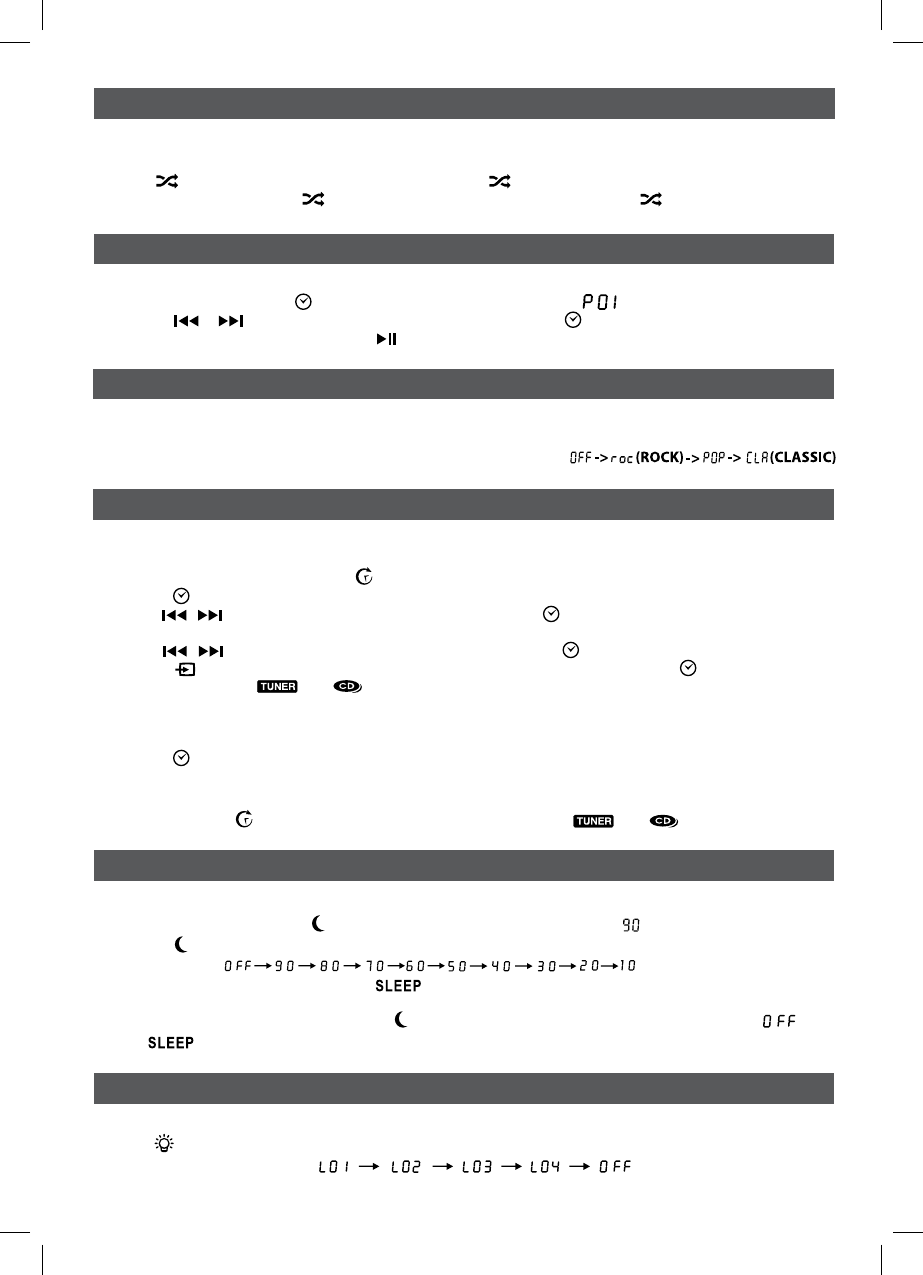
SLEEP TIMER SETTING
ILLUMINATED SPEAKERS
The sleep timer automatically turns the unit off at a certain time.
1. While the unit is on, press the zzz SLEEP button on the remote control and “ ” appears on the display.
2. Press the zzz SLEEP button repeatedly to select the desired sleep time as below:
3. After setting a desired sleep time, the “ “ appears on the display.
4. The unit will automatically turn off once it reaches the sleep time.
• To clear the preset sleep time press the zzz SLEEP button on the remote control to select “ “ and
the “ “ disappears on the display.
PRESET EQ
This system has four different equalizer settings to adjust the levels of bass and treble.
During playback, press the PRESET EQ button to select a desired music mode. Each time the PRESET EQ button
is pressed, the music mode will be changed to the next one as follows:
When the unit turns on, the speakers will light up with multi-color LEDs and interact with the music. Press and
hold the button on the unit or remote control repeatedly to select the desired mode as below :
TIMER SETTING
The timer function will turn the unit on at a preset time.
To Set Timer
1. In standby mode, press and hold the TIMER button on the remote control until the display blinks.
2. Press the /PROG/MEM button until the hour digits blink.
3. Tap the / button to adjust the desired hours then tap the /PROG/MEM button once to conrm. The
minute digits will begin to blink.
4. Tap the / button to adjust the desired minutes then tap the /PROG/MEM button once to conrm.
5. Press the SOURCE button to select the timer mode (RADIO or CD), then tap the /PROG/MEM button
once to conrm. The “ ” or “ ” icon will be shown on the display.
• For RADIO timer, tune in to a desired station.
• For CD timer, insert a CD into the unit.
6. Press the VOL +/– buttons to adjust the volume levels.
7. Press the /PROG/MEM button to conrm.
8. The unit will wake up to “RADIO” or “CD” when the timer reaches the preset time.
To Cancel Timer
• Press and hold the TIMER button on the remote control until the “ ” or “ ” icon goes out.
(Multi-color LEDs) (Red LED) (Green LED) (Blue LED)
BWA17AA005_IB_r.indd 6 2017/1/17 14:42:09

EN
EN
EN - 7
TROUBLESHOOTING GUIDE
SOLUTIONS
• Make sure your Bluetooth® device is working properly.
• Make sure the source is Bluetooth® mode.
• Check your device’s manual for details on Bluetooth® pairing and
linking.
• Make sure the source is CD mode.
• Make sure button is pressed.
• Make sure disc label is facing up.
• Pause mode is activated.
• Disc may be damaged or dirty; check disc.
• Make sure the unit is on a secure spot. Vibration or jarring can cause
the disc to skip.
• Make sure FM antenna wire is fully extended.
• Electrical interference in your home can cause poor reception.
Move the unit away from them (especially those with motors and
transformers).
• Rotate the unit horizontally.
• Make sure AC adapter is secure in the outlet, and outlet has power.
• Make sure the current mode is correct.
• Make sure you’ve turned on the connected device, and music are
being played back.
• Check if volume is set to zero.
PROBLEMS
BLUETOOTH®
Bluetooth® devices
doesn’t pair with this unit.
CD
Disc in place but unit
won’t play
Disc skips
RADIO
Poor FM reception
OTHERS
System doesn’t turn on
No sound
Specications and external appearance are subject to change without notice.
BWA17AA005_IB_r.indd 7 2017/1/17 14:42:09
EN
EN
EN - 8
LIMITED WARRANTY
VENTURER ELECTRONICS (“VENTURER”) makes the following limited warranty. This limited warranty extend to the
original consumer purchaser and is limited to non-commercial use of the product.
Ninety (90) Day Parts & Labor Warranty
Venturer products purchased in the United States are warranted to be free from defects in materials or workmanship for
a period of ninety (90) days from the date of their original retail purchase. If the unit fails to conform to this warranty, we
will service the product using new or refurbished parts and products, at VENTURER’s sole discretion.
During a period of ninety (90) days from the eective warranty date, VENTURER will provide, when needed, service
labor to repair a manufacturing defect at its designated Service Center. To obtain warranty service in the United
States, you must rst contact our Customer Support Center at www. venturer.com. The determination of service will
be made by VENTURER Customer Support. PLEASE DO NOT RETURN YOUR UNIT TO VENTURER WITHOUT PRIOR
AUTHORIZATION. New or remanufactured replacements for defective parts or products will be used for repairs by
VENTURER at its designated Service Center for ninety (90) days from the eective warranty date. Such replacement
parts or products are warranted for an additional ninety (90) days from the date of repair or replacement.
The Customer will be required to ship the unit to the Service Center indicated at the time Customer Support is contacted
to make the necessary repairs. The customer is responsible for all transportation charges to the service facility.
Packaging and Shipping Instruction
When you send the product to the VENTURER service facility you must use the original carton box and packing material
or an equivalent as designated by VENTURER.
Your Responsibility
(1) You must retain the original sale receipt to provide proof of purchase.
(2) These warranties are eective only if the product is purchased and operated in the U.S.A. or Canada.
(3) Warranties extend only to defects in material or workmanship, and do not extend to any product or parts which
have been lost or discarded, or damage to product or parts caused by misuse, accident, improper operation or
maintenance, or use in violation of instructions provided with the product, or to product which has been altered
or modied without authorization of VENTURER, or to products or parts thereof which have had the serial number
removed or changed.
Out of Warranty
In the event your product requires repair after the limited warranty period has expired, please contact our
Customer Support Center at www.venturer.com
Important: You are responsible for any transportation, shipping or insurance relative to the return of product to
our Product Returns Center.
All warranties implied by state law, including the implied warranties of merchantability and tness for a particular
purpose, are expressly limited to the duration of the limited warranties set forth above. With the exception of any
warranties implied by state law as hereby limited, the foregoing warranty is exclusive and in lieu of all other warranties,
guarantees, agreements and similar obligations of manufacturer or seller with respect to the repair or replacement of
any parts. In no event shall VENTURER be liable for consequential or incidental damages.
No person, agent, distributor, dealer or company is authorized to change, modify or extend the terms of these warranties
in any manner whatsoever. The time within action must be commenced to enforce any obligation of VENTURER arising
under the warranty or under any statute, or law of the United States or any state thereof, is hereby limited to ninety (90)
days from the date of purchase. This limitation does not apply to implied warranties arising under state law.
This warranty gives you specic legal rights and you may also have other rights, which may vary from state to state.Some
states do not allow limitations on how long an implied warranty lasts, when an action may be brought, or the exclusion
or limitation of incidental or consequential damages, so the above provisions may not apply to you.
For more information on other products and services, please visit our web site at: www.venturer.com
Important: Also keep your “Bill of Sale” as proof of purchase.
Model no ............................................................................................ Product name ............................................................................................
Type of set ......................................................................................... Serial no .......................................................................................................
Invoice no .......................................................................................... Date purchased .........................................................................................
Dealer name ..................................................................................................................................................................................................................
FOR SERVICE AND REPAIR, PLEASE VISIT www.venturer.com
As concerns grow about the environmental impact of outdated electronic products, Venturer
Electronics is committed to being a part of the solution. Free of charge, Venturer Electronics
customers can return qualifying units to us for recycling. For more details, please visit our website at
www.venturer.com/recycle.
BWA17AA005_IB_r.indd 8 2017/1/17 14:42:09

Printed in China
811- 669891W010
BWA17AA005_IB_r.indd 9 2017/1/17 14:42:09