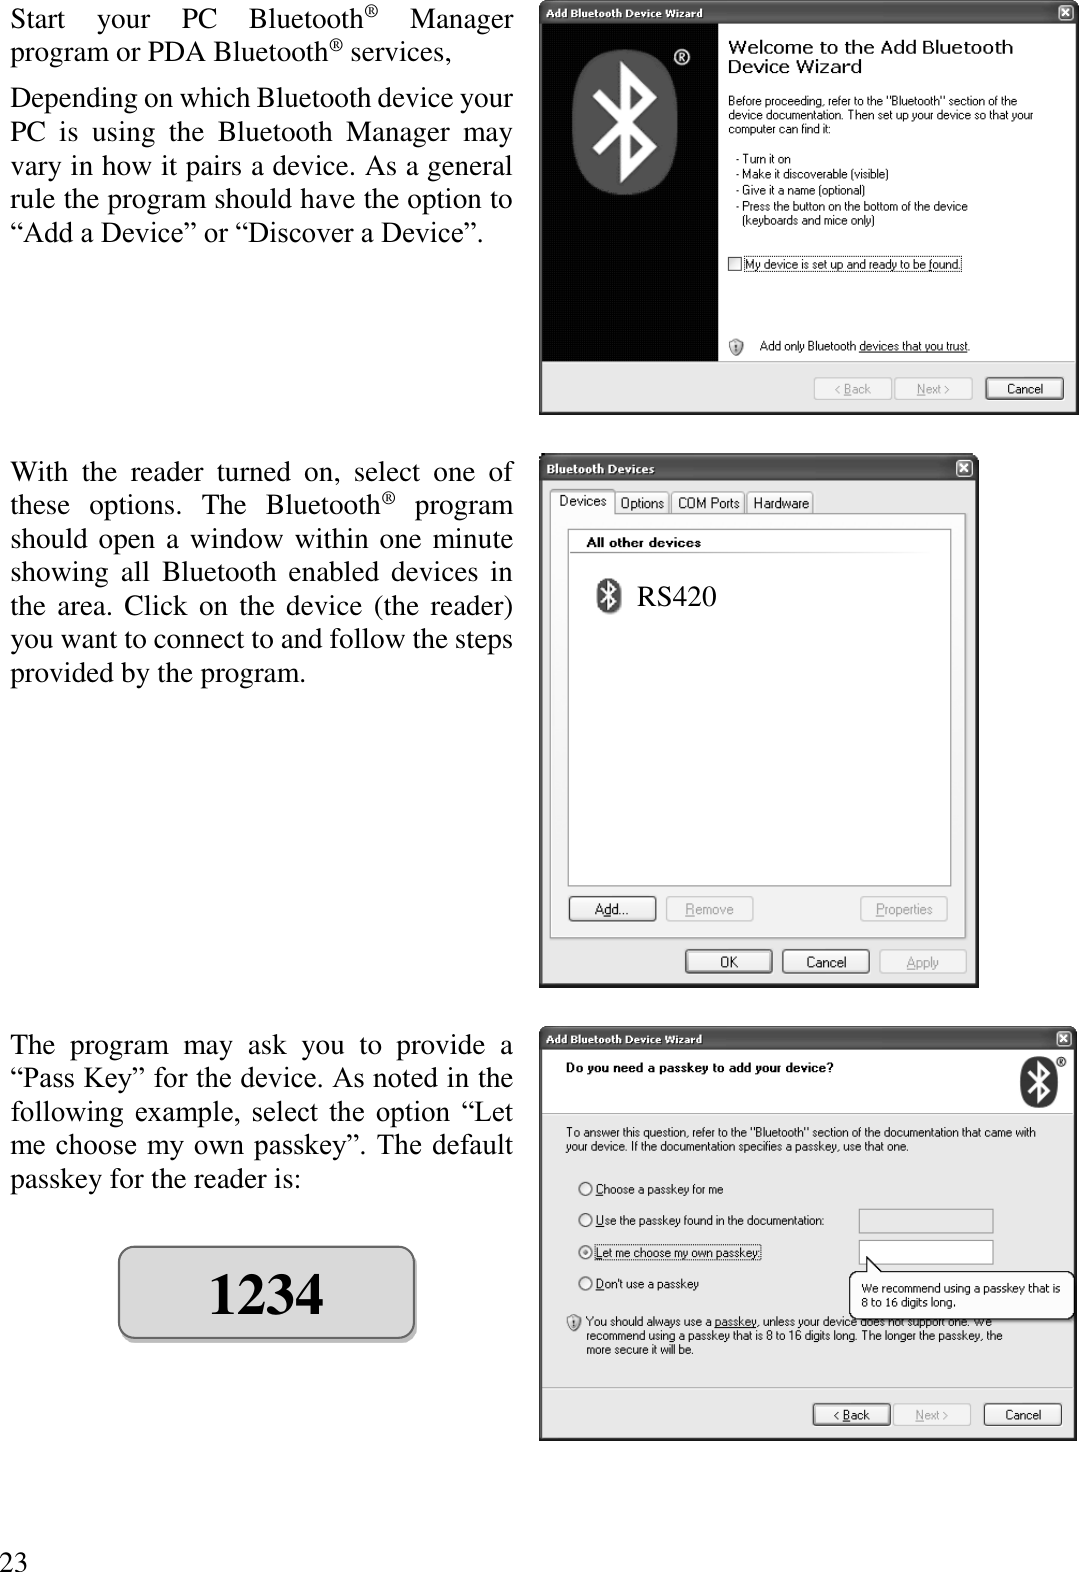
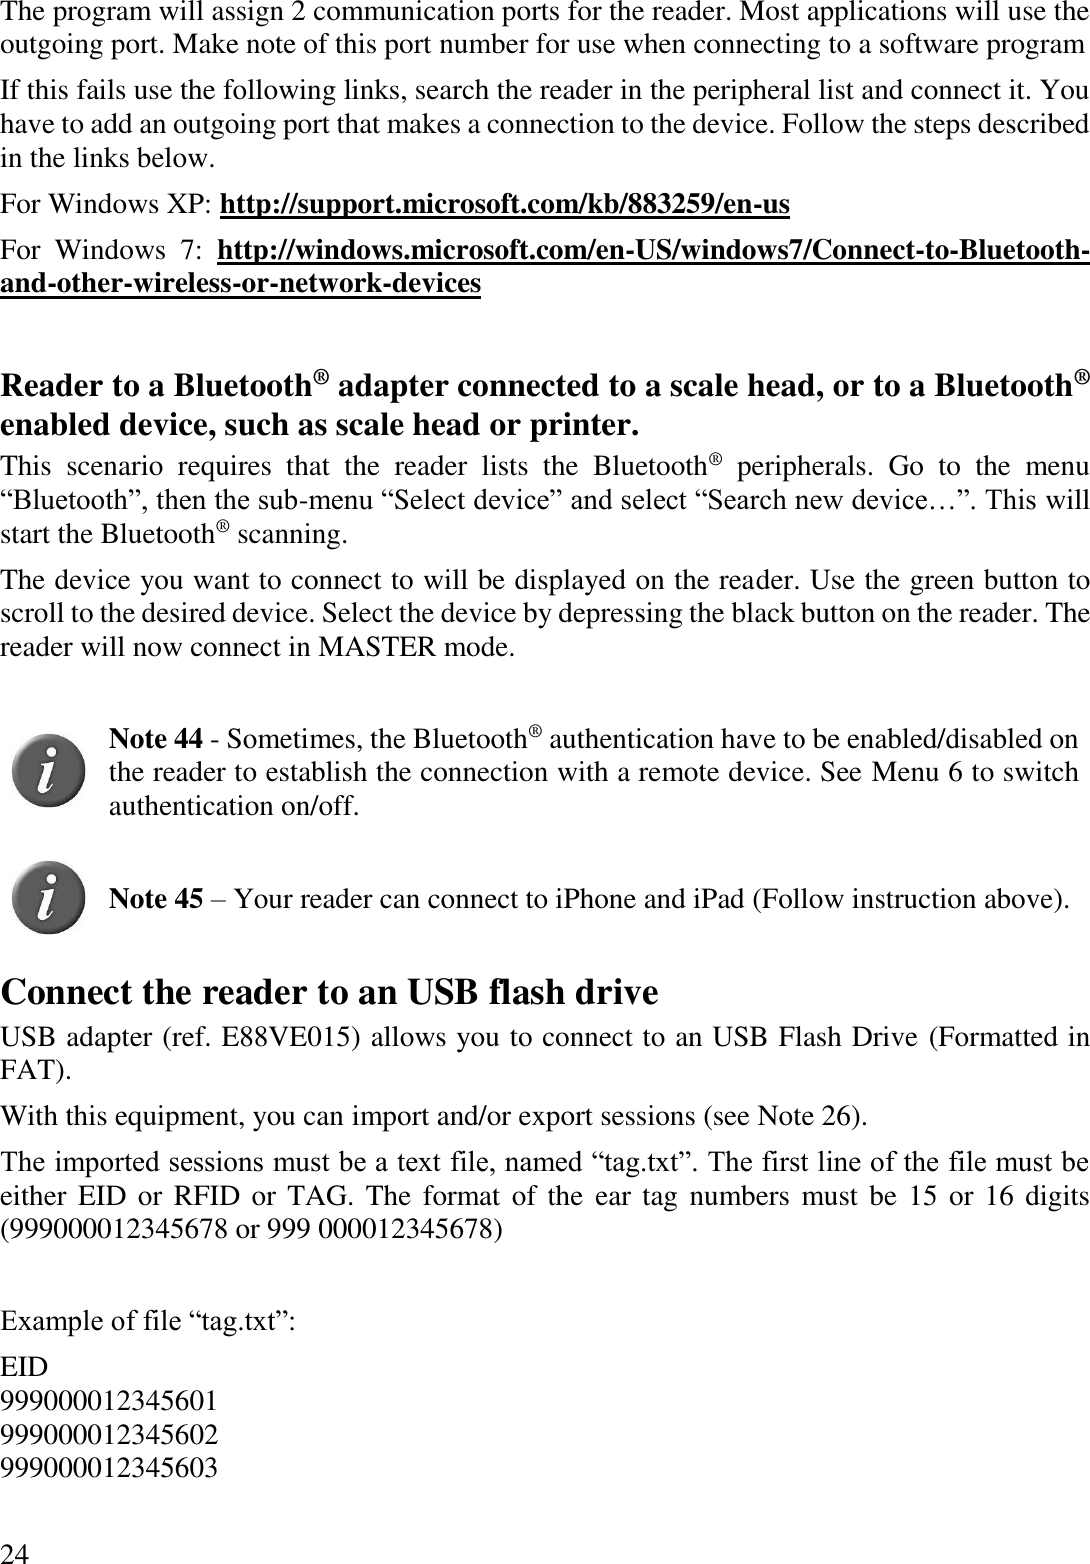
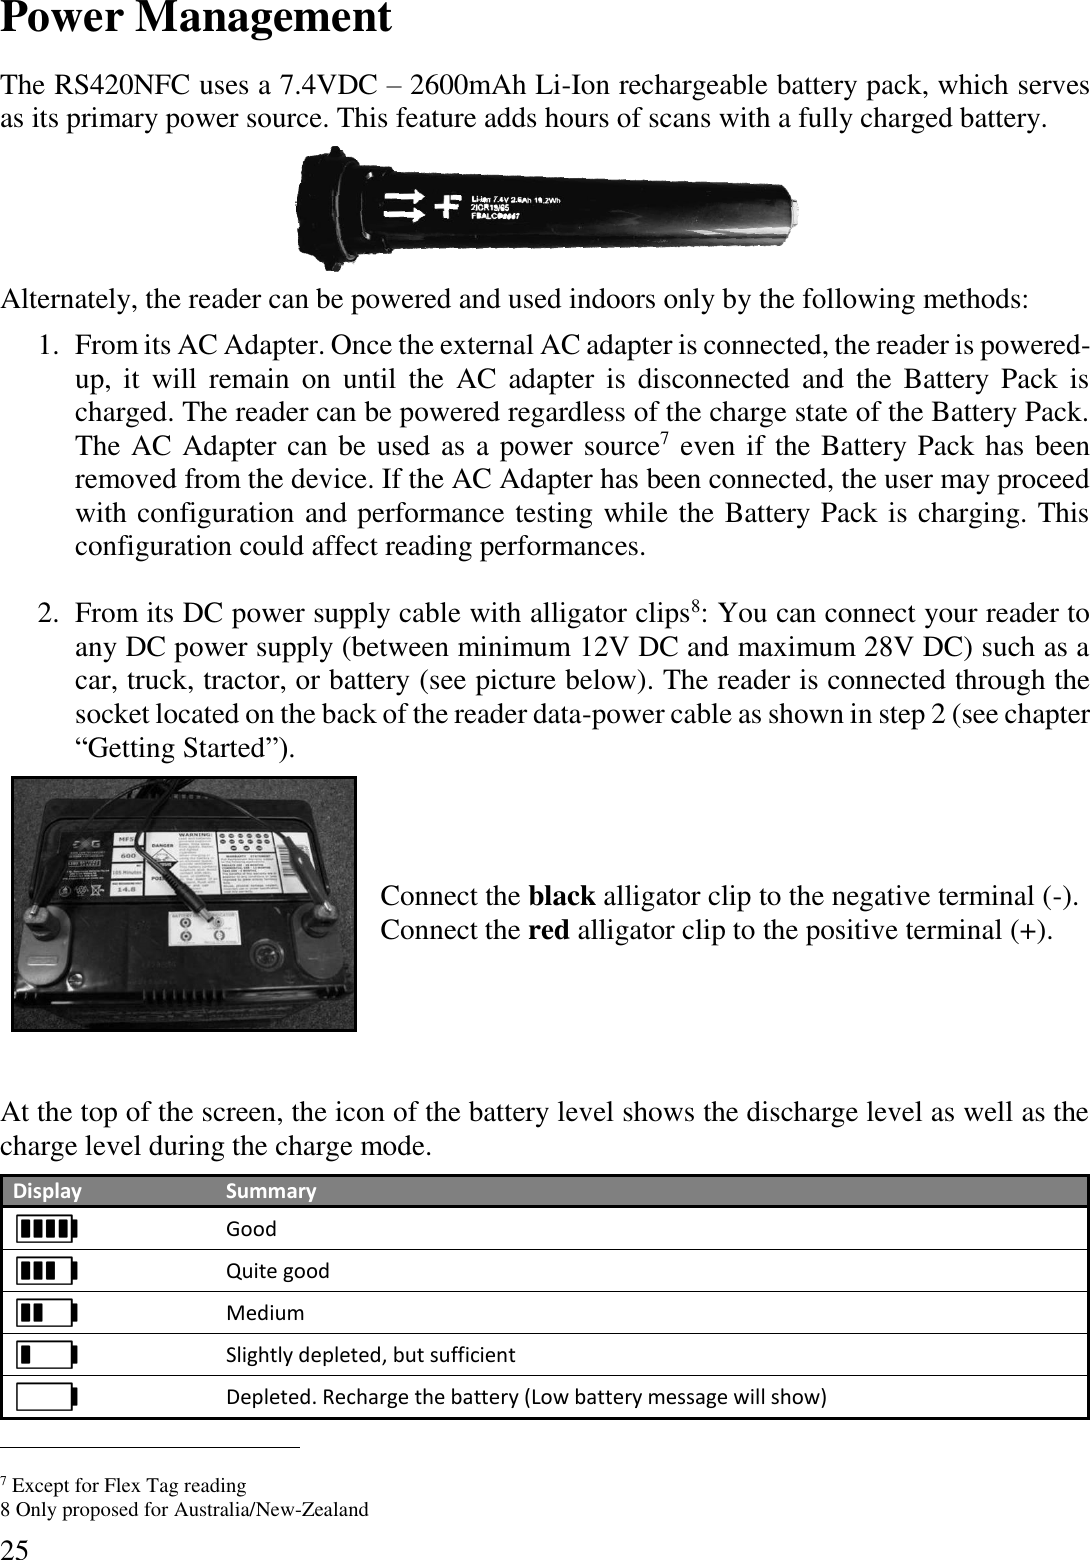
Allflex USA 30014 RFID and NFC reader with Bluetooth function User Manual
Allflex USA, Inc. RFID and NFC reader with Bluetooth function
UserManual.wiki
>
Allflex USA
>
30014 User Manual
>
User Manual
Contents
1.
User Manual
2.
User Manaul
User Manual
Navigation menu
Upload a User Manual
Namespaces
Wiki Guide
HTML
PDF
Info
Views
User Manual
Discussion / Help
Navigation


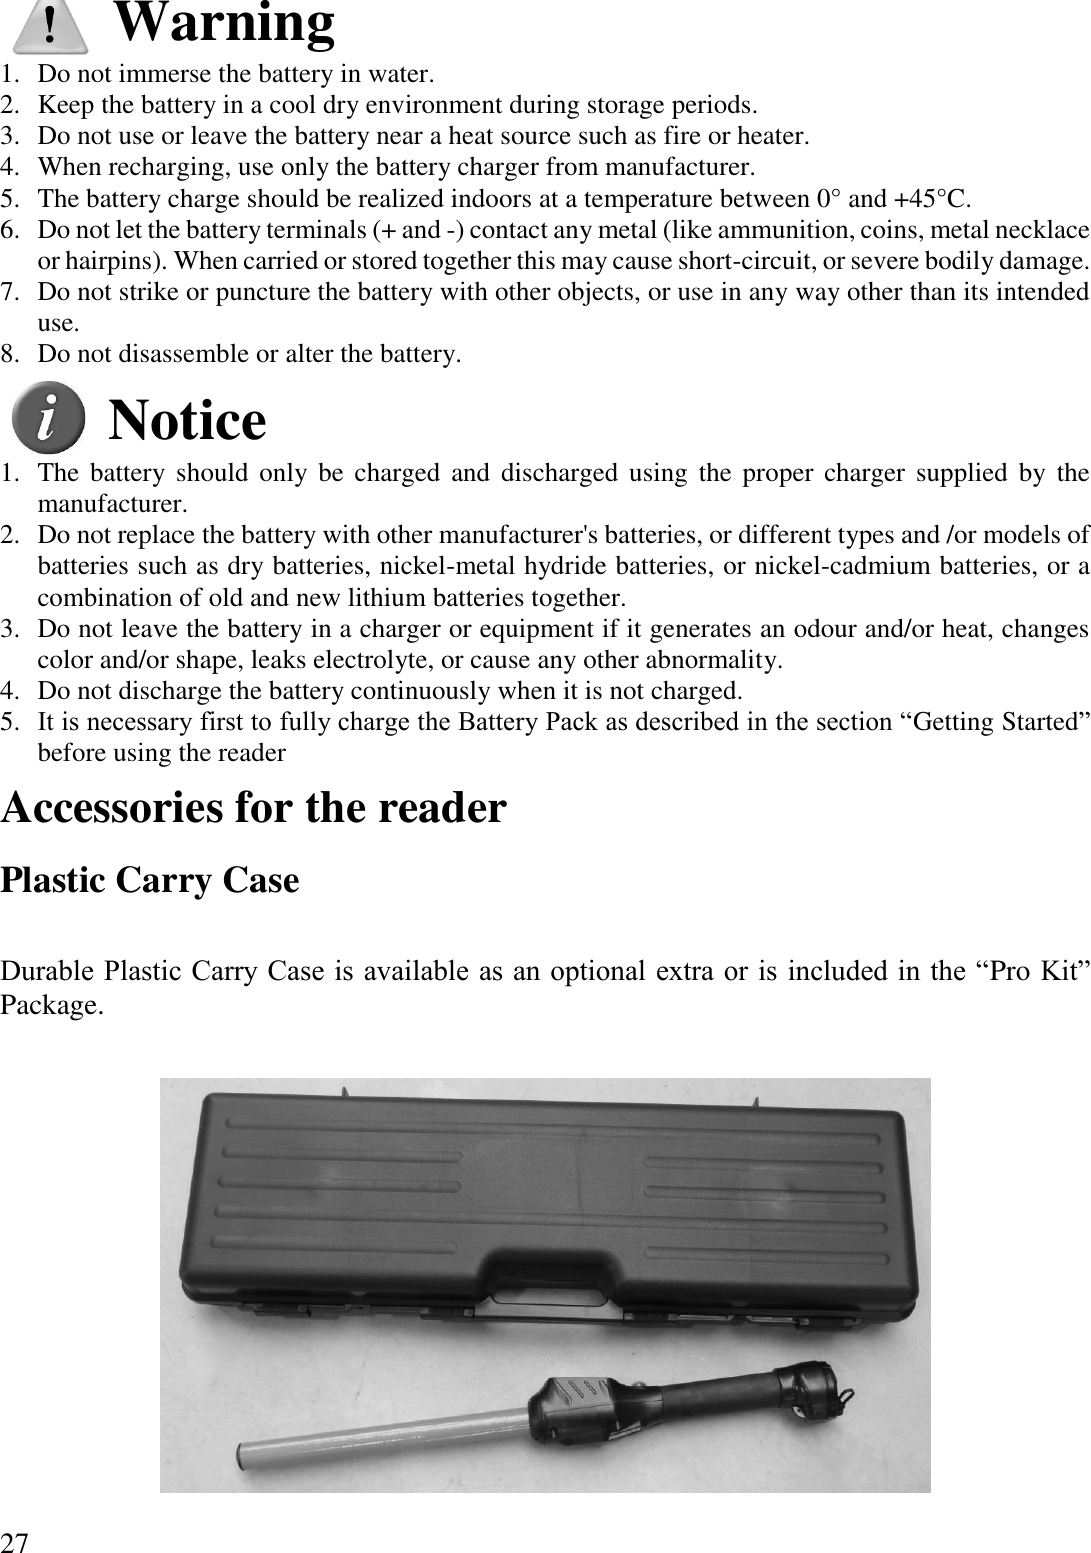
![32 Allflex Offices Allflex Europe S. A. ZI DE Plague Route des Eaux 35502 Vitré FRANCE Téléphone/Phone: +33 (0)2 99 75 77 00. Télécopieur/Fax: +33 (0)2 99 75 77 64 www.allflex-europe.com SCR Dairy www.scrdairy.com/contact2.html Allflex Australia 33-35 Neumann Road Capalaba Queensland 4157 AUSTRALIA Phone: +61 (0)7 3245 9100 Fax: +61 (0)7 3245 9110 www.allflex.com.au Allflex USA, Inc. P.O. Box 612266 2805 East 14th Street Dallas Ft. Worth Airport, Texas 75261-2266 UNITED STATES OF AMERICA Phone: (972) 456-3686 Phone: (800) 989-TAGS [8247] Fax: (972) 456-3882 www.allflexusa.com Allflex New Zealand Private Bag 11003 17 El Prado Drive Palmerston North NEW ZEALAND Phone: +64 6 3567199 Fax: +64 6 3553421 www.allflex.co.nz Allflex Canada Corporation Allflex Inc. 4135, Bérard St-Hyacinthe, Québec J2S 8Z8 CANADA Téléphone/Phone: (450) 261-8008 Télécopieur/Fax: (450) 261-8028 Allflex UK Ltd. Unit 6 - 8 Galalaw Business Park TD9 8PZ Hawick UNITED KINGDOM Phone: +44 (0) 1450 364120 Fax: +44 (0) 1450 364121 www.allflex.co.uk Sistemas De Identificaçao Animal LTDA Rua Dona Francisca 8300 Distrito Industrial Bloco B – Módulos 7 e 8 89.239-270 Joinville SC BRASIL Tel: +55 (47) 4510-500 Fax: +55 (47) 3451-0524 www.allflex.com.br Allflex Argentina CUIT N° 30-70049927-4 Pte. Luis Saenz Peña 2002 1135 Constitución - Caba Buenos Aires ARGENTINA Tel: +54 11 41 16 48 61 www.allflexargentina.com.ar Beijing Allflex Plastic Products Co. Ltd. No. 2-1, the west side of Tongda Road, Dongmajuan Town, Wuqing District, Tianjin City, 301717 CHINA Tel: +86(22)82977891-608 www.allflex.com.cn](https://usermanual.wiki/Allflex-USA/30014.User-Manual/User-Guide-3948580-Page-32.png)