Alpha Networks AR430W Super G Wireless Router User Manual AR430W
Alpha Networks Inc. Super G Wireless Router AR430W
User manual
Super G Wireless Broadband Router
Model # AR430W
Quick Installation Guide

Ver. 1A
This Quick Installation Guide only provides the basic instructions. For more
detailed information, please refer to the User’s Manual in the supplied CD.
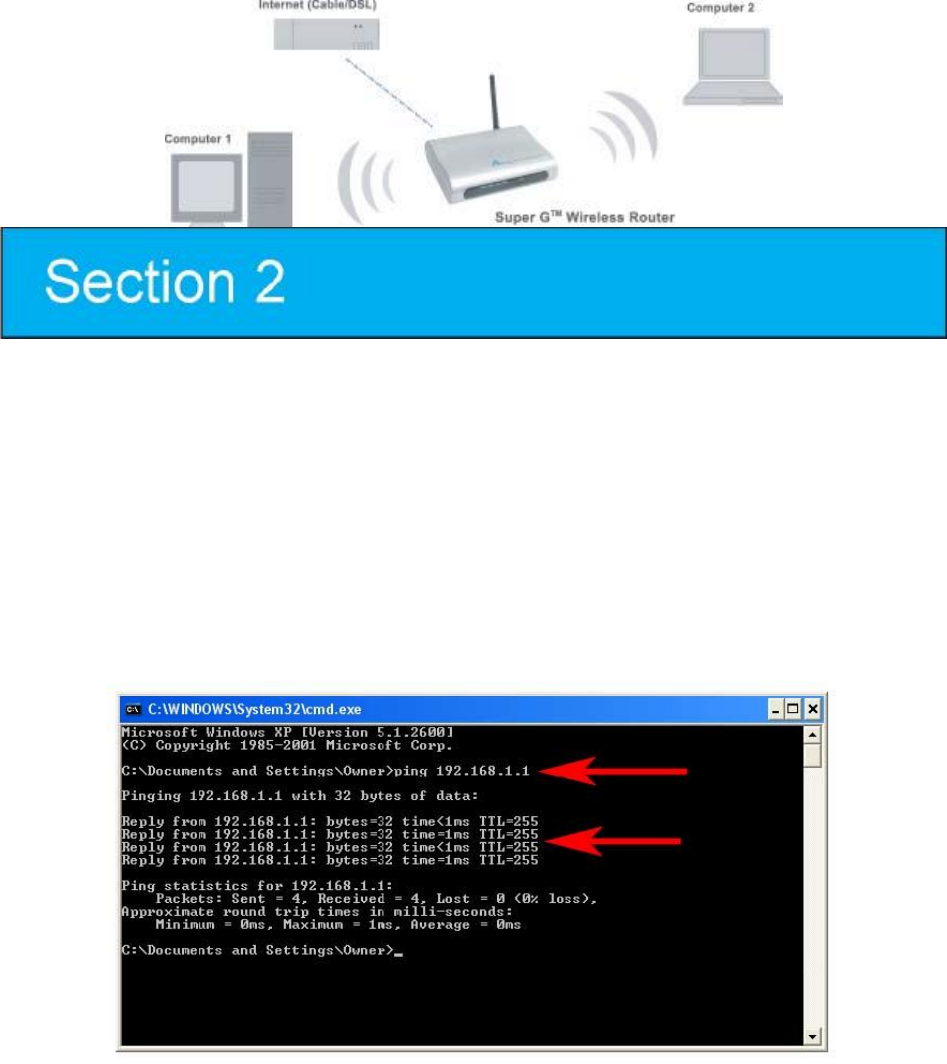
Connecting the Router
Note: Prior to connecting the router, be sure to power off your computer, DSL/Cable modem,
and the router. You should setup the router with a wired connection first before attempting to
setup any wireless connection.
Step 1 Connect one end of a network cable to the WAN port of the router and connect the
other end of the cable to the DSL/Cable modem.
Step 2 With another network cable, connect one end of the cable to your computer’s network card
and connect the other end to one of the LAN (Ethernet) ports of the router.
Step 3 Power on the DSL/Cable modem and wait for the lights on the modem to settle down.
Step 4 Power on the router by connecting one end of the supplied power adapter to the power
jack of the router and connecting the other end to an electrical outlet.
Step 5 Power on your computer.
Step 6 Make sure the WAN, WLAN, and the LAN port that the computer is connected to are lit. If
not try the above steps again.
Verifying Connection to the Router
Step 1 Go to Start, Run, type command (for Windows 95/98/ME) or cmd (for Windows
2000/XP) and click OK. You will see the command prompt as below.
Step 2 Type ping 192.168.1.1 and press Enter. You should get four reply responses back.
Step 3 If you get Request timed out, or Destination host unreachable, double-check the
network cable connection between the computer and the router and try Step 2 again. If you still
encounter problem, go to the next step; otherwise proceed to Section 3, Configure the Router.
Step 4 For Windows 2000/XP, type ipconfig/release and press Enter.
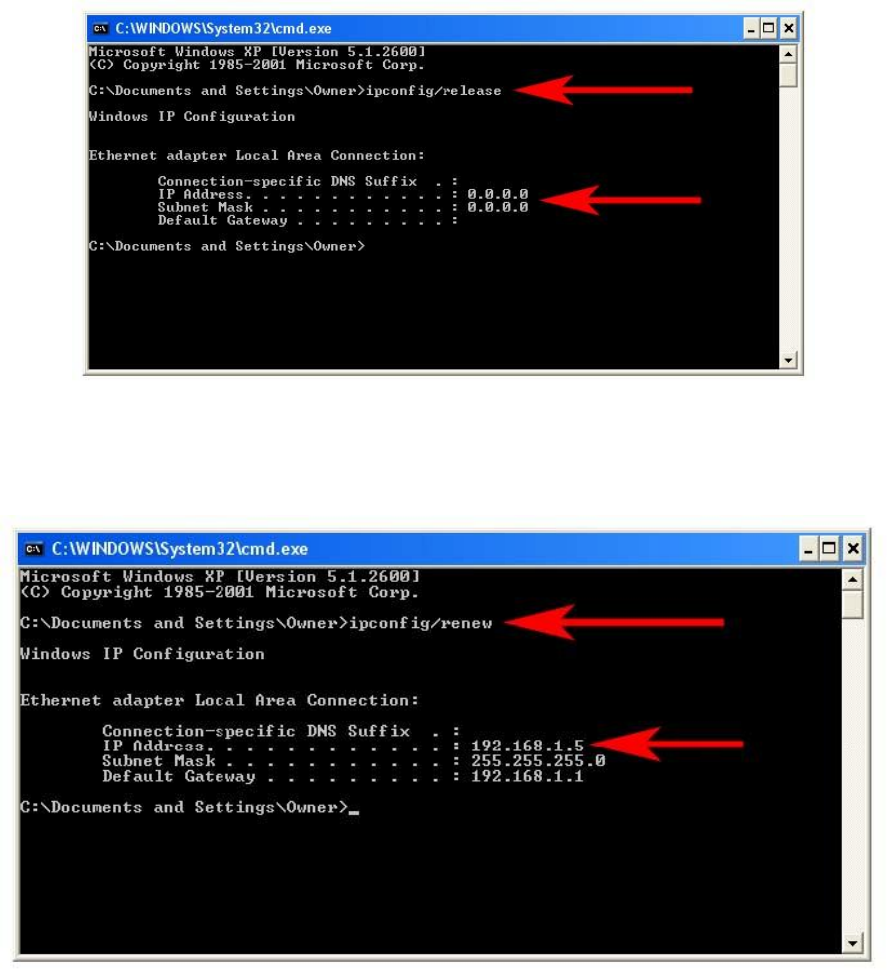
Step 5 Type ipconfig/renew and press Enter. You should get an IP address of
192.168.1.x (where x is a number between 2 - 254). Proceed to Section 3, Configure the Router.
If you don’t get an IP address, reset the router by holding in the reset button at the back of the
router for 10 seconds while it is ON and try ipconfig/renew again.
Step 6 For Windows 95/98/ME go to Start, Run, type winipcfg and click OK.
Step 7 Select your network card from the drop-down menu and click Release.

Step 8 After your IP address is released, click Renew. You should get an IP address of
192.168.1.x (where x is a number between 2 - 254). If you don’t get an IP address, reset the
router by holding in the reset button at the back of the router for 10 seconds while it is ON and try
Renew again.
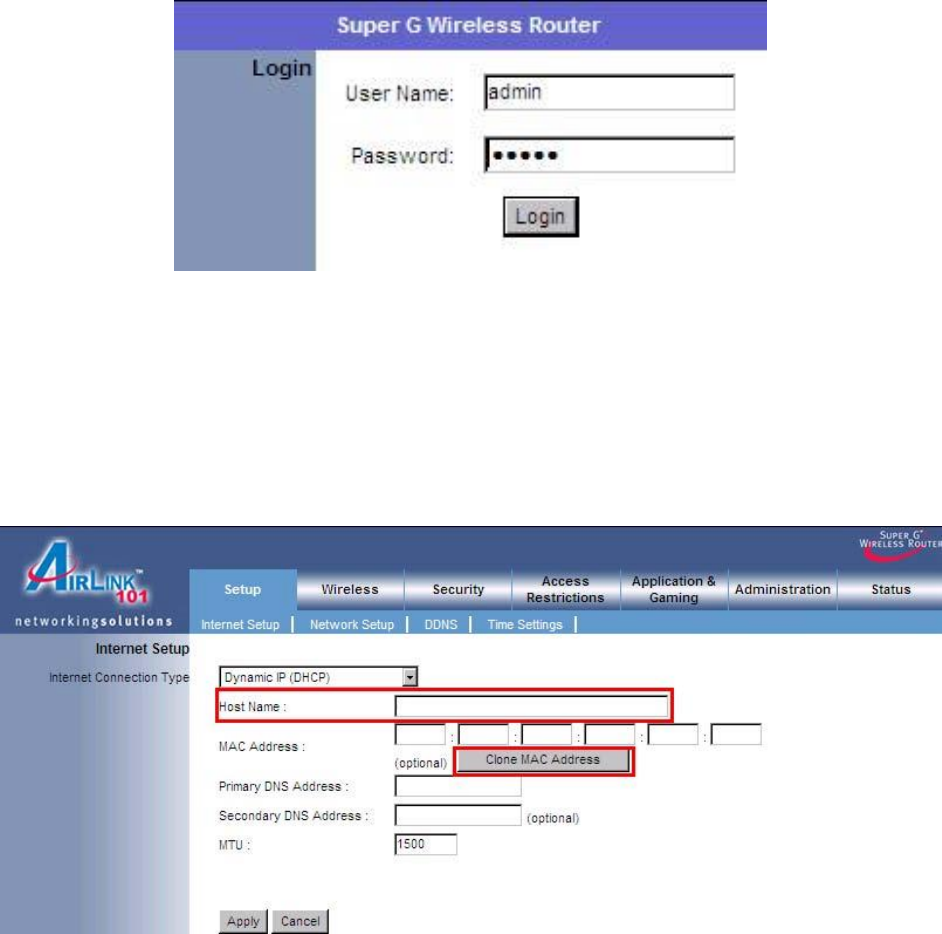
Configuring the Router
Step 1 Open the web browser and type 192.168.1.1 in the URL Address field and press Enter.
Step 2 Enter admin for both username and password fields and click OK.
Cable Modem
For most cable modem users, you should be able to connect to the Internet without any
configuration. If your ISP has provided you with a host name, enter it in the optional Host Name
field.
If your ISP requires a registered MAC Address, click on the Clone MAC Address button. Click
Apply and OK to save the setting.
If you have trouble connecting to the Internet, please refer to the Troubleshooting section at the
end of this guide.
DSL
For DSL users, follow the steps below to configure the router. Step 1
Select PPPoE from the drop-down menu.
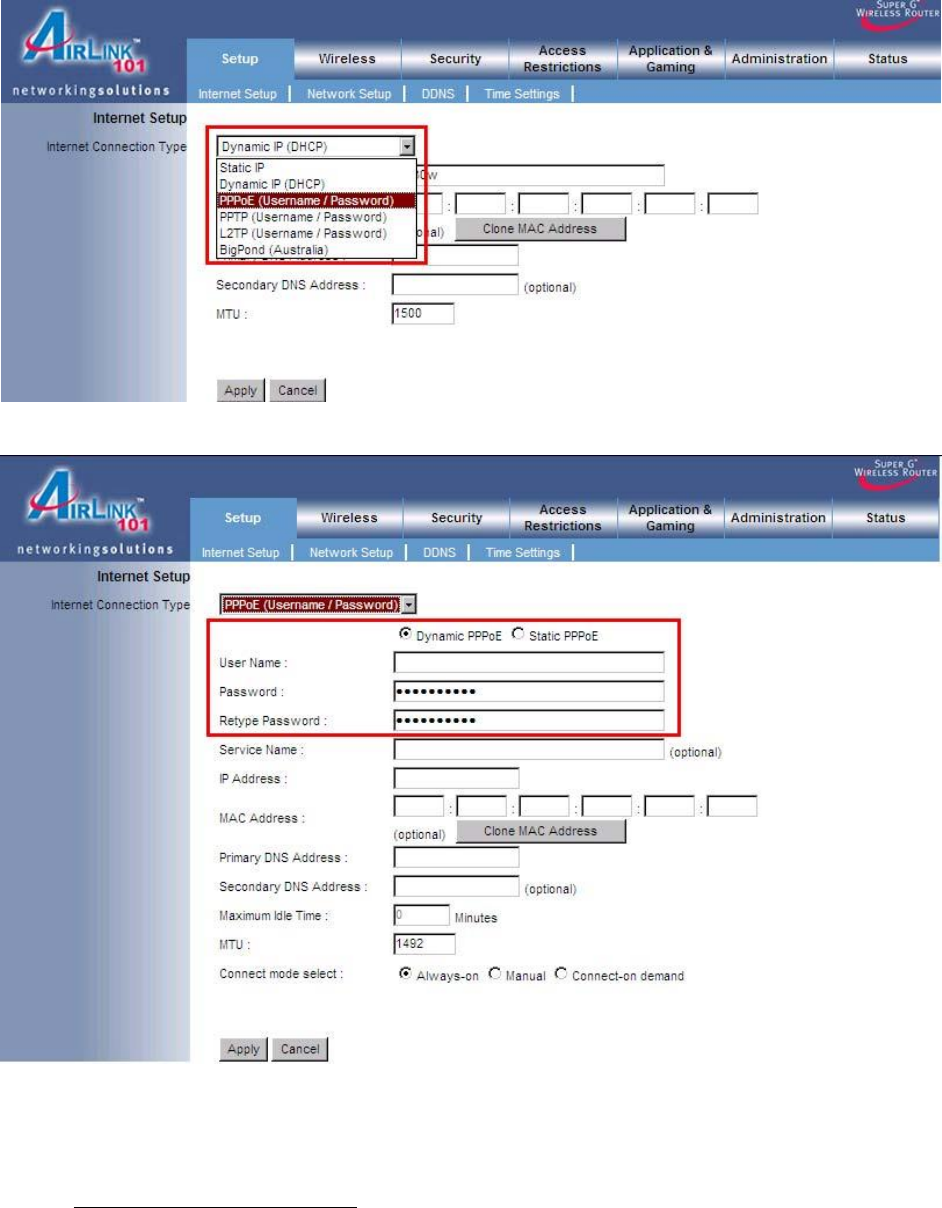
Step 2 Enter your username and password provided by your ISP.
Note: Depending on the ISP, you may need to include the domain name with your
username.
Example: username@sbcglobal.net Step 3 Click Apply and OK to save the setting. If you have
trouble connecting to the Internet, please refer to the Troubleshooting section at
the end of this installation guide.
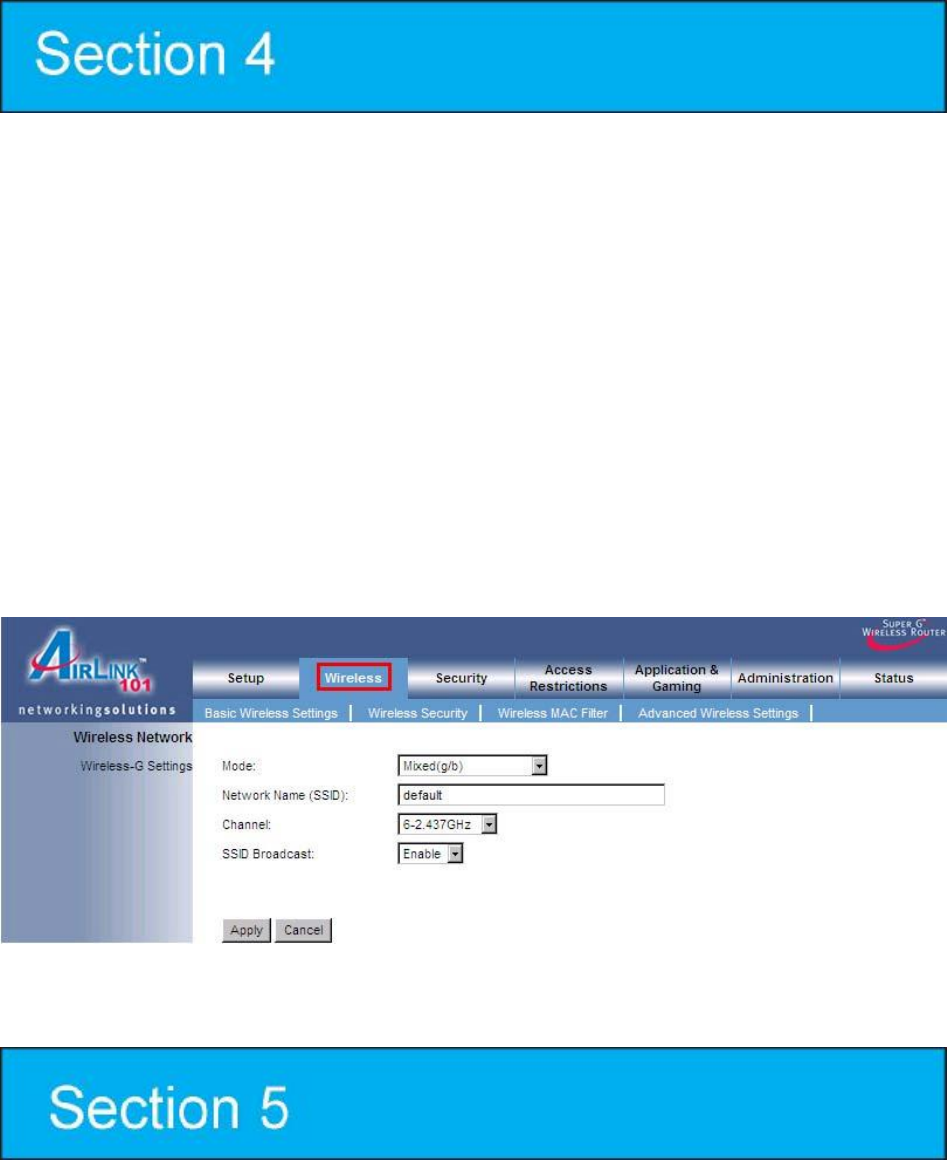
Connecting the Router Wirelessly
Below are the default wireless settings of the router. You must configure your wireless network
card to the same settings in order to establish a wireless connection to the router. Please refer to
your wireless network card’s manual on how to configure these settings.
SSID: default Operating Mode: Infrastructure Authentication: Open System Channel #: 6 WEP:
disabled
If you want to change the router’s wireless settings, log in to the router and select the
Wireless tab. Be sure to click Apply and OK to save the setting.
For information on changing the router’s log in password and enabling wireless encryption, please
refer to the User’s Manual in the provided CD.
Troubleshooting
If you have trouble connecting to the Internet, try the following steps.
Step 1 Power off the Cable/DSL modem, router, and computer and wait for 5 minutes.
Step 2 Turn on the Cable/DSL modem and wait for the lights on the modem to settle down.
Step 3 Turn on the router and wait for the lights on the router to settle down.
Step 4 Turn on the computer.
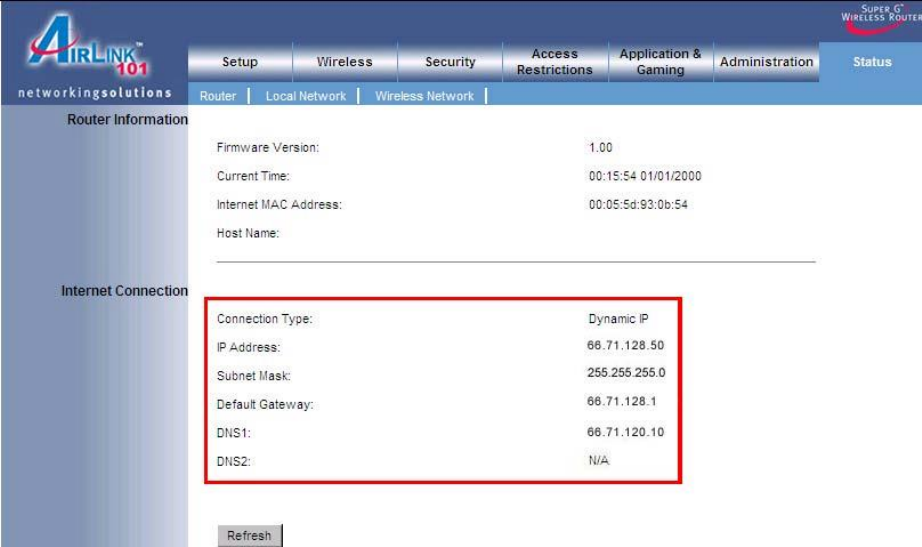
Step 5 Reconfigure the router as described in Section 3.
Step 6 Log in to the router and select the Status tab.
Step 7 Verify that the IP Address, Default Gateway, and at least one of the DNS fields
have valid numbers assigned to them (instead of all 0’s).
If each field has a valid number assigned, the router is connected to the Internet.

Federal Communication Commission Interference Statement
This equipment has been tested and found to comply with the limits for a Class B digital device,
pursuant to Part 15 of the FCC Rules. These limits are designed to provide reasonable protection
against harmful interference in a residential installation. This equipment generates, uses and can
radiate radio frequency energy and, if not installed and used in accordance with the instructions,
may cause harmful interference to radio communications. However, there is no guarantee that
interference will not occur in a particular installation. If this equipment does cause harmful
interference to radio or television reception, which can be determined by turning the equipment off
and on, the user is encouraged to try to correct the interference by one of the following measures:
Reorient or relocate the receiving antenna.
Increase the separation between the equipment and receiver.
Connect the equipment into an outlet on a circuit different from that to which
the receiver is connected.
Consult the dealer or an experienced radio/TV technician for help.
This device complies with Part 15 of the FCC Rules. Operation is subject to the following two
conditions: (1) This device may not cause harmful interference, and (2) this device must accept
any interference received, including interference that may cause undesired operation.
FCC Caution: Any changes or modifications not expressly approved by the party responsible for
compliance could void the user's authority to operate this equipment.
IMPORTANT NOTE:
FCC Radiation Exposure Statement:
This equipment complies with FCC radiation exposure limits set forth for an uncontrolled
environment. This equipment should be installed and operated with minimum distance 20cm
between the radiator & your body.
This transmitter must not be co-located or operating in conjunction with any other antenna or
transmitter.
IEEE 802.11b or 802.11g operation of this product in the U.S.A. is firmware-limited to channels 1
through 11.
Industry Canada Statement
Operation is subject to the following two conditions:
1) this device may not cause interference and
2) this device must accept any interference, including interference that may cause undesired
operation of the device
This device has been designed to operate with an antenna having a maximum gain of 2dBi.
Antenna having a higher gain is strictly prohibited per regulations of Industry Canada. The
required antenna
impedance is 50 ohms.
To reduce potential radio interference to other users, the antenna type and its gain should be so
chosen that the EIRP is not more than required for successful communication.

Technical Support
E-mail: support@airlink101.com Toll Free: 1-888-746-3238 Web Site: www.airlink101.com
*Super GTM technology (108 Mbps) can only be obtained when using products with Atheros Super GTM chipset
*Theoretical maximum wireless signal rate based on IEEE standard 802.11g specifications. Actual data throughput will vary. Network conditions
and environmental factors, including volume of network traffic, building materials and construction, mix of wireless products used, radio frequency
interference (e.g., cordless telephones and microwaves) as well as network overhead lower actual data throughput rate. Copyright © 2007
AirLink101. All rights reserved. AirLink101, the stylized AirLink101 logo, specific product designations, and all other words and logos that are
identified as trademarks and/or service marks are, unless noted otherwise, the trademarks and service marks of AirLink101. All other product or
service names are the property of their respective holders. AirLink101 products are protected under numerous U.S. and foreign patents and
pending applications, mask work rights, and copyrights.