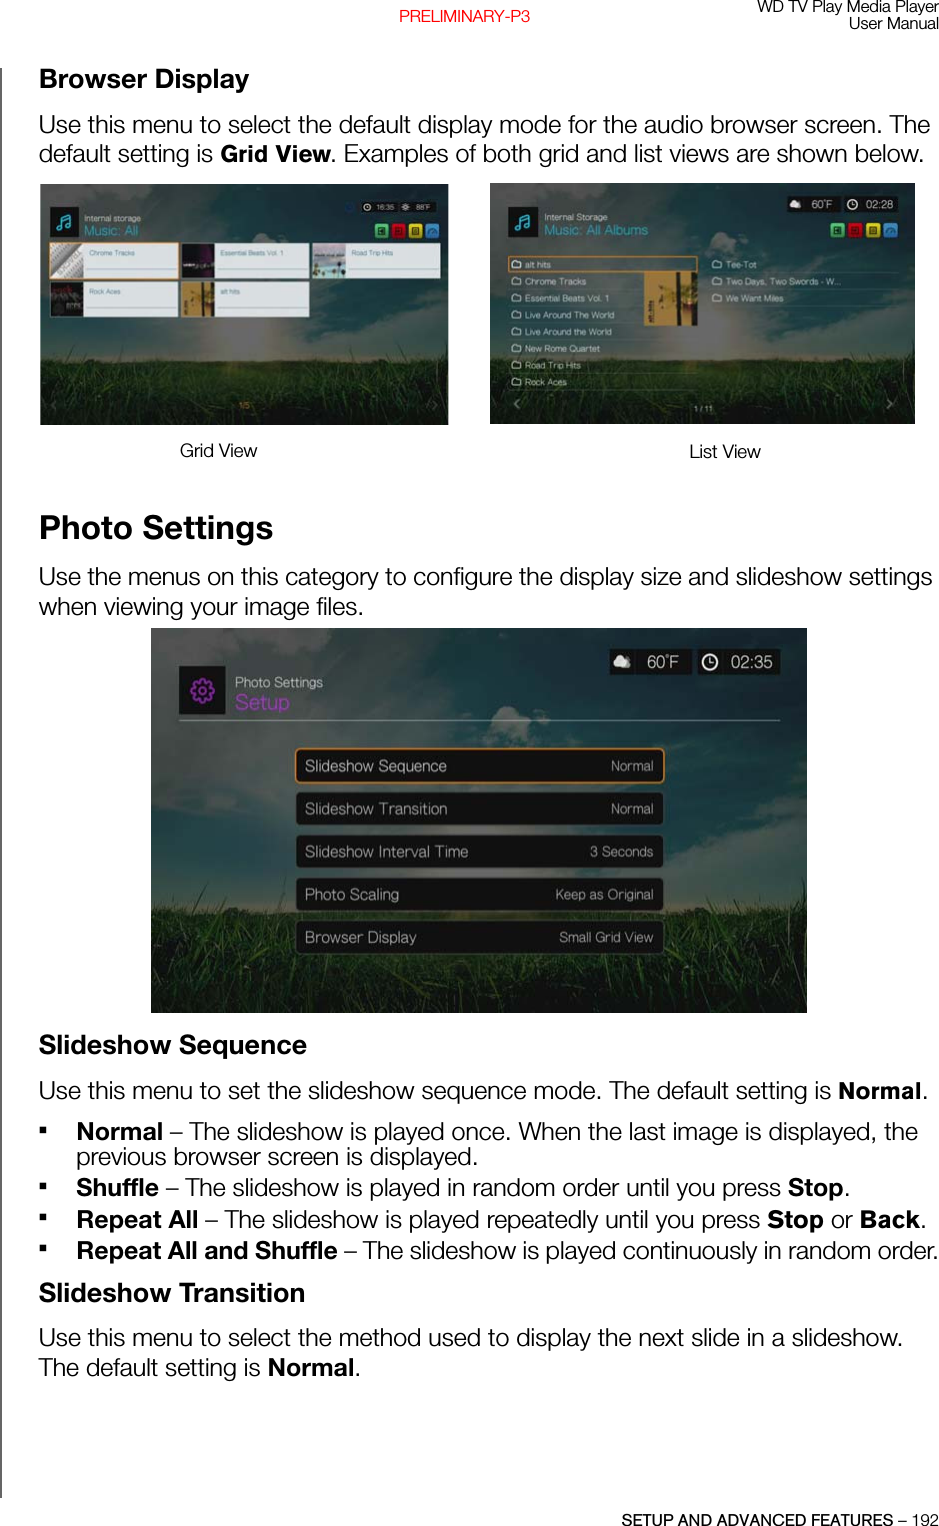
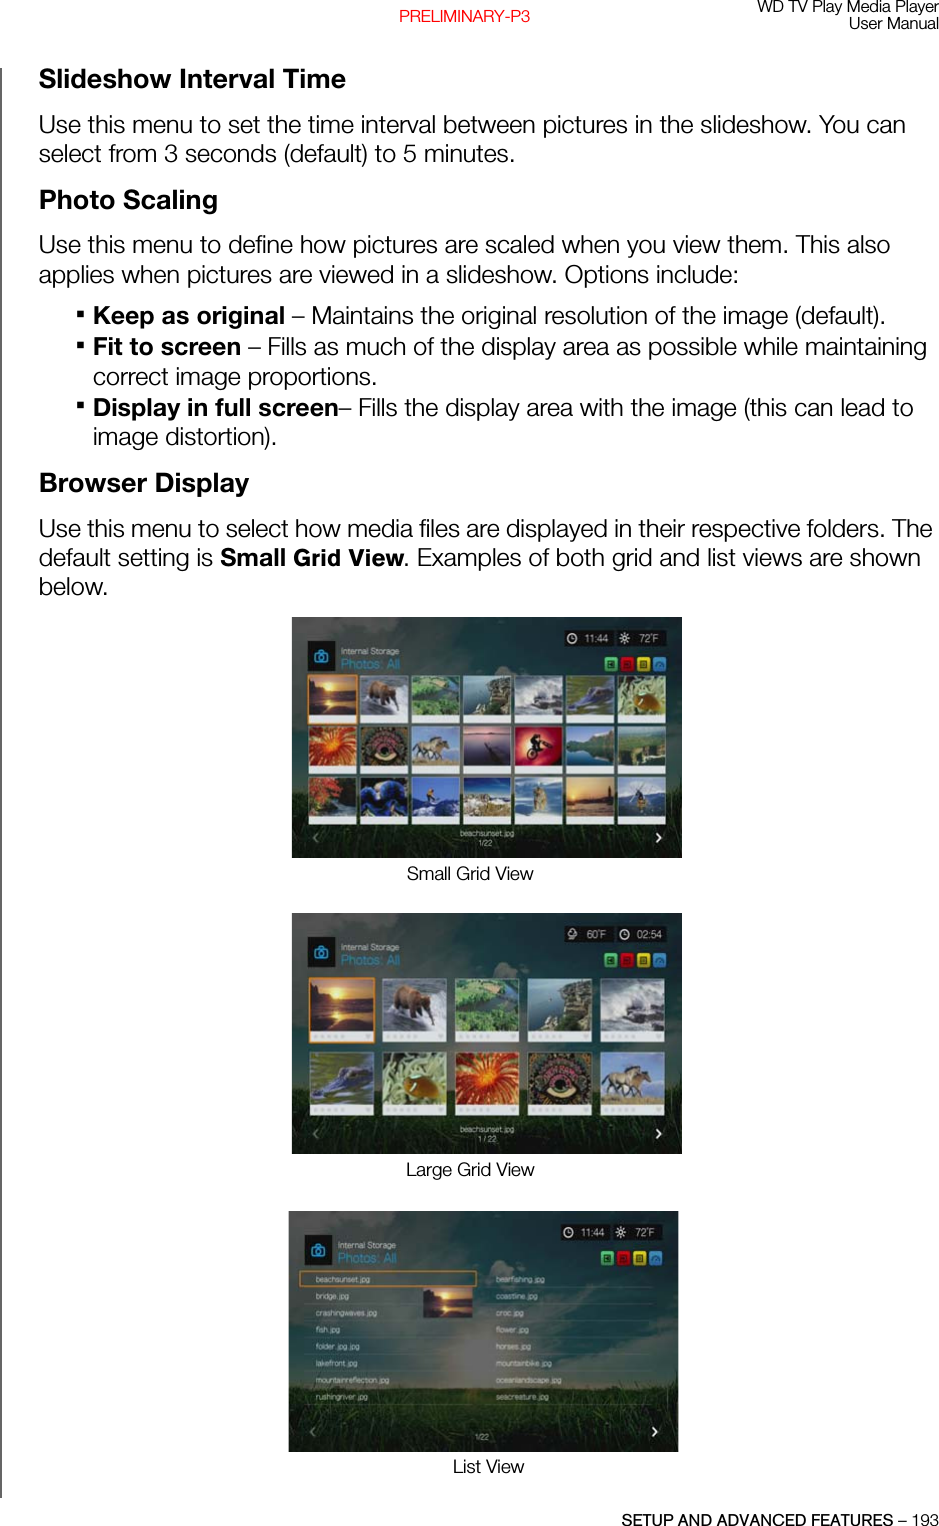
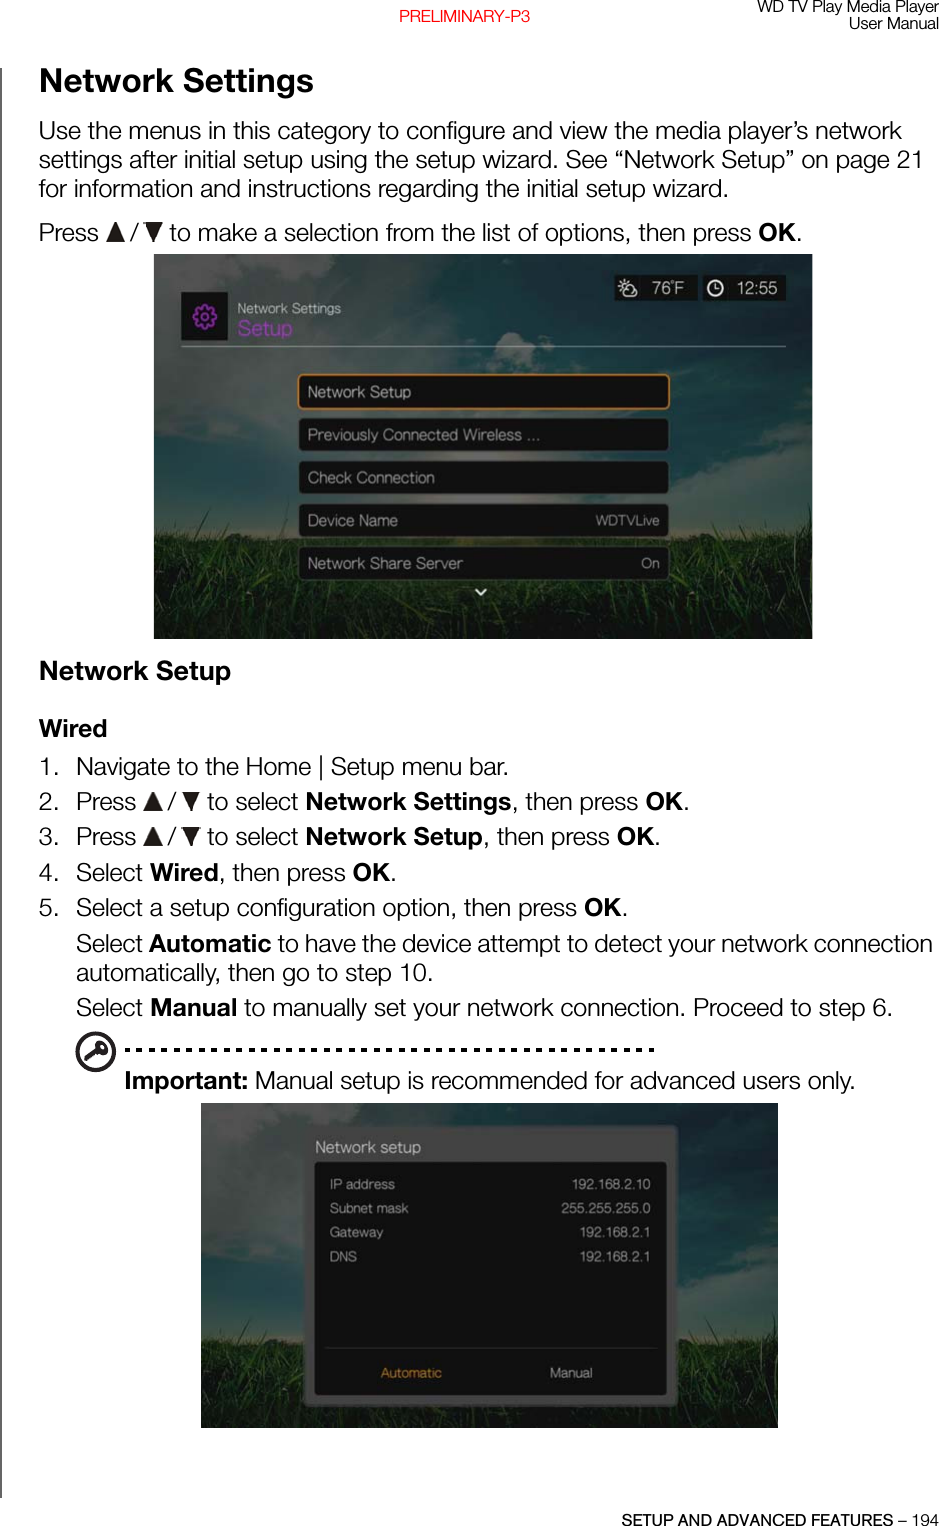
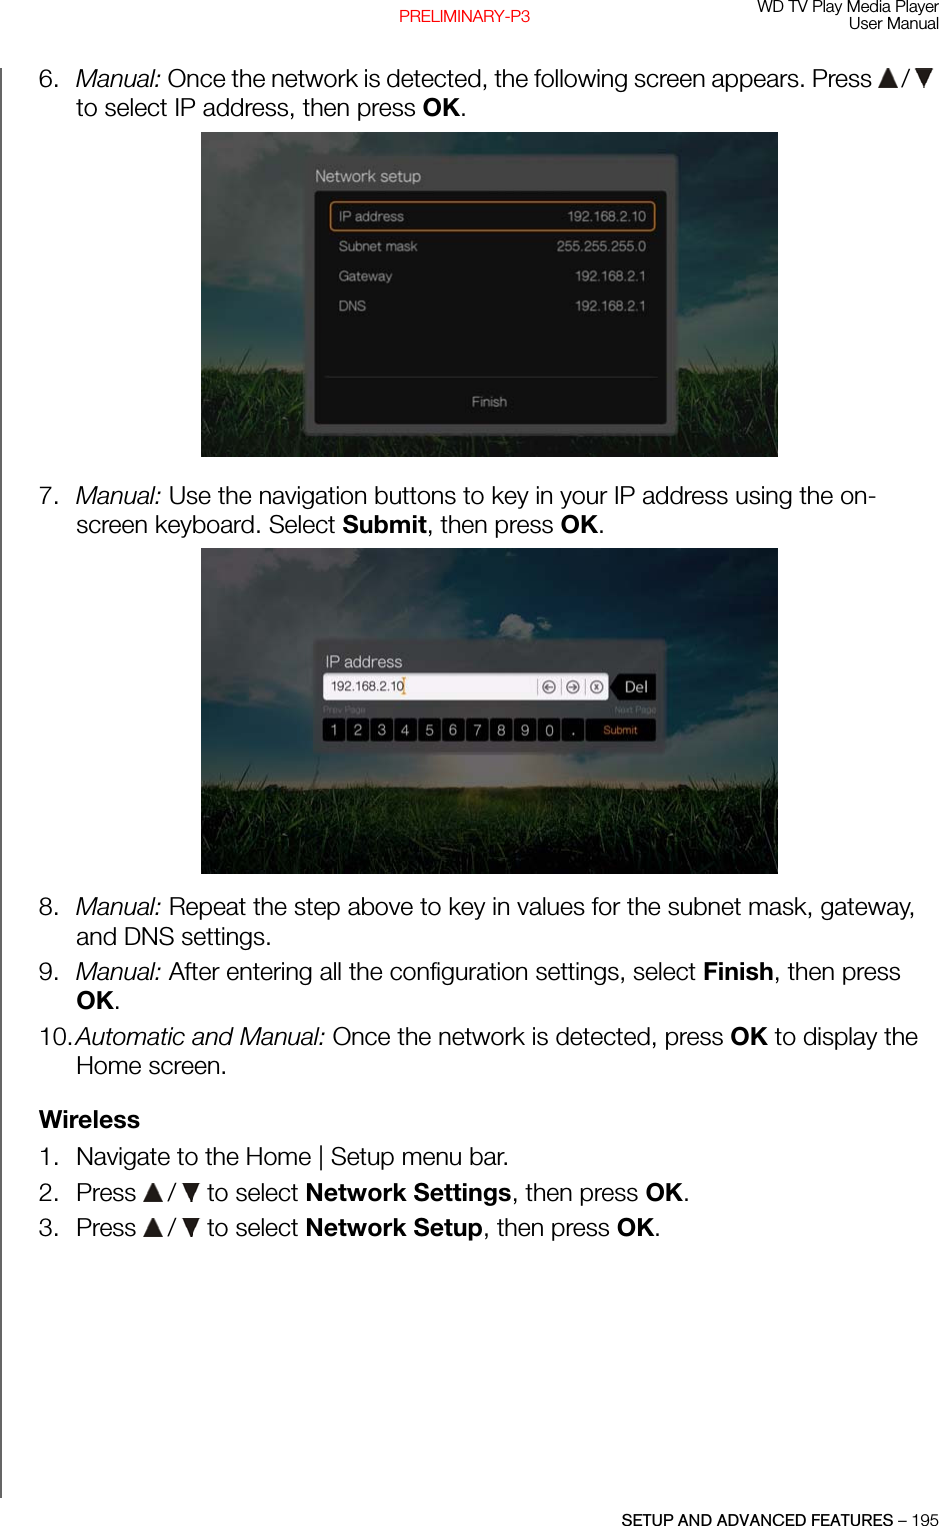
Alpha Networks C2H WD TV Play User Manual WD TV Play Media Player
Alpha Networks Inc. WD TV Play WD TV Play Media Player
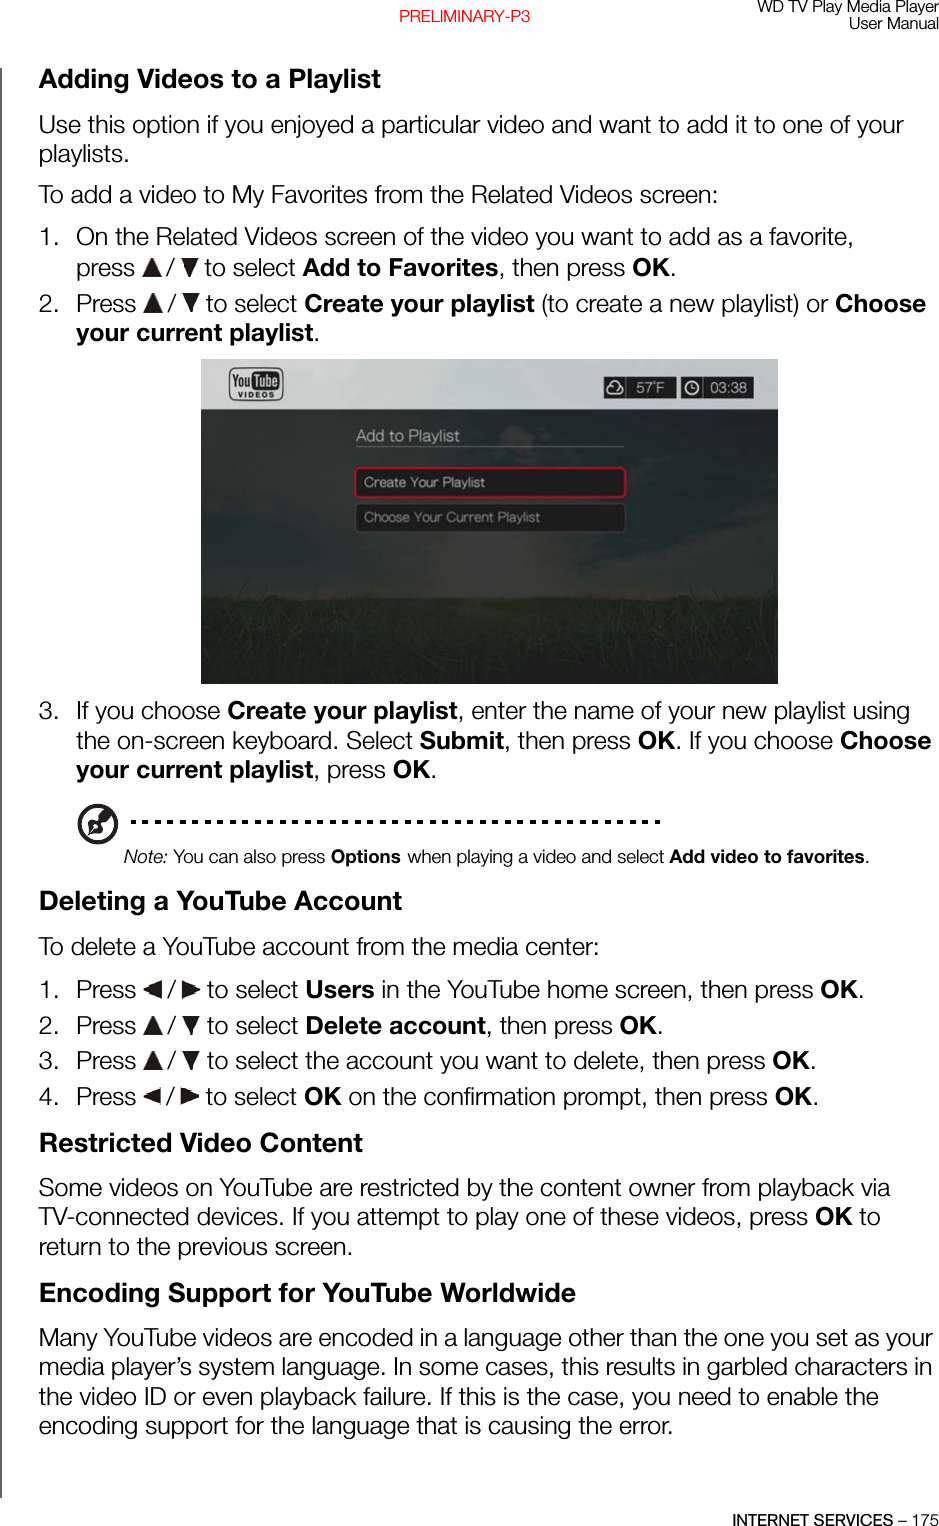
UserManual.wiki
>
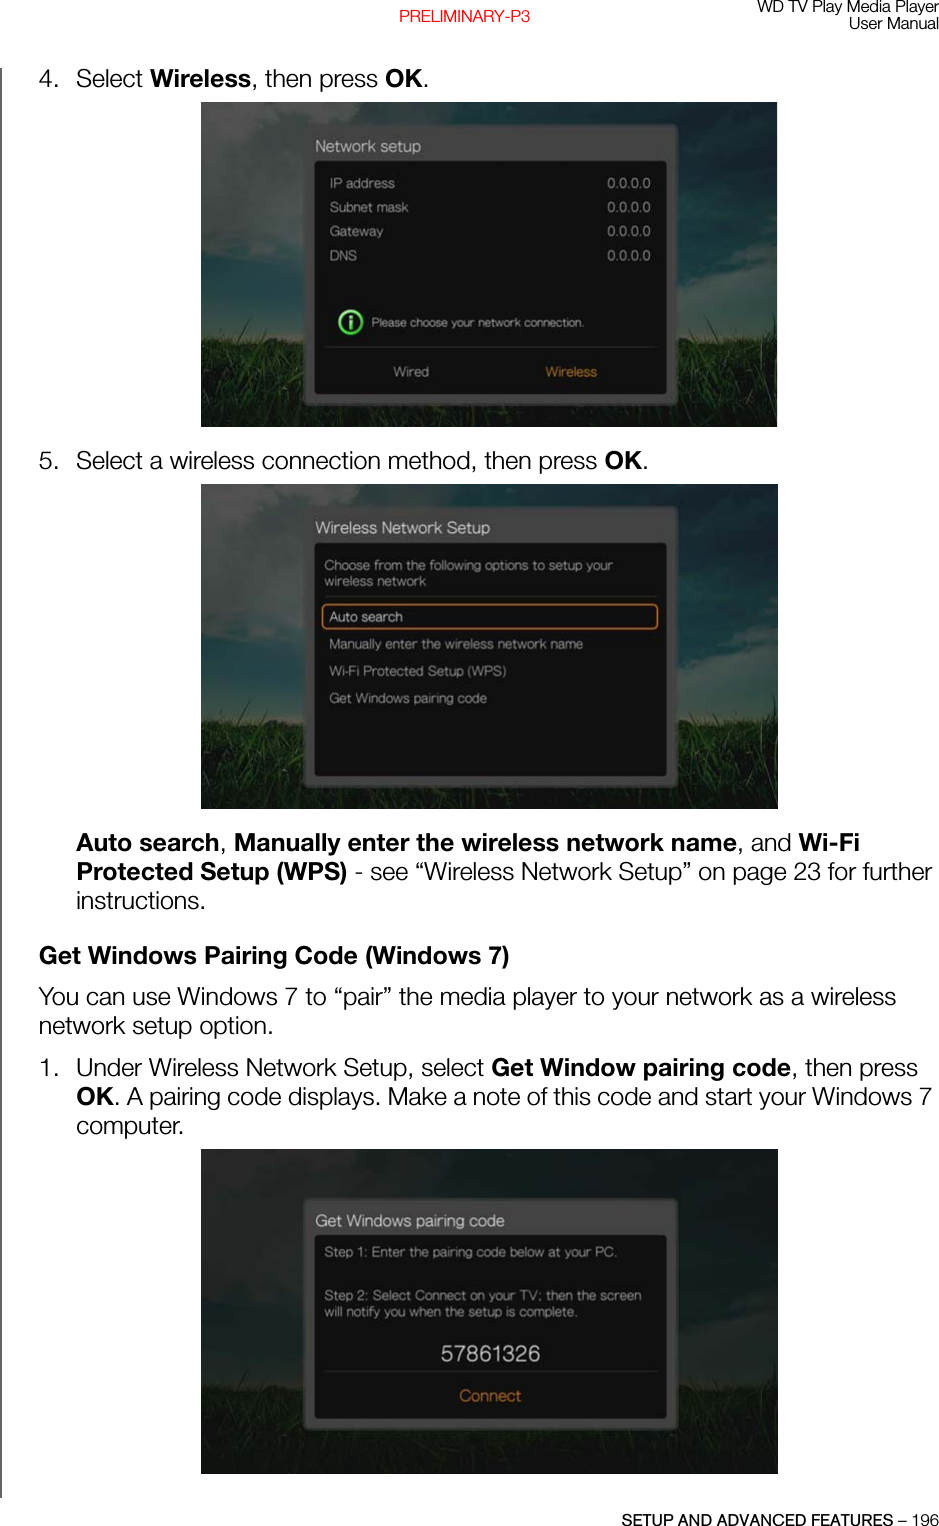
Alpha Networks
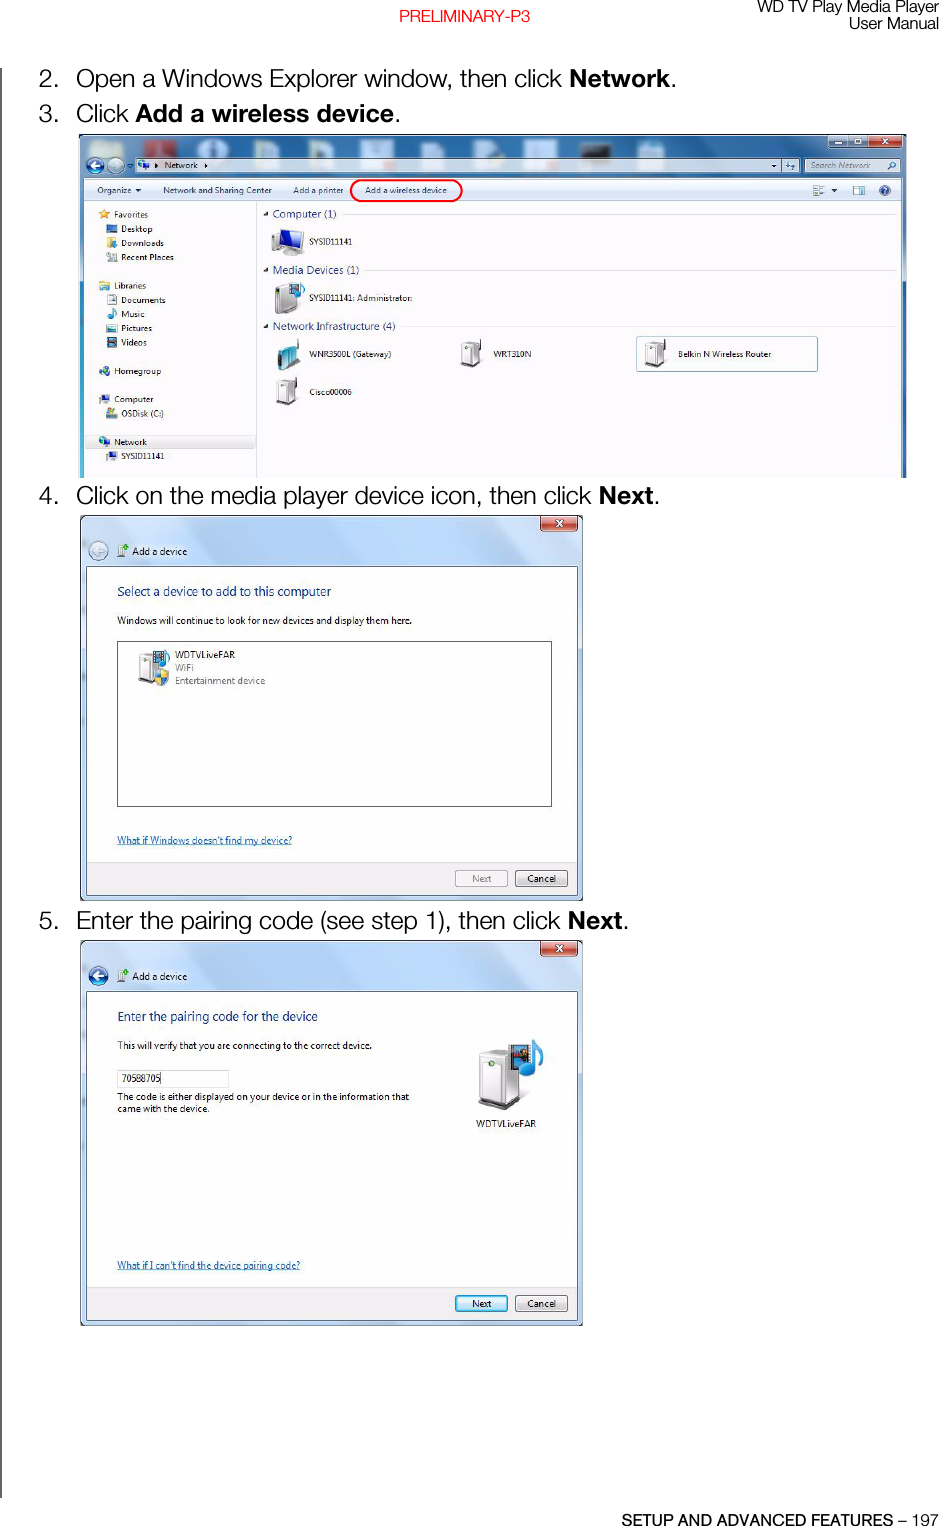
>
C2H User Manual
>
User Manual Part 2
Contents
1.
User Manual Part 1
2.
User Manual Part 2
User Manual Part 2
Navigation menu
Upload a User Manual
Namespaces
Wiki Guide
HTML
PDF
Info
Views
User Manual
Discussion / Help
Navigation


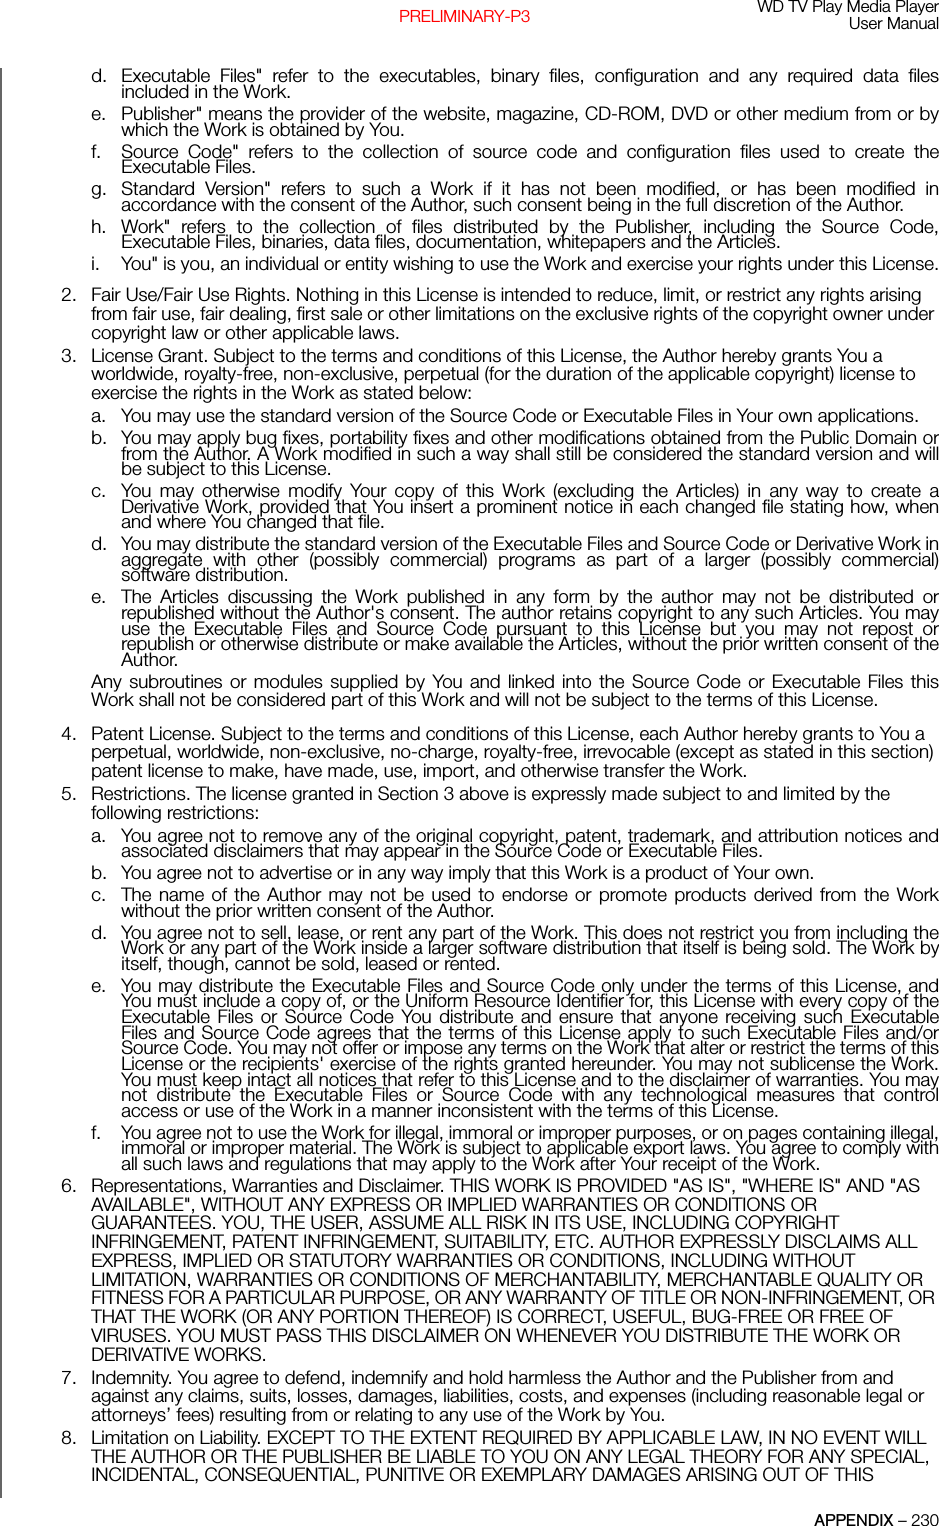
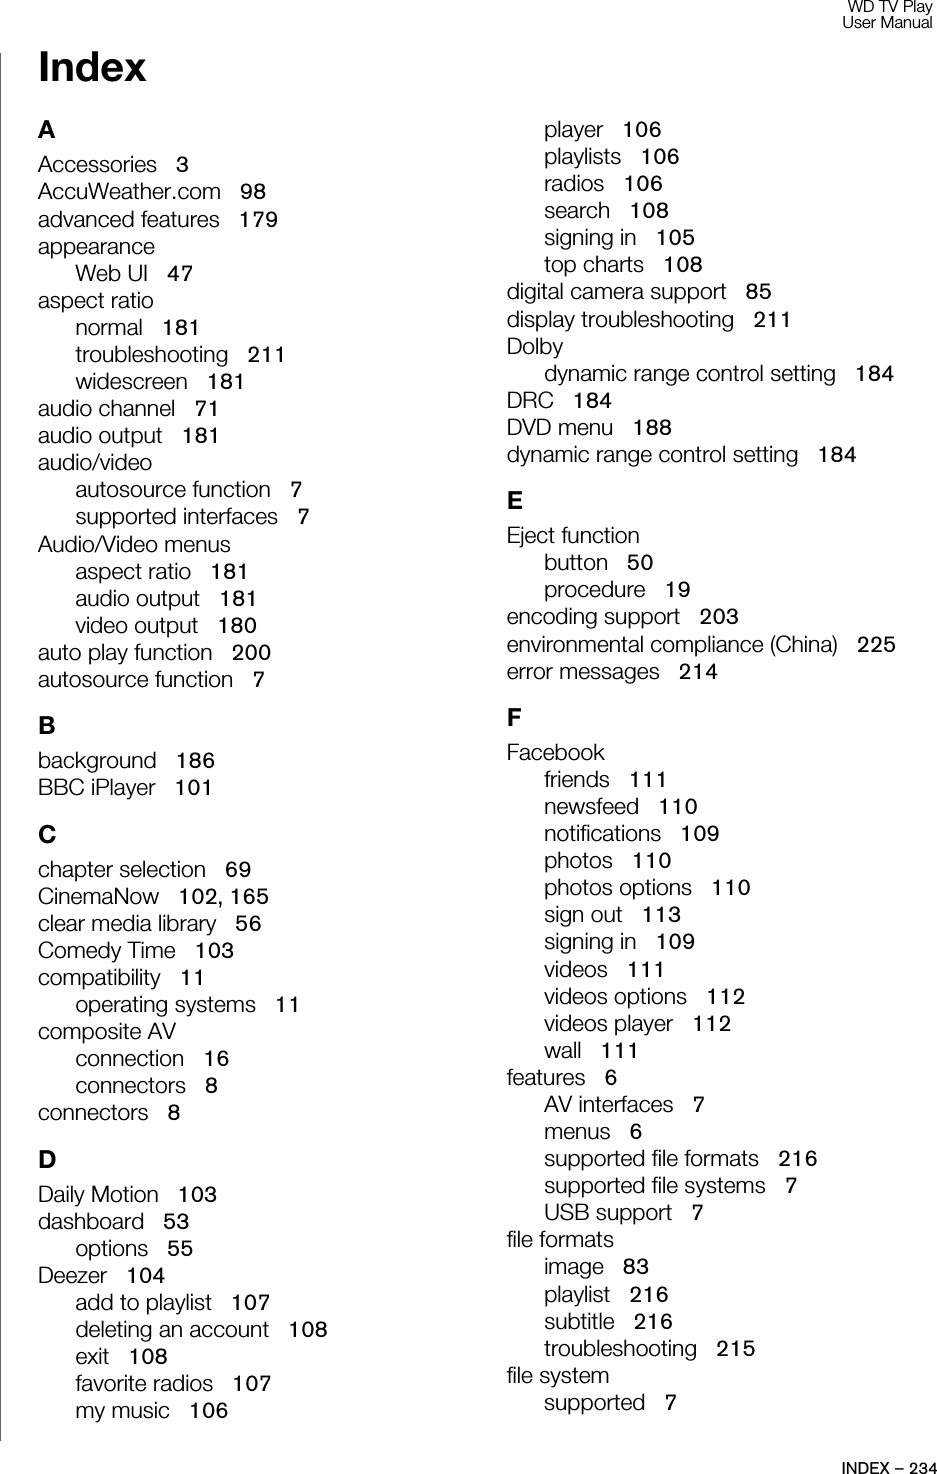
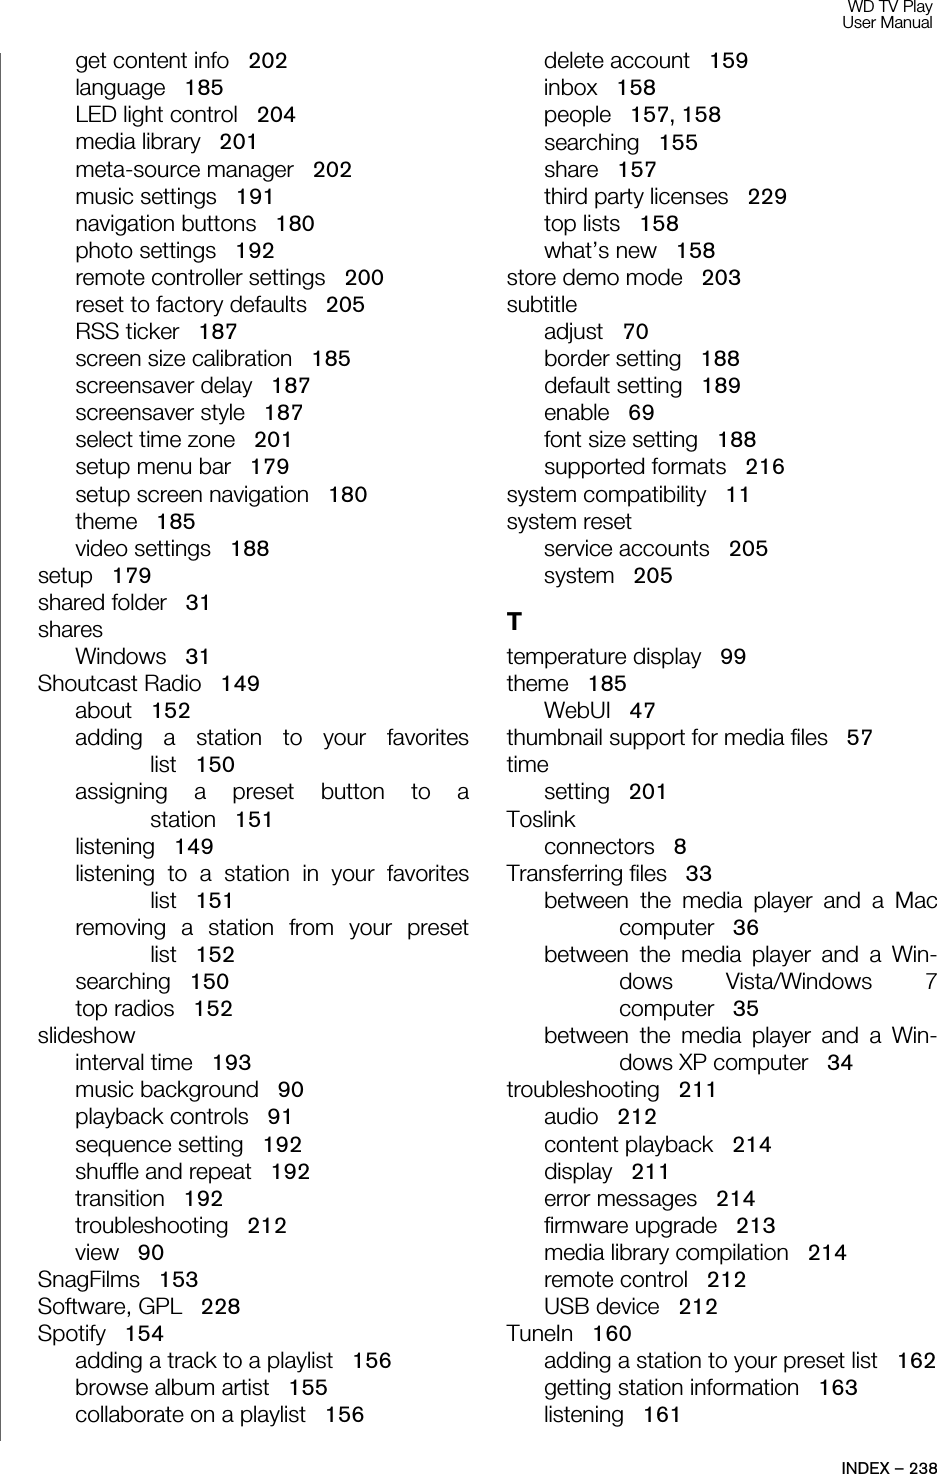
![WD TV Play Media PlayerUser ManualSYSTEM MAINTENANCE – 214PRELIMINARY-P3Common Error Messages If this message appears Perform this actionHOMEHard drive cannot aggregate. There are different conditions under which this error message may appear. The message will specify the issue. For example, not enough space is used on the storage or a journaled file system.No storage present. Attach the USB device that contains your media files. Media Library requires more storage space: [XXXMB] 1. Eject and disconnect the USB device from the media player. 2. Connect the USB device to your computer and delete unnecessary files to meet the required storage space. 3. Attach the USB device to the media player again. Please turn off journaling on the attached storage's file system for the media player to compile the media library. 1. Eject and disconnect the USB device from the media player. 2. Connect the USB device to your Apple computer and disable the journaling function. Refer to the Apple Help for information. 3. Attach the USB device to the media player again. Unable to compile media library on read-only storage.1. Eject and disconnect the USB device from the media player. 2. Connect the USB device to your computer and make sure the read-only protection is disabled. 3. Attach the USB device to the media player again.Unable to compile media library. Please check your storage setting.There are two different conditions under which this error message may appear:1. Insufficient storage space on the drive(s).2. Drive is configured as “read-only.”Free up drive storage space or adjust the drive settings to resolve this error.Unrecognized storage. The USB device model is not supported. Use another USB device. Question XX: WD USB HDD Trouble ShootingThis indicates a system diagnostic failure. Contact WD Technical Support for assistance. CONTENT PLAYBACKThere is no media in the current folder. There are no supported media files in the selected folder. Select another folder that contains media files of the correct format.](https://usermanual.wiki/Alpha-Networks/C2H.User-Manual-Part-2/User-Guide-1746280-Page-69.png)

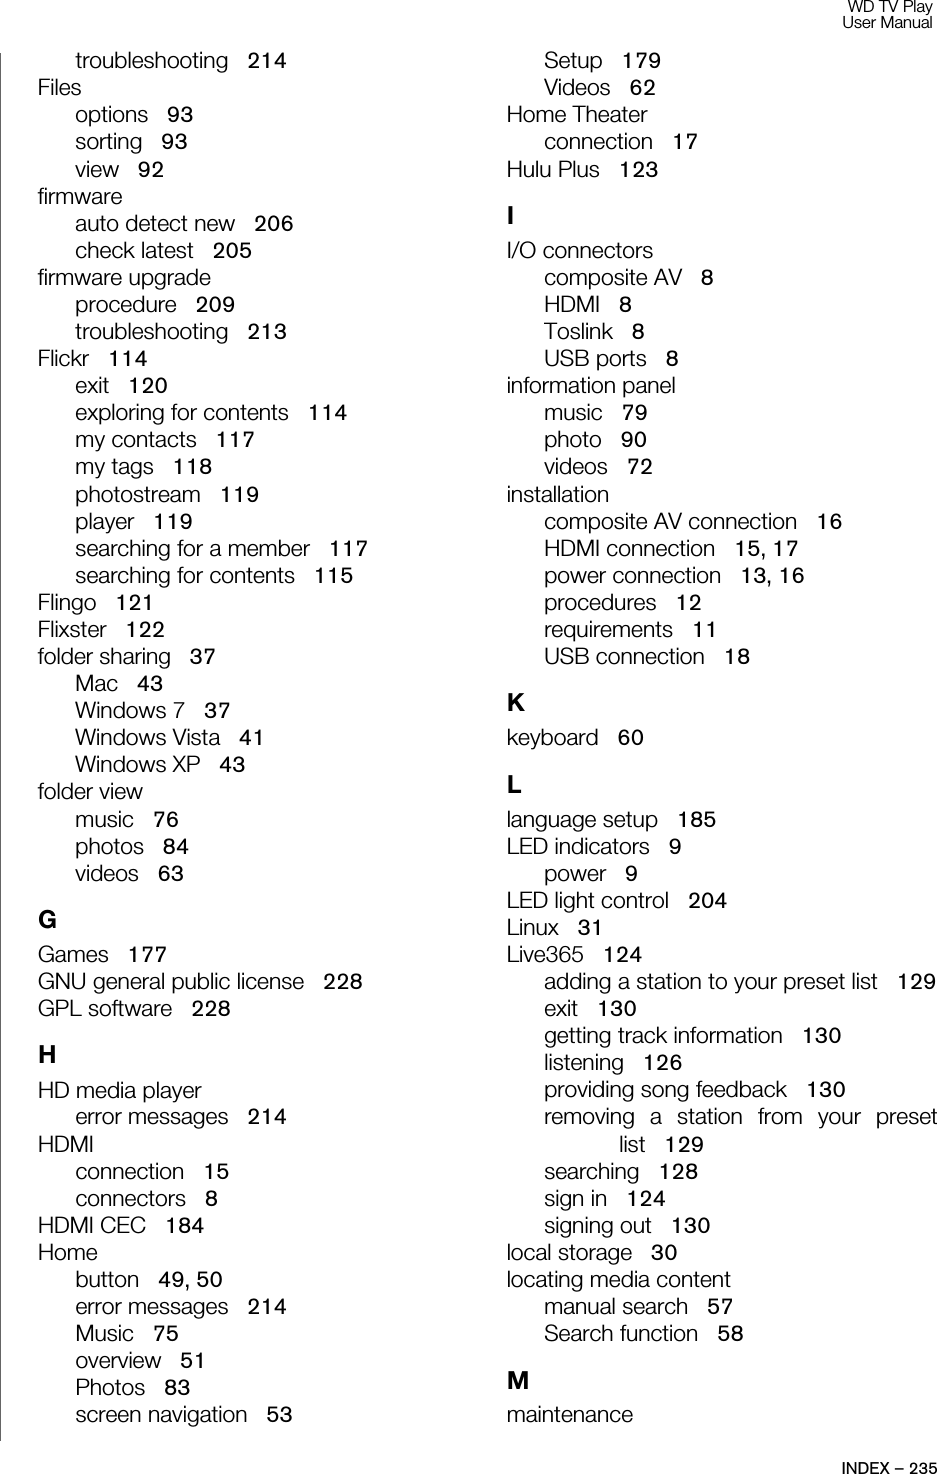
![WD TV Play Media PlayerUser ManualAPPENDIX – 223PRELIMINARY-P3Industry Canada (IC)This device complies with RSS-210 of the Industry Canada Rules. Operation is subject to the following two conditions:1. this device may not cause interference and2. this device must accept any interference, including interference that may cause undesired operation of the deviceThis device has been designed to operate with an antenna having a maximum gain of 2dBi. Antenna having a higher gain is strictly prohibited per regulations of Industry Canada. The required antenna impedance is 50 ohms.To reduce potential radio interference to other users, the antenna type and its gain should be so chosen that the EIRP is not more than required for successful communication.IMPORTANT NOTE: C Radiation Exposure Statement:This equipment complies with IC radiation exposure limits set forth for an uncontrolled environment. This equipment should be installed and operated with minimum distance 20cm between the radiator & your body.Ce dispositif est conforme à la norme CNR-210 d'Industrie Canada applicable aux appareils radio exempts de licence. Son fonctionnement est sujet aux deux conditions suivantes: (1) le dispositif ne doit pas produire de brouillage préjudiciable, et (2) ce dispositif doit accepter tout brouillage reçu, y compris un brouillage susceptible de provoquer un fonctionnement indésirable.Ce dispositif a été conçu pour fonctionner avec une antenne ayant un gain maximal de dB [2]. Une antenne à gain plus élevé est strictement interdite par les règlements d'Industrie Canada. L'impédance d'antenne requise est de 50 ohms.NOTE IMPORTANTE: (Pour l'utilisation de dispositifs mobiles)Déclaration d'exposition aux radiations:Cet équipement est conforme aux limites d'exposition aux rayonnements IC établies pour un environnement non contrôlé. Cet équipement doit être installé et utilisé avec un minimum de 20 cm de distance entre la source de rayonnement et votre corps.ICES-003/NMB-003 StatementCet appareil numérique de la classe B est conforme à la norme NMB-003 du Canada.This device complies with Canadian ICES-003 Class B.Safety ComplianceApproved for US and Canada. CAN/CSA-C22.2 No. 60065:03, UL-60065, 7th Ed: Audio, Video and Similar Electronic Apparatus - Safety Requirements.Approuvé pour les Etats-Unis et le Canada. CAN/CSA-C22.2 No. 60065:03, UL-60065 7th Ed. Appareils audio, vidéo et appareils électroniques analogues - Exigences de sécurité.This device is only for use with the compatible UL Listed AC adapter.](https://usermanual.wiki/Alpha-Networks/C2H.User-Manual-Part-2/User-Guide-1746280-Page-78.png)