Amazon com Services L7E20070323 Portable Cellular/ PCS CDMA Text Device User Manual
Payne LLC Portable Cellular/ PCS CDMA Text Device Users Manual
Contents
- 1. Users Manual
- 2. User Manual
- 3. Users Manual per CRN75243
Users Manual

Y
about
your
-e-

Y
Y
©
2007
or its
affiliates.
All
rights
reserved.
/
the :
logo
are
trademark
or
'-gisierea
trademarks
of or
its
affiliate*
nt
the
u.b.
and
other
countries.
and
alt
trademarks
and
logos
are
trademarks
or
registered
trademarks
of . in the
U.S.
and
other
countries.
The
.
device
6.
Sux^eei
ic-pt-nding
patent
protection
in the
United
States
and
other countries.
T
table
of
contents
INTRODUCTION
01
About
this
Manual
01
About
the
User's Guide
01
Physical Components
and
Documentation
02
TOUR
OF
YOUR
03
Front View
of 03
Back
View
of 05
Bottom
View
of 06
Removing
the
Back
Cover
07
Replacing
the
Back
Cover
09
ACCESSORIES
10
Charging
Your.
10
Using
Your
12
Connecting
to
Your
Computer
14
Using
an SD
Memory Card
16
A
WORD
ABOUT
WIRELESS
17
Simple
Explanation
of
Wireless Technology
17
Wireless Safety
17
MAINTAINING
YOUR
19
Caring
for
Your
19
Changing
the
Battery
20
Tips
for
Conserving Your Battery
22
Battery
Safety
22
Recycling
and the
Battery Properly
22
T
TIPS
AND
TROUBLESHOOTING
23
About
the
Screen
23
Battery
Charging
23
Text
Size
23
The
Wireless
Connection
24
Resetting
Your
24
Security
Concerns
24
SD
Memory
Cards
25
The
Store
25
The
USB
Connection
26
No
Sound
26
Customer
Support
27
NOTICES
AND
CERTIFICATIONS
28
Government
Standards
for
Radio
Frequency
Signals
28
FCC
Notice
28
RF
Exposure
Information
(SAR)
29
UL
Certification Number
29
PRODUCT SPECIFICATIONS
30
™
model number
D00111
Introduction
About
This Manual
About
Your
provides
a
description
and
illustration
for
each
of
your
components.
It
also furnishes some background
information
about
the
wireless connection,
and
some safety precautions
associated
with
this
technology.
If
you
have
questions
that
need
answers,
you may
find
the
"Tips
and
Troubleshooting" section useful.
Your
License
Agreement
and
Terms
of
Use
are
included
in a
separate manual.
About
The
User's
Guide
The
User's
Guide
is an
electronic document already
on
your
that
includes explanations
and
examples
for
all of the
features
and
functions.
It is
designed
to be
used
as a
reference,
and is ,
like
all
other content
on
When
you
turn
on for the
first
time,
the ,
User's
Guide
will
open automatically.
It
helps
you get
started
immediately,
and
also
highlights
some
important
features
you
will
want
to
explore.
01
T
Physical
Components
and
Documentation
This
is
what
you
will
find
in
your
box:
Power
adapter
USB
cable
About
Your
(you
are
reading
it
now)
License
Agreement
and
Terms
of Use
02
T
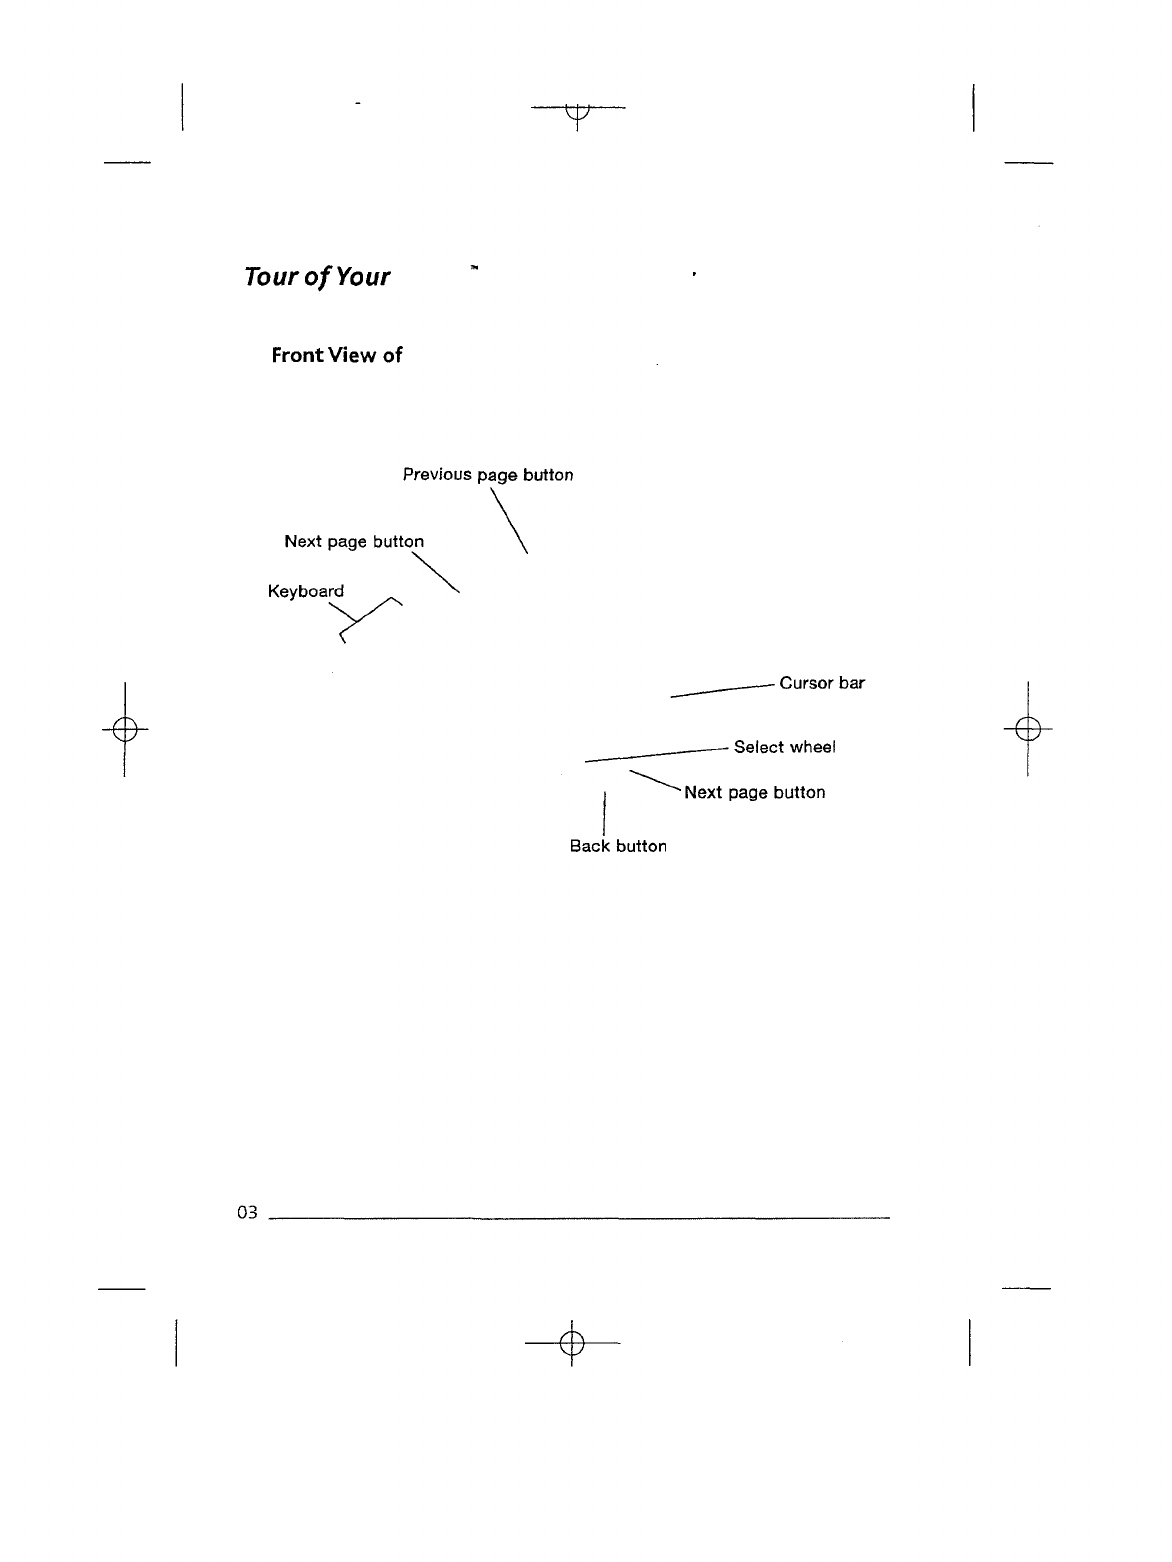
Tour
of
Your
Front View
of
Previous page
button
Next
page button
Keyboard
-
Cursor
bar
•
Select wheel
~
Next page button
Back
button
03
Y
Cursor
bar
Select
wheel
Next
page
button
Back
button
Keyboard
Contains
the
cursor, which
is a
silver
rectangle
that
allows
you to
select
a
particular
line
on the
display.
You
move
the
cursor
up and
down
the
right
side
of
this
bar
using
the
select
wheel.
When
the
cursor
is
lined
up
with
the
appropriate
selection
point,
you
press
the
select
wheel
to
make your selection.
Roll
this
wheel
to
move
the
cursor
up and
down
the
cursor bar.
Press
it to
select
a
particular item.
Takes
you to the
next
page
in
your
(There
is a
next page
button
on
either side
of .)
Like
the
back
button
on
your
web
browser,
this
button
allows
you to
retrace your
steps
on
Use
the
keyboard
to
enter
search
terms,
annotations
.
URLs
for web
sites,
etc.
There
are
also some
special
function
keys
that
are
described
in the
User's
Guide.
Previous page
button
Takes
you to the
previous page
in
your
04
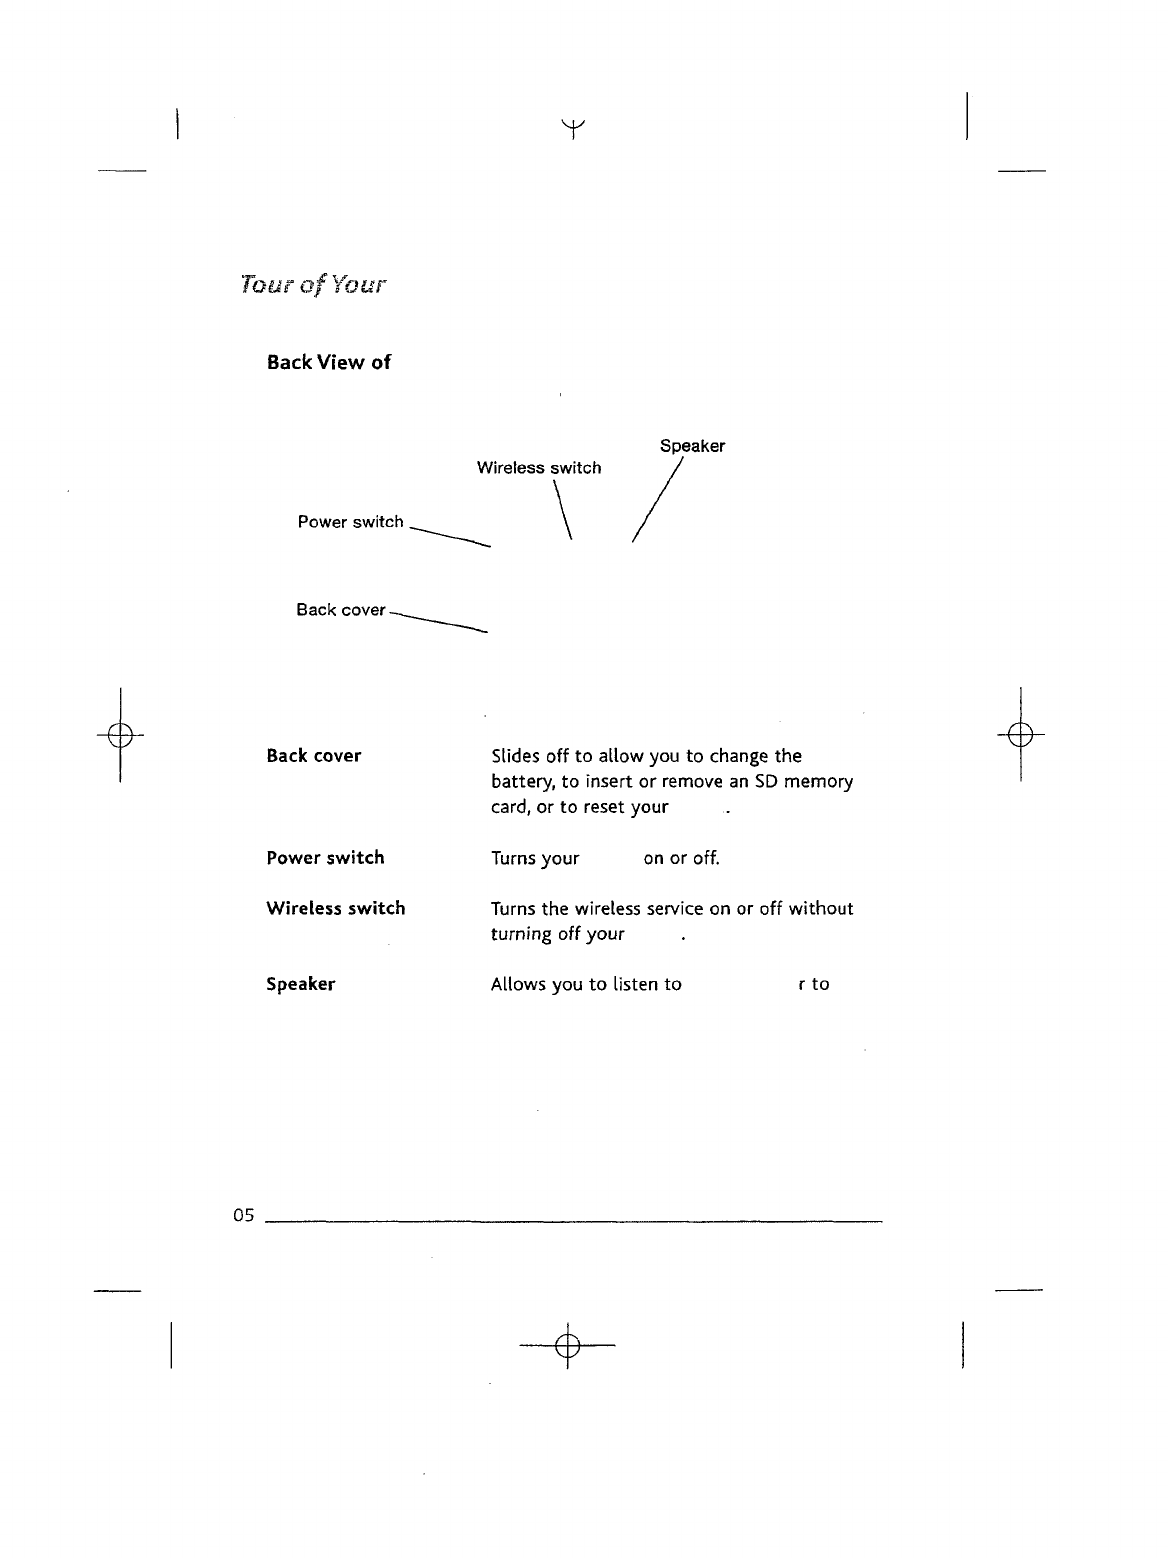
Tour
of
Your
Back
View
of
Power
switch.
Back cover
-
Y
Speaker
Wireless switch
Back
cover
Power
switch
Wireless
switch
Speaker
Slides
off to
allow
you to
change
the
battery,
to
insert
or
remove
an SD
memory
card,
or to
reset
your
Turns
your
on
or
off.
Turns
the
wireless service
on or off
without
turning
off
your
Allows
you to
listen
to
rto
05
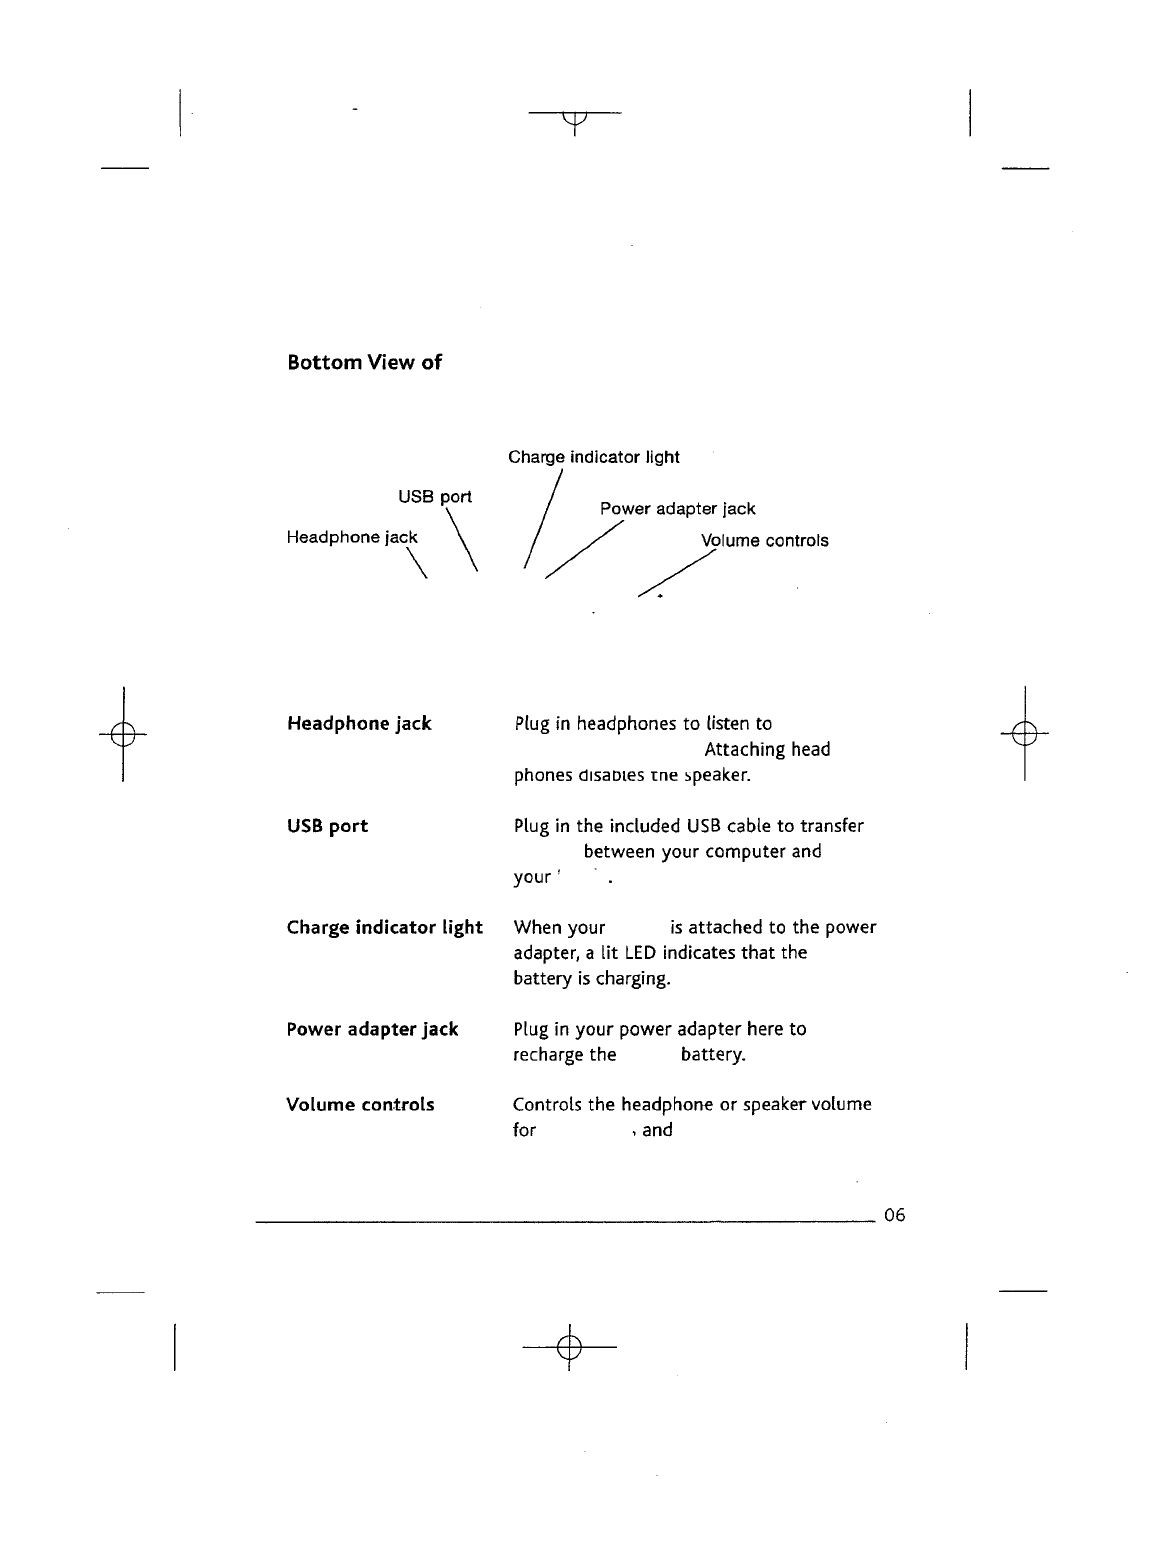
Bottom View
of
V
USB
port
Headphone jack
\
Charge
indicator light
Power
adapter jack
Volume
controls
Headphone jack
USB
port
Plug
in
headphones
to
listen
to
Attaching
head
phones
disaoies
une
speaker.
Plug
in the
included
USB
cable
to
transfer
between
your computer
and
your'
Charge
indicator
light
When your
is
attached
to the
power
adapter,
a lit LED
indicates
that
the
battery
is
charging.
Power
adapter jack
Plug
in
your power adapter here
to
recharge
the
battery.
Volume
controlsControls
the
headphone
or
speaker volume
for
, and
06
'v
JourofYour.
Removing
the
Back
Cover
You
will
need
to
remove
the
back cover
to:
Insert
or
remove
an SD
memory
card
Reset
your
Replace
the
battery
07
Y
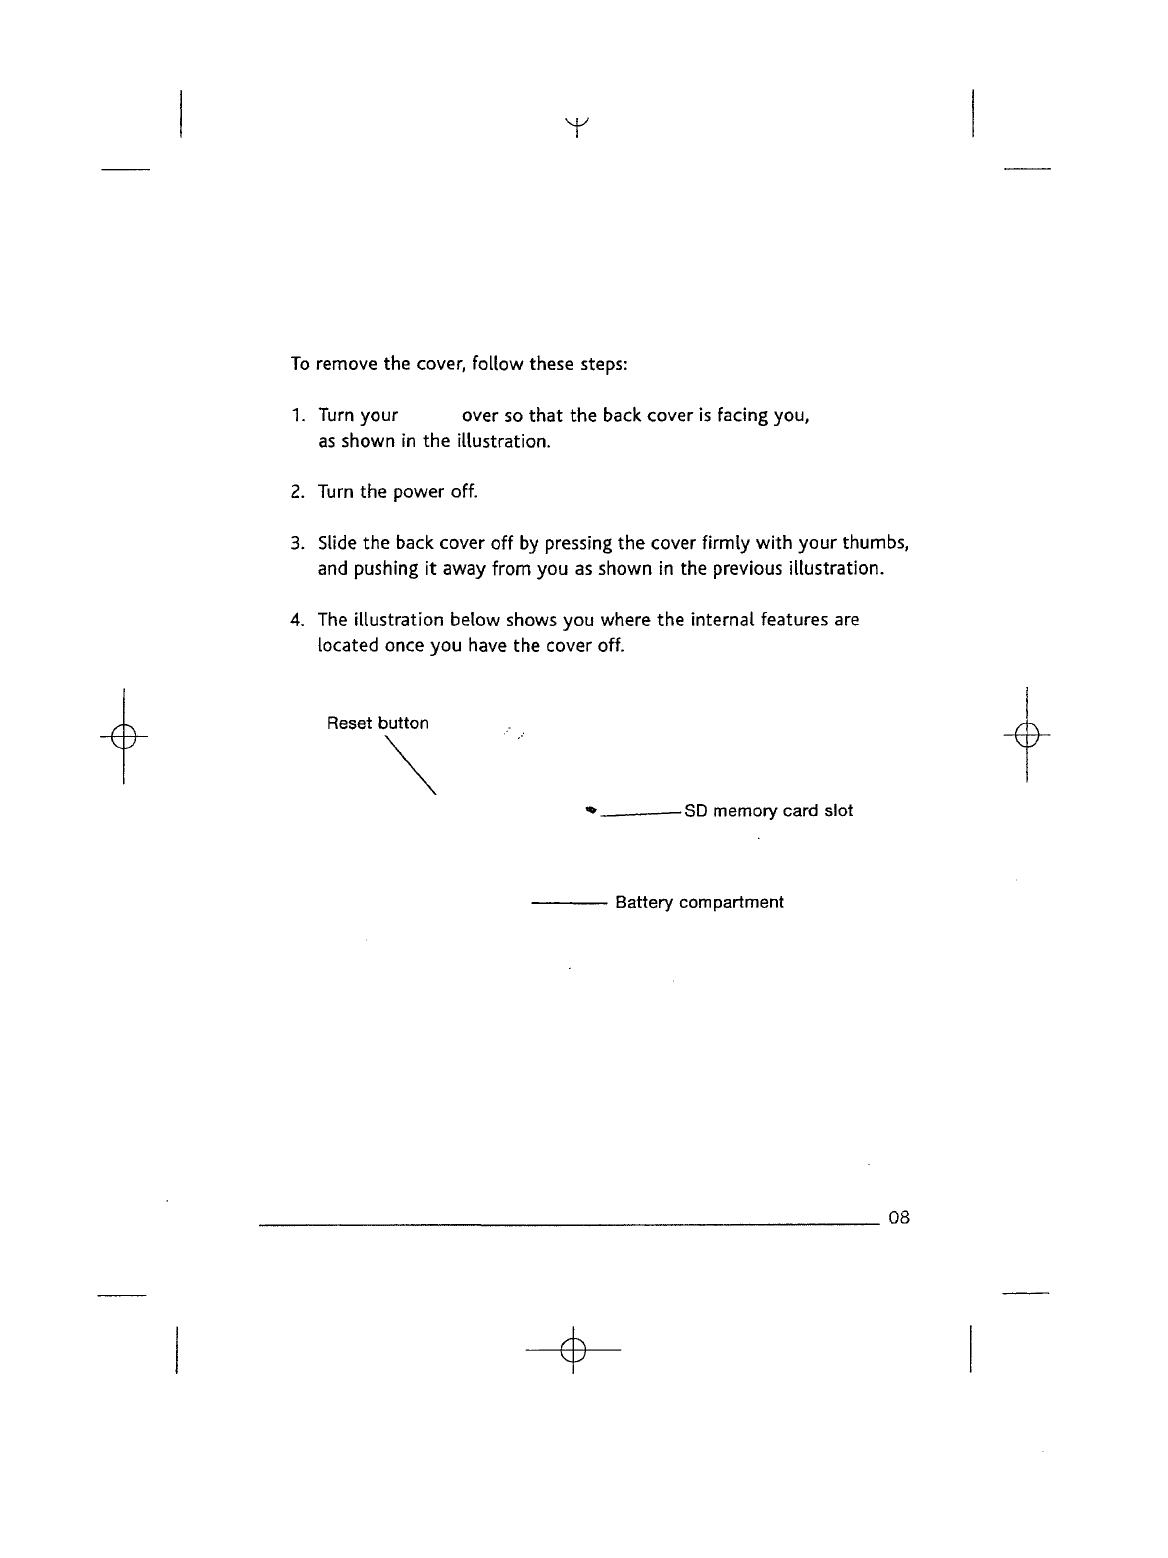
To
remove
the
cover,
follow
these steps:
1.
Turn
your
over
so
that
the
back cover
is
facing you,
as
shown
in the
illustration.
2.
Turn
the
power off.
3.
Slide
the
back
cover
off by
pressing
the
cover
firmly
with
your
thumbs,
and
pushing
it
away
from
you as
shown
in the
previous
illustration.
4. The
illustration
below shows
you
where
the
internal
features
are
located once
you
have
the
cover off.
Reset
button
-SD
memory card slot
Battery compartment
08
lour
of
Your
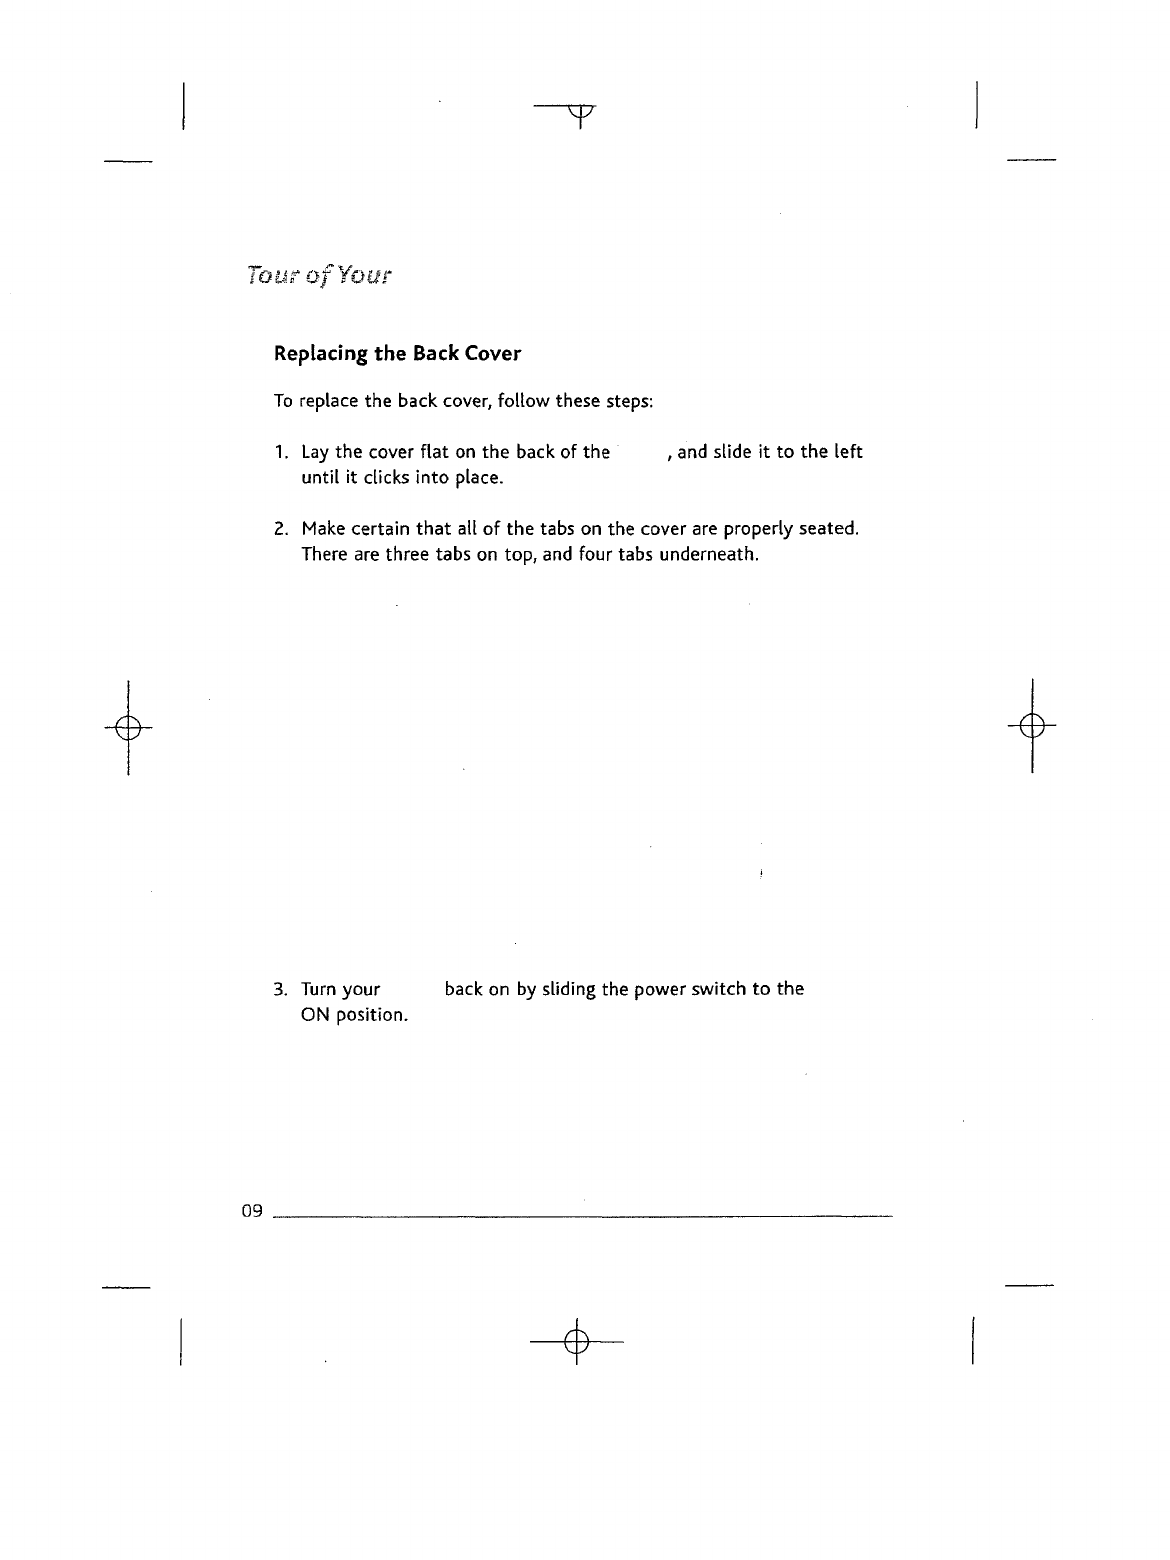
Replacing
the
Back
Cover
To
replace
the
back cover,
follow
these steps:
1.
Lay the
cover
flat
on the
back
of the , and
slide
it to the
left
until
it
clicks
into
place.
2.
Make certain
that
all of the
tabs
on the
cover
are
properly seated.
There
are
three tabs
on
top,
and
four tabs underneath.
3.
Turn
your
back
on by
sliding
the
power
switch
to the
ON
position.
09
T
Accessories
Your
comes
with
a
power adapter,
a and a USB
cable.
In
addition,
you can
purchase
a
designed
for
your
as
well
as
replacements
or
spares
for any of
these
accessories
at the
Store
on
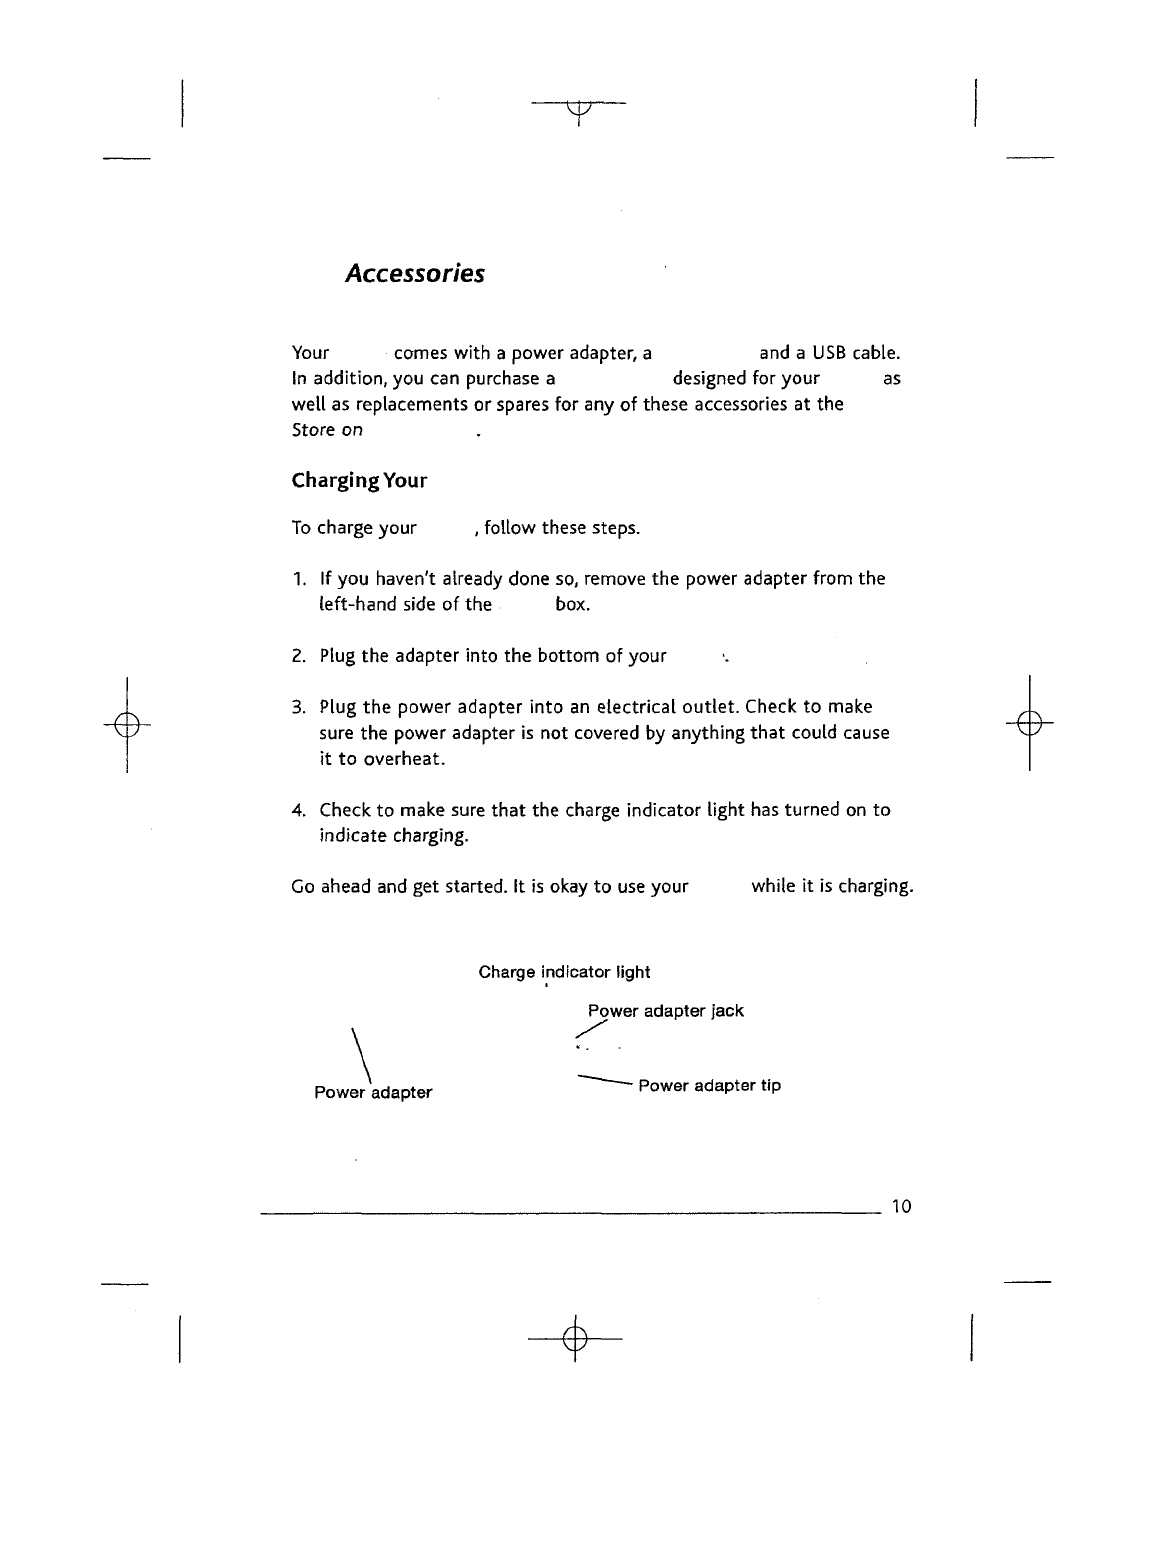
Charging
Your
To
charge your
,
follow
these steps.
1.
If you
haven't already done
so,
remove
the
power adapter from
the
left-hand
side
of the
box.
2.
Plug
the
adapter
into
the
bottom
of
your
3.
Plug
the
power
adapter
into
an
electrical
outlet.
Check
to
make
sure
the
power adapter
is not
covered
by
anything
that
could
cause
it to
overheat.
4.
Check
to
make
sure
that
the
charge indicator
light
has
turned
on to
indicate
charging.
Go
ahead
and get
started.
It is
okay
to use
your
while
it is
charging.
Charge
indicator
light
Power
adapter
jack
Power
adapter
~~~~~~
Power
adaPter
tJP
10
y
Accessories
Recharging
While
Abroad
The
power adapter
is a
universal power adapter
and
will
work
worldwide.
If you are
traveling
outside
the
United States,
and
want
to
recharge
your
,
simply
connect
the
power adapter
to a
country
approved
physical
plug
adapter
(not
included)
for the
country
that
you are in.
HELPFUL
HINT:
If the
charge indicator
light
doesn't
light
up,
make
sure
that
the
power adapter
tip is
fully
inserted.
If
still
isn't
charging,
try
another electrical
outlet.
11
06_08JIanualMECH.qxd
6/8/07 3:48
PM
Ratafi
17
Using
Your
:
Cover
Your
comes
with
a
protective cover
and is
designed
to be
used
with
the
cover
on.
The
cover
protects your when
you
slip
it
into
your
purse,
briefcase,
or
other carrying
case.
It
also helps position
the
device
for
use
when
the
wireless service
is on
(see page
29 for
more
information).
with
the
Cover
On
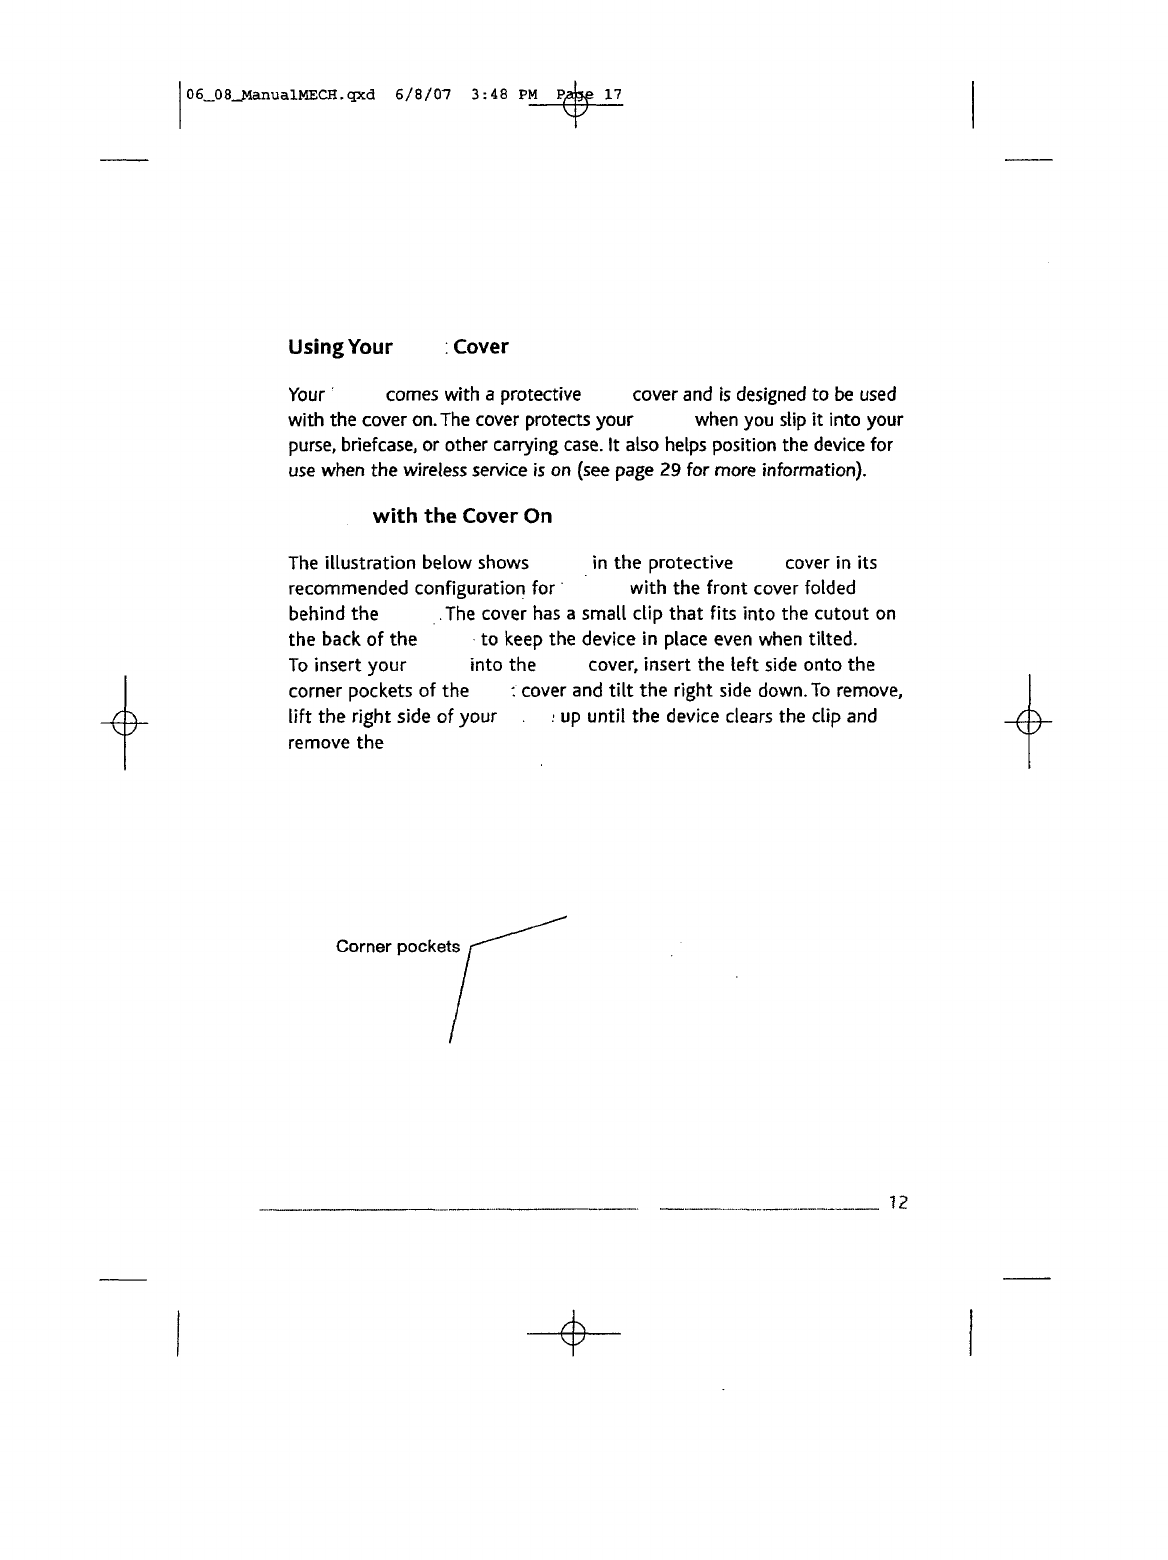
The
illustration
below
shows
in the
protective
cover
in its
recommended
configuration
for
with
the
front
cover
folded
behind
the
.The
cover
has a
small
clip
that
fits
into
the
cutout
on
the
back
of the to
keep
the
device
in
place
even
when
tilted.
To
insert your
into
the
cover, insert
the
left
side
onto
the
corner
pockets
of the
:
cover
and
tilt
the
right
side
down.
To
remove,
lift
the
right
side
of
your
.
:
up
until
the
device clears
the
clip
and
remove
the
Corner
pockets
12
.
Accessories
Protecting Your
The
cover helps protect
the
display
and
controls from
scratches
or
impacts.
To
secure
the
case,
wrap
the
elastic band (located
on the
back
cover)
around
the top
cover
as
shown below.
13
Connecting
to
Your
Computer
When
you
connect
to
your
computer
you can
transfer
. and
other
Your
' "
comes
with
a USB
cable
to
attach
to
your
Windows
or
Macintosh computer. When attached
to
your
computer, your
screen
displays
a
message
that
you are in USB
Drive Mode.
The
wireless service
is
off,
and you
cannot
use
your
for
until
you
disconnect
the USB
cable.
To
disconnect your
, use the
Safely
Remove
Hardware icon
in the
system tray
if you
are
using Windows
or if you are
using
a
Macintosh, eject your
by
dragging
it to the
eject icon
in the
Finder.
NOTE:
Although
you
need
to
connect
to
your computer
to
transfer
files,
all
other files
will
be
transferred wirelessly
without
connecting
to
your computer.
For a
complete
list
of the
things
that
you can do
when
you
connect
to
your computer,
refer
to
the
User's
Cuide
on
your
14
"^r
cessones
Attaching
the USB
Cable
To
connect
to
your computer,
follow
these steps:
1.
Plug
the USB
cable
into
an
available
USB
port
or a
powered
USB hub
on
your
computer.
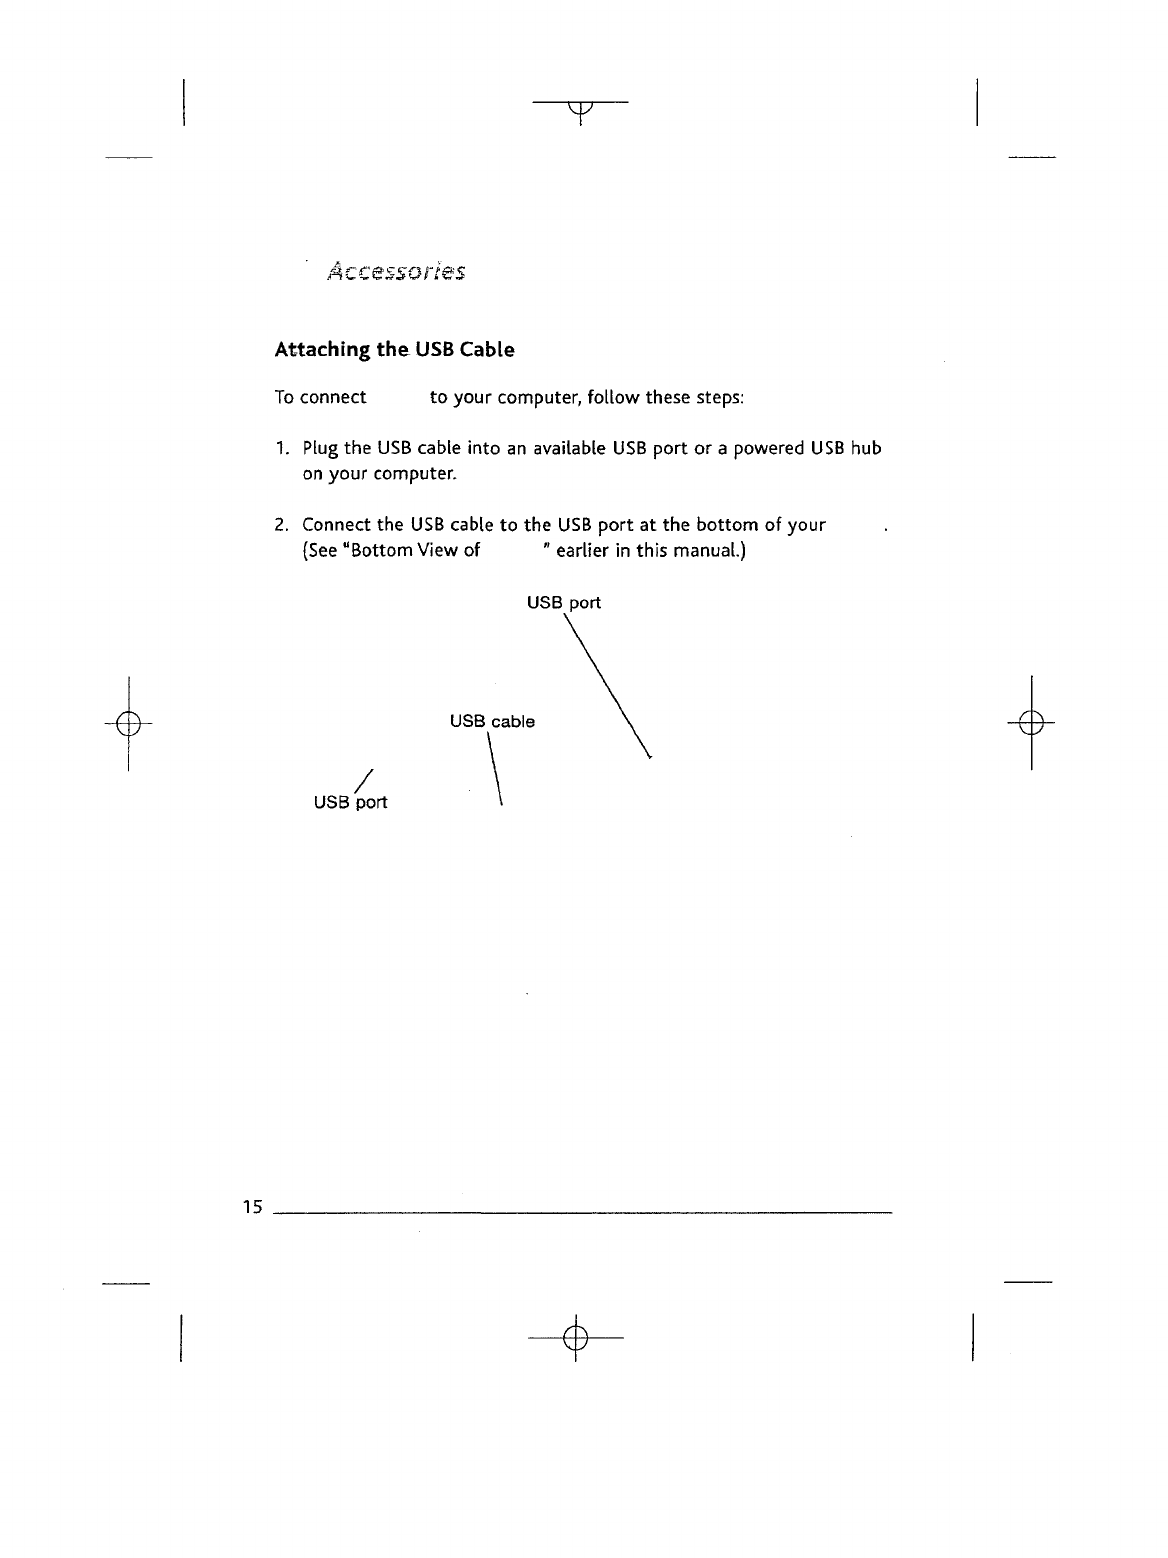
2.
Connect
the USB
cable
to the USB
port
at the
bottom
of
your
(See
"Bottom
View
of
"
earlier
in
this
manual.)
USB
port
USB
cable
USB
port
15
Using
an SD
Memory
Card
If
you
would
like
to
increase
your
.
storage capacity,
you can
purchase
and
insert
an SD
memory
card.
For the
latest
recommended
cards,
see the
Store
on the .
website. (These cards
are
standard,
and you may
purchase
them
from
; or
other
retailers.)
To
insert
or
remove
an SD
memory
card,
follow
these steps:
1.
Turn
the
power off.
2.
Slide
the
back cover
off as
described earlier
in
this
manual.
3.
Locate
the SD
memory
card
slot
on the
right
side
of the
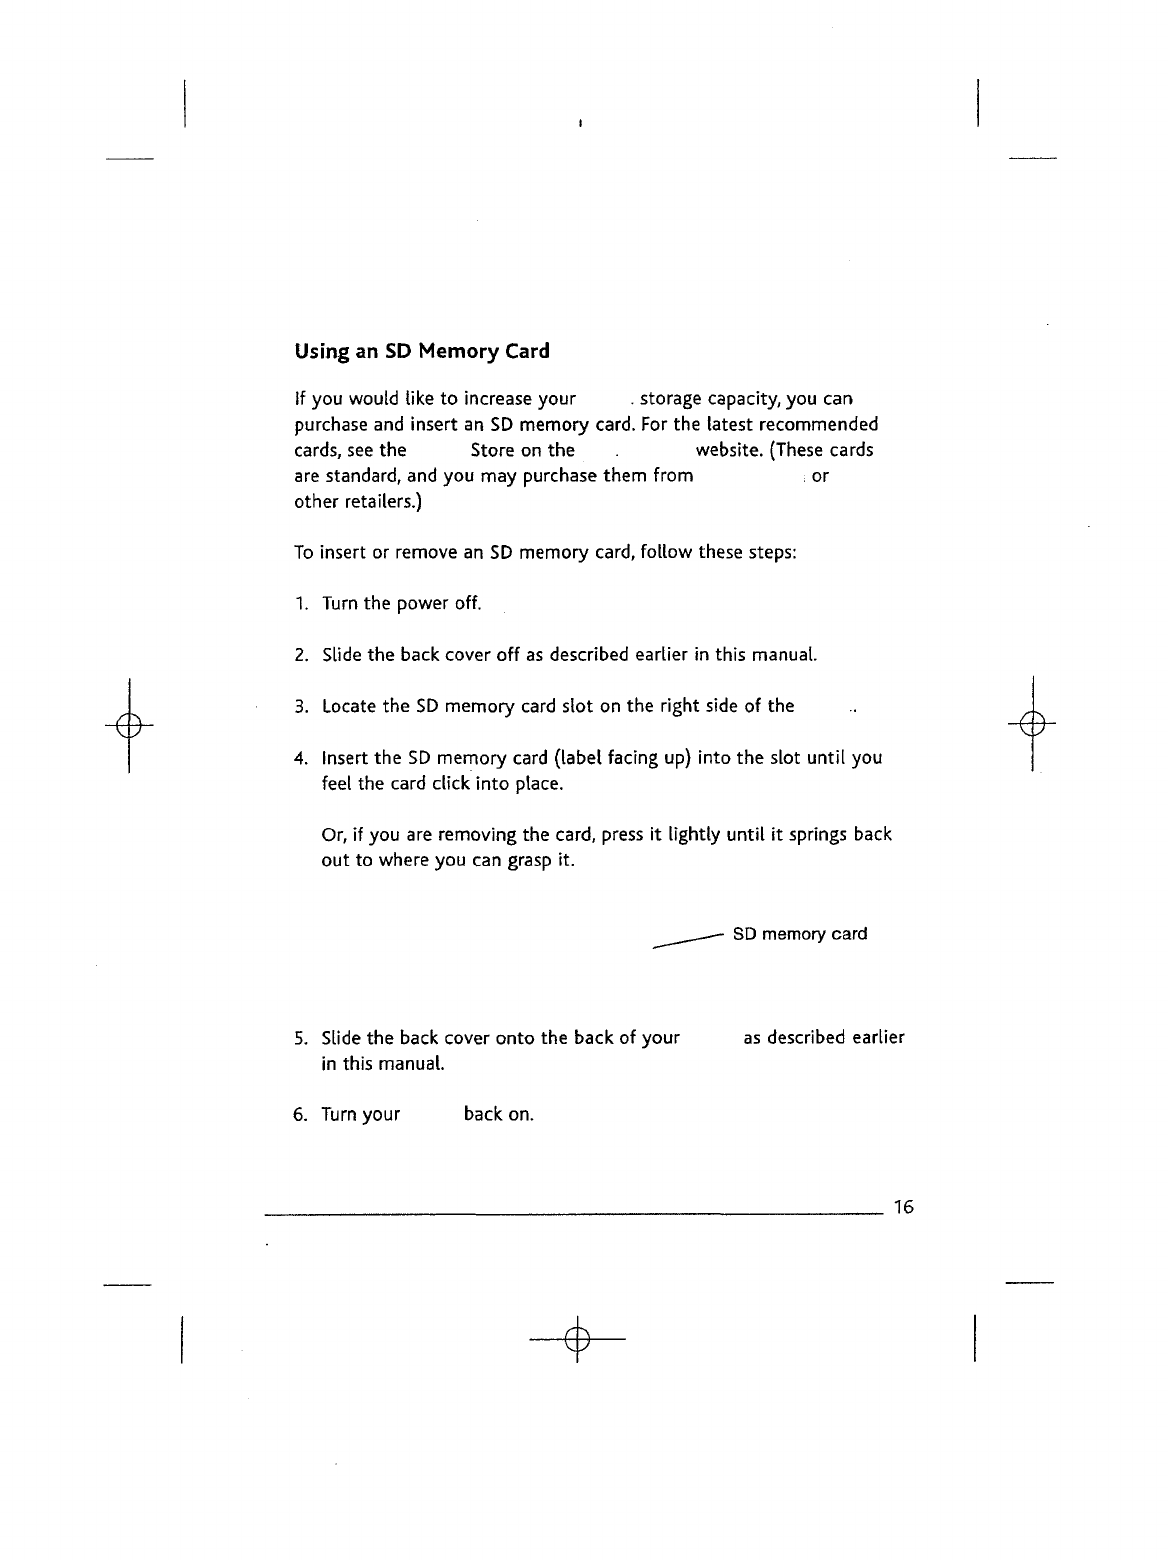
4.
Insert
the SD
memory
card
(label
facing
up)
into
the
slot
until
you
feel
the
card
click
into
place.
Or, if you are
removing
the
card,
press
it
lightly
until
it
springs back
out to
where
you can
grasp
it.
SD
memory
card
5.
Slide
the
back cover
onto
the
back
of
your
as
described earlier
in
this
manual.
6.
Turn your back
on.
16
A
Word
About
Wireless
To
get the
most from your
you
will
want
to use the
wireless
service.
When
you
connect
to,
through
the
wireless connection,
you can
shop for, purchase,
and
download
a
variety
of
You
can
also
access
other
services
available
on
Simple
Explanation
of
Wireless Technology
The
uses
the
same
EVDO
wireless
technology
that
advanced
cell
phones use. When
you
have
your turned
on,
and
wireless switched
to the ON
position, your device
is a
radio trans
mitter
and
receiver
just
like
a
cell phone.
The
quality
of
your connection
depends
on
your distance from
the
cellular tower
and the
signal strength
in
your
area.
Your
informs
you of the
current signal strength
by
displaying
a
number
of
bars
next
to
the
signal strength icon located
at the
bottom
of the
screen.
The
more
bars
displayed,
the
stronger
the
signal.
Wireless
Safety
In
general,
turn
the
wireless
service
of
your
to the OFF
position
in
areas
where
its use is
forbidden
or
when
it may
cause
interference
or
danger.
Some
specific situations
are
described below.
In
general,
you
should
not use
your
with
the
wireless
service
turned
on any
place
you are not
allowed
to use
your
cell
phone.
17
T
Turn
Off
Wireless
When
Flying
Turn
off
your
wireless
service
before boarding
any
aircraft.
To
prevent
possible
interference
with
aircraft systems,
the
U.S.
Federal
Aviation
Administration (FAA) regulations require
you to
have
permission from
a
crew member
to use
your device's wireless service
while
the
plane
is
on the
ground.
If
you
have
your wireless
service
turned off,
you can use
your
for
once
a
crew member
has
said
it is
okay
to use
electronic
devices.
Be
Careful
Around
Other
Electronic
Devices
Most
modern electronic equipment
is
shielded from radio frequency
(RF)
signals. However,
RF
signals
may
affect improperly installed
or
inadequately shielded electronic operating systems
or
entertainment
systems.
If in
doubt,
check
with
the
manufacturer. Consult
the
manufacturer
of any
personal medical
devices
(such
as
pacemakers
and
hearing
aids)
to
determine
if
they
are
adequately shielded from
external
RF
signals.
Watch
for
Signs
There
are
some
places
where radio signals could constitute
a
hazard.
For
example, health
care
facilities, construction sites,
and so
forth.
If
you are not
sure, look around
for
signs indicating that two-way
radios
or
cell
phones should
be
turned off.
18
T
Maintaining
Your
Caring
for
Your
Avoid
exposing
your
and its
accessories
to
rain
or
liquid
spills.
If
your
device
does
get
wet, immediately
turn
the
power
off and
remove
the
battery. Wait
for it to dry
completely
before
inserting
the
battery
again.
If
your device
needs
service, consult
only
-authorized-personnel
by
contacting
us
through
Customer
Support
listed
at the end of the
Tips
and
Troubleshooting
section. Faulty
service
may
void
the
warranty.
Clean
the
screen
with
a
soft
cloth;
be
careful
not to
wipe
it
with
anything
abrasive.
When carrying your
.=
in a bag or
briefcase,
keep
the on to
avoid
scratches.
Don't
expose
your
,
to
extreme heat
or
cold.
For
example,
don't
leave
it in the
trunk
of
your
car in
sub-zero
or
high-heat conditions.
19

Changing
the
Battery
The
battery that
comes
with
.-
can be
recharged
many times;
however,
you may
need
to
replace
it
eventually.
Be
sure
to use an
-approved
battery
that
is
compatible
with
.You
can
order
one
from
the
Store
on .
(Search
on"
battery".)
CAUTION!
USING NON-
-APPROVED
BATTERIES
MAY
VOID
YOUR
WARRANTY
AND
CAUSE
DAMAGE
TO
YOUR
To
change
the
battery, follow
these
steps:
1.
Turn
your
over
so
that
the
back
cover
is
facing you.
2.
Turn
the
power
off.
3.
Slide
the
back
cover
off as
explained
earlier
in
this manual.
4.
To
release
the
battery from
the
battery holder, insert your finger
under
the tab on the
right
side
of the
battery,
and
pull
upwards.
5.
Unplug
the
battery
cable
from
the
device,
and set the
battery
to one
side.
20
T
M&smtaining
Your
6.
Attach
the
battery cable
of the new
battery
to the
small connector
in
the
battery compartment.
7.
Press
the new
battery
into
the
battery holder.
8.
Slide
the
back
cover
on as
described
earlier
in
this manual.
9.
Attach your power
adapter
as
described
earlier
in
this,
manual
to
charge your
new
battery.
10.Turn
your
back
on by
sliding
the
power switch
to the
ON
position.
21
T
Tips
for
Conserving
Your
Battery
The
battery
will
have
a
much
longer
life
if you
charge
it
frequently,
rather than
waiting
until
it is
fully
drained
to
charge
it.
The
battery
may
need
recharging
if it has not
been used
for a
long
period
of
time,
whether
or not it was
fully
charged before
it was
stored.
Battery Safety
CAUTION!
FAILURE
TO
FOLLOW
THESE SAFETY
INSTRUCTIONS
COULD
RESULT
IN
FIRE, ELECTRIC
SHOCK,
OR
OTHER
INJURY
OR
DAMAGE.
Do
not
attempt
to
disassemble
or
short-circuit
the
battery.
Do
not
handle
a
damaged
or
leaking
battery.
Do
not
incinerate
the
battery.
Charge
the
battery
only
in
temperatures
that
range from
32°F
to
95°F
(0°C
to
35°C).
Recycling
and the
Battery Properly
In
some
areas,
the
disposal
of
rechargeable batteries
in
household
or
business
trash
is
prohibited.
For
information
about
the
proper disposal
of
and
the
battery
and to
learn more about
and the
environment,
go to
http://www.-
environment.
22
Y
Tips
and
Troubleshooting
About
the
Screen
Q:
My
screen
flashes
every
time
I
A:
The
flash
you
see
when
you
i
is a
normal part
of the
display refresh
process.
Q: My
screen
is
blank. What should
I do?
A:
First,
make
sure
the
power switch
on the
back
of
your
is in
the ON
position.
Next,
plug
in the
power adapter,
and
check
to see if
the
charge
indicator
light
illuminates
(your battery
may be
completely discharged).
Battery Charging
Q: The
battery
does
not
seem
to
charge. What
is
wrong?
A:
First, make
sure
you are
using
an
electrical
outlet
that
works.
Next,
check
that
the
power adapter
is
completely
plugged
into
the
electrical
outlet,
and
that
the
power adapter
tip is
fully
inserted
into
the
correct
jack
on the
bottom
of
your
:.
(These jacks
are
shown
in
"Bottom View
of
"
earlier
in
this
manual.)
Finally,
you may
need
to
replace
your
battery.
The
battery
can be
recharged
many
times;
however,
it
will
eventually wear out.
For
more
information
on
ordering replacement batteries,
check
the
Store
on
(Search
on"
battery".)
Text
Size
Q: Why
can't
I
change
the
text
size
in the
menus
or the
Store?
A: The
text
size feature
is
only
available when
you are or
using
Basic
Web. (For more
information,
see the
User's
Guide.)
23
T
The
Wireless
Connection
Q: Why
can't
I
establish
a
connection
to the
network?
A:
Make
sure
the
wireless
switch
on the
back
of
your
, is in the
ON
position. Next, check
the
wireless signal strength
by
looking
at
the
signal strength shown
at the
bottom
of the
screen.
You
need
at
least
one bar of
signal strength
to
establish
a
wireless
connection.
Resetting
Your
Q: My is
turned
on, but
isn't
responding when
I
press
the
keys
or
buttons. What should
I do?
A:
Resetting your
.
will
resolve most problems
of
this
sort.
Remove
the
back
cover,
and use a
paper
clip
or
other small object
to
press
the
Reset
button.
(This
button
is
shown
in
"Removing
and
Replacing
the
Back
Cover"
earlier
in
this
manual.)
Your
will
take
a few
minutes
to
restart.
Security
Concerns
Q:
I
lost
my . How do I
deregister
my
device?
A: You can
register
on the
Manage
My
page
on . , or
contact
.
Customer Support (see "Customer Support"
at the
end
of
this section.)
24
Y
Tips
and
Troubleshooting
SD
Memory
Cards
Q:
i
cannot insert
my SD
memory card. What should
I do?
A:
Make
sure
the SD
memory
card
is
facing
the
right
way.
With
the
back
of
your,
facing you, insert
the SD
memory
card
with
its
label
facing
up.
Press
the
edge
of the SD
memory
card
into
the
slot
until
you
feel
the
card
click
into
place.
Q: Why
doesn't
my
recognize
my SD
memory
card?
A:
Your
SD
memory
card
may be
formatted improperly
or is
corrupted.
Use
an SD
memory
card
reader
attached
to
your computer
to
verify
the
card's
formatting.
SD
memory
card
formatting
utilities
are
usually
available
from
the SD
memory
card
manufacturer's
web
site.
Second,
your
SD
memory
card
may be
locked.
Check
the
lock
tab on the
side
of
the SD
memory card
to
ensure
it is in the
unlocked position.
The
Store
Q: My is not
registered
to my
account, what
do I do?
A:
This
can
happen
if it was a
gift
or if you
received your from
someone
else.
You
need
to
register your
with
to
assign
it to
your,
.
account.
Go to the
Home screen,
select
"Settings" from
the
menu,
and
under Account Name select
Register
and
enter your
login
credentials.
Q: I
bought something
on the .
Store,
and I
don't
see it on my
device.
A: It
sometimes
takes
a few
minutes
for the
automatic download
to
occur.
If
you
want
to
download manually,
make
sure your wireless
service
is on, go to the
Home screen,
and
then select
"Check
for New
Items" from
the
menu.
25
The USB
Connection
Q:
When
I
connect
to my
computer
with
the USB
cable,
my
computer
does
not
recognize
A:
First,
make
sure
your
is in the ON
position
and
awake.
Then
verify
that
your
USB
cable
is
inserted correctly
in
your
and in
your computer
USB
port.
Finally,
reset
your
, and
wait
until
it
finishes
starting
up
before reinserting your
USB
cable. (See "Resetting
Your
"
earlier
in
this section.)
Q: I
transferred
some
from
my
computer
to my •, and now
I
can't find
it on my :.
A:
Make
sure
the
file format
of the
transferred
item
is
supported
by
.
Formats natively supported are:
Also,
make
sure
that
you
placed
the
file
in the
appropriate folder.
All of
your should
go
into
the
folder,
files
should
go
into
the
folder,
and
files
should
go in the
folder.
No
Sound
Q: Why
don't
I
hear
any
sound coming from
my ?
A: Try
increasing
the
volume
by
pressing
the
"+"
button
at the
bottom
of
your (pictured
in
"Bottom View
of
earlier
in
this
manual).
If you are
using headphones,
make
sure
that
they
are
plugged
in all the
way.
Remember
that
the
speaker
is
disabled when
headphones
are
connected.
26

Tips
and
Troubleshooting
Customer
Support
If
you
continue
to
have problems,
one of our
Customer
Service
members
will
be
happy
to
help.
Here
is the web
address:
http://www.
.com/
You
can
also
contact
us by
phone using
one of the
phone numbers below:
If
you are
calling
from
inside
the US,
call
toll
free:
If
you are
calling
from outside
the US,
call:
Support
is
available
at the
following
times:
Monday
through
Friday, 6am-8pm Pacific Time
Saturday
and
Sunday,
6am-5pm
Pacific
Time
27
""Y
Notices
and
Certifications
Government
Standards
for
Radio
Frequency
Signals
In
1991-92,
the
Institute
of
Electrical
and
Electronics
Engineers
(IEEE)
and the
American
National
Standards
Institute
(ANSI) joined
in
updating
ANSI's
1982
standard
for
safety levels
with
respect
to
human exposure
to
Radio
Frequency (RF) signals. More
than
120
scientists,
engineers
and
physicians from universities, government health agencies,
and
industries
developed
this
standard.
In
1993,
the
Federal
Communications Commission
(FCC)
adopted this updated standard.
In
August
1996,
the FCC
adopted
a
hybrid standard consisting
of the
existing
ANSI/IEEE
standard
and the
guidelines published
by the
National
Council
of
Radiation Protection
and
Measurements
(NCRP).The
design complies
with
updated
NCRP
standards.
FCC
Notice
This
device complies
with
part
15
of the FCC
Rules.
Operation
is
subject
to the
following
two
conditions:
(1)
This device
may not
cause
harmful
interference,
and (2)
this device must
accept
any
interference received,
including
interference
that
may
cause
undesired operation.
This
equipment
has
been
tested
and
found
to
comply
with
the
limits
for a
Class
B
digital
device,
pursuant
to
part
15 of the
FCC
Rules.
These
limits
are
designed
to
provide
reasonable
protection against
harmful
interference
in a
residential
installation.This
equipment generates,
uses,
and can
radiate radio frequency energy and,
if not
installed
and
used
in
accordance
with
the
instructions,
may
cause
harmful interference
to
radio communications. However, there
is
no
guarantee
that
interference
will
not
occur
in a
particular
installation.
If
this
equipment does
cause
harmful interference
to
radio
or
television reception, which
can
be
determined
by
turning
the
equipment
off and on, the
user
is
encouraged
to try to
correct
the
interference
by one or
more
of the
following
measures:
Reorient
or
relocate
the
receiving
antenna.
Increase
the
separation between
the
equipment
and
receiver. Connect
the
equipment
into
an
outlet
on a
circuit different
from
that
to
which
the
receiver
is
connected.
Consult
the
dealer
or an
experienced
radio/TV
technician
for
help.
Changes
or
modifications
not
expressly approved
by the
party responsible
for
compliance could void
the
user's
authority
to
operate
the
equipment.
This
device meets
the FCC
Radio
Frequency
Emission
Guidelines
and is
certified
with
the FCC
as
FCC ID
number
UUU-L7E20070323
28
T"
Radio Frequency Exposure
Information
(SAR)
This
device meets
the
government's requirements
for
exposure
to
radio
waves. This device
is
designed
and
manufactured
not to
exceed
the
emission
limits
for
exposure
to
radio frequency
(RF)
energy
set by the
U.S.
Federal
Communications Commission.
The
exposure standard
for
wireless
devices
employs
a
unit
of
measurement known
as the
Specific
Absorption
Rate,
or
SAR.
The SAR
limit
set by the FCC is 1.6
W/kg.
Tests
for SAR are
conducted
using standard operating positions accepted
by the
FCC
with
the
device
transmitt-
ing at its
highest certified power
level
in all
tested frequency
bands.
Although
the SAR is
determined
at the
highest certified power
level,
the
actual
SAR
level
of the
device
while
oper-
ating
can be
well
below
the
maximum value. This
is
because
the
device
is
designed
to
operate
at
multiple
power
levels
so as to use
only
the
power required
to
reach
the
network.
In
general,
the
closer
you are to a
wireless base-station antenna,
the
lower
the
power
output.
The
highest
measured
SAR
value
for the
device
as
reported
to the FCC
when held
at
least 0.60 inches
(1.5
cm)
from
the
body
is
0.96 W/kg.
The
FCC has
granted
an
Equipment Authorization
for
this model
device
with
all
reported
SAR
levels
evaluated
as in
compliance
with
the FCC RF
exposure guidelines.
SAR
information
on
this
device
is on
file
with
the FCC and can be
found under
the
Display Grant section
of
http://www.fcc.gov/oet/ea/
after searching
on FCC ID:
UUU-L7E20070323.
This
device
meets
RF
exposure guidelines when used either
with
the
i
cover accessory
that
comes
with
the
device
used
in its
recommended configuration (see page
12) or
when
positioned
at
least 0.60
of an
inch (1.5
cm)
away from
the
body.
Use of
other
accessories
may
impair compliance
with
FCC RF
exposure guidelines.
If you do not use the
included
cover,
position
the
device
a
minimum
of
0.60
of an
inch
(1.5
cm)
from
your
body when
the
wireless
service
is on.
UL
Certification
Number
The
UL
Certification Number
is:
29
T
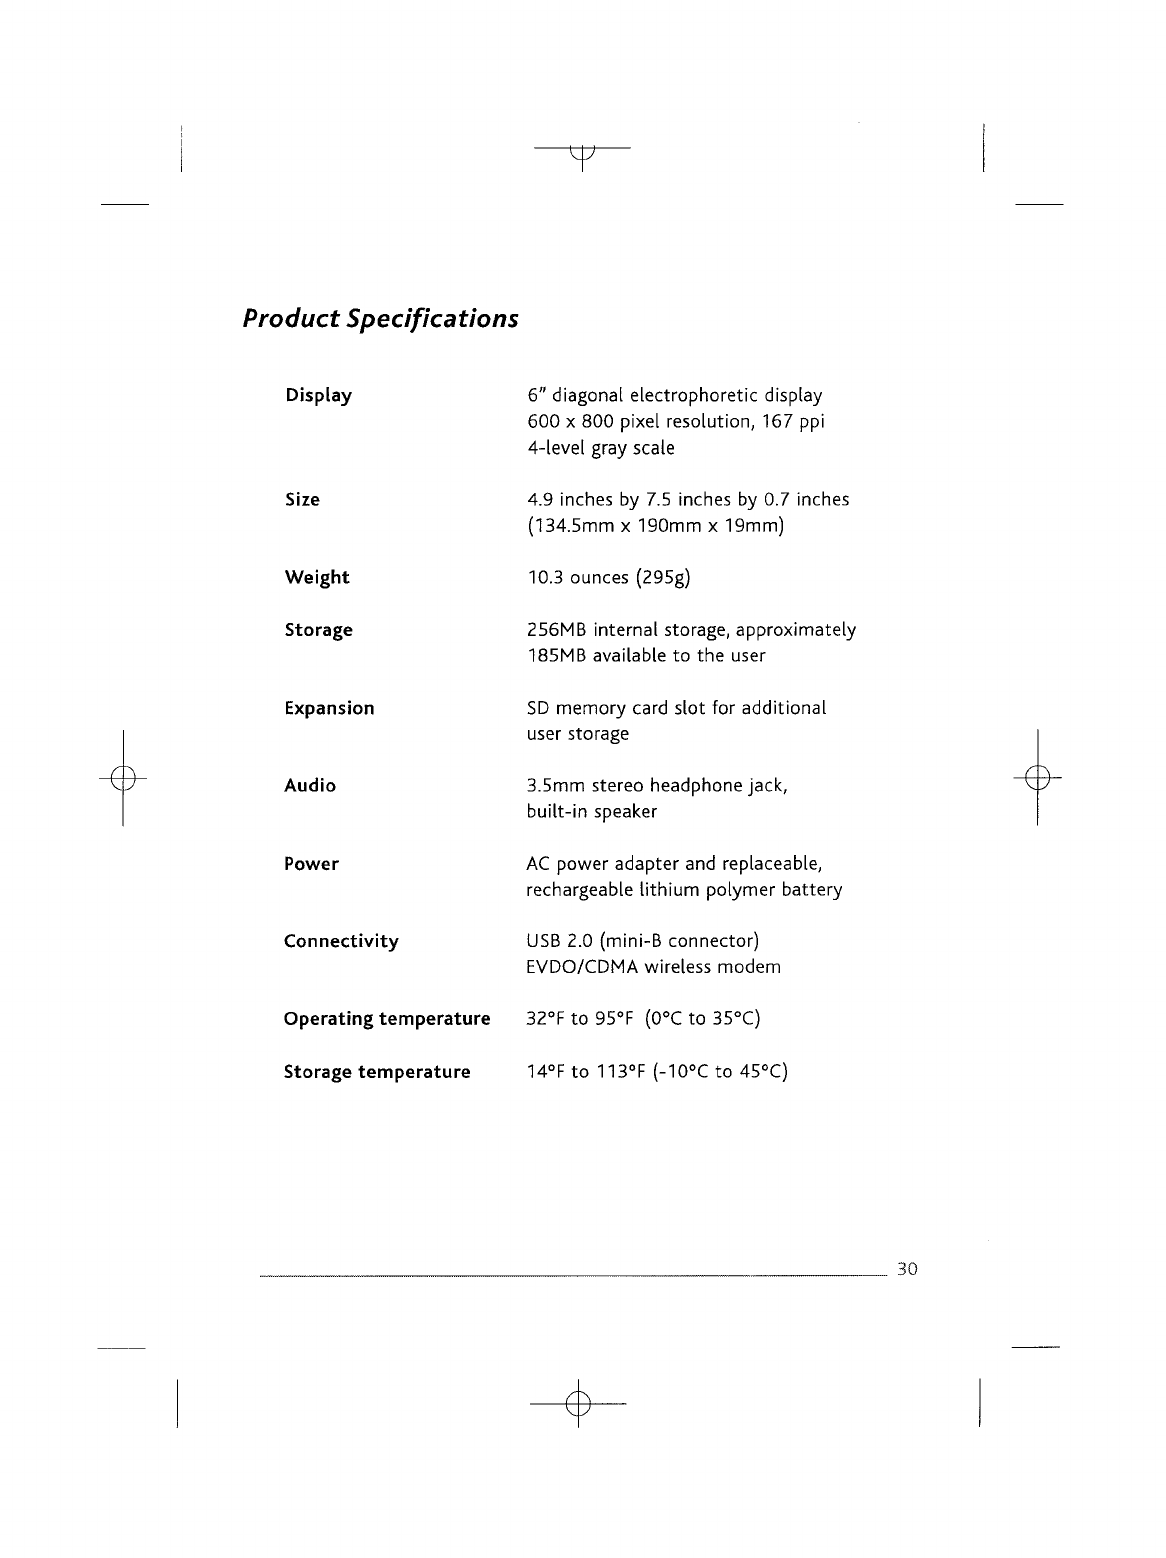
Product
Specifications
Display
Size
Weight
Storage
Expansion
Audio
Power
Connectivity
Operating temperature
Storage
temperature
6"
diagonal
electrophoretic
display
600 x 800
pixel resolution,
167 ppi
4-level
gray
scale
4.9
inches
by 7.5
inches
by 0.7
inches
(134.5mm
x
190mm
x
19mm)
10.3
ounces
(295g)
256MB
internal
storage, approximately
185MB
available
to the
user
SD
memory
card
slot
for
additional
user
storage
3.5mm stereo headphone
jack,
built-in
speaker
AC
power adapter
and
replaceable,
rechargeable
lithium
polymer battery
USB
2.0
(mini-B
connector)
EVDO/CDMA
wireless modem
32°F
to
95°F
(0°C
to
35°C)
14°F
to
113°F
(-10°Cto
45°C)
30

Y
P/N
-
220-1000-00
revOI