Ambicom Bt Gps Users Manual
GPS-CF to the manual 2b95ab4c-334b-46be-b26b-c40331cb5055
2015-02-05
: Ambicom Ambicom-Bt-Gps-Users-Manual-507505 ambicom-bt-gps-users-manual-507505 ambicom pdf
Open the PDF directly: View PDF ![]() .
.
Page Count: 24

Quick Installation Guide
Model: BT-GPS/GPS-CF/GPS-CF3
Before You Start
PLEASE CHARGE THE BATTERY FOR
AT LEAST 5 HOURS BEFORE THE INITIAL USE
Please install a GPS Mapping Software Before
Proceeding
Compatible with commercial standard NMEA 0183
GPS mapping software such as Microsoft Streets and
Trips, DeLorme Street Atlas USA, iGuidance and
more
1. Hardware Descriptions
1a. Hardware Descriptions – BT-GPS Rev2.0 2
1b. Hardware Descriptions – BT-GPS Rev1.5 3
1c. Hardware Descriptions – BT-GPS Rev1.0 4
1d. Hardware Descriptions – GPS-CF 5
1e. Hardware Descriptions – GPS-CF3 5
1f. Hardware Descriptions – GPS-USB 6
2. Connecting to the GPS Device
2a. PDA Setup 7
2b. Laptop Setup 11
3. Troubleshooting GPS Signal Activities 15
4. Technical support Help 17
5. Warranty 18
1. Hardware Description
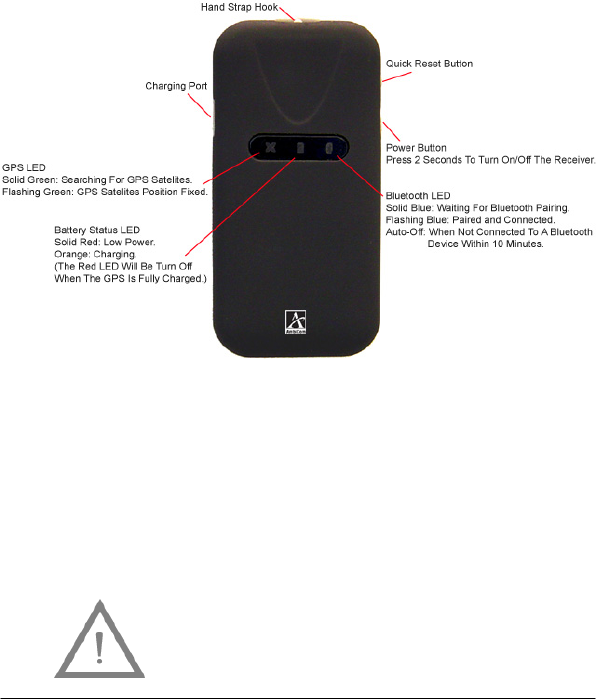
1a. Hardware Description – BT-GPS Rev 2.0
PLEASE CHARGE THE BATTERY FOR
AT LEAST 5 HOURS BEFORE THE
INITIAL USE
2
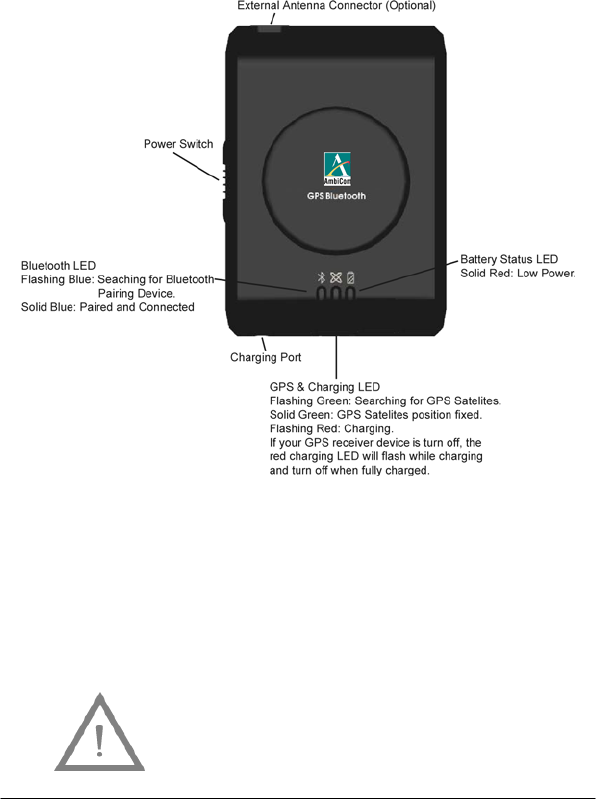
1b. Hardware Description – BT-GPS Rev 1.5
PLEASE CHARGE THE BATTERY FOR
AT LEAST 5 HOURS BEFORE THE
INITIAL USE
3
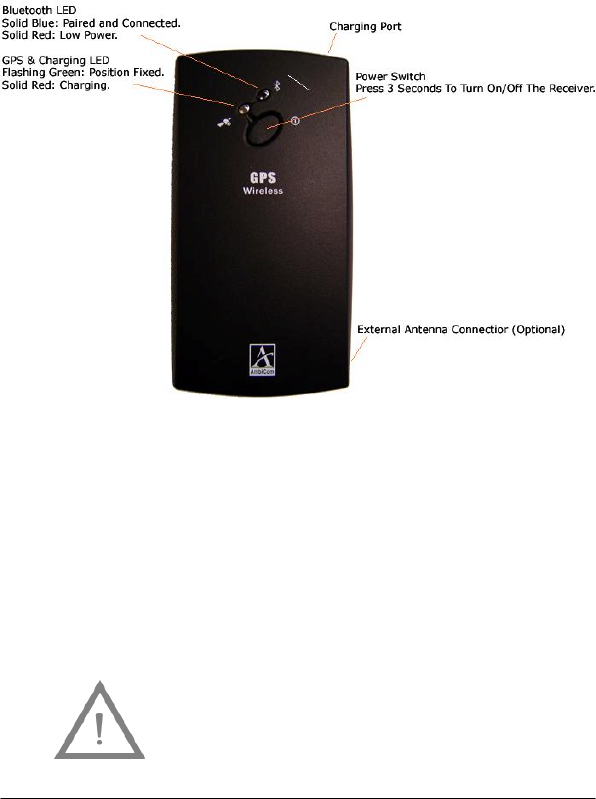
1c. Hardware Description – BT-GPS Rev 1.0
PLEASE CHARGE THE BATTERY FOR
AT LEAST 5 HOURS BEFORE THE
INITIAL USE
4

1d. Hardware Description – GPS-CF
1e. Hardware Description – GPS-CF3
5
1f. Hardware Description – GPS-USB
6

2. Connecting To The GPS Device
In order for Bluetooth device to communicate, a correct
COM port number must be assigned.
Most current GPS mapping software will assign a Com port
number automatically. If it fails to assign one, try to use
the "Auto Detect Com Port" feature.
2a. PDA Setup
GPS-CF/GPS-CF3: Insert the card into the PDA’s CF slot.
Follow the instructions in your mapping software to setup
the correct COM port.
Bluetooth GPS: Turn on your PDA’s Bluetooth function
and the BT-GPS device to discovery mode. Then discover
and pair the BT-GPS. Please refer to your PDA’s user
manual for more information on how to successfully
discover and pair a Bluetooth device or refer to Page 8 or
10.
This section is divided into 2 main Scenarios, PDA with
Widcomm Bluetooth software and PDA with Microsoft
Bluetooth software.
Note: Widcomm Bluetooth software is common on most
Bluetooth enabled Pocket PC running on Windows CE 4.x
or earlier operating system. For Pocket PC running on
Windows Mobile 5.x operating system, it has been
replaced by Microsoft Bluetooth software.
7
Scenario A. PDA with Widcomm Bluetooth
software
These steps apply to PDA that uses Widcomm Bluetooth
software. For additional information, please refer to your
system guide.
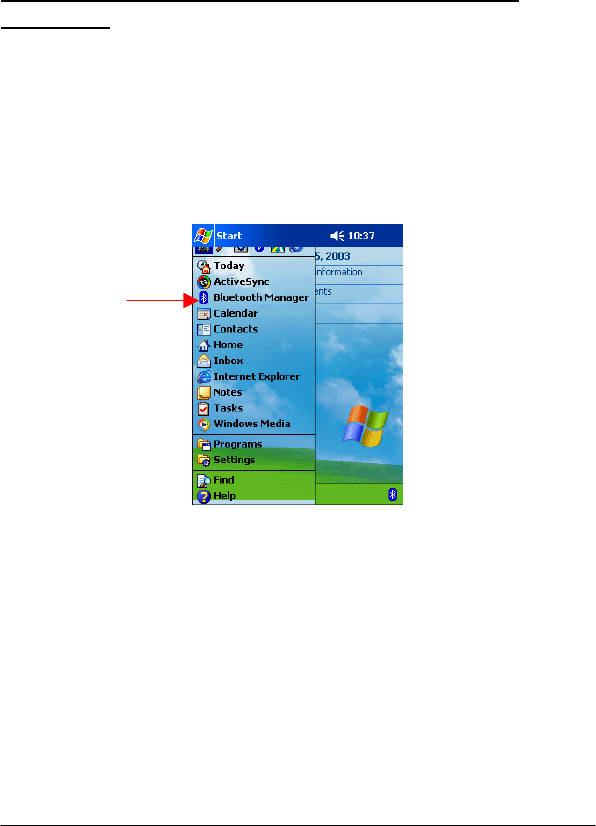
1. Tap “Bluetooth Manager” from the Start Menu or
tap the Bluetooth icon at the bottom right corner.
2. Tap “New”. Then tap “Connect!”.
3. Tap “Explore a Bluetooth device” from the list.
Then tap “Next”.
4. Tap “Next” again.
5. Tap twice on the GPS device and the PDA will begin
retrieving services.
8
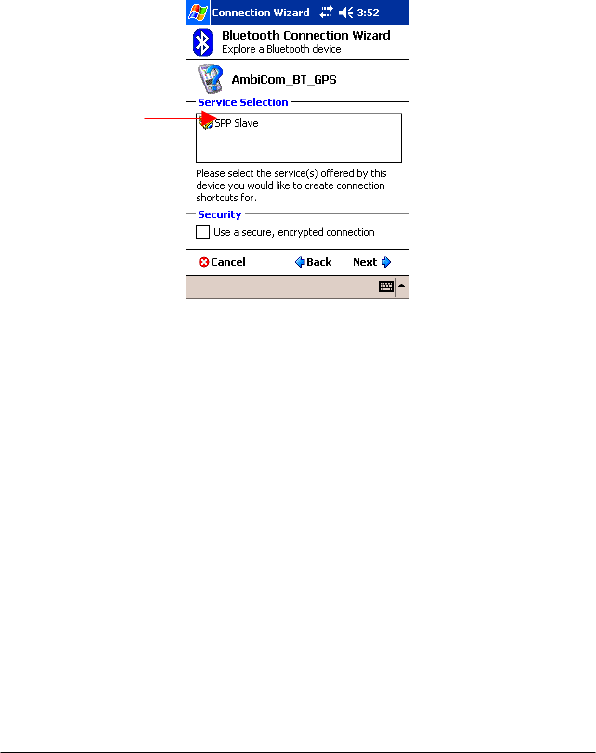
6. Tap the service name, then “Next”.
You will be required to supply the PIN for Pairing. The
default PIN is 0000.
7. Tap Finish to save the Bluetooth GPS connection.
9

Scenario B. PDA with Microsoft Bluetooth
software
These steps apply to WM5.x PDA that uses Microsoft
Bluetooth software. For additional information, please
refer to your system guide.
1. Tap the Bluetooth icon at the bottom right corner.
2. Put a checked mark next to “Turn on Bluetooth”.
3. Tap the Devices tab and tap “New Partnership…”.
4. Tap on the GPS device you want to establish a
connection and then tap Next.
5. You will be required to supply the PIN for Pairing. The
default PIN is 0000. Then Tap Next.
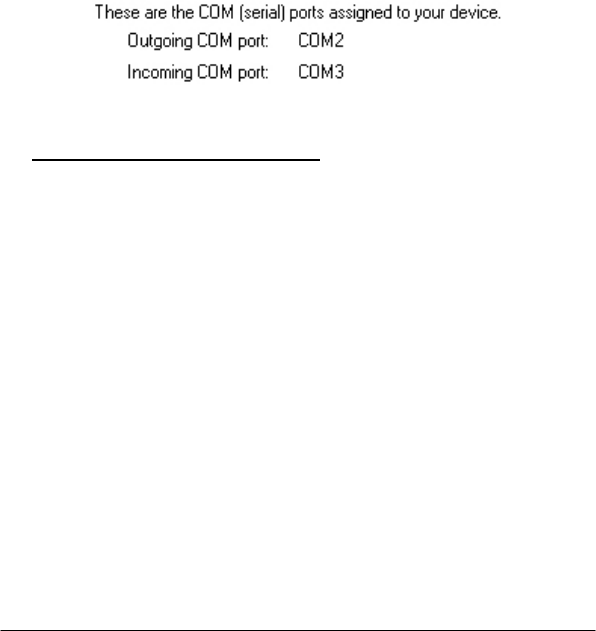
6. Put a check mark next to “Serial Port” and tap Finish.
7. If the on-screen keyboard is still open, close it and tap
on the “COM Ports” tab.
8. Tap “New Outgoing Port” and make sure the GPS
device is highlighted. Then tap Next. Assign a COM
Port number and then tap Finish. This is the default
COM Port that will be used in your GPS software to
communicate with the GPS device.
10

2b. Laptop Setup
In order for Bluetooth device to communicate, a correct
COM port number must be assigned.
Most current GPS mapping software will assign a Com port
number automatically. If it fails to assign one, try to use
the "Auto Detect Com Port" feature.
GPS-CF/GPS-CF3: Insert the GPS card with the PC Card
Adapter into the laptop’s PC Card slot. Microsoft Windows
will detect a new hardware and request for the driver.
Insert the Driver CD into your laptop and browse to the
correspondence folder in the “Drivers” directory.
GPS-USB: See Page 14
Bluetooth GPS: Turn on your laptop’s Bluetooth function
and the BT-GPS device to discovery mode. Then discover
and pair the BT-GPS. Please refer to your laptop’s user
manual for more information on how to successfully
discover and pair a Bluetooth device or refer to Page 12
or 13.
This section is divided into 2 main Scenarios, Laptop with
Widcomm Bluetooth software and Laptop with Microsoft
Bluetooth software.
Note: Widcomm Bluetooth software is common on
Bluetooth enabled Windows XP laptop. For Windows Vista
/ Windows XP SP2 laptop, it has been replaced by
11
Microsoft Bluetooth software. For other Bluetooth
provider please refer to your laptop system guide.
Scenario A. Laptop with Widcomm Bluetooth
software
These steps apply to laptop that uses Widcomm Bluetooth
software. For additional information, please refer to your
system guide.
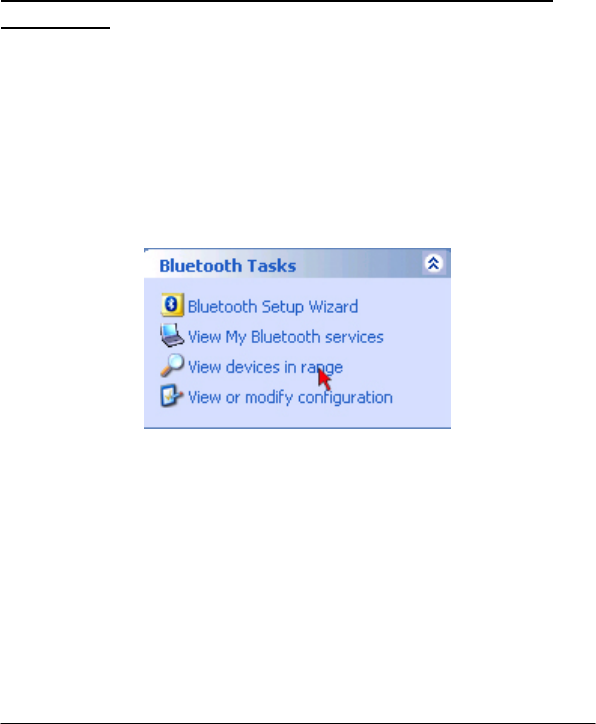
1. Double click “My Bluetooth Places” icon on the
desktop, and click “View devices in range” to
discover your new Bluetooth device.
2. Double-click the GPS device you want to establish a
connection.
You are required to supply the PIN for Pairing. The
default PIN is 0000.
3. Continue to follow the wizard to finish the pairing
process.
12
Scenario B. Laptop with Vista/Windows XP SP2
Bluetooth software
These steps apply to laptop that uses Vista / Windows XP
Service Pack 2 generic Bluetooth software. For additional
information, please refer to Microsoft’s website.
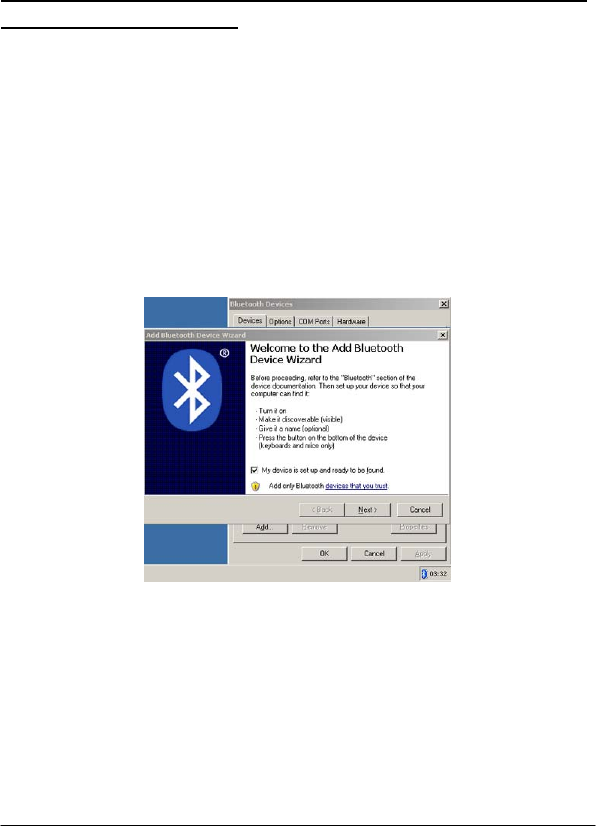
1. Double click the Bluetooth icon in the Taskbar near the
clock and the Bluetooth Devices window will show up.
Click the “Add” button. Put a check mark next to “My
device is set up and ready to be found”. Then click
“Next”.
2. Double-click the GPS device you want to establish a
connection.
You will be required to supply the PIN for Pairing. The
default PIN is 0000.
13
3. Continue to follow the wizard to finish the pairing
process.
4. Please take note of your Bluetooth Outgoing COM port
number and make sure they are the same in your GPS
software. This will be the default COM Port used in
your GPS software to communicate with the GPS
device.
GPS-USB
1. Installations and Setup
1. Insert the Setup CD into an available CD-ROM drive.
When the screen prompted, click “GPS Driver
Installation”.
2. Select the driver that matches your GPS model.
3. Follow the on-screen wizard to complete installation.
At the end of driver installation, insert the AmbiCom
GPS-USB into an available USB port on your computer
device.
Notice For GPS-USB Rev: 1.0/2.0 and Windows
VISTA: Please install the original driver. At the end of the
driver installation, you will need to plug-in the device and
Vista might complain it cannot locate the driver and ask
you to search online. Select YES to update the driver
from Microsoft Windows Update.
14
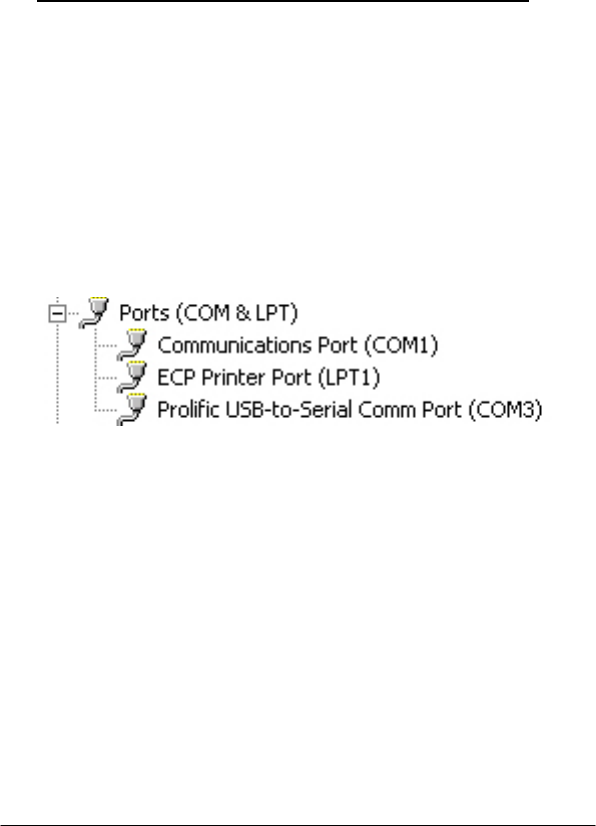
2. Determine the GPS-USB COM Port value
If you need to know your COM port value for your GPS
map software, please follow the steps below.
Click StartRun, type devmgmt.msc in the Open
box, and then click OK. The “Device Manager”
windows will open.
Click on the “+” sign next to “Ports (COM & LPT)”
to reveal the COM port value.
It should listed as the Prolific USB-to-Serial Comm
Port (COMxx)
3. Troubleshoot GPS Signal Activities
Q: My GPS system is not tracking any satellites
signal.
Ans: Perform this with a full charged PDA/laptop in an
open area with clear sky and away from high-power
electricity tower, microwave, tall building or any signal
interference devices.
15

Q: The GPS System is still not working after I have
followed the solution above.
Ans: Checking the COM Port setting. If your map software
has “Auto Detect” feature, try to use that to detect the
correct COM port number. Most GPS mapping software
will assigned it automatically. Laptop user can also check
the COM port number manually via Device Manager under
System in the Control Panel.
Ans: For BT-GPS, turn off the device for at least 10
seconds and turn it on again.
Ans:For GPS-CF only, press and hold the reset button for
10 seconds while the card is still in the CF slot. Then
remove the card from the PDA and re-insert it again.
Ans: Try to perform a soft reset for the PDA or reboot the
Laptop
Q: How to configure Microsoft Streets and Trips
2007/2006?
1. Connect the AmbiCom GPS-USB to your device.
2. Start Streets & Trips.
3. On the Tools menu, click “GPS Task Panel”.
4. In the GPS Task Panel, click “Configure GPS...”.
5. Click “Scan” to have Streets & Trips find the COM
port that has the GPS device connected.
6. Select the correct port and click “OK”.
7. In the GPS Task Panel, put a checkmark next to
“Start GPS tracking:”.
16

Q: How to configure DeLorme Street Atlas USA
2006.
1. Connect the AmbiCom GPS-USB to your device.
2. Start Streets Atlas 2006.
3. Click the “Options” icon from the top tool bar.
4. Click the “GPS Settings” tab in the Options menu.
5. Select “Generic NMEA” from the Device option
pull down menu.
6. Select the corresponding GPS–USB COM port from
the Port option pull down menu. (Refer to Page 4)
7. Click “OK” to use the setting.
8. Click the “GPS” tab from the bottom tool panel.
9. Click “Start GPS”.
4. Technical Support Help
Weekdays M-F: 9a.m - 6p.m. (Except holidays)
Phone: (408) 321 - 0822
Email: support@ambicom.com
17

5. Warranty - 1 Year Limited Warranty
As the original purchaser from AmbiCom Authorized
Reseller, you receive a 1 year limited warranty from
AmbiCom: This warranty gives you specific legal rights.
You may also have other rights that vary from state to
state.
1 Year Limited Warranty
AmbiCom, Inc. warrants its product to be free from
defects in materials and workmanship, under normal use
and service, for 1 year from the date of purchase from its
Authorized Reseller with proof of purchase.
USA/Canada
During the warranty period, AmbiCom will, at its option,
either repair or replace defective products with similar
parts and products. Should the product be identified as
defective, the end user is responsible for the cost of
sending the product to the place of purchase1 /
manufacturer2.
Outside USA/Canada
During the warranty period, AmbiCom will, at its option,
either repair or replace defective products with similar
parts and products. Should the product be identified as
defective, the end user is responsible for the cost of
sending the product to the place of purchase1 /
manufacturer2 and the cost of returning the product
to the end user.
18

Warranty Notice
Any replaced or repaired product has a ninety-day (90-
day) warranty or the remainder of the initial warranty
period, whichever is longer.
RMA number and Proof of Purchase are required for
all warranty service.
1if within store return policy period. Check with the store
policy.
2iif store return policy has expired or requesting for a
warranty service.
AmbiCom, Inc. shall not be responsible for any software,
firmware, information or memory data of customer
contained in, stored on, or integrated with any products
returned to AmbiCom, Inc. pursuant to any warranty.
Exclusion: The warranty on your products shall not apply
to defect or damages resulting from:
• Improper or inadequate handling or installation of
the product operation outside the environmental
specification for the products.
• Incidental, contingent, or consequential charges.
• Power spikes or other power related damage.
• Compatibility problems with any other software of
hardware products.
• Installation of any other software of hardware
products.
• Physical damage causes by misuse, misapplication
or negligence.
19

Warranty Limitations
The warranty set forth above is exclusive and no other
warranty, whether written or oral is expressed or implied.
AmbiCom, Inc. specifically disclaims the implied
warranties of merchantability and fitness for a particular
purpose.
AmbiCom, Inc. Also specifically disclaims any
responsibility for any incidental or consequential damages
that its products may cause. A buyer’s recourse shall be
strictly limited to those contained in this warranty. Some
states do not allow these limitations on the length of an
implied warranty, so the above limitations or exclusions
may not apply to you. However, any implied warranty or
merchantability of fitness for a particular purpose is for a
period of 1 year on this written warranty.
AmbiCom, Inc. reserves the right to change its warranty
policy without prior notice. Information provided in this
manual is subject to change without prior notice.
For last minute warranty changes that is not printed as
time of publishing, please contact support@ambicom.com.
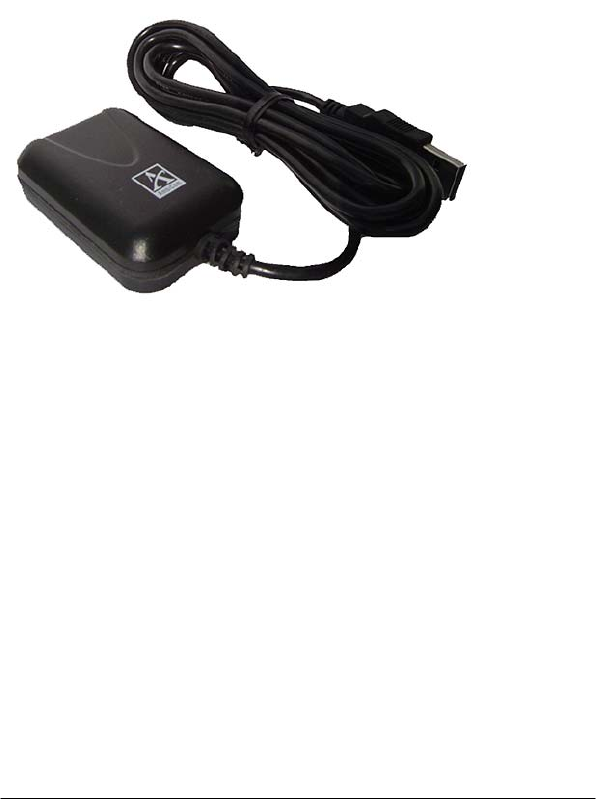
Battery
This product uses a Lithium-Ion battery. Please charge
fully before first use. THE LITHIUM-ION BATTERY
CONTAINED IN THE PRODUCT MUST BE RECYCLED
OR DISPOSED OF PROPERLY. USE ONLY WITH
SUPPLIED CHARGER(s) AND SUPPLIED AC ADAPTOR
FOR BATTERY CHARGING.
20

FCC
This equipment has been tested and found to comply with
the limits for a Class B digital device, pursuant to Part 15
of the FCC Rules. These limits are designed to provide
reasonable protection against harmful interference in a
residential installation.
This equipment complies with FCC RF radiation exposure
limits set forth for an uncontrolled environment. This
equipment should be installed and operated with a
minimum distance of 20cm between the radiator and your
body. This equipment generates, uses and can radiate
radio frequency energy and, if not installed and used in
accordance with the instructions, may cause harmful
interference to radio communications. However, there is
no guarantee that interference will not occur in a
particular installation.
If this equipment does cause harmful interference to radio
or television reception, which can be determined by
turning the equipment off and on, the user is encouraged
to try to correct the interference by one or more of the
following measures:
• Reorient or relocate the receiving antenna.
• Increase the separation between the equipment
and receiver.
• Connect the equipment into an outlet on a circuit
different from that to which the receiver is
connected.
• Consult the dealer or an experienced radio/TV
technician for help.
21

Any changes or modifications not expressly approved by
the grantee of this device could void the user’s authority
to operate the equipment.
22

MEMO
23

Rev5.5
24
