Amcrest Technologies ATR-22 Walkie Talkie User Manual
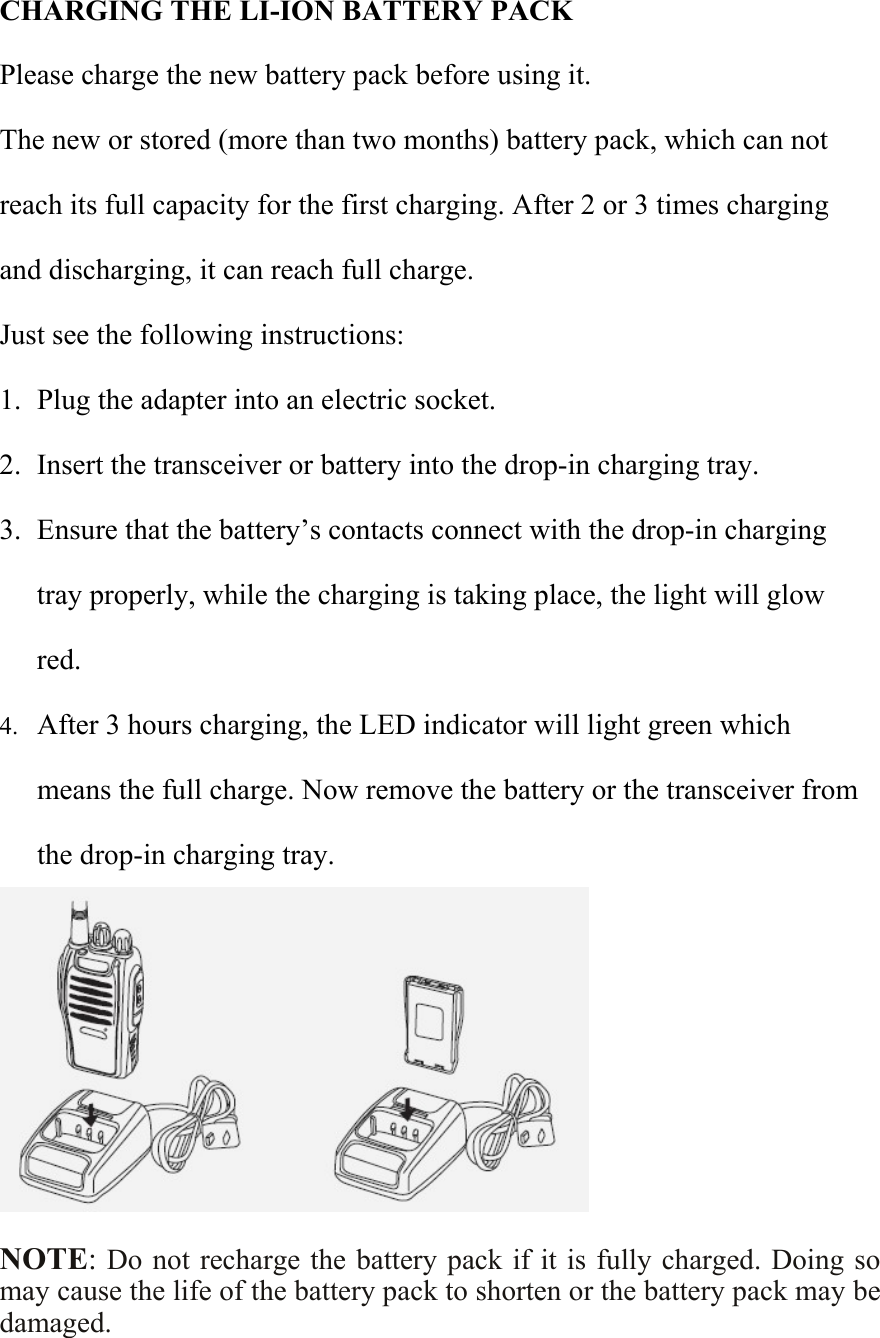
Amcrest Technologies LLC Walkie Talkie
UserManual.wiki
>
Amcrest Technologies
>
ATR 22 User Manual
User Manual
Navigation menu
Upload a User Manual
Namespaces
Wiki Guide
HTML
PDF
Info
Views
User Manual
Discussion / Help
Navigation
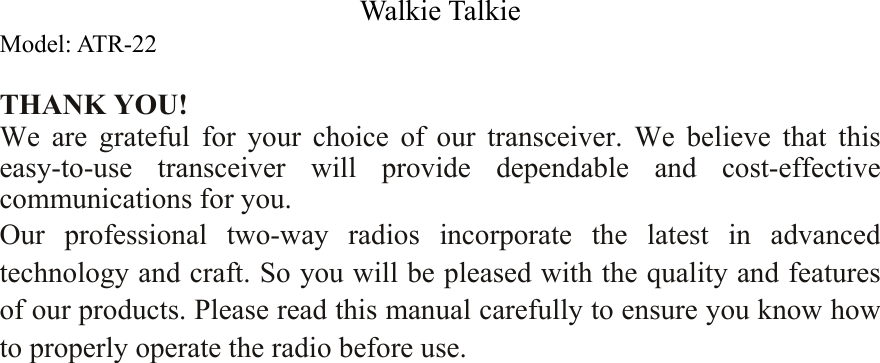


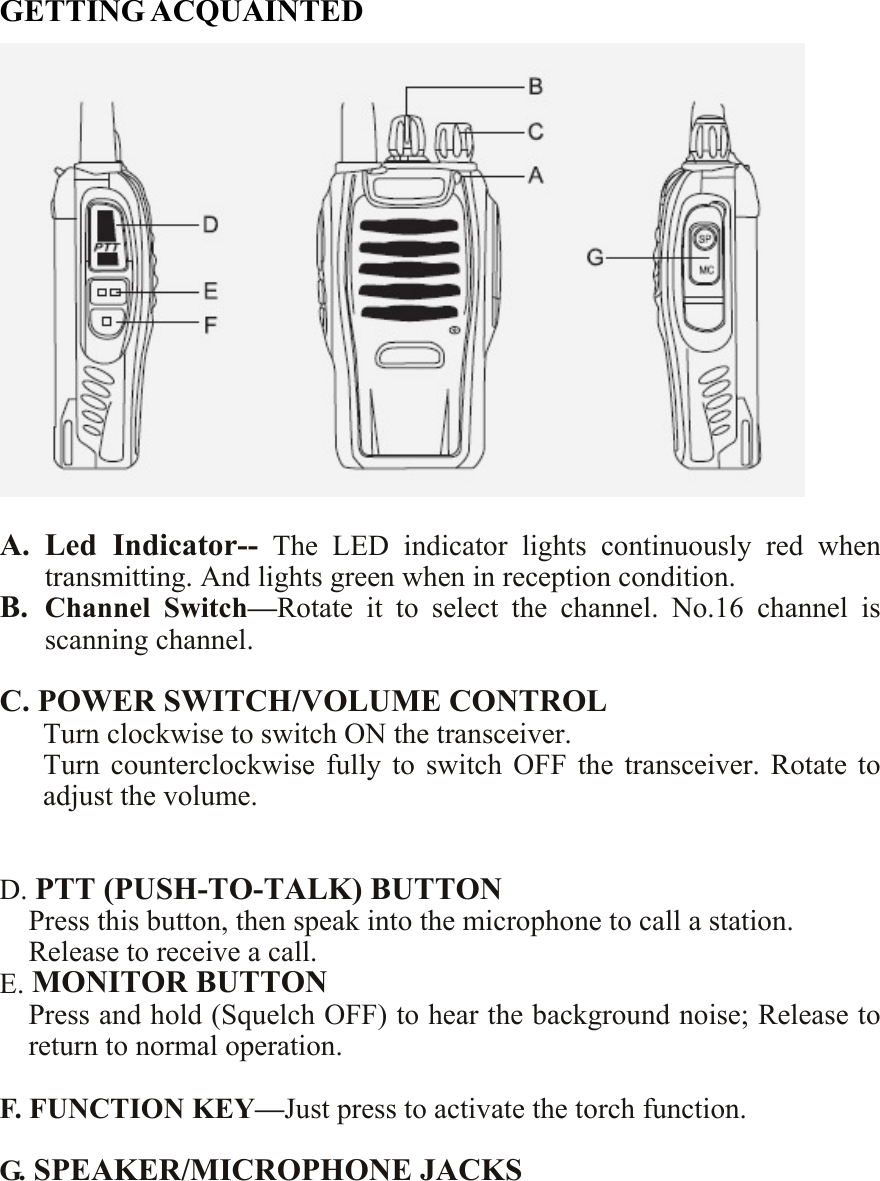
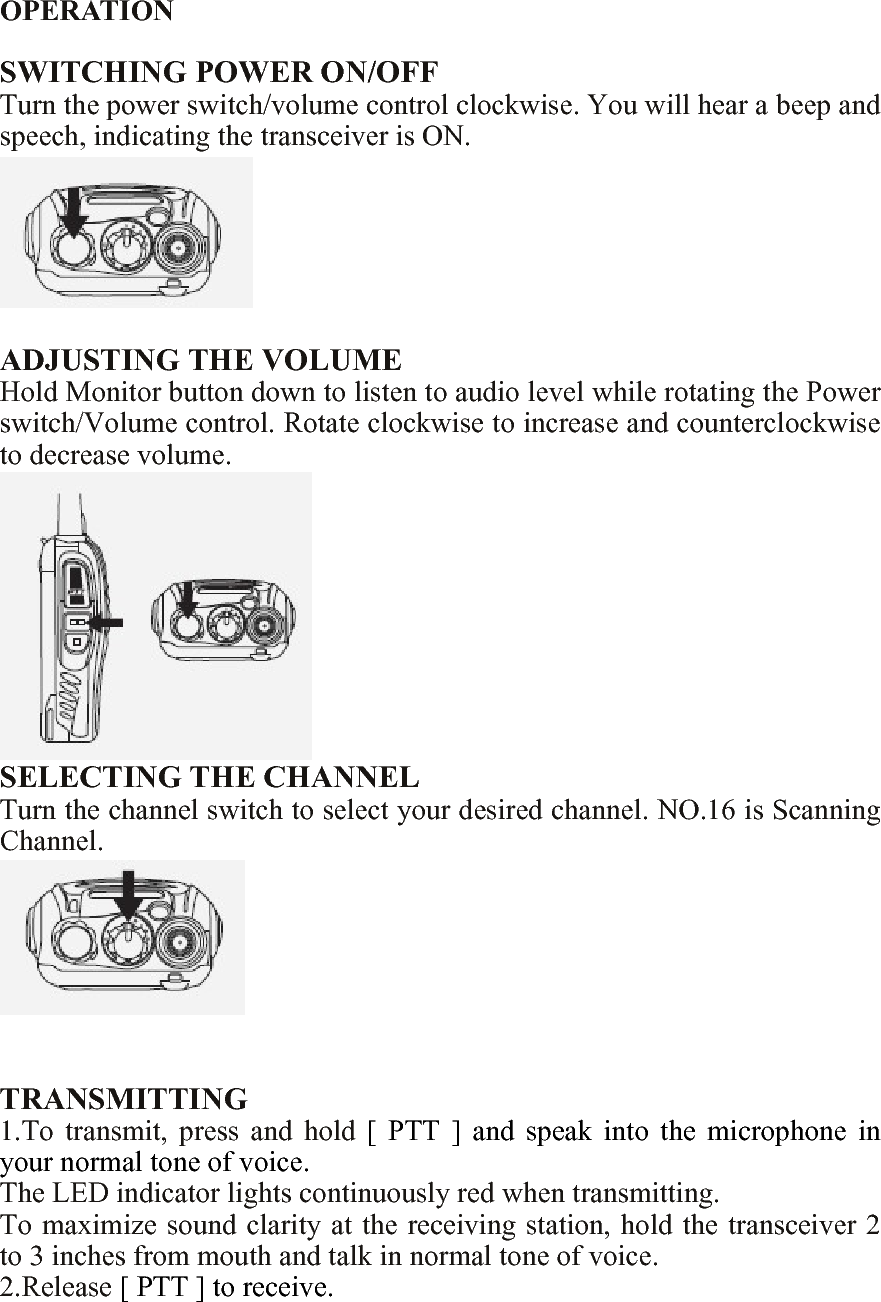
![OPERATION SWITCHING POWER ON/OFF Turn the power switch/volume control clockwise. You will hear a beep and speech, indicating the transceiver is ON. ADJUSTING THE VOLUME Hold Monitor button down to listen to audio level while rotating the Power switch/Volume control. Rotate clockwise to increase and counterclockwise to decrease volume. SELECTING THE CHANNEL Turn the channel switch to select your desired channel. NO.16 is Scanning Channel. TRANSMITTING 1.To transmit, press and hold [ PTT ] and speak into the microphone in your normal tone of voice. The LED indicator lights continuously red when transmitting. To maximize sound clarity at the receiving station, hold the transceiver 2 to 3 inches from mouth and talk in normal tone of voice. 2.Release [ PTT ] to receive.](https://usermanual.wiki/Amcrest-Technologies/ATR-22/User-Guide-3083586-Page-9.png)
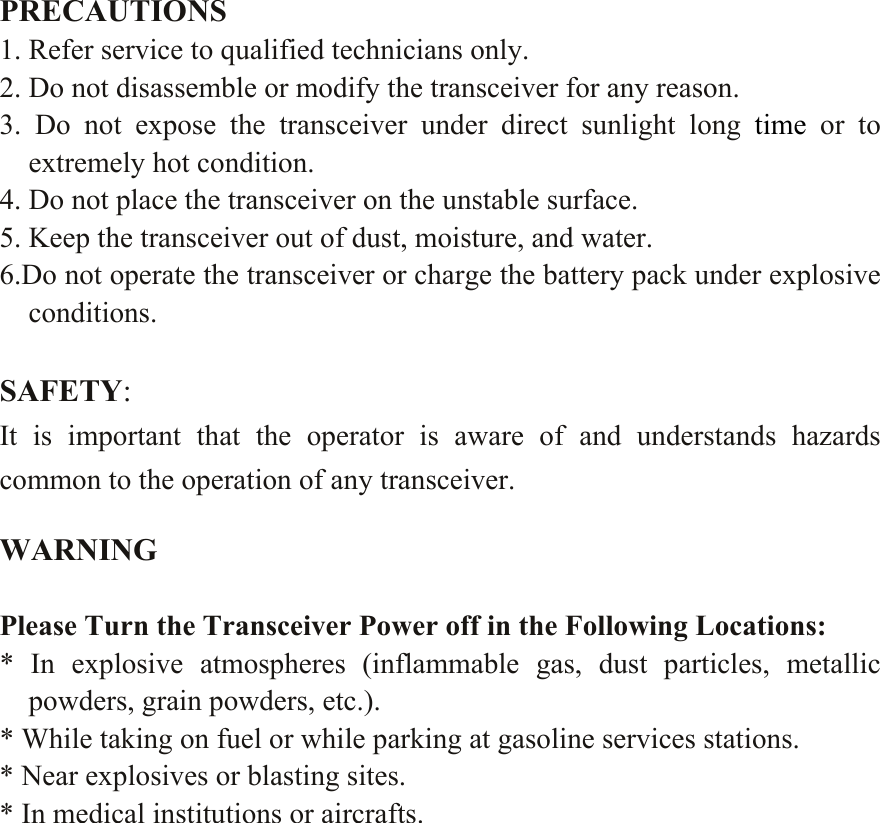
![have begun speaking into the microphone. When you operate the VOX function, you must use an optional headset with microphone. 1.When operating the VOX function, be sure to set the VOX Gain level which allows the transceiver to recognize the sound levels. 2.If the microphone is too sensitive, the transceiver will begin transmitting when there is noise in the background. 3.If it is not sensitive enough, it will not pick up your voice when you begin speaking. Be sure to adjust the VOX Gain level to an appropriate sensitivity to allow smooth transmission. On channel 1-5, press and hold the MONI and PTT, then switch on the transceiver, thus to activate the VOX functions ON/OFF. EMERGENCY ALARM On channel 11, press and hold the PTT and MONI, then switch the transceiver on, thus to activate the emergency alarm function ON/OFF. Also it can be set with program software. If the function is OFF, the other transceiver receives the signal, it is not able to alarm. Battery Saver The battery saver function will decrease the amount of power used when a signal is not being received and no operations are being performed(no keys are being pressed, and no switches are being turned). While the channel is not busy and no operation is performed for more than 10 seconds, Battery Saver turns ON. When a signal is received or an operation is performed, Battery Saver turns OFF. BATTERY LOW ALERT Battery Low Alert reminds you of recharging. When the battery power is very low, an alert tone will sound and the LED indicator will blink red. Please recharge or replace the battery pack. MONITOR When you are receiving and no signals present, the squelch function can mute the speaker, so you can not hear the background noise. If you want to switch the squelch function OFF, press and hold [MONI] button. It is very helpful when you want to adjust the volume level and receive the weak signals.](https://usermanual.wiki/Amcrest-Technologies/ATR-22/User-Guide-3083586-Page-12.png)