Amigo Technology AME-CA31B 56K BLUETOOTH MODEM User Manual V
Amigo Technology Inc. 56K BLUETOOTH MODEM V
USERS MANUAL
56K Bluetooth Modem
User Manual
Copyright
Copyright 2003 by this company. All rights reserved. No part of this publication
may be reproduced, transmitted, transcribed, stored in a retrieval system, or
translated into any language or computer language, in any form or by any
means, electronic, mechanical, magnetic, optical, chemical, manual or
otherwise, without the prior written permission of this company.
Disclaimer
This company makes no representations or warranties, either expressed or
implied, with respect to the contents hereof and specifically disclaims any
warranties, merchantability or fitness for any particular purpose. Any software
described in this manual is sold or licensed "as is". Should the programs prove
defective following their purchase, the buyer (and not this company, its
distributor, or its dealer) assumes the entire cost of all necessary servicing,
repair, and any incidental or consequential damages resulting from any defect
in the software. Further, this company reserves the right to revise this
publication and to make changes from time to time in the contents hereof
without obligation to notify any person of such revision or changes.
All brand and product names mentioned in this manual are trademarks and/or
registered trademarks of their respective holders.
1
Regulatory Statements
FCC Notice
This equipment has been tested and found to comply with the limits for a Class
B digital device, pursuant to Part 15 of FCC Rules. These limits are designed
to provide reasonable protection against harmful interference in a residential
installation. This equipment generates, uses, and can radiate radio frequency
energy and, if not installed and used in accordance with the instructions, may
cause harmful interference to radio communications. However, there is no
guarantee that interference will not occur in a particular installation. If this
equipment does cause harmful interference to radio or television reception,
which can be determined by turning the equipment off and on, the user is
encouraged to try to correct the interference by one or more of the following
measures:
1. Reorient or relocate the receiving antenna.
2. Increase the separation between the equipment and receiver.
3. Connect the equipment into an outlet on a circuit different from that
to which the receiver is connected.
4. Consult the dealer or an experienced radio/television technician for
help.
Changes or modifications not expressly approved by the party responsible for
compliance could void the user's authority to operate the equipment.
1) To comply with FCC RF exposure compliance requirements, a separation
distance of at least 20 cm must be maintained between the antenna of this
device and all persons.
2) This transmitter must not be co-located or operating in conjunction with any
other antenna or transmitter.
Notice 1:
The changes or modifications not expressly approved by the party responsible for
compliance could void the user's authority to operate the equipment.
2
FCC Requirement
This equipment complies with Part 68 of the FCC rules. On the base unit of this
equipment is a label that contains, among other information, the FCC
Registration Number and Ringer Equivalence Number (REN) for this
equipment. If requested, this information must be given to telephone company.
The REN is useful in determining the quantity of devices you may connect to
your telephone line and still have all of those devices ring when your telephone
number is called. In most, but not all area, the sum of the REN of all devices
connected to one line should not exceed five (5). To be certain of the number
of devices you may connect to your line, as determined by the REN, you
should contact your local telephone company to determine the maximum
number of REN for your calling area.
If your equipment causes harm to the telephone network, the telephone
company may discontinue your service temporarily. If possible, they will notify
you in advance. But if advance notice is not practical, you will be notified as
soon as possible. You will be informed of your right to file a complain with the
FCC. Your telephone company may make changes in its facilities, equipments,
operations or procedures that could affect the proper functioning of your
equipment. If they do, you will be notified in advance to give you an opportunity
to maintain uninterrupted telephone service.
The equipment may not be used on coin service by the telephone company.
Connection to party lines is subject to state tariffs.
3
Important Safety Instructions
1. Read these instructions carefully.
2. Follow all warnings and instructions marked on the product.
3. Unplug this product from the wall outlet before cleaning. Do not use liquid
cleaners or aerosol cleaners. Use a damp cloth for cleaning.
4. Do not use this product near water.
5. Do not place this product on an unstable cart, stand, or table. The product
may fall, causing serious damage to the product.
6. The openings should never be blocked by placing the product on a bed, sofa,
rug, or other similar surface. This product should never be placed near or
over a radiator or heat register, or in a built-in installation unless proper
ventilation provided.
7. This product should be operated from the type of power indicated on the
marking label. If you are not sure of the type of power available, consult your
dealer or local power company.
8. Do not allow anything to rest on the power cord. Do not locate this product
where persons will walk on the cord.
9. If an extension cord is used with this product, make sure that the total
ampere rating of the equipment plugged into the extension cord does not
exceed the extension cord ampere rating. Also, make sure that the total
rating of all products plugged into the wall outlet dose not exceed 15
amperes.
10. Do not attempt to service this product yourself, as opening or removing
covers may expose you to dangerous voltage points or other risks. Refer all
servicing to qualified service personnel.
4
About this Manual
Purpose
This user manual gives you all the information you need to install and operate
the modem properly.
Manual Structure
This user manual consists of four chapters:
Chapter 1 Getting Started
This chapter tells you what items are contained in the package and things that
you need to check before you proceed the installation.
Chapter 2 Modem Overview
This chapter gives you all the necessary information that you need to know
about the modem, such as its features and layout.
Chapter 3 Setting Up
This chapter contains step-by-step procedure on how to install the modem and
other necessary peripherals, configure the modem under Windows operating
system, and verify the modem installation.
Chapter 4 Communication Software
This chapter gives tips on how to install and use communication software.
For AT commands, please refer to “AT command.pdf” file stored in the
packaged CD.
5
Table of Contents
Chapter 1 Getting Started
1.1 Package Contents
1.2 System Requirements
Chapter 2 Modem Overview
2.1 Specifications
2.2 Front Panel
Chapter 3 Setting Up
3.1 ESD Precautions
3.2 Installing the Modem
3.3 Installing the Bluetooth Dongle
3.4 Starting Using the Bluetooth Device
3.5 Using the Bluetooth Places Explorer
3.6 Connecting the Bluetooth Modem
3.7 Uninstalling the Bluetooth Software
Chapter 4 Communication Software
4.1 Installing the Application Program
4.2 Tips on Configuring the Communication Software
6

Congratulations on your purchase of this Data/Fax/TAM modem. This
modem features the latest innovations in high-speed modem design, making
electronic communication faster and easier. This User Manual will show you
how to install and properly use the modem in order to take full advantage of
its features.
1.1 Package Contents
Make sure that you have the following items:
1. Bluetooth Modem
2. Bluetooth USB Dongle (option)
3. AC Power Adapter
4. User Manual
5. CD with Application Software
6. RJ-11 Telephone Cable
If any of the items is damaged or missing, contact your dealer immediately.
7
1.2 System Requirements
If this package comes with one Bluetooth USB Dongle, please make sure
that your laptop or PC meets the following minimum system requirements:
One available USB port
CD-ROM drive
The laptop or PC must have one of these operating systems, i.e.,
Microsoft Windows98 SE, Millennium, Windows 2000 and Windows
XP with USB 1.1 support
Penitum II 300 MHZ MMX-Compatible PC or Greater
At least 64MB hard disk space and memory
8

Before you proceed with the installation, it is necessary that you have
enough information about the modem. This chapter tells you all you need to
know about the modem.
2.1 Specifications
Modem Features:
Data Mode:
Line Speed: 300 ~ 56000bps
Standard Compatibility : ITU-T V.90, V.34, V.32,V.32bis,V.23, V.22bis,
V.21, and Bell 103, 212A
Error Correction: ITU-T V.42, MNP2-4
Data Compression: ITU-T V.44, V.42bis, MNP5
Flow Control: RTS/CTS, XON/XOFF
Comment Set: TIA/EIA 602 “AT” command set
Fax Mode:
Line Speed: 2400 ~ 14400bps
Standard Compatibility: ITU-T V.17, V.27 ter, V.29 and V.21 channel 2
Command Set: Class 1, 1.0, 2 and associated AT command sets
TAM Mode:
Digital Telephone answering machine (TAM); Voice mail system
Bluetooth Features:
Bluetooth Specification 1.1 compliant
Pico-net and scatter-net support
Up to 7 slaves supported
Class 1 Bluetooth type
Maximum data rates up to 723Kbps
Effective ranges up to 100 meters without interference
General Features
Line Interface: 2xRJ-11 jacks for line and telephone
DTE Interface: Bluetooth interface
9

2.2 Front Panel
The LED indicators located on the front panel show the modem’s status and
activity. The table below lists the function of each LED indicator:
Label Name Description
READY Ready Lights when modem’s power is on
OH Off Hook Lights when modem is dialing/on line
Link Link Lights when modem is in Bluetooth mode
RXD Receive data Lights when modem is receiving data
10

This chapter contains detailed instructions on how to install and configure the
modem and Bluetooth Dongle as well as how to verify if its installation is
correct. We recommend that you follow the steps accordingly to avoid future
problems.
3.1 ESD Precautions
Electrostatic discharge (ESD) can damage your processor, disk drives,
expansion boards, and other system components. Always observe the
following precautions before you install any system component.
1. Do not remove a component from its protective packaging until you are
ready to install it.
2. Wear a wrist grounding strap and attach it to a metal part of the system unit
before handling components. If a wrist strap is not available, maintain
contact with the system unit throughout any procedure requiring ESD
protection.
11
3.2 Installing the Modem
1. Plug the telephone cable into the LINE jack located at the back of the
modem.
2. Plug the other end of the telephone cable into a telephone wall jack.
3. Plug the AC adapter power cord into the AC 9V connector located at the
back of the modem.
4. Plug the transformer end of the adapter into a standard AC wall outlet.
5. To connect a telephone to the modem:
a. Plug the telephone to the modem’s PHONE jack.
b. Power on the Modem and lift the handset and listen for a dial tone to
check for a working connection.
NOTE: Make sure that your modem is turned off before you plug in the AC
adapter. Also check the voltage range in your area before plugging your
system into an outlet.
12
(You can skip 3.3-3.5 steps if you have ever installed one Bluetooth Dongle.)
3.3 Installing the Bluetooth Dongle
NOTE:
DO NOT plug the USB Dongle into an available USB port until you are prompted
during the installation process.
If you have connected the Bluetooth Dongle to your computer, please
remove it, cancel any hardware wizard that may show up, and start here.
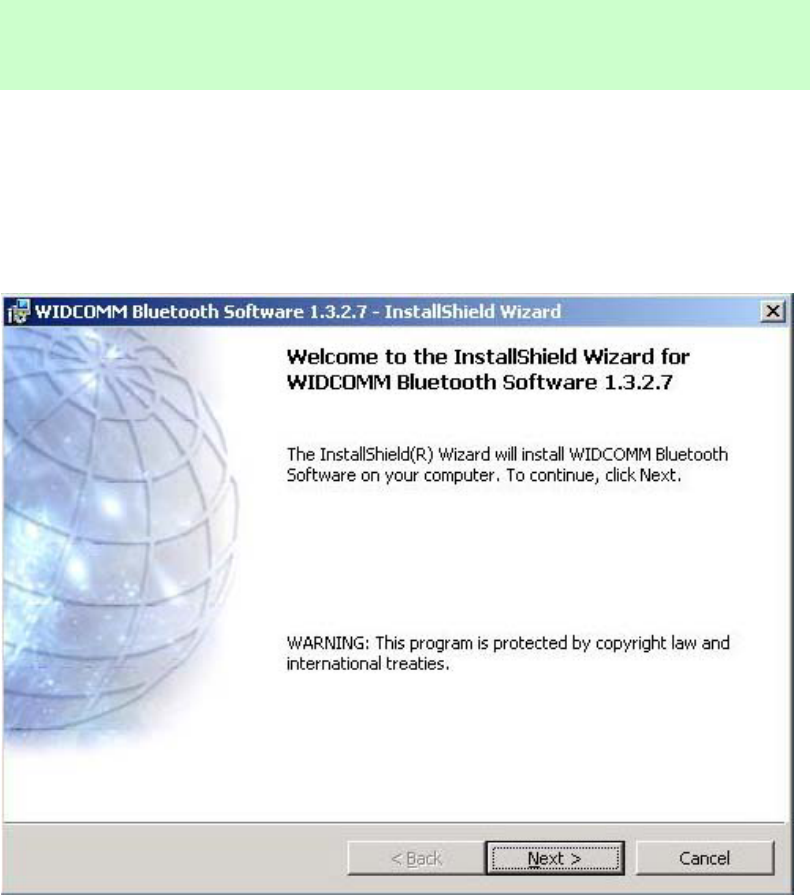
1. Close any open programs and insert the packaged CD into your CD-ROM
drive. Open Dongle folder and run setup.exe file in the CD.
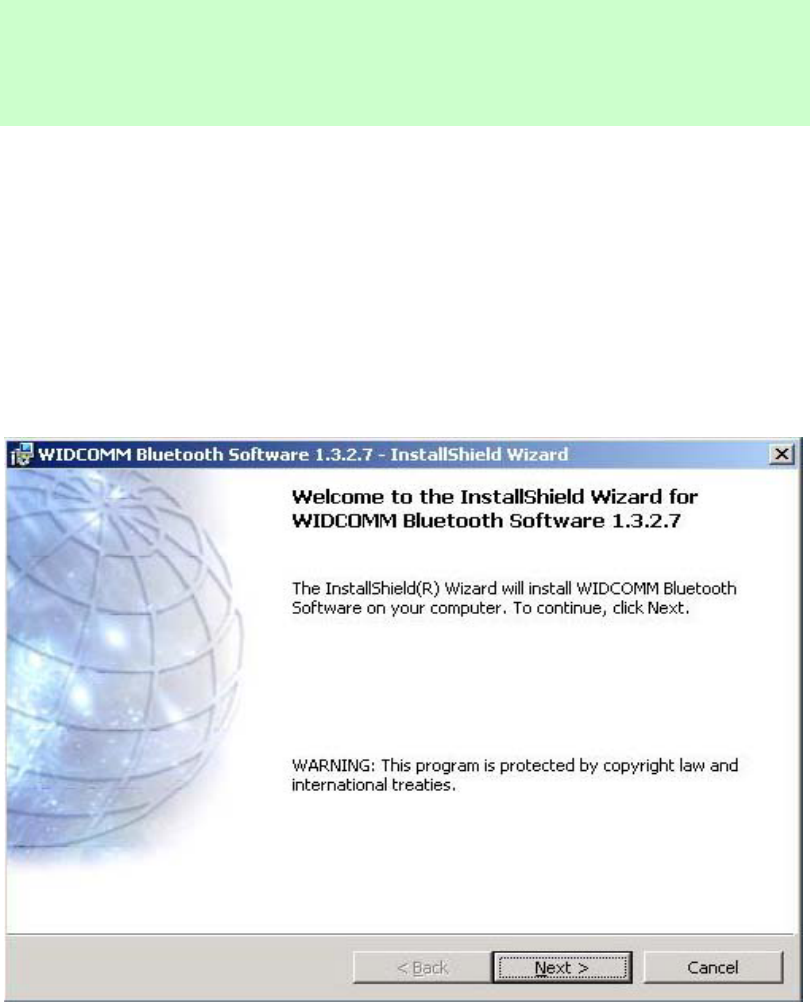
2. The Welcome screen informs you that the WIDCOMM Bluetooth Software
Setup program is ready to begin. Click on the Next button.
3. In the License Agreement screen, click on the radio button to the left of” I
accept the terms in the license agreement”. Click on the Next button.
13
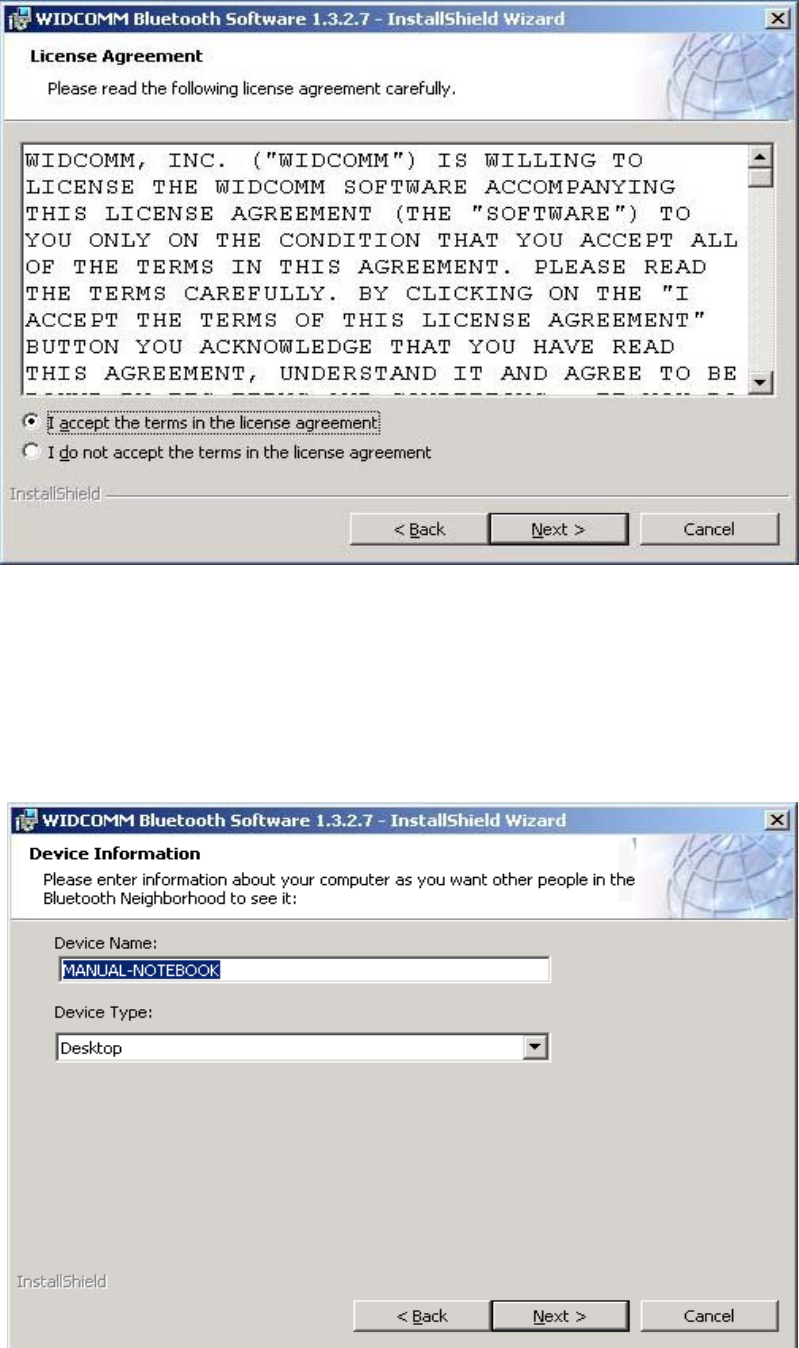
4. In the Device Information screen: (The screen won’t be displayed if you
re-installed this software.)
a. Enter a device name
b. Select a device type
c. Click on the Next button.
14
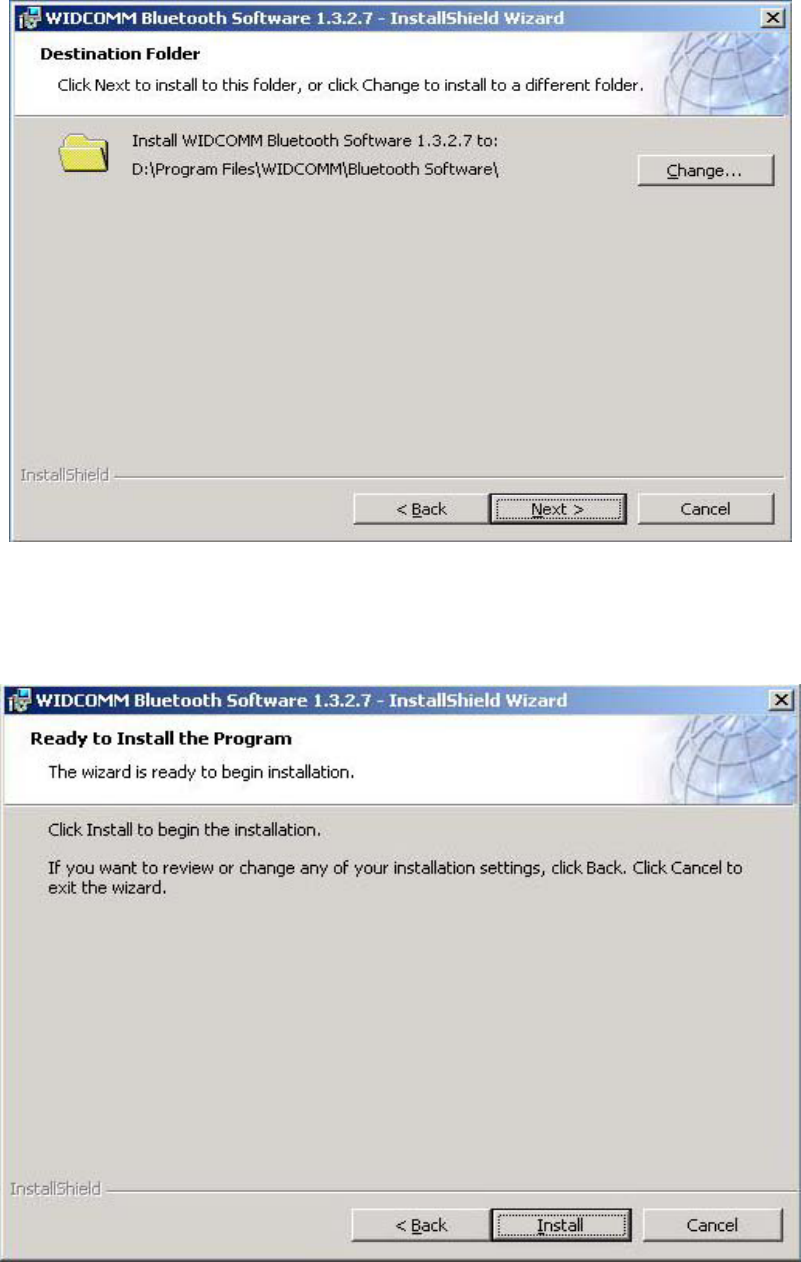
5. In the Destination Folder screen you are asked to confirm the Destination
Folder for the application software. If you would like to, you may change
the destination folder to another location as the directory.
6. The Ready to Install the Program screen informs you that the driver is
ready for installation. Click on the Install button to continue.
15
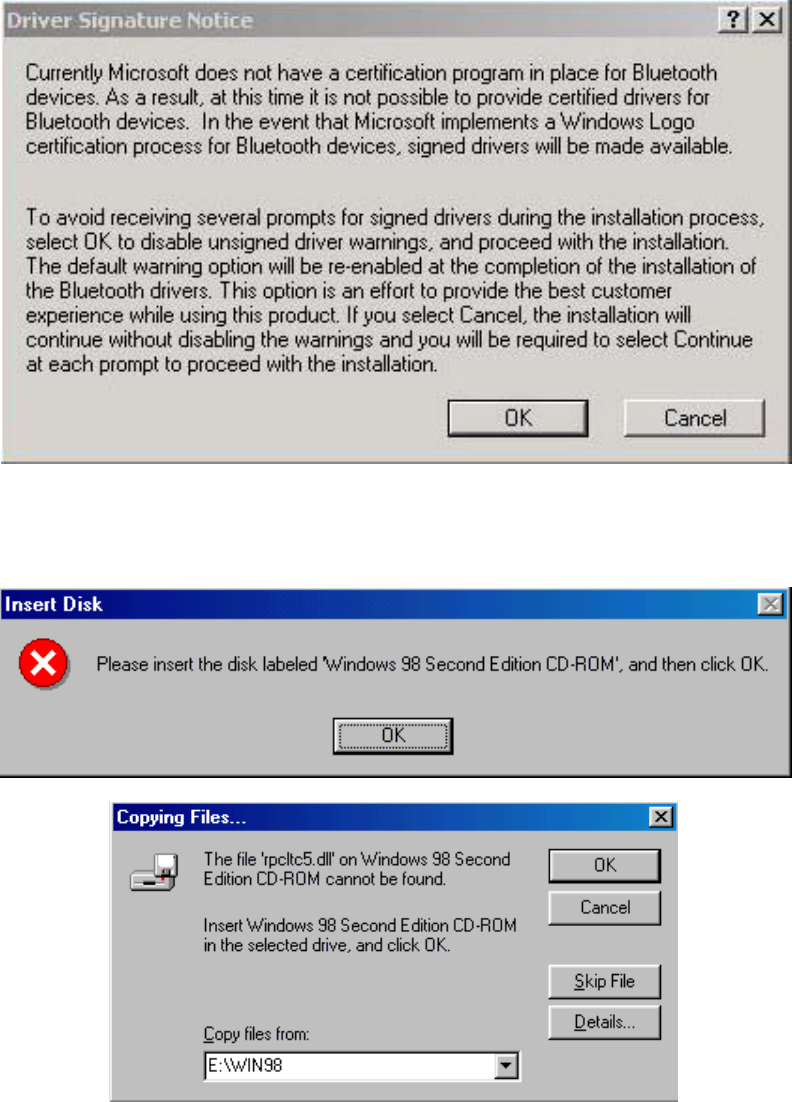
7. For Windows 2000/XP users, please click on OK button from the
following “Driver Signature Notice” dialog box to proceed with installation.
For Windows 98 Users, you will be asked to specify the directory of
Windows 98 source files path during installation. Please enter the location
of the Windows 98 setup files and follow the on-screen description.
8. Now, plug the Bluetooth Dongle into an available USB port firmly and click
OK to continue.
16
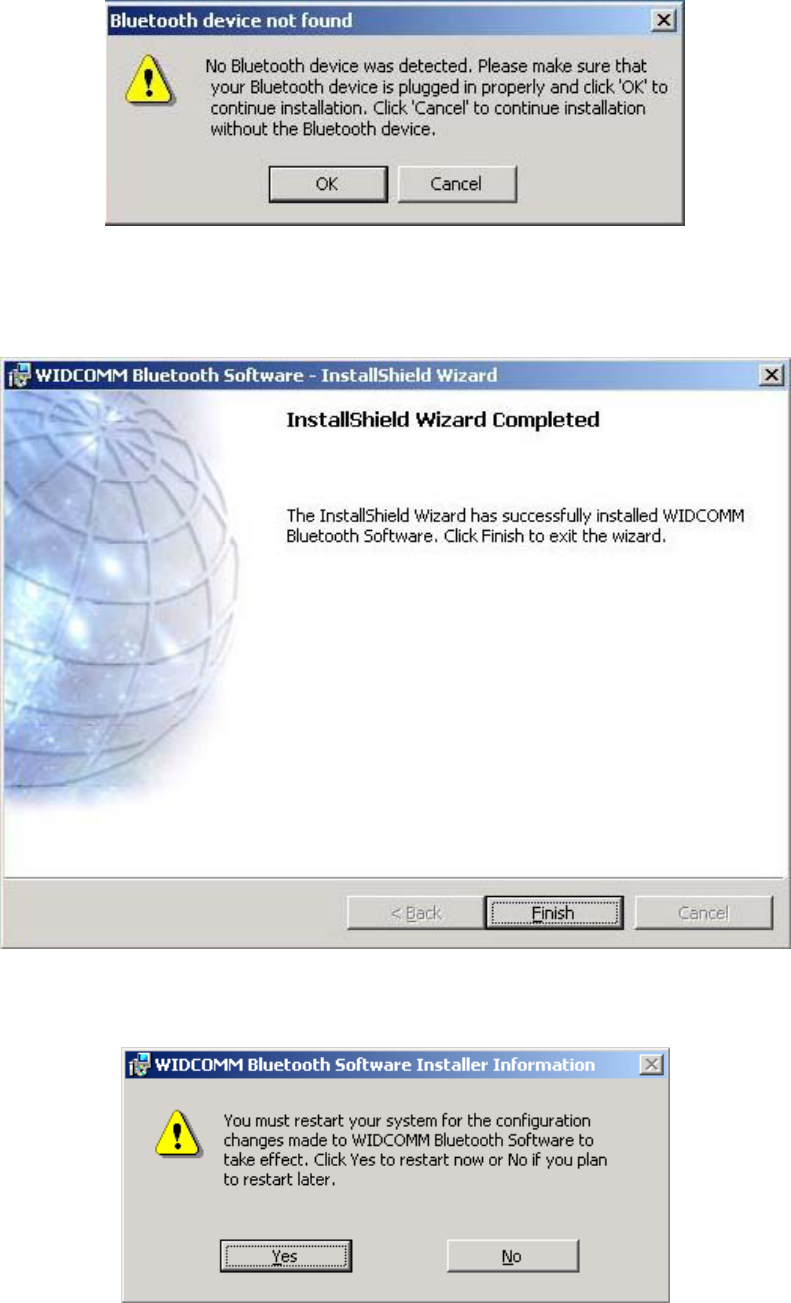
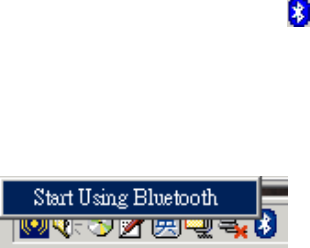
9. When the files have been copied, you will be presented with a screen
informing of its completion. Click Finish to finish the installation process.
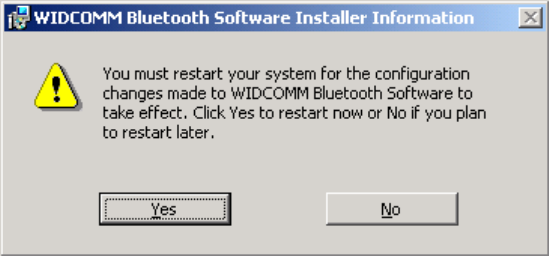
10. Click on Yes button to reboot your PC.
17
3.4 Starting Using the Bluetooth Device
After you have the Bluetooth software installed and reboot your PC for the
first time, please right-click on the Bluetooth icon on the system tray
and highlight Start Using Bluetooth. This wizard will help you quickly
configure your Bluetooth Dongle step by step. If you don’t want to follow the
wizard, just click Start Using Bluetooth and configure Bluetooth Dongle
later.
18
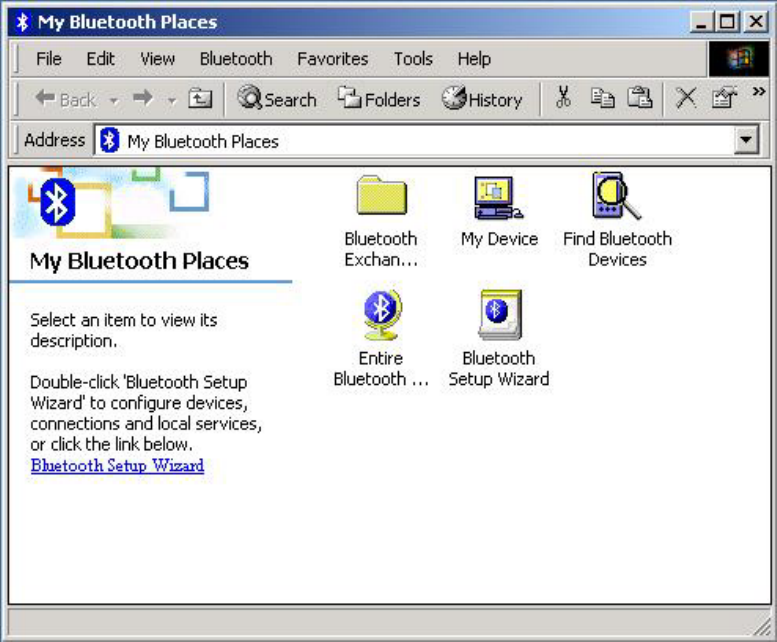
3.5 Using the Bluetooth Places Explorer
You can double click on the Bluetooth icon in the Windows system tray or
double click on the My Bluetooth Places on your desktop to launch the My
Bluetooth Places explorer.
Bluetooth Setup Wizard: Double click this icon and the setup wizard
screen will be displayed. It allows you to configure devices,
connections and local services.
Entire Bluetooth Neighborhood: Double click this icon to display
Bluetooth devices that have been found.
Find Bluetooth Devices: Double click this icon; the system will start
to look for Bluetooth devices in the vicinity and displays the devices it
finds in the right pane of My Bluetooth Places.
My Device: Double click this icon to display all available services on
this computer.
Bluetooth Exchange Folder: Contains files and folders visible to
remote Bluetooth devices. Double click it to browse the directory on
your system.
19

3.6 Connecting the Bluetooth Modem
1. Double click Find Bluetooth Devices; the Bluetooth Dongle will start to
search the Bluetooth Modem.
2. The Bluetooth Modem will be found. Right click it and select Pair Device.
20
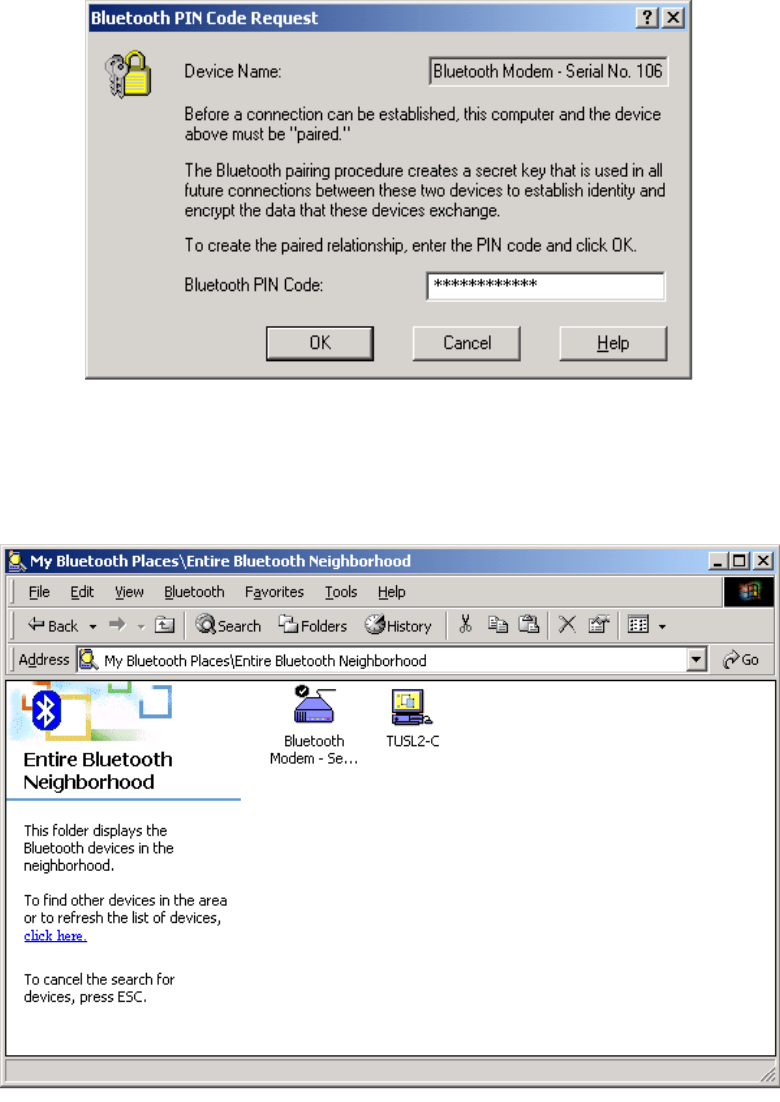
3. Enter PIN Code which you can find it on the back case of the modem.
4. While the pairing process is successful, the Bluetooth Modem icon will
have a tick mark. Double click the icon to display the remote modem’s
functions.
5. You can now use dial-up or fax function of this modem respectively.
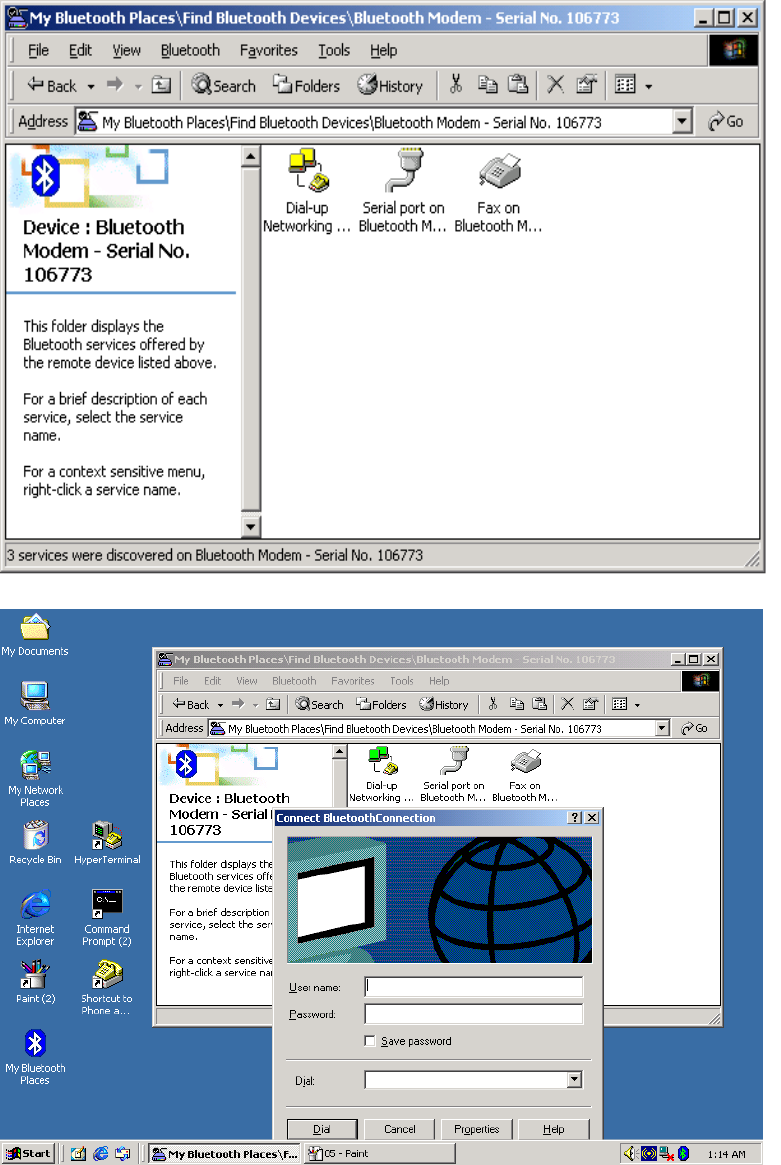
Dial-up
:
Double click Dial-up Networking and enter User name,
Password and Dialing number to start Internet connection.
21
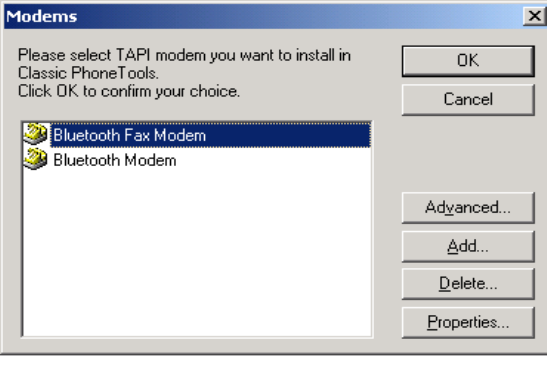
Fax
:
Double click FAX on Bluetooth Modem to start the modem’s
fax function. The Fax on Bluetooth Modem icon will change color into
green when it is successfully connected. Open BVRP folder and run
setup.exe file in the CD. Select Bluetooth Fax Modem. Click OK to
22
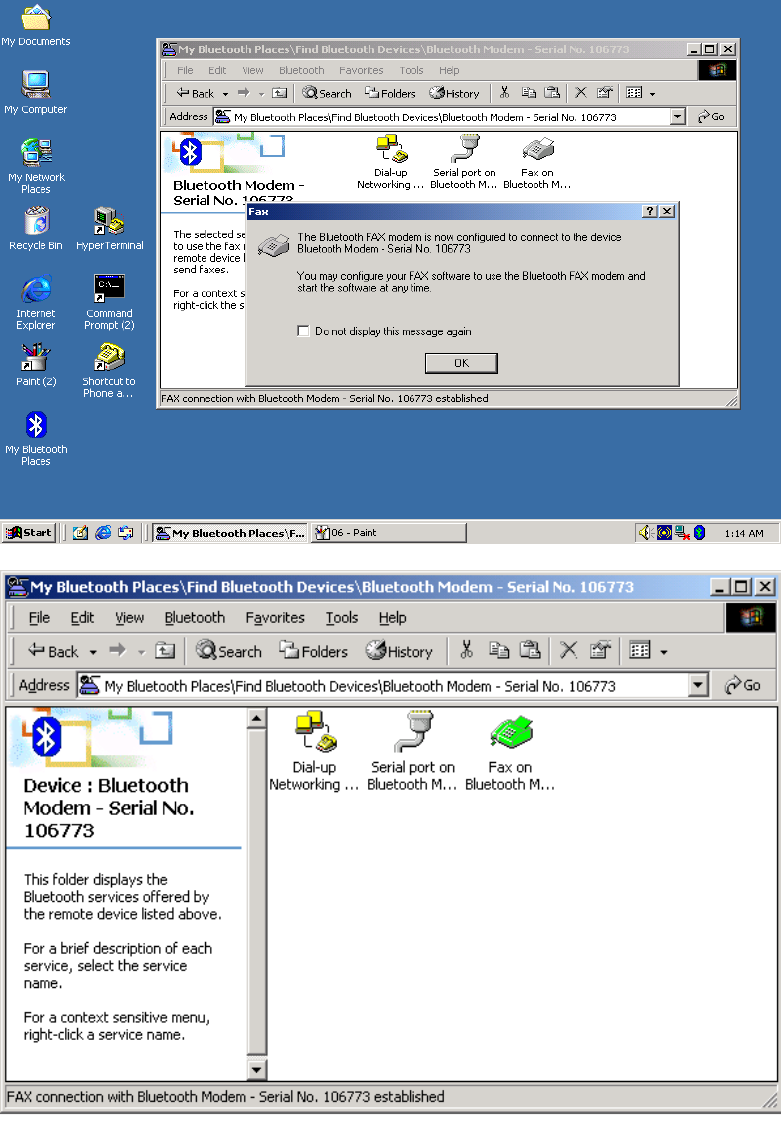
start the fax function.
23
24
3.7 Uninstalling the Bluetooth software
If you are installing the Bluetooth software for the first time, please skip this
section. Any previous versions of the Bluetooth software must be uninstalled
before installing an upgraded version.
NOTE:
Before uninstalling, please unplug the Bluetooth Dongle first.
1. From your PC desktop, click Start -> Settings -> Control Panel ->
Add/Remove Programs -> WIDCOMM Bluetooth Software -> Remove
2. The screen will guide you to Modify, Repair or Remove the software. Click
on the Next button to continue.
3. Click on the Remove button from the “Remove the Program” screen.
25

4. When the software has been removed, click on the Finish button.
5. Click on the Yes button to reboot your PC.
26
27

This chapter gives you tips on how to configure your communication
software.
4.1 Installing the Application Program
To install the application program, simply insert the packaged CD into the
CD-ROM drive. Open BVRP folder and run setup.exe file in the CD. Follow
the instructions appears on the screen for the software installation. Refer to
the application program guide in the CD for more details.
If you want to use other communication program, please refer to section 4.2
for more details.
28

4.2 Tips on Configuring the Communication Software
This modem uses the most up-to-date industry and commercially popular
standards to ensure functional compatibility with most communication
software. During initial setup of the communication software, it will normally
prompt you to define the type of fax/modem that you are currently using. The
following list guides you on how to select the proper device type.
The device type only defines the protocol by which your software
will communicate with your fax/modem and does not set nor limit
the speed.
1. For the Baud rate, choose any speed between 38,400 to 115,200. Your
fax/modem will automatically adjust to the optimum transmission speed
after successfully connecting with a remote fax/modem.
2. There are three flow controls: None, Hardware (CTS/RTS), and Software
(XON/XOFF). Set your software to use either Hardware or Software flow
control. If “None” is selected, the communication software will not be able to
detect a buffer overflow and result in transmission errors.
3. For fax device type, choose TR29 Class 1.
4. For fax speed, choose automatic or fastest speed. Your fax/modem will
automatically adjust to the optimum transmission speed after successfully
connecting with a remote fax machine or another fax/modem.
5. Make sure that you have correctly set all the other parameters required by
the software to operate successfully.
6. Refer to your Communication software manual for details.
29