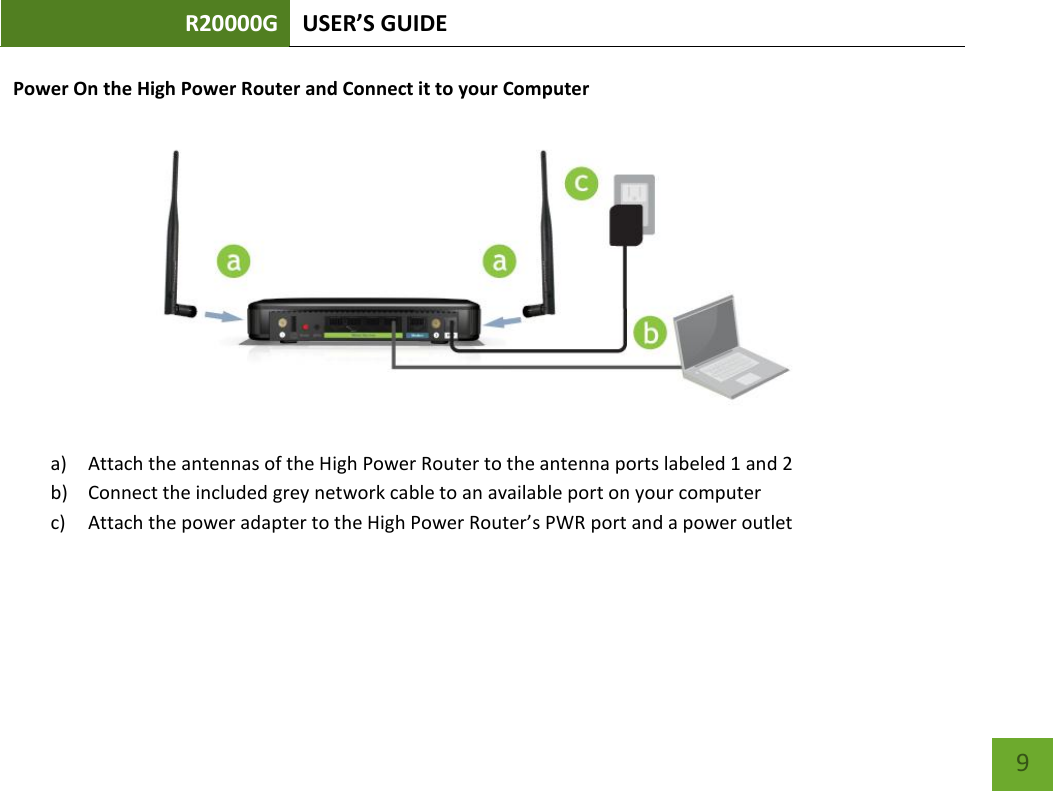
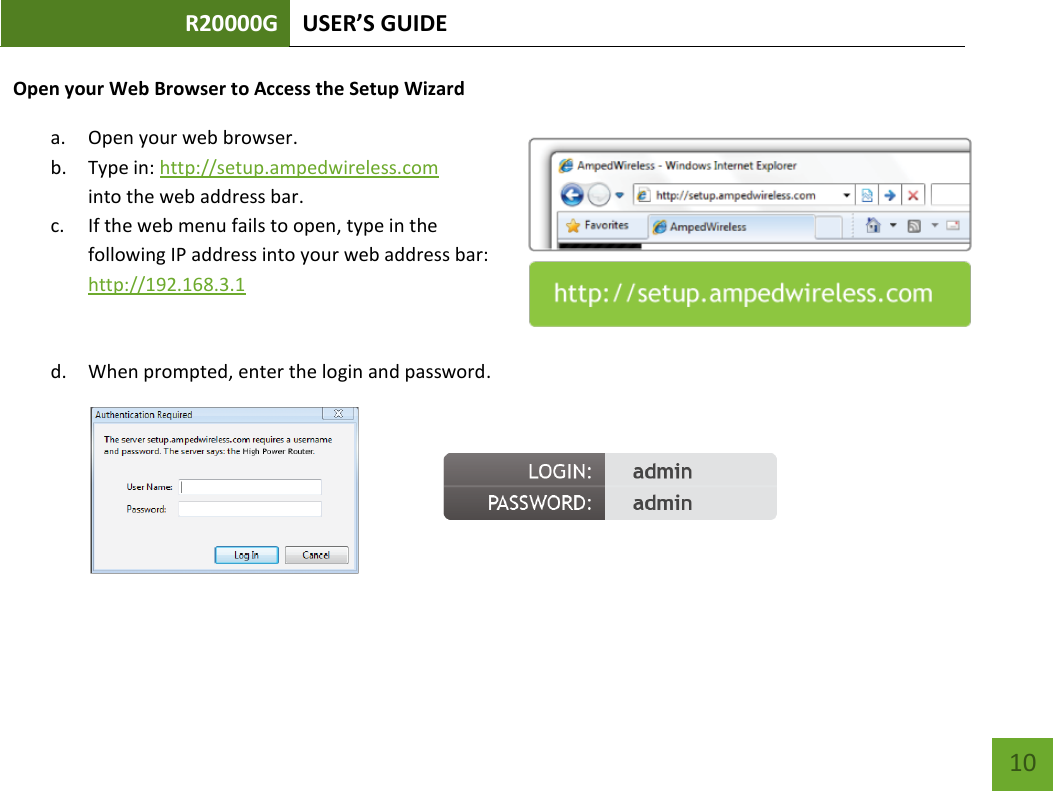
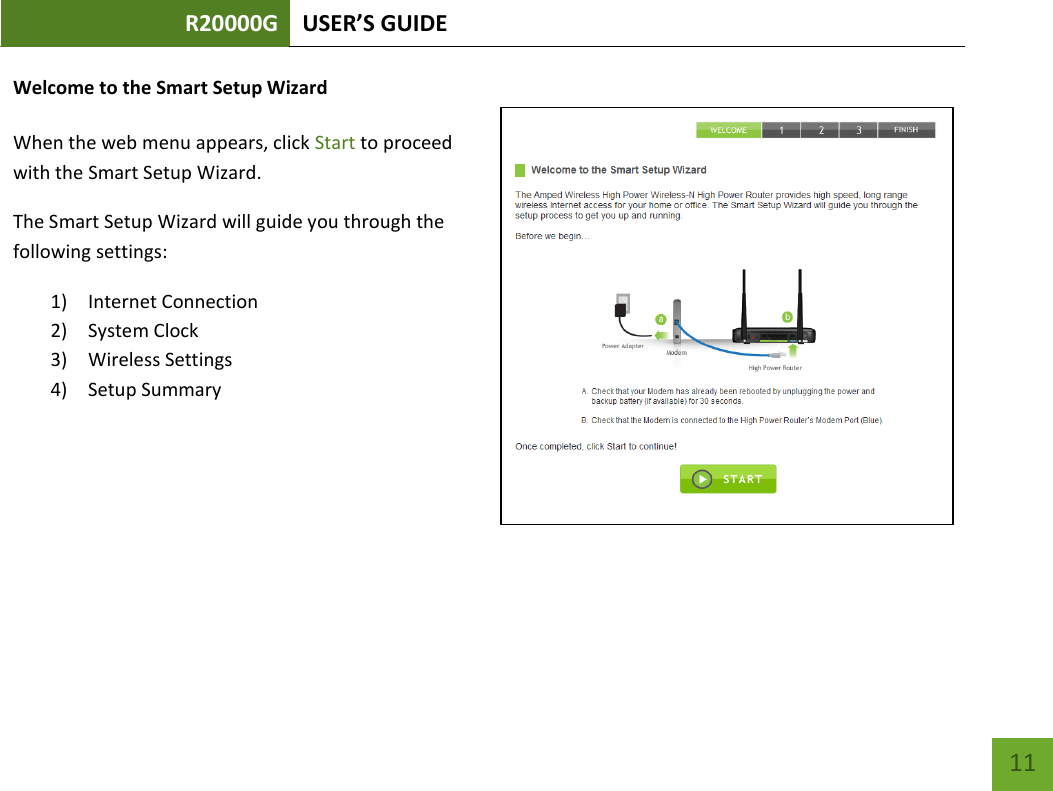
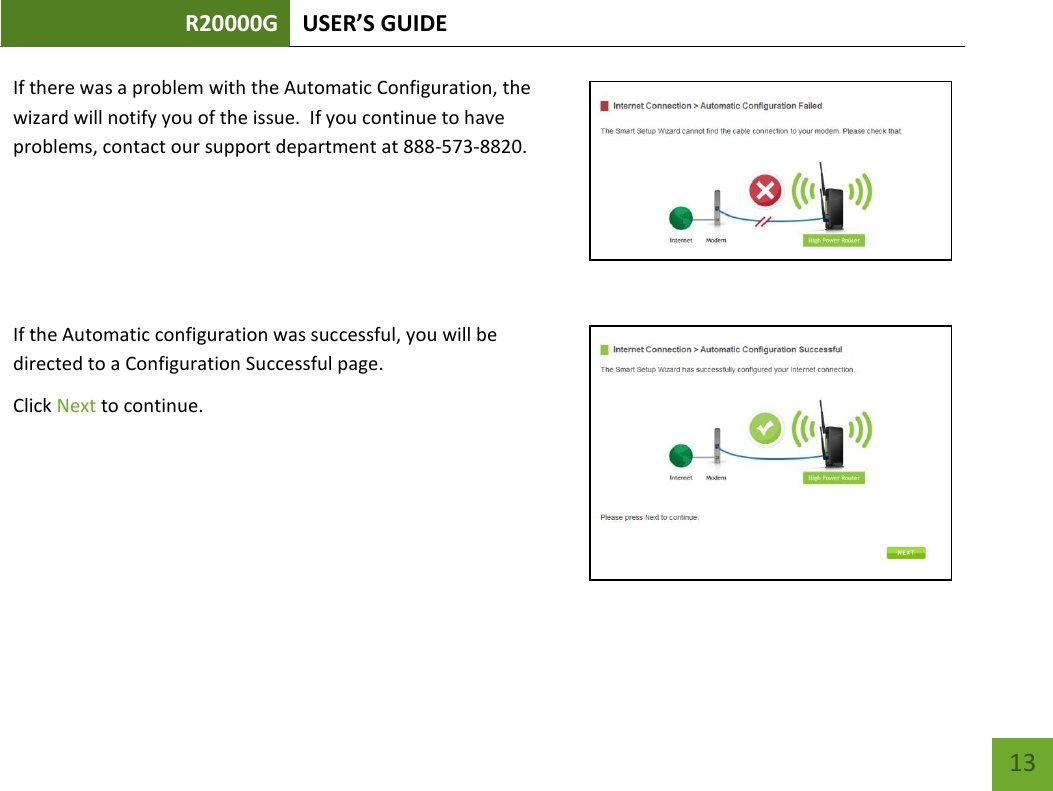
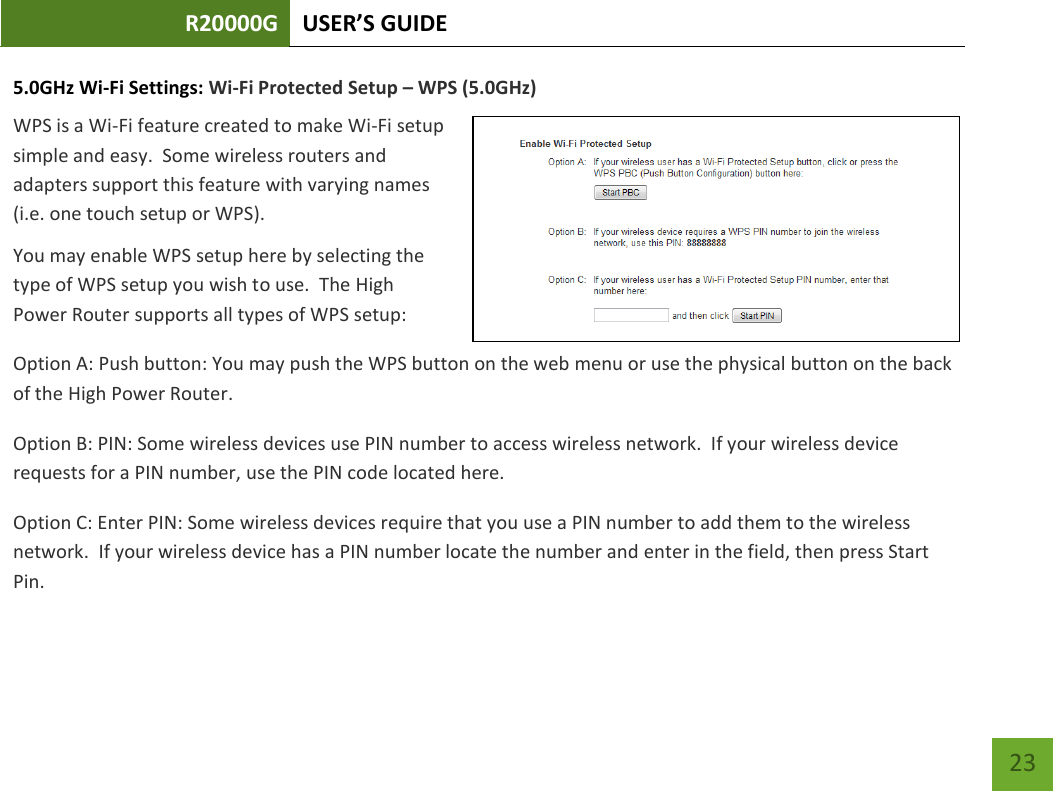
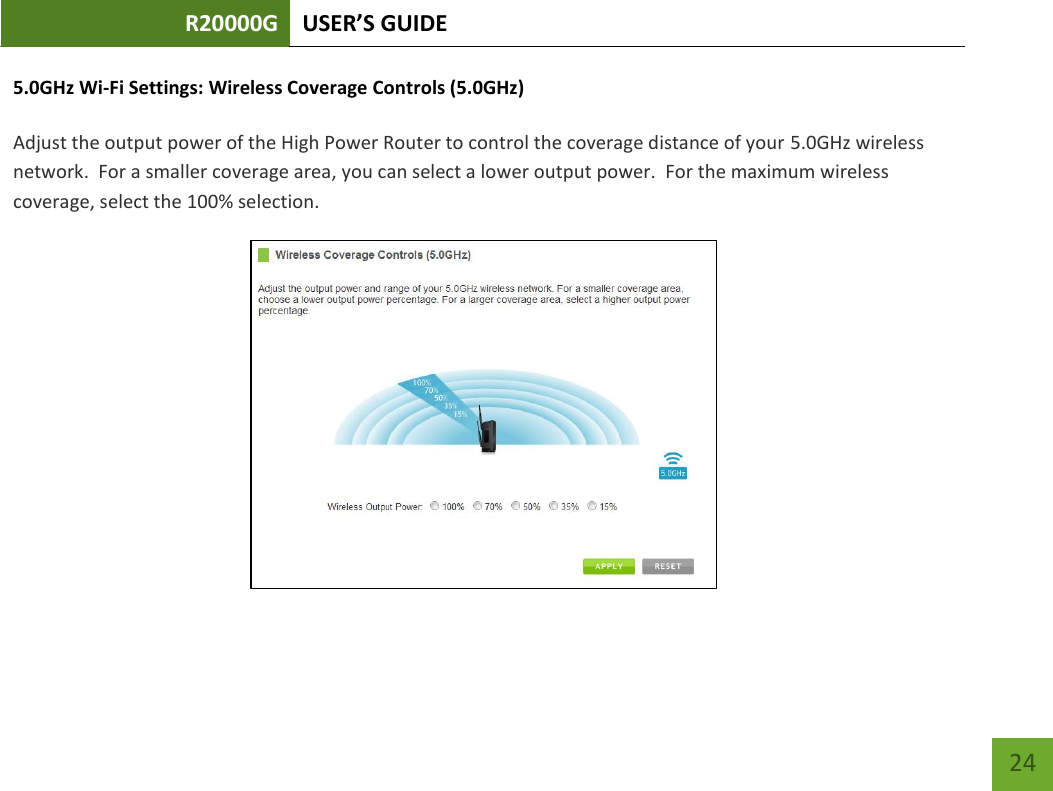
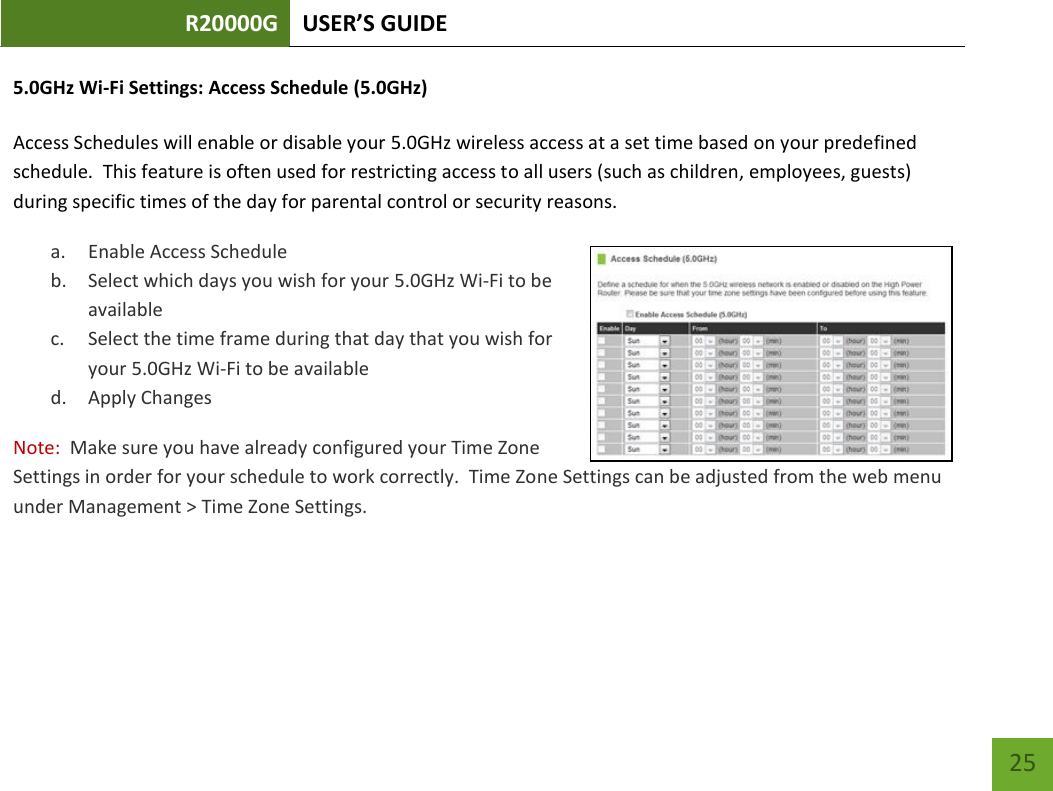
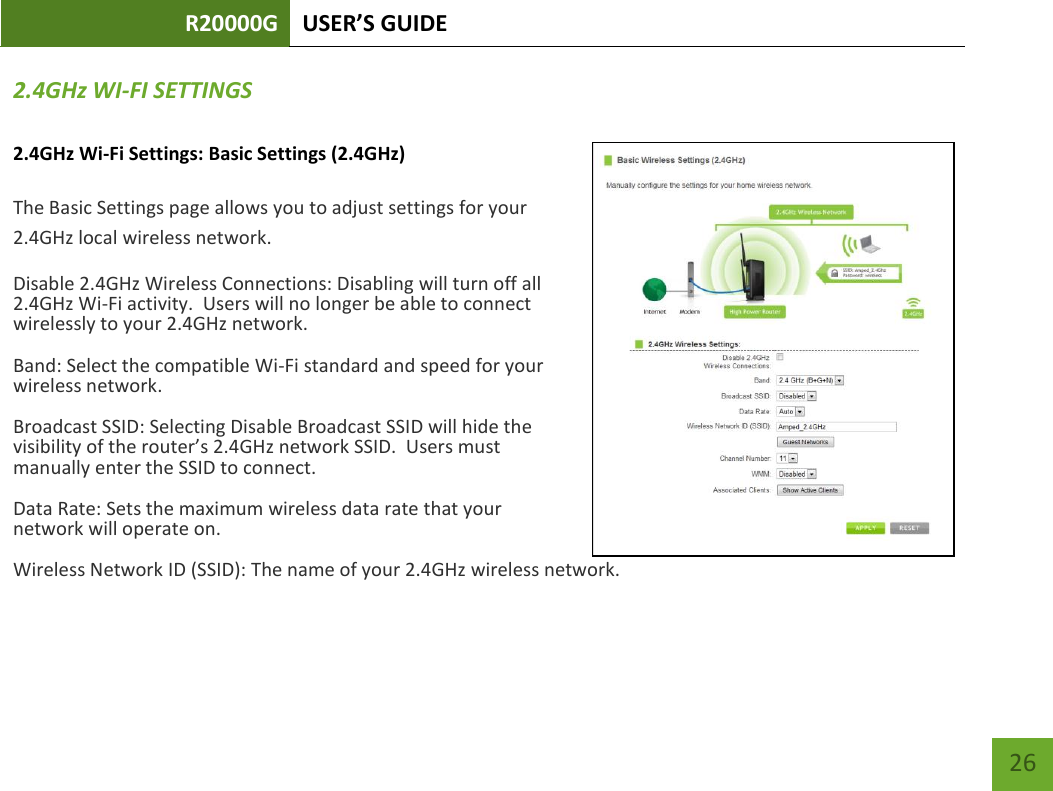
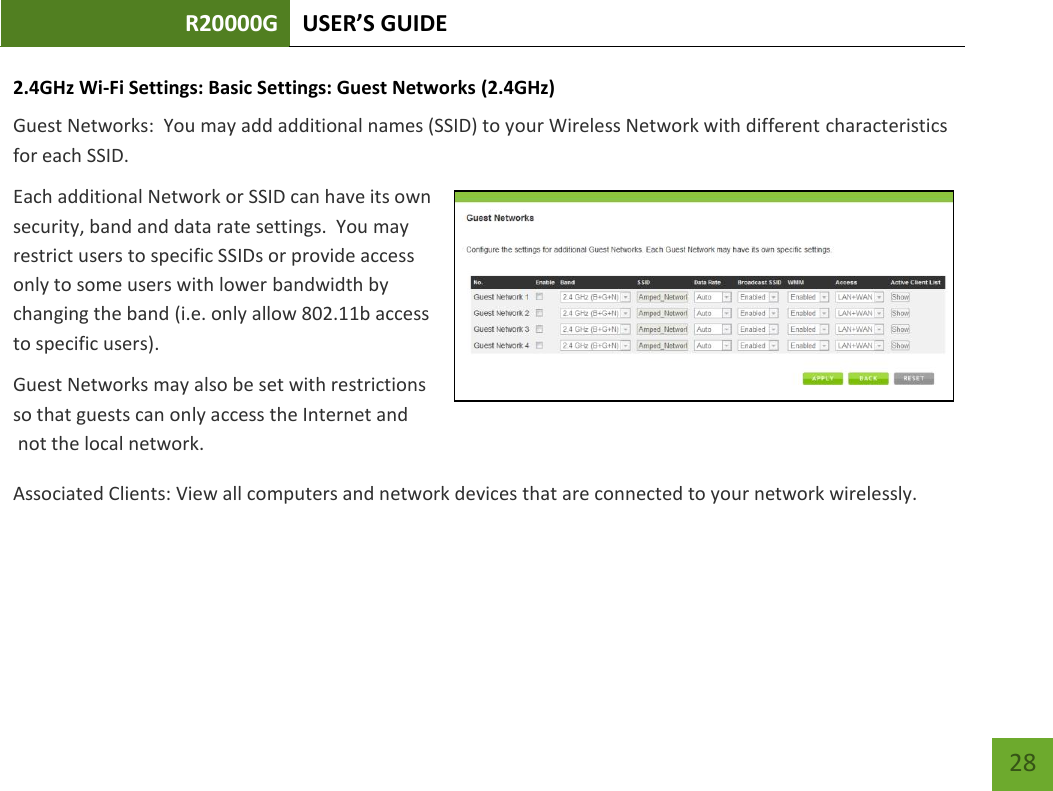
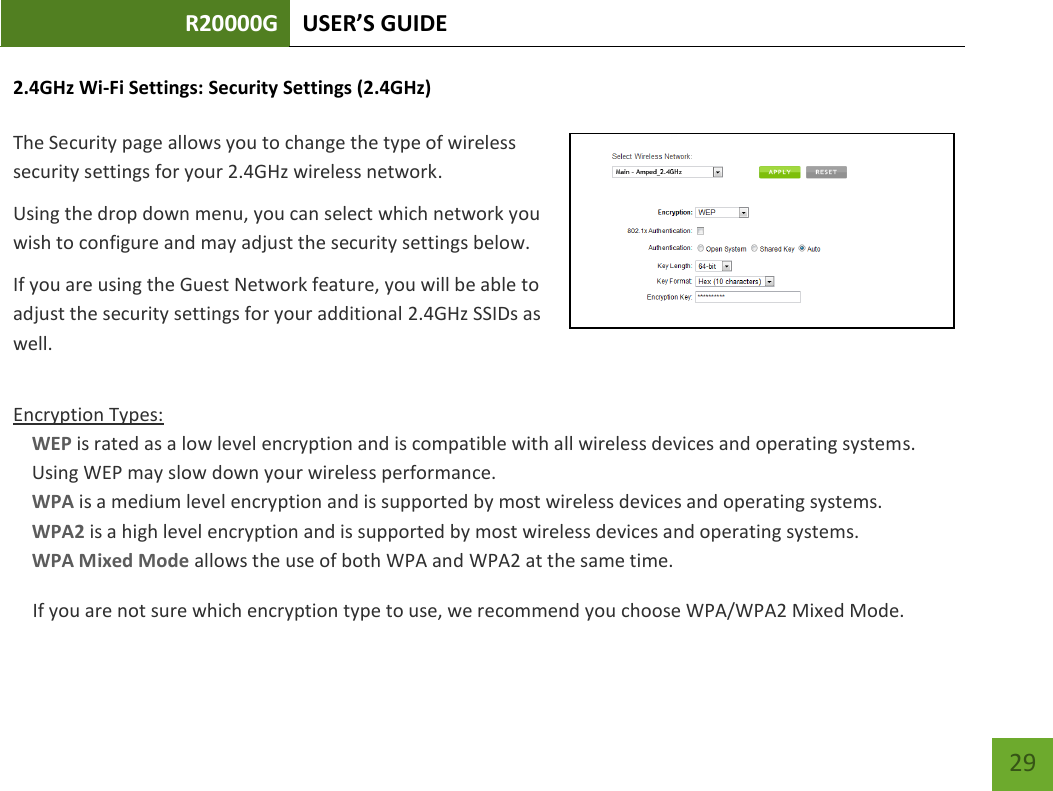
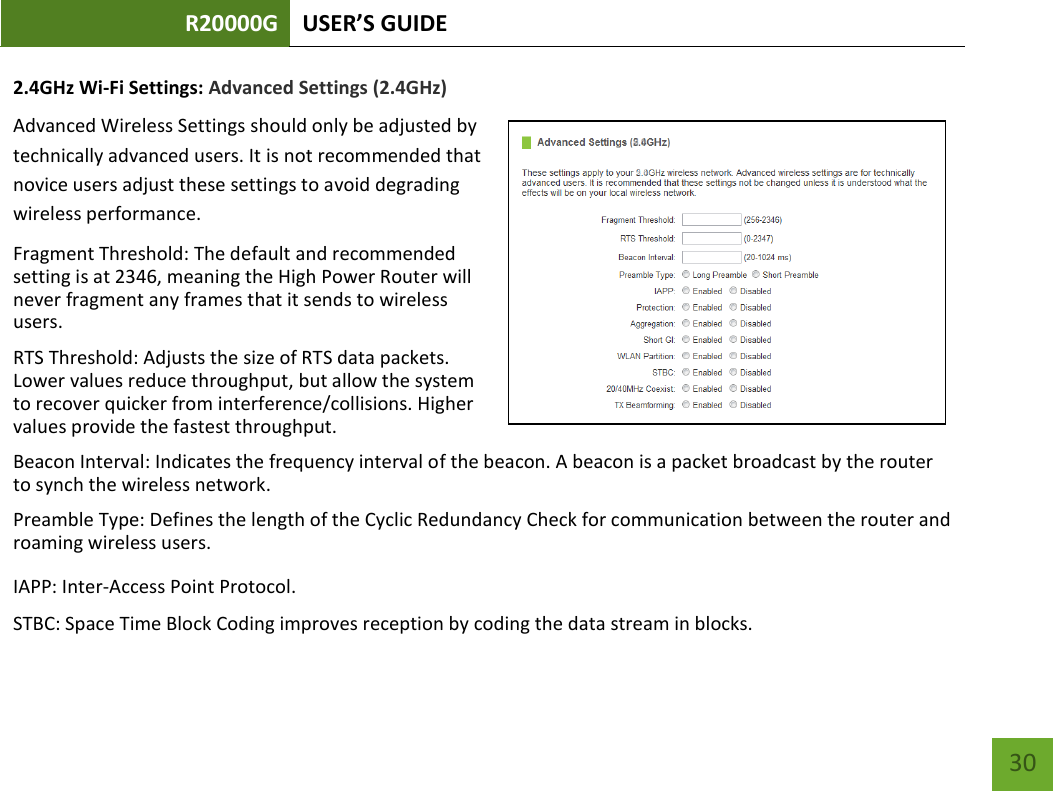
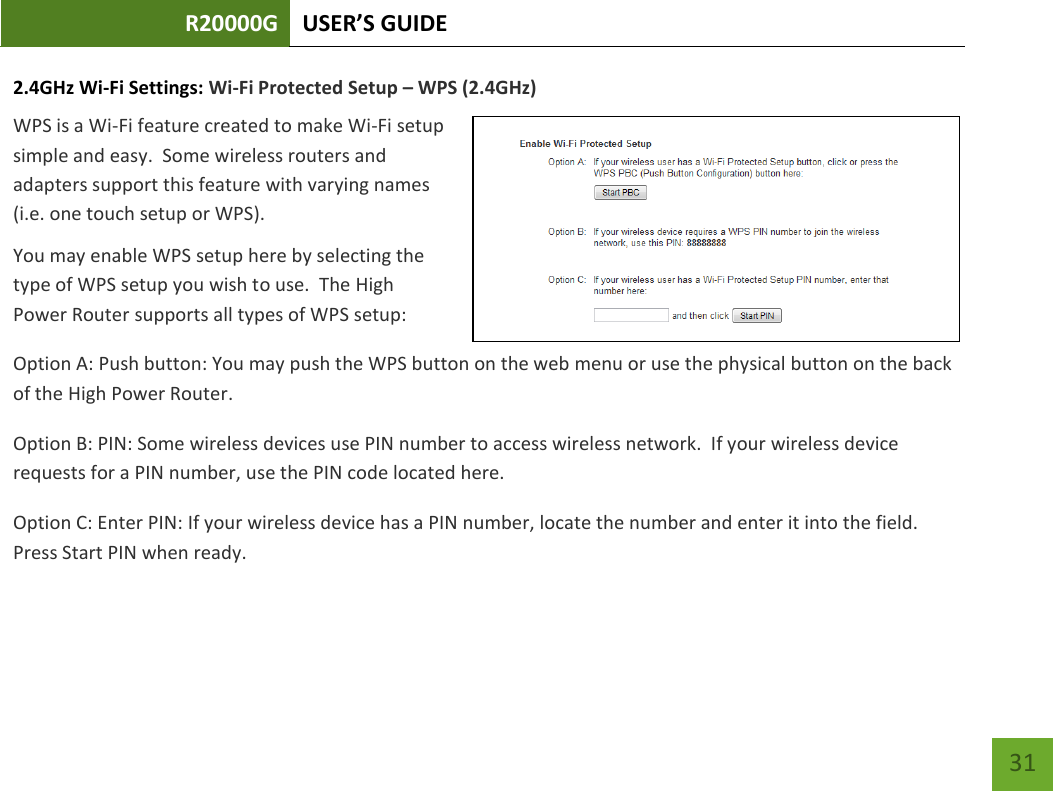
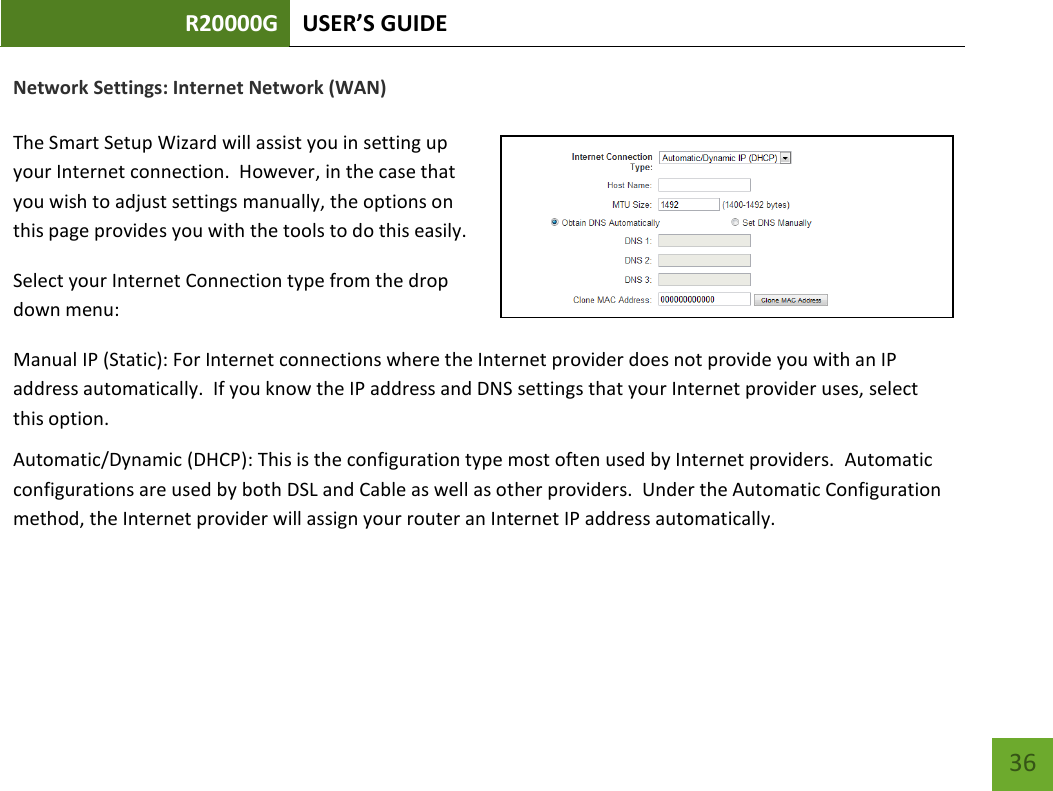
Amped Wireless R20000G High Power Wireless-N 600mW Gigabit Dual Band Router User Manual Amped Wireless
Amped Wireless High Power Wireless-N 600mW Gigabit Dual Band Router Amped Wireless
UserManual.wiki
>
Amped Wireless
>
R20000G User Manual
User Manual
Navigation menu
Upload a User Manual
Namespaces
Wiki Guide
HTML
PDF
Info
Views
User Manual
Discussion / Help
Navigation


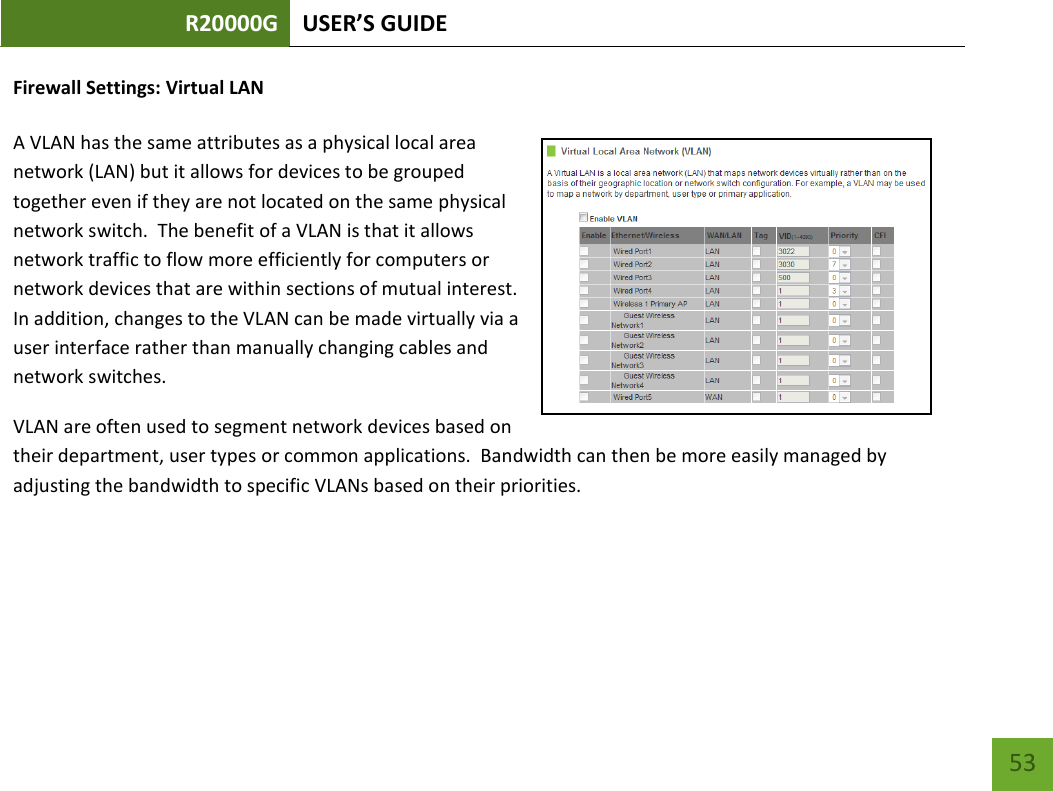

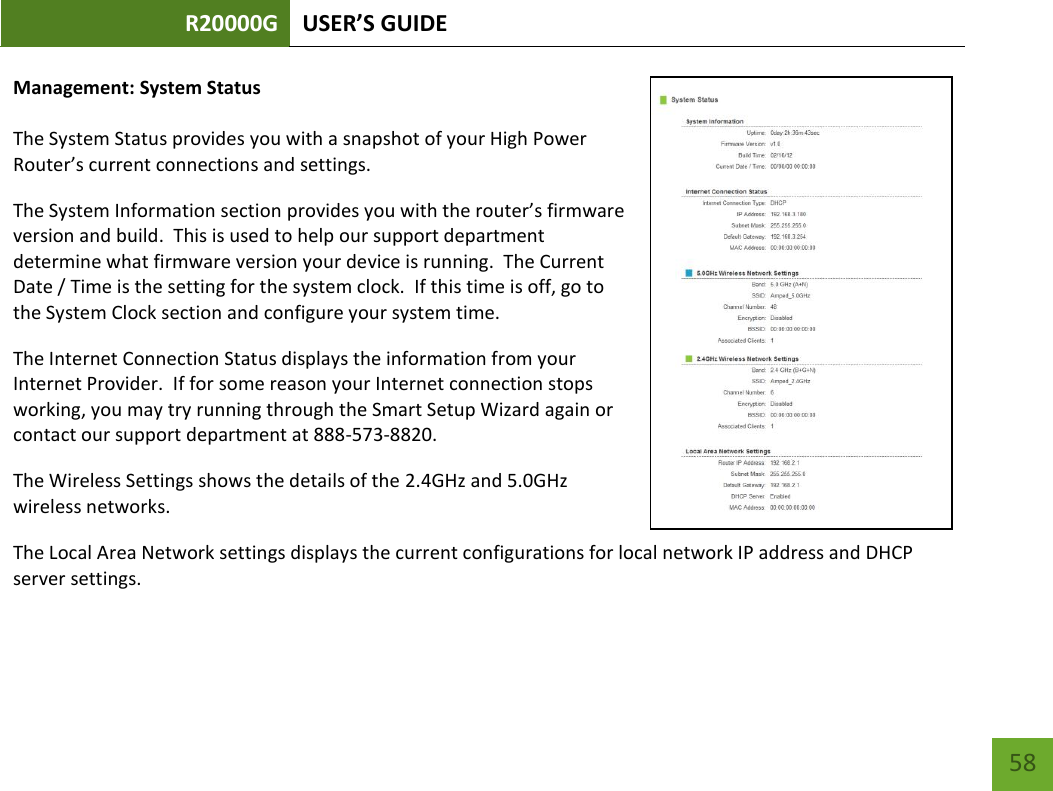


![R20000G USER’S GUIDE 89 This Class B digital apparatus complies with Canadian ICES-003.This device complies with Industry Canada licence-exempt RSS standard(s).Operation is subject to the following two conditions:(1) This device may not cause interference, and(2) This device must accept any interference, including interference that may cause undesiredoperation of the device.The device for the band 5150-5250 MHz is only for indoor usage to reduce potential forharmful interference to co-channel mobile satellite systems.This device has been designed to operate with the antennas listed below, and having amaximum gain of [2] dB (for 2.4GHz band),[4] dB (for 5GHz band). Antennas not included inthis list or having a gain greater than [2] dB (for 2.4GHz band), [4] dB (for 5GHz band) arestrictly prohibited for use with this device. The required antenna impedance is [50] ohms.802.11b/g/nAntenna Type: Dipole AntennaAntenna Gain: 2dBi802.11a/anAntenna Type: Dipole AntennaAntenna Gain: 4dBi](https://usermanual.wiki/Amped-Wireless/R20000G/User-Guide-1757086-Page-90.png)
![R20000G USER’S GUIDE 90 IC Radiation Exposure StatementThis equipment complies with IC RSS-102 radiation exposure limit set forth for an uncontrolledenvironment. This equipment should be installed and operated with minimum distance 20cmbetween the radiator and your body.Cet appareil numérique de la classe [*] est conforme à la norme NMB-003 du Canada.Le présent appareil est conforme aux CNR d'Industrie Canada applicables aux appareils radioexempts de licence.L'exploitation est autorisée aux deux conditions suivantes:(1) l'appareil ne doit pas produire de brouillage, et(2) l'utilisateur de l'appareil doit accepter tout brouillage radioélectrique subi, même si lebrouillage est susceptible d'en compromettre le fonctionnement.les dispositifs fonctionnant dans la bande 5150-5250 MHz sont réservés uniquement pour uneutilisation à l’intérieur afin de réduire les risques de brouillage préjudiciable aux systèmes desatellites mobiles utilisant les mêmes canaux.](https://usermanual.wiki/Amped-Wireless/R20000G/User-Guide-1757086-Page-91.png)