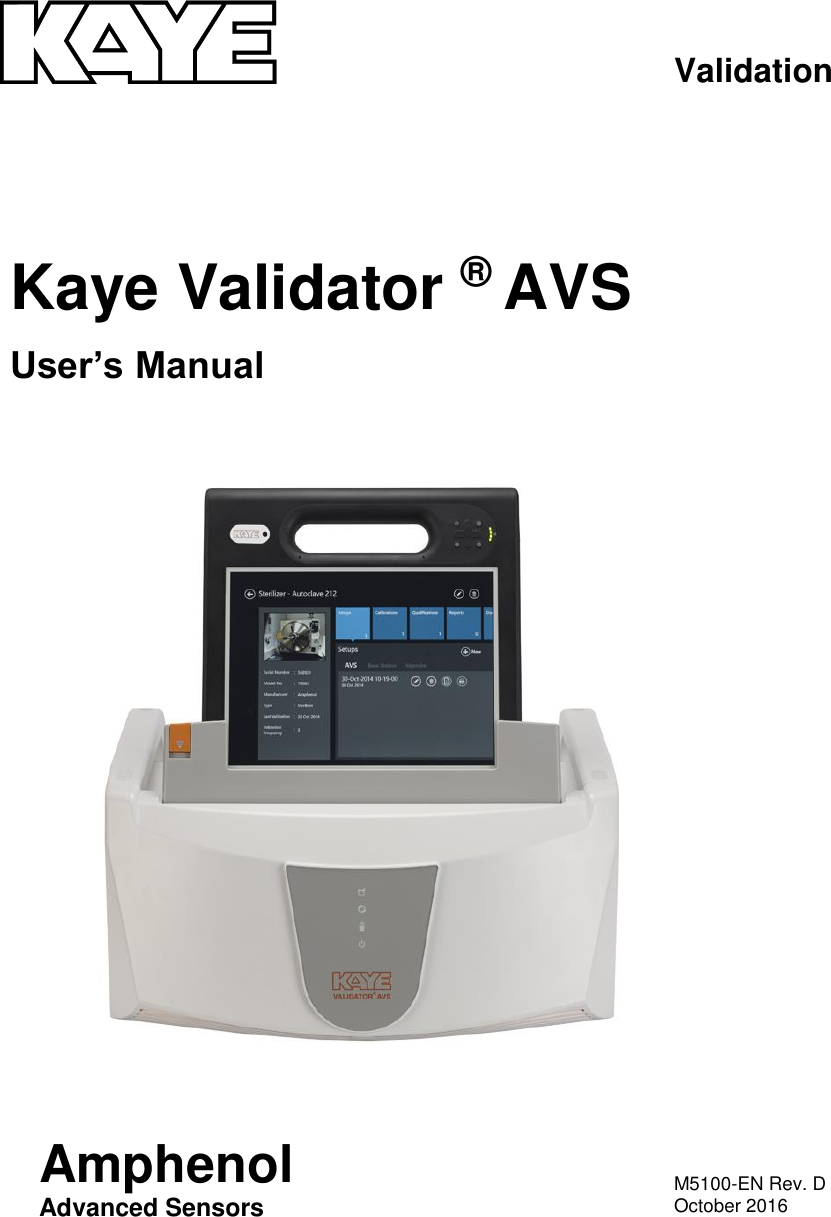
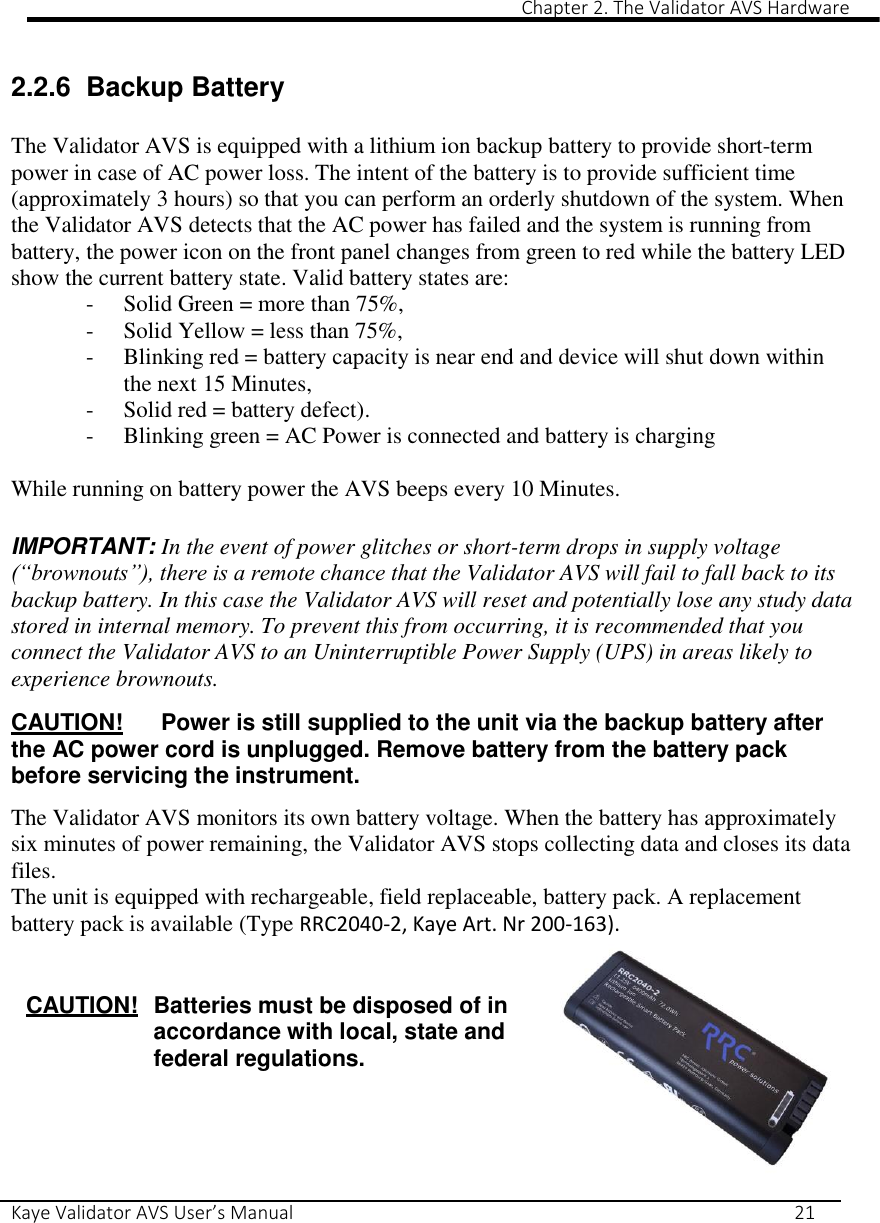
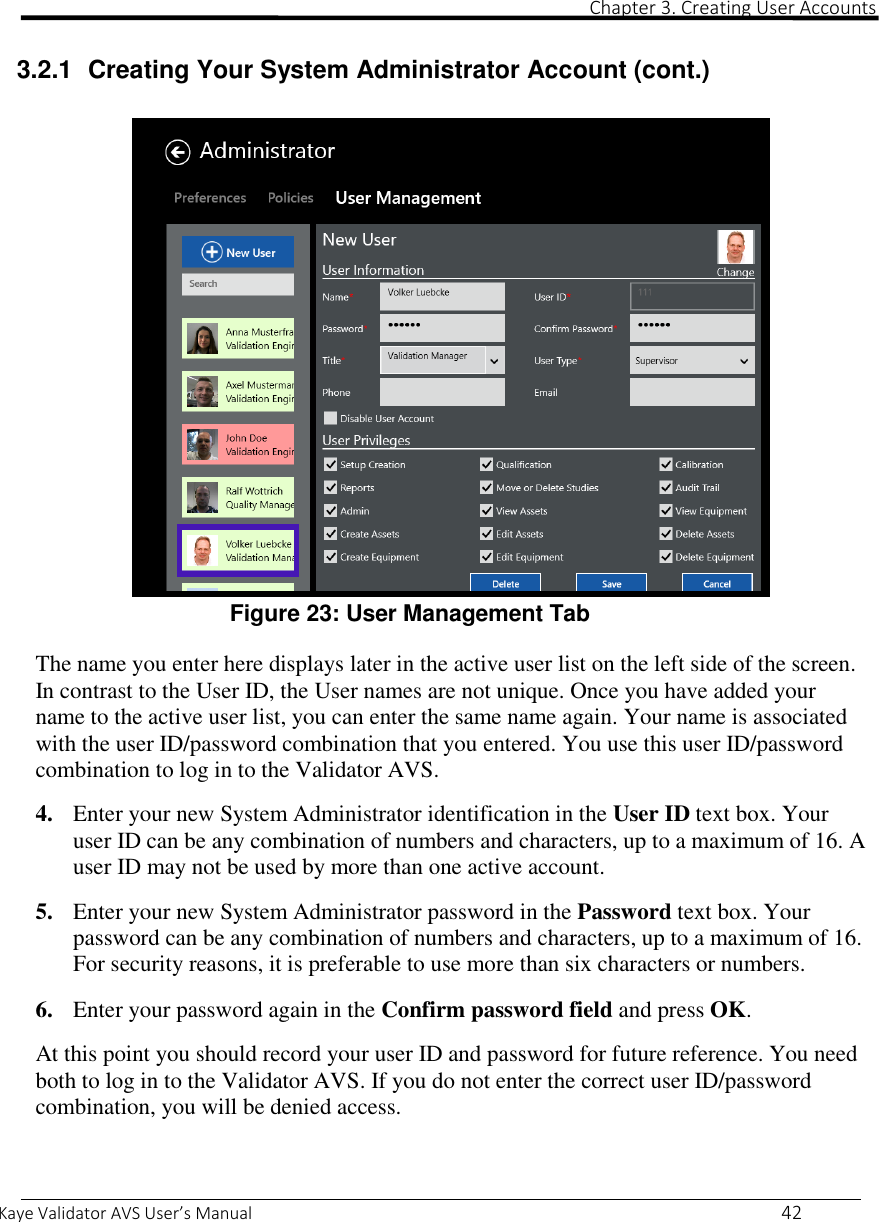
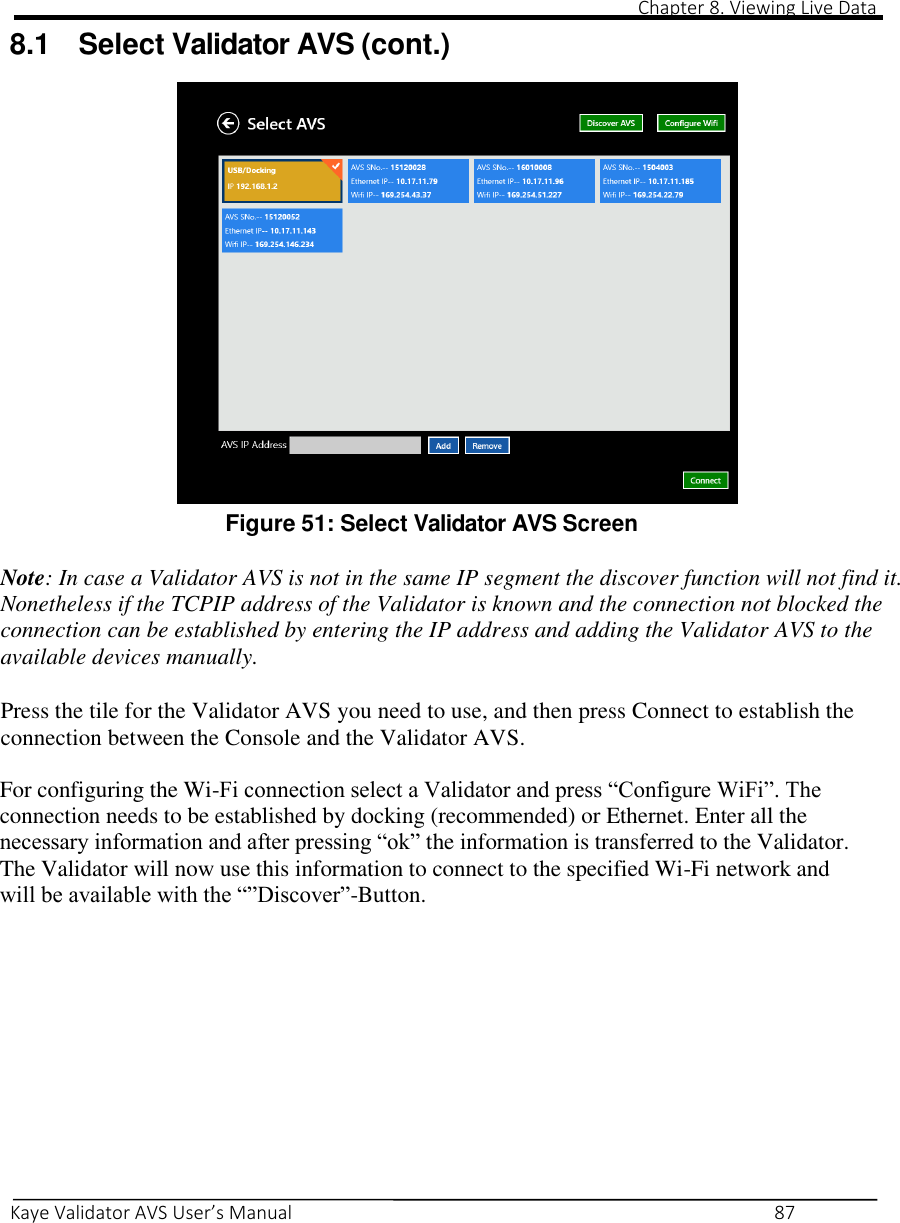
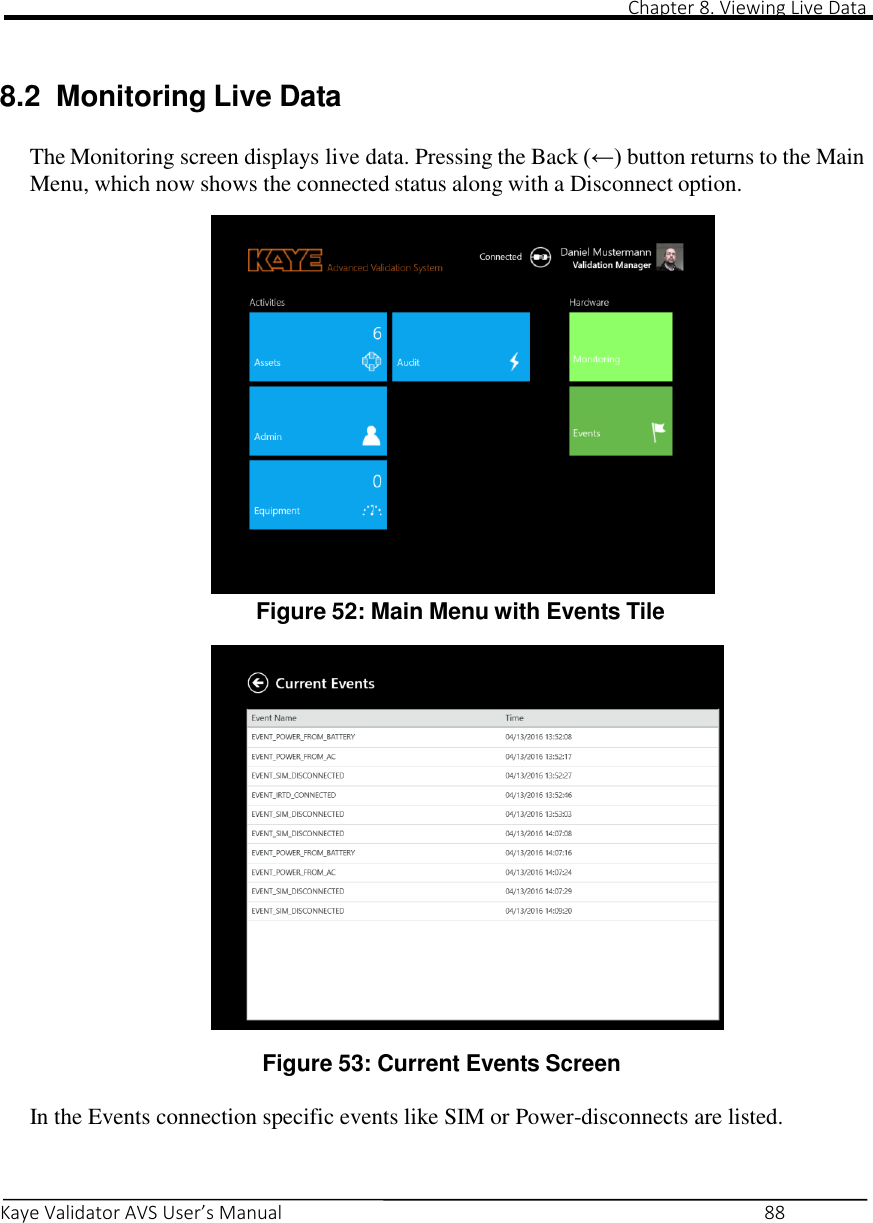
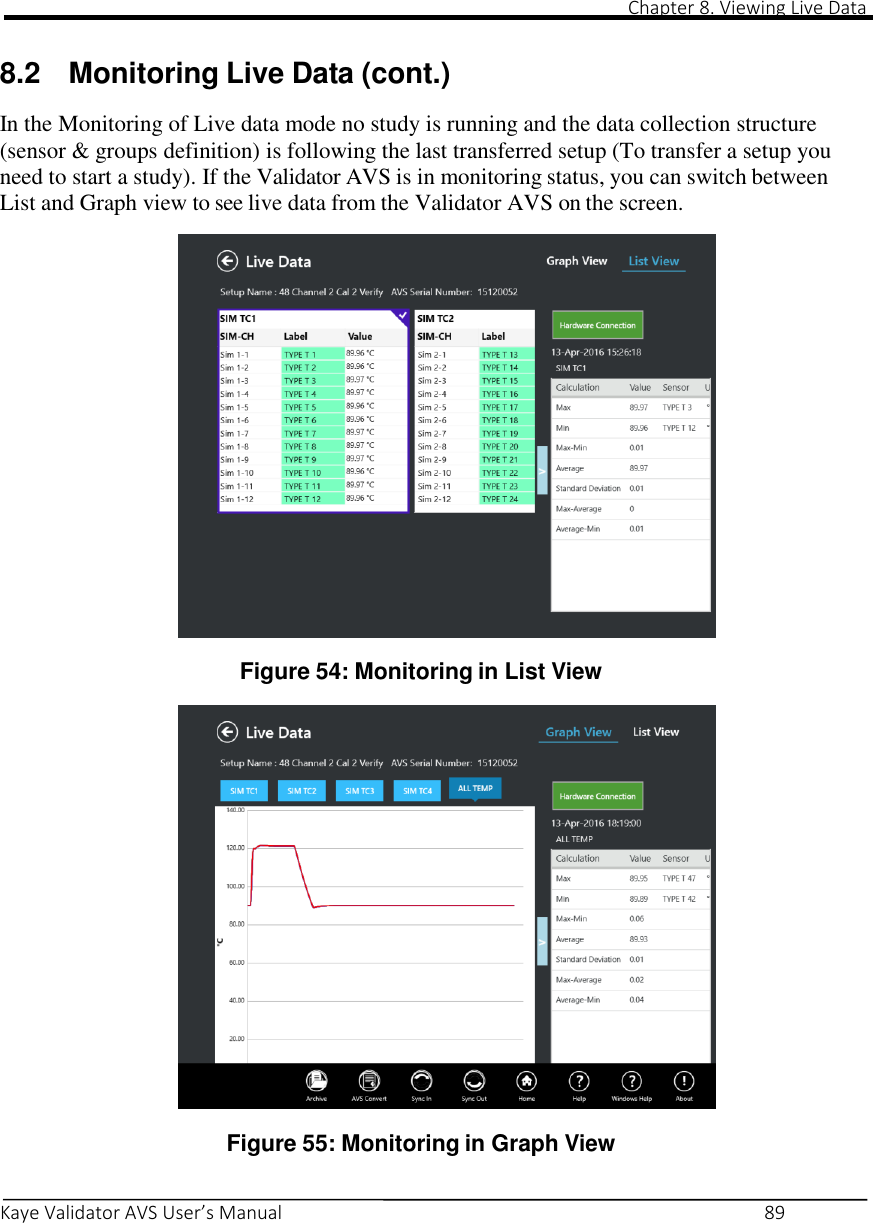
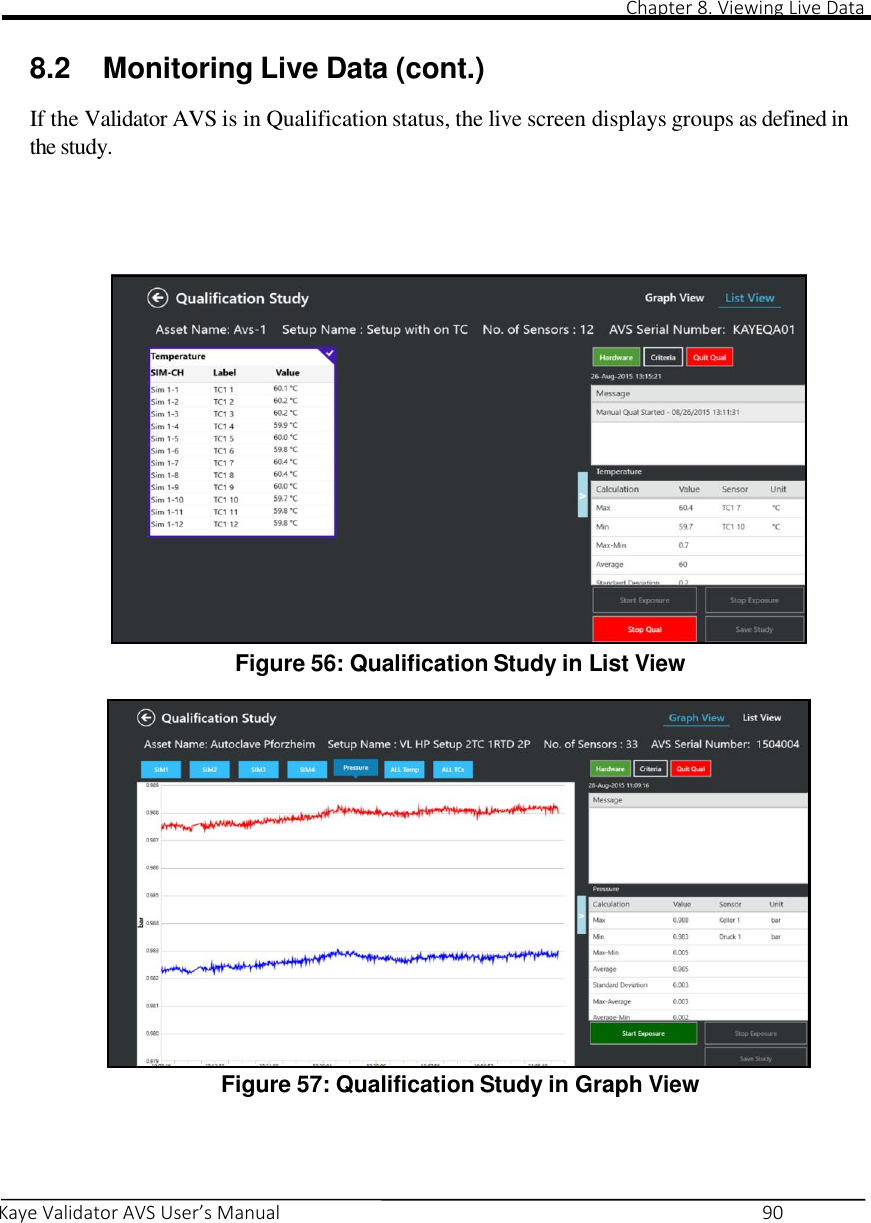
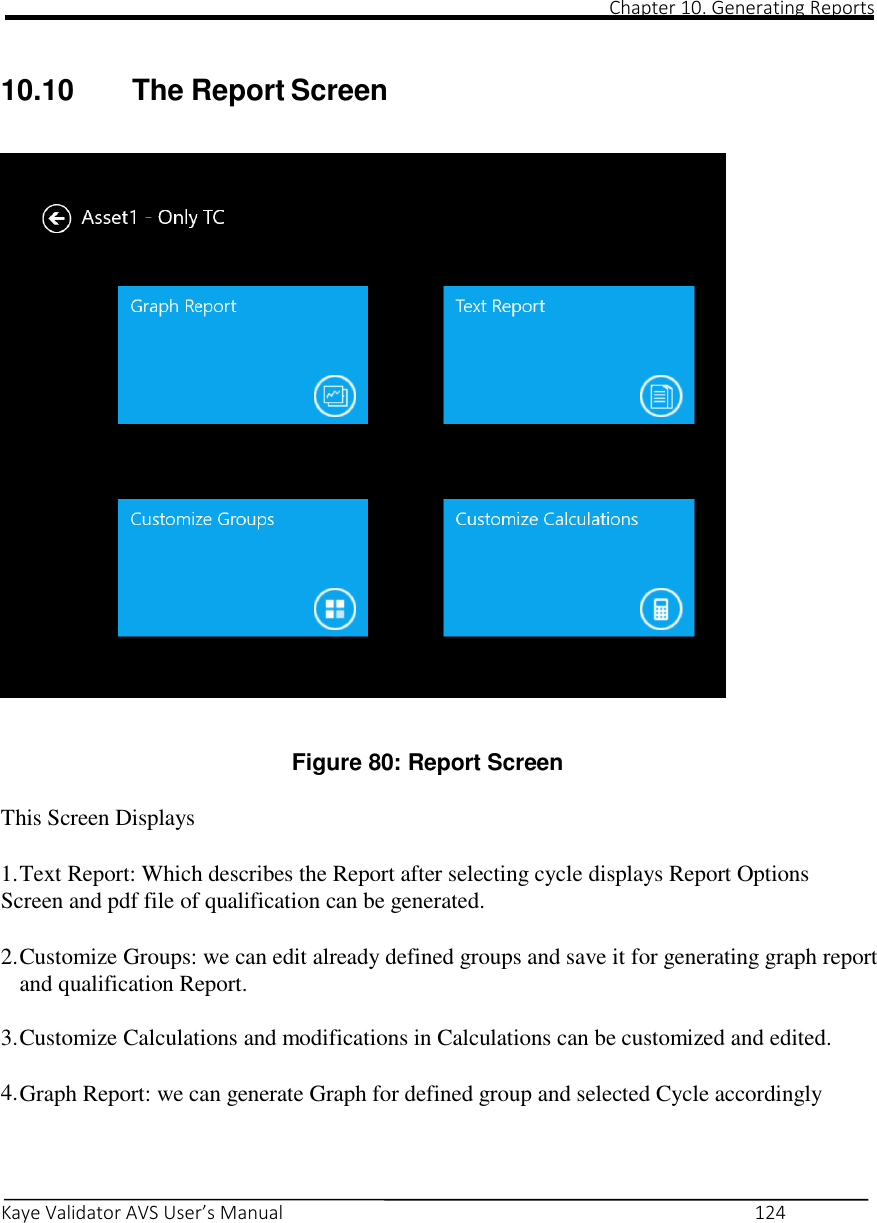
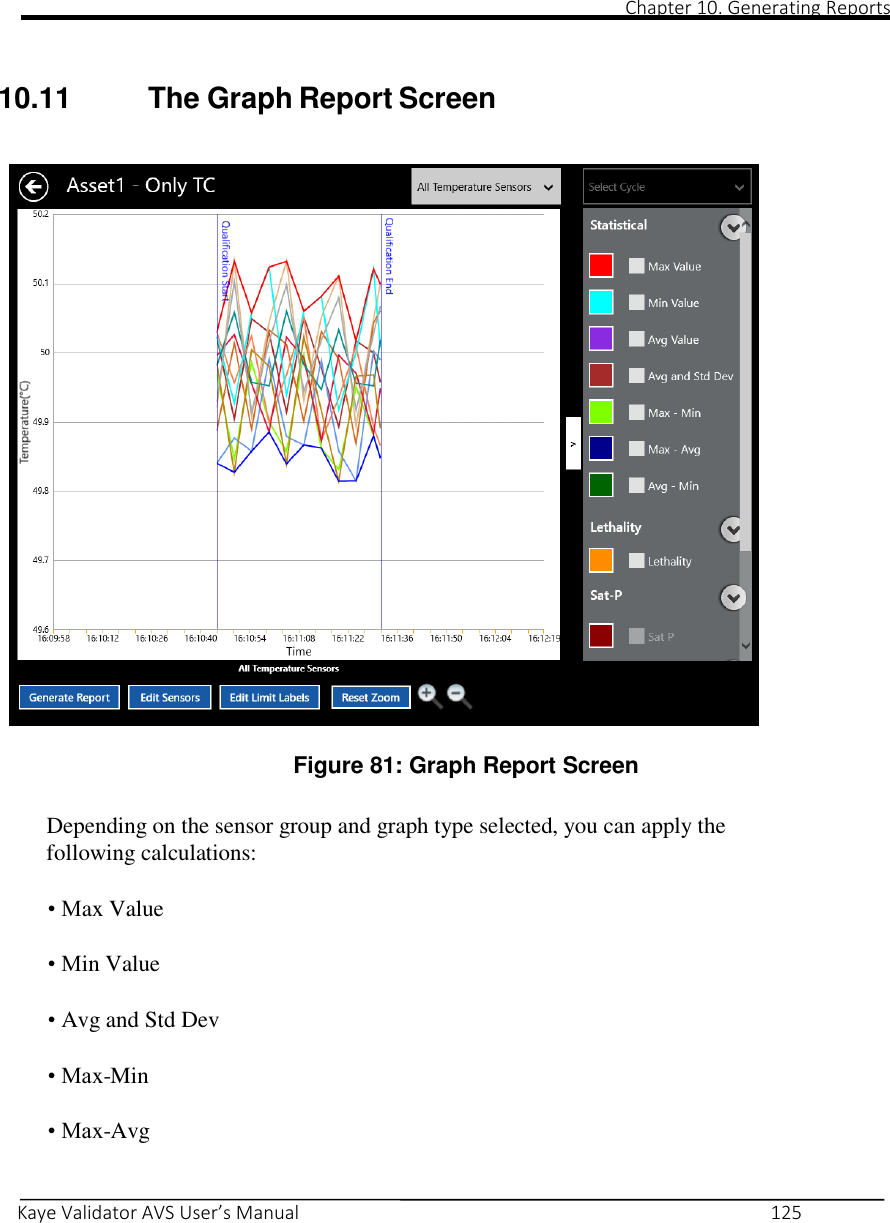
Amphenol Thermometrics AVS-X2015 Advanced validation system User Manual Kaye Validator AVS User s Manual
Amphenol Thermometrics, Inc. Advanced validation system Kaye Validator AVS User s Manual
UserManual.wiki
>
Amphenol Thermometrics
>
AVS X2015 User Manual
User manual
Navigation menu
Upload a User Manual
Namespaces
Wiki Guide
HTML
PDF
Info
Views
User Manual
Discussion / Help
Navigation
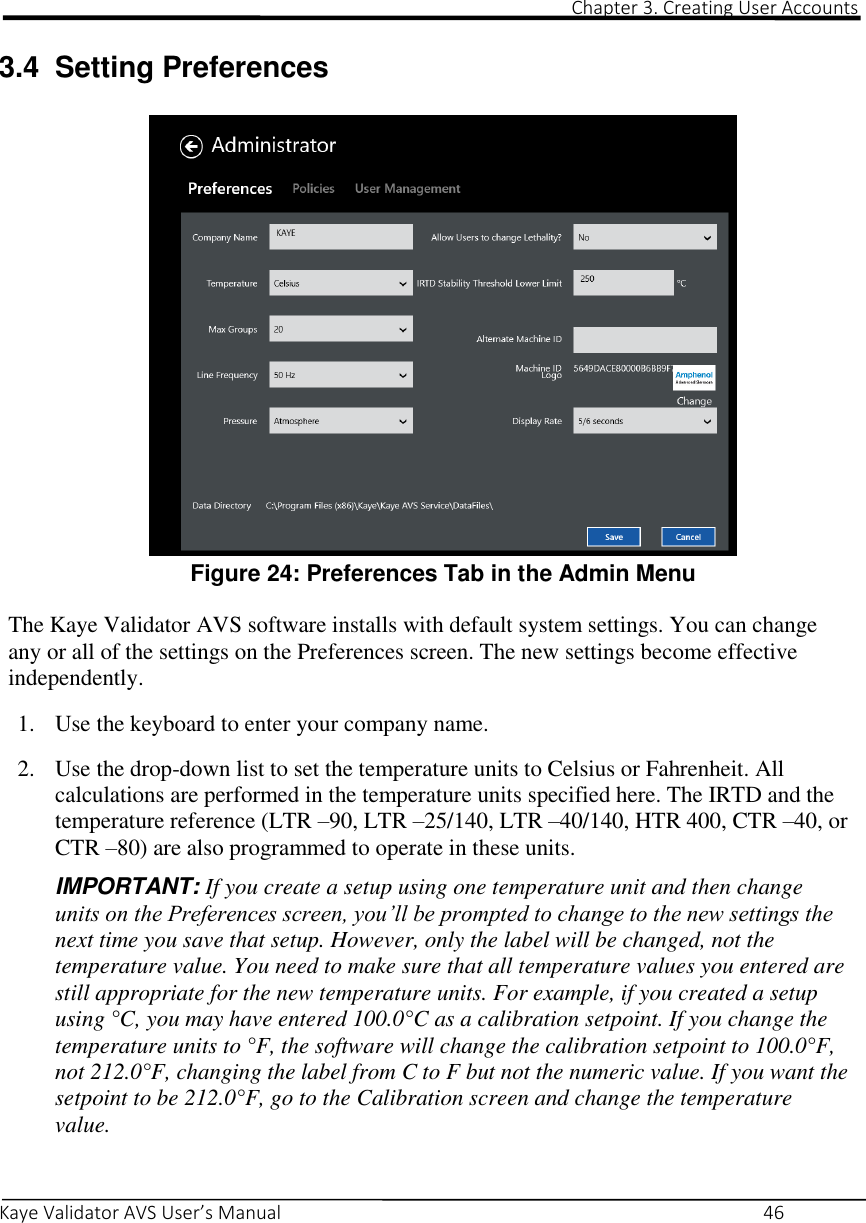
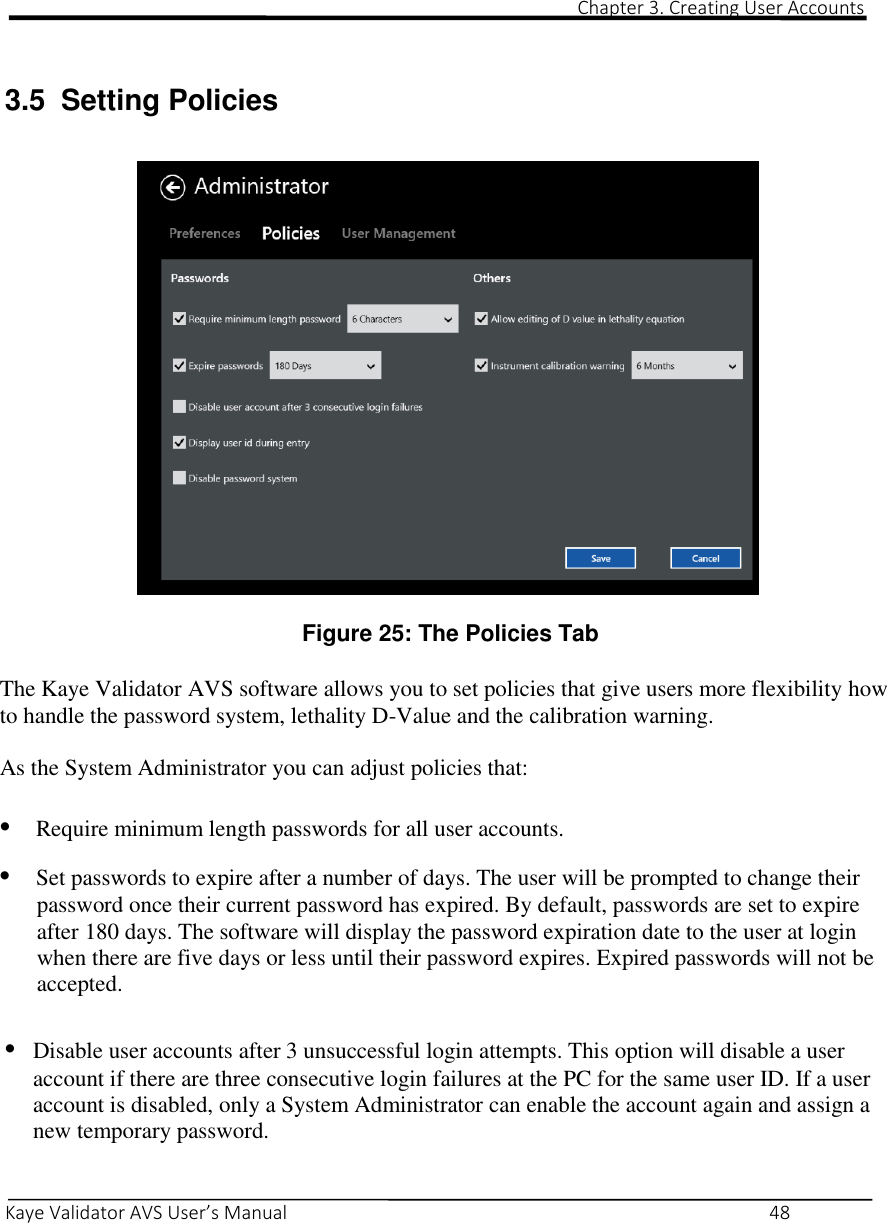
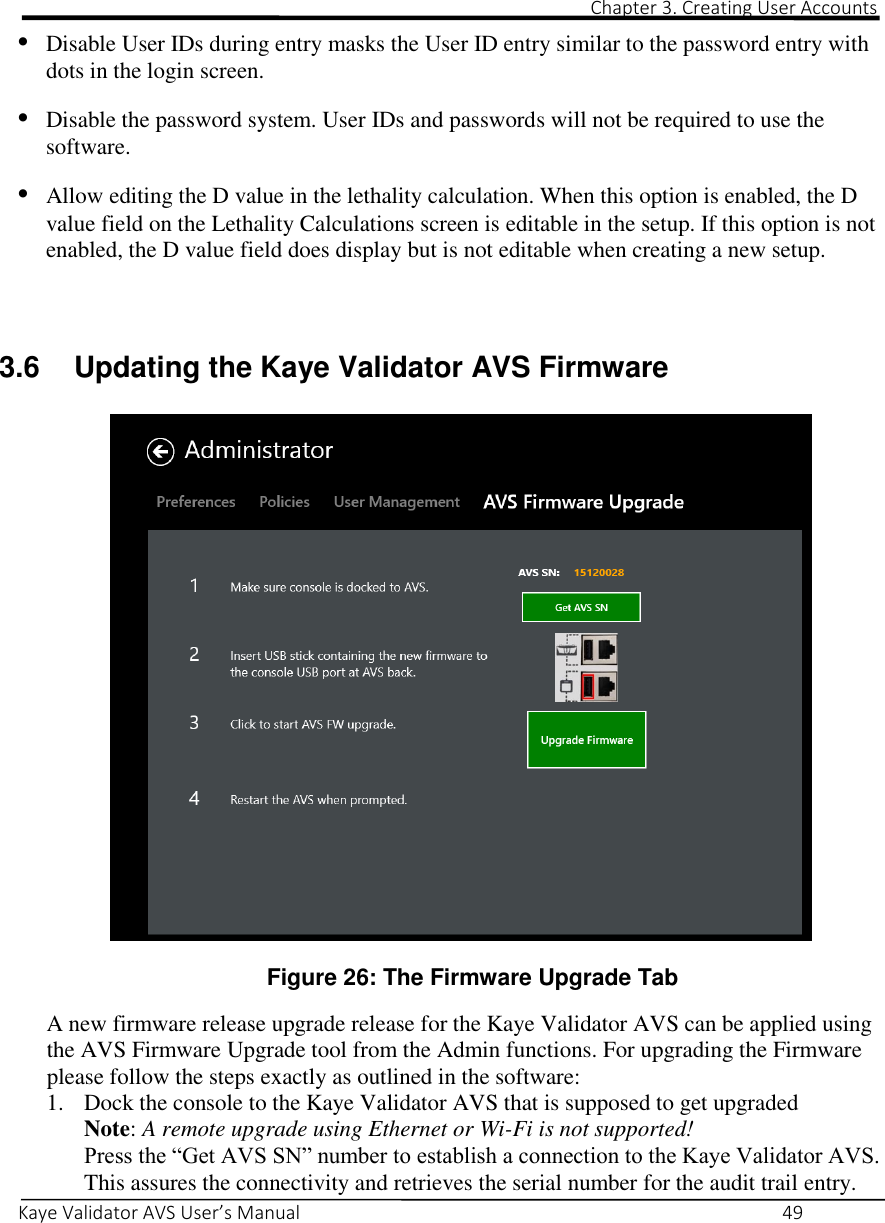
![[No content intended for this page]](https://usermanual.wiki/Amphenol-Thermometrics/AVS-X2015/User-Guide-3171880-Page-2.png)
![[No content intended for this page]](https://usermanual.wiki/Amphenol-Thermometrics/AVS-X2015/User-Guide-3171880-Page-4.png)

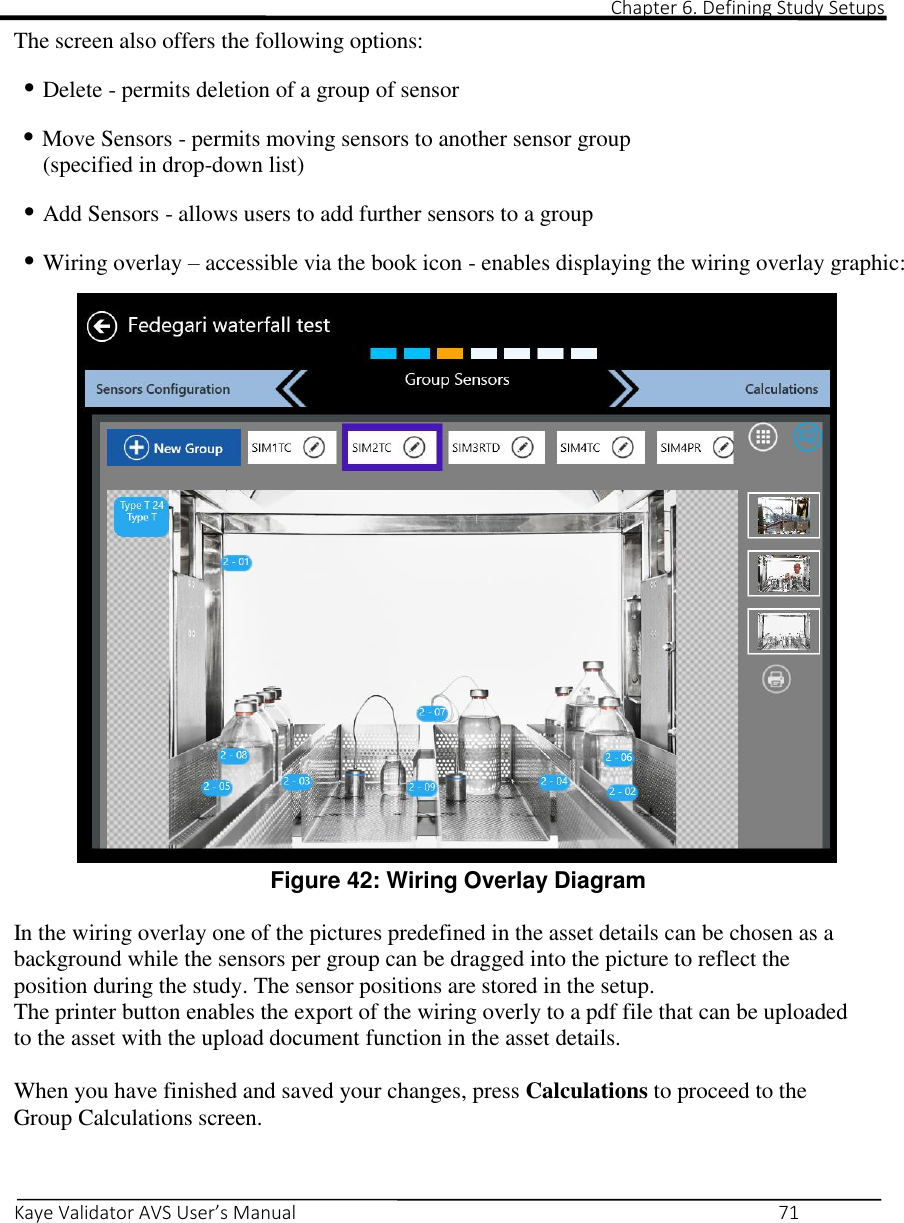
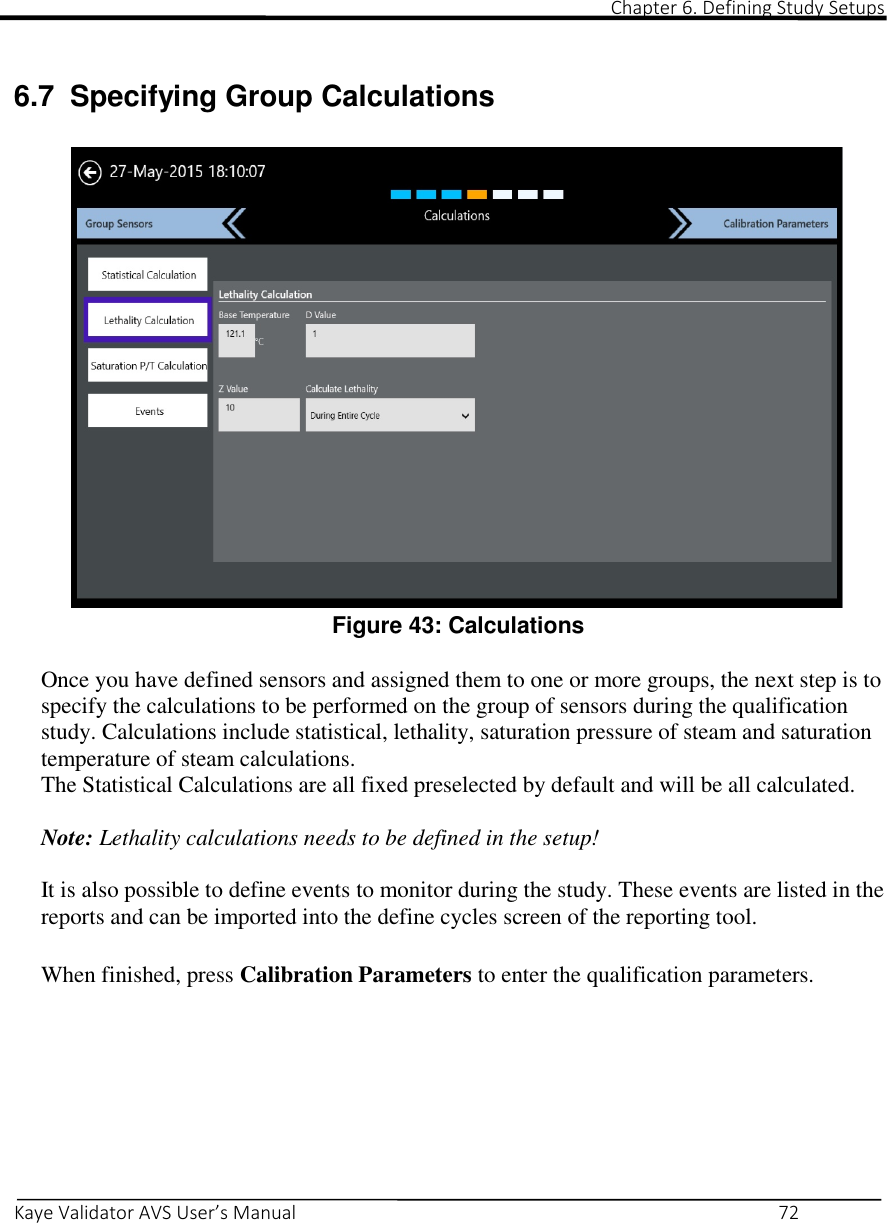
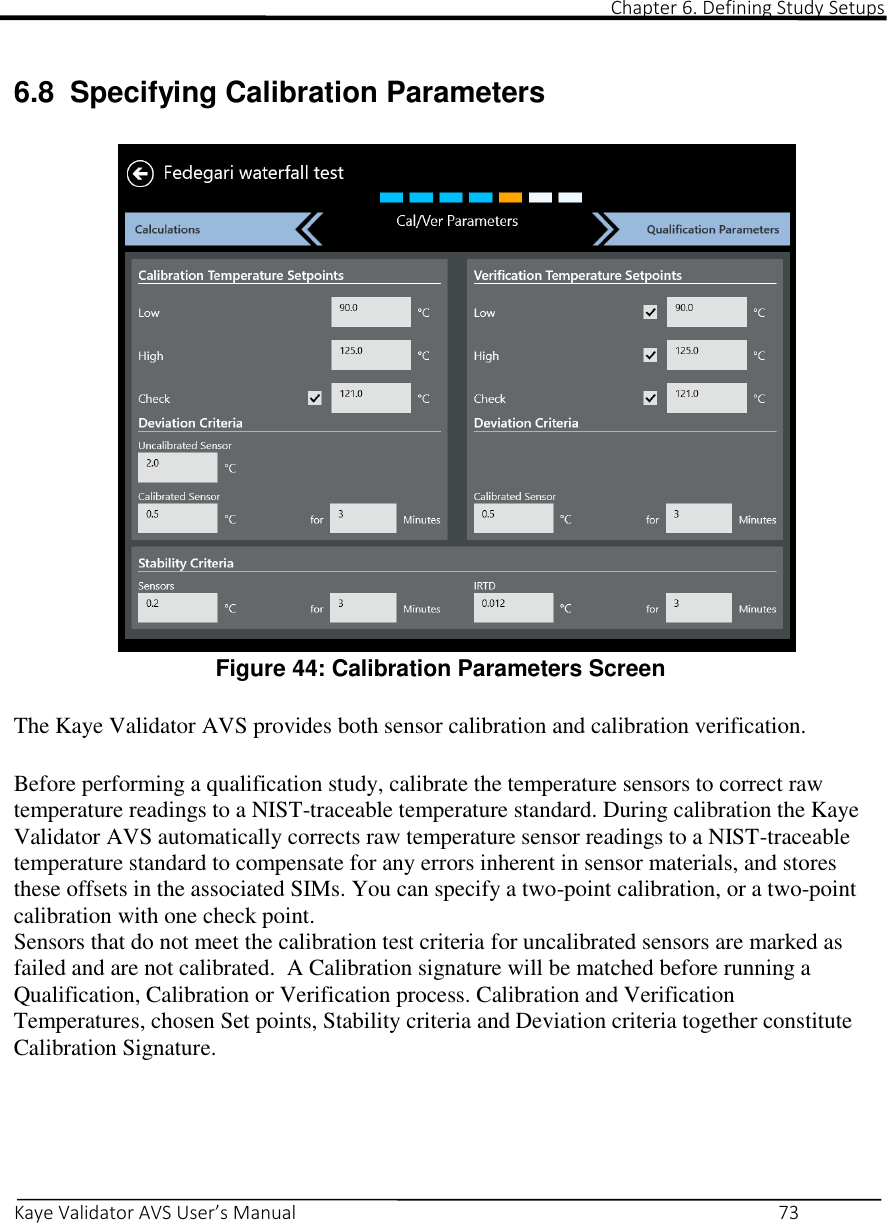

![[No content intended for this page]](https://usermanual.wiki/Amphenol-Thermometrics/AVS-X2015/User-Guide-3171880-Page-141.png)


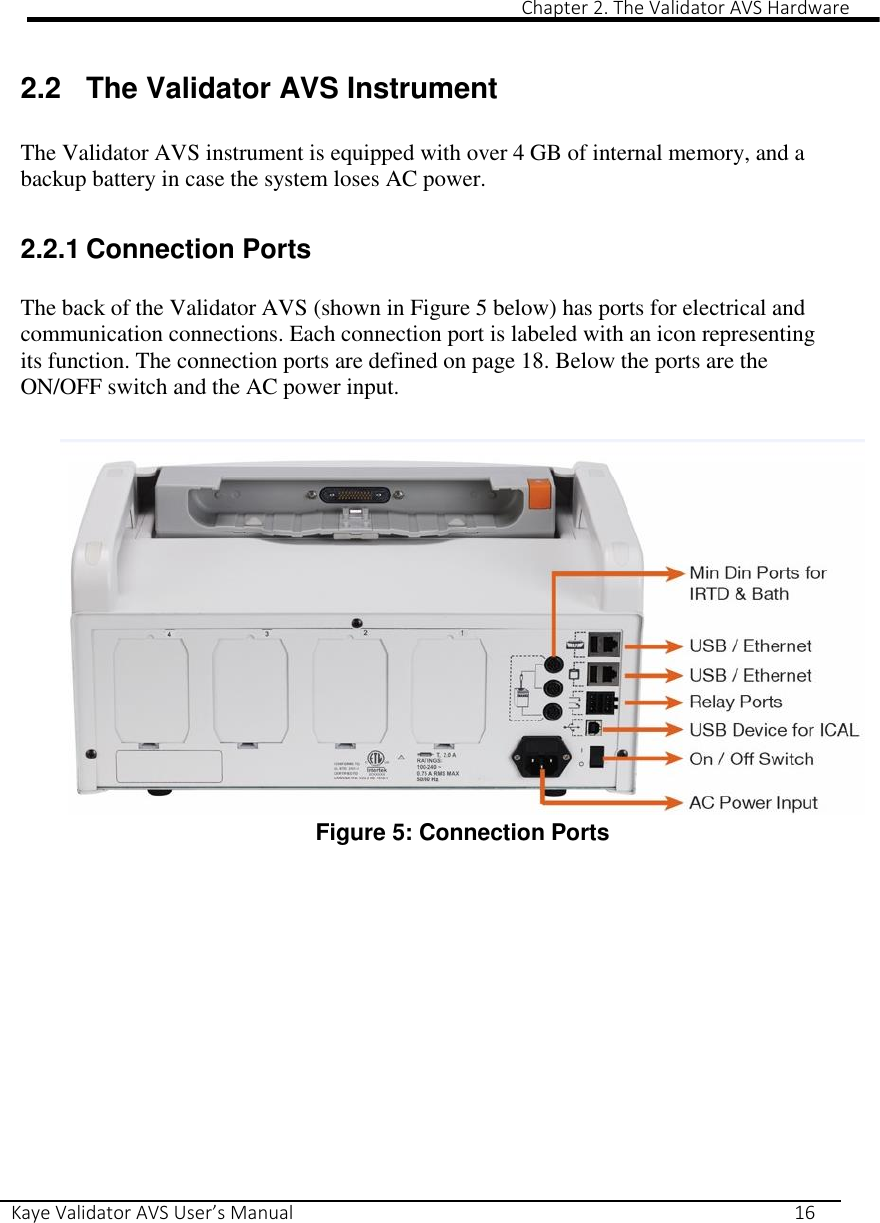
![[No content intended for this page]](https://usermanual.wiki/Amphenol-Thermometrics/AVS-X2015/User-Guide-3171880-Page-170.png)