Ampt 31570013 Ampt Communication Unit (SDAG) User Manual 57070008 1 v20141111x
Ampt LLC Ampt Communication Unit (SDAG) 57070008 1 v20141111x
UserManual.wiki
>
Ampt
>
31570013 User Manual
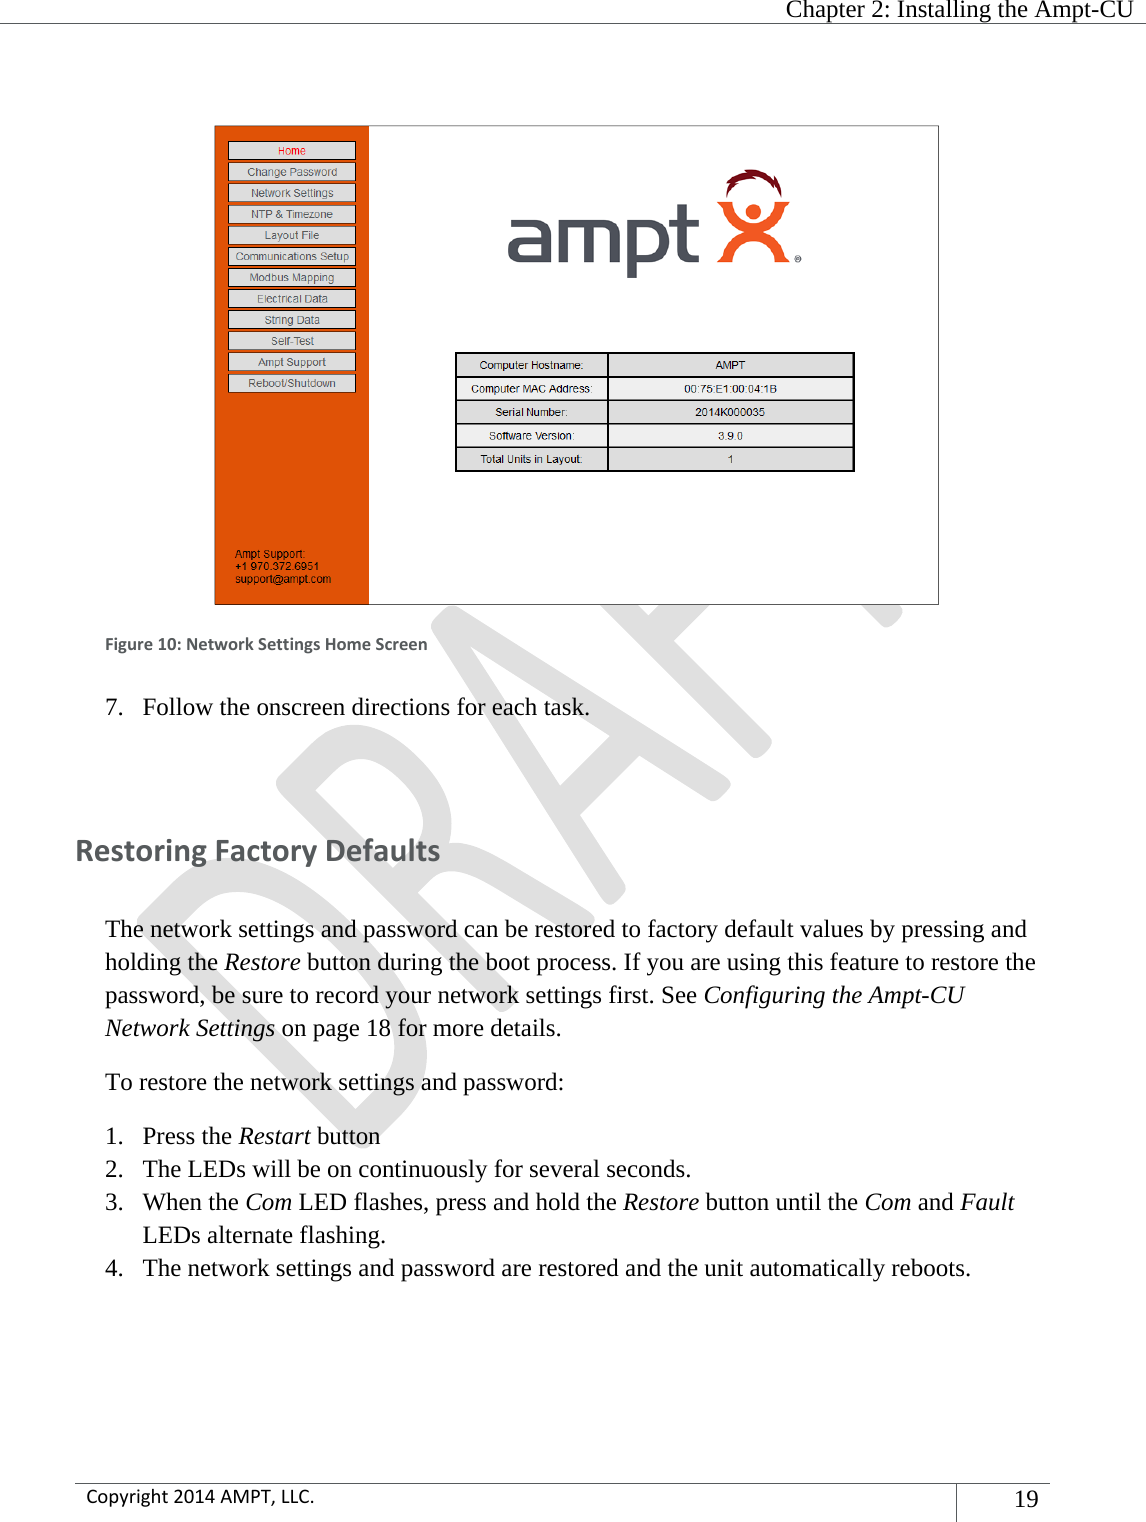
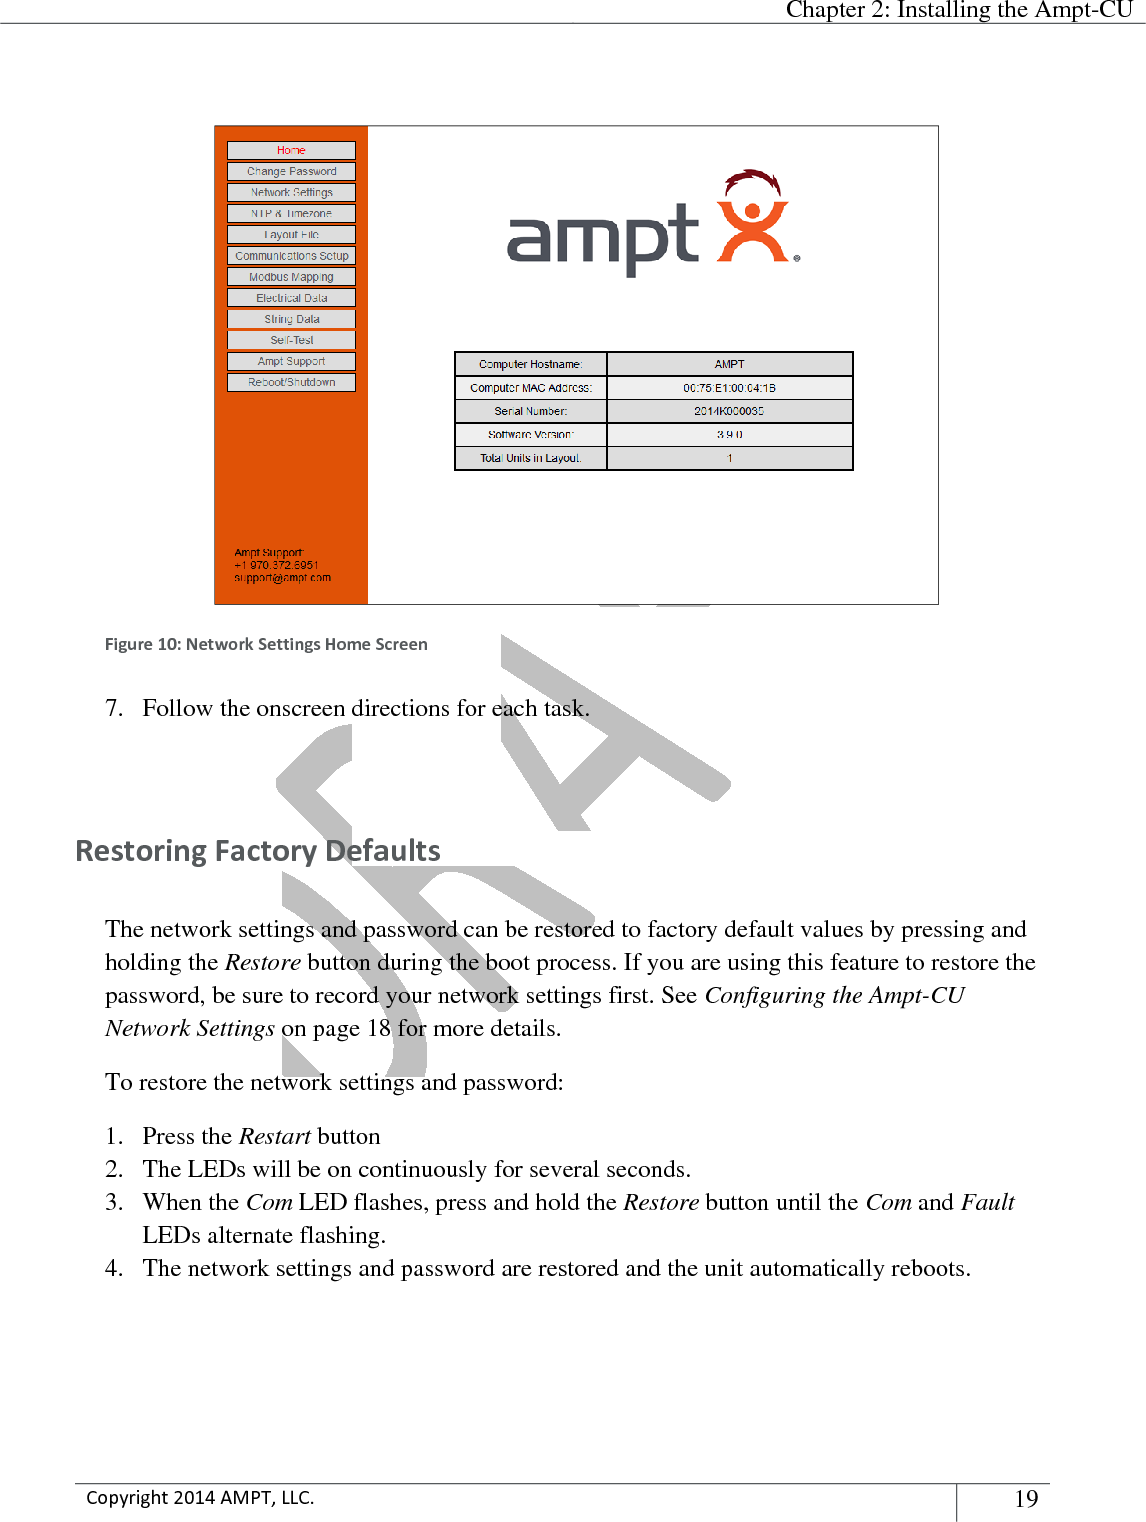
User manual
Navigation menu
Upload a User Manual
Namespaces
Wiki Guide
HTML
PDF
Info
Views
User Manual
Discussion / Help
Navigation