Apple A1460 Tablet Device User Manual iPad User Guide
Apple Inc. Tablet Device iPad User Guide
Apple >
Contents
User Manual 7 of 7
Accessibility 24
Universal Access features
iPad incorporates numerous accessibility features, including:
VoiceOver screen reader Â
Â
Large Text Â
White on Black Â
Speak Selection Â
Speak Auto-text Â
Mono Audio and balance Â
AssistiveTouch Â
Support for braille displays Â
Playback of closed-captioned content Â
Zoom, White on Black, and Mono Audio work with all apps. Large Text works with Mail and Notes.
VoiceOver works with the built-in iPad apps, and with some third-party apps you can download
from the App Store. Closed-captioning works with videos and podcasts that support it.
For more information about the iPad accessibility features, go to www.apple.com/accessibility.
Turn on accessibility features using iPad: Go to Settings > General > Accessibility.
Turn on accessibility features using iTunes: Connect iPad to your computer and select iPad in
Summary screen.
About VoiceOver
VoiceOver describes aloud what appears onscreen, so you can use iPad without seeing it.
VoiceOver tells you about each element on the screen as you select it. When you select an
element, a black rectangle (the VoiceOver cursor) encloses it and VoiceOver speaks the name or
describes the item.
VoiceOver reads the text. If you turn on Speak Hints, VoiceOver may tell you the name of the item
and provide instructions for you—for example, “double-tap to open.” To interact with items on the
screen, such as buttons and links, use the gestures described in “Learning VoiceOver gestures” on
page 110 .
107
Draft
Apple Confidential

When you go to a new screen, VoiceOver plays a sound and automatically selects and speaks
you know when the display changes to landscape or portrait orientation, and when the screen is
locked or unlocked.
Note:
VoiceOver is available in many languages, but not all.
Setting up VoiceOver
Important: VoiceOver changes the gestures you use to control iPad. Once VoiceOver is turned on,
standard operation.
Note: You can’t use VoiceOver and Zoom at the same time.
Go to Settings > General > Accessibility > VoiceOver. You can also set
Triple-click Home” on page 116 .
Go to Settings > General > Accessibility > VoiceOver. When Speak Hints
is turned on, VoiceOver may tell you the action of the item or provide
instructions for you—for example, “double-tap to open.” You can also
add Hints to the rotor, then swipe up or down to adjust. See “Using the
VoiceOver rotor control” on page 111.
Set the VoiceOver speaking rate Go to Settings > General > Accessibility > VoiceOver and drag the Speaking
Rate slider. You can also add Speech Rate to the rotor, then swipe up or
down to adjust. See “Using the VoiceOver rotor control” on page 111.
Change typing feedback Go to Settings > General > Accessibility > VoiceOver > Typing Feedback.
Use phonetics in typing feedback Go to Settings > General > Accessibility > VoiceOver > Use Phonetics. Text
phonetic equivalent—for example, “f” and then “foxtrot.”
Use pitch change Go to Settings > General > Accessibility > VoiceOver > Use Pitch Change.
VoiceOver uses a higher pitch when entering a letter, and a lower pitch
when deleting a letter. VoiceOver also uses a higher pitch when speaking
speaking the last item of a group.
Set the rotor options for
web browsing
Go to Settings > General > Accessibility > VoiceOver > Rotor. Tap to select
or deselect options, or drag up to reposition an item.
Change VoiceOver pronunciation Set the rotor to Language and then swipe up or down. The Language rotor
position is available when you select more than one pronunciation.
Select the pronunciations
available in the language rotor
Go to Settings > General > Accessibility > VoiceOver > Language Rotor. To
change the position of a language in the list, drag up or down.
Change the language for iPad Go to Settings > General > International > Language. Some languages
International > Region Format.
Skip images while navigating Go to Settings > General > Accessibility > VoiceOver > Navigate Images.
You can choose to skip all images or only those without descriptions.
unlock iPad
108 Chapter 24 Accessibility
Draft
Apple Confidential

Using VoiceOver
Select items on the screen:
Enable vertical navigation Add Vertical Navigation to the rotor, use the rotor to select it, then swipe
up or down to move to the item above or below. See “Using the VoiceOver
rotor control” on page 111.
on the screen
Unlock iPad Select the Unlock button, then double-tap the screen.
Select an item by name
through the list alphabetically, or tap the table index to the right of the list
Change the name of a screen
Speak the text of the selected element:
previous word or character (twist the rotor control to choose characters or words). You can include
the phonetic spelling. See “Setting up VoiceOver” on page 108.
Stop speaking an item
Speaking automatically resumes when you select another item.
Change the speaking volume Use the volume buttons on iPad, or add volume to the rotor and swipe up
and down to adjust. See “Using the VoiceOver rotor control” on page 111.
Mute VoiceOver
Mute. If an external keyboard is connected, you can also press the Control
key on the keyboard to mute or unmute VoiceOver.
Change the reading voice Go to Settings > General > Accessibility > VoiceOver > Use Compact Voice.
Speak the entire screen from
the top
Speak from the current item to
the bottom of the screen
Speak the iPad status information Tap the top of the screen to hear such information as the time, battery life,
Wi-Fi signal strength, and more.
“Tap” the selected item when VoiceOver is on: Double-tap anywhere on the screen.
“Double-tap” the selected item
when VoiceOver is on
Triple-tap anywhere on the screen.
Adjust a slider
the setting.
Scroll a list or area of the screen
speaks the range of items displayed (for example, “showing rows 5 through
10”). You can also scroll continuously through a list, instead of paging
through it. Double-tap and hold. When you hear a series of tones, you can
109
Chapter 24 Accessibility
Draft
Apple Confidential

Use a list index Some lists have an alphabetical index along the right side. The index can’t
Reorder a list Some lists, such as Rotor and Language Rotor in Accessibility settings can
be reordered. Select on the right side of an item, double-tap and hold
until you hear a sound, then drag up or down. VoiceOver speaks the item
you’ve moved above or below, depending on the direction you’re dragging.
Rearrange the Home screen On the Home screen, select the icon you want to move. Double-tap and
hold the icon, then drag it. VoiceOver speaks the row and column position
as you drag the icon. Release the icon when it’s in the location you want.
You can drag additional icons. Drag an item to the left or right edge of the
press the Home button .
Unlock iPad Select the Unlock switch, then double-tap the screen.
Learning VoiceOver gestures
some additional gestures let you move around the screen and control individual elements when
some space between them.
You can use standard gestures when VoiceOver is turned on, by double-tapping and holding your
turned on, the VoiceOver Practice button appears, which gives you a chance to practice VoiceOver
gestures before proceeding.
Practice gestures: Go to Settings > General > Accessibility > VoiceOver, then tap VoiceOver Practice.
If you don’t see the VoiceOver Practice button, make sure VoiceOver is turned on.
Here’s a summary of key VoiceOver gestures:
Navigate and read
ÂTap: Speak item.
ÂFlick right or left: Select the next or previous item.
ÂFlick up or down: Depends on the Rotor Control setting. See “Using the VoiceOver rotor
control” on page 111.
 Stop speaking the current item.
 Read all from the top of the screen.
110 Chapter 24 Accessibility
Draft
Apple Confidential

 Read all from the current position.
Â
dismiss an alert or go back to the previous screen.
 Open the Item Chooser.
 Scroll one page at a time.
 Go to the next or previous page (such as the Home screen, Stocks,
or Safari).
 Speak additional information, such as position within a list or whether text
is selected.
Â
 Select the last item on the page.
Activate
ÂDouble-tap: Activate the selected item.
ÂTriple-tap: Double-tap an item.
ÂSplit-tap: An alternative to selecting an item and double-tapping is to touch an item with one
 Activate the item.
ÂDouble-tap and hold (1 second) + standard gesture: Use a standard gesture.
The double-tap and hold gesture tells iPad to interpret the subsequent gesture as standard.
slide a switch.
 Play or pause in Music, Videos, YouTube, Voice Memos, or Photos.
Take a photo (Camera). Start or pause recording in Camera or Voice Memos. Start or stop
the stopwatch.
 Open the element labeler.
 Open the Item Chooser.
 Mute or unmute VoiceOver.
Â
Using the VoiceOver rotor control
gestures when VoiceOver is turned on.
Operate the rotor:
Change the options included in the rotor: Go to Settings > General > Accessibility > VoiceOver >
Rotor and select the options you want to be available using the rotor.
the rotor to switch between hearing text spoken word-by-word, character-by-character, or line-
hear all the text (either word-by-word or character-by-character), or to jump from one element to
another of a certain type, such as headers or links.
111
Chapter 24 Accessibility
Draft
Apple Confidential
Reading text
Select and hear text by:
Character, word, or line Â
Speaking
Adjust VoiceOver speaking by:
Volume or rate Â
Use of typing echo, pitch change, or phonetics (using Apple Wireless Keyboard) Â
See “Controlling VoiceOver using an Apple Wireless Keyboard” on page 114 .
Navigating
Select and hear text by:
Character, word, or line Â
Heading Â
Link, visited link, non-visited link, or in-page link Â
Form control Â
Table or row (when navigating a table) Â
List Â
Landmark Â
Image Â
Static text Â
Items of the same type Â
Buttons Â
Â
Â
Containers (screen regions such as the dock) Â
Zoom in or out
Entering text
Move insertion point and hear text by:
Character, word, or line Â
Select edit function
Select language
Using a control
Select and hear values by:
Character, word, or line Â
Adjust the value of the control object
112 Chapter 24 Accessibility
Draft
Apple Confidential

Entering and editing text with VoiceOver
keyboard connected to iPad to enter text. You can use the editing features of iPad to cut, copy, or
There are two ways to enter text in VoiceOver—standard typing and touch typing. With standard
typing, you select a key, then double-tap the screen to enter the character. With touch typing, you
typing can be quicker, but may require more practice than standard typing.
Enter text:
onscreen keyboard, and type characters.
ÂStandard typing:
when it’s selected, and again when the character is entered.
ÂTouch typing:
key you want. VoiceOver speaks the character for each key as you touch it, but doesn’t enter a
Note: Touch typing works only for the keys that enter text. Use standard typing for other keys
such as Shift, Delete, and Return.
Move the insertion point: Flick up or down to move the insertion point forward or backward
in the text. Use the rotor to choose whether you want to move the insertion point by character,
by word, or by line. VoiceOver makes a sound when the insertion point moves, and speaks the
character, word, or line that the insertion point moves across.
When moving forward by words, the insertion point is placed at the end of each word, before
the space or punctuation that follows. When moving backward, the insertion point is placed
at the end of the preceding word, before the space or punctuation that follows it. To move the
insertion point past the punctuation at the end of a word or sentence, use the rotor to switch
back to character mode. When moving the insertion point by line, VoiceOver speaks each line as
you move across it. When moving forward, the insertion point is placed at the beginning of the
next line (except when you reach the last line of a paragraph, when the insertion point is moved
to the end of the line just spoken). When moving backward, the insertion point is placed at the
beginning of the line that’s spoken.
Choose standard or touch typing With VoiceOver turned on and a key selected on the keyboard, use the
Delete a character Select , then double-tap or split-tap. You must do this even when touch
typing. To delete multiple characters, touch and hold the Delete key, then
delete. VoiceOver speaks the character as it’s deleted. If Use Pitch Change is
turned on, VoiceOver speaks deleted characters in a lower pitch.
Select text
double-tap. If you chose Select, the word closest to the insertion point is
selected when you double-tap. If you chose Select All, the entire text is
selected. Pinch apart or together to increase or decrease the selection.
choose Cut, Copy, or Paste, then double-tap.
113
Chapter 24 Accessibility
Draft
Apple Confidential

Undo
Enter an accented character In standard typing mode, select the plain character, then double-tap and
hold until you hear a sound indicating alternate characters have appeared.
the current selection.
Change the language you’re
typing in
rotor appears only if you select more than one language in the VoiceOver
Language Rotor setting. See “Setting up VoiceOver” on page 108.
Using VoiceOver with Safari
When you search the web in Safari with VoiceOver on, the Search Results rotor items lets you hear
the list of suggested search phrases.
Search the web:
rotor. Flick right or left to move down or up the list, then double-tap the screen to search the web
using the current search phrase.
Using VoiceOver with Maps
You can use VoiceOver to zoom in or out, select pins, and get information about locations.
Zoom in or out:
zoom in or out.
Select a pin:
Get information about a location:
Flick left or right to select the More Info button, then double-tap to display the information page.
Controlling VoiceOver using an Apple Wireless Keyboard
You can control VoiceOver on iPad using an Apple Wireless Keyboard. See “Using Bluetooth
devices” on page 37.
You can use VoiceOver keyboard commands to navigate the screen, select items, read screen
contents, adjust the rotor, and perform other VoiceOver actions. All the keyboard commands
(except one) include Control-Option, abbreviated in the table below as “VO.”
VoiceOver Help speaks keys or keyboard commands as you type them. You can use VoiceOver Help
to learn the keyboard layout and the actions associated with key combinations.
VoiceOver keyboard commands
VO = Control-Option
current position
VO–A
Read from the top VO–B
Move to the status bar VO–M
Press the Home button VO–H
Select the next or previous item VO–Right Arrow or VO–Left Arrow
Tap an item VO–Space bar
VO–”-”
Choose the next or previous
rotor item
VO–Up Arrow or VO–Down Arrow
114 Chapter 24 Accessibility
Draft
Apple Confidential

Choose the next or previous
speech rotor item
VO–Command–Left Arrow or VO–Command–Right Arrow
Adjust speech rotor item VO–Command–Up Arrow or VO–Command–Down Arrow
Mute or unmute VoiceOver VO–S
VO–Shift-S
Turn on VoiceOver help VO–K
Escape
Quick Nav
Left Arrow–Right Arrow
Select the next or previous item Right Arrow or Left Arrow
Select the next or previous item
Up Arrow or Down Arrow
Control–Up Arrow or Control–Down Arrow
“Tap” an item Up Arrow–Down Arrow
Option–Up Arrow, Option–Down Arrow, Option–Left Arrow, or
Option–Right Arrow
Change the rotor Up Arrow–Left Arrow or Up Arrow–Right Arrow
Single-letter Quick Nav for the web
When you view a web page with Quick Nav enabled, you can use the following keys on the
keyboard to navigate the page quickly. Typing the key moves to the next item of the indicated
type. Hold the Shift key as you type the letter to move to the previous item.
HHeading
LLink
R
BButton
CForm control
IImage
TTable
SStatic text
WARIA landmark
XList
MElement of the same type
1Level 1 heading
2Level 2 heading
3Level 3 heading
4Level 4 heading
5Level 5 heading
6Level 6 heading
115
Chapter 24 Accessibility
Draft
Apple Confidential

Using a braille display with VoiceOver
You can use a refreshable Bluetooth braille display to read VoiceOver output in braille, and you
can use a braille display with input keys and other controls to control iPad when VoiceOver
is turned on. iPad works with many of the most popular wireless braille displays. For a list of
supported braille displays, go to www.apple.com/accessibility/iphone/braille-display.html.
Set up a braille display: Turn on the display, then go to Settings > General > Bluetooth and
turn on Bluetooth. Then go to Settings > General > Accessibility > VoiceOver > Braille and choose
the display.
Go to Settings > General > Accessibility > VoiceOver > Braille.
Go to Settings > General > Accessibility > VoiceOver > Braille.
For information about common braille commands for VoiceOver navigation, and for information
support.apple.com/kb/HT4400.
The braille display uses the language that’s set for Voice Control. This is normally the language
that’s set for iPad in Settings > International > Language. You can use the VoiceOver language
Set the language for VoiceOver: Go to Settings > General > International > Voice Control, then
choose the language.
If you change the language for iPad, you may need to reset the language for VoiceOver and your
braille display.
You can set the leftmost or rightmost cell of your braille display to provide system status and
other information:
Announcement History contains an unread message Â
The current Announcement History message hasn’t been read Â
VoiceOver speech is muted Â
The iPad battery is low (less than 20% charge) Â
iPad is in landscape orientation Â
Â
The current line contains additional text to the left Â
The current line contains additional text to the right Â
Set the leftmost or rightmost cell to display status information: Go to Settings > General >
Accessibility > VoiceOver > Braille > Status Cell, then tap Left or Right.
See an expanded description of the status cell: On your braille display, press the status cell’s
router button.
Triple-click Home
the Home button
button to:
Â
Â
Â
Â
116 Chapter 24 Accessibility
Draft
Apple Confidential

Set the Triple-click Home function: Go to Settings > General > Accessibility > Triple-click Home,
then choose the feature you want.
Zoom
The Zoom accessibility feature lets you magnify the entire screen to help you see what’s on
the display.
Go to Settings > General > Accessibility > Zoom. Or, use Triple-click Home.
See “Triple-click Home” on page 116 .
Zoom in or out
and-drag gesture, described below), iPad automatically returns to that
Move around the screen
quickly. When you open a new screen, Zoom always goes to the top-middle
of the screen.
While using Zoom with an Apple Wireless Keyboard, the screen image follows the insertion point,
keeping it in the center of the display. See “Using an Apple Wireless Keyboard” on page 31.
Large Text
Large Text lets you make the text larger in Mail and Notes. You can choose 20-point, 24-point,
32-point, 40-point, 48-point, or 56-point text.
Set the text size: Go to Settings > General > Accessibility > Large Text.
White on Black
Use White on Black to invert the colors on the iPad display, which may make it easier to read the
screen. When White on Black is turned on, the screen looks like a photographic negative.
Invert the screen’s colors: Go to Settings > General > Accessibility > White on Black.
Speak Selection
Turn on Speak Selection and adjust speaking rate: Go to Settings > General > Accessibility >
Speak Selection.
Have text read to you Select the text, then tap Speak.
117
Chapter 24 Accessibility
Draft
Apple Confidential

Speak Auto-Text
Speak Auto-text speaks the text corrections and suggestions iPad makes when you type.
Go to Settings > General > Accessibility > Speak Auto-text.
Speak Auto-text also works with VoiceOver or Zoom.
Mono Audio
Mono Audio combines the sound of the left and right channels into a mono signal played on
both sides. This lets users with hearing impairment in one ear hear the entire sound signal with
the other ear.
Go to Settings > General > Accessibility > Mono Audio.
AssistiveTouch
buttons. You can use a compatible adaptive accessory (such as a joystick) together with
AssistiveTouch to control iPad. You can also use AssistiveTouch without an accessory to perform
Turn on AssistiveTouch: Go to Settings > General > Accessibility > AssistiveTouch. You can also
Triple-click Home.
Adjust the tracking speed Go to Settings > General > Accessibility > AssistiveTouch > Touch speed.
Show or hide the
AssistiveTouch menu
Click the secondary button on your accessory.
Hide the menu button Go to Settings > General > Accessibility > AssistiveTouch > Always Show
Menu.
Tap the menu button, tap Gestures, and then tap the number of digits
needed for the gesture. When the corresponding circles appear on the
Perform a pinch gesture Tap the menu button, tap Favorites, and then tap Pinch. When the pinch
circles appear, touch anywhere on the screen to move the pinch circles,
then drag the pinch circles in or out to perform a pinch gesture. When you
Create your own gesture Tap the menu button, tap Favorites, and then tap an empty gesture
placeholder. You can also go to Settings > General > Accessibility >
AssistiveTouch > “Create custom gesture.”
Tap the menu button, then tap Device.
Simulate pressing the Home button Tap the menu button, then tap Home.
Move the menu button Drag it to any location on the screen.
Exit a menu without performing
a gesture
Tap anywhere outside the menu.
118 Chapter 24 Accessibility
Draft
Apple Confidential
Universal Access in OS X
Take advantage of the Universal Access features in OS X when you use iTunes to sync information
and content from your iTunes library to iPad. In the Finder, choose Help > Help Center, then search
for “universal access.”
For more information about iPad and OS X accessibility features, go to www.apple.com/accessibility.
Minimum font size for mail messages
To increase readability, set the minimum font size for Mail message text to Large, Extra Large,
or Giant.
Set the minimum mail message font size: Go to Settings > Mail, Contacts, Calendars > Minimum
Font Size.
The Large Text setting overrides this minimum font size.
Widescreen keyboards
All built-in iPad apps show a larger onscreen keyboard when you rotate iPad to landscape view.
You can also type using an Apple Wireless Keyboard.
Closed captioning
Turn on closed captioning for videos: Go to Settings > Video > Closed Captioning.
Not all video content includes closed captions.
119
Chapter 24 Accessibility
Draft
Apple Confidential

Settings 25
Airplane Mode
Airplane mode disables the wireless features of iPad in order to reduce potential interference with
aircraft operation and other electrical equipment.
Turn on airplane mode: Tap Settings and turn airplane mode on.
When airplane mode is on, appears in the status bar at the top of the screen, and iPad emits
no Wi-Fi, cellular (4G or 3G models), or Bluetooth signals. You won’t be able to use apps or features
that depend on these connections.
If allowed by the aircraft operator and applicable laws and regulations, you can continue to listen
to music, watch videos, browse email, calendar, and other data you’ve previously received, and use
apps that don’t require an Internet connection.
If Wi-Fi is available and allowed by the aircraft operator and applicable laws and regulations,
go to Settings > Wi-Fi to turn it on. Similarly, you can turn on BlueTooth in Settings > General >
BlueTooth.
Wi-Fi
Joining a Wi-Fi network
Wi-Fi settings determine whether iPad uses local Wi-Fi networks to connect to the Internet. When
iPad is joined to a Wi-Fi network, the Wi-Fi icon in the status bar at the top of the screen shows
signal strength. The more bars you see, the stronger the signal.
Once you join a Wi-Fi network, iPad automatically connects to it whenever the network is in range.
If more than one previously used network is in range, iPad joins the one last used.
If no Wi-Fi networks are available, iPad (4G or 3G models) connect over your cellular network,
if possible.
You can also use iPad to set up a new AirPort base station that provides Wi-Fi services to your
Setting up an AirPort base station” on page 121.
Go to Settings > Wi-Fi.
120
Draft
Apple Confidential

Set iPad to ask if you want to
join a new network
connect to the Internet when a previously used network isn’t available.
doesn’t join it
Go to Settings > Wi-Fi then tap next to a network you’ve joined before.
Then tap “Forget this Network.”
Join a closed Wi-Fi network To join a Wi-Fi network that isn’t shown in the list of scanned networks, go
to Settings > Wi-Fi > Other, then enter the network name.
You must already know the network name, password, and security type to
connect to a closed network.
Adjust settings for connecting
to a Wi-Fi network
Go to Settings > Wi-Fi, then tap next to a network. You can set an HTTP
from a DHCP server.
Setting up an AirPort base station
An AirPort base station provides a Wi-Fi connection to your home, school, or small business
network. You can use iPad to set up a new AirPort Express base station, AirPort Extreme base
station, or Time Capsule.
Use the AirPort Setup Assistant: Go to Settings > Wi-Fi. Under the “Set up an AirPort base
station” heading, tap the name of the base station you want to set up. Then follow the onscreen
instructions.
Some older AirPort base stations cannot be set up using an iOS device. For setup instructions, see
the documentation that came with the base station.
If the base station you want to set up isn’t listed, make sure it has power, that you’re within range,
been reset.
you change the base station’s settings and monitor its status.
badge on the app icon on the Home screen.
Change the number of recent
Change the alert styles
Center list.
121
Chapter 25 Settings
Draft
Apple Confidential

Display numbered badges on
Center list. Turn on Badge App Icon.
Prevent alerts from showing
when iPad is locked
iPad is locked.
Some apps have additional options. For example, Messages lets you specify how many times the
Location Services
Location Services lets apps such as Reminders, Maps, Camera, and third-party location-based
apps gather and use data showing your location. Your approximate location is determined using
available information from cellular network data (4G or 3G models), and from local Wi-Fi networks
using it.
When an app is using Location Services, appears in the status bar.
Every app and system service that uses Location Services appears in the Location Services settings
tries to use it.
The location data collected by Apple doesn’t personally identify you. If you have third-party apps
on iPad that use Location Services, review the third party’s terms and privacy policy for each app
to understand how it uses your location data.
Go to Settings > Location Services.
Cellular Data
Use Cellular Data settings (on models that support cellular connections) to activate cellular data
SIM card. With some carriers, you can also change your data plan.
Go to Settings > Cellular Data, then tap
View Account. Follow the onscreen instructions.
other services. If Cellular Data is turned on, carrier charges may be incurred.
For example, using certain features and services such as Messages transfer
data could result in charges to your data plan.
122 Chapter 25 Settings
Draft
Apple Confidential

VPN
VPNs used within organizations let you communicate private information securely over a non-
“Network” on page 12 5.
Personal Hotspot
With iPad Wi-Fi + 4G models, you can use Personal Hotspot to share an Internet connection with
a computer or other device—such as an iPod touch, iPhone, or other iPad—connected to your
iPad via Wi-Fi. You can also use Personal Hotspot to share an Internet connection with a computer
connected to iPad via Bluetooth or USB. Personal Hotspot works only if iPad is connected to the
Internet over the cellular data network.
Note: This feature may not be available in all areas. Additional fees may apply. Contact your carrier
for more information.
Share an Internet connection: Go to Settings > General > Network and tap Set Up Personal
Hotspot—if it appears—to set up the service with your carrier.
After you turn on Personal Hotspot, other devices can connect in the following ways:
ÂW-Fi: On the device, choose your iPad from the list of available Wi-Fi networks.
ÂUSB: Connect your computer to iPad using the Dock Connector to USB Cable. In your
ÂBluetooth: On iPad, go to Settings > General > Bluetooth and turn on Bluetooth. To pair and
connect iPad with your device, refer to the documentation that came with your computer.
When a device is connected, a blue band appears at the top of the iPad screen. Personal
Hotspot remains on when you connect with USB, even when you aren’t actively using the
Internet connection.
Note: The Personal Hotspot icon appears in the status bar of iOS devices using the
Personal Hotspot.
Change the Wi-Fi password
for iPad
Go to Settings > Personal Hotspot > Wi-Fi Password, then enter a password
of at least 8 characters.
Monitor your cellular data
network usage
Go to Settings > General > Usage > Cellular Usage.
Brightness & Wallpaper
Use Brightness settings to adjust the screen to a comfortable level.
Adjust the screen brightness: Go to Settings > Brightness & Wallpaper and drag the slider.
Set whether iPad adjusts screen
brightness automatically
If Auto-Brightness is on, iPad adjusts the screen brightness for current light
conditions using the built-in ambient light sensor.
Wallpaper settings let you set an image or photo as wallpaper for the Lock screen or Home screen.
See “Changing the wallpaper” on page 27.
123
Chapter 25 Settings
Draft
Apple Confidential

Picture Frame
Picture Frame mode turns iPad into an animated picture frame. Choose which transition to use,
the duration of each photo, and which album to display. Choose whether to zoom in on faces and
Start Picture Frame: Tap on the Lock screen.
Remove the Picture Frame button
from the lock screen
Go to Settings > General > Passcode Lock.
General
information about your iPad, and reset various iPad settings.
About
Go to Settings > General > About to get information about your iPad, including available storage
space, serial numbers, network addresses, and legal and regulatory information. You can also view
Change the name of your iPad: Go to Settings > General > About, then tap Name.
The name appears in the sidebar when iPad is connected to iTunes, and it’s used by iCloud.
Software Update
Software Update lets you download and install iOS updates from Apple.
Update to the latest iOS version: Go to Settings > General > Software Update.
If a newer version of iOS is available, follow the onscreen instructions to download and install
the update.
Note: Make sure iPad is connected to a power source so that the installation, which can take
several minutes, completes successfully.
Usage
You can view available storage space, the percentage of battery power remaining, and, on 4G or
3G models, cellular usage.
View available storage: Go to Settings > General > Usage.
Manage iCloud storage Go to Settings > General > Usage > Manage Storage. You can view or
additional iCloud storage space.
View app storage Go to Settings > General > Usage. Each installed app’s total storage space is
shown. For more details, tap the app’s name.
See your cellular usage Go to Settings > General > Usage > Cellular Usage. Available on 4G or
3G models.
Reset your usage statistics Go to Settings > General > Usage > Cellular Usage, then tap Reset Statistics
to clear the data and cumulative time statistics.
Show battery percentage Go to Settings > General > Usage and turn Battery Percentage on.
124 Chapter 25 Settings
Draft
Apple Confidential

Sounds
You can set iPad to play a sound whenever you get a new message, email, or reminder. Sounds
can also play for appointments, sending an email, keyboard clicks, and when you lock iPad.
Adjust the alerts volume: Go to Settings > General > Sounds and drag the slider. Or, if “Change
with Buttons” is turned on, use the volume buttons on the side of iPad.
Note:
to silent.
Allow the volume buttons to
change the alerts volume
Go to Settings > General > Sounds and turn on “Change with Buttons.”
Change the alert and other sounds Go to Settings > General > Sounds and select tones for the items in the list.
Change the volume of other
sounds
Use the volume buttons on the side of iPad.
Network
Wi-Fi settings.
Ask your network administrator which settings to use. In most cases, if
you’ve set up VPN on your computer, you can use the same VPN settings
for iPad. See “VPN” on page 123.
For information about Wi-Fi settings, see “Wi-Fi” on page 120 .
Bluetooth
iPad can connect wirelessly to Bluetooth devices such as headphones. You can also connect the
Apple Wireless Keyboard using Bluetooth. See “Using an Apple Wireless Keyboard” on page 31.
Go to Settings > General > Bluetooth.
Connect to a Bluetooth device Tap the device in the Devices list, then follow the onscreen instructions
to connect to it. See the documentation that came with the device for
instructions about Bluetooth pairing.
iTunes Wi-Fi Sync
You can sync iPad with iTunes on a computer that’s connected to the same Wi-Fi network.
Enable iTunes Wi-Fi Sync: Connect iPad to your computer using the Dock Connector to USB
Cable. In iTunes, turn on “Sync over Wi-Fi connection” in the device’s Summary pane. See “Syncing
with iTunes” on page 20.
connected to a power source and:
iPad and your computer are both connected to the same Wi-Fi network. Â
iTunes on your computer is running. Â
See Wi-Fi Sync status Go to Settings > General > iTunes Wi-Fi Sync.
Immediately sync with iTunes Go to Settings > General > iTunes Wi-Fi Sync, then tap Sync Now.
125
Chapter 25 Settings
Draft
Apple Confidential

Spotlight Search
The Spotlight Search setting lets you specify the content areas searched by Search, and rearrange
the order of the results.
Set which content areas are searched by Search: Go to Settings > General > Spotlight Search,
then select the items to search.
Set the order of search result
categories
Go to Settings > General > Spotlight Search. Touch next to an item and
drag to move the item in the list.
Auto-Lock
of iPad.
Set the amount of time before iPad locks: Go to Settings > General > Auto-Lock, then choose
a time.
If you’re listening to music while the screen is locked, use the volume buttons to adjust the volume.
Passcode Lock
By default, iPad doesn’t require a passcode to unlock it.
Setting a passcode enables data protection. See “Security features” on page 38.
Set a passcode: Go to Settings > General > Passcode Lock to set a 4-digit passcode.
If you forget your passcode, you must restore the iPad software. See “Updating iPad” on page 139.
change your passcode
Go to Settings > General > Passcode Lock.
Set how long before your
passcode is required
Go to Settings > General > Passcode Lock and enter your passcode. Tap
Require Passcode, then select how long iPad will wait after being locked
before it requires your passcode in order to be unlocked again.
Go to Settings > General > Passcode Lock.
Simple Passcode and use a longer passcode with a combination of
numbers, letters, punctuation, and special characters.
Erase data after ten failed
passcode attempts
Go to Settings > General > Passcode Lock and tap Erase Data.
After ten failed passcode attempts, all settings are reset, and all your
information and media are erased by removing the encryption key to
the data.
Go to Settings > General > Passcode Lock. See “Picture Frame” on page 12 4 .
iPad Cover Lock / Unlock
You can automatically lock or unlock iPad 2 or later when you use it with the iPad Smart Cover
(available separately). When this feature is turned on, iPad automatically locks and goes to sleep
when you close the cover, and then wakes when you open it. This setting appears when you
attach the iPad Smart Cover.
Restrictions
You can set restrictions for the use of some apps and for purchased content. For example, parents
Turn on restrictions: Go to Settings > General > Restrictions, then tap Enable Restrictions.
Important: If you forget your restrictions passcode, you must restore the iPad software. See
“Restoring iPad” on page 139.
126 Chapter 25 Settings
Draft
Apple Confidential

You can set the following restrictions:
Safari Safari is disabled and its icon is removed from the Home screen. You cannot use Safari to browse
the web or access web clips.
YouTube YouTube is disabled and its icon is removed from the Home screen.
Camera Camera is disabled and its icon is removed from the Home screen. You cannot take photos.
FaceTime You cannot make or receive FaceTime video calls. The FaceTime icon is removed from the
Home screen.
iTunes The iTunes Store is disabled and its icon is removed from the Home screen. You cannot preview,
purchase, or download content.
Ping You cannot access Ping or any of its features.
Installing Apps The App Store is disabled and its icon is removed from the Home screen. You cannot install apps
on iPad.
Deleting Apps You cannot delete apps from iPad. doesn’t appear on app icons when you’re customizing the
Home screen.
Dictation You cannot use text dictation.
Explicit
Language
iPad attempts to replace explicit dictated words with asterisks.
Location
changes to the settings can’t be made, including authorizing additional apps to use the services.
Accounts The current Mail, Contacts, Calendar settings are locked and you cannot add, modify, or
delete accounts.
Set content
restrictions
Tap Ratings For, then select a country from the list. You can then set restrictions using a country’s
ratings system for music, podcasts, movies, TV shows, and apps. Content that doesn’t meet the
rating you select won’t appear on iPad.
In-app
Purchases
or functionality within apps downloaded from the App Store.
Require
Password
Requires you to enter your Apple ID for in-app purchases after the time period you specify.
Multiplayer
Games
play games, or add friends in Game Center.
Adding Friends
Multiplayer Games is turned on, you can continue to play with existing friends.
Side Switch
Lock the screen in portrait or landscape orientation: Go to Settings > General > “Use the Side
Switch to…,” then tap Lock Rotation.
Go to Settings > General > “Use the Side Switch
to…,” then tap Mute.
The Side Switch doesn’t mute audio or video playback. Use the volume buttons on the side to
silence these sounds.
Multitasking Gestures
Multitasking gestures let you quickly switch between apps, reveal the multitasking bar, and go the
Home screen. See “Using multitasking gestures” on page 16.
127
Chapter 25 Settings
Draft
Apple Confidential

Date & Time
These settings apply to the time shown in the status bar at the top of the screen, and in world
clocks and calendars.
Set whether iPad shows 24-hour time or 12-hour time: Go to Settings > General > Date & Time.
(24-Hour Time may not be available in all countries or regions.)
Set whether iPad updates the
date and time automatically
Go to Settings > General > Date & Time.
If iPad is set to update the time automatically, it determines your time
zone based on your Internet connection and updates it for the time zone
you’re in. If you’re traveling, iPad may not be able to automatically set the
local time.
Set the date and time manually
Tap Time Zone to set your time zone. “Tap Date & Time,” then tap “Set Date
& Time” and enter the date and time.
Keyboard
Typing” on page 28.
To reset the keyboard dictionary, see “Reset” on page 129
For information about using international keyboards, see Appendix B, “ International
Keyboards,” on page 132 .
International
Set the language for iPad: Go to Settings > General > International > Language, choose the
language you want to use, then tap Done.
Set the calendar format Go to Settings > General > International > Calendar, and choose the format.
number formats
Go to Settings > General > International > Region Format, then choose
your region.
The Region Format also determines the language used for the days and
months that appear in apps.
Accessibility
To turn on accessibility features, choose Accessibility and choose the features you want. See
Chapter 24, “Accessibility,” on page 107.
A, “iPad in
Business,” on page 130 .
128 Chapter 25 Settings
Draft
Apple Confidential

Reset
You can reset the keyboard dictionary, network settings, home screen layout, and location
warnings. You can also erase all of your content and settings.
Erase all content and settings: Go to Settings > General > Reset, then tap Erase All Content
and Settings.
are removed. It cannot be used until it’s set up again.
Reset all settings Go to Settings > General > Reset and tap Reset All Settings.
All your preferences and settings are reset.
Reset network settings Go to Settings > General > Reset and tap Reset Network Settings.
When you reset network settings, your list of previously used networks and
on. The Wi-Fi and “Ask to Join Networks” settings are left turned on.
Reset the keyboard dictionary Go to Settings > General > Reset and tap Reset Keyboard Dictionary.
You add words to the keyboard dictionary by rejecting words iPad suggests
as you type. Tap a word to reject the correction and add the word to the
keyboard dictionary. Resetting the keyboard dictionary erases all words
you’ve added.
Reset the Home screen layout Go to Settings > General > Reset and tap Reset Home Screen Layout.
Reset location warnings Go to Settings > General > Reset and tap Reset Location Warnings.
Location warnings are requests made by apps to use Location Services.
request to use Location Services. If you tap Cancel in response, the request
isn’t shown again. To reset the location warnings so that you get a request
for each app, tap Reset Location Warnings.
Settings for apps
See other chapters for information about settings for apps. For example, for Safari settings, see
Chapter 4, “Safari,” on page 40.
129
Chapter 25 Settings
Draft
Apple Confidential
iPad in Business A
Appendix
iPad in the enterprise
With support for secure access to corporate networks, directories, and Microsoft Exchange,
iPad is ready to go to work. For detailed information about using iPad in business, go to
www.apple.com/ipad/business.
If you’re in an enterprise environment, you may be able to set up accounts and other items on
iPad to use the information systems at your company, school, or organization. For example, a
iPad can access your Exchange email, calendars, and contacts.
Passcode Lock, which requires you to create and enter a passcode in order to use iPad.
webpage, or by installing them directly on iPad for you. Your administrator may have you install a
installation begins.
Important:
Setting up Microsoft Exchange accounts
Microsoft Exchange provides email, contact, tasks, and calendar information that you can
automatically sync wirelessly to iPad. You can set up an Exchange account directly on iPad.
Set up an Exchange account on iPad: Go to Settings > Mail, Contacts, Calendars. Tap Add
Account, then tap Microsoft Exchange.
Your service provider or administrator can provide the account settings you need.
130
Draft
Apple Confidential
VPN access
VPN (virtual private network) provides secure access over the Internet to private networks, such as
VPN. Ask your administrator what settings you should use.
information, contact your administrator.
LDAP and CardDAV accounts
When you set up an LDAP account, you can view and search for contacts on your company or
organization’s LDAP server. The server appears as a new group in Contacts. Because LDAP contacts
aren’t downloaded to iPad, you must have an Internet connection to view them. Check with your
administrator for account settings and other requirements (such as VPN).
When you set up a CardDAV account, your account contacts are synced with iPad over the air. You
may also be able to search for contacts on your company or organization’s CardDAV server.
Set up an LDAP or CardDAV account: Go to Settings > Mail, Contacts, Calendars, then tap Add
Account. Tap Other.
Your service provider or administrator can provide the account settings you need.
131
Appendix A iPad in Business
Draft
Apple Confidential

International Keyboards B
Appendix
and languages written from right to left.
Adding and removing keyboards
keyboard for the language you’ve set is available. To make keyboards for other languages available,
use Keyboard settings. For a list of keyboards supported by iPad, go to www.apple.com/ipad/specs.
Add a keyboard: Go to Settings > General > International > Keyboards > Add New Keyboard,
then choose a keyboard from the list. Repeat to add more keyboards.
Remove a keyboard: Go to Settings > General > International > Keyboards, then tap Edit. Tap
next to the keyboard you want to remove, then tap Delete.
Edit your keyboard list: Go to Settings > General > International > Keyboards. Tap Edit, then
drag next to a keyboard to a new place in the list.
Switching keyboards
Switch keyboards while typing: Touch and hold the Globe key to show all enabled keyboards.
key appears when you enable more than one keyboard.
You can also tap . When you tap
Continue tapping to access other enabled keyboards.
Many keyboards provide letters, numbers, and symbols that aren’t visible on the keyboard.
Enter accented letters or other alternate characters: Touch and hold the related letter, number,
or symbol, then slide to choose a variant. On a Thai keyboard, for example, you can choose native
numbers by touching and holding the related Arabic number.
Chinese
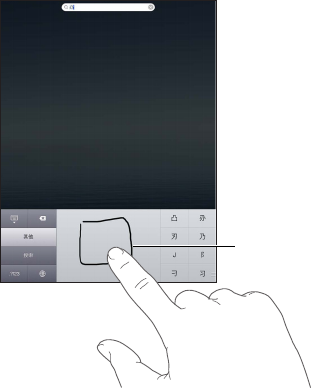
Typing using Pinyin
characters appear. Tap a suggestion to choose it, continue typing Pinyin to see more options.
If you keep entering Pinyin without spaces, sentence suggestions appear.
132
Draft
Apple Confidential
Typing using Cangjie
Build Chinese characters from the component Cangjie keys. As you type, suggested characters
Typing using Stroke (Wubihua)
sequence: horizontal, vertical, left falling, right falling, and hook. For example, the Chinese
character 圈 (circle) should begin with the vertical stroke 丨.
As you type, suggested Chinese characters appear (the most commonly used characters appear
If you’re not sure of the correct stroke, enter an asterisk (*). To see more character options, type
another stroke, or scroll through the character list.
Tap the match key (匹配) to show only characters that match exactly what you typed.
Typing using Zhuyin
Use the keyboard to enter Zhuyin letters. As you type, suggested Chinese characters appear. Tap
a suggestion to choose it, or continue entering Zhuyin letters to see more options. After you type
an initial letter, the keyboard changes to show more letters.
If you keep entering Zhuyin without spaces, sentence suggestions appear.
Drawing Chinese characters
recognizes them and shows matching characters in a list, with the closest match at the top. When
you choose a character, its likely follow-on characters appear in the list as additional choices.
Touchpad
Touchpad
Some complex characters, such as 鱲 (part of the name for the Hong Kong International
Airport), � (elevator), and 㗎 (particle used in Cantonese), can be typed by writing two or more
component characters in sequence. Tap the character to replace the characters you typed.
Roman characters are also recognized.
Select the character or characters you want to convert, then tap Replace.
133
Appendix B International Keyboards
Draft
Apple Confidential

Japanese
You can type Japanese using the Kana or Romaji keyboards. You can also type facemarks.
Typing Japanese kana
Use the Kana keypad to select syllables. For more syllable options, tap the arrow key and select
another syllable or word from the window.
Typing Japanese romaji
Use the Romaji keyboard to type syllables. Alternative choices appear along the top of the
keyboard, tap one to type it. For more syllable options, tap the arrow key and select another
syllable or word from the window.
Typing facemarks or emoticons
Using the Japanese Kana keyboard, tap the ^_^ key.
Using the Japanese Romaji keyboard (QWERTY-Japanese layout), tap the Number key , then tap
the ^_^ key.
Symbols key , then tap the ^_^ key.
Typing emoji characters
Use the Emoji keyboard to add picture characters. You also can type emoji characters using a
Japanese keyboard. For example, type はーと to get ♥.
Using the candidate list
As you type on Chinese, Japanese, or Arabic keyboards, suggested characters or candidates appear
Use the extended candidate list: Tap the up arrow at the right to view the full candidate list. Flick
up or down to scroll the list. Tap the down arrow to go back to the short list.
Using shortcuts
When using certain Chinese or Japanese keyboards, you can create a shortcut for word and input
pairs. The shortcut is added to the personal dictionary. When you type a shortcut while using a
supported keyboard, the associated word or input pair is substituted for the shortcut. Shortcuts
are available for the following keyboards:
Â
Chinese - Traditional (Pinyin) Â
Chinese - Traditional (Zhuyin) Â
Japanese (Romaji) Â
Japanese (50 Key) Â
Go to Settings > General > Keyboard > Shortcuts.
134 Appendix B International Keyboards
Draft
Apple Confidential
Vietnamese
Touch and hold a character to see the available diacritical marks, then slide to choose the one
you want.
You can also type the following key sequences to enter characters with diacritical marks:
aa—â Â
Âaw—ă (a caron)
Âee—ê
Âoo—ô
Âow—ơ (o hook)
Âw—ư (u hook)
Âdd—đ (d dash)
Âas—á (a acute)
af—à Â (a grave)
Âar—ả (a question mark)
Âax—ã (a rising accent)
Âaj—ạ (a drop tone)
135
Appendix B International Keyboards
Draft
Apple Confidential

Support and Other Information C
Appendix
iPad Support site
Comprehensive support information is available online at www.apple.com/support/ipad. You can
also use Express Lane for personalized support (not available in all areas). See expresslane.apple.com.
Low-battery image or “Not Charging” message appears
iPad is low on power and needs to charge for up to twenty minutes before you can use it. For
information about charging iPad, see “Charging the battery” on page 22.
or
or
When charging, make sure you’re using the 10W USB power adapter that came with iPad or the Â
USB port on a recent Mac. The fastest way to charge is to use the power adapter. See “Charging
the battery” on page 22.
Â
iPad may not charge when connected to the USB port on an older Mac, a PC, a keyboard, or to Â
a USB hub.
If your Mac or PC doesn’t provide enough power to charge iPad, a Not Charging message appears
in the status bar. To charge iPad, disconnect it from your computer and connect it to a power
outlet using the included Dock Connector to USB Cable and 10W USB power adapter.
iPad doesn’t respond
iPad may be low on power. Connect iPad to the 10W USB power adapter to charge. See Â
“Charging the battery” on page 22.
Press and hold the Sleep/Wake button for a few seconds until a red slider appears, then press Â
and hold the Home button to force the app you were using to close.
Â
button until a red slider appears, then drag the slider. Then press and hold the Sleep/Wake
button until the Apple logo appears.
If that doesn’t work, reset iPad. Press and hold both the Sleep/Wake button and the Home Â
button for at least ten seconds, until the Apple logo appears.
If the screen doesn’t rotate when you turn iPad, hold iPad upright, and make sure that the Â
screen rotation lock is not engaged.
136
Draft
Apple Confidential

Restarting and resetting iPad
If something isn’t working right, try restarting iPad, forcing an app to close, or resetting iPad.
Restart iPad:
logo appears.
Force an app to close: Hold down the Sleep/Wake button on top of iPad for a few seconds until a
red slider appears, then hold down the Home button until the app closes.
Reset iPad: Hold down the Sleep/Wake button and the Home button at the same time for at least
ten seconds, until the Apple logo appears.
“This accessory is not supported by iPad” appears
The accessory you attached may not work with iPad. Make sure the Dock Connector to USB Cable
is free of debris, and refer to the documentation that came with the accessory.
Most apps for iPhone and iPod touch can be used with iPad, but they might not take advantage
of the large screen. In this case, tap to zoom in on the app. Tap to return to the original size.
Check the App Store to see if there’s a version of the app that’s optimized for iPad, or a universal
version that’s optimized for iPhone, iPod touch, and iPad.
Onscreen keyboard doesn’t appear
If iPad is paired with a Bluetooth keyboard, the onscreen keyboard doesn’t appear. To make the
onscreen keyboard appear, press the Eject key on a Bluetooth keyboard. You can also make the
Backing up iPad
You can use iCloud or iTunes to automatically back up iPad. If you choose to automatically back
up using iCloud, you can’t also use iTunes to automatically back up to your computer, but you can
use iTunes to manually back up to your computer.
Backing up with iCloud
iCloud automatically backs up to iPad daily over Wi-Fi, when it’s connected to a power source and
is locked. The date and time of the last backup is listed at the bottom of the Storage & Backup
screen. iCloud backs up your:
Purchased music, TV shows, apps, and books Â
Photos and videos in your Camera Roll Â
iPad settings Â
App data Â
Home screen and app organization Â
Messages Â
Note: Purchased music isn’t backed up in all areas and TV shows aren’t available in all areas.
137
Appendix C Support and Other Information
Draft
Apple Confidential

iCloud settings. When you turn on iCloud backup, iPad no longer backs up to your computer
automatically when you sync with iTunes.
Turn on iCloud backups Go to Settings > iCloud, then log in using your Apple ID and password, if
required. Go to Storage & Backup, then turn iCloud Backup on.
Back up immediately Go to Settings > iCloud > Storage & Backup, then tap Back Up Now.
Manage your backups Go to Settings > iCloud > Storage & Backup, then tap Manage Storage.
Tap the name of your iPad.
Go to Settings > iCloud > Storage & Backup, then tap Manage Storage.
View the devices being backed up Go to Settings > iCloud > Storage & Backup > Manage Storage.
Stop iCloud automatic backups
Music that isn’t purchased in iTunes isn’t backed up in iCloud. You have to use iTunes to back up
and restore that content. See “Syncing with iTunes” on page 20.
Important: Backups for music or TV show purchases are not available in all areas. Previous
purchases may be unavailable if they are no longer in the iTunes Store, App Store, or iBookstore.
Purchased content, as well as Photo Stream content, doesn’t count against your 5 GB of free
iCloud storage.
Backing up with iTunes
iTunes creates a backup of photos in Camera Roll or in Saved Photos, text messages, notes,
backed up, but can be restored by syncing with iTunes.
When you connect iPad to the computer you normally sync with, iTunes creates a backup each
time you:
ÂSync with iTunes: iTunes syncs iPad each time you connect iPad to your computer. iTunes won’t
Syncing
with iTunes” on page 20.
ÂUpdate or restore iPad: iTunes automatically backs up iPad before updating and restoring.
iTunes can also encrypt iPad backups to secure your data.
Encrypt iPad backups: Select “Encrypt iPad backup” in the iTunes Summary screen.
Connect iPad to the computer you normally sync with, select iPad
in the iTunes window, and click Restore in the Summary pane.
Removing an iTunes backup
You can remove an iPad backup from the list of backups in iTunes. You may want to do this, for
example, if a backup was created on someone else’s computer.
Remove a backup:
1 In iTunes, open iTunes Preferences.
ÂMac: Choose iTunes > Preferences.
ÂWindows: Choose Edit > Preferences.
2 Click Devices (iPad doesn’t need to be connected).
3 Select the backup you want to remove, then click Delete Backup.
4
138 Appendix C Support and Other Information
Draft
Apple Confidential
Updating and restoring iPad software
You can update iPad software in Settings, or by using iTunes. You can also erase iPad, and then use
iCloud or iTunes to restore a backup.
Deleted data is no longer accessible through the iPad user interface, but it isn’t erased from iPad.
For information about erasing all content and settings, see “Reset” on page 129.
Updating iPad
You can update iPad software in Settings, or by using iTunes.
Update wirelessly on iPad: Go to Settings > General > Software Update. iPad checks for available
software updates.
Update software in iTunes: iTunes checks for available software updates each time you sync iPad
using iTunes. See “Syncing with iTunes” on page 20.
For more information about updating iPad software, go to support.apple.com/kb/HT4623.
Restoring iPad
You can use iCloud or iTunes to restore iPad from a backup.
Restore from an iCloud backup: Reset iPad to erase all settings and information. Sign in to iCloud
and choose Restore from a Backup in the Setup Assistant. See “Reset” on page 129.
Restore from an iTunes backup: Connect iPad to the computer you normally sync with, select
iPad in the iTunes window, and click Restore in the Summary pane.
When the iPad software is restored, you can either set it up as a new iPad, or restore your music,
videos, app data, and other content from a backup.
For more information about restoring iPad software, go to support.apple.com/kb/HT1414.
Can’t send or receive email
If iPad can’t send or receive email, try these steps.
Can’t send email
Â
a red slider appears, then drag the slider. Then press and hold the Sleep/Wake button until the
Apple logo appears.
In Settings, go to Mail, Contacts, Calendars, then select the account you’re trying to use. Tap Â
Account Info, then tap SMTP under Outgoing Mail Server. You can set up additional SMTP
servers, or select one from another mail account on iPad. Contact your Internet service provider
Set up your mail account directly on iPad, instead of syncing it from iTunes. Go to Settings > Â
Mail, Contacts, Calendars, tap Add Account and enter your account information. If iPad is unable
to locate your service provider’s settings when you enter your email address, go to support.
apple.com/kb/HT4810 for help setting up your account.
For additional troubleshooting information, go to www.apple.com/support/ipad. If you still can’t
send email, you can use Express Lane (not available in all areas). Go to expresslane.apple.com.
139
Appendix C Support and Other Information
Draft
Apple Confidential