Apple A1584 Tablet Device User Manual Live Preview
Apple Inc. Tablet Device Live Preview
UserManual.wiki
>
Apple
>
A1584 User Manual
>
Manual 2
Contents
1.
Manual 1
2.
Manual 2
3.
Manual 3
4.
Manual 4
5.
Manual 5
6.
A1584_User_Manual_Important_Info_Guide
Manual 2
Navigation menu
Upload a User Manual
Namespaces
Wiki Guide
HTML
PDF
Info
Views
User Manual
Discussion / Help
Navigation
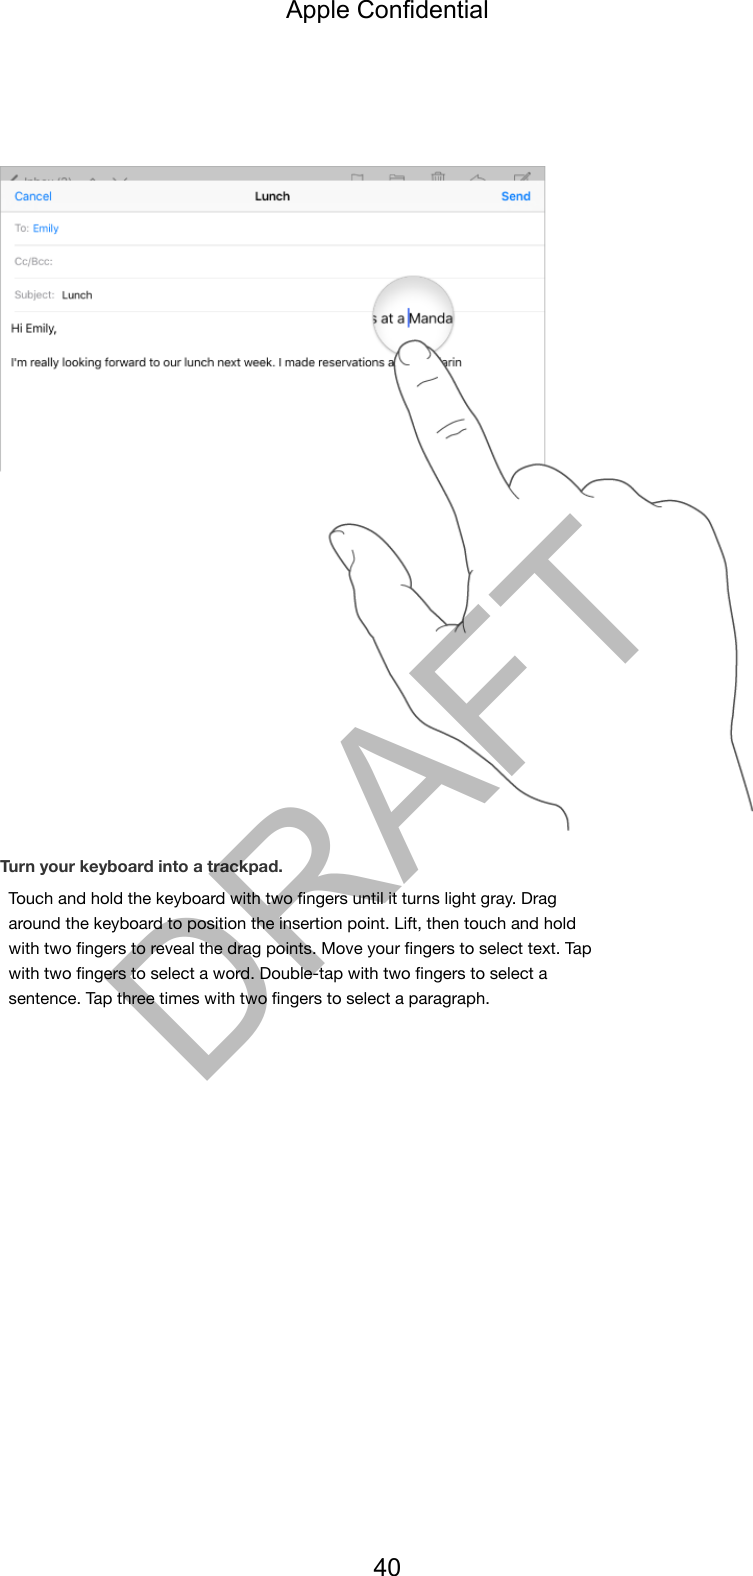
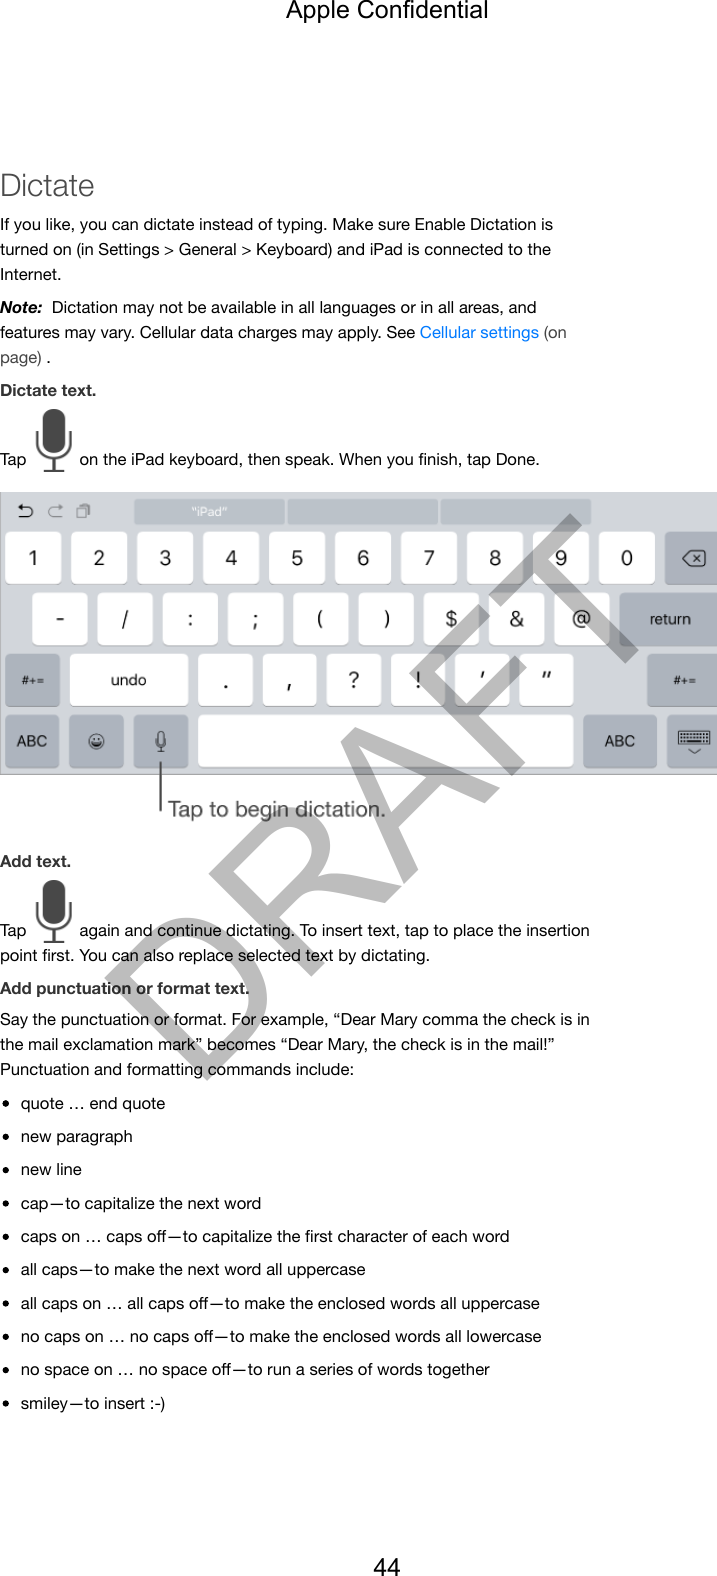
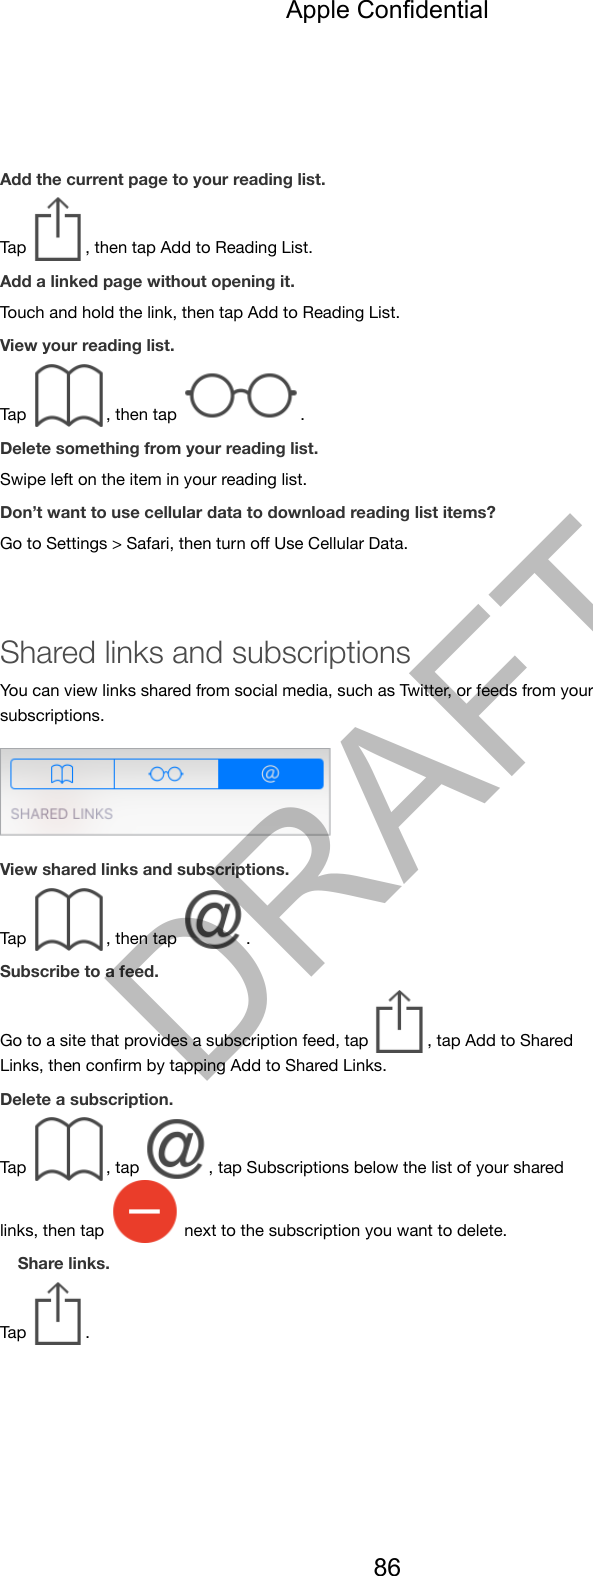
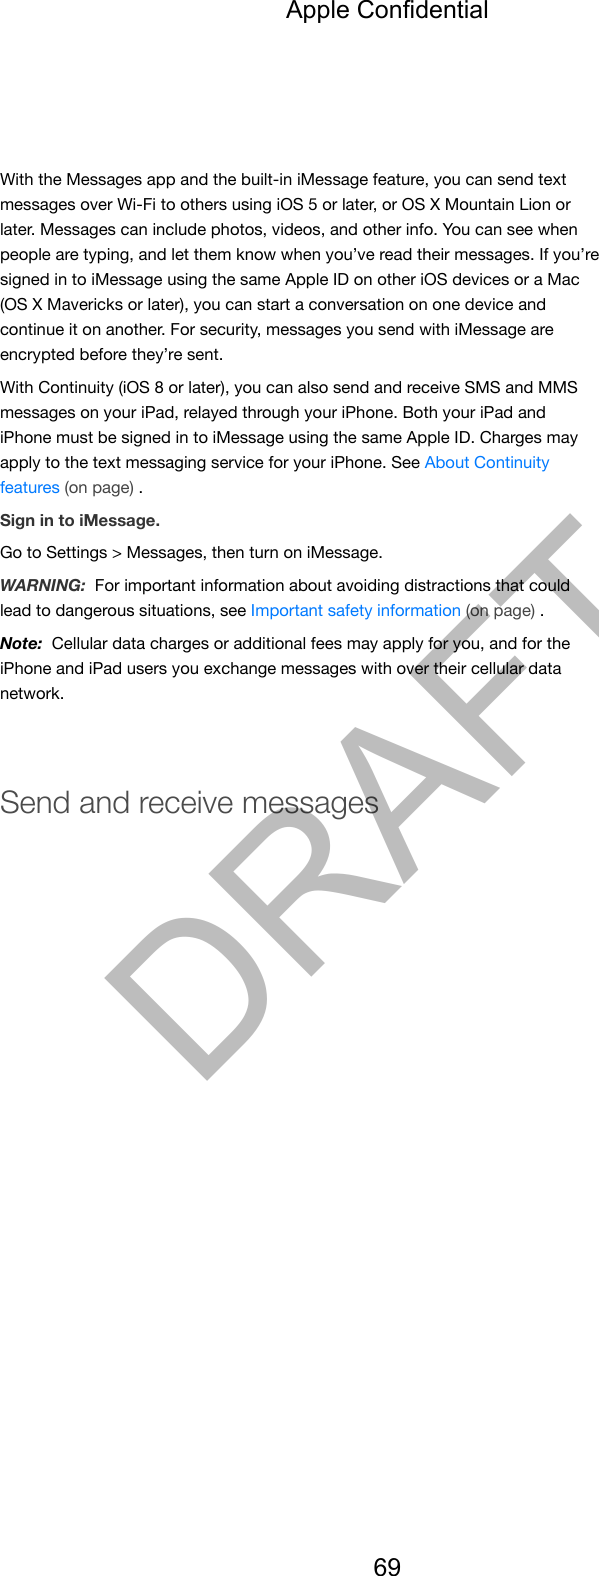
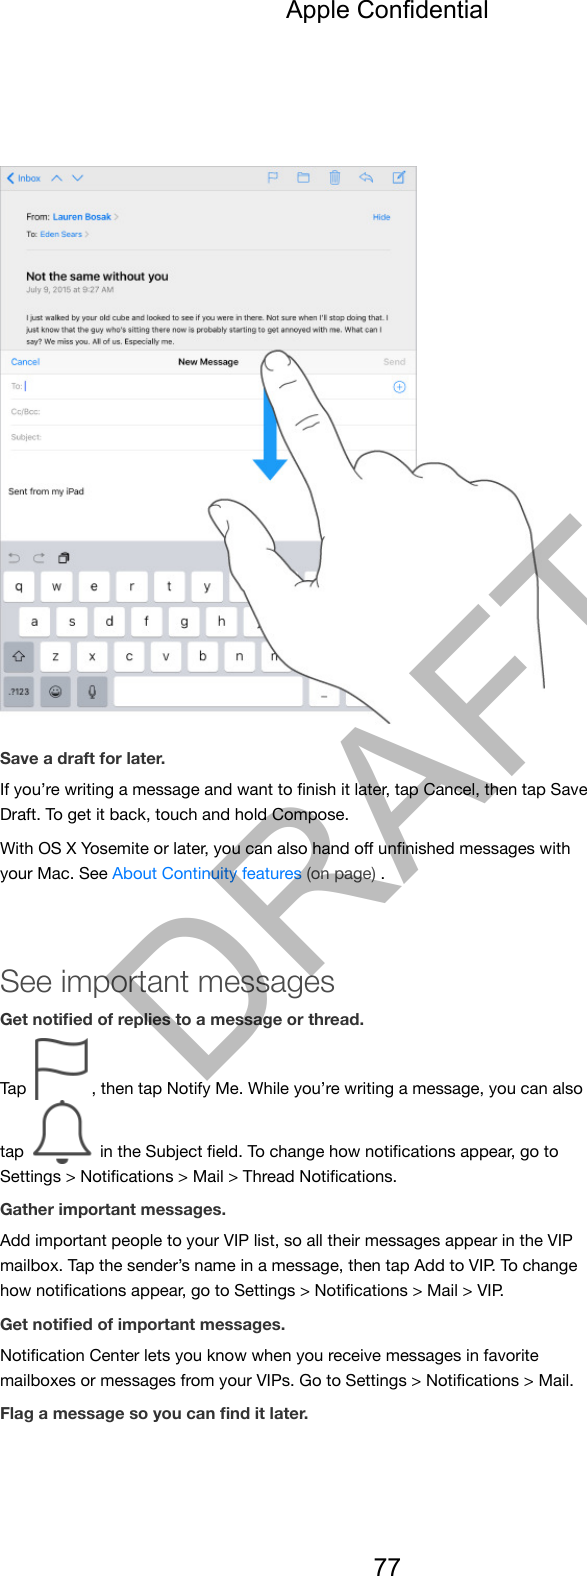
![Access shared purchases.Open iTunes Store, iBooks Store, or App Store, tap Purchased, then choose afamily member from the menu that appears.When a family member initiates a purchase, it is billed directly to the familyorganizer’s account. Once purchased, the item is added to the initiating familymember’s account and is shared with the rest of the family. If Family Sharing isever disabled, each person keeps the items they chose to purchase—even ifthey were paid for by the family organizer.Turn on Ask to Buy.The family organizer can require young family members to request approval forpurchases or free downloads. Go to Settings > iCloud > Family, then tap theperson’s name.Note: Age restrictions for Ask to Buy vary by area. In the United States, thefamily organizer can enable Ask to Buy for any family member under age 18; forchildren under age 13, it’s enabled by default.Hide your iTunes Store, App Store, and iBooks Store purchases.To hide all your purchases from family members, tap Settings > iCloud > Family> [your name], then turn off Share My Purchases. On your computer, you canalso hide specific purchases so they aren’t available to other family members.See support.apple.com/en-us/HT201322.Share photos or videos with family members.Apple Confidential52DRAFT](https://usermanual.wiki/Apple/A1584.Manual-2/User-Guide-2777959-Page-18.png)
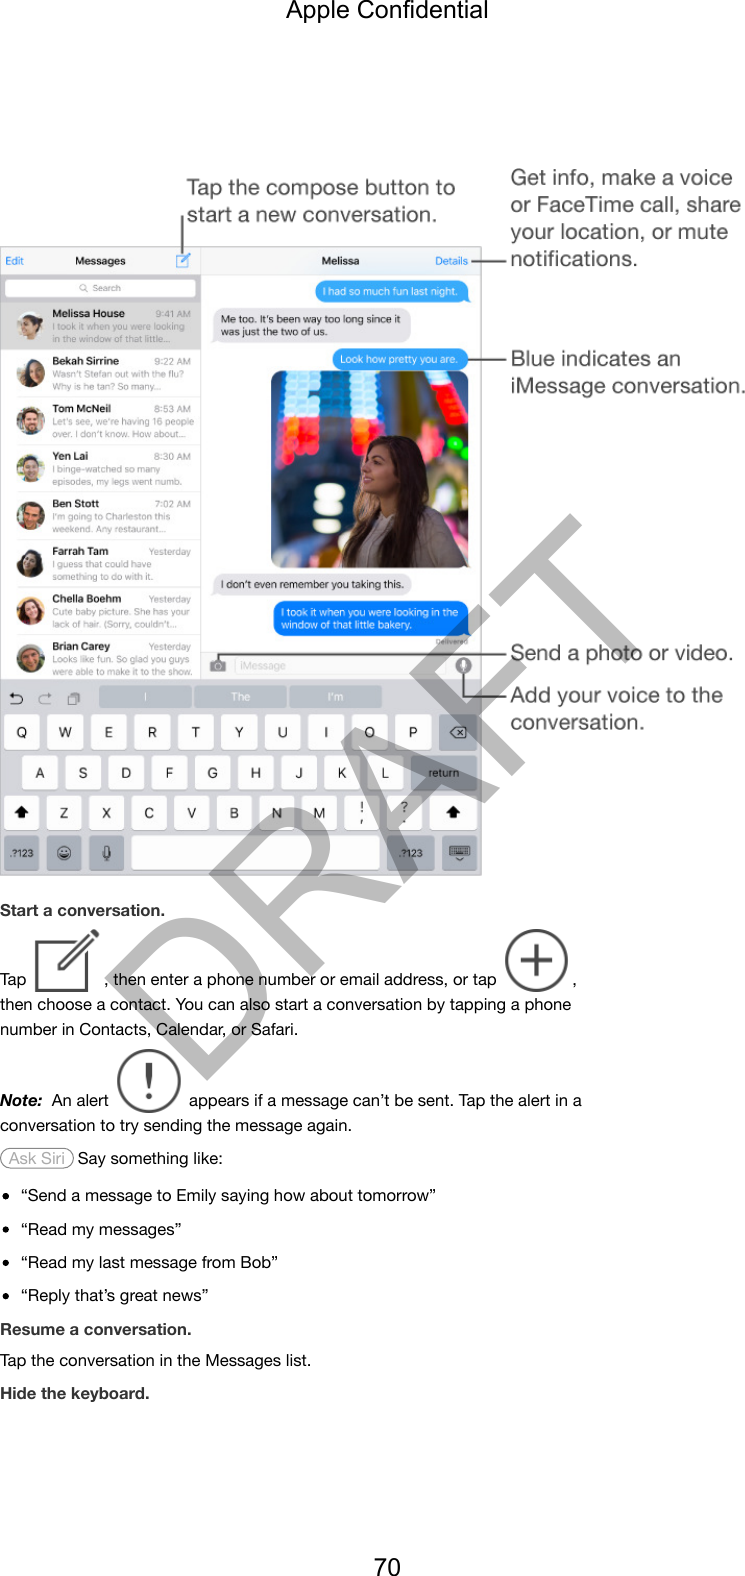

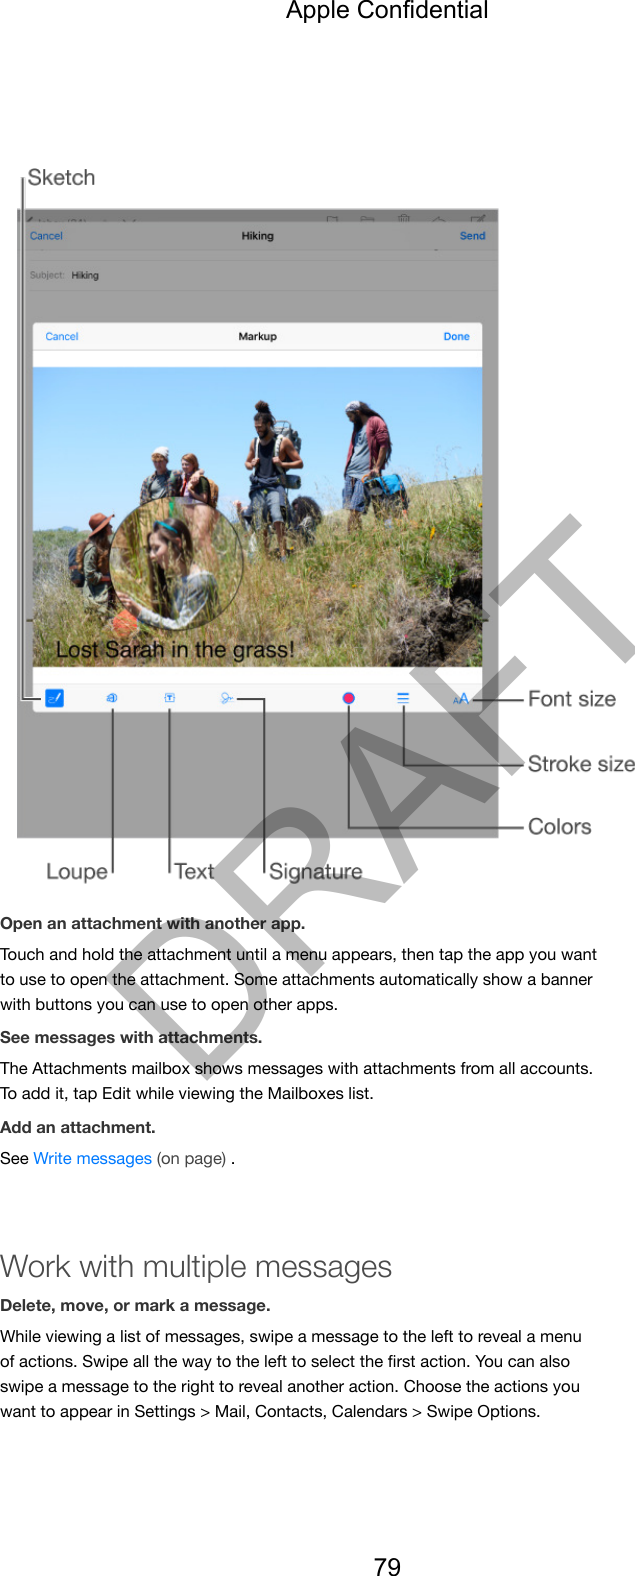
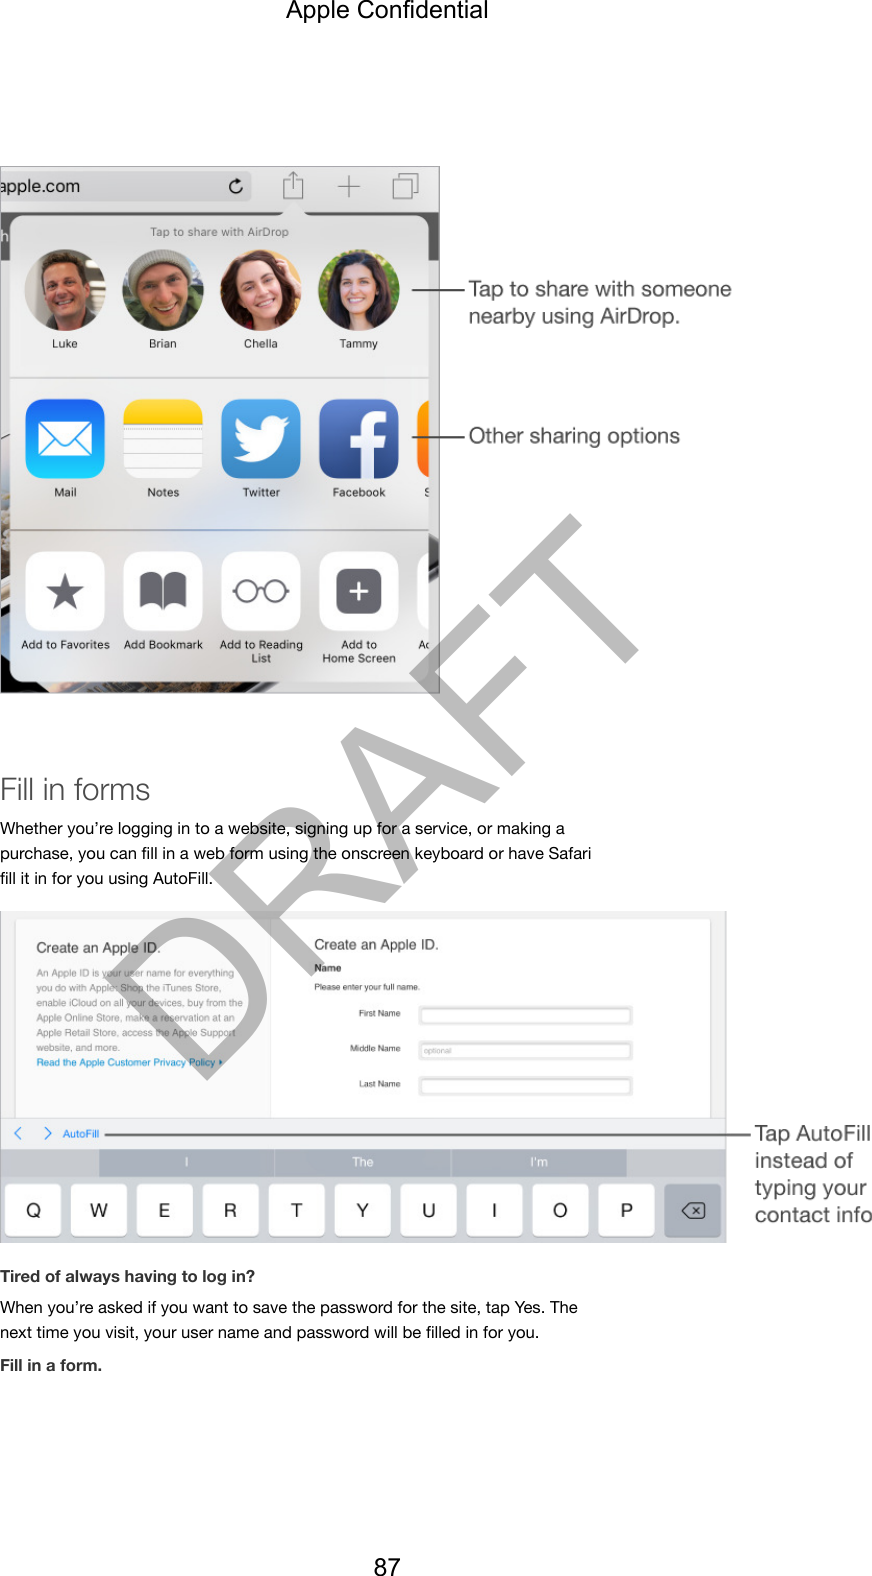
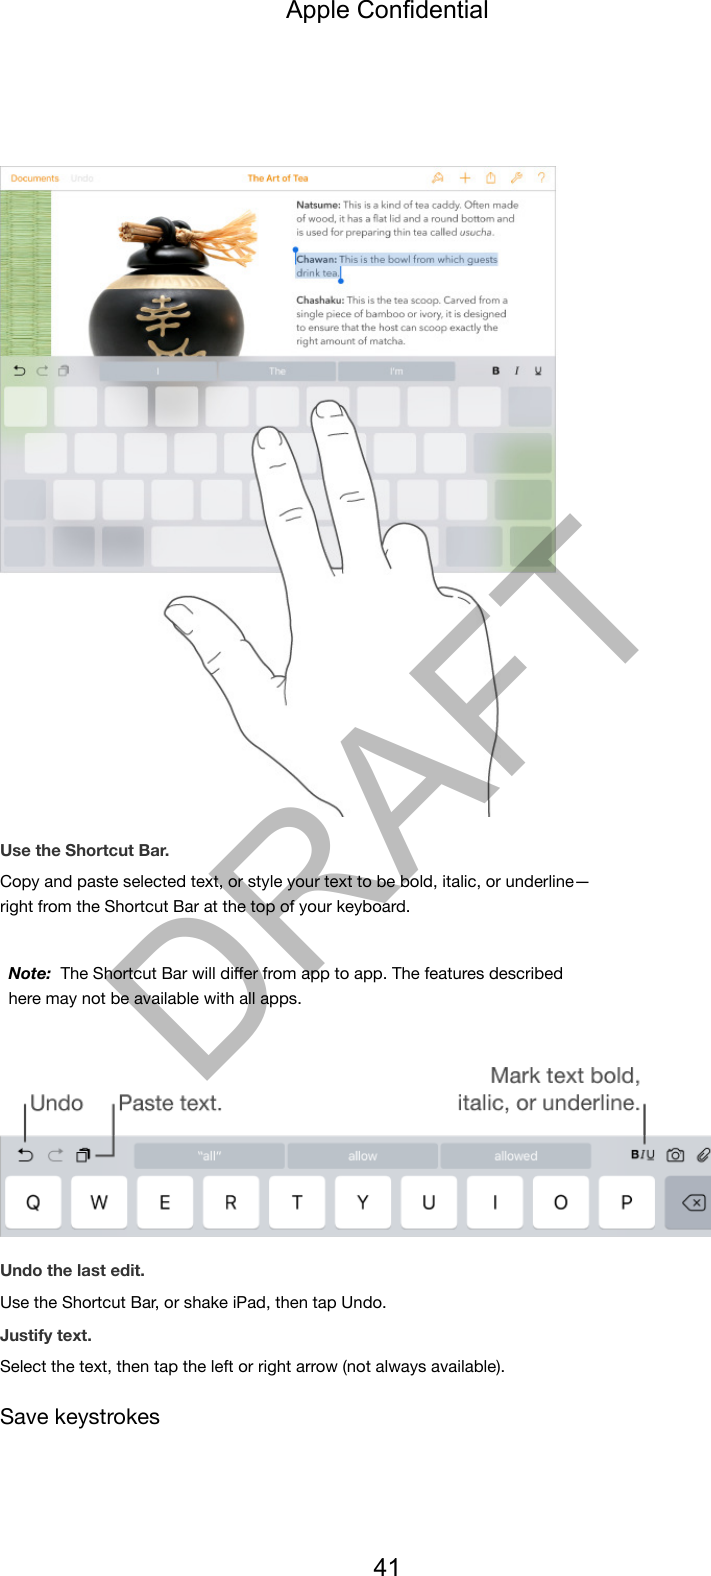
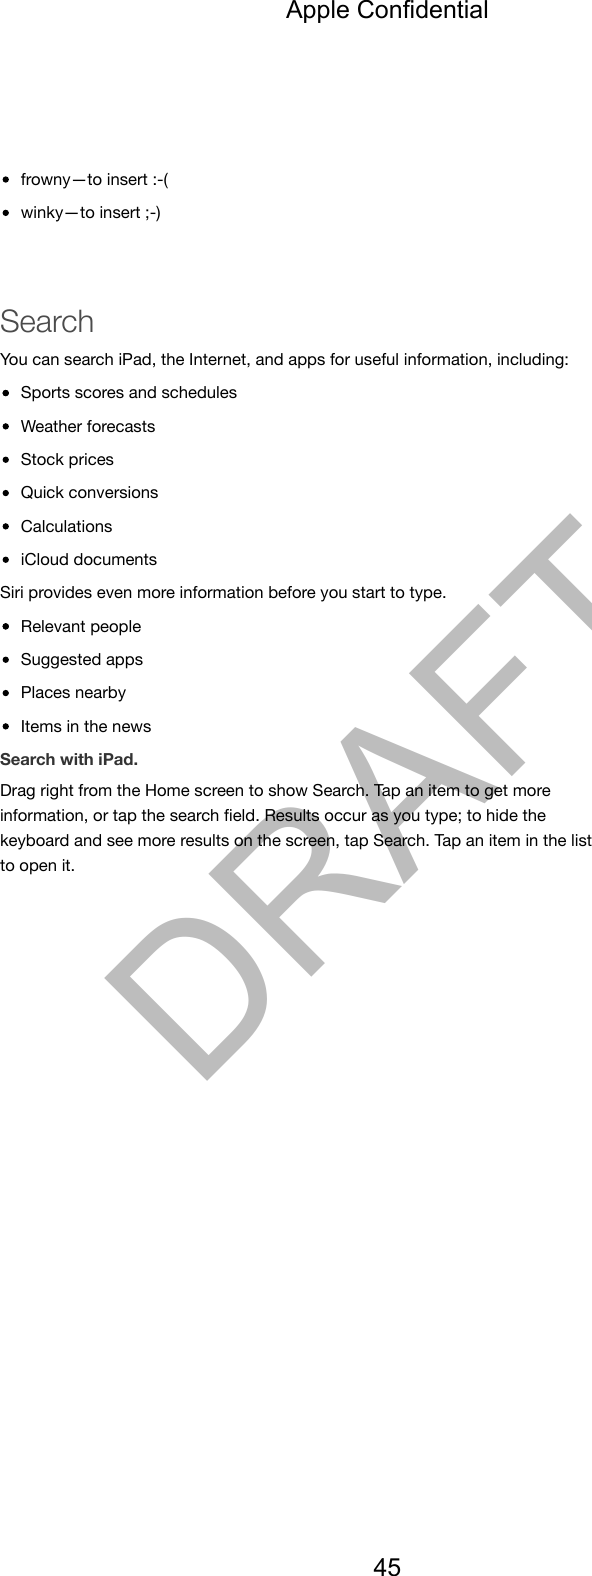
![Delete, move, or mark multiple messages.While viewing a list of messages, tap Edit. Select some messages, then choosean action. If you make a mistake, shake iPad immediately to undo.Organize your mail with mailboxes.Tap Edit in the mailboxes list to create a new one, or rename or delete one.(Some built-in mailboxes can’t be changed.) There are several smart mailboxes,such as Unread, that show messages from all your accounts. Tap the ones youwant to use.Recover a deleted message.Go to the account’s Trash mailbox, open the message, then tap andmove the message. Or, if you just deleted it, shake iPad to undo. To see deletedmessages across all your accounts, add the Trash mailbox. To add it, tap Edit inthe mailboxes list, then select it in the list.Archive instead of delete.Instead of deleting messages, you can archive them so they’re still around, inthe Archive mailbox, if you need them. To turn this option on, select ArchiveMailbox in Settings > Mail, Contacts, Calendars > account name > Account >Advanced. To delete a message instead of archiving it, touch and hold , then tap Delete.Stash your trash.You can set how long deleted messages stay in the Trash mailbox. Go toSettings > Mail, Contacts, Calendars > [account name] > Account > Advanced.See and save addressesSee who received a message.While viewing the message, tap More in the To field.Add someone to Contacts or make them a VIP.Tap the person’s name or email address, then tap Add to VIP. You can also addtheir address to a new or existing contact.Print messagesPrint a message.Tap , then tap Print.Print an attachment or picture.Tap to view it, tap , then choose Print.Apple Confidential80DRAFT](https://usermanual.wiki/Apple/A1584.Manual-2/User-Guide-2777959-Page-46.png)