Apple IMacG5(20 Inch) IMac G5 20 Inch Memory Replacement Instructions (Do It Yourself Manual) User Manual I Mac G520 Instructions(Do 20inch
User Manual: Apple iMacG5(20-inch) iMacG520-inchMemoryReplacementInstructions(DoItYourselfManual)
Open the PDF directly: View PDF ![]() .
.
Page Count: 10
Memory 20-inch, Rev. B
iMac G5
Memory, 20-inch
Replacement Instructions
Follow the instructions in this document carefully. Failure to follow these instructions could
damage your equipment and void its warranty.
Note:
Online instructions are available at http://www.apple.com/support/doityourself/.
Tools Required
• Use a Phillips #2 screwdriver
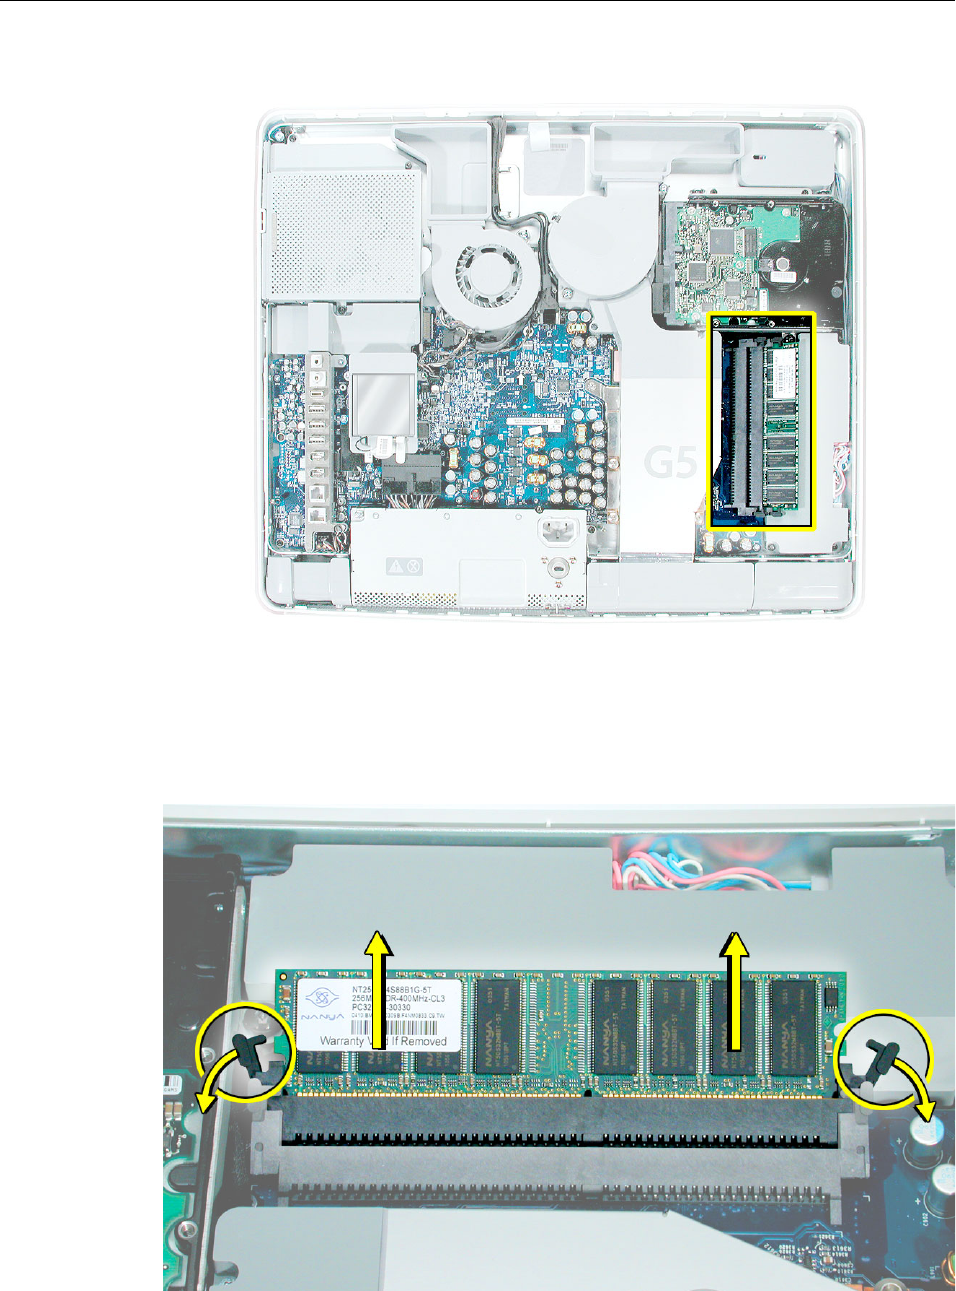
Part Location

2 -
iMac G5 Memory, 20-inch
About iMac G5 Memory
1. iMac G5 computers work with memory modules (DIMMs) that meet all of these
criteria: PC3200, 2.5V, unbuffered, 8-byte, nonparity, 184-pin, 400Mhz DDR SDRAM.
2. There are two RAM slots. The maximum amount of RAM you can install is 2 GB. You
can use RAM module sizes of 256 MB, 512 MB and 1 GB, in either slot.
3. DIMMs with any of the following features are not supported in the iMac G5 computer:
registers or buffers, PLLs, ECC, parity, or EDO RAM.
iMac G5 Memory, 20-inch -
3
Opening the Computer
1. Turn off your computer by choosing Shut Down from the Apple (
K
) menu.
2. Disconnect all cables, and unplug the power cord from your computer.
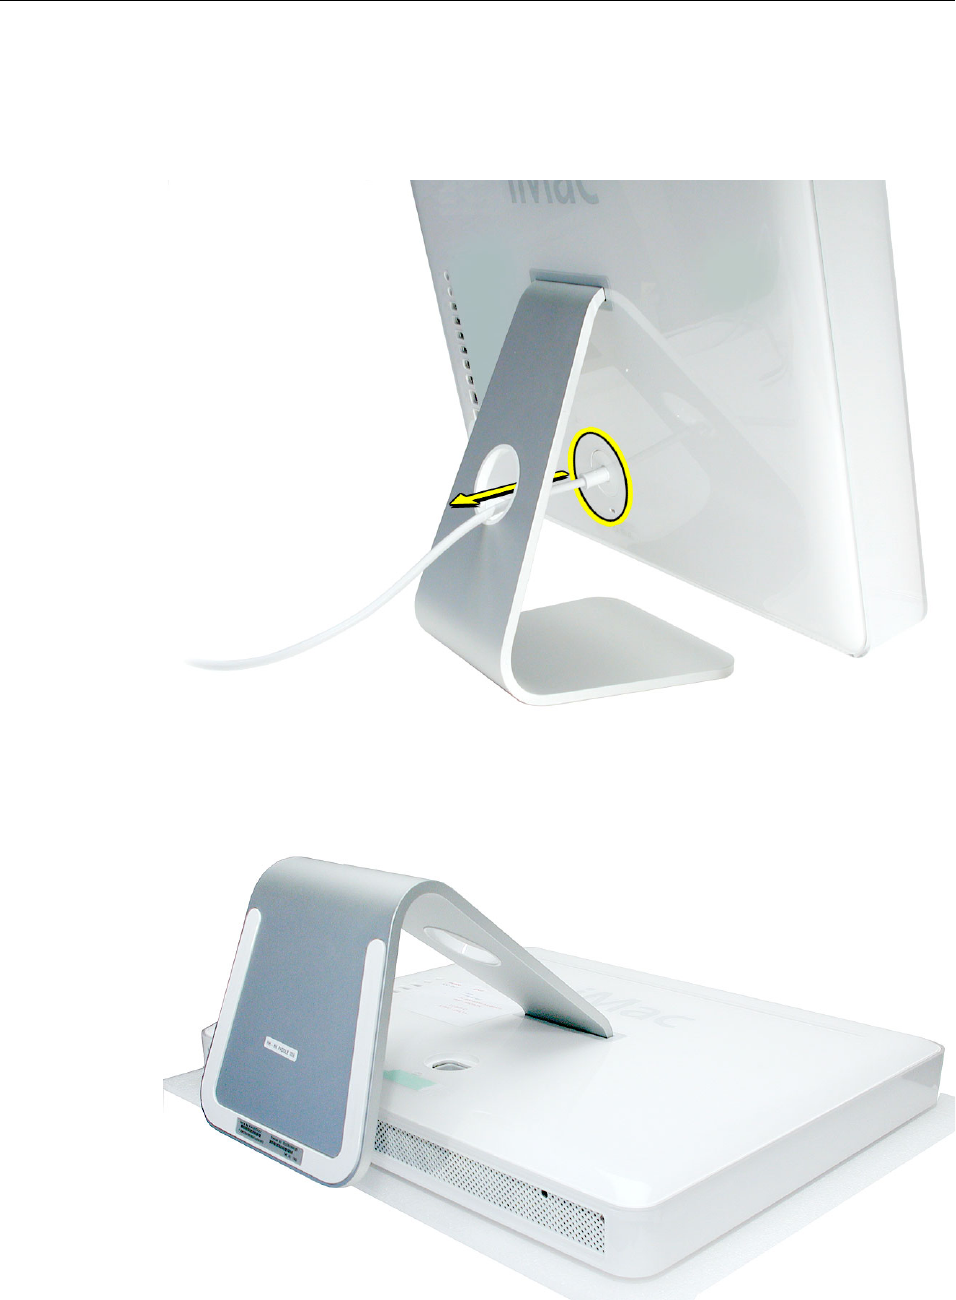
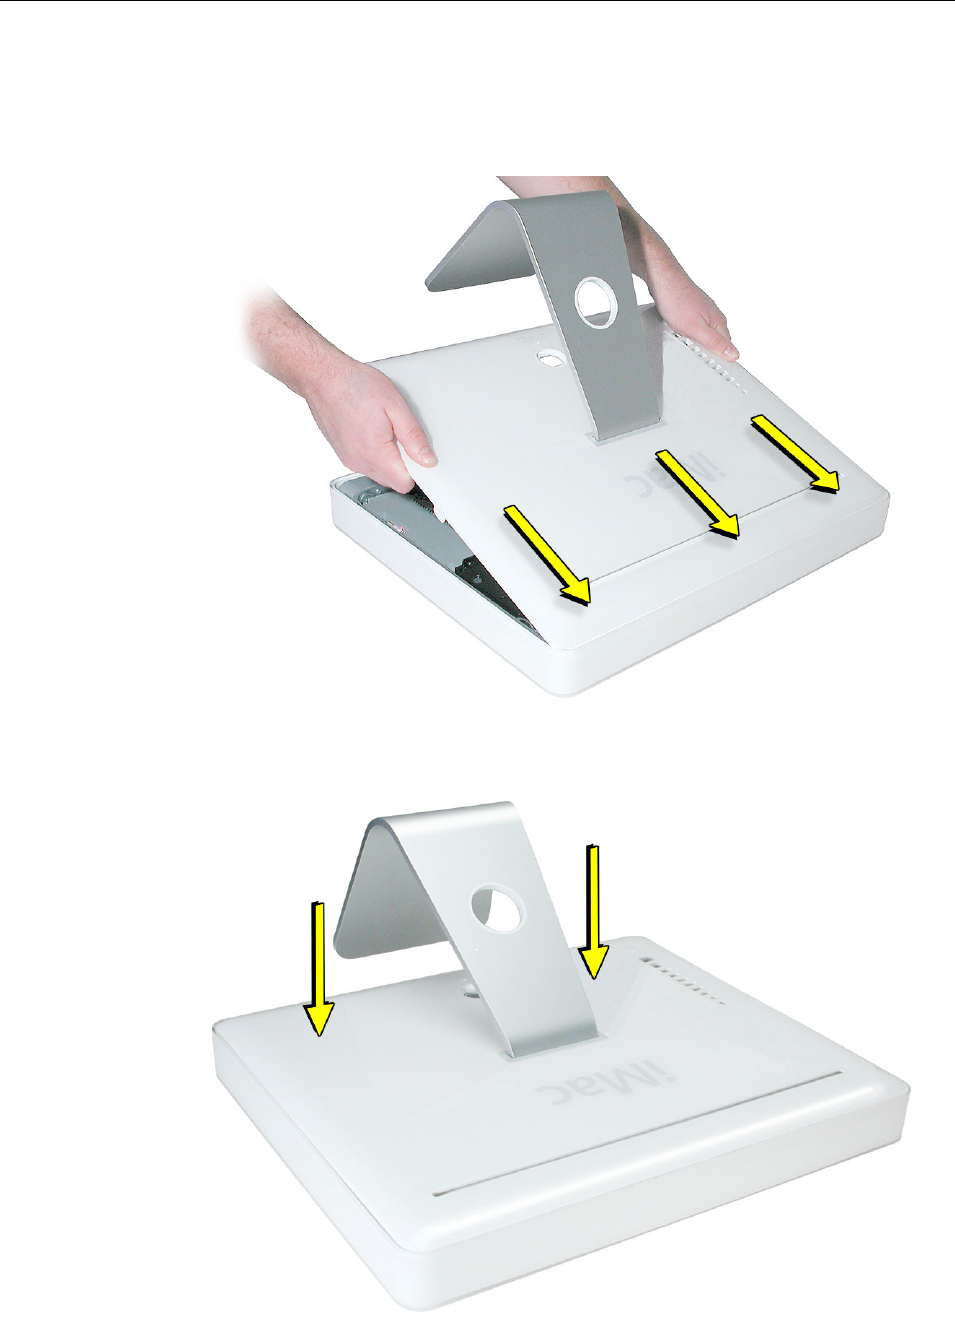
3. Place a soft, clean towel or cloth on the desk or surface. Hold the sides of the
computer and slowly lay the computer face down as shown.
4 -
iMac G5 Memory, 20-inch
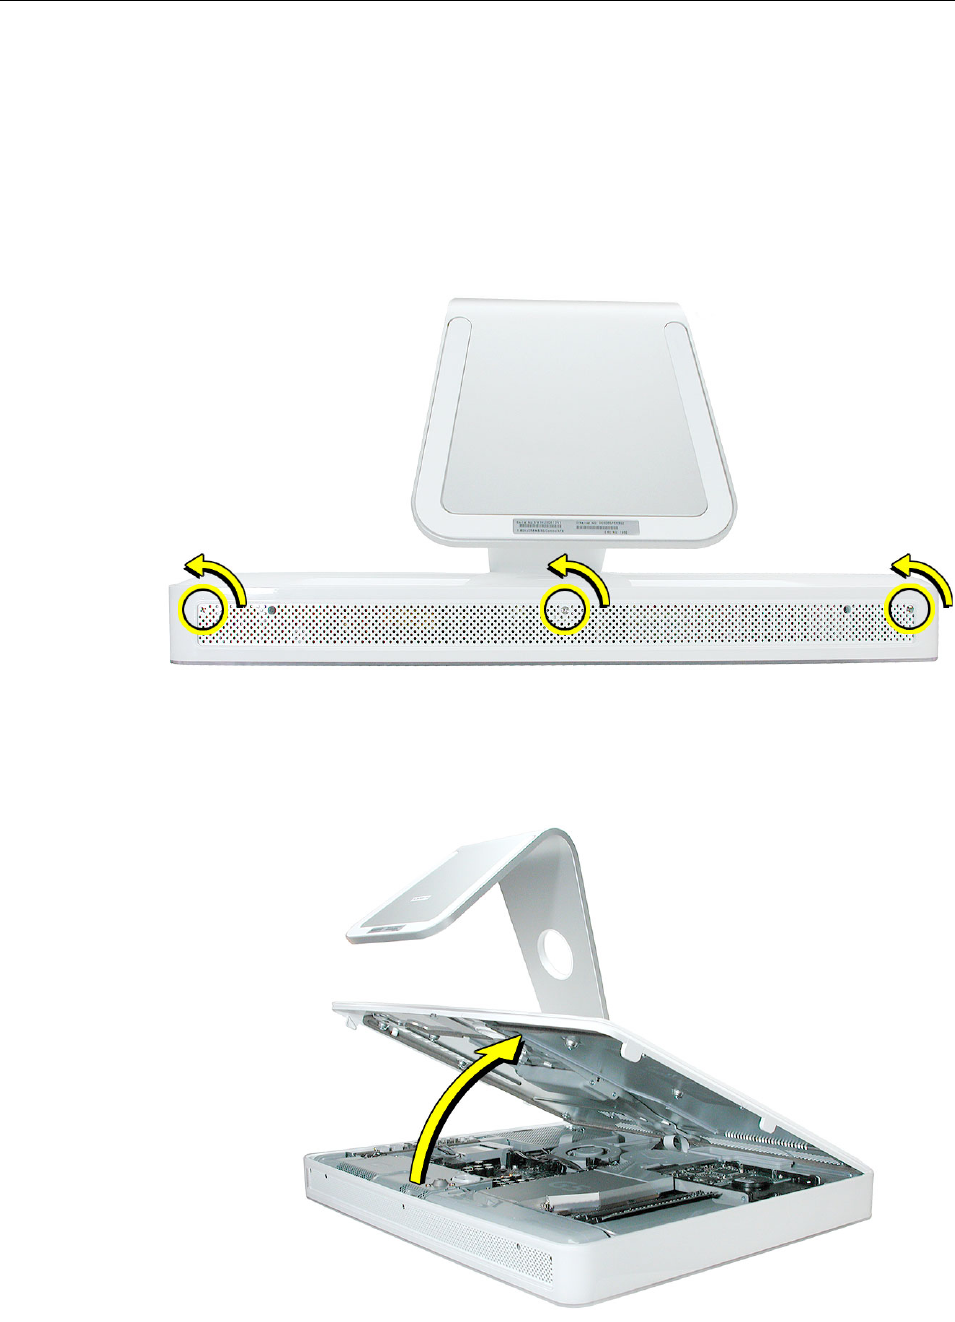
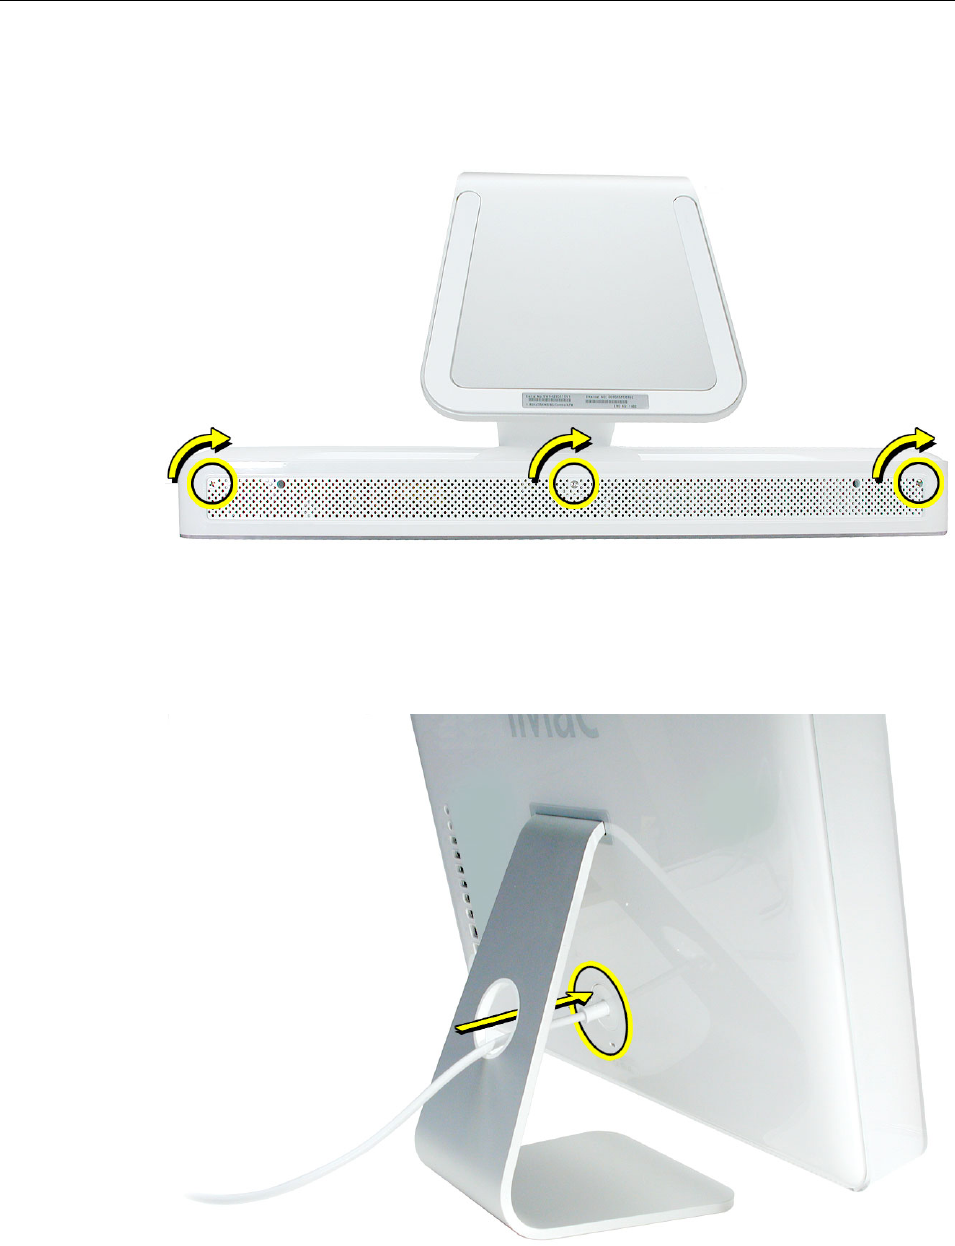
4. Locate the three case screws circled below. You may have to lift the metal foot to
locate the middle case screw.
Note:
These screws are captive; they are part of the
display/bezel assembly and cannot be removed.
5. Using the tool provided, or a Phillips #1 screwdriver, loosen the three captive screws.
Note:
Turn the two outer screws all the way counterclockwise until they stop turning.
The middle screw acts differently. Turn the middle screw counterclockwise about five
revolutions.
6. Holding the back cover by the metal foot, tilt the cover up and lift it off the computer.
Set the back cover aside.
iMac G5 Memory, 20-inch -
5
Removing the Memory, 20-inch iMac
1.
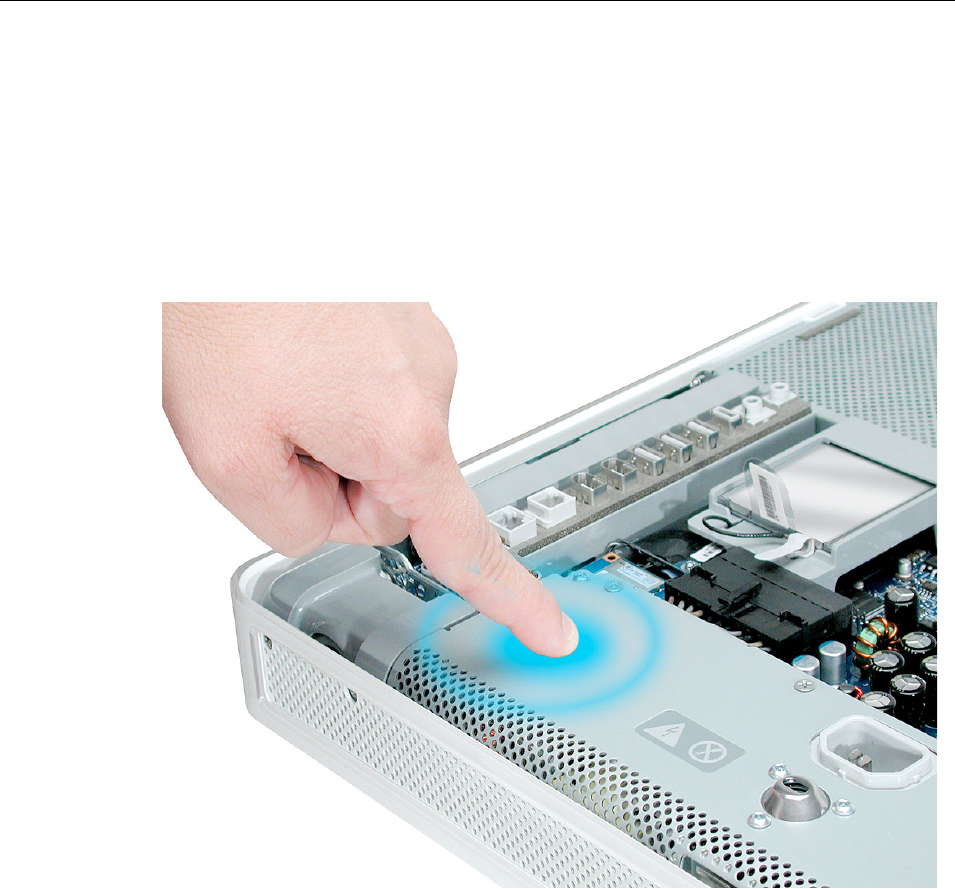
Important:
Ground yourself. Touch the metal surface (as shown below) on the inside
of the computer to discharge any static electricity.
Warning: Always discharge static electricity before you touch any parts or
install any components inside the computer. To avoid generating static
electricity, do not walk around the room until you have finished installing the
part and closed the computer.
6 -
iMac G5 Memory, 20-inch
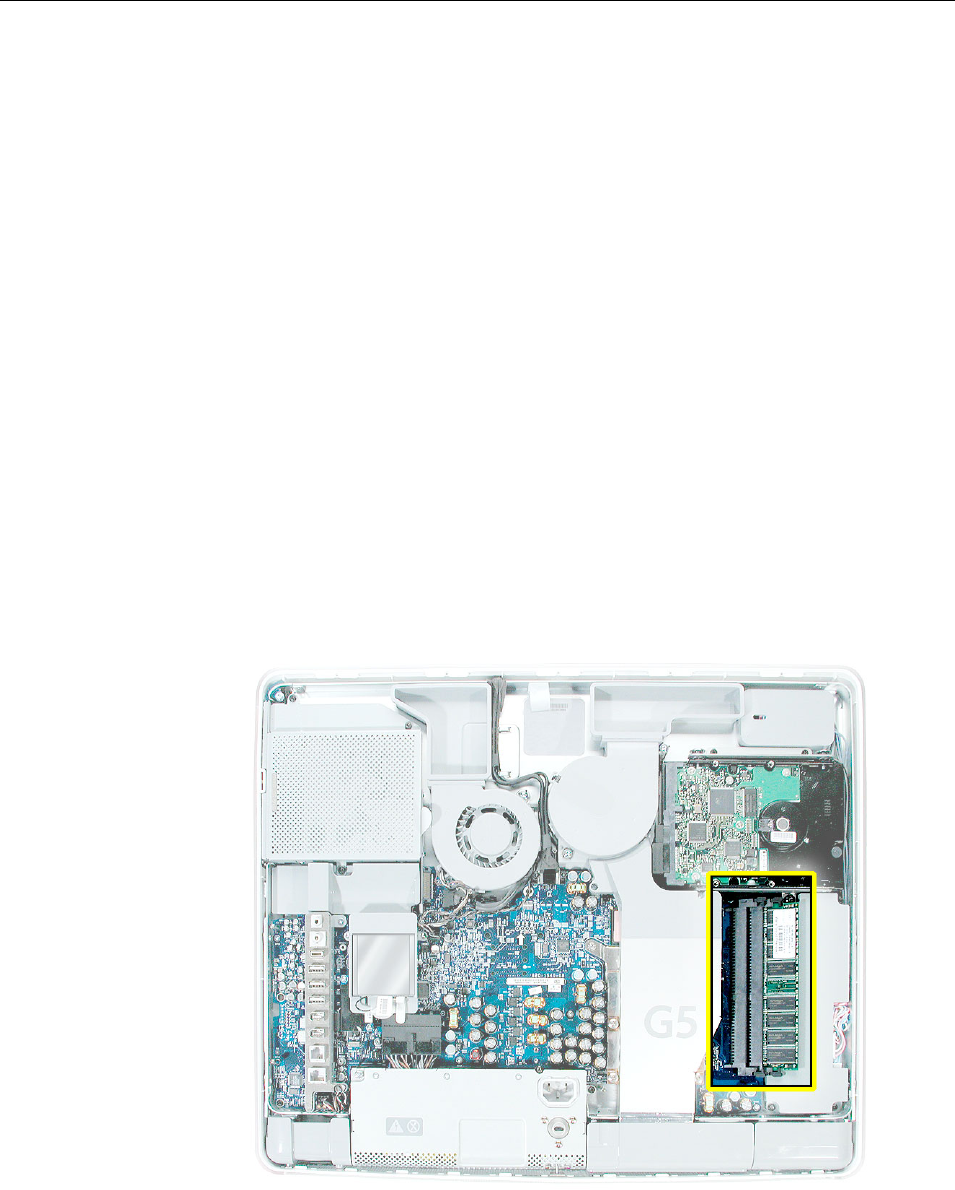
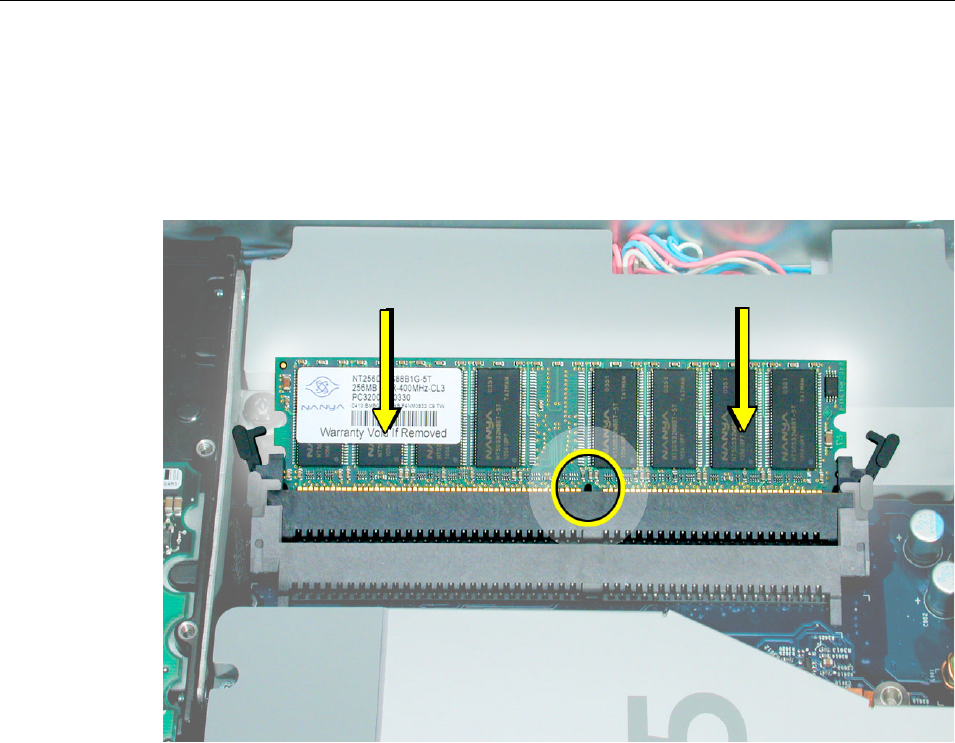
2. Locate the memory module(s) in the bottom right corner.
3. Rotate the computer counterclockwise so the memory is in the position shown below.
4. To release the memory from its slot, push down on the two side latches. Then pull the
memory module out of the slot. Repeat this step if you have a second memory
module.
Important:
Return the memory to Apple in the packaging provided.
iMac G5 Memory, 20-inch -
7
Installing the Replacement Memory
1. Remove the replacement memory module from its packaging.
2. Replace the memory module(s) by lining up the notch on the module with the notch on
the slot. Press firmly on the memory module until it clicks into place. Use your thumb
and index finger to push the module into the slot.
8 -
iMac G5 Memory, 20-inch
Closing the Computer
1. Replace the cover so that the slots on the top edge of the cover mate with the tabs on
the display housing.
2. Lower and press the cover into place until it fits snugly on the computer.
iMac G5 Memory, 20-inch -
9
3. Tighten the case screws by turning them clockwise. You might need to tighten the
middle screw first, then adjust the corner screws so the case settles into the display/
bezel.
4. Position the computer in the upright position. Reconnect the power cord and
remaining cables. Turn on the computer.

10 -
iMac G5 Memory, 20-inch
Apple Computer, Inc.
© 2004 Apple Computer, Inc. All rights reserved.
This document is protected under U.S. Copyright Law and International Treaties, and no
part of this document may be reproduced in any form without written permission from
Apple.
Apple is not responsible for typographical, printing, or inadvertent errors.
Apple Computer, Inc.
1 Infinite Loop
Cupertino, CA 95014-2084
USA
+ 1 408 996 1010
http://www.apple.com
Apple, the Apple logo, Mac, Macintosh, and the Mac logo are trademarks of Apple
Computer, Inc., registered in the U.S. and other countries.
