Aram Huvis API API User Manual API100
Aram Huvis Co., Ltd. API API100
User Manual
User Manual
This device complies with Part 15 of the FCC Rules. Operation is subject to the following two conditions:
(1) This device may not cause harmful interference. and
(2) This device must accept any interference received, including interference that may cause undesired operation.
Caution
Any changes or modifications (including the antenna) made to this device that are not expressly approved by the manufacturer
may void the user’s authority to operate the equipment.

Contents
C. System Settings
D. Program Settings
ⅰ. Both Sides
ⅱ. Settings
E. Application
ⅰ. Start Analysis
ⅱ. Full Analysis
ⅲ. View Mode
CRM
Moisture
Sebum
Pore
Melanin
Acne
Wrinkle
Sensitivity
Summary
1
2
3
5
7
8
9
10
11
12
13
14
15
16
17
18
F. Warranty
19
A. Components
B. H/W Parts
※Notes on use
・The images of this manual can be different with the actual things.
・
The information contained in this manual and future improvements are subject to
change without
notice.
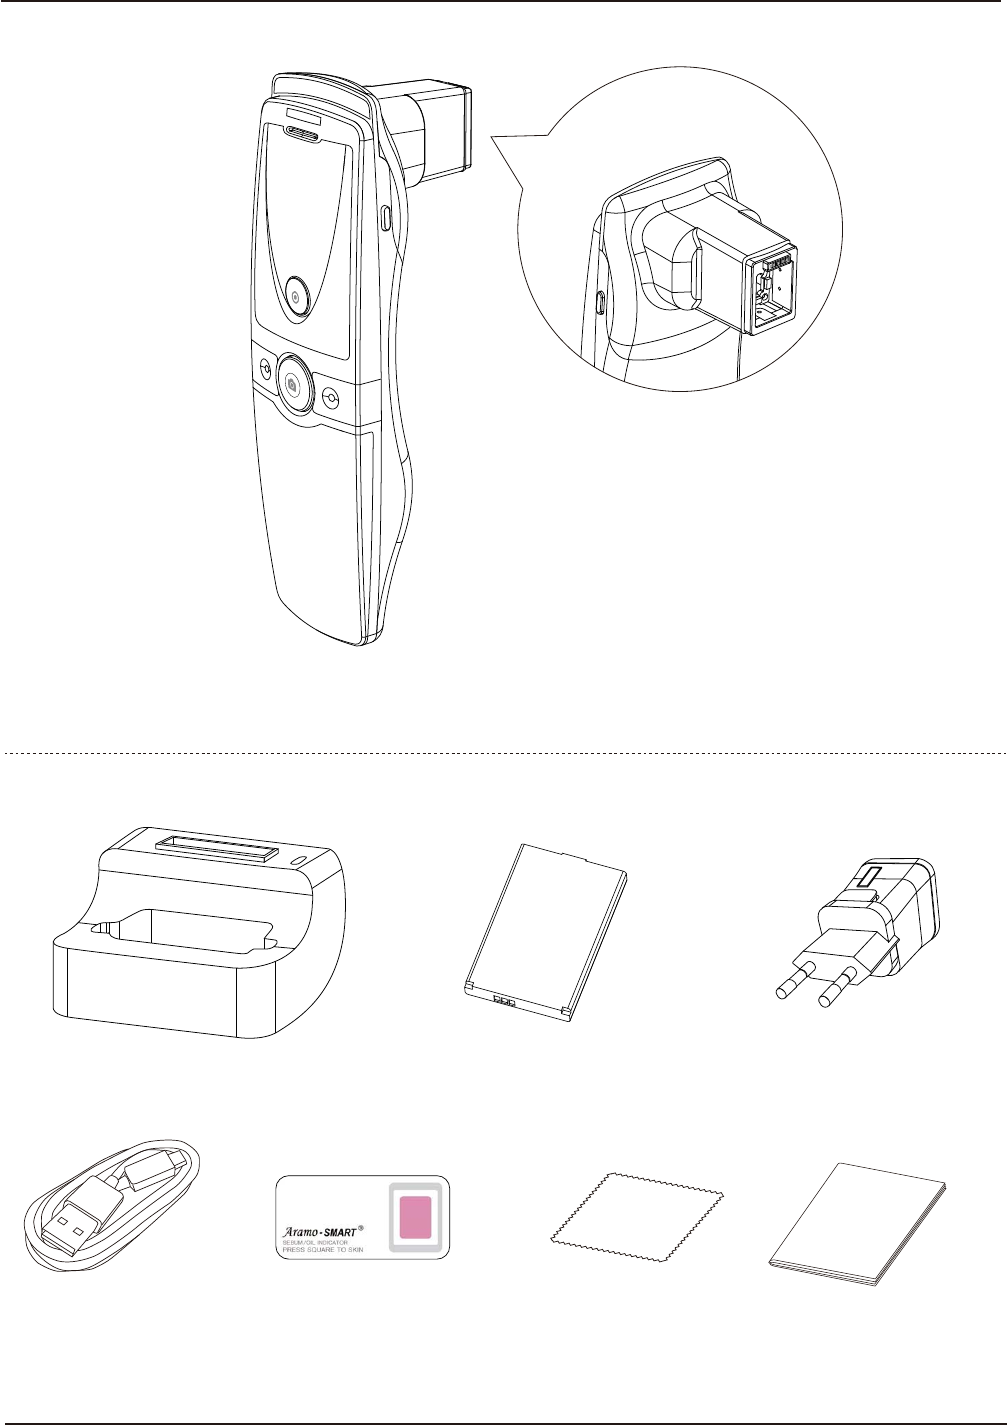
Components
API 100
Charger
Manual
Battery
USB cable
Cradle
Sebum paper 1 box
Main body with skin lens
Cleaning cloth
1A. Components
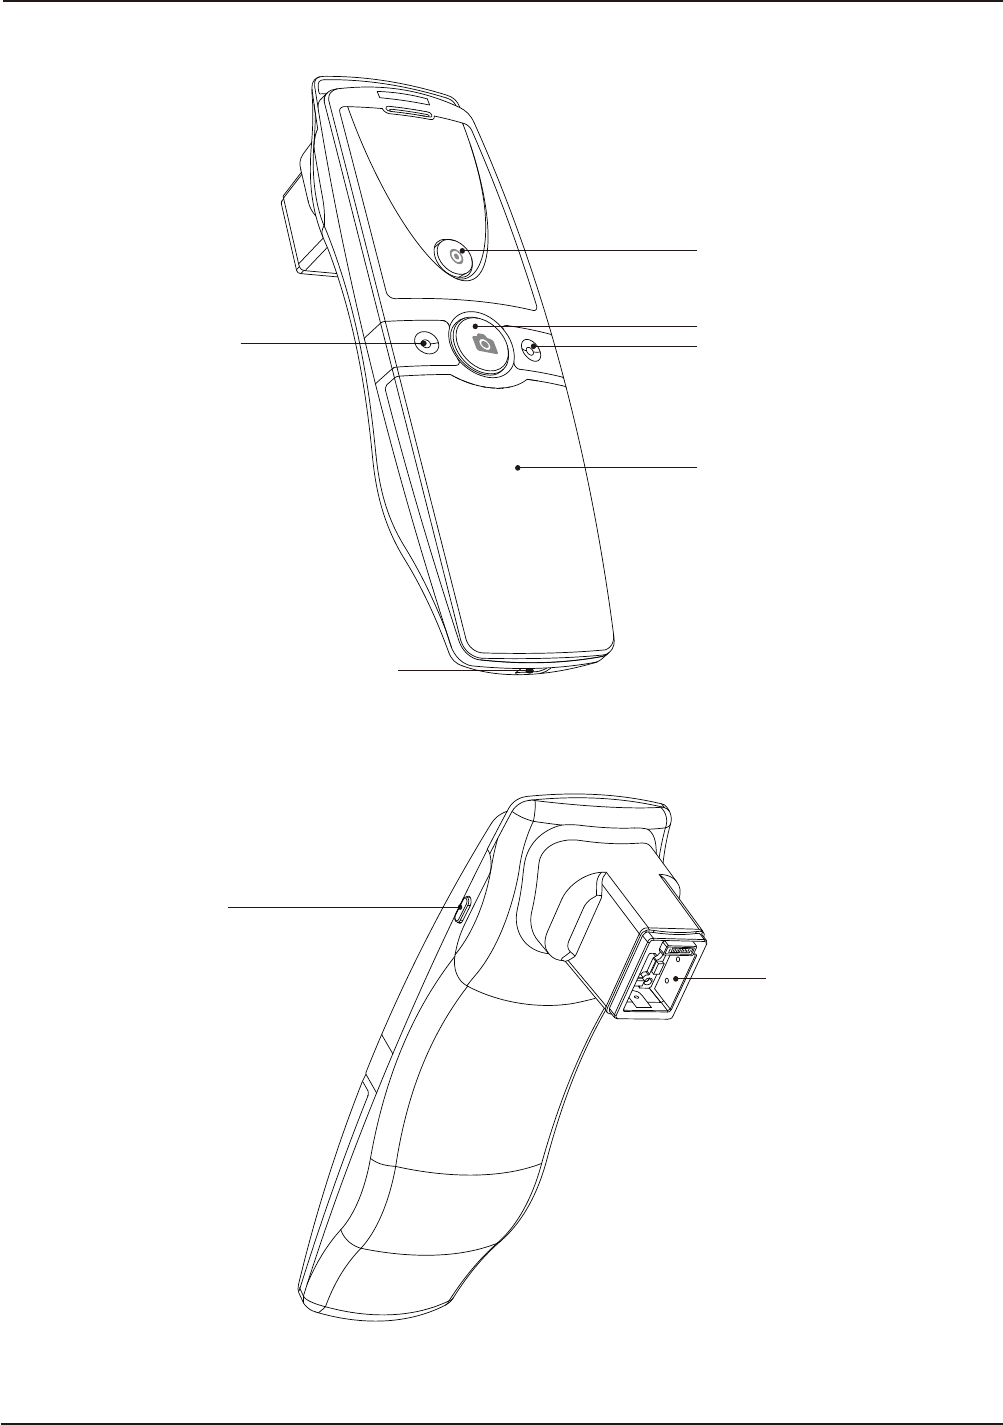
H/W Parts
Both Sides
Battery cover
LED light & lens
Mode up Mode down
Capture
Start, Analysis, Result
External adaptor connection
Power on & off
2B. H/W Parts - Both Sides
H/W Parts
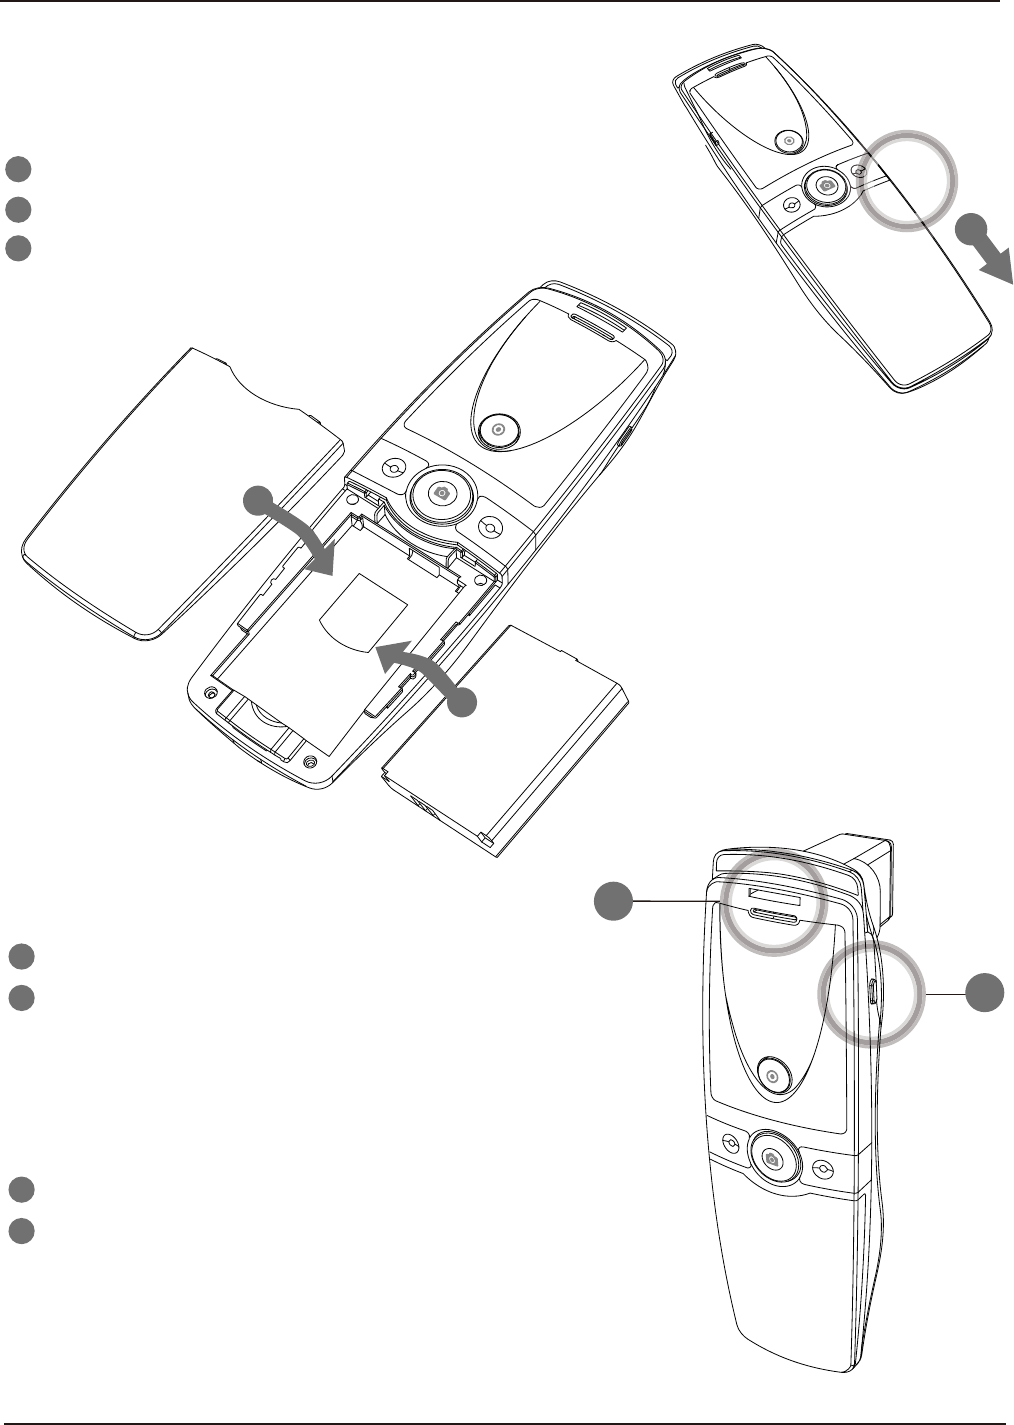
Settings
Insert the battery
Insert the battery and gently press the battery into place.
Close the cover.
1
2
To turn on the power
Press and hold “Power” button.
"Indicate LED" starts twinkling in blue light.
When it stops, the device is ready to use.
1
2
To turn off the power
Press and hold "Power" button.
"Indicate LED" will be turned off.
1
2
3
1
1
2
3
2
3B. H/W Parts - Settings
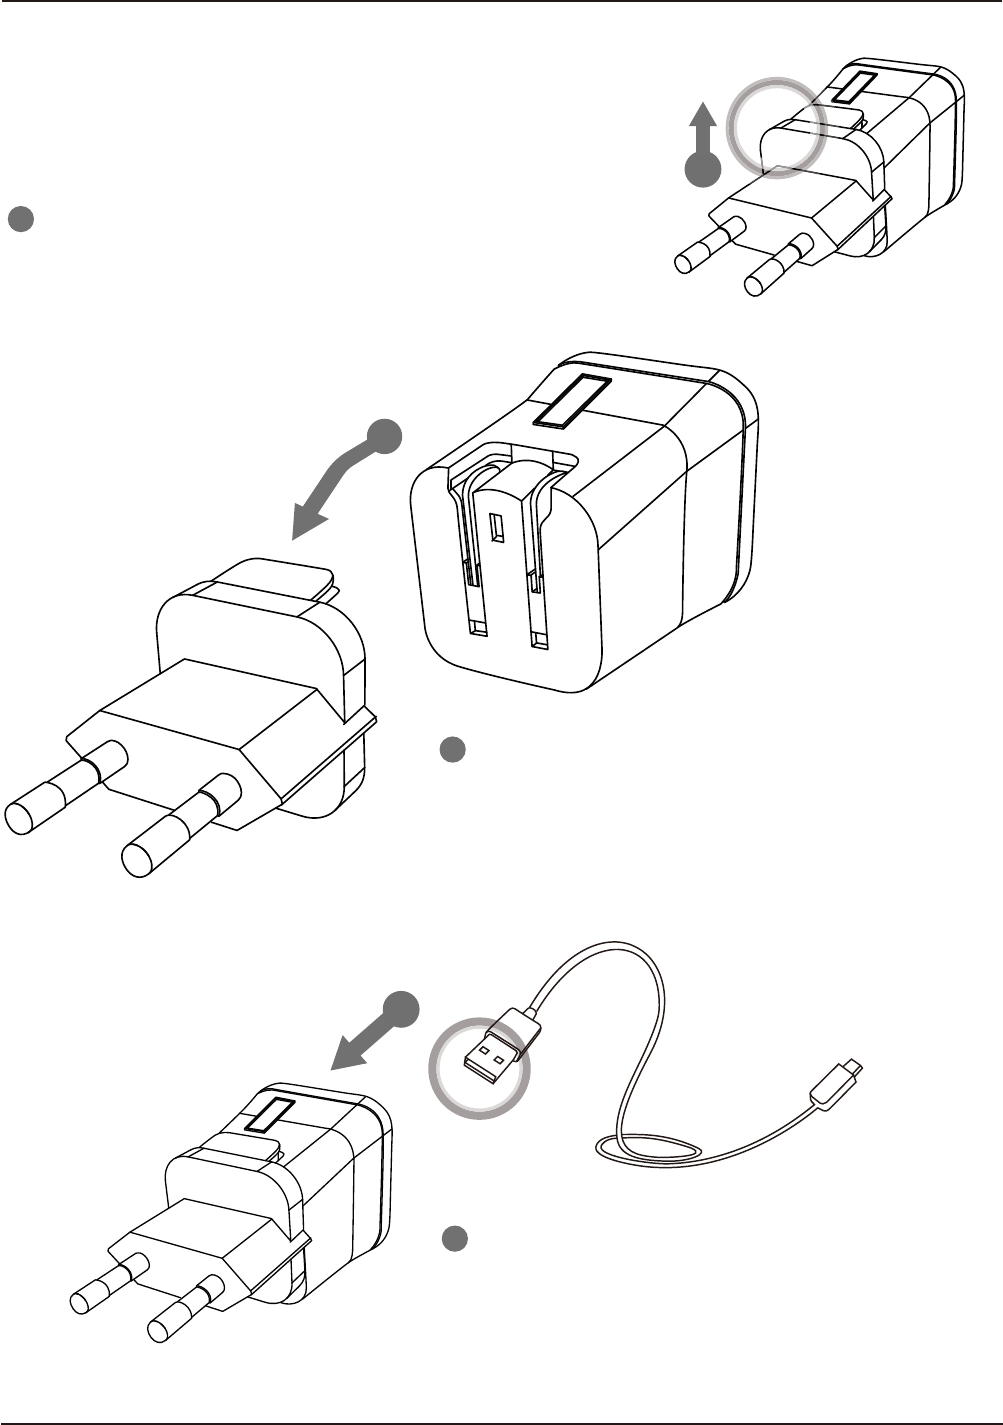
Charger can be used for 110V & 220V.
The default is 220V.
Then 220V European type is disassembled and
you can see the 110V-220V American type inside
of the charger.
Push the plug down to up at "Push" marked.
1
2
3
Choose the one you want to use and
connect USB cable in adaptor.
H/W Parts
Settings
1
2
3
4 B. H/W Parts
- Settings

System Settings
Download & Install
PC User
Go to link on the browser as below.
http://www.aramhuvis.com/download
1
1
Install the program.
2
2
Tablet device or Smartphone user
iOS : Go to "App Store" and search "Solutionist" to download the program.
Android : Go to "Google Play Store" and download it.
5C. System Settings
System Settings
How to connect with the program
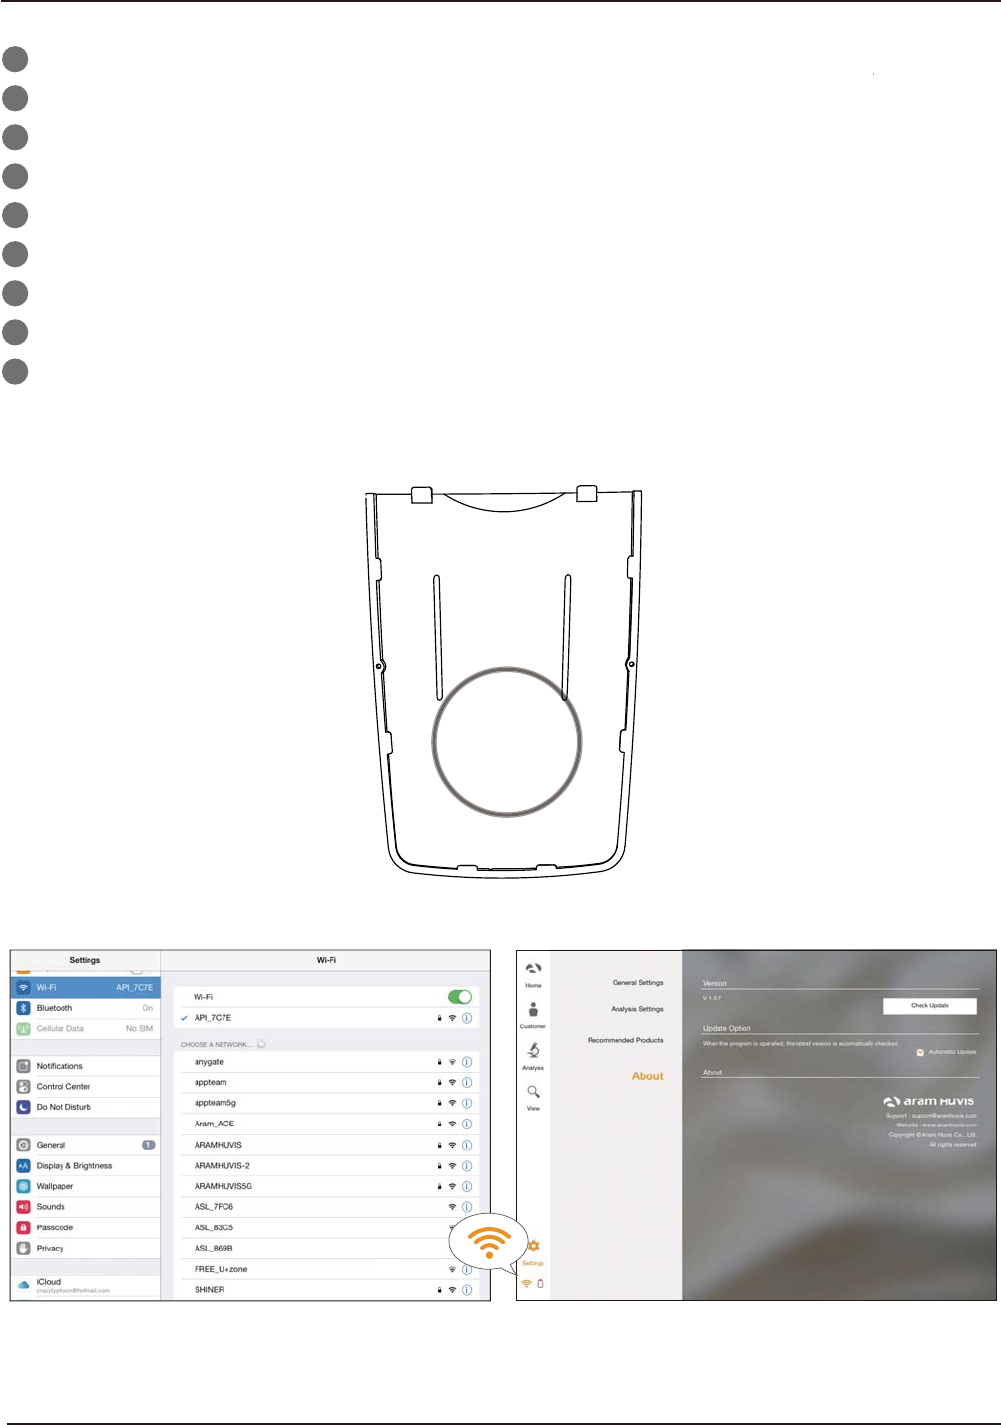
First of all, check the Wi-Fi name and password which is described at back side of battery cover.
Wi-Fi name & password must be same and the format is "API_XXXX".
Turn on the device.
While turning on the device, prepare PC, Tablet, Smartphone to run the S/W.
Once “API” device is turned on, please go to network setting to set up the Wi-Fi connection.
!#$$$$%
When above code is connected, run the program “Solutionist".
To check working properly, please check the program and see the left below side.
If it is correctly set up, you can see the orange light of Wi-Fi singal.
1
2
3
4
5
6
7
8
9
SSID: API_XXXX
PW: API_XXXX
6 C. System Settings
Program Settings
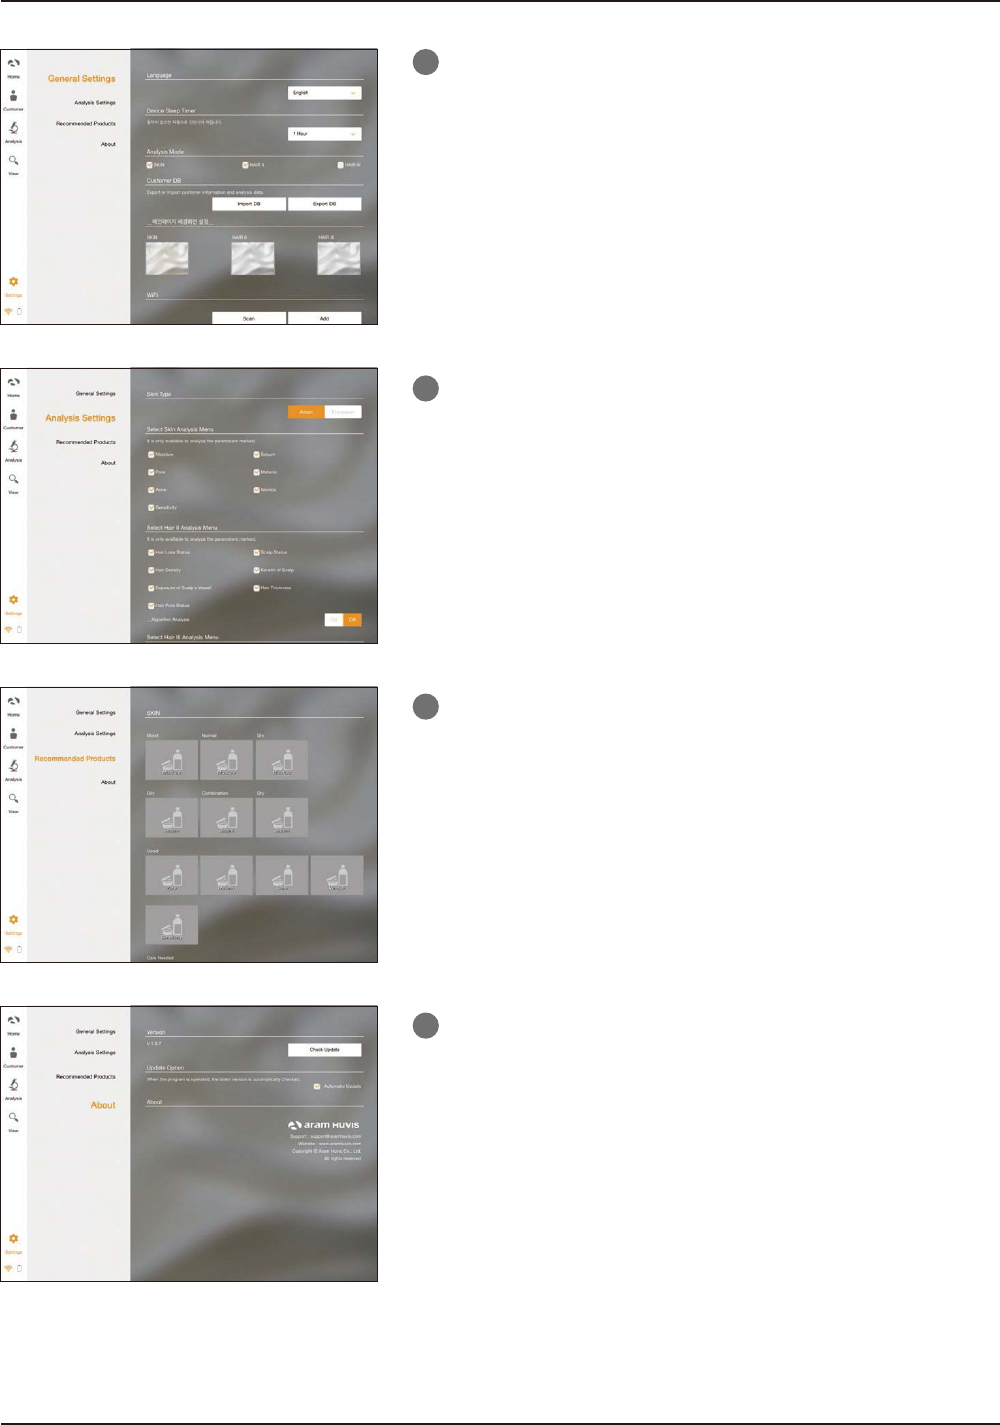
General Settings
Change the language, analysis mode and etc.
1
Analysis Settings
Set up the skin type and analysis parameter.
2
Recommended Products
Available for each analysis result.
3
About
Check the current version and update is available in
Wi-Fi connection.
4
7D. Program Settings
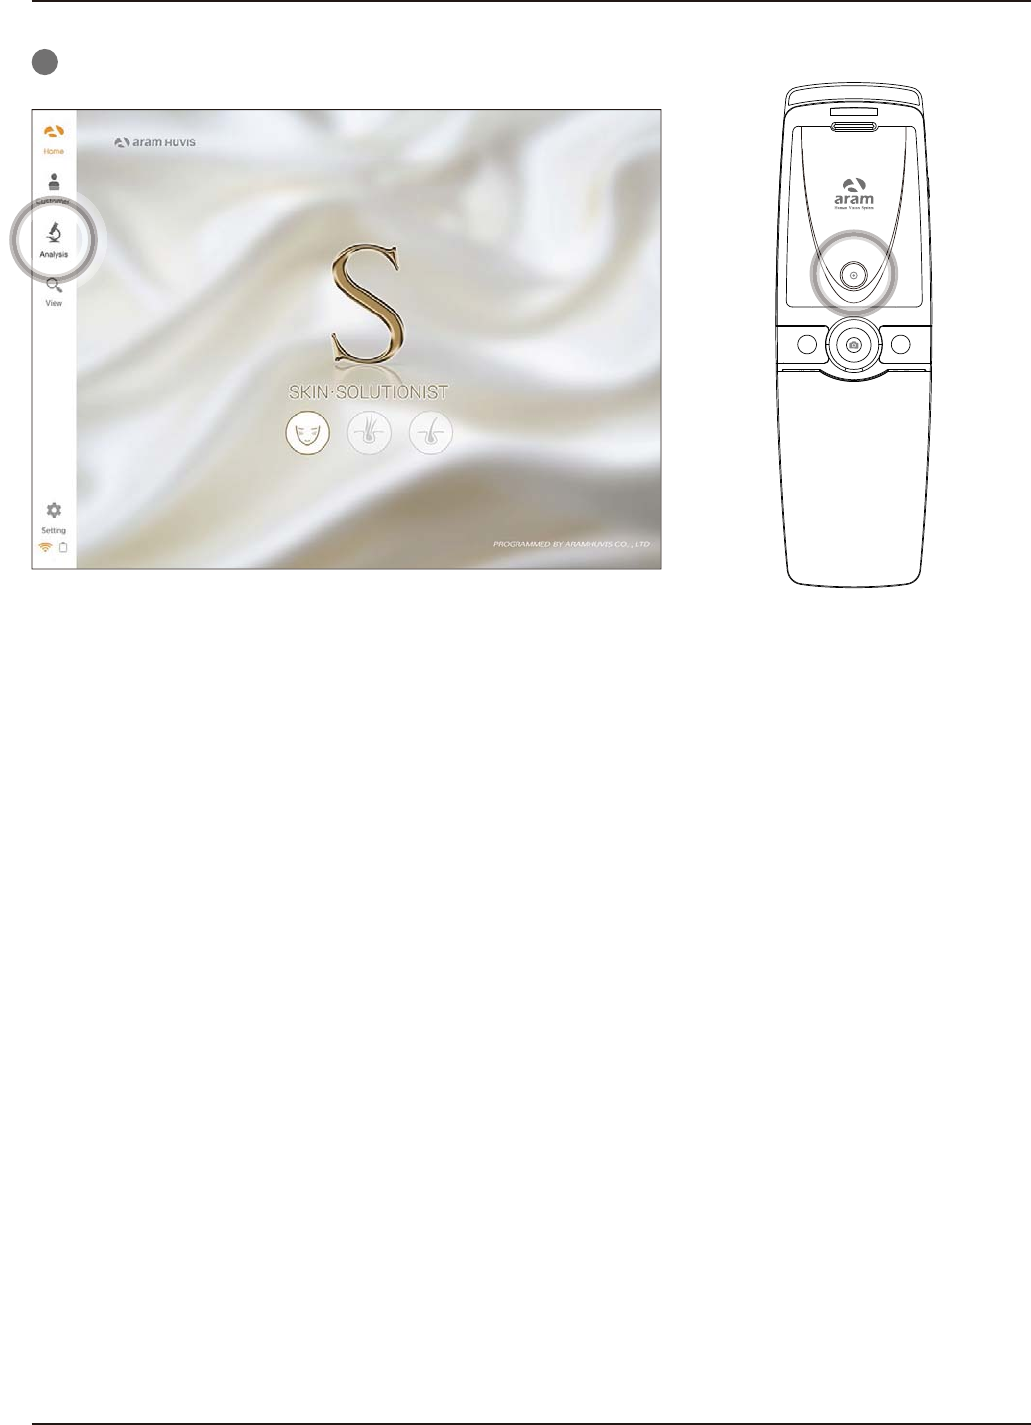
Touch “Analysis” to start.
1
Application
Start Analysis
8 E. Application - Start Analysis
Application
CRM
Take picture of customer's face with built-in camera
or use the picture you already have in device.
4
Check the customer information and
analysis result list.
3
Among the customer lists, select the client to check or
start analysis.
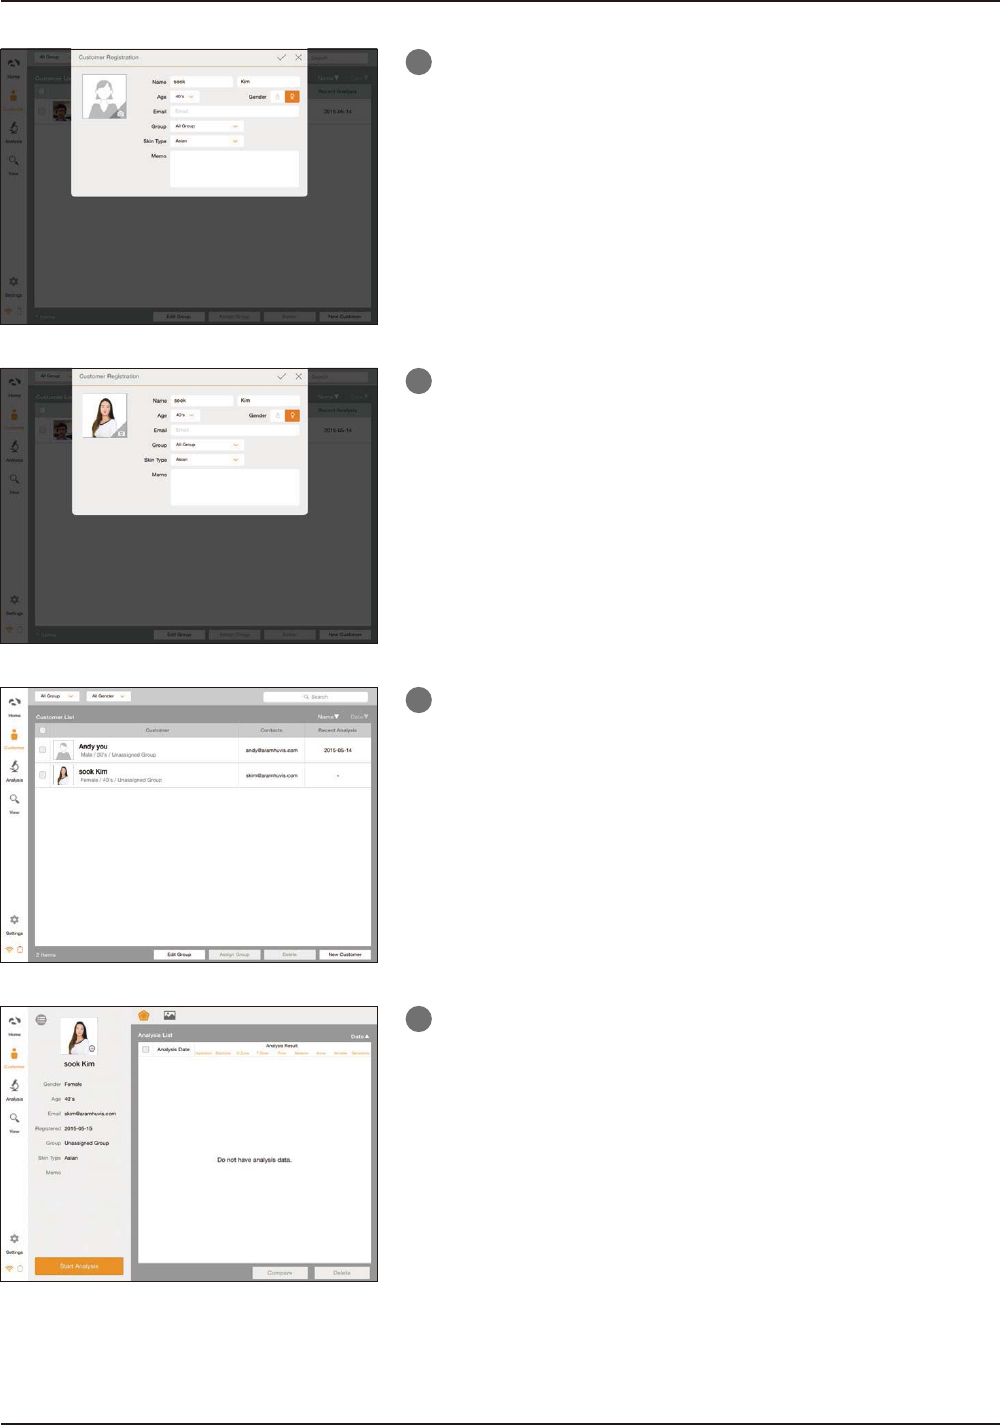
Input the information.
- full name, email address, gender and age group
1
2
9E. Application - CRM

Press "capture" button and when you hear "beep" sound,
please put the sensor onto your skin and wait until
you hear "beep" sound again.
1
Check the result.
To analyze next step, touch button.
2
Application
Moisture
or
To ana
l
yze next st
o
r
Moisture sensor
10 E. Application - Moisture
Application
Sebum
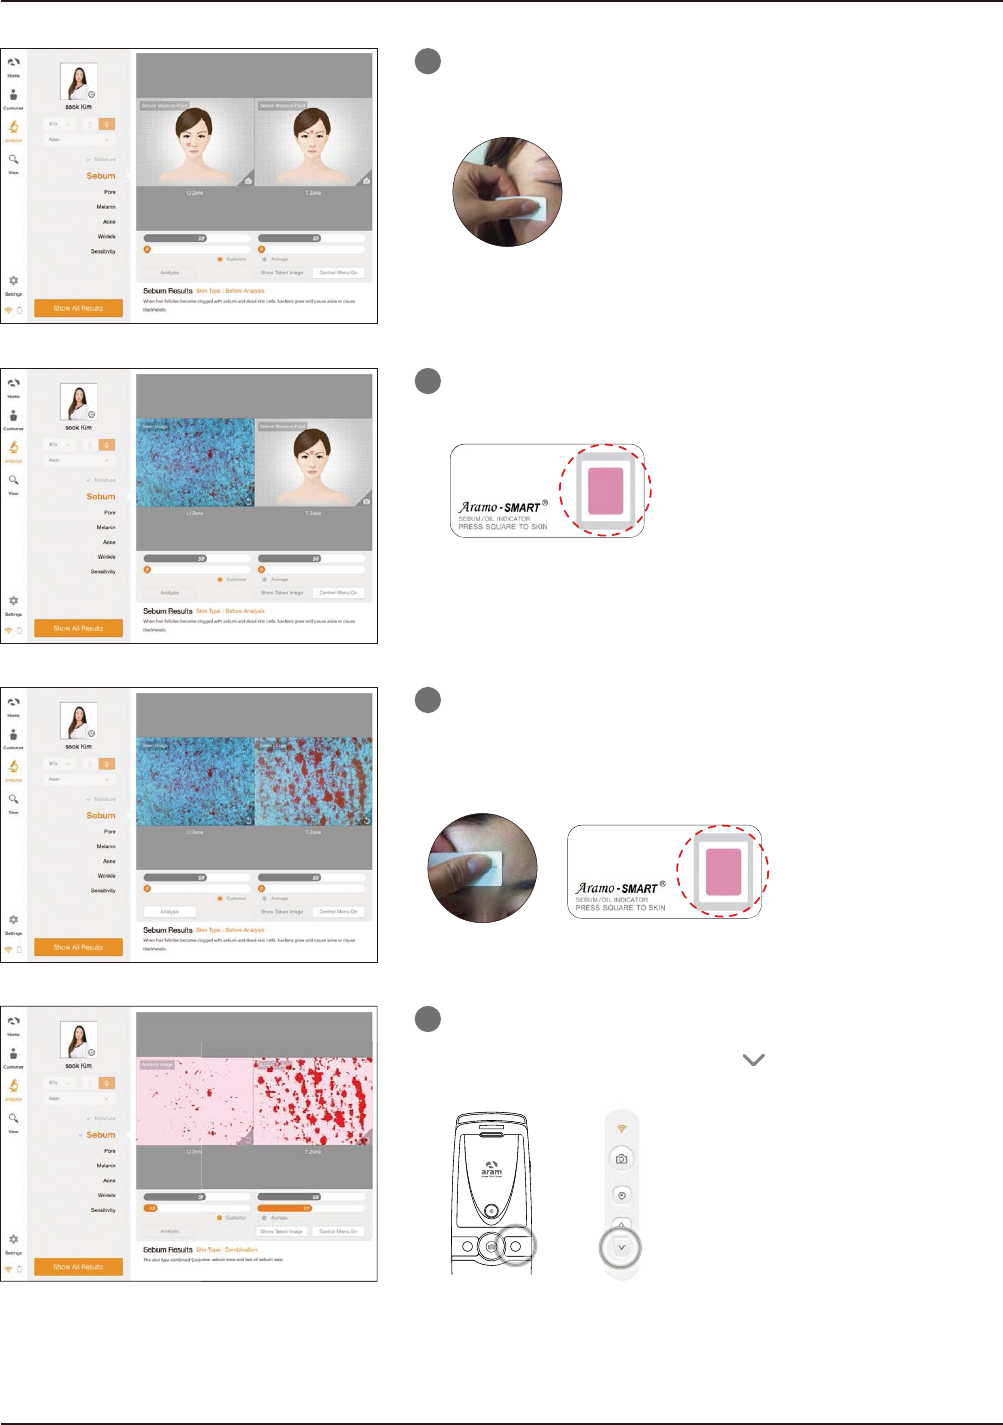
U-zone
T-zone
Check the result.
To analyze next step, touch button.
4
Put the sebum paper onto the U-zone on the cheek,
then press it for 2~3 seconds.
1
Place camera on the pink area and take picture.
(U-zone)
2
Sebum paper
Sebum paper
Put the sebum paper onto the T-zone on face,
then press it for 2~3 seconds.
Place camera on the pink area and take picture.(T-zone)
3
or
To ana
l
yze next st
e
o
r
11E. Application - Sebum
Application
Pore
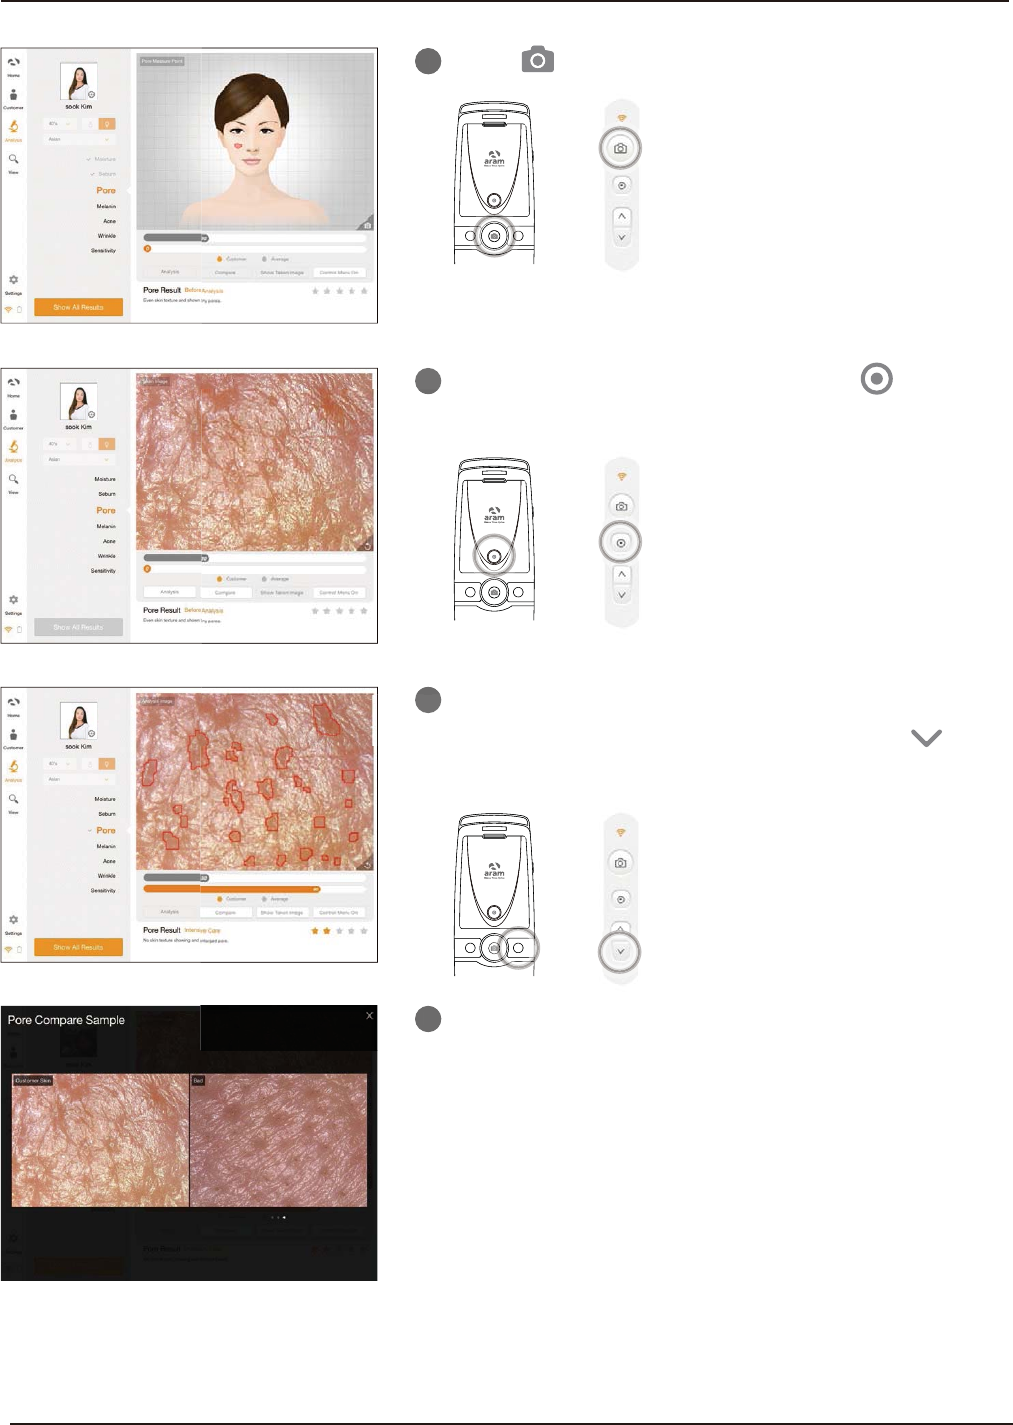
Put the camera into the skin and touch button
to analyze.
2
Touch button to activate camera mode.
1
Compare your image with 3 sample images.
- Good
- Normal
- Bad
4
The result will be appeared to compare with age group.
Check the result. To analyze next step, touch button.
Touch "Compare" button to check the sample image.
3
or
Touch button
t
1
o
r
or
t
o ana
l
yze.
Th lt ill b
3
o
r
or
Compare your
i
ma
G
d
4
Check
the
result.
To
Touc
h
"
Compare
"
b
or
12 E. Application - Pore

The result will be appeared to compare with age group.
Check the result. To analyze next step, touch button.
Touch "Compare" button to check the sample image.
Application
Melanin
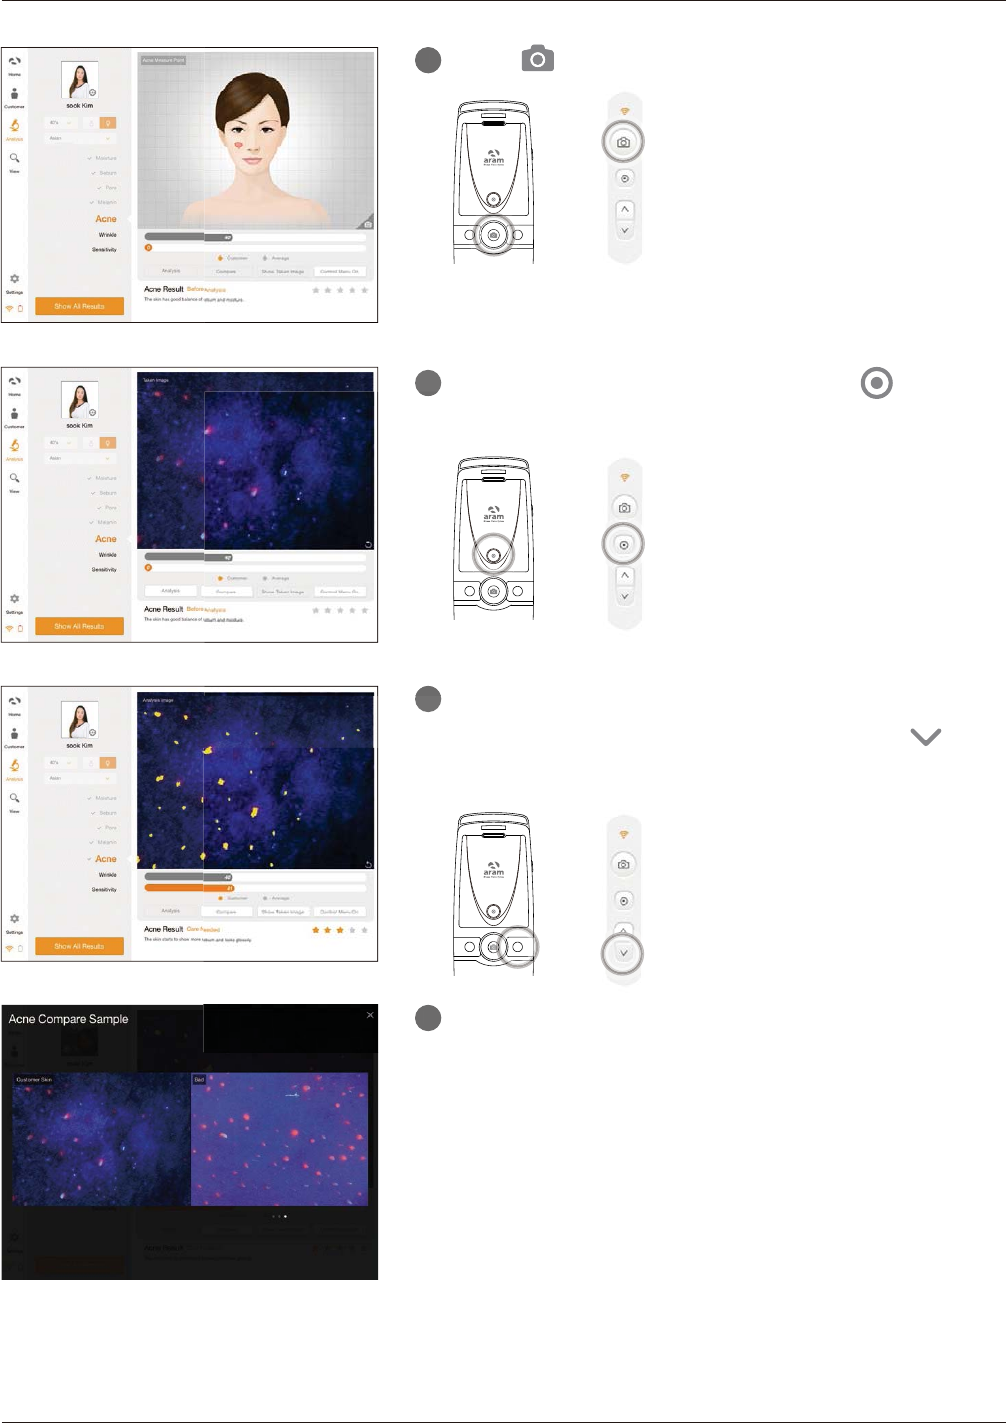
Put the camera into the skin and touch button
to analyze.
2
3
Compare your image with 3 sample images.
- Good
- Normal
- Bad
4
Touch button to activate camera mode.
1
or
Touch button
t
1
o
r
or
The result will be
a
t
o ana
l
yze.
3
o
r
or
Touc
h
"
Com
p
are
"
b
Compare your
i
m
a
Good
4
or
13E. Application - Melanin
The result will be appeared to compare with age group.
Check the result. To analyze next step, touch button.
Touch "Compare" button to check the sample image.
3
Application
Acne
Put the camera into the skin and touch button
to analyze.
2
Compare your image with 3 sample images.
- Good
- Normal
- Bad
4
Touch button to activate camera mode.
1
or
Touch button to
1
o
r
or
Theresultwillbeap
3
t
o ana
l
yze.
o
r
or
Touc
h
"
Com
p
are
"
b
Compare your
i
ma
g
Good
4
or
14 E. Application - Acne
The result will be appeared to compare with age group.
Check the result. To analyze next step, touch button.
Touch "Compare" button to check the sample image.
3
Application
Wrinkle
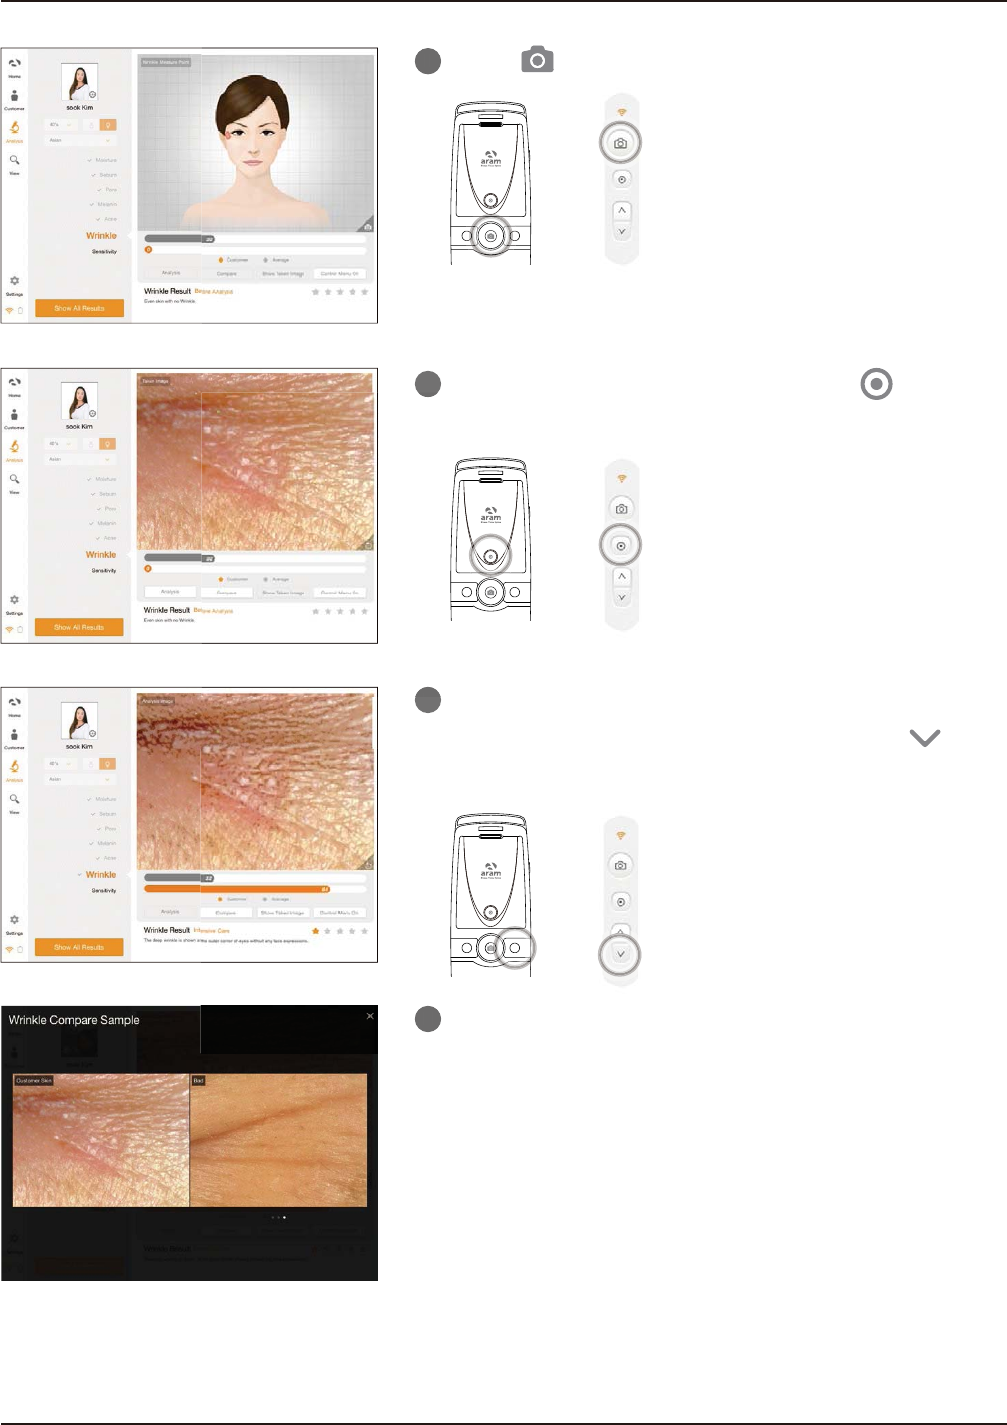
Put the camera into the skin and touch button
to analyze.
2
Compare your image with 3 sample images.
- Good
- Normal
- Bad
4
Touch button to activate camera mode.
1
or
Touch button t
1
o
r
or
Theresultwillbeap
3
t
o ana
l
yze.
o
r
or
Touc
h
"
Com
p
are
"
b
Compare your
i
ma
Good
4
or
15E. Application - Wrinkle
Application
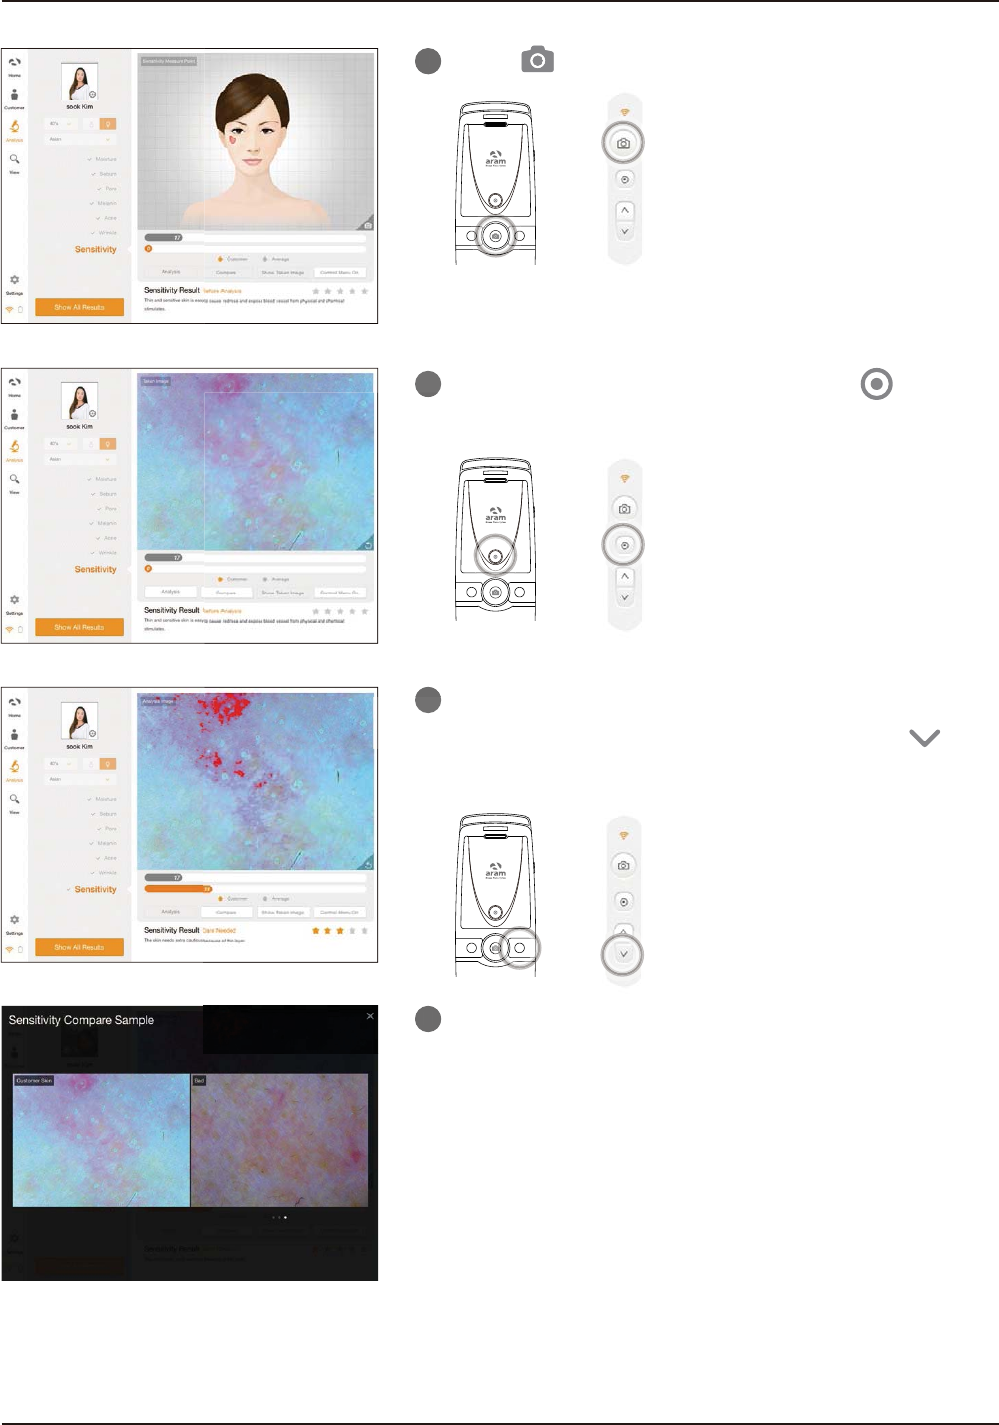
Sensitivity
4
Put the camera into the skin and touch button
to analyze.
2
The result will be appeared to compare with age group.
Check the result. To analyze next step, touch button.
Touch "Compare" button to check the sample image.
3
Compare your image with 3 sample images.
- Good
- Normal
- Bad
4
Touch button to activate camera mode.
1
or
Touch button to
1
o
r
or
t
o ana
l
yze.
Theresultwillbeap
3
o
r
or
Touc
h
"
Com
p
are
"
b
Compare your
i
ma
g
Good
4
or
16 E. Application - Sensitivity
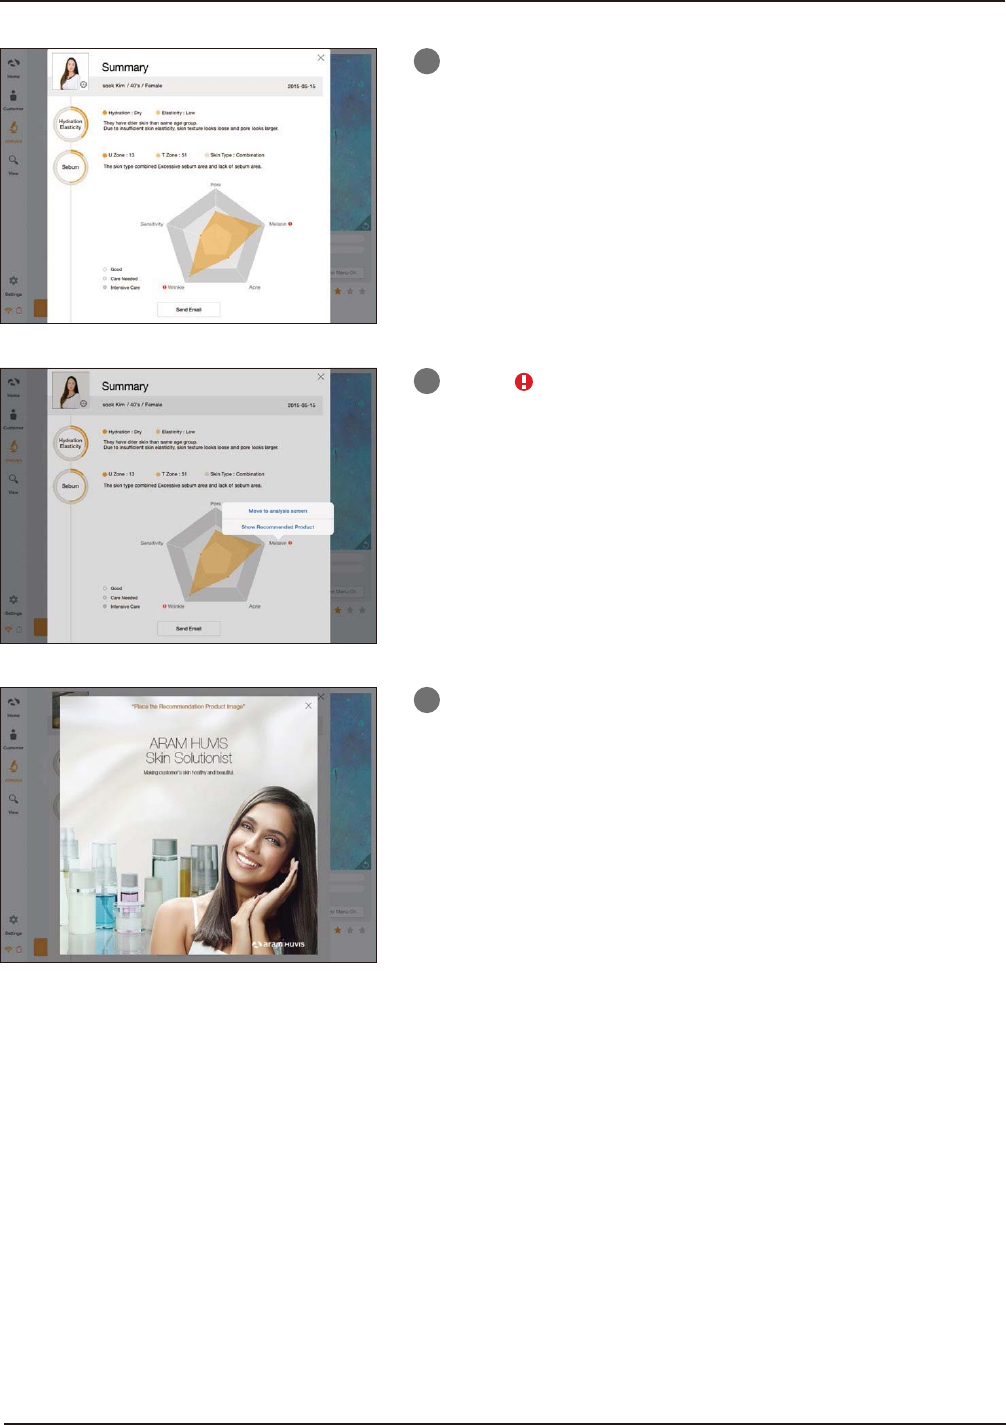
Available to check product image.
3
Summary
Check the result.
1
Touch button or each parameter on pentagon graph.
Once you select "Show Recommended Product",
product image is appeared.
2
17E. Application - Summary
1
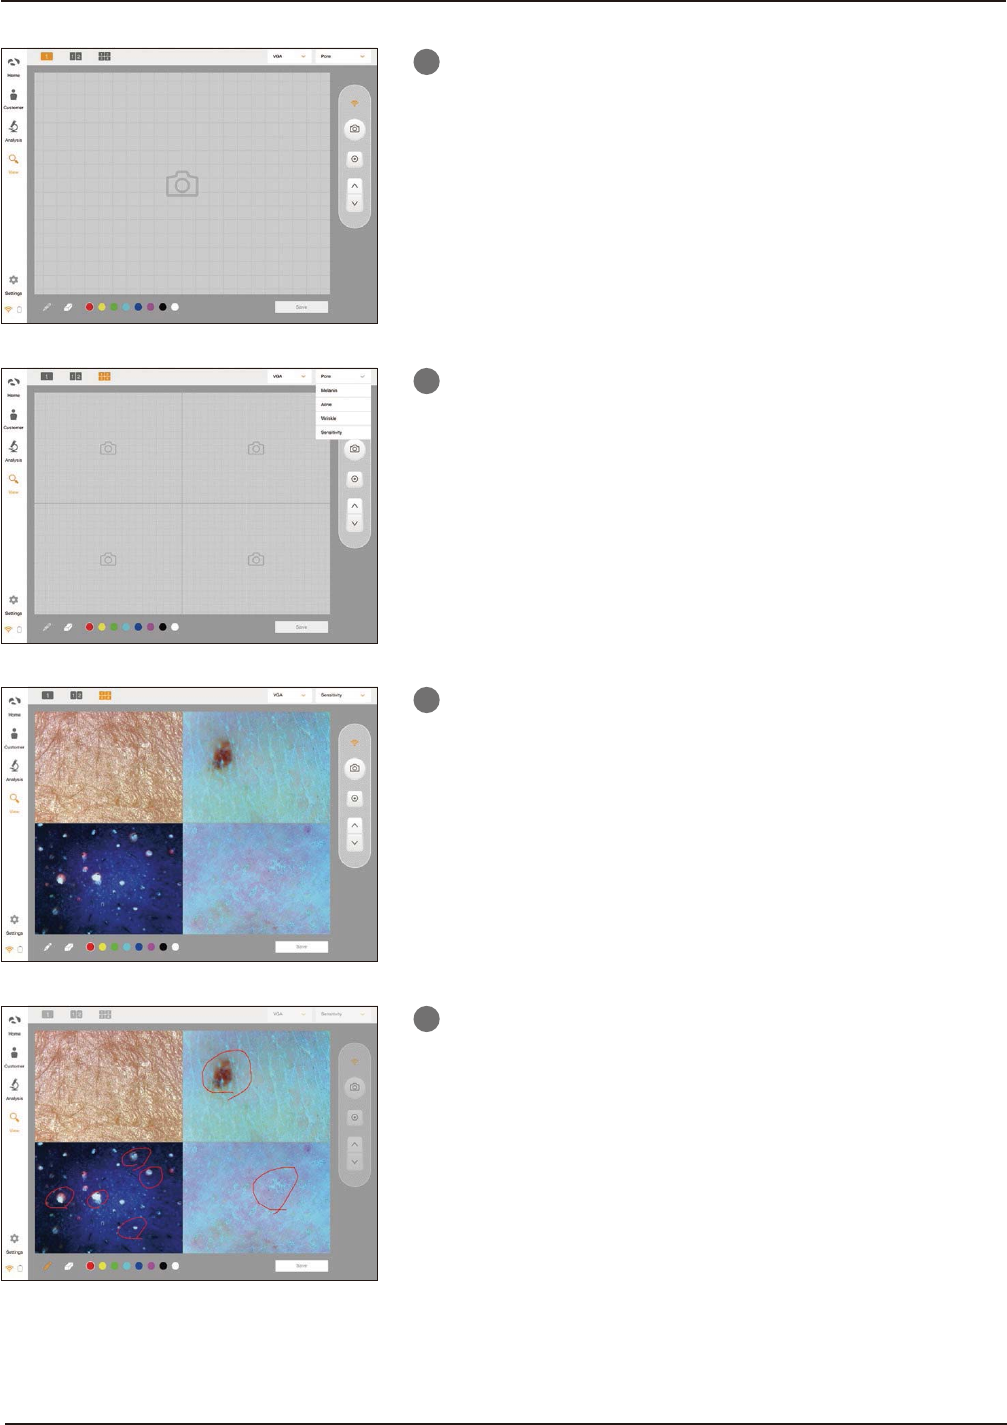
View Mode
In view mode, it is able to take pictures with capture
button in many times.
2
The user can select analysis parameter to take picture.
3
In one screen, you can see 4 different images maximum.
4
The user can mark the defect or concern according to
the image with note function.
18 E. Application - View Mode