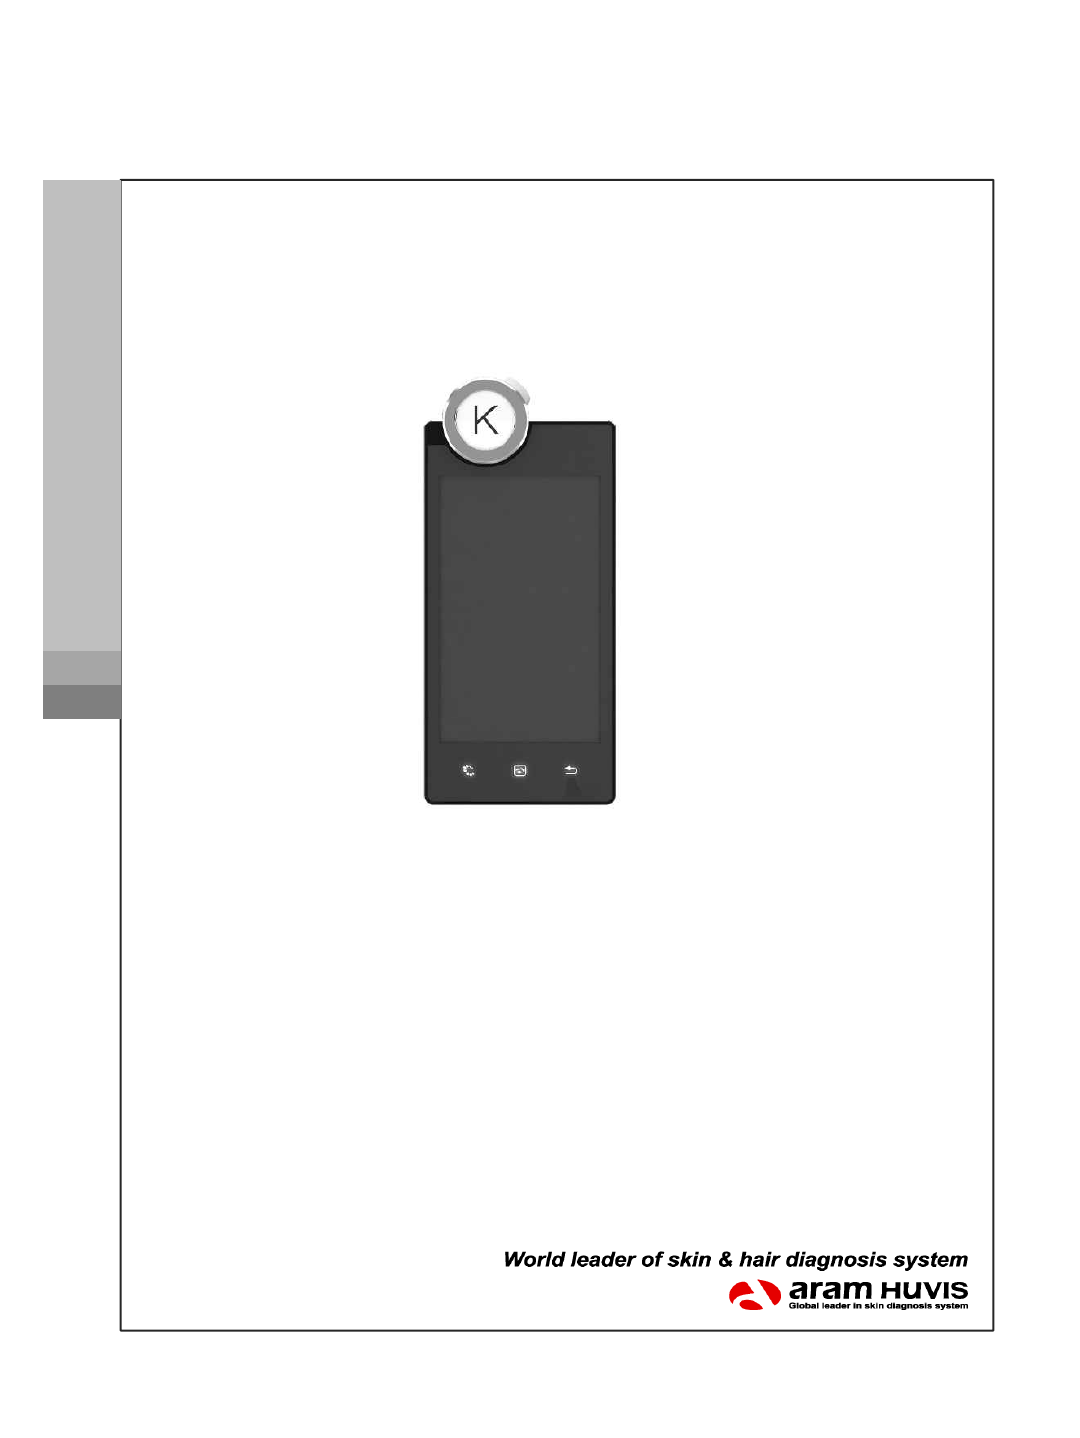
Aram Huvis APM ARAMO PROFESSIONAL MICROSCOPE User Manual Microsoft PowerPoint Kera Skin Manual 20120319
Aram Huvis Co., Ltd. ARAMO PROFESSIONAL MICROSCOPE Microsoft PowerPoint Kera Skin Manual 20120319
Users Manual
User’s Manual
APM-100
CELL SCORE IDENTITY
DIAGNOSIS MICROSCOPE
ASP-100
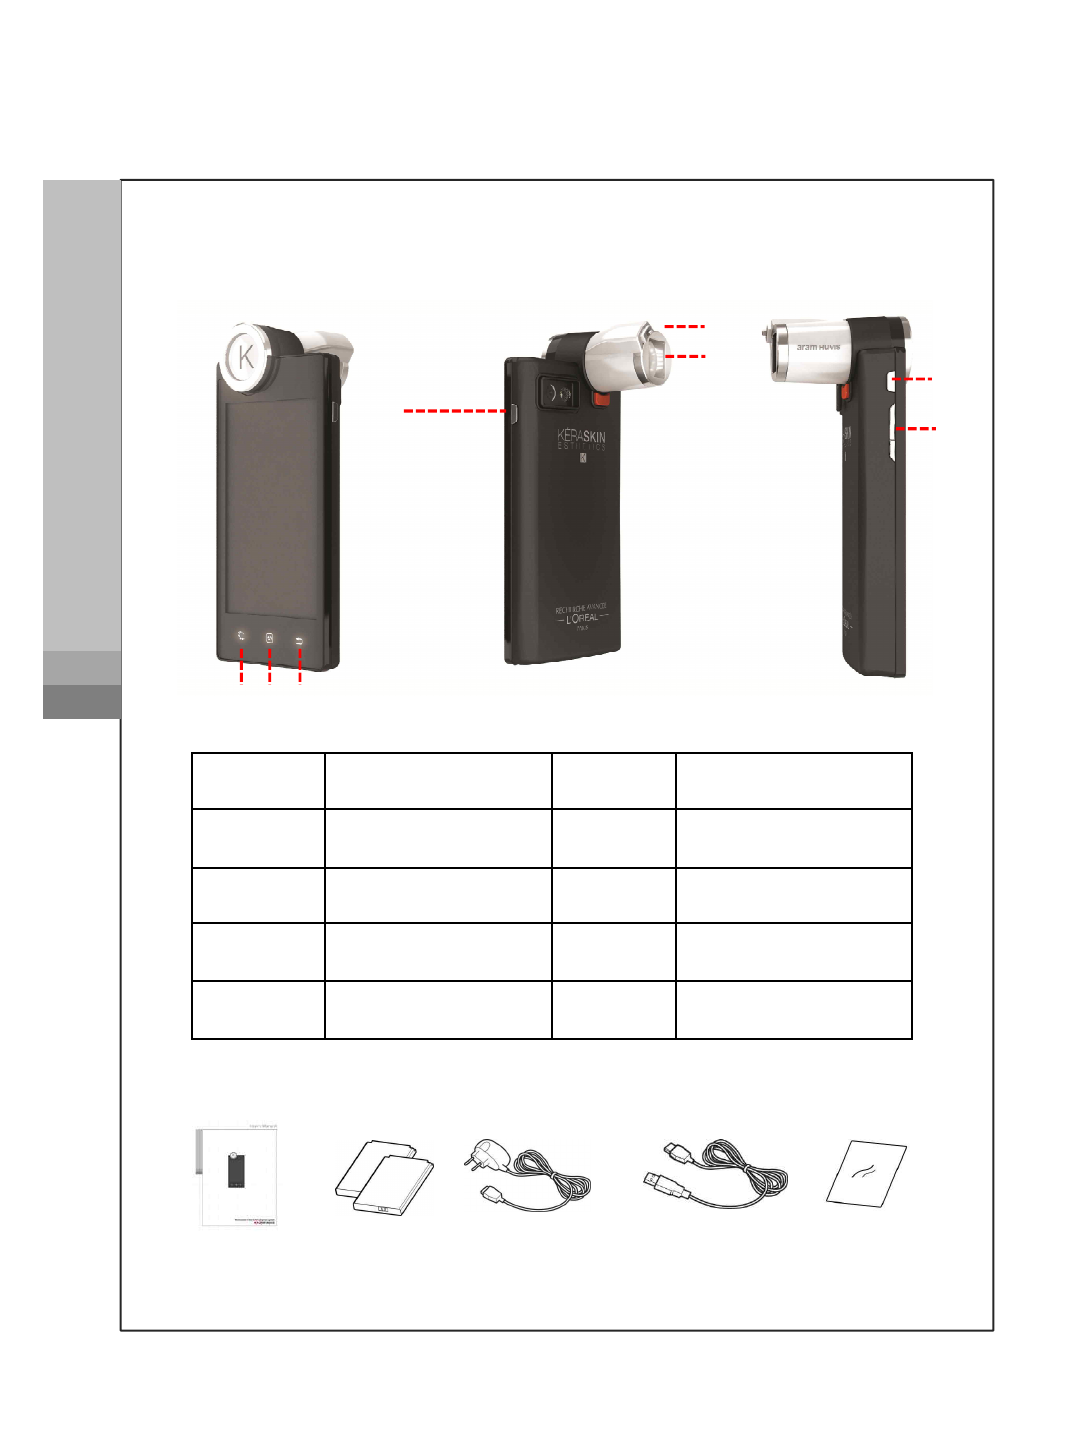
System and components
④
① ② ③
⑥
⑦
⑧
Getting started
ASP-100
⑤
APM-100
Battery
User manual Mobile charger USB cable Cleaning cloth
Number
Function
Number
Function
①
Menu
⑤
Moisture sensor
②
Home
⑥
Camera lens
③
Back
⑦
On/ Off
④
Diagnosis
⑧
Volume
1
APM-100
Battery uses
Getting started
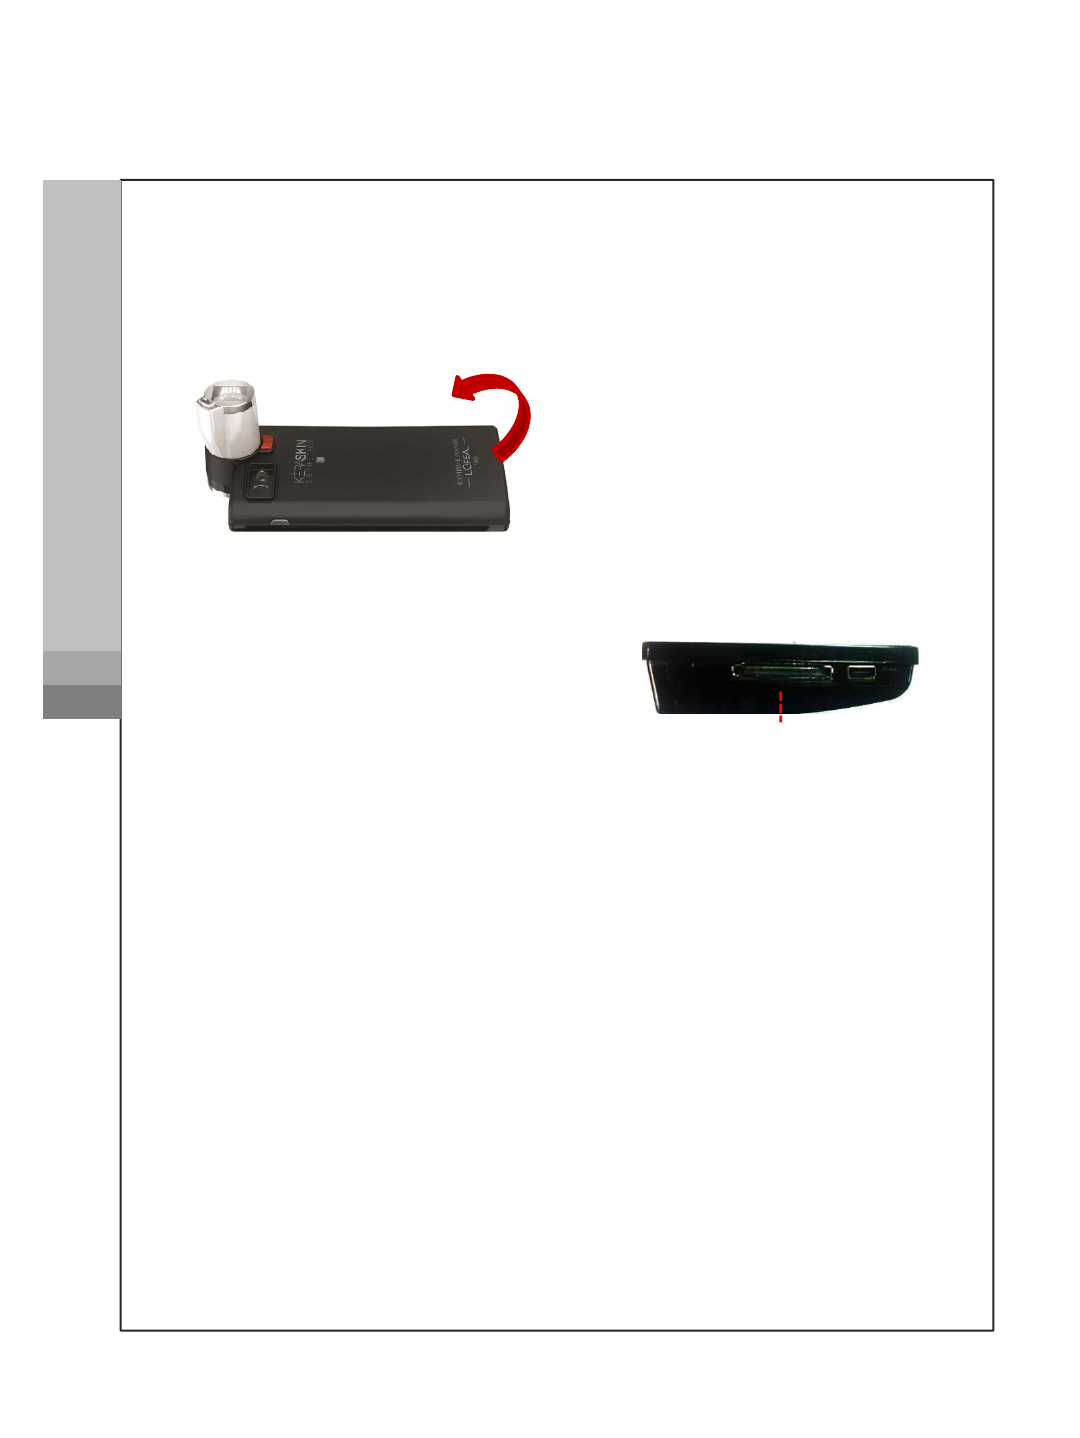
To change the battery
Open the cover to pull off
To charge the battery
Connect the charger to the USB slot
under the device.
To charge the battery
Connect the charger to the USB slot
under the device. USB
Use the touch screen
Your device’s touch screen lets you select items or perform
functions. Lean basic actions to use touch screen
•Tap : Touch once with your finger to select or launch the menu
option, or application
•Drag : Tap and drag your finger up, down, left, or right to move
to items on lists.
•Tap and hold : Tap an item and hold it for more than 2 seconds
to open pop-up option list
•Double-tap : Tap twice quickly with your finger to zoom in or out
while viewing photos. 2
Getting Started
Enter text
Enter text by selecting characters on the virtual keypads
Getting started
APM-100
①
②
③
⑤
⑥
④
①
Enter text by selecting characters on the virtual keypads
No.
Function
①
Shortcuts for frequent use
②
Change case
③
Switch between ABC and Number(symbol) mode
④
Space
⑤
Delete
⑥
Start new line
②
③
⑤
⑥
④
3
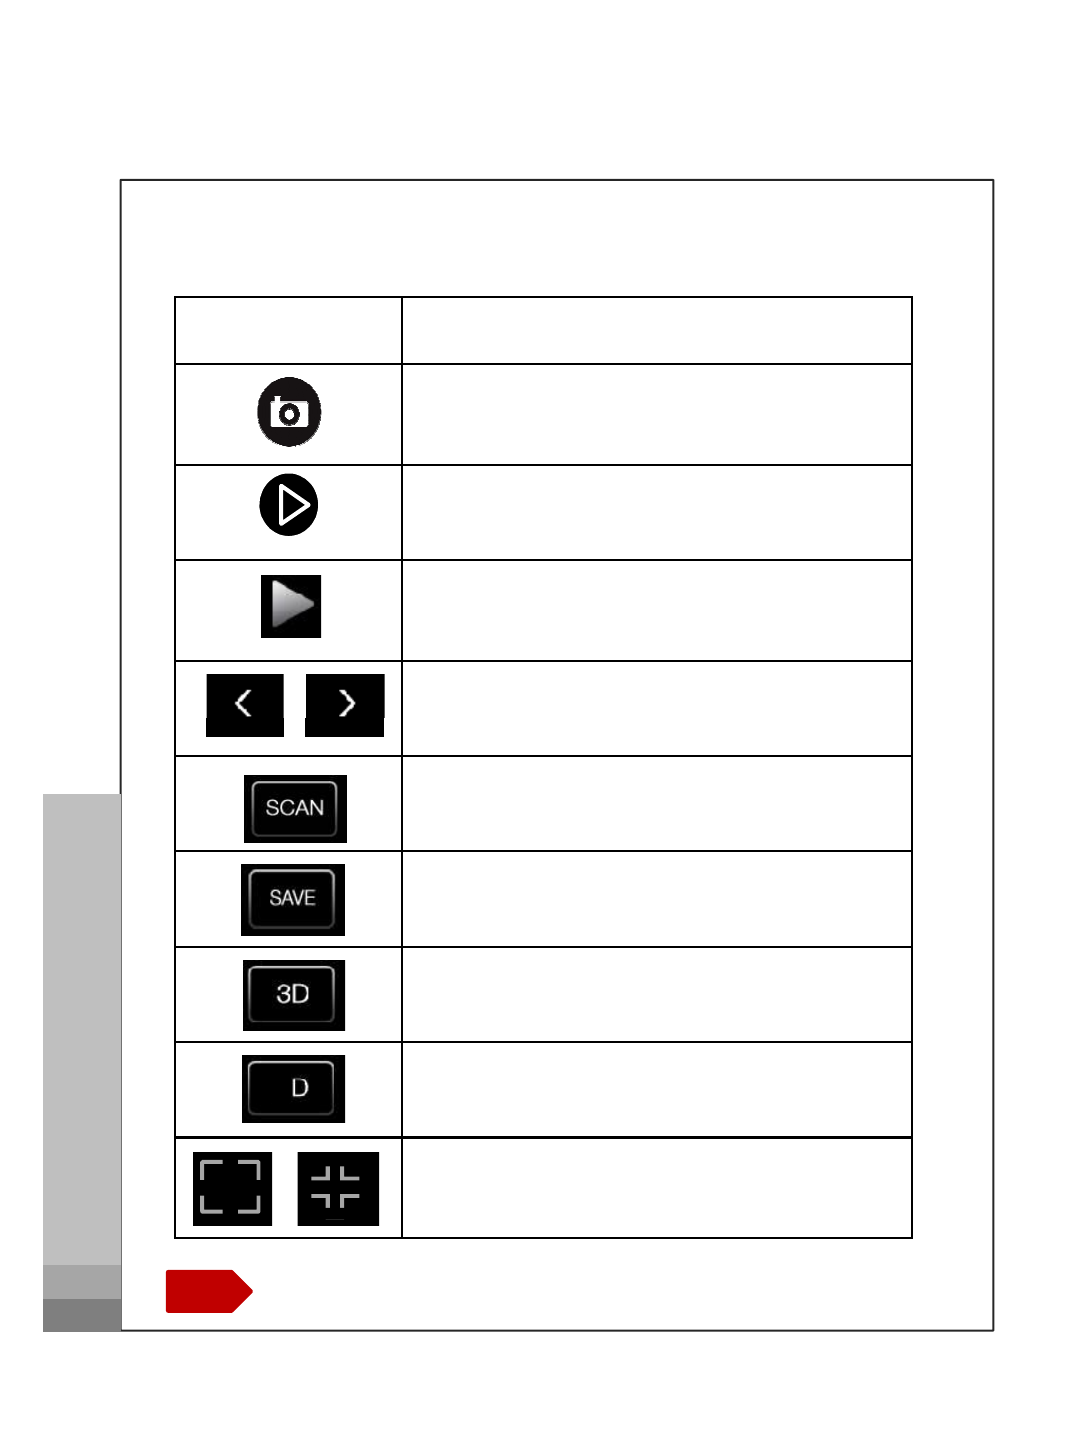
Icons
To do
Place onto your skin to take images and
to measure the value
Touch to take images from the device
Change result values by touching screen
GO PRE
GO NEXT
Icons to operate in Manual
Icons to operate
GO PRE
GO NEXT
SCAN IMAGE
SAVE IMAGE
3D IMAGE
2D IMAGE
MAGNIFY THE IMAGE
DOWNSIZE THE IMAGE
C.S.I Diagnosis Microscope
Touch the >or fling the screen to go to next page.
Note
2
4
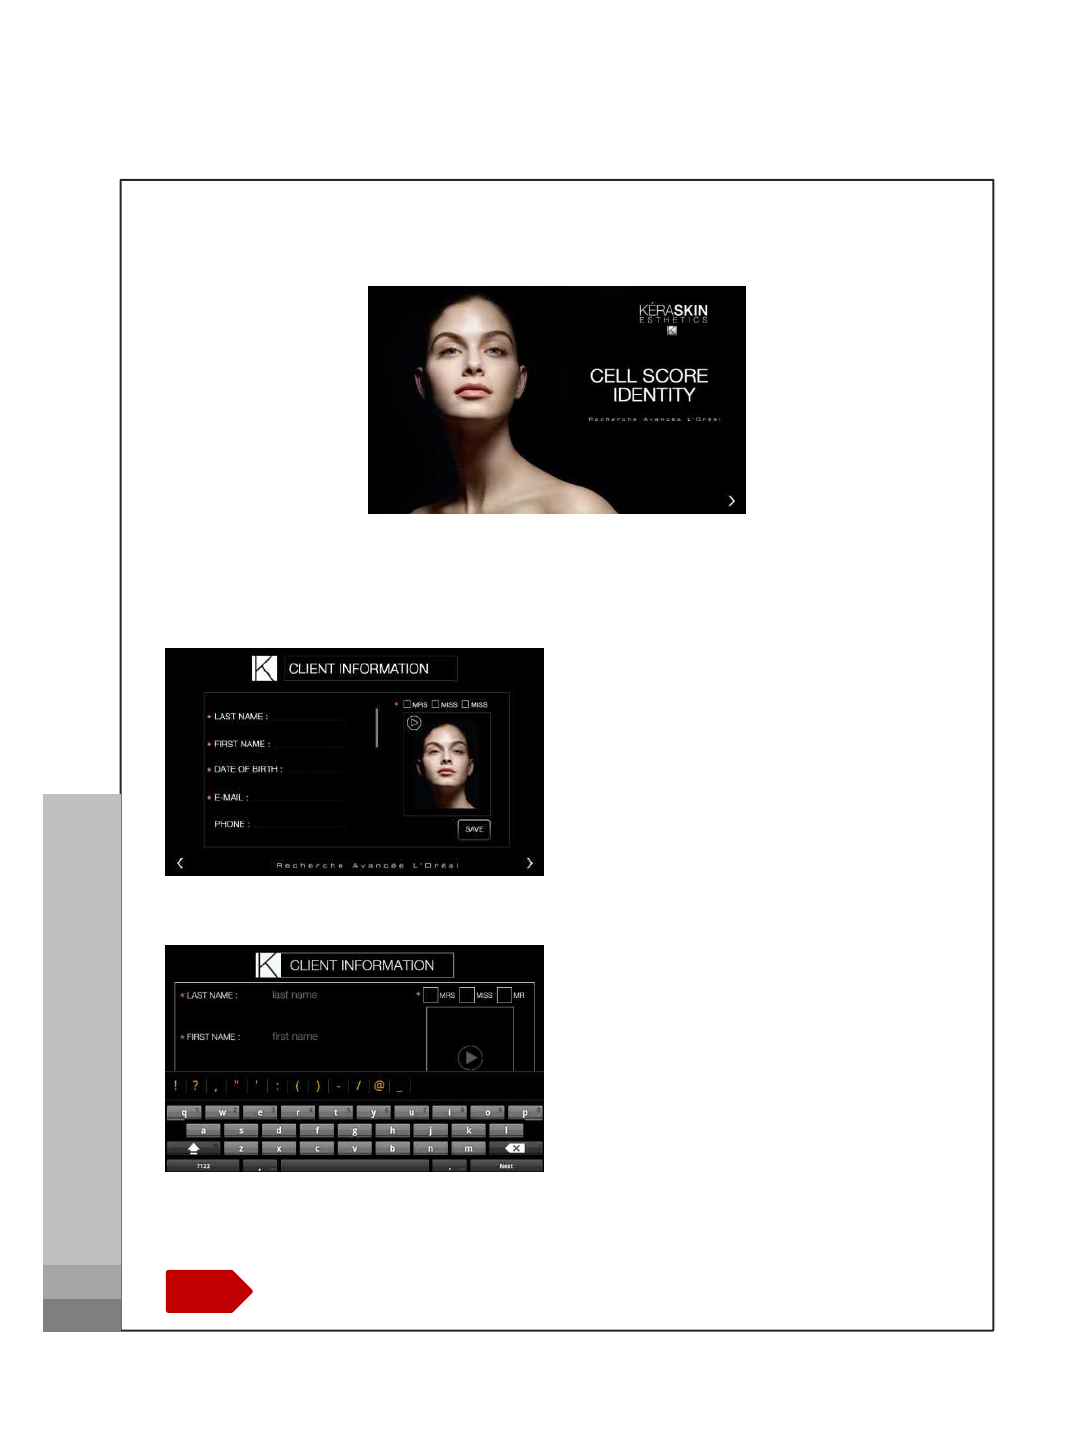
Diagnosis Process
Register client information
How to register
•Default information(*marked)
needed to be filled to go next
process
How to operate
C.S.I Diagnosis Microscope
How to register
•Default information(*marked)
needed to be filled to go next
process
Touch the >or fling the screen to go to next page.
Note
•Touch the text to display
keypad
5
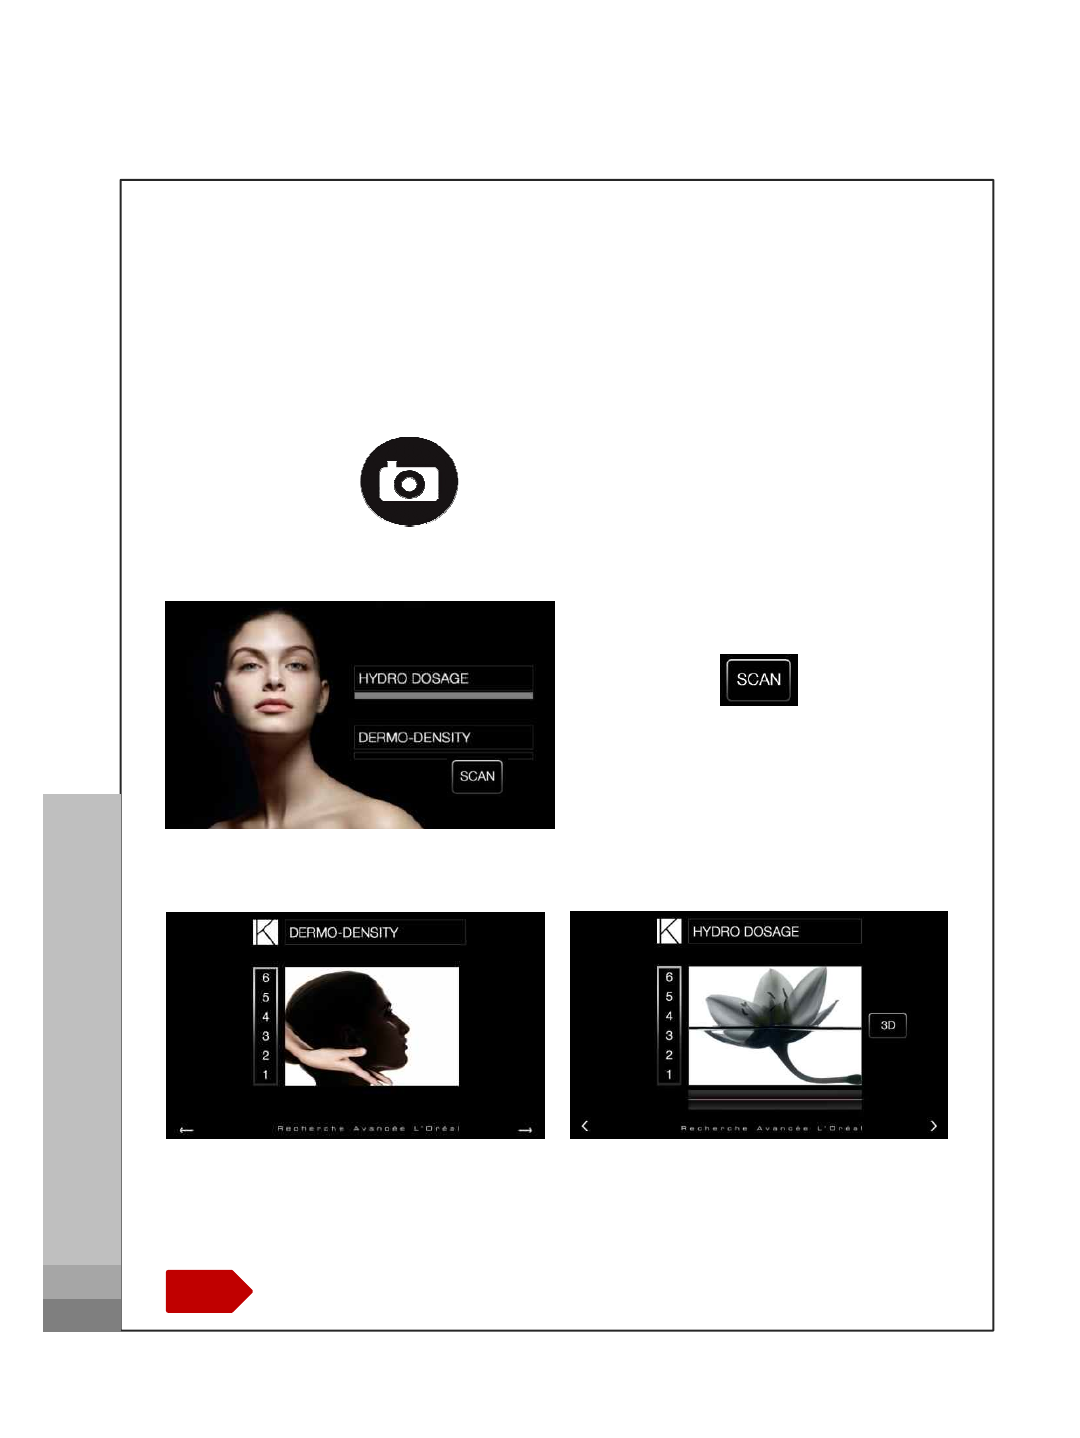
How to measure
•Touch to diagnosis
Diagnosis Process
Dermo Density & Hydro Dosage
How to operate
Place the sensor onto your skin and
press for 3 seconds
How to measure
•Touch to diagnosis
C.S.I Diagnosis Microscope
Touch the >or fling the screen to go to next page.
Note
Result values displays
6
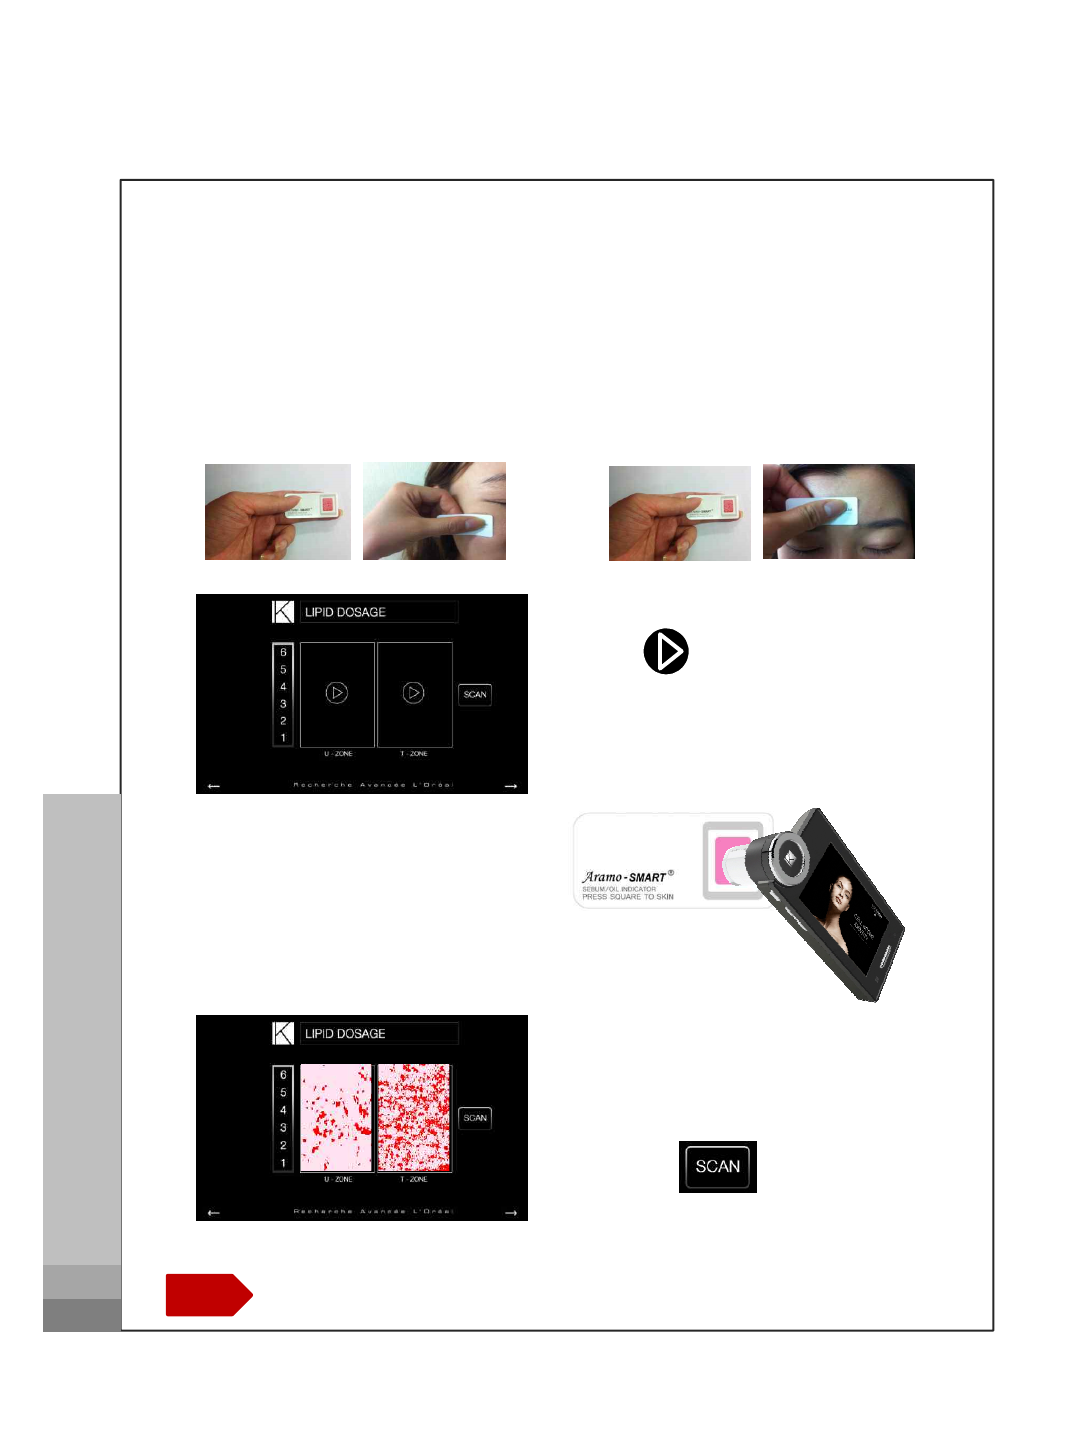
Lipid Dosage
Put the below sebum tape (pink area) onto the U-zone of your
face for 3 seconds
U - ZONE T - ZONE
•Tap to take picture of
pink area of U and T – ZONE
How to operate
UT
C.S.I Diagnosis Microscope
Touch the >or fling the screen to go to next page.
Note
•Take picture of pink area by touching the screen
•Touch to diagnosis
7
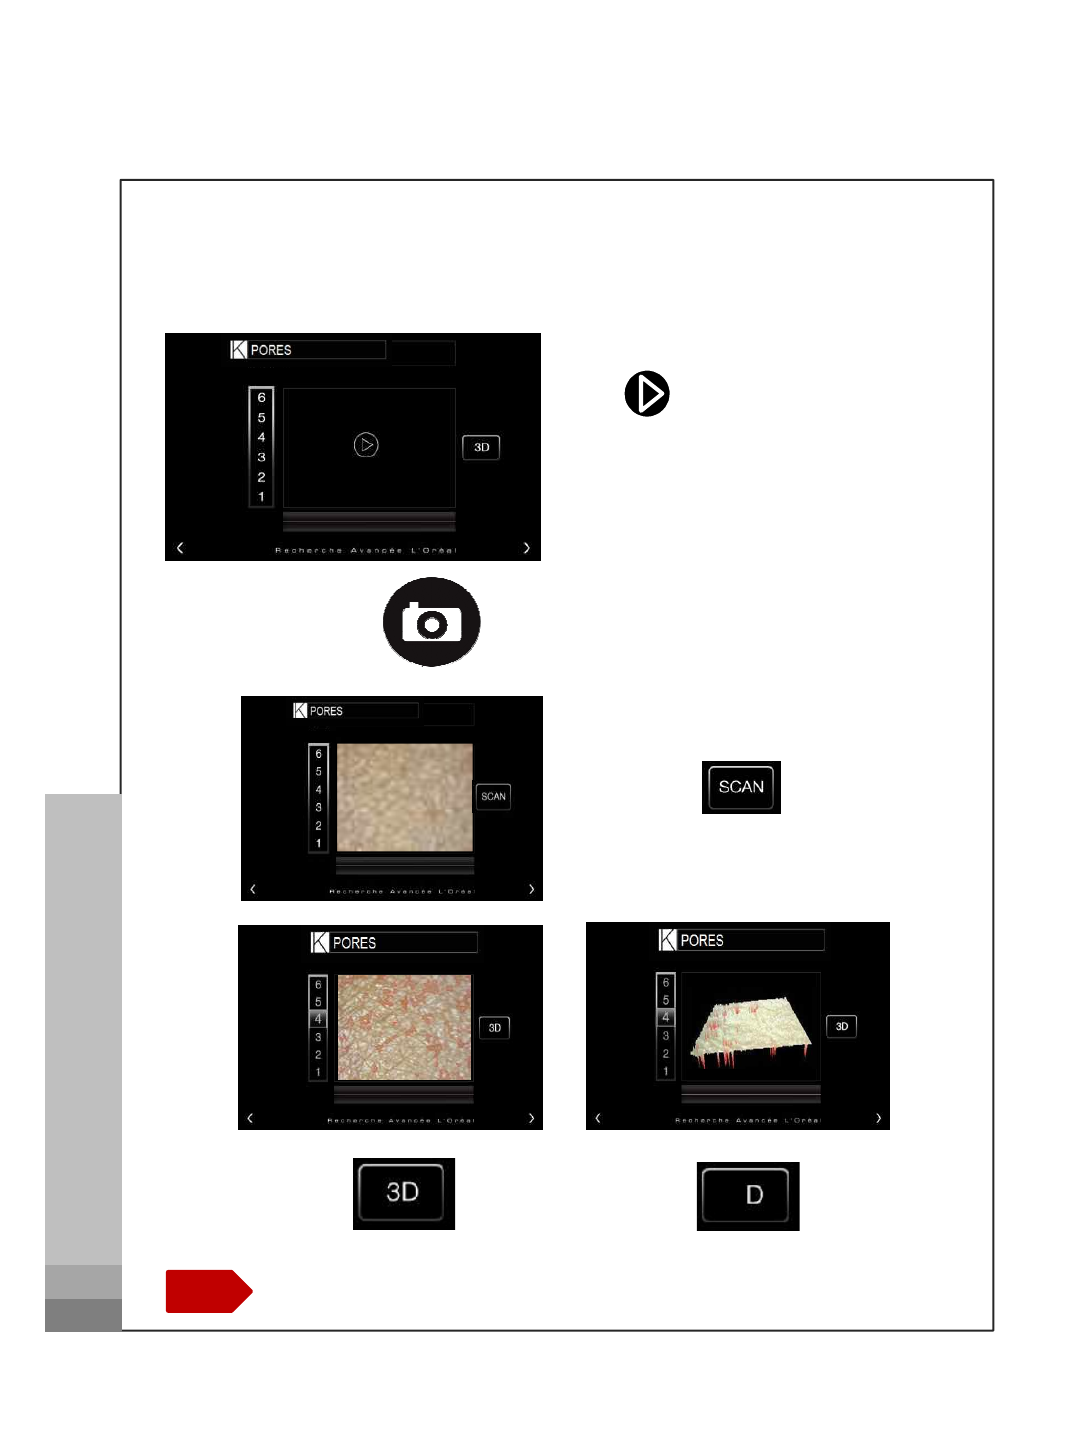
Pores
Tap to take picture of pores.
How to operate
Place the lens onto your skin and
press for 3 seconds
Touch to diagnosis.
C.S.I Diagnosis Microscope
Touch the >or fling the screen to go to next page.
Note
2
8
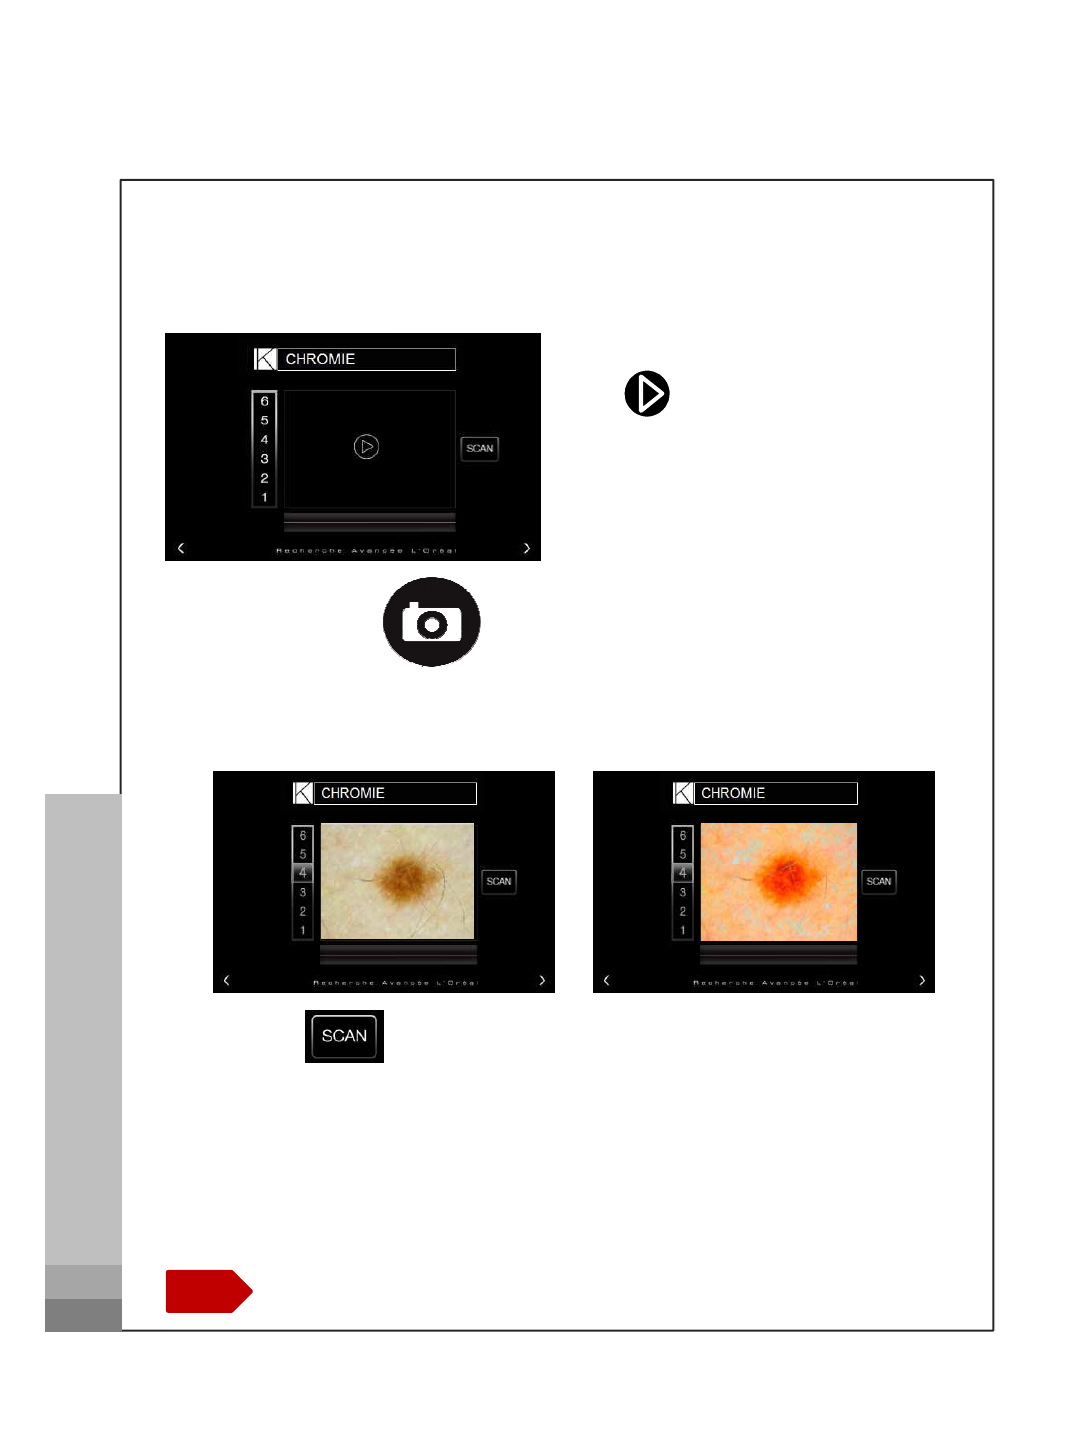
Chromie
Tap to take picture of pores.
How to operate
Place the lens onto your skin and
press for 3 seconds
Touch to diagnosis.
C.S.I Diagnosis Microscope
Touch the >or fling the screen to go to next page.
Note 9
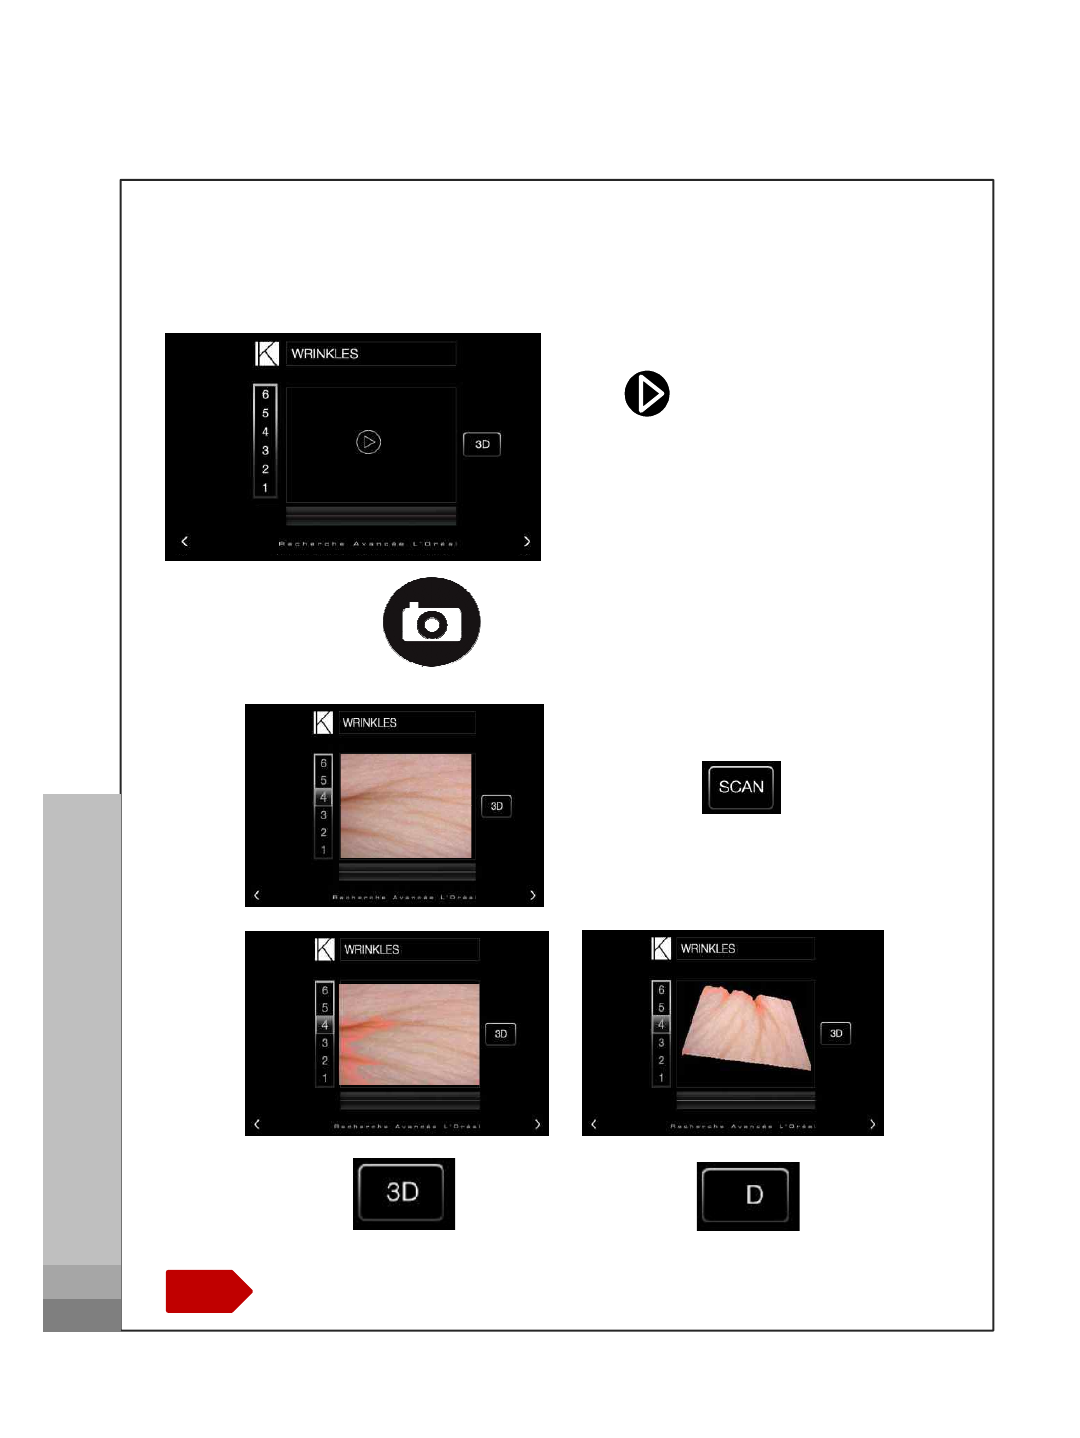
Wrinkles
Tap to take picture of pores.
How to operate
Place the lens onto your skin and
press for 3 seconds
C.S.I Diagnosis Microscope
Touch the >or fling the screen to go to next page.
Note
Touch to diagnosis.
2
10
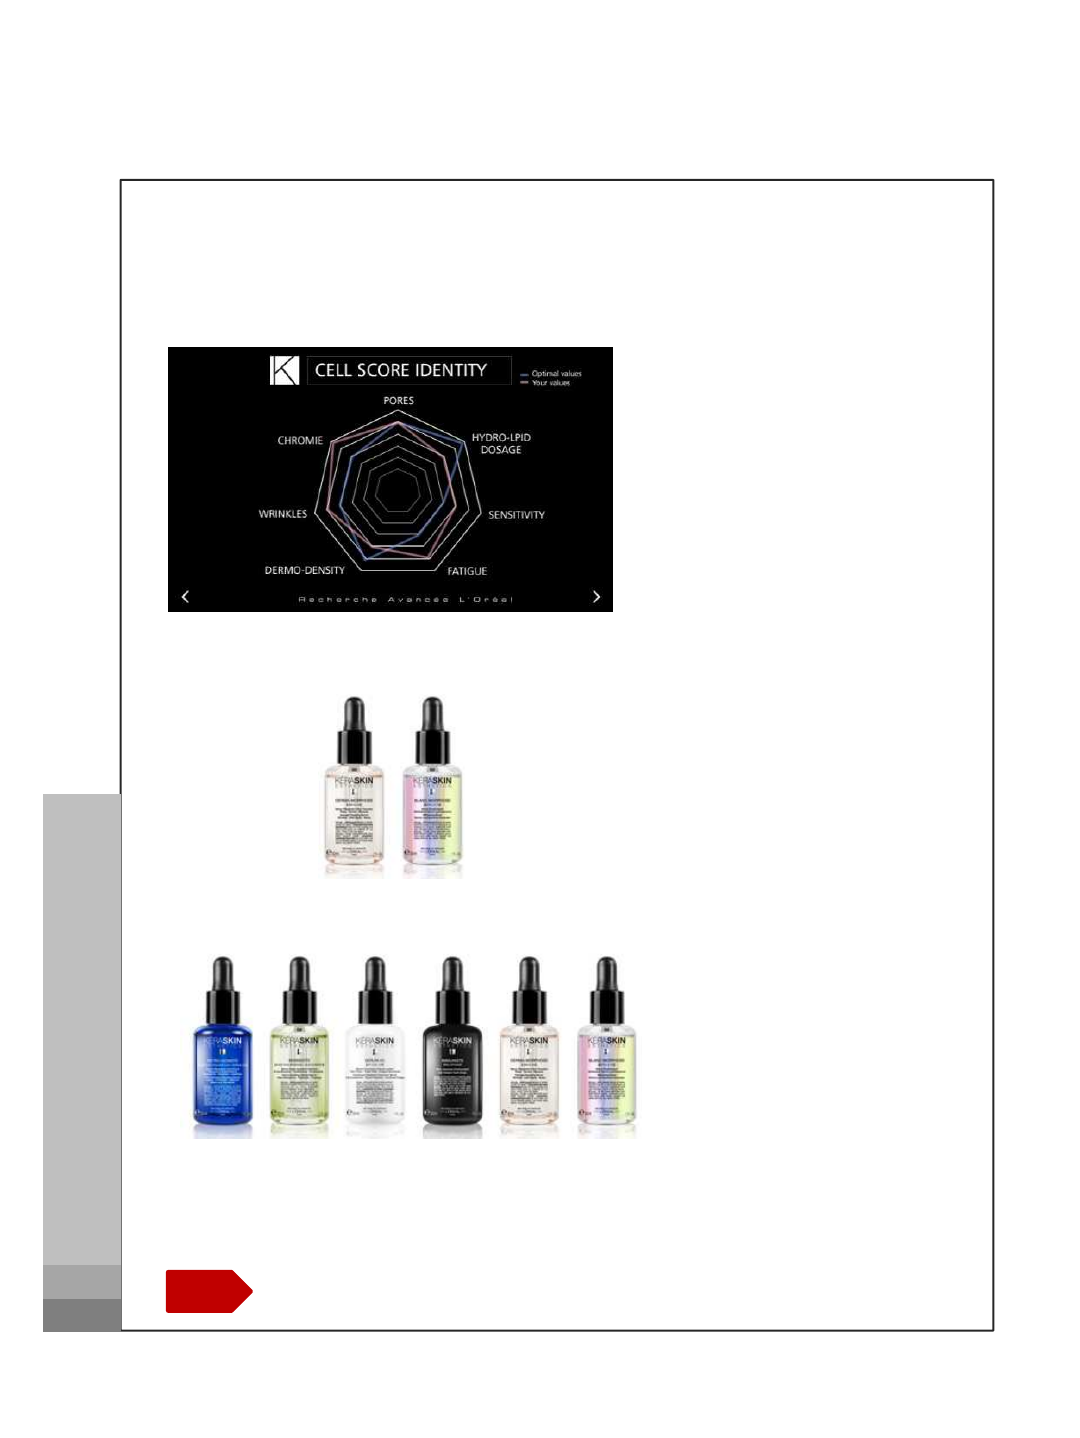
Result
Result
Heptagon Spider-gram
How to operate
C.S.I Diagnosis Microscope
Touch the >or fling the screen to go to next page.
Note
At Home Prescription
Show two product
Serum Blending
Show 6 drops of serum
11

FCC Statement
This device complies with Part 15 of the FCC Rules. Operation is subject to the following
two conditions:
(1) This device may not cause harmful interference. and
(2) This device must accept any interference received, including interference that may cause
undesired operation.
This equipment has been tested and found to comply with the limits for a Class B digital
device, pursuant to part 15 of the FCC Rules. These limits are designed to provide reasonable
protection against harmful interference in a residential installation. This equipment generates,
uses and can radiate radio frequency energy and, if not installed and used in accordance with
the instructions, may cause harmful interference to radio communications. However, there is
no guarantee that interference will not occur in a particular installation. If this equipment
does cause harmful interference to radio or television reception, which can be determined by
turning the equipment off and on, the user is encouraged to try to correct the interference by
one or more of the following measures:
- Reorient or relocate the receiving antenna.
- Increase the separation between the equipment and receiver.
- Connect the equipment into an outlet on a circuit different from that to which the receiver is
connected.
- Consult the dealer or an experienced radio/TV technician for help.
Caution
Any changes or modifications (including the antenna) made to this device that are not
expressly approved by the manufacturer may void the user’s authority to operate the
equipment.