Arcadyan Technology WA4001CB WLAN ACCESS POINT User Manual P74841 F5D7233 man indd
Arcadyan Technology Corporation WLAN ACCESS POINT P74841 F5D7233 man indd
UserManual.wiki
>
Arcadyan Technology
>
WA4001CB User Manual
>
USER MANUAL 3 OF 7
Contents
1.
USER MANUAL 1 OF 7
2.
USER MANUAL 2 OF 7
3.
USER MANUAL 3 OF 7
4.
USER MANUAL 4 OF 7
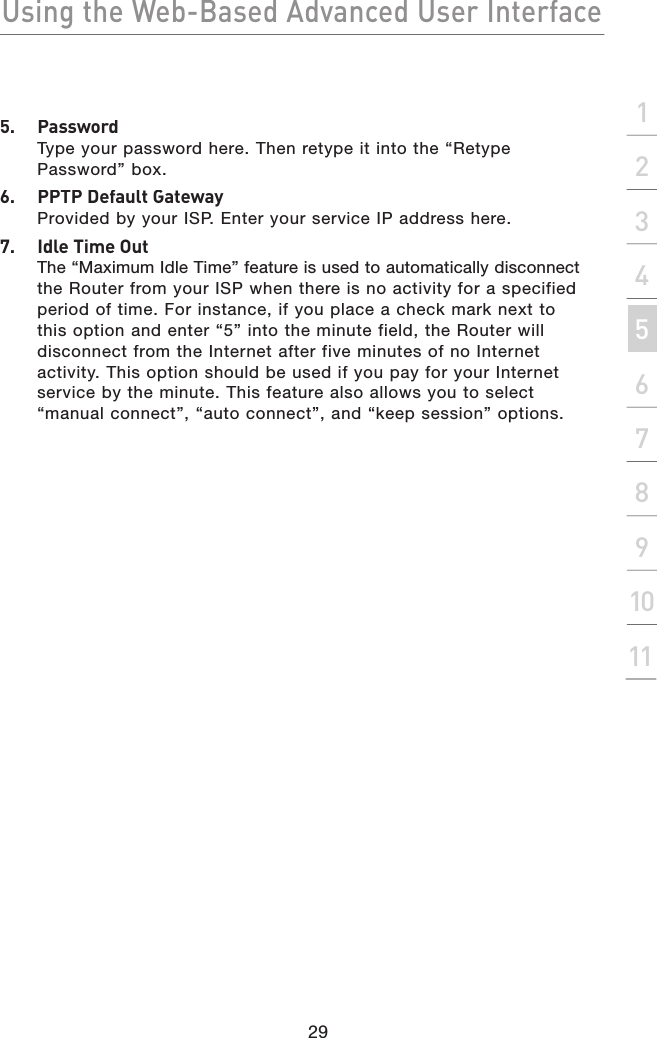
5.
USER MANUAL 5 OF 7
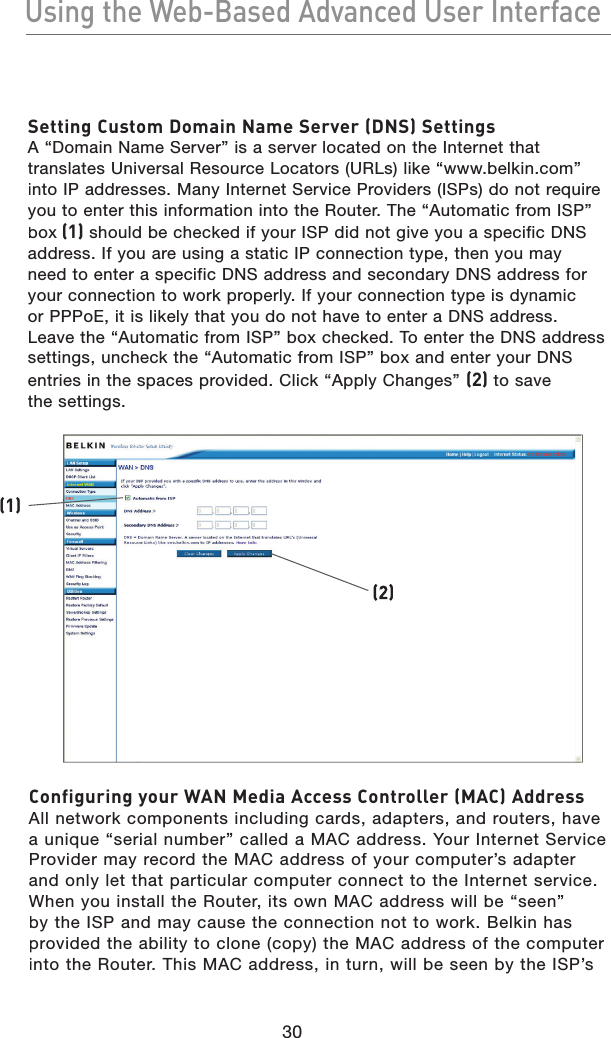
6.
USER MANUAL 6 OF 7
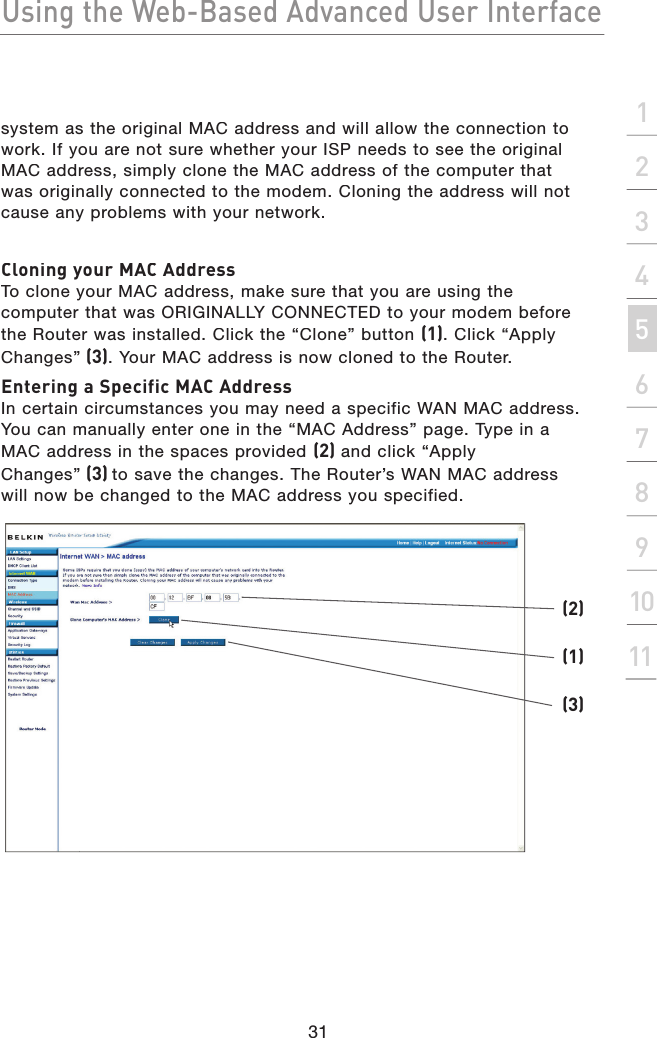
7.
USER MANUAL 7 OF 7
USER MANUAL 3 OF 7
Navigation menu
Upload a User Manual
Namespaces
Wiki Guide
HTML
PDF
Info
Views
User Manual
Discussion / Help
Navigation
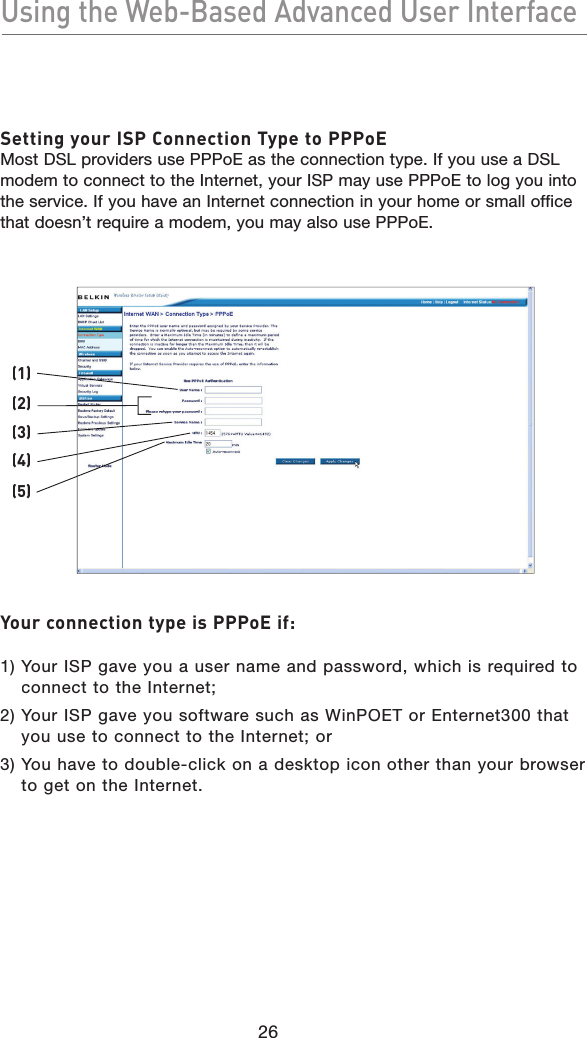
![28Using the Web-Based Advanced User InterfaceUsing the Web-Based Advanced User InterfaceSetting your Internet Service Provider (ISP) Connection Type to Point-to-Point Tunneling Protocol (PPTP)[European Countries Only]. Some ISPs require a connection using PPTP protocol, a type of connection most common in European countries. This sets up a direct connection to the ISP’s system. Type in the information provided by your ISP in the space provided. When you have finished, click “Apply Changes” (8). After you apply the changes, if your Router is set up properly, the “Internet Status” indicator will read “Connected”.1. IP AddressProvided by your ISP. Enter the IP address here.2. Subnet MaskProvided by your ISP. Enter your subnet mask here.3. Default GatewayProvided by your ISP. Enter your default gateway here.4. User IDProvided by your ISP. Enter your PPTP account name here.(1)(2)(3)(4)(5)(6)(7)(8)](https://usermanual.wiki/Arcadyan-Technology/WA4001CB.USER-MANUAL-3-OF-7/User-Guide-591316-Page-3.png)