Archos 2718W Pocket Media Assistant AV500 series User Manual
Archos SA Pocket Media Assistant AV500 series
Archos >
User Manual
Annex No.5
Users Manual
English Language User Guide
ARCHOS™ VIDEO AV500 SERIES
USB 2.0 Hard Disk / MP3 Player/Recorder / JPEG Viewer / MPEG4 Personal Video
Player/Recorder / Pocket Linux™ based PDA with WiFi connectivity
User Guide for ARCHOS AV520, AV540, & AV580

2
Table of Contents
Ports, Buttons, and Connections....................................................................................... 6
1 First Time Usage.......................................................................................................... 8
1.1 Plugging in the AC Adapter ................................................................................................8
1.2 Turning on the AV500.........................................................................................................8
1.3 Shutting off the AV500 and Battery saving features.........................................................8
1.4 Charging the Batteries .........................................................................................................8
1.5 Caring for the AV500 ..........................................................................................................9
1.6 Hardware Reset ....................................................................................................................9
2 The Applications Tab ................................................................................................ 10
3 The Pocket AV Tab ................................................................................................... 11
4 The Games Tab ......................................................................................................... 12
5 The Settings Tab........................................................................................................ 13
6 Playing Music Files.................................................................................................... 14
7 Recording Music Files ............................................................................................... 15
8 Using the Browser ..................................................................................................... 16
9 Connecting/Disconnecting the AV500 to a Computer............................................... 17
10 Playing MPEG4 Video Files...................................................................................... 19
11 Recording MPEG4 Video Files.................................................................................. 20
12 Technical Support ..................................................................................................... 21
13 Troubleshooting......................................................................................................... 23
13.1 AV500 / Computer locks up (freezes operation) or Stops ................................................23

3
Warranty and Limited Liability
This product is sold with a limited warranty and specific remedies are available to the original purchaser in the
event the product fails to conform to the limited warranty. Manufacturer’s liability may be further limited in
accordance with its sales contract.
In general, the manufacturer shall not be responsible for product damages caused by natural disasters, fire, static
discharge, misuse, abuse, neglect, improper handling or installation, unauthorized repair, alteration or accident . In
no event shall the manufacturer be liable for loss of data stored on disk media.
MANUFACTURER SHALL NOT BE LIABLE FOR ANY SPECIAL, INCIDENTAL OR CONSEQUENTIAL
DAMAGES. EVEN IF INFORMED OF THE POSSIBILITY THEREOF IN ADVANCE.
ARCHOS licensor(s) makes no warranties, express or implied, including, without limitation, the implied
warranties of merchantability and fitness for a particular purpose, regarding the licensed materials.
ARCHOS’s licensor(s) does not warrant, guarantee or make any representations regarding the use or the
results of the use of the licensed materials in terms of its correctness, accuracy, reliability, correctness or
otherwise. The entire risk as to the results and performance of the licensed materials is assumed by you. The
exclusion of implied warranties is not permitted by some jurisdictions. The above exclusion may not apply to
you.
In no event will ARCHOS’s licensor(s), and their directors, officers, employees or agents
(collectively ARCHOS’ licensor) be liable to you for any consequential, incidental or indirect
damages (including damages for loss of business profits, business interruption, loss of business
information, and the like) arising out of the use of inability to use the licensed materials even if
ARCHOS’ licensor has been advised of the possibility of such damages. Because some jurisdiction
do not allow the exclusion or limitation of liability for consequential or incidental damages, the
above limitations may not apply to you.
Please see your sales contract for a complete statement of warranty rights, remedies and limitation of liability.
Furthermore, warranty does not apply to:
1. Damages or problems resulting from misuse, abuse, accident, alteration or incorrect electrical current
or voltage.
2. Any product tampered-with or damaged warranty seal or serial number label.
3. Any product without a warranty or serial number label.
4. Batteries and any consumable items delivered with or in the equipment.
Warnings and Safety Instructions
CAUTION
To prevent risks of electric shock, this unit must only be opened by qualified service personnel.
Power off and disconnect the power supply cable before opening the unit.
WARNING
To prevent fire or shock hazard, do not expose the unit to rain or moisture.
Use of this product is for personal use only. Copying CDs or loading music, video, or picture files for sale or other
business purposes is or may be a violation of copyright law. Copyrighted materials, works of art, and/or
presentations may require authorization to be fully or partially recorded. Please be aware of all such applicable
laws concerning the recording and use of such for your country and jurisdiction.

4
FCC Compliance Statement
FCC Compliance
This equipment has been tested and found to comply with limits for a Class B digital device, pursuant to Part 15 of
the FCC Rules. These limits are designed to provide reasonable protection against harmful interference in a
residential installation. This equipment generates, uses and can radiate radio frequency energy and, if not installed
and used in accordance with instructions, may cause harmful interference to radio communications. However,
there is no guarantee that interference will not occur in a particular installation. If this equipment does cause
harmful interference to radio or television reception, which can be determined by turning the equipment off and on,
the user is encouraged to try to correct the interference by one or more of the following measures:
• Reorient or relocate the receiving antenna.
• Increase the separation between the equipment and receiver.
• Connect the equipment into an outlet on a circuit different from that to which the receiver is connected.
• Consult the dealer or an experienced radio/TV technician for help.
CAUTION : Modifications not authorized by the manufacturer may void users authority to operate this device.
FCC Part 15 - Operation is subject to the following two conditions:
1. This device may not cause harmful interference;
2. This device must accept any interference received including interference that may cause undesired operation.
Electrostatic Discharge
Note: During electrostatic discharge, the product may be malfunctioning. Reset to return to normal operation.
Use a pin or paper clip to press the pin-hole reset button on the bottom (right side) of the unit.
Copyright Notice
Copyright ARCHOS © 2004 All rights reserved.
This document may not, in whole or part, be copied, photocopied, reproduced, translated or reduced to any
electronic medium or machine-readable form without prior consent, in writing, from ARCHOS. All brands and
products names are registered trademarks and the property of their respective owners. Specifications are subject
to change without notification. Errors and omissions accepted. Images and illustrations may not always match
contents. Copyright ® ARCHOS. All rights reserved.
Disclaimer of warranty: to the extent allowed by applicable law, representations and warranties of non-infringement of
copyrights or other intellectual property rights resulting from the use of the product under conditions other than as here above
specified, are hereby excluded.
LCD Pixel Policy
The LCD screen on your Archos AV500 unit has been manufactured to rigorous standards to provide a high quality
viewing experience. Nevertheless, your LCD screen may have slight imperfections. This is not particular to the
Archos screen, but to all devices which have LCD screens regardless of the original manufacturer of the LCD.
Each product vendor guarantees that his screen will contain no more than a certain number of defective pixels.
Each screen pixel contains three dot elements (Red, Blue, and Green). One or all of the dots in a given pixel may
be stuck on or stuck off. A single dot stuck off is the least noticeable. All three dots of a pixel stuck on is the most
noticeable. Archos guarantees that its AV500 screen will have no more than 1 defective pixel (regardless if that
pixel has one or more defective dots). This means that during the period of guarantee for your country or
jurisdiction, if the screen on your product has two or more defective pixels, Archos will repair or replace your AV500
product at its cost. Thus, one defective pixel is not grounds for replacement or repair of the product.

5
Dear Customer,
ARCHOS thanks you for your choice of this exciting AV500 PDA. Never before has one been
able to carry with him or her so many data and media files. With PDA functionality, you will be
able to enjoy these without a computer. We are sure that your AV500 will give you years of
enjoyment. Of course you can always use it as a regular portable hard disk too.
This guide will explain to you the functions of the AV500. Our engineers have packed this product
with many functions and capabilities. The better you know how to use it, the more enjoyment you
will get from it. Remember, with the AV500, you can…
• Use it as a Personal Data Assistant
• Use it as a PDA to retrieve e-mail and organize your schedule
• View JPEG and BMP images
• Play MPEG-4 movies
• Listen to and record MP3 music files
• Store MP3, MP4, JPEG or any type of data file
• Read and write data to and from CompactFlash™ cards via the CF slot
We wish you many years of enjoyment from your AV500 product. Don’t forget to check our web
site (www.archos.com category software), as we periodically update the Archos Video AV500
internal operating software (OS) to offer new functions and improved features.
The ARCHOS TEAM

6
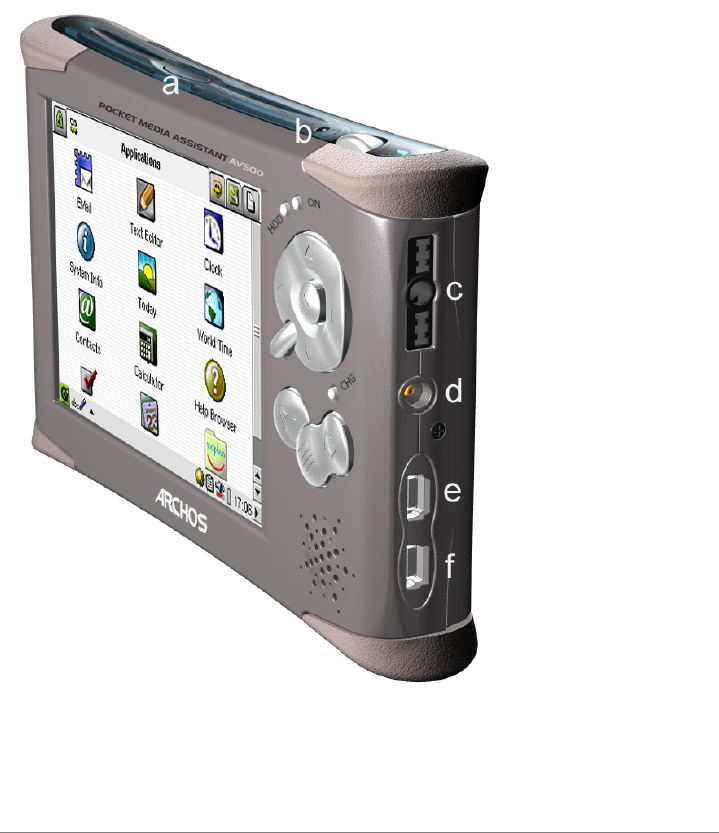
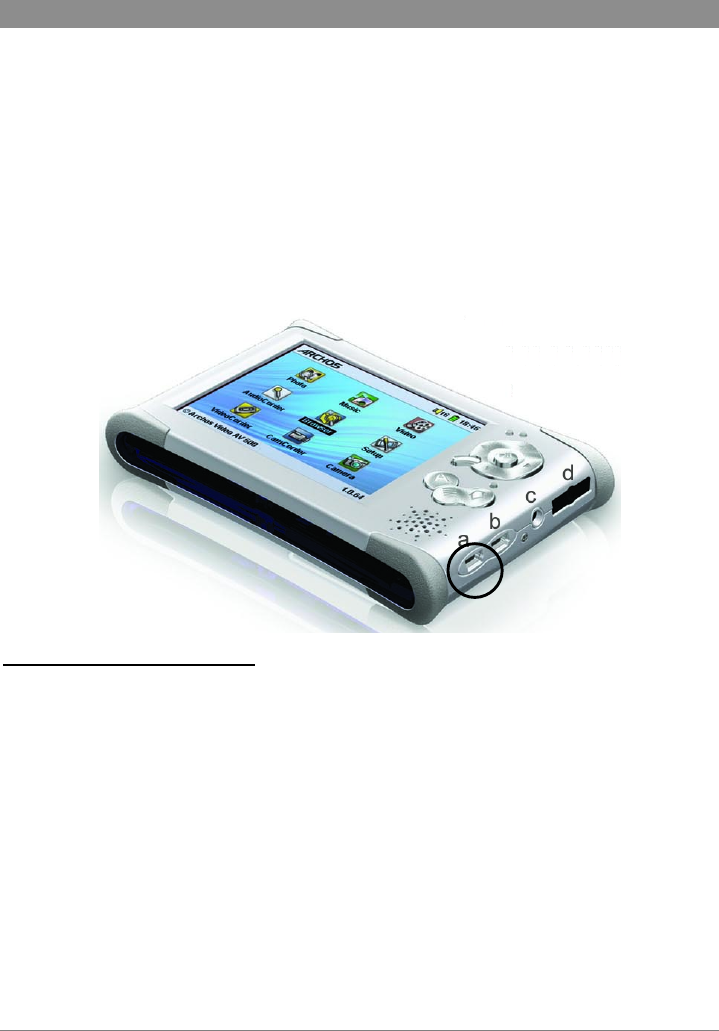
Ports, Buttons, and Connections
a Hard drive activity indicator
b On indicator
c Adapter/Charger Connected
d Move up
e Move down
f Move Left
g Move Right
h On/Enter/Play – Hold for 3 seconds to turn on as ‘Enter’ key on a keyboard
i Escape/Stop/Off
j The Archos button – Goes directly to the Pocket AV tab
k The Menu button – Opens up the Qtopia™ pop-up menu
l The Tab button – Cycles through the AV500 tabs
m TV/LCD button – switch between built-in screen and external video
n TFT LCD touch screen 320 x 240 pixels
o built-in loud speaker
7
a Infrared port
b built-in microphone
c Headphone & AV in/out Multi-connect jack – connect headphones, AV cradle, or FM
Remote Control
d Power connector –
use only the provided
Archos AC
adapter/charger
e USB 1.1 host port
(USB 1.1 compatible) –
use to attach compatible
usb devices to the AV500
f USB 2.0 slave port
(USB 1.1 compatible) –
use to connect the AV500
as an external hard drive
to your computer

8
1 First Time Usage
1.1 Plugging in the AC Adapter
• Use only the included ARCHOS charger/adapter.
• Before using for the first time, charge the batteries for a full four hours.
• You may use the Archos Video AV500 after the first half hour of charging, but this will
increase the necessary charging time to obtain a completely full charge.
1.2 Turning on the AV500
• For the very first time, press and hold the PLAY/ON button . The top green indicator
light will go on, be patient, it may take several seconds for the operating system to boot
up.
• If the unit shuts off right away, plug in the Archos adapter/charger to make sure the
batteries get charged.
1.3 Shutting off the AV500 and Battery saving features
The AV500 does not shut off. It goes into a ‘suspend’ mode. Press and hold the ESC Ó
button for three seconds. It will ‘go on standby’ in three seconds. In the suspend mode
it uses a very small amount of electrical current to maintain certain settings. If you
leave your AV500 in suspend mode for more than a month without charging the battery
you may loose certain settings, including the time of day. They will default to the
original factory values.
In the Configurations tab, you will find an application for setting your personal preferences for
automatic sleep mode and usage of the backlight. This application is called Light and Energy.
1.4 Charging the Batteries
Use ONLY an Archos charger/adapter that is specified for the AV500. Other chargers or adapters
may damage the AV500. The green CHG indicator lights up to indicate that the external adapter is
connected. The batteries will charge automatically when the AC adapter/charger is plugged in.
This light will start to blink when the batteries are fully charged.

9
1.5 Caring for the AV500
The Archos Video AV500 is an electronic product that needs to be treated with more care than
typical consumer electronic products.
• Do not subject it to shock.
• Do not subject it to heat. Keep it ventilated and especially while it is connected to a
computer.
• Keep the AV500 away from water and excessively humid areas.
• Keep the AV500 away from strong electromagnetic fields.
• Keep any connected cords to the AV500 neatly arranged. This light product could fall if
a cord is accidentally pulled by a child.
1.6 Hardware Reset
In the case that your AV500 freezes operation (due to electrostatic phenomena for example), you
can actuate a hardware reset by taking a paper clip and pressing on the reset button. The reset
button can be found on the bottom of the device. Look toward the right and you will see a single
pin hole all by itself. Click the button inside with the use of the paper clip.
10
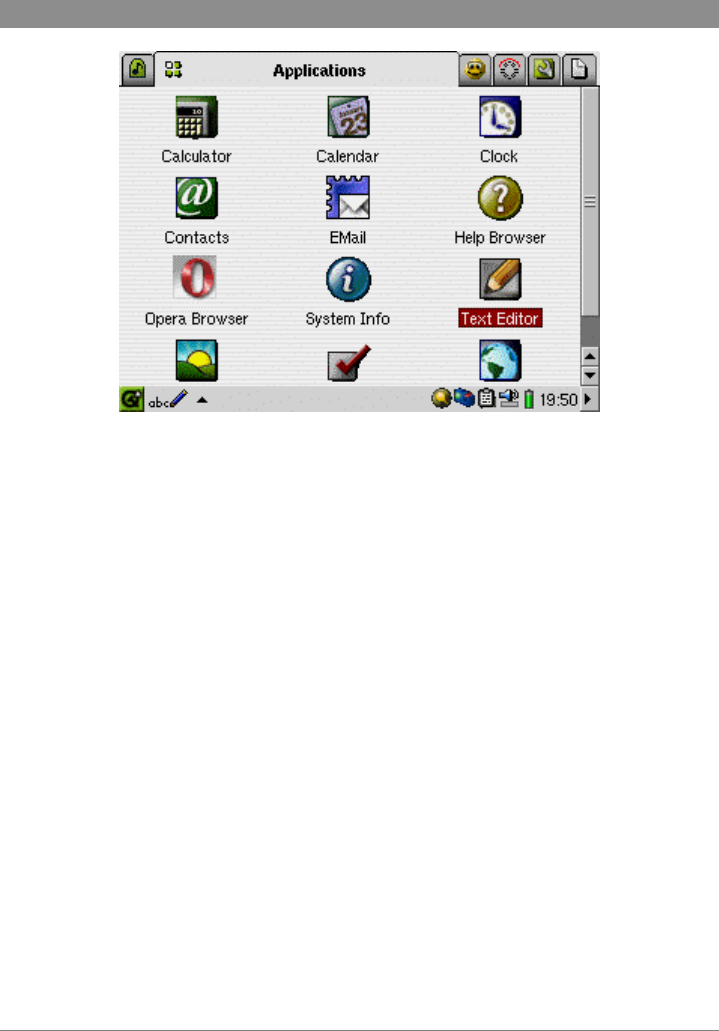
2 The Applications Tab
Calculator Basic calculator application
Calendar Calendar with settable alarms event noting
Clock Clock application which includes stopwatch feature
Contacts Store all personal contact information here (names, addresses, e-mails, etc.)
Email Read and Write e-mails with this POP & IMAP compliant e-mail application.
Help Browser Browse through the various help documents for the applications
Opera Browser Web browser application to view web pages
System Info Shows current system information
Text Editor Read and write basic text files.
Today Shows a summary of pending tasks, appointments, and e-mail.
Image Viewer View JPEG and BMP images with the viewer. Includes slide show option.
Todo List Application to set tasks to do
World Time Application to show and set different time zone clocks
11
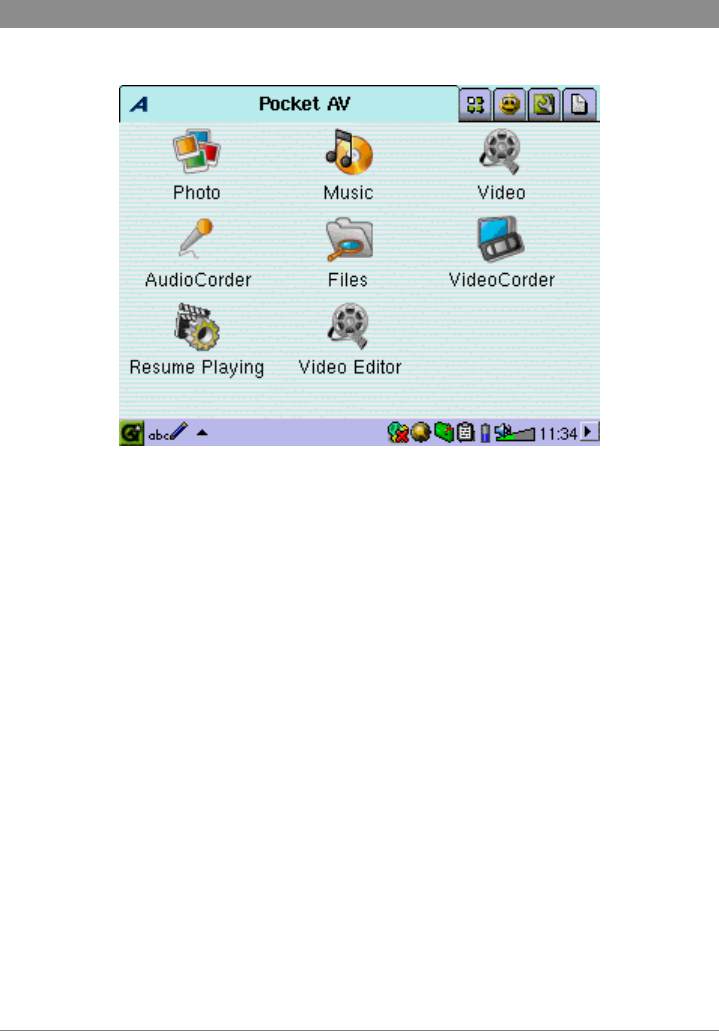
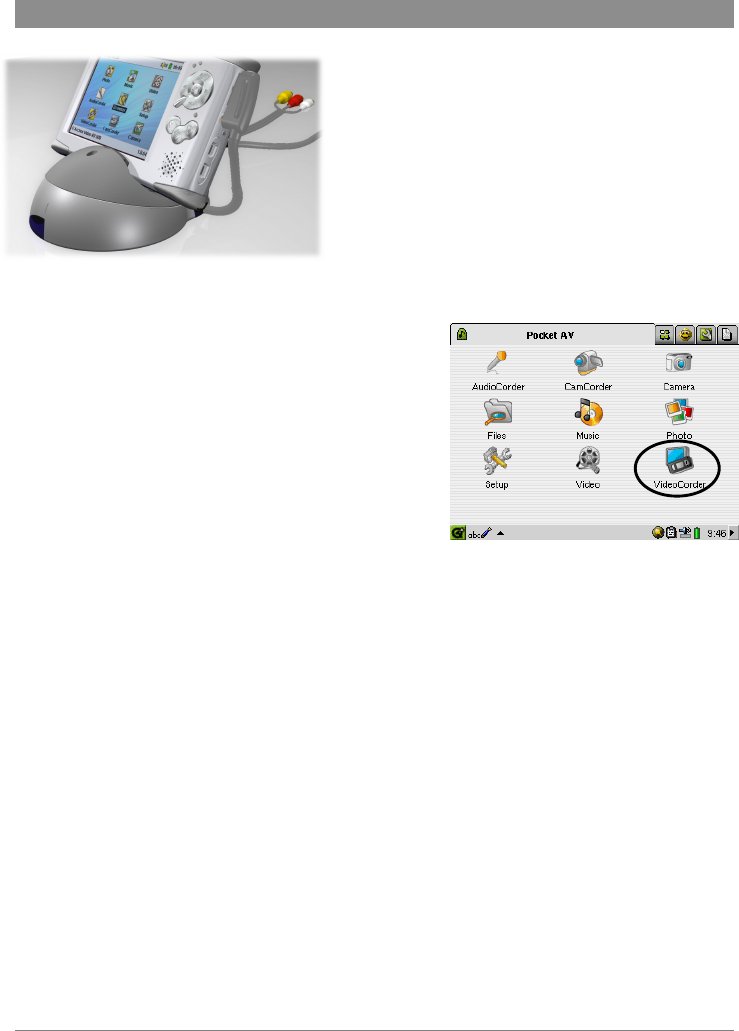
3 The Pocket AV Tab
AudioCorder Used to create audio recordings from the built-in microphone or line-in.
Camcorder Used to create video files when an optional camera is attached.
Camera Used to take pictures when an optional camera module is attached.
Files File browser used to locate and play media files.
Music Goes directly to the Music folder and displays the playable music files.
Photo Goes directly to the Photo folder and displays the displayable image files.
Setup Allows the user to change personal preferences of the Operating System.
Video Goes directly to the Video folder and displays the playable video files.
VideoCorder Used to create video files from a video/audio source combination.
12
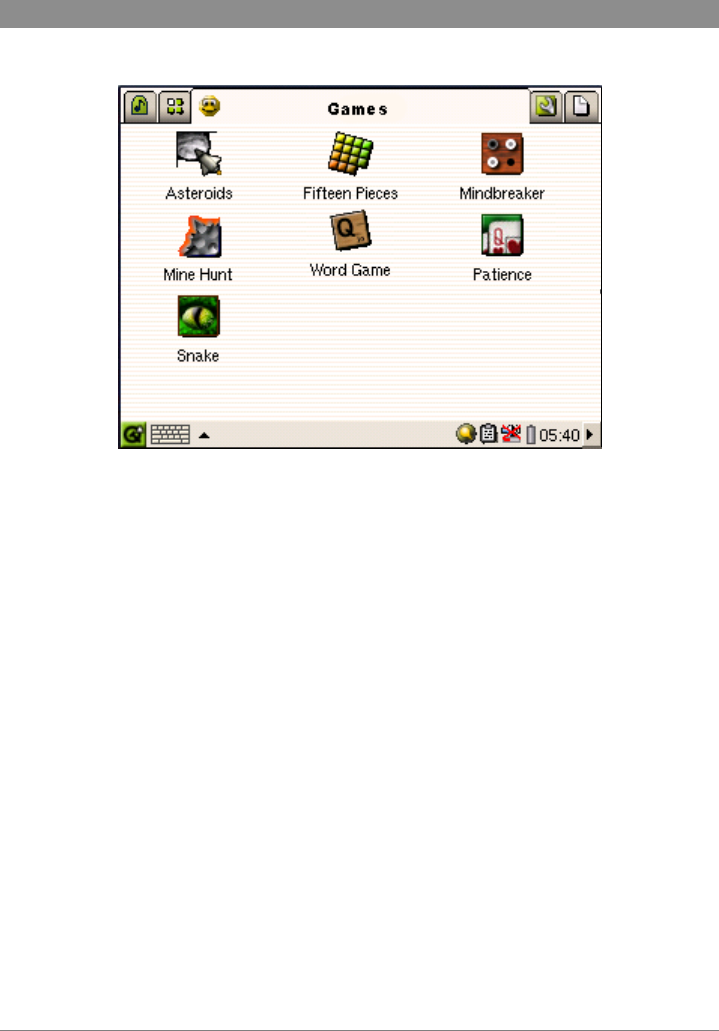
4 The Games Tab
Asteroids Shoot and destroy asteroids before they crash into your ship
Fifteen Pieces Traditional game to slide 15 tiles into numerical order
Mindbreaker Similar to the traditional Mastermind™ game
Mine Hunt Map the mined terrain without being blown up
Word Game Use your word power to get the highest score
Patience Traditional solitary card game
Snake Get the little gremlins without hitting your own tail or the walls
13
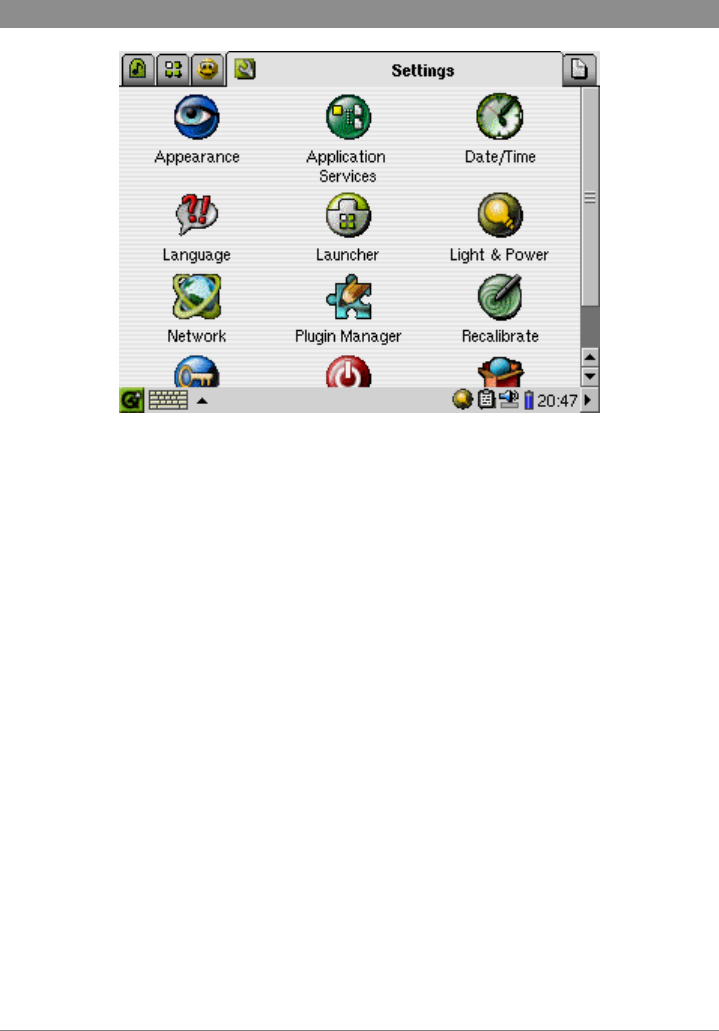
5 The Settings Tab
Appearance Set the screen layout and background to your preference
App Services Assign a file type to a specific application
Date/Time Set the date and time of your Archos device
Language Set the interface language of your device (EN, FR, DE, ES, IT)
Launcher Set the icon and font type for your applications
Light & Power Set the auto off and auto screen dim option to your own preferences
Network Set up your network preferences for the Wifi connection
Plugin Manager Manages the various software plugubs on your device
Recalibrate Recalibrates the touch screen
Security Set up a password to use the device
Software Packages Application to help you install software on your AV500
14
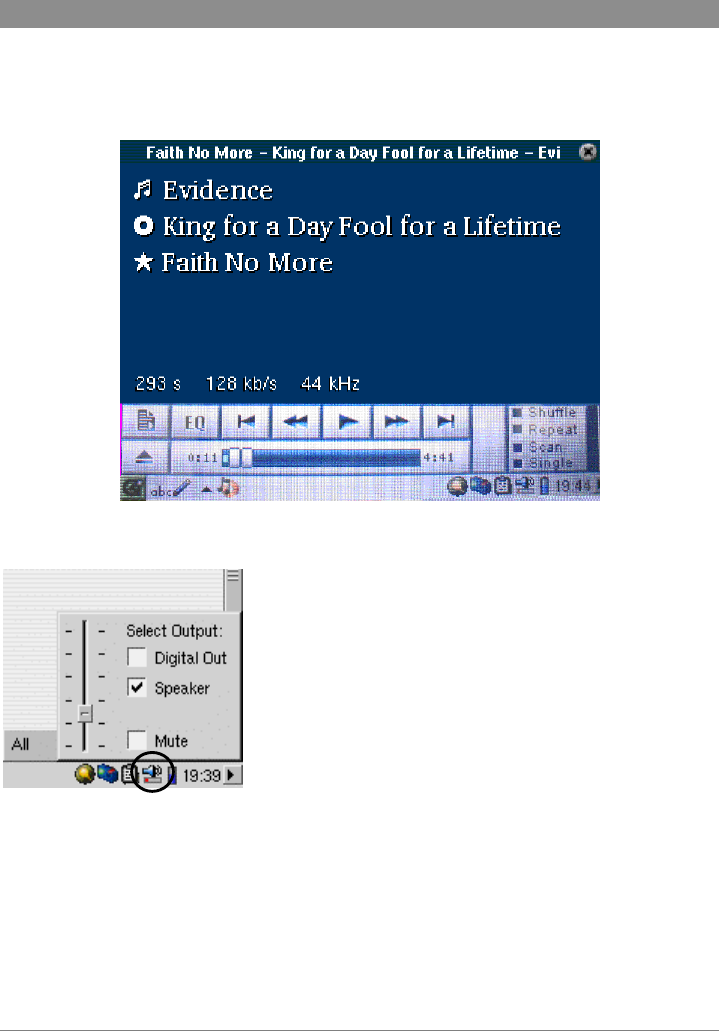
6 Playing Music Files
When you click on this icon in the main screen, you open the music player application. The
browser will also open in \Media\Music if there are no songs in the playlist. You can browse the
hard drive to find songs that you would like to play. You can play, MP3 and WMA music.
If you would like to hear the sound out of the built in speaker,
click on the speaker icon in the system tray, and then check the
box ‘speaker’.
15
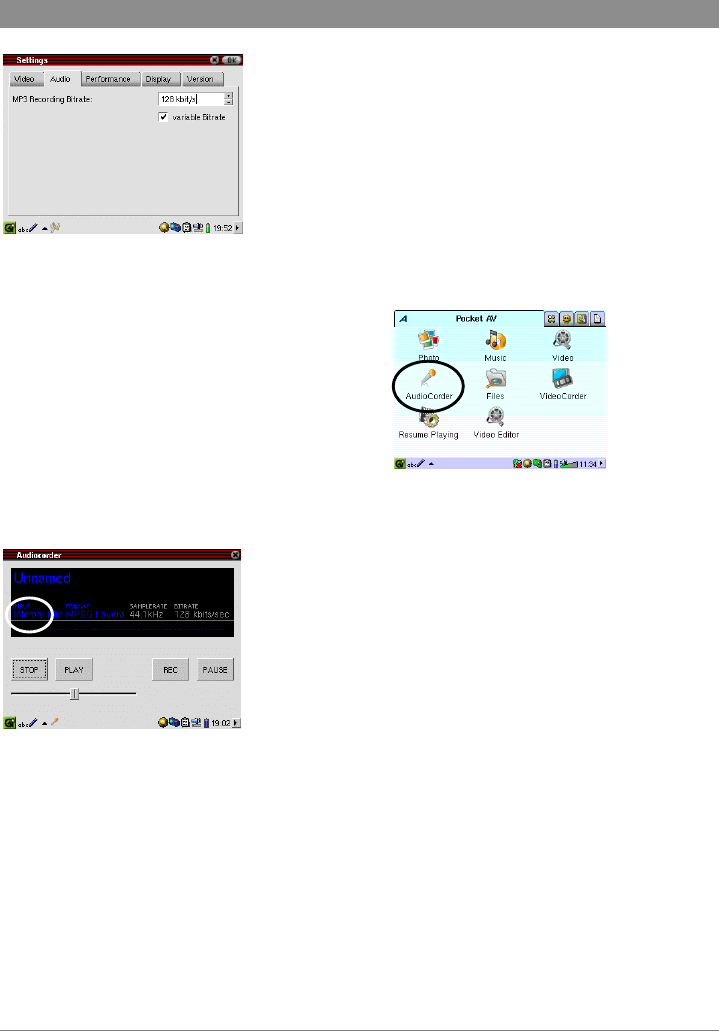
7 Recording Music Files
You can use your AV500 to record directly from a standard
line level audio source or from the built-in microphone (top
side of AV500 – next to the photo button). For direct analog
recordings, connect your line level audio source to the Red and
white RCA plugs of the TV cradle’s AV In cables. Place your
AV500 into the TV cradle and turn it on. Go to the settings
screen first and set the desired recording bitrate for audio
recordings.
Once this is set, click the main menu’s
AudioCorder.
Once in the application, click on the tactile screen on the input (Line-in or microphone) and select
the one applicable to you. Just click on REC and your
recording will start.
16
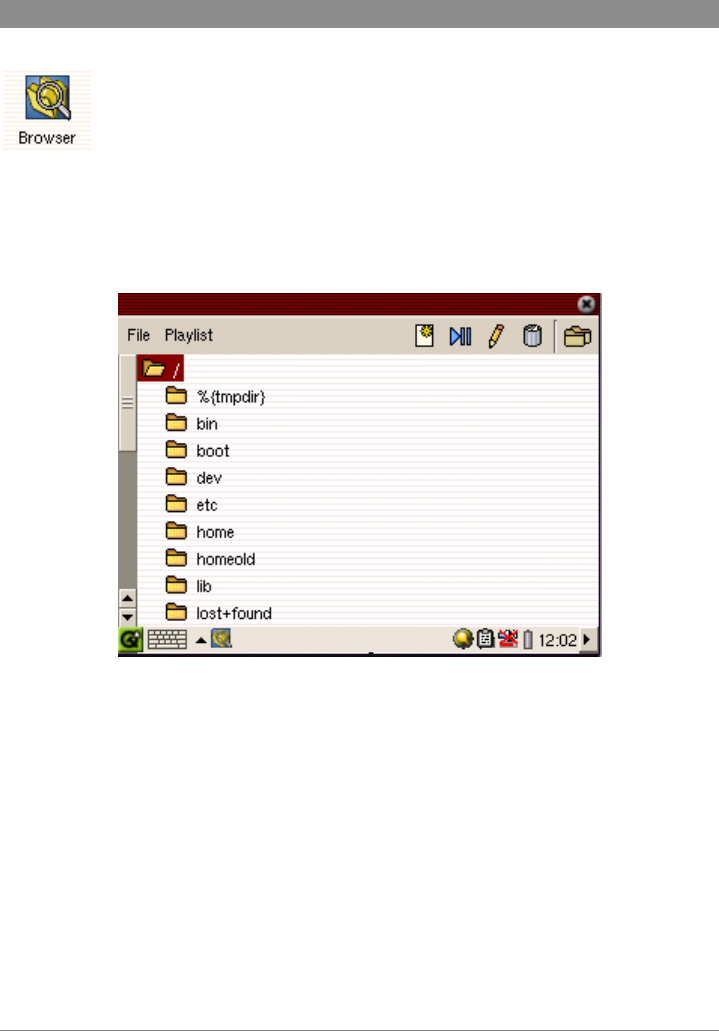
8 Using the Browser
The browser is used to navigate the file system on the AV500. The file system uses
a hierarchical system which includes folders and subfolders. Because you will be
putting hundreds of files on your AV500, it is STRONGLY ADVISED that keep a
neat and orderly file structure. Otherwise, you will be spending time searching for
files and not listening or watching them. We suggest that adhere to directory Media to keep all
your media files (pictures, audio, and video).
17
9 Connecting/Disconnecting the AV500 to a Computer
Note that when the AV500 is connected to a computer, it will use more energy than usual. Your
battery power will be consumed at a higher rate than normal. If the AV500 looses power while
connected to your computer you could destroy your directory structure and/or loose data. Thus,
you should always use the AC adapter when connected to your computer. Be careful to
understand the disconnection procedure also since disconnecting incorrectly can lead to data loss
or computer/AV500 freeze up. The AV500 is not compatible with Windows® NT, Windows® 95,
or Windows® 98 (first edition). While connected as a hard disk to your computer, the AV500
buttons are blocked and are no longer functional.
Connecting to your computer
• Use the power adapter to prevent the AV500 from shutting off due to low power. (This
could cause damage to the hard disk data structure.)
• Plug the provided USB cable into your running computer.
• Turn on the AV500 – wait until it completely boots up.
• Plug the other end of cable into your now running AV500 (USB plug a above).
18
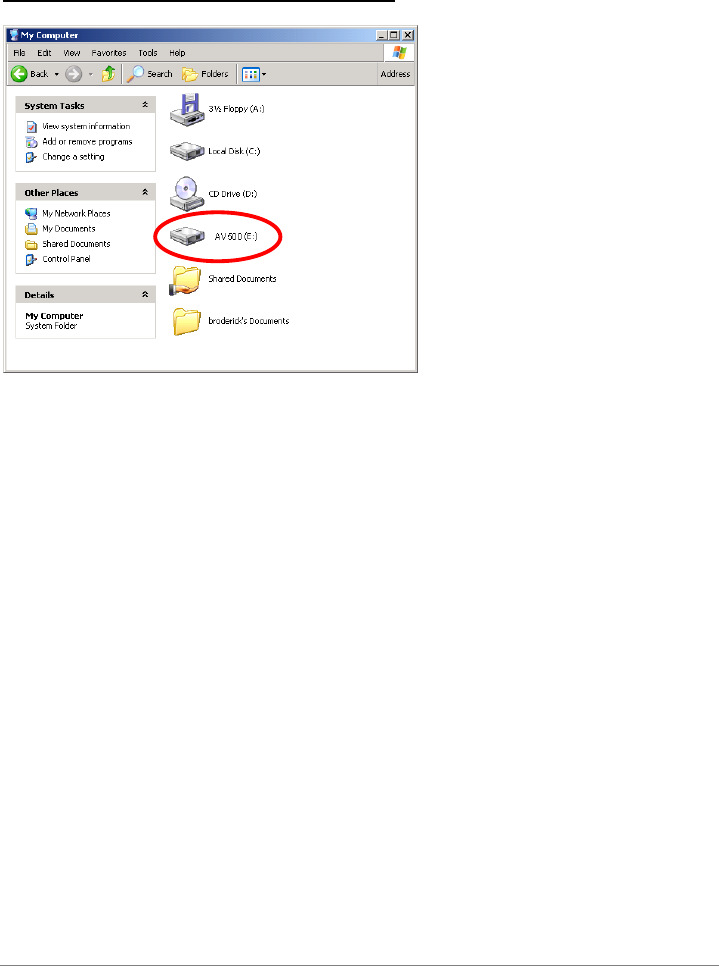
Windows™ ME, 2000, XP (Home/professional)
When connected, the AV500 will be
recognized as a Mass Storage Device
and mount automatically within a few
seconds of being connected. Do not
use the drivers on the CD-ROM, those
are for Windows98SE. You will see a
new drive letter, such as E: in My
Computer called AV500. You can
now use the hard disk called AV500
like any other external hard disk.
Simply access it using Windows™
Explorer
19
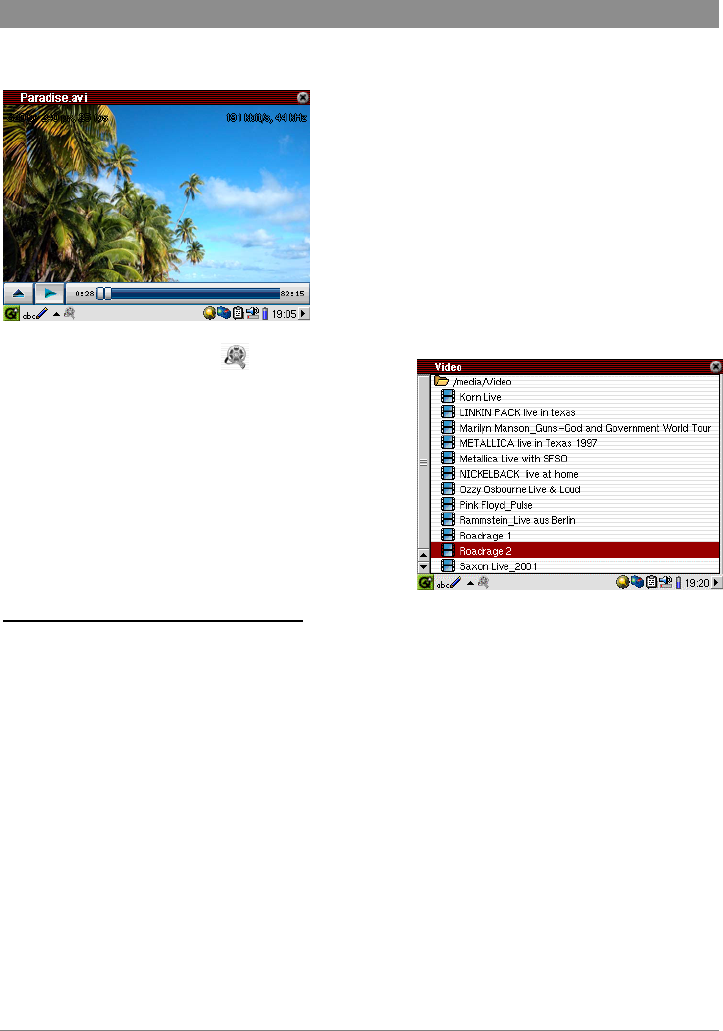
10 Playing MPEG4 Video Files
The AV500 series can play video files of the MP4 format. The AV500 will not directly play files
of type .mov, .mpg, .mpeg, nor .avi files created with
codecs other than XviD and DivX™. If you have
some of these other file types that you would like to
view on your AV500, you must use the software on
the included CD to re-encode them into the proper
XviD or DivX™ MP4 with an MP3 sound stream.
Like a music file, you simply select the file from the
Browser mode and then click on PLAY/ENTER. If
you click on the Video icon in the main screen,
the file browser will open and you will see the
contents of \Media\Video. Scroll down to the desired
video file and click on PLAY. The video player
application will open and start playing the video file.
Watching Video on your Television
To send the video signal out to a television, first make sure your TV cradle is properly connected
to a television. See the TV Cradle User Guide for instructions on how to connect it. Place the
AV500 into the cradle and connect the multi-connect plug. Switch your television to auxiliary
video input (often found just below channel 1 – sometimes called L1 or L2). Press and hold the
left function button A for three seconds. The built-in AV500 screen will go blank and a video
signal will be sent out to the television.
To make the video return to the built-in screen, hold down on the PLAY/ENTER button for three
seconds.
20
11 Recording MPEG4 Video Files
The AV500 can record video programming with
stereo sound. Just place your AV unit into the TV
Cradle which you have connected to your television
or home cinema. See the accompanying User Guide
for connecting your TV Cradle to your home Audio-
Visual system.
Next, start up your AV500 and go to the Archos tab.
There you will find an application called
VideoCorder. This is the video recording application. Once you enter this program, you will be
placed at the pre-recording screen. You will be able to
see the video signal and hear the audio signal that are
presently going into the AV500. By going to “Settings”
you change specific parameters of your recording. Once
these parameters are changed to your liking, return to the
prerecording screen and press on the PLAY/ENTER
button to start your recording. Click on the
PLAY/ENTER button again if you want to pause the
recording, and then on the STOP/ESC button when you
want to stop your recording. The Settings screen has a timer function that you can use to make
timed recordings.
ATTENTION: You should also take care to understand the copyright laws
for your country and/or jurisdiction. Commercially produced video materials
are typically copyright protected and your legal right to copy such material
may be limited or restricted. Please see a law professional if you are unsure.

21
12 Technical Support
• Consumable items included with your product are not under warranty (cables, headphones,
etc.)
• If technical support (Telephone or E-mail) determines that your product needs to be returned,
please contact the place of purchase to have your product repaired or replaced (depending on
problem type). Customers who purchased directly from the Archos web site should fill out
the form on the web site under Support : Product Returns.
• There is an FAQ – Frequently Asked Questions section at the ARCHOS Website
www.archos.com that can help answer many of your questions.
• If you need technical help, you may contact ARCHOS directly in your own language via
these phone numbers. For other countries, please use e-mail technical support.
-------- Telephone Support --------
DO NOT USE PHONE SUPPORT FOR MARKETING
AND SALES QUESTIONS. These numbers are to aid those
who have technical difficulties / malfunctions.
949-609-1400 (USA, Canada)
01 70 20 00 30 (France)
0207-949-0115 (UK)
069-6698-4714 (Germany)
09-1745-6224 (Spain)
02-4827-1143 (Italy)
02-050-405-10 (Netherlands)
-------- E-mail Support --------
tech-support.us@archos.com English (United States and Canada customers)
tech-support.eu@archos.com English or French (Europe and the rest of the planet)
tech-support.de@archos.com German (Germany)
To respond to your e-mails efficiently, when sending one, please indicate the product name and
question type in the Subject of the e-mail.
For example:
To: tech-support.us@archos.com
Subject: AV500 – Playing a Playlist

22
WWW.ARCHOS.COM
Worldwide Offices
United States & Canada Europe & Asia
ARCHOS Technology
3, Goodyear – Unit A
Irvine, CA 92618 USA
Phone: 1 949-609-1483
Fax: 1 949-609-1414
ARCHOS S.A.
12, rue Ampère
91430 Igny
France
Phone: +33 (0) 169 33 169 0
Fax: +33 (0) 169 33 169 9
United Kingdom Germany
ARCHOS (UK) Limited
Regus House
Windmill Hill Business Park
Whitehill Way
Swindon
Wiltshire SN5 6QR UK
Phone: +44 (0) 1793 44 15 10
Fax: +44 (0) 1793 44 16 10
ARCHOS Deutschland GmbH
Bredelaerstrasse 63
40474 Düsseldorf
Germany
Tel: +49 211 1520 384
Fax: +49 211 1520 349

23
13 Troubleshooting
13.1 AV500 / Computer locks up (freezes operation) or Stops
Problem: The AV500 locks-up. None of the buttons work.
Solution: If the lock buttons is set, none of the buttons respond. Hold down the left function
button “Archos Button” for three seconds to turn off the lock buttons function. A freeze up could
also be caused by electrostatic phenomena. That is, static electricity has temporarily knocked out
the AV500. In this case, you can reset the AV500 by using a paper clip and pushing the button in
the pin-hole on the side bottom of the AV500.
Problem: The computer locks-up.
Answer: Most likely because you did not use the green ‘safely remove hardware’ icon in the
system tray in order to remove the AV500 from your computer. You will have to restart your
computer.