Archos A101C Home Tablet User Manual
Archos SA Home Tablet Users Manual
UserManual.wiki
>
Archos
>
A101C User Manual
Users Manual
Navigation menu
Upload a User Manual
Namespaces
Wiki Guide
HTML
PDF
Info
Views
User Manual
Discussion / Help
Navigation


![24USBDEUTSCHÜBERTRAGEN VON MEDIADATEIENVerbinden Sie Ihren ARNOVA mit dem Computer, mit Hilfe des mitgeliefertem USB-Kabels. Daraufhin schaltet sich der ARNOVA ein. Innerhalb weniger Sekunden erscheint der ARNOVA als Symbol auf Ihrem Computer. Sie können Ihre Media-Dateien durch Kopieren/Einfügen in die jeweiligen Ordner auf Ihren ARNOVA entweder mit dem Windows® Explorer (oder mit dem Finder auf einem Mac®) übertragen oder indem Sie den Windows Media® Player verwenden. Verwenden Sie den Windows Media Player® (Tab Sync [Synchronisieren]), um Musik, Videos und Fotos Ihrer Wahl auf Ihrem ARNOVA zu synchronisieren. Weitere Informationen entnehmen Sie bitte der Windows Media Player®-Hilfe.Sobald die Dateiübertragung beendet ist, schließen Sie den Windows® Explorer und alle anderen Programme. Klicken Sie auf das ‘Sicher entfernen’ Icon in der Ablageleiste neben der Uhr. Sie können das USB-Kabel jetzt entfernen.2341UserGuide_Arnova_10G2_PN109786_book.indd 24 16/06/2011 13:14:21](https://usermanual.wiki/Archos/A101C/User-Guide-1529941-Page-24.png)
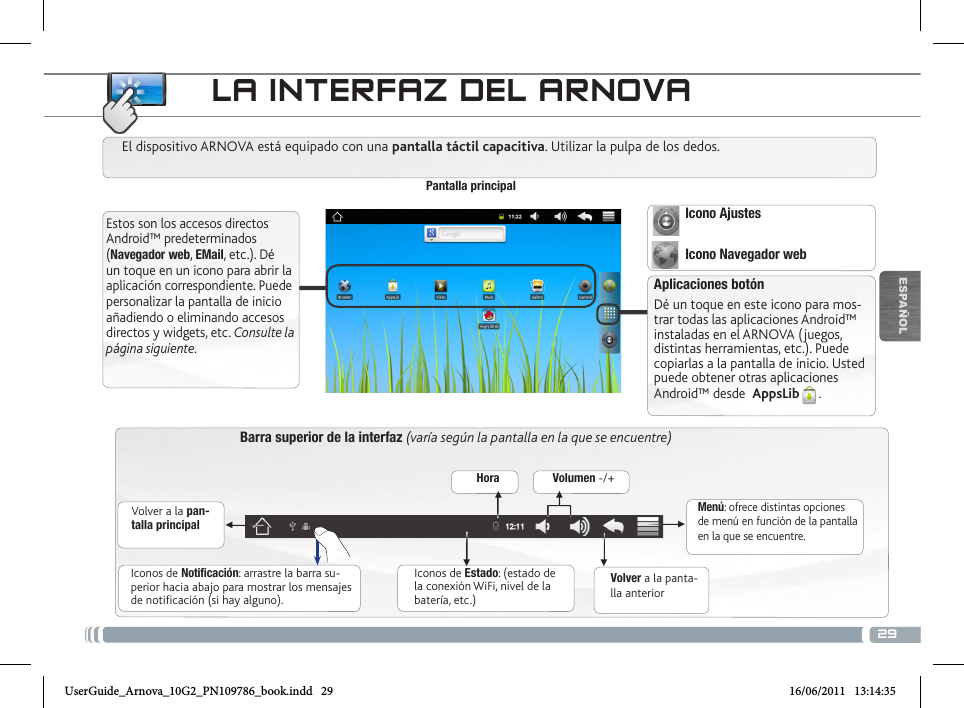
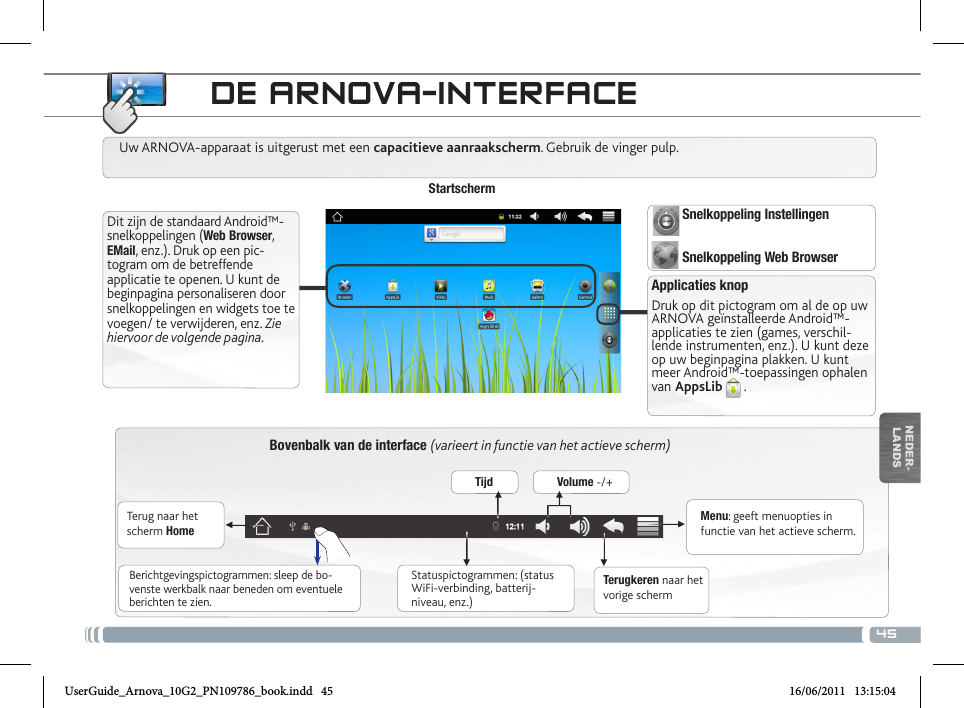
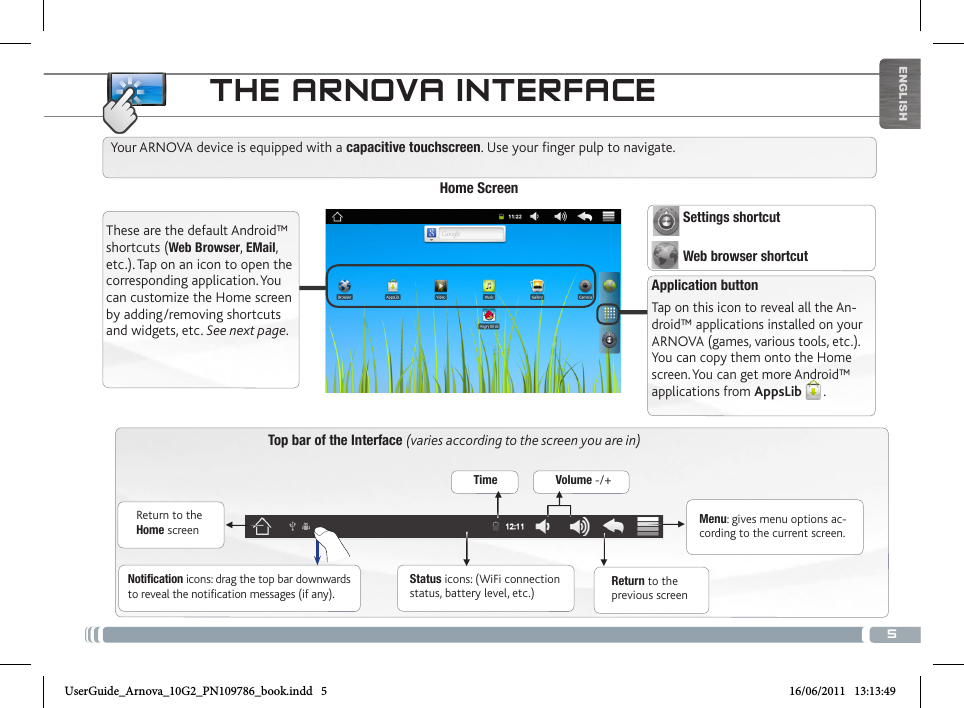
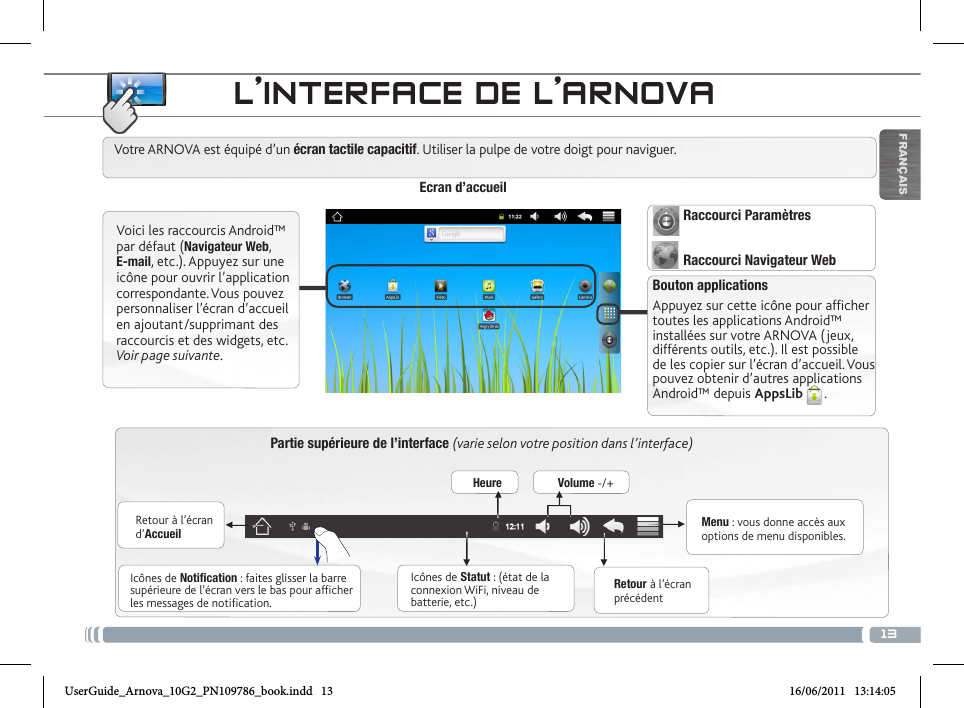
![37▼▼▼▼▼▼ITALIANOINTERFACCIABarra superiore dell'interfaccia (varia in base alla schermata selezionata)Consente di tornare alla Pagina inizialeConsente di tornare alla schermata precedenteMenu: consente di accedere alle opzioni del menu in base alla schermata corrente.Il dispositivo ARNOVA è dotato di uno capacitivo schermo a sfioramento. Utilizzando la polpa delle dita.Schermata Home [Pagina iniziale]Applicazioni pulsanteSfiorare questa icona per mostrare le applicazioni Android™ installate sul vo-stro ARNOVA (giochi, tools vari ecc..). E’ possibile copiarli direttamente sul vostro schermo. Potete ottenere altre applicazioni Android™ da Appslib . Icone delle Stato: collegamen-to wifi, livello batteria ecc..Icone di Notifica: trascinare la barra degli stru-menti verso il basso per mostrare i messaggi di notifica (se attivi)Queste sono le scorciatoie An-droid™ (Web Browser, EMail, ecc.) - sfiorare un’icona per aprire l’applicazione corrispondente. E’ possibile personalizzare lo scher-mo aggiungendo /rimuovendo scorciatoie e congegni, ecc.. - vedi pagina successivaOra Volume -/+Icona ImpostazioniIcona Web BrowserUserGuide_Arnova_10G2_PN109786_book.indd 37 16/06/2011 13:14:49](https://usermanual.wiki/Archos/A101C/User-Guide-1529941-Page-37.png)
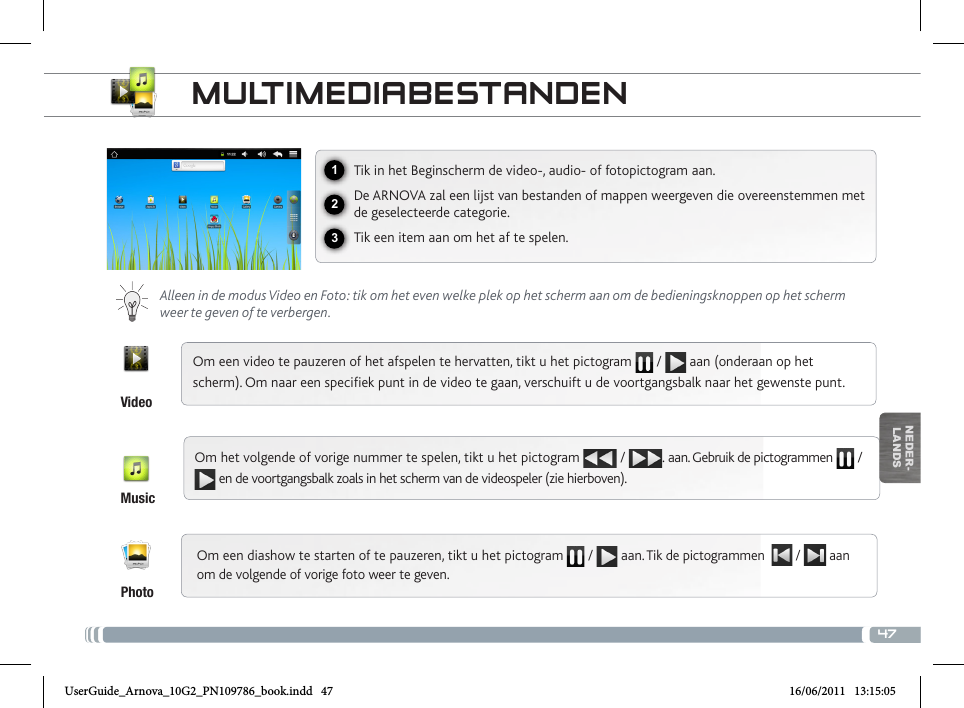
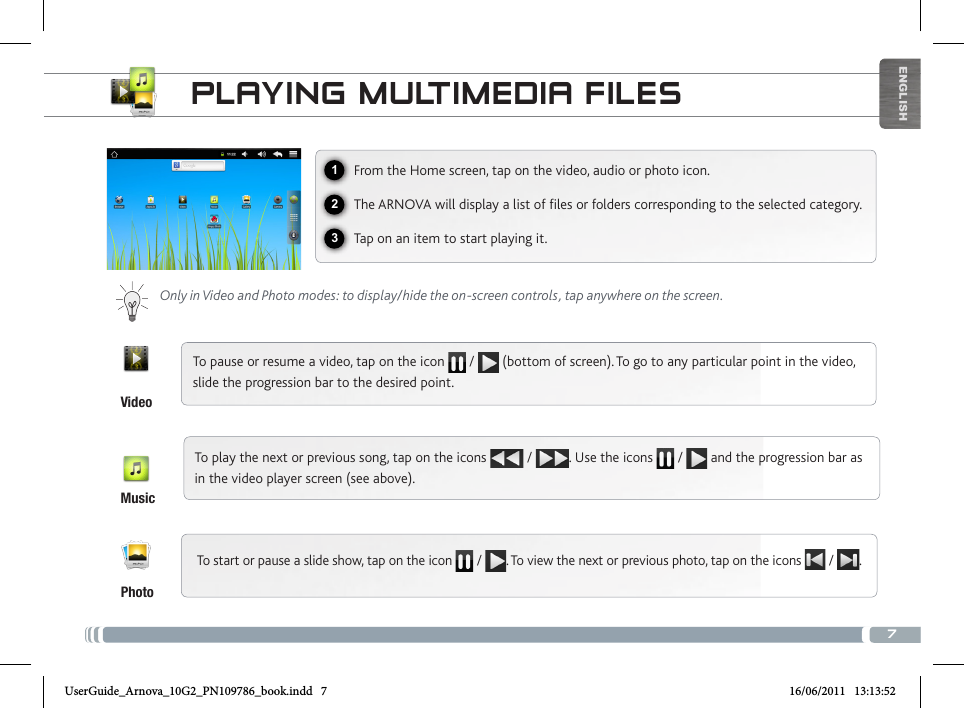
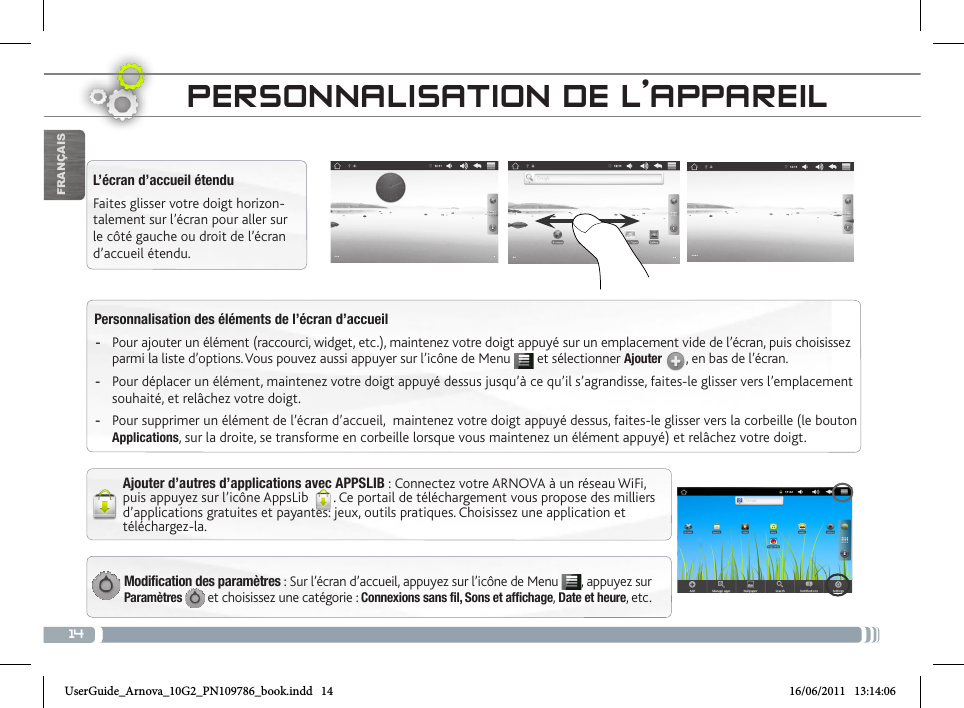
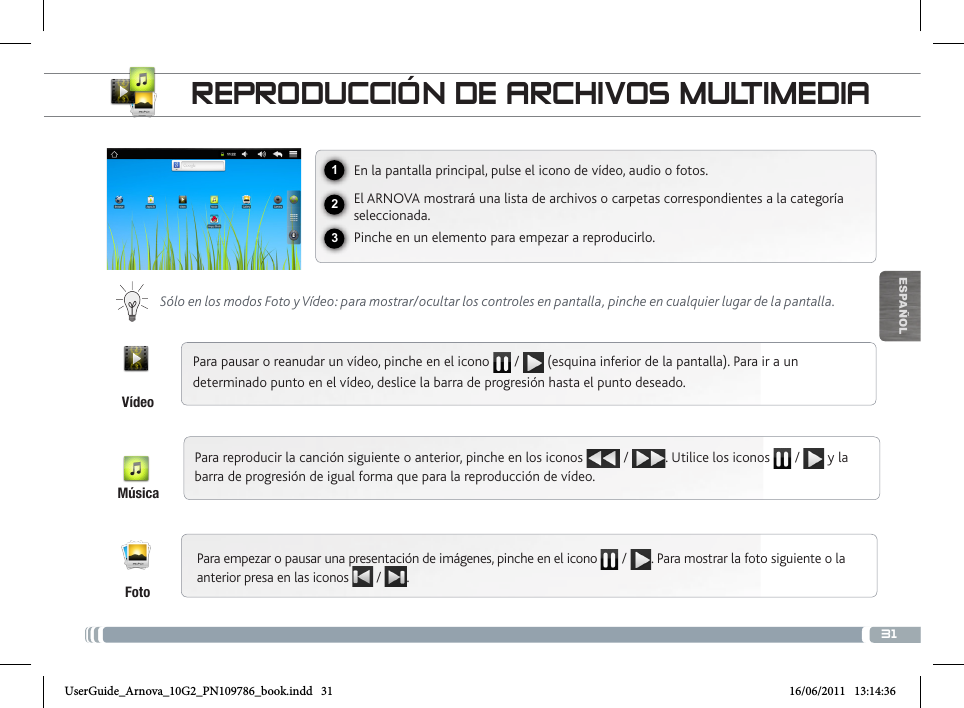
![39123ITALIANOLETTURA DEI FILES MULTIMEDIASulllo schermo tattile, premete sull’icona video, audio o foto.Verrà visualizzato un elenco di fi le o cartelle corrispondenti alla categoria selezionata.Toccare un elemento per riprodurlo. Solo nelle modalità Video e Photo [Foto]: per visualizzare/nascondere i comandi sullo schermo, toccare un’area qualsiasi dello schermo.Per sospendere o riprendere la riproduzione di un video, toccare l'icona / (parte inferiore dello schermo). Per selezionare un punto specifico nel video, fare scorrere la barra di avanzamento al punto desiderato. Per riprodurre il brano successivo o precedente, toccare le icone / . Utilizzare le icone / e la barra di avanzamento come nella schermata del lettore video (vedere sopra).Per avviare o sospendere una presentazione, toccare l'icona / . Per visualizzare la fotografia seguente o precedente, premete sulle icone / .VideoMusicaFotoUserGuide_Arnova_10G2_PN109786_book.indd 39 16/06/2011 13:14:50](https://usermanual.wiki/Archos/A101C/User-Guide-1529941-Page-39.png)
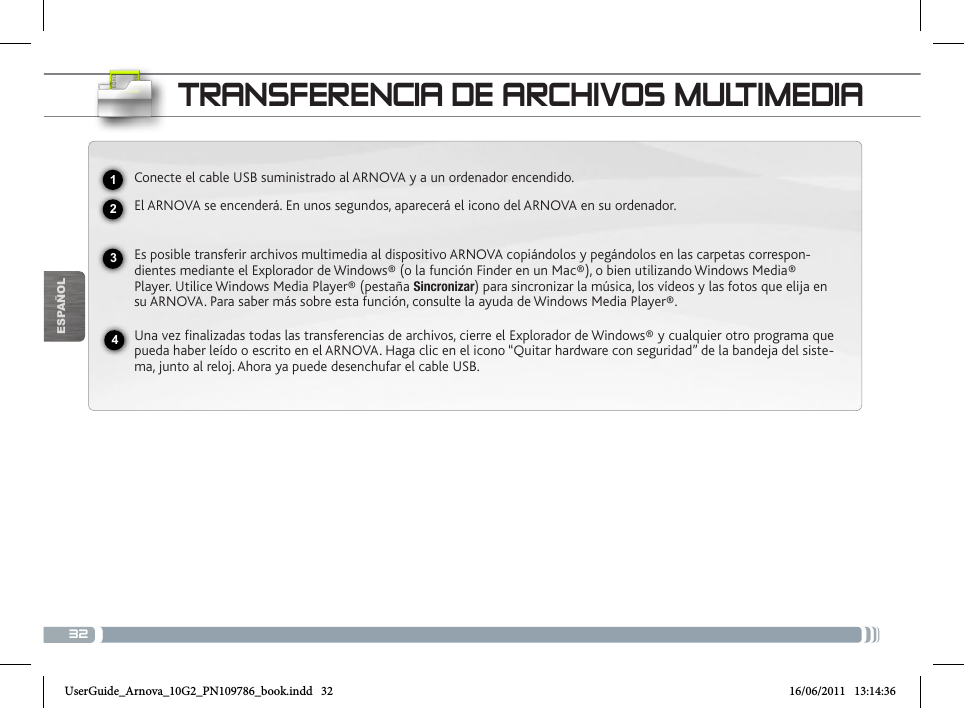
![40USBITALIANOTRASFERIMENTO DI CONTENUTI MULTIMEDIALICollegare il cavo USB in dotazione ad il ARNOVA e ad un computer funzionante.Il dispositivo ARNOVA si accende. Dopo qualche secondo, verrà visualizzata l'icona ARNOVA sul computer.I file multimediali possono essere trasferiti nel dispositivo ARNOVA copiandoli/incollandoli nelle rispettive cartelle usando Windows® Explorer (o Finder su Mac®), oppure usando Windows Media® Player. Utilizzare Windows Media Player® (sche-da Sync [Sincronizzazione]) per sincronizzare la musica, le foto e i video desiderati nel dispositivo ARNOVA. Per ulteriori informazioni, consultare la Guida di Windows Media Player®.Una volta terminati tutti i trasferimenti dei file, chiudere Windows® Explorer e tutti gli altri programmi che possano aver letto o scritto sull’ARNOVA. Fare clic sull’icona “Rimozione sicura dell’hardware” nella barra di sistema, accanto all’orologio. Potete adesso disconnettere il cavo USB.2341UserGuide_Arnova_10G2_PN109786_book.indd 40 16/06/2011 13:14:51](https://usermanual.wiki/Archos/A101C/User-Guide-1529941-Page-40.png)