User manual

Appearance.......................................................................................................................................2
TurnOnandturnOff........................................................................................................................2
1.Desktop.........................................................................................................................................2
2.Lockingdesktop............................................................................................................................4
1.Player .........................................................................................................................................4
2.Music..........................................................................................................................................5
3.Soundrecorder.............................................................................................................................5
4.Camera..........................................................................................................................................6
Takingpictures..............................................................................................................................6
Recordingvideo............................................................................................................................6
5.Browser.........................................................................................................................................7
6.PlayStore..................................................................................................................................7
7.Calendar.....................................................................................................................................8
Newevent.....................................................................................................................................8
8.Clock..............................................................................................................................................8
Alarmclock ...................................................................................................................................8
9.Calculator..................................................................................................................................9
10.Downloads..................................................................................................................................9
11.Maps .......................................................................................................................................9
12.E‐mail ........................................................................................................................................10
13.FileManager.........................................................................................................................12
Deletingfiles...............................................................................................................................13
15.Settings ......................................................................................................................................13
16.Wi‐Finetworksettings ..........................................................................................................14
Expandstorage ...............................................................................................................................15
2.TFcardusage ..............................................................................................................................16
Installingprograms/Uninstallingtheapplication .....................................................................16
DownloadingapplicationsfromInternetdirectly .....................................................................16
Uninstallingtheapplication .......................................................................................................17
Chargingthedevice ....................................................................................................................17
Note ................................................................................................................................................17
FCCStatement: ...............................................................................................................................18
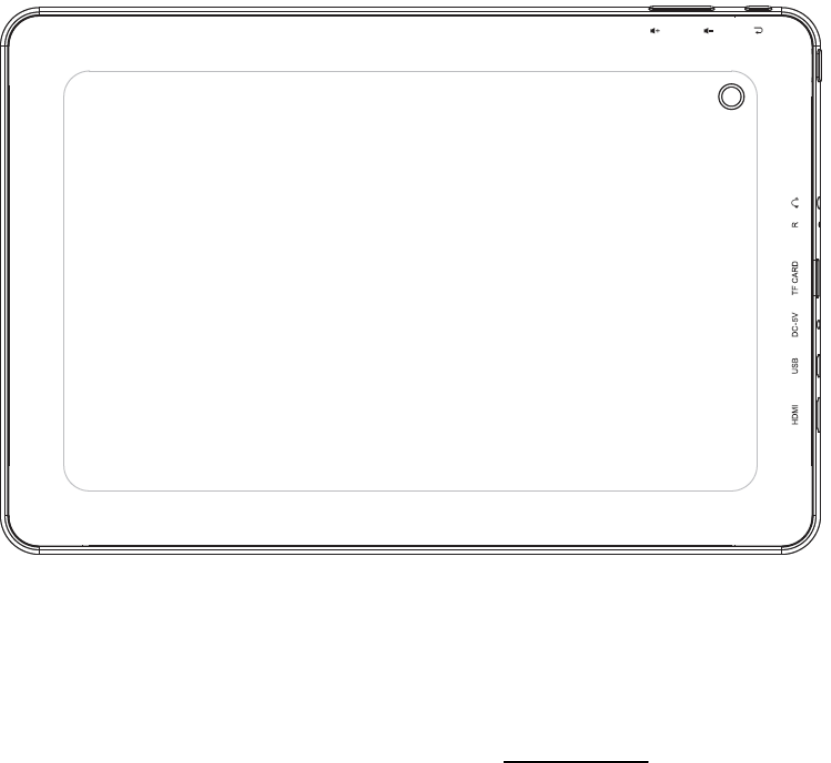
Appearance
TurnOnandturnOff
Turningon:Pressandholdthepowerswitchforfiveseconds
Turningoff:Pressandholdthepowerswitchforfiveseconds–TapTurnOff–TapOK
Screenlocking/unlocking:Pressthepowerswitchtolock/unlockthescreen.
Forceshut‐down:Ifthedevicedoesn’thaveresponse,presstheResetkeytorestartthedevice.
Note:Donotforceshutdownthedeviceunlessnecessary.Undernormalcondition,pleasefollow
thenormalproceduretoturnoffthedevice.
Resetkey:PresstheResetkeytorestartthedevice.。
Touchscreen
Tap:Taptoselectaniconoroption.
Tapandhold:Tapandholdanicontodragittothedesktop.
Draganddrop:Draganddroponthedesktoptoswitchamongdifferentinterfaces.
☆Toavoidscratchingorbreakingthescreen,donotputanyobjectonit.
1.Desktop

1:Taptoviewallapplications
2:Voicesearchshortcut
3:Googlesearch
4:Returntocurrentoperation
5:Returntodesktopdirectlyfromtheprograminterface
6:Multipagetaskselectionkey
7:Menufunctionshortcut
8:USBconnectionsymbol
9:TFcardconnectionstatus
10:Currenttime
11:3G/WIFIconnectionsignalsymbol
12:Batterystatus
Ondesktop,taptheMenukeytoshowthemenulist andperform
theoperation.Atthesametime,setcommonprogramsondesktopbytappingandholdingthe
programicontomovetothedesktop;
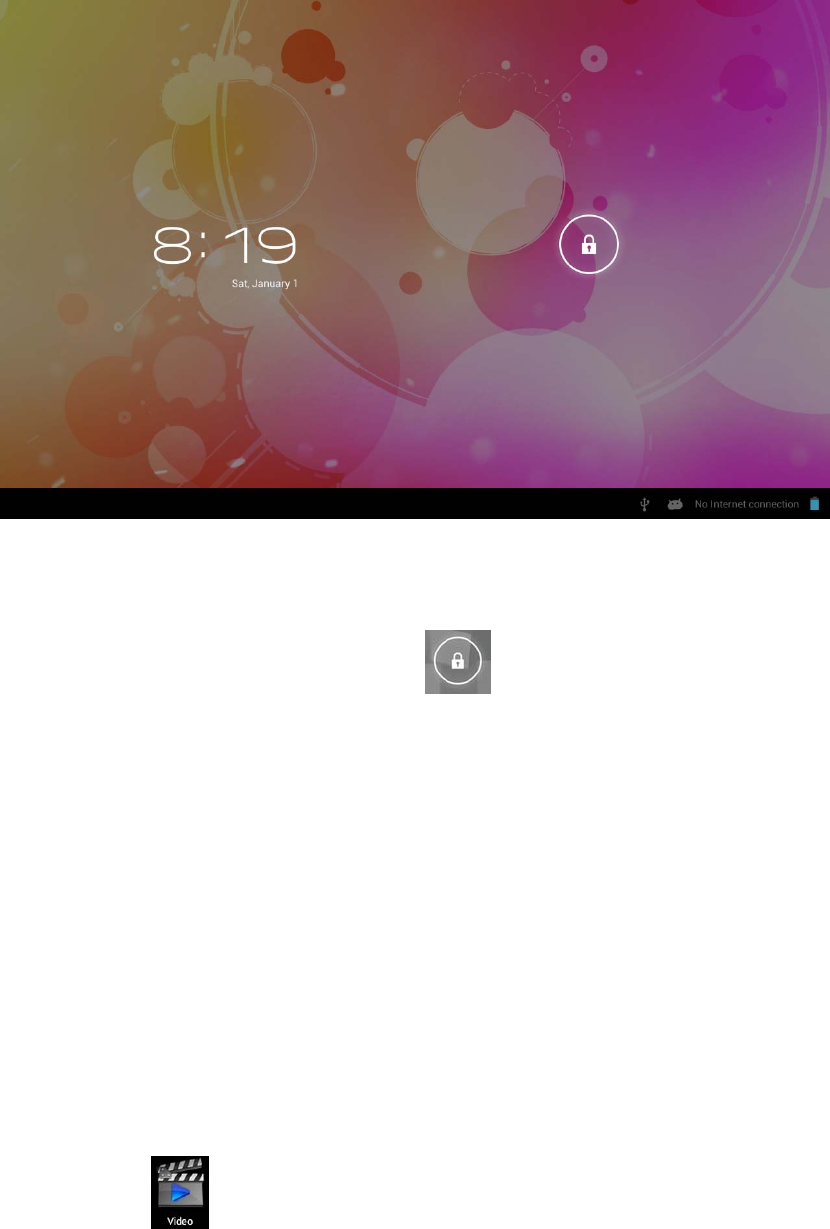
2.Lockingdesktop
IfthePCwon’tbeusedforalongtime,orthepowerswitchistapped,thedeviceentersstandby
state.Thestandbyhastwostates.Oneisdeep‐sleepstandby,inwhichthescreenisturnedoff;
theotherislightstandbyafterpressingthepowerswitch.Thepictureshowsthedefaultlight
standbystate.Tapandholdtheunlockingswitch ,andtheA,Bsymbolsasshowninthe
pictureappear;pointAisthecameraiconandpointBistheunlockingicon.Thesystemwill
promptaboutthepathofunlocking.TherippleatpointBinthepictureisthepathoftheprompt.
TapanddragtheunlockingswitchtopointBtounlockthescreen,tapanddragtheunlocking
switchtopointAtoactivatethecamerafunction.
Programoperation
1.Player
☆AVI,WMV,RM,RMVB,3GP,MKV,MP4,ASF,VOB,MPG,MOVupto1080PHD‐Definition
☆Thecompatiblepictureformatsare:JPEG,BMP,GIF,PNG
1. Tap tointoplayinginterface.
2. Selectdesiredvideotoplayfromtheall/contents/myfavorite/customlist.

3. Taponthescreentoadjustthevideo(includingvolume,pause/play,brightness,
etc.)
4. Tapapicturetobrowse.,slidingscreencanbrowsepictures.
5. Taptheiconformoredetailedinformationorchoosepicturestoplay,or
rotating,clipetc.
6. Taptheicontodelete.
2.Music
☆ Supportmusicformat:MP3
、
WMA
、
OGG
、
FLAC
、
WAV
、
ACC
。
☆ TapMyMusicicon .
☆ Selectdesiredmusictoplayfromthemusic/album/artist/playinglist.
☆ TapPrevious→Pause→Nexticon foroperation.
☆ Toreturntopreviousinterfacewhileplayingmusic,taporto
returntothedesktop.
PresstheMenukeyformusicoperation,asintheinterfacebelow:
3.Soundrecorder
Clickthesoundrecordericon .Thefollowinginterfaceappears
Taptostartrecording,tap tostoptherecording,tap toviewthe
recordingfiles,whichwillbenamedbytime;selectarecordingfiletoplay;tapto
performsoundrecordingsettingaccordingtotheprompt.
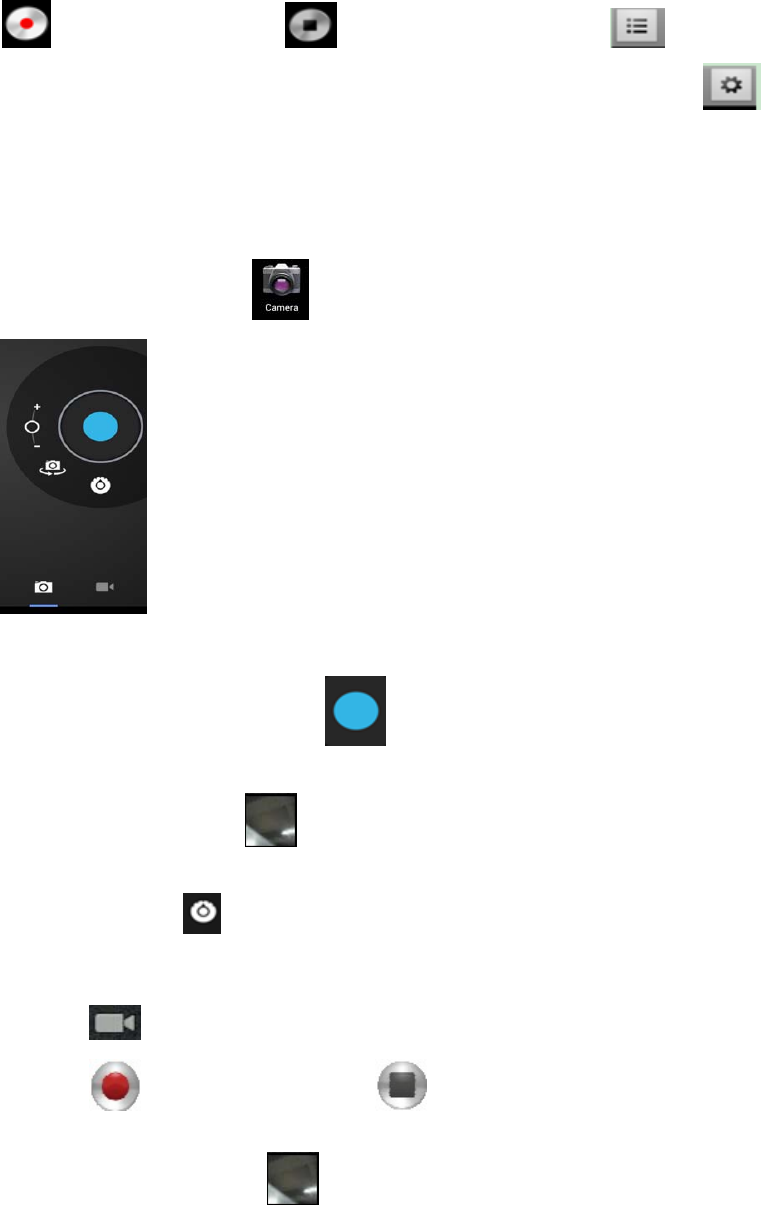
4.Camera
Tapthecameraicontoturnonthecameraandtheinterface
appears.
Takingpictures
1. Inthecamerainterface,taptotakepictures.
2. Thepictureswillbesavedautomatically.
3. TapthethumbnailofthepicturetoviewtheoriginalinGallery.
4. PresstheBackkeytoreturntothecamera.
5. Taptheicon toperformcamerasetting.
Recordingvideo
1. Taptoswitchtothevideomode,inwhichyoucanrecordvideo.
2. Taptostartrecording,andtaptostoprecording.
3. Thevideofileswillbesavedautomatically.
4. Tapthevideothumbnailtoplaythevideo.
5. PresstheBackkeytoreturntothecamera.

6. Taptoswitchtocamerainterface.
7. Pressthekeytoperformsettingsforvideorecording.
Note:Youcantaptoswitchbetweenfrontcameraandrearcameratotake
picturesandrecordvideo.
(Note:Onlythemodelswithdoublecamerahassuchfunction)
5.Browser
Tapthebrowsericon ondesktoptoaccesstheInternet:
1:Previousweb;selecttoview;2:Currentweb;3:Addweb;;4::Menukey
6.PlayStore
For
ward
\Bac
k
Refresh
Click the link to
open
independent
window
Current
URL
Bookmark
folder
Web
histor
y
Web
interface
shortcut
1 2 3 4
Search Web history
Taptheicon queryanddownloadapplications.。
Whenplaystoreisrunforthefirsttime,thesystemwillasktologinwithGoogleaccount
(ifyoudon’thaveaGMAILaccount,pleaseapplyathttp://gmail.google.com).
Afterdownloading,installtheapplications.
7.Calendar
Tapthecalendaricon .
Whenthecalendarisusedforthefirsttime,youneedtoaddanExchangeaccount.Enter
thee‐mailaddressandpasswordoftheaccount,tapNextandfollowthepromptthefinish
theaccountsetting,andthenthecalendarisavailable.
Newevent
1. IntheCalendarinterface,tapthedateyouwanttocreateanevent.
2. Selectthetime→enterthedetailsineachfield.
3. TapOK.
4. TaptheMenukeytoselectdesiredcalendarinterface.
☆ Thedatesdisplayedingreyhaveevents.
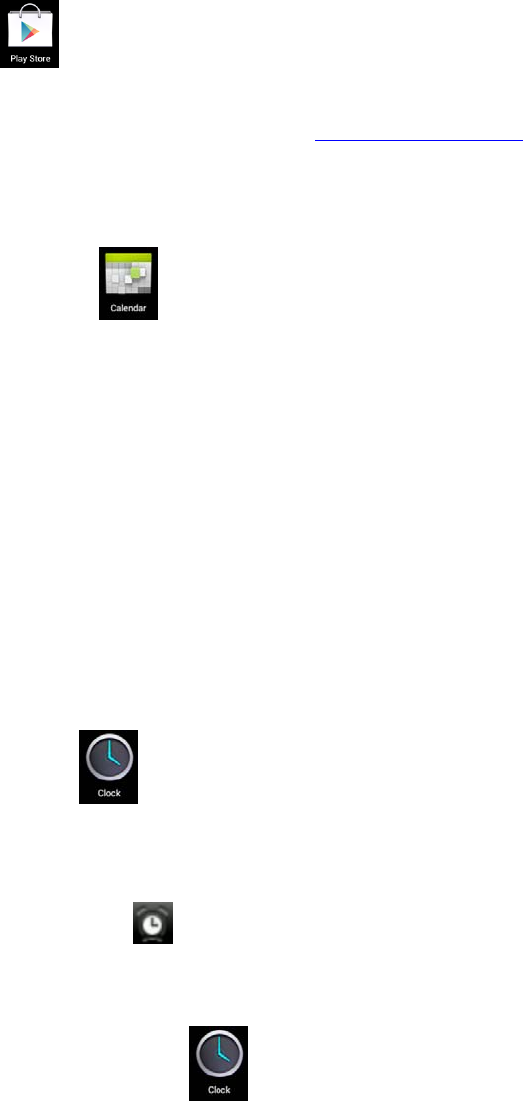
8.Clock
Taptheclockicon toviewcurrentdateandtime.
Alarmclock
Youcansetseveralalarmclocksatthesametime.
☆ Whentheiconappearsintheupperstatusbarofthescreen,atleastone
alarmclockisactivated.
Addingalarmclock
1. Taptheclockicon .
2. PresstheMenukey→Addalarmclock.
3. Setthealarmclockaccordingly.
☆Ifyoudon’tselectRepeat,thealarmclockwillbedeletedautomaticallyafter
thealarmtime.
4. TapEnablealarmclock.
5. TapOK.
Turningoffalarmprompt
Whenthealarmtimeisout,awindowwiththenameofalarmclockwillpopup.
Ifyouwanttorepeatthealarmclockin10minutes,tapSnooze.
TapCanceltostoptheprompt.
Enablingalarmclock
IfyouselectRepeatinthesettings,thealarmclockwillbedeactivatedtemporarily,
butwon’tbedeleted.
1. Inthealarmclockinterface,taptheiconafterdesiredalarmclock.
2. Taptore‐activatethealarmclock.
Editingalarmclock
1. Taptheclockicon ,→tap .
2. Tapadesiredalarmclock→edit.
Deletingalarmclock
1. Taptheclockicon ,→tap .
2. Tapdesiredalarmclockandenter.
3. TapDelete.
Taptoreturntothedesktop.
9.Calculator
1. Tapthecalculatoricon
2. Tapthefiguresandoperatorstocalculate.
3. TapCleartodeleteone,ortapandholdCleartoclearalltheresults.
10.Downloads
Tapthedownloadicon .
1. ViewcurrentlydownloadedapplicationsinPC,selectandinstall.
11.Maps
☆ThisfunctionrequiresInternetconnection.
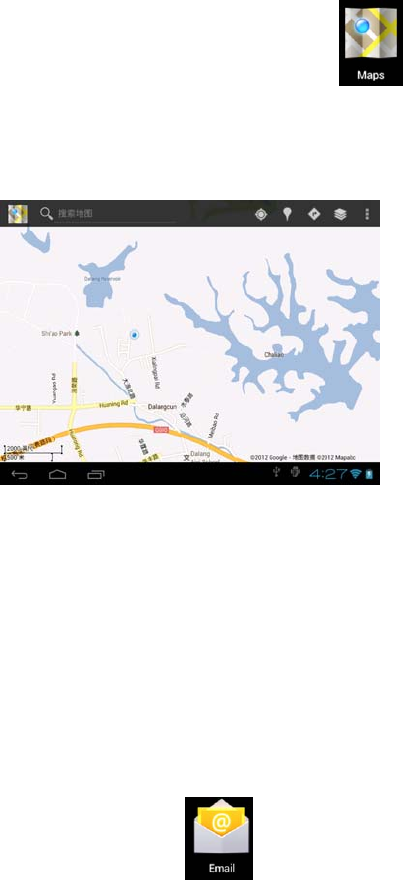
AfterconnectingtotheInternet,tapthemapicontoopenyourcurrentposition
automatically;asshownbelow,youcansearchdesiredinformation;
12.E‐mail
☆SupportPOP3andSMTPaccounts.
Addinge‐mailaccount
Youcanenteroneorseveraldesirede‐mailaddressesonthedevice.
1. Tapthee‐mailicon .
2. InYouraccountinterface,tapNext.
3. Ine‐mailaddressoption,enteryoure‐mailaddress.
4. Inpasswordoption,→enteryoure‐mailpassword.
5. TapOK.
6. Manualsetting(optional):Theserverfillsthesupplier(i.e.gmail.com)
automaticallyaccordingtoyoure‐mailaccount.However,ifyouneedtochange
theserversetting,clickManualsettingtomakenecessarychange.
7. TapNext.
8. Optional:Entertheaccountname.
9. Enterthenameofthemessage→TapOK.
☆ Aftersetting,ifyoucan’taccessafreee‐mailaccount,pleasecheckwithyour
e‐mailserviceproviderwhethertheirserversupportPOPandSMTPprotocol.
Inbox

1. Tapthee‐mailicon .
2. Ifyouonlysetonee‐mailaccount,itwillbeopeneddirectly.Ifyouhavesetseveral
accountstheaccountlistwillbedisplayed.
3. Tapdesirede‐mailaccount→tapInbox.
Openinge‐mail
1. IntheInboxinterface,tapandopenane‐mail.
2. Forattachment,tapOpentostartrespectiveapplication,ortapSavetosave
theattachmenttoSDcard.
3. ToReply,tapReplyorReplytoall.
a) Writethemessageyouwanttosend.
b) TapSendtosendthee‐mailimmediately;tapDraftstosavebutdonot
sendthee‐mail,ordeletedirectlybutdonotsaveorsend.
4. Todeletethee‐maildirectly,tapDelete.
Writingnewe‐mail
1. InInboxinterface,presstheMenukey→Write.
2. TapSendto,andthenentertheaddressoftherecipient.
3. Orifyouwanttosendaccorbcc,presstheMenukey→Addccandbcc,and
enterthee‐mailaddressesoftherecipients.
4. Enterdesiredsubjectinthetitlebarofthee‐mail.
5. TapWriteoptiontoenteryourpersonalinformation.
6. Ifnecessary,presstheMenukey→ tapAddattachmenttoaddthe
attachmentfile.
7. Afterwriting,presstheMenukey→tapSend.
Editinge‐mailaccount
1. Tapthee‐mailicon .
2. IntheInboxinterface,presstheMenukey→tapAccountsetting.
3. Setyoure‐mailaccountaccordingly.
4. TaptoreturntotheInboxinterface.
Deletinge‐mailaccount
☆Ifyouhaveseveralaccountsandhavedeletedthedefaultaccount,thenexte‐mail
accountinthelistwillbesettodefaultautomatically.
1. Tapthee‐mailicon .
2. IntheInboxinterface,presstheMenukey→tapAccount.
3. Tapandholdtheaccountyouwanttodelete.
4. InthepopupAccountoptionwindow,tapDeleteaccount.
5. TapOKtoconfirmtheoperation.
Settingdefaulte‐mailaccount
Youshouldalwayshaveadefaultaccount.Therefore,ifyouhaveseverale‐mail
accounts,youcansetanyonetodefault.
1. Tapthee‐mailicon .
2. IntheInboxinterface,presstheMenukeytap→Accountsetting.
3. TapDefaultaccounttoselectit.
Ifyoudeletethedefaultaccount,thenexte‐mailaccountinthelistwillbesetto
defaultautomatically.
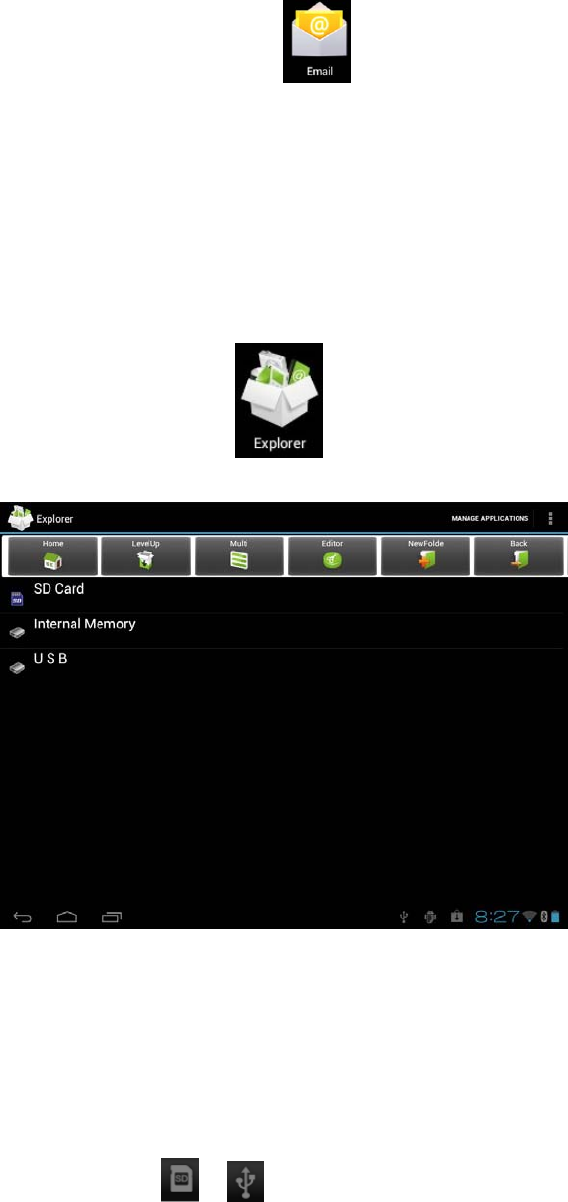
13.FileManager
TaptheExplorericontoviewthefilesinallstoragedevices(internalmemory,SD
card,USBstorage),andinstallAndroidapplicationstothedevicequickly.
14.CopyingfilesbetweenPCandthedevice
Youcancopyfilesbetweenexternalstoragedevice,internalmemoryandthePC
throughFileManager.Tocopyfilestothedevice,itisrequiredtocopytoSDcardor
USBstoragedevicefirst.
1. Taportoshowthefilesinyourstoragedevice.
2. TapandholdthedesiredfileorfolderandtapCopy.
3. Tapthe icontoreturntotheinternalmemory,tapthetargetfolderandthen
tapPaste.
Deletingfiles
Tapandholdthefileorfolder,tapDeleteandthentapOKtodelete.
,
15.Settings
Wirelessandnetwork
Wi‐Fi
Setandmanagewirelessaccesspoint。(VeiwWIFInetwork
Settings)
Flowuse Flowdatasettingsandmanagement
FlightmodeTurnon/stopflyingmode
EthernetCablenetworkconfiguration.
VPNVPNnetworkconfiguration
Mobilenetwork3Gnetworksetting.
More..
3GinformationShow3Gdonglesupportmodel
Device
Volume
Adjustthevolumeofmedia,alarmclockandnotification
bytappinganddraggingtheslider
,andthentapping
OK。
NotificationringtoneSelectdesirednotificationringtone
Voice
ScreenlocksoundsPlaysoundwhenlockingandunlockingthescreen
Brightness
Adjustthebrightnessofthescreenbytappingand
draggingtheslider ,andthentapping
OK
wallpaperWallpapersetting
Auto‐rotatescreenSwitchorientationautomaticallywhenrotatingthedevice
SystemhibernateAdjustthedelaybeforethesystemautomatically
hibernates
FontsizeAdjustfontsizeinterface.
Gravityinduction
coordinatesystem
Choosecoordinatesystem,forsomegames,needto
choosespecialcoordinatesystem。
Disply
ScreenadaptationAdjustthescreensize.
displaydevicetheusesituationofstoragecapacity.
StorageSDCardformattingRemoveallthedataintheSDcard.
Battery Displybatteryusedata.
Application Displytheapplicationsituationindevice.
Peesonal
Accountand
synchronization
Addandmanagetheaccountinthedevice.
Location
service
SetthepositionofGoogleservicesandGooglesearch
applications.
Screensafety
protectionScreensafetyprotectionsetting.
Passwords Passwordssetting.
Equipment
management
1.Addordeletedevicemanager.
2.UnknownsourceAPKinstallation.
Security
Credentialsstored
Applicationmanagementandaccesssecurityvouchers
andotherdocuments.
Setthedefaultlanguagesystem
Keyboardandinput
methodSetthedefaultkeyboardinputmethodandsystem
Languageand
inputmethod Mouse/touchboardAdjustthemousepointerspeedofmovement.
Backupand
reset
1.backup/Datareduction
2.RestorethefactorySettings.
System
Dateandtime Setandchangethetimeanddataindevice.
Auxiliary
function
Setthescreentobeautomaticrotation,displyfontand
touchingeffectetc。
Developers
options
Thebasicapplicationfordevelopers
Abouttables
Checkmessages,andpower,legalinformation,model,
Androidversion,theversionofthekernelandtheversion
number.
16.Wi‐Finetworksettings
SincemanyfunctionsrequireWi‐Ficonnection,pleaseconfiguretheWi‐Finetwork
beforeoperation.
1.Click→Wirelessandnetwork.
2.SelecttoturnonWi‐Fi.
ThedevicewillautomaticallyscanandlistallavailableWi‐Finetworks.IftheWi‐Fi
connectionhasicon,youneedtoenterthevalidpassword.
3.TapaWi‐Ficonnection→ifpasswordisrequired,pleaseenterthevalidpassword→
tapConnect,andtheiconappearsonthedesktopafterconnectingtoWi‐Fi
network.
4.Taptoreturntothedesktop.
☆IfyousettohideWi‐Fi,itwon’tbescannedautomatically.PleasetapAddWi‐Fi
Network,andthenentercorrespondinginformationtoaddtheWi‐Fi.
3Gnetworksettings
1.Toconnectto3Gnetwork,pleaseselectthe3GDooglethatthedevicesupports.The
deviceonlysupportsexternalUSB3GDoogles.The3Gsupportlistcanbefoundin
→Wirelessandnetwork→More→3Gsupport.
AfterinstallingtheSIMcardintothe3GNIC,installthe3GNICtotheUSBOTGcableandthen
connecttothedevice;
3.Afterconnectingtothe3GNIC,tap→ Wirelessandnetwork→More→Mobile
networktoperform3GInternetaccesssettings.
4.TurnonthemobilenetworkandselectEnableddataflow→Dataroaming,thenselectAPN,
enterandselectMenukey:createnewAPNforInternetaccess.ForChinaUnicom3GInternet
access,pleasesetasfollows:
Name:3GWAP/APN:3gnet/Proxy:Notset/Port:80/Username:Notset/Password:Notset
/Server:Notset/MMSC:Notset/MMCproxy:Notset/MMCport:Notset/MCC:460/MNC:
01/Authenticationtype:Notset/APNtype:Notset/APNtype:Notset
Connectto3Gnetworkaftersetting;thesymbolappearsonthescreenafterconnecting
to3Gnetwork.
Ifthesymbolisgrey,itisscanningthenetwork;bluesymbolindicatesthatthenetworkis
connected,andthesymbolindicatesdatatransmitting.
Expandstorage
1.USBflashdrive
ConnectoneendoftheOTGcabletotheflashdriveandtheotherendtotheUSBOTG
interfaceofthedevice.Youcanusetheflashdrivewhenitisready.
☆ Donotinsert/removetheUSBflashdrivefrequently,orelseitmaydamagethe
flashdrive.
2.TFcardusage
☆Thedevicesupportsmemorycardupto32GB.
Insertthememorycardintotheslot,presswithfingerstoclampit;thescreenwillshow
PreparingSDcard,andtheTFcardisreadyforusewhenthecharactersdisappear.Youcan
operatewhenthecardisready.
RemovingTFcard
Closeallprogramsorfilesopenedfromthememorycard.Tap →TFcardand
devicememory→RemoveTFcard.Pressthecardanditwilleject.
☆Donotinsert/removethememorycardrepeatedly,orelseitmaydamagethe
card.
☆Pleaseusequalifiedmemorycardtoavoidincompatibility.
Installingprograms/Uninstallingtheapplication
☆YoucaninstallthepurchasedordownloadedAndroidapplicationsquickly
through .
1. Copydesired.apkfilestoSDcardorUSBstoragedevice→insertthecardintothe
deviceorconnectUSBflashdrivetothedevice.
2. Tapthefilemanagericon .
3. Tapor andfindthefolderthatsaves.apkfiles.
4. Selectan.apkfile→Install.Aftertheapplicationisinstalled,theiconwillappearin
theinterfacethatshowsallapplications.
5. Taptoruntheapplicationdirectly,ortapOKtoreturntotheFileManager
interface.
DownloadingapplicationsfromInternetdirectly
YoucandownloadAndroidapplicationsfromtheInternetdirectly,andinstallinthe
devicequickly.
1. Clickthe icontoconnecttotheInternet.
2. EntertheURLandtapthedownloadlinkofdesiredapplication.
3. Afterdownloading,tapandholdthedownloadedfiles(indownloadloginterface),
→clickOpen→Install.
ConnectingtoPCtosavefiles
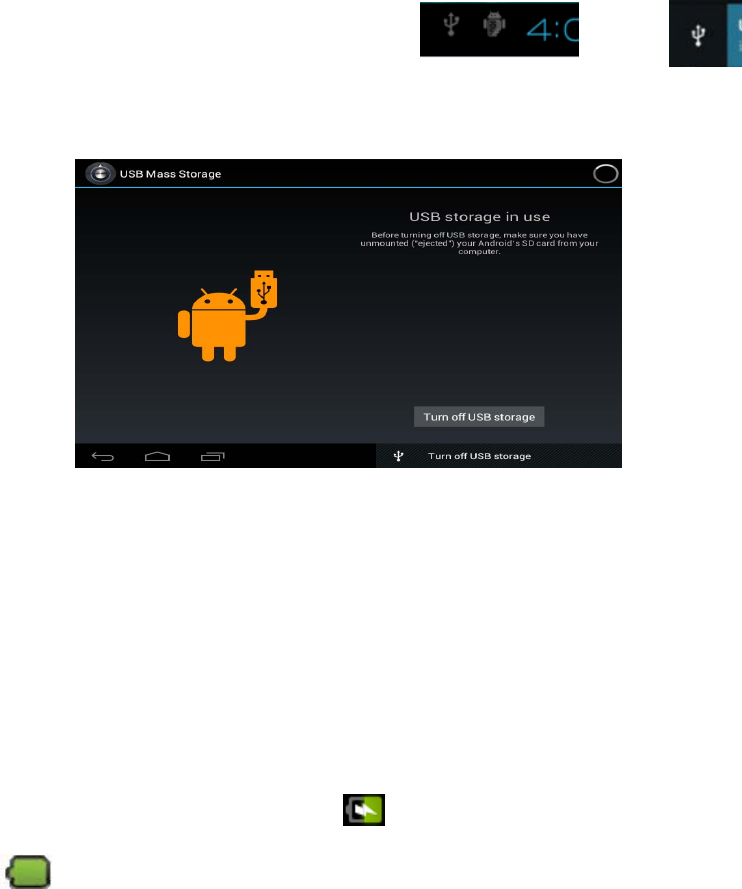
1.ConnectthetabletPCtoPCandthetabletPCcanbeusedasmobilestoragedevice;
toconnecttoPC,connectoneendoftheUSBcabletotheUSBOTGinterfaceofthe
tabletPCandtheotherendtotheUSBinterfaceofPC;
2.Afterconnected,thetabletPCwillprompt ,clicktheicon
andthenselectTurnonUSBstoragetotransmitdatabetweenPCandtabletPC,as
shownbelow:
Uninstallingtheapplication
YoucanuninstalltheAndroidapplicationquickly.
1. TapMenukey→Settings→Application→Manageapplications.
2. Tapanapplication→Uninstall.
3. TapOKtouninstall.
Chargingthedevice
Connectoneendofthepoweradaptertothesocketandtheotherendtothepower
jacktochargethedevice.
Duringcharging,thebatterysymbolis ;aftercharged,thebatterysymbolturns
into .
☆YoucanuseUSBcabletochargethedevice.
☆Youcanusethedevicewhilecharging;however,itwillextendthechargingtime.
●Usethedeviceatleastonceeveryweek.
●Chargethebatteryregularly.
●Donotkeepthebatterytoolowforlongtime.
Note
Whenyouusethisdevice,pleasefollowthesafetynoticebelowtopreventfire,electric
shockandinjury.
Keepthedeviceawayfromrainandmoisture.
Keepthedeviceawayfromdirectsunlightandheatsource.
Protectthepowercord.Whenconnectthepowercord,donotstepontoitor
placeanyobjectonit,whichmaycauseextrusion.Protecttheconnectorofthe
powercordconnecteddevicesspecially.
Pleaseusetheoriginalpoweradapterforcharging.Nonconformingchargersmay
causeharms.
Donotdisassembletheshellorrepairitwithoutauthorization.
Handlethescreengently.Toclearthefingerprintsordustonthescreen,usesoftcloth
dedicatedforcameralensinsteadofgauze.
FCCStatement:
ThisequipmenthasbeentestedandfoundtocomplywiththelimitsforaClassBdigitaldevice,
pursuanttoPart15oftheFCCRules.Theselimitsaredesignedtoprovidereasonableprotection
againstharmfulinterferenceinaresidentialinstallation.Thisequipmentgenerates,usesandcan
radiateradiofrequencyenergyand,ifnotinstalledandusedinaccordancewiththeinstructions,
maycauseharmfulinterferencetoradiocommunications.However,thereisnoguaranteethat
interferencewillnotoccurinaparticularinstallation.Ifthisequipmentdoescauseharmful
interferencetoradioortelevisionreception,whichcanbedeterminedbyturningtheequipment
offandon,theuserisencouragedtotrytocorrecttheinterferencebyoneormoreofthe
followingmeasures:
‐‐Reorientorrelocatethereceivingantenna.
‐‐Increasetheseparationbetweentheequipmentandreceiver.
‐‐Connecttheequipmentintoanoutletonacircuitdifferentfromthattowhichthereceiveris
connected.
‐‐Consultthedealeroranexperiencedradio/TVtechnicianforhelp.
Thisdevicecomplieswithpart15oftheFCCRules.Operationissubjecttothefollowingtwo
conditions:
(1)Thisdevicemaynotcauseharmfulinterference,and(2)thisdevicemustacceptany
interferencereceived,includinginterferencethatmaycauseundesiredoperation.
Changesormodificationsnotexpresslyapprovedbythepartyresponsibleforcompliancecould
voidtheuser'sauthoritytooperatetheequipment.