Archos AN7DG3B ChildPad User Manual
Archos SA ChildPad
UserManual.wiki
>
Archos
>
AN7DG3B User Manual
User manual
Navigation menu
Upload a User Manual
Namespaces
Wiki Guide
HTML
PDF
Info
Views
User Manual
Discussion / Help
Navigation

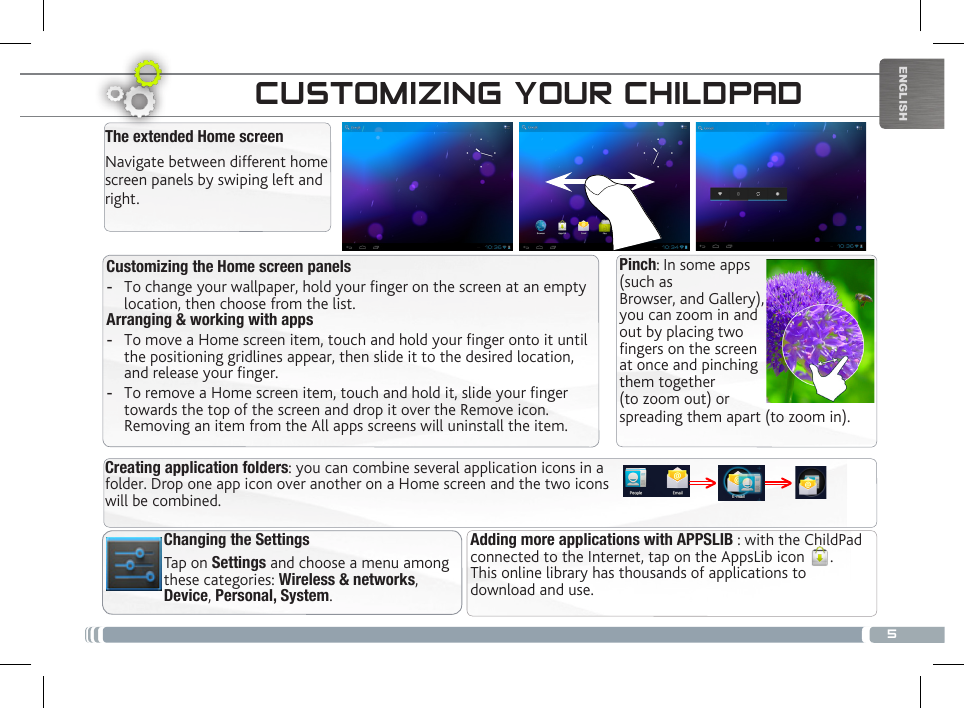


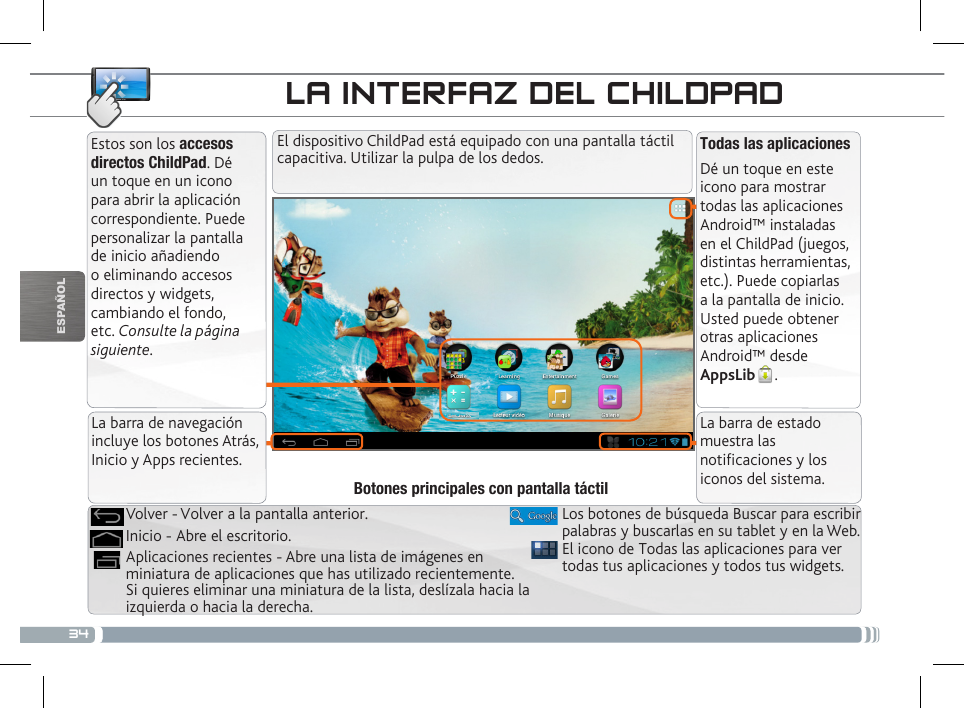
![35ESPAÑOLLA INTERFAZ DEL CHILDPADPersonalización de los elementos de la pantalla de inicio -Para cambiar el fondo de pantalla, mantenga el dedo en la pantalla en un punto vacío y elija uno de la lista.Cómo organizar y utilizar las aplicaciones -Para desplazar un elemento de la pantalla de inicio, tóquelo y mantenga el dedo sobre él hasta que aparezca la parrilla de posición, a continuación, arrástrelo hasta el lugar que desee y suelte el dedo. -Para eliminar el icono de una aplicación del escritorio, mantén pulsado el icono, desliza el dedo por la pantalla y suelta la aplicación sobre el icono para eliminar contenido.La pantalla de inicio ampliadaDeslice el dedo horizontalmente en la pantalla para ir al lado izquierdo o derecho de la pantalla de inicio ampliada. Cambio de los ajustesDé un toque en Ajustes y elija una categoría: Conexiones inalámbricas y redes, Dispositivo, Personal, Sistem.Agregar más aplicaciones - APPSLIB: Conecte el ChildPad Internet, a continuación, pulse el icono de AppsLib. Esta biblioteca en línea de aplicaciones gratis y adquiribles para descargar y utilizar.Crear carpetas de aplicaciones: puedes combinar varios iconos de aplicaciones en una carpeta. Arrastra el icono de una aplicación sobre el de otra en una pantalla del escritorio y se combinarán ambos iconos.PERSONALIZACIÓN DEL CHILDPADPinzar[Pinch]: En algunas aplicaciones, puede ampliar y reducir la imagen colocando dos dedos en la pantalla y acercándolos (para reducir) o separándolos (para ampliar).](https://usermanual.wiki/Archos/AN7DG3B/User-Guide-1754354-Page-35.png)


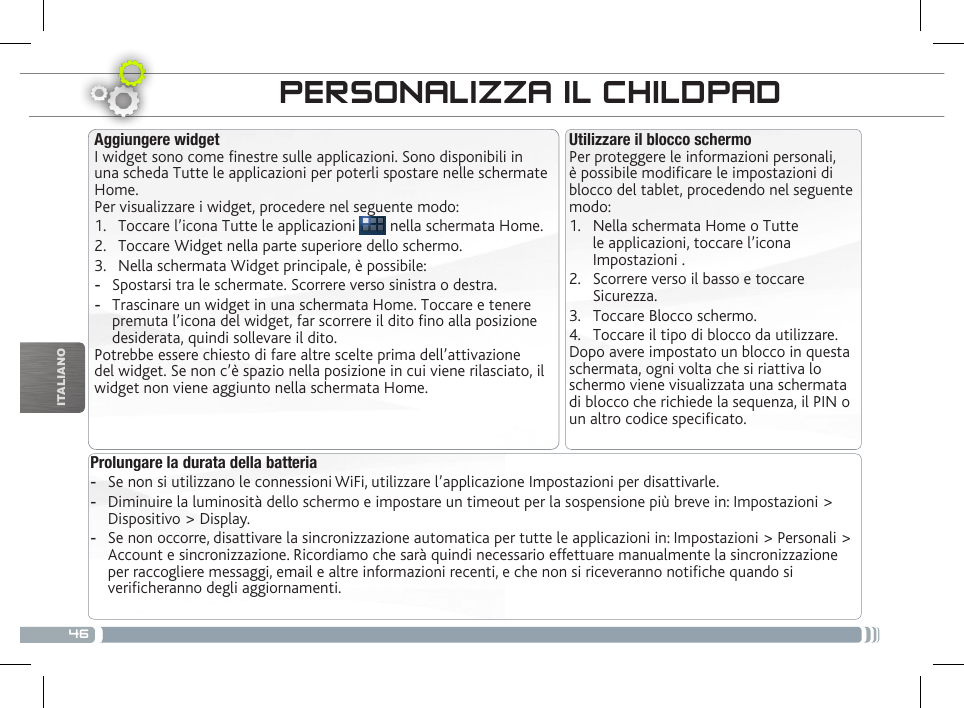
![45ITALIANOINTERFACCIA DEL CHILDPADCambiare lo sfondo Per modificare lo sfondo, posizionare il dito sullo schermo in una posizione vuota, quindi scegliere dall’elenco. Disporre e utilizzare le applicazioni - Per spostare un elemento della schermata Home, toccare e tenere premuto il dito su di esso fino a quando non appaiono le linee della griglia di posizionamento, quindi farlo scorrere sulla posizione desiderata e rilasciare il dito. - Per rimuovere l’icona di un’applicazione dalla schermata Home, toccarla e tenere premuto, far scorrere il dito verso la parte superiore dello schermo e rilasciare l’applicazione sopra l’icona Rimuovi.Aggiungere altre applicazioni - APPSLIB: connettete il vostro ChildPad a Internet, poi premete cull’icona AppsLib . Questo portale vi propone di scaricare, gratuitamente e a pagamento, diverse migliaia di applicazioni. Scegliete un’applicazione e scaricatela.Cambio ImpostazioniToccare Impostazioni e scegliere una categoria: Wireless e reti, Dispositivo, Personale, Sistema.Creazione di cartelle delle applicazioni: È possibile combinare diverse icone di applicazioni in un’unica cartella. Rilasciare l’icona di un’applicazione sopra un’altra in una schermata Home per combinare le due icone.PERSONALIZZA IL CHILDPADSchermo interoFare scivolare il dito in senso orizzontale sullo schermo per posizionarsi sulla parte sinistra o destra dello schermo. Avvicinare le dita[Pinch]: In alcune applicazioni, è possibile eseguire lo zoom avanti e indietro posizionando contemporaneamente due dita sullo schermo e avvicinandole (per ridurre) o allargandole (per ingrandire).](https://usermanual.wiki/Archos/AN7DG3B/User-Guide-1754354-Page-45.png)

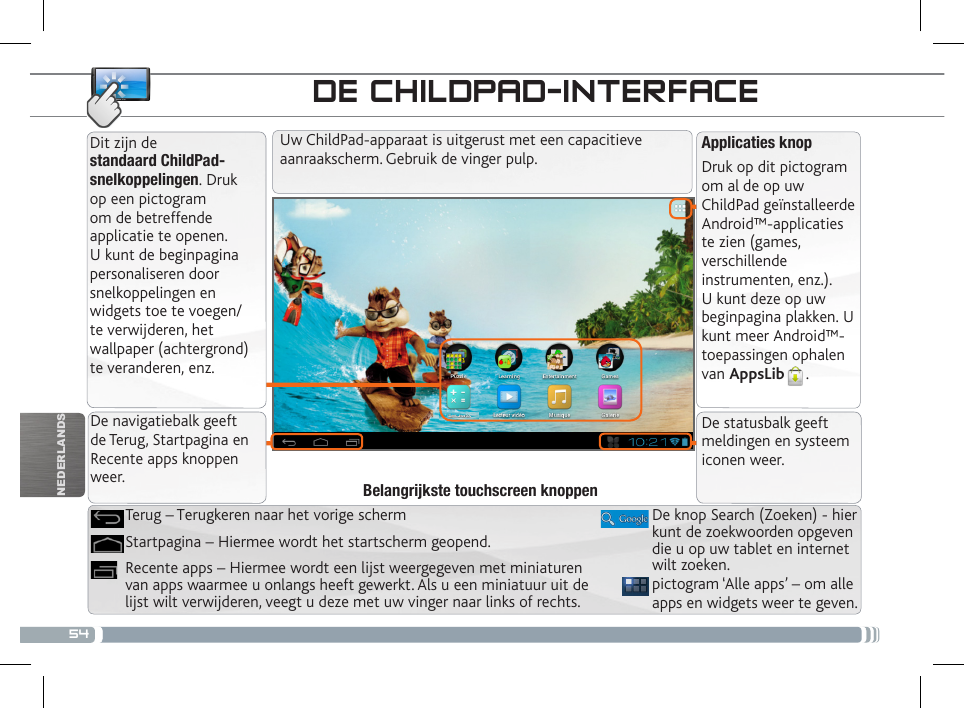
![55NEDERLANDSDE CHILDPAD-INTERFACEDe achtergrond wijzigenAls u uw achtergrond wilt wijzigen, houdt u een leeg gedeelte van het scherm aangeraakt met uw vinger en kiest u een optie in de lijst.Apps ordenen en werken met apps- Als u een item op het startscherm wilt verplaatsen, houdt u het item aangeraakt met uw vinger, totdat de positioneringslijnen verschijnen. Vervolgens sleept u het item naar de gewenste locatie en laat u het los.- Als u een app-pictogram van het startscherm wilt verwijderen, blijft u het pictogram aanraken, veegt u met uw vinger naar de bovenkant van het scherm en laat u de app los op het pictogram ‘Verwijderen’ .Het uitgebreide beginschermSchuif met uw vinger horizontaal over het scherm om naar de linker- of de rechterkant van uw uitgebreide beginscherm te gaan. Het toevoegen van meer toepassingen - APPSLIB: met de ChildPad verbonden met het internet, druk op het pictogram AppsLib . Deze online bibliotheek van gratis en betaalde toepassingen om te downloaden en te gebruiken.De instellingen wijzigenDruk op Instellingen en kies een categorie: Draadloos en netwerken, Apparaat, Persoonlijk, Systeem.Mappen voor toepassingen maken: u kunt verschillende app-pictogrammen combineren in een map. Laat het ene app-pictogram los op het andere op een startscherm en de twee pictogrammen worden gecombineerd.PERSONALISEER UW CHILDPAD Knijp[Pinch]: In bepaalde applicaties. U kunt in- of uitzoomen door tegelijkertijd twee vingers op het scherm te plaatsen en deze dicht te knijpen (uitzoomen) of uit elkaar te halen (inzoomen).](https://usermanual.wiki/Archos/AN7DG3B/User-Guide-1754354-Page-55.png)

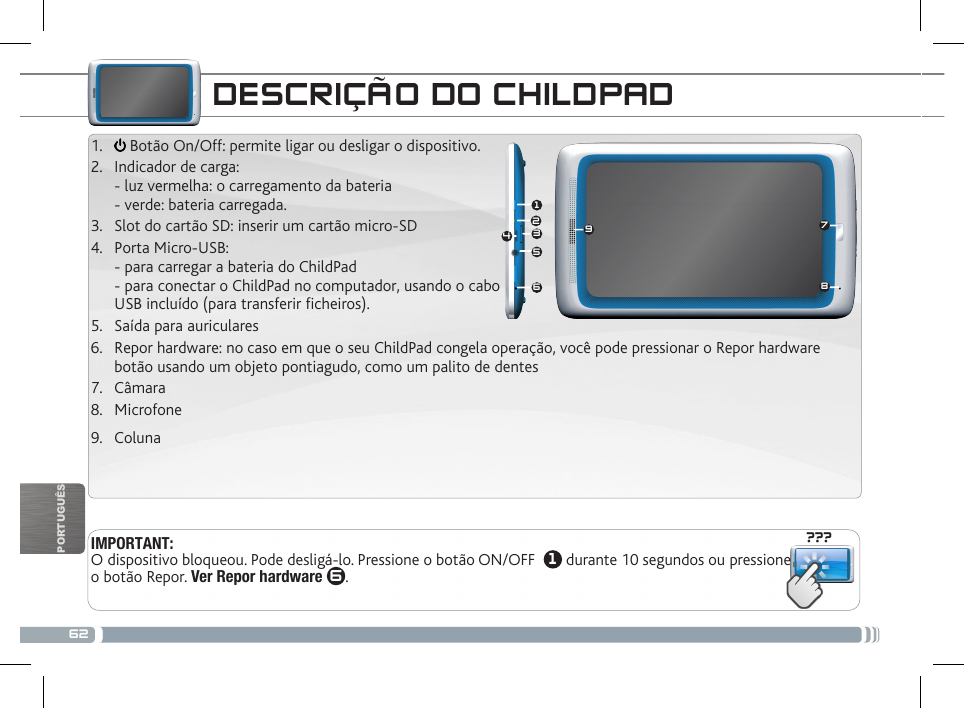
![65PORTUGUÊSEcrã inicial ampliadoDeslize o dedo na horizontal no ecrã para se deslocar para o lado esquerdo ou direito do ecrã inicial ampliado. Alterar a imagem de fundoPara alterar o seu papel de parede, toque continuamente com o dedo no ecrã num local vazio, em seguida, selecione a partir da lista. Organizar e trabalhar com aplicações- Para mover um item no ecrã Home (Inicial), toque e mantenha o seu dedo no mesmo até aparecer a grelha de posicionamento, em seguida, deslize-o para a localização pretendida e retire o dedo.- Para remover o ícone de uma aplicação do Ecrã Principal, toque sem soltar no ícone, deslize o dedo para a parte superior do ecrã e largue a aplicação sobre o ícone Remover.Mudando os AjustesNa tela inicial, toque em Ajustes e escolha uma categoria: Redes sem fios e outras, Dispositivo, Pessoal, Sistema.Adicionando mais aplicações com APPSLIB: Com o ChildPad conectado à Internet, toque no ícone AppsLib . Esta biblioteca online de aplicações gratuitas e pagáveis para fazer download e usar.Criar pastas de aplicações: pode combinar vários ícones de aplicações numa pasta. Largue o ícone de uma aplicação sobre outro num Ecrã Principal e os dois ícones serão combinados.PERSONALIZANDO O SEU PRODUTO Aperte[Pinch]: Em algumas aplicações, o utilizador pode aumentar ou diminuir o zoom pousando dois dedos ao mesmo tempo no ecrã e apertando-os (para diminuir o zoom) ou separando-os (para aumentar o zoom).](https://usermanual.wiki/Archos/AN7DG3B/User-Guide-1754354-Page-65.png)