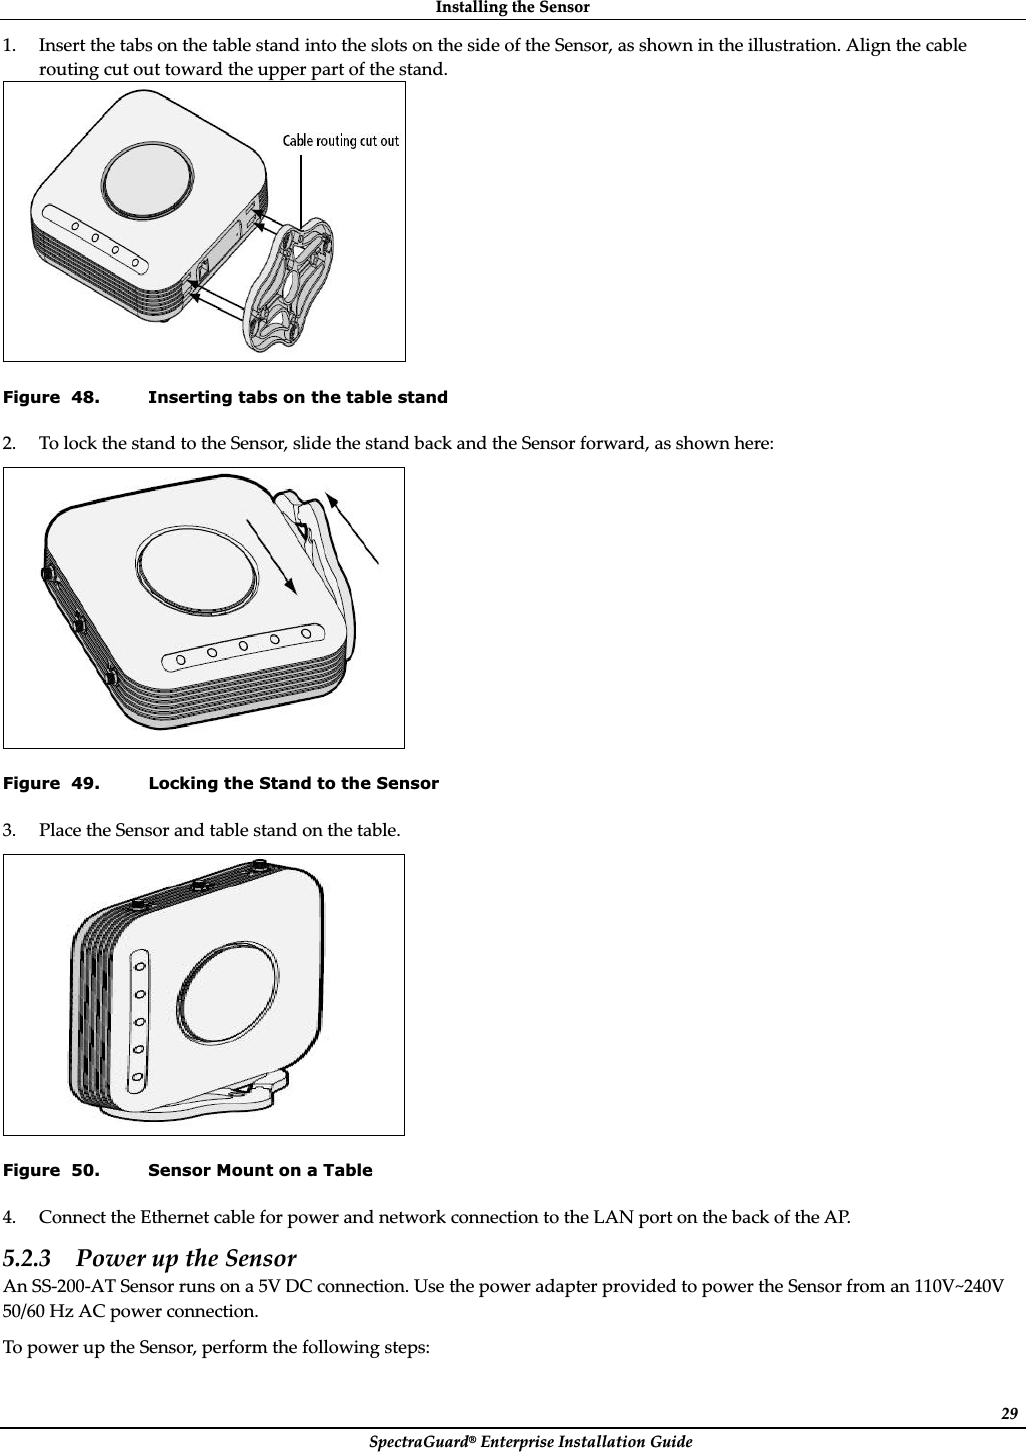
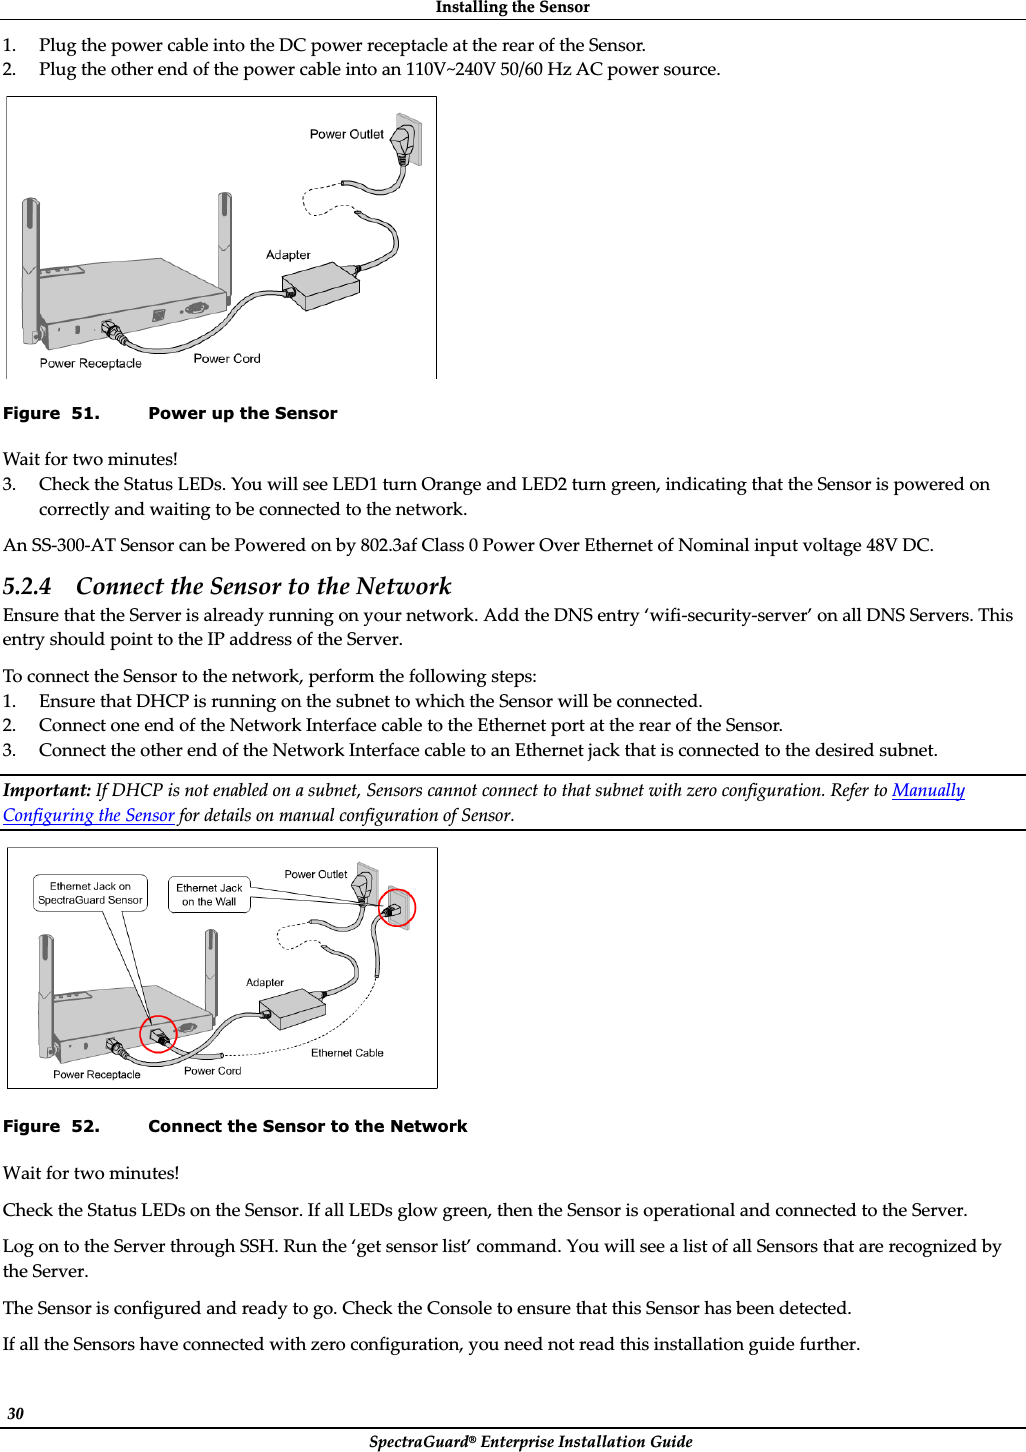
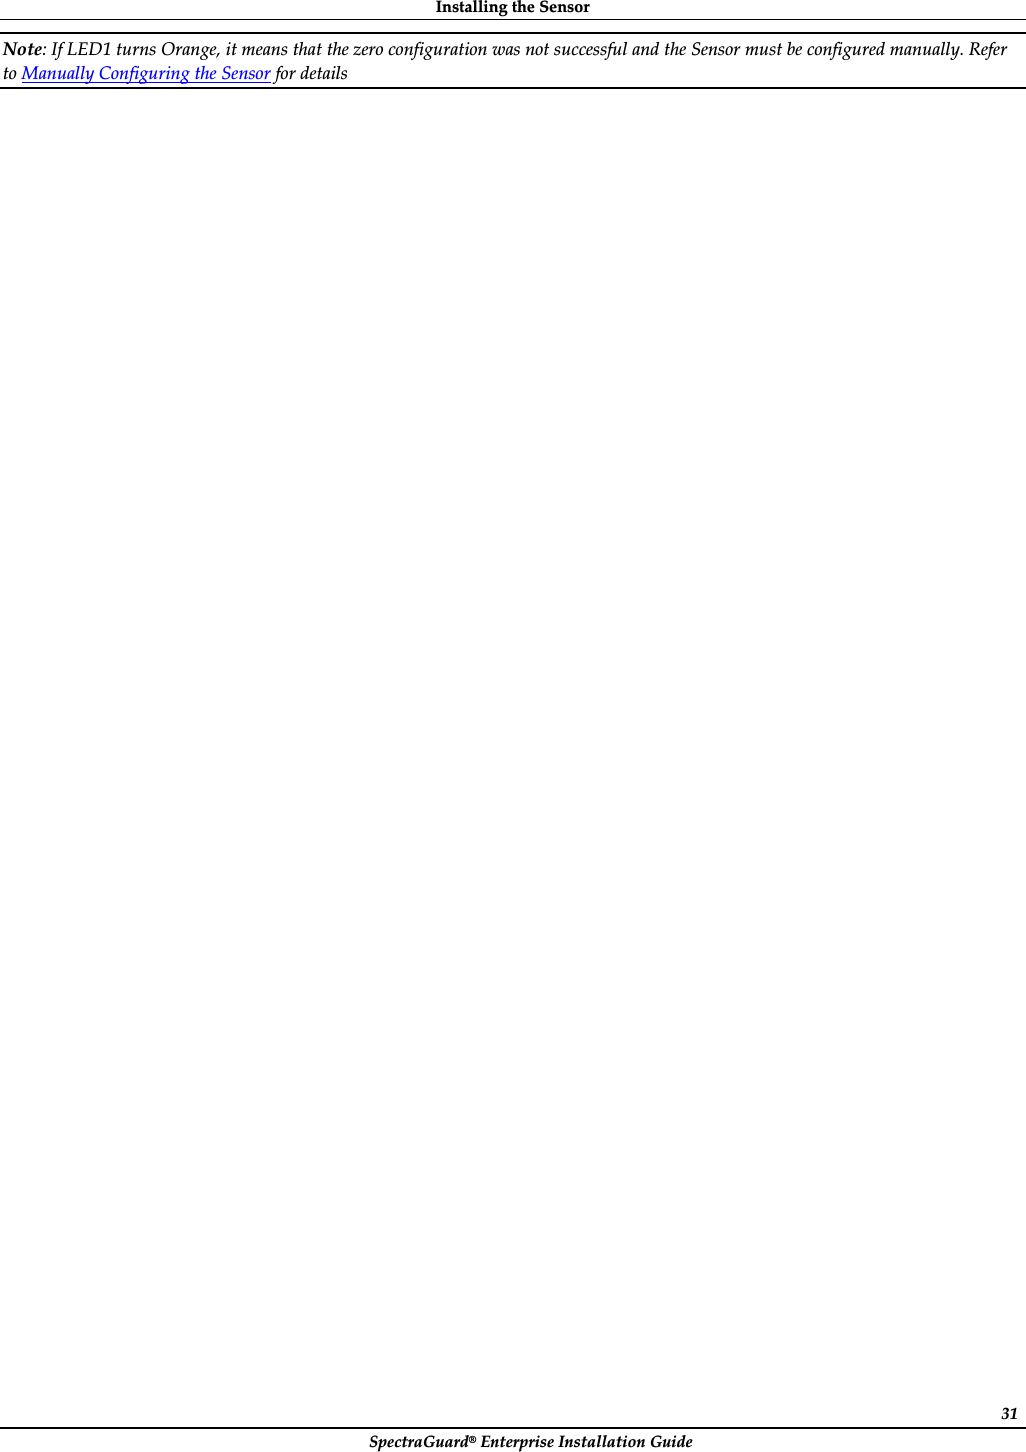
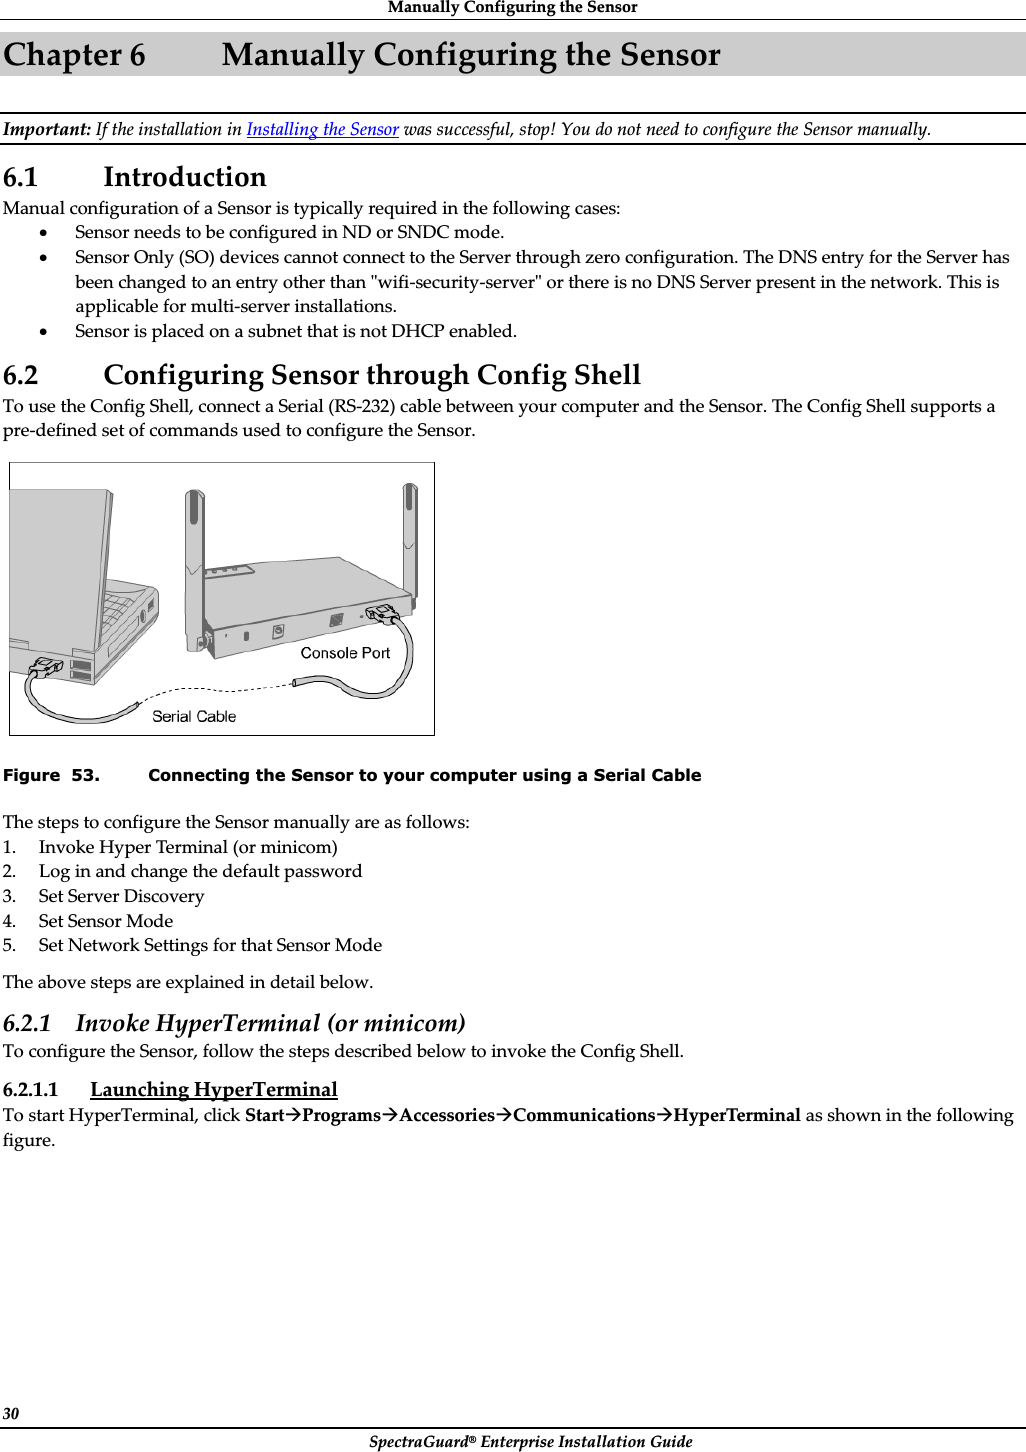
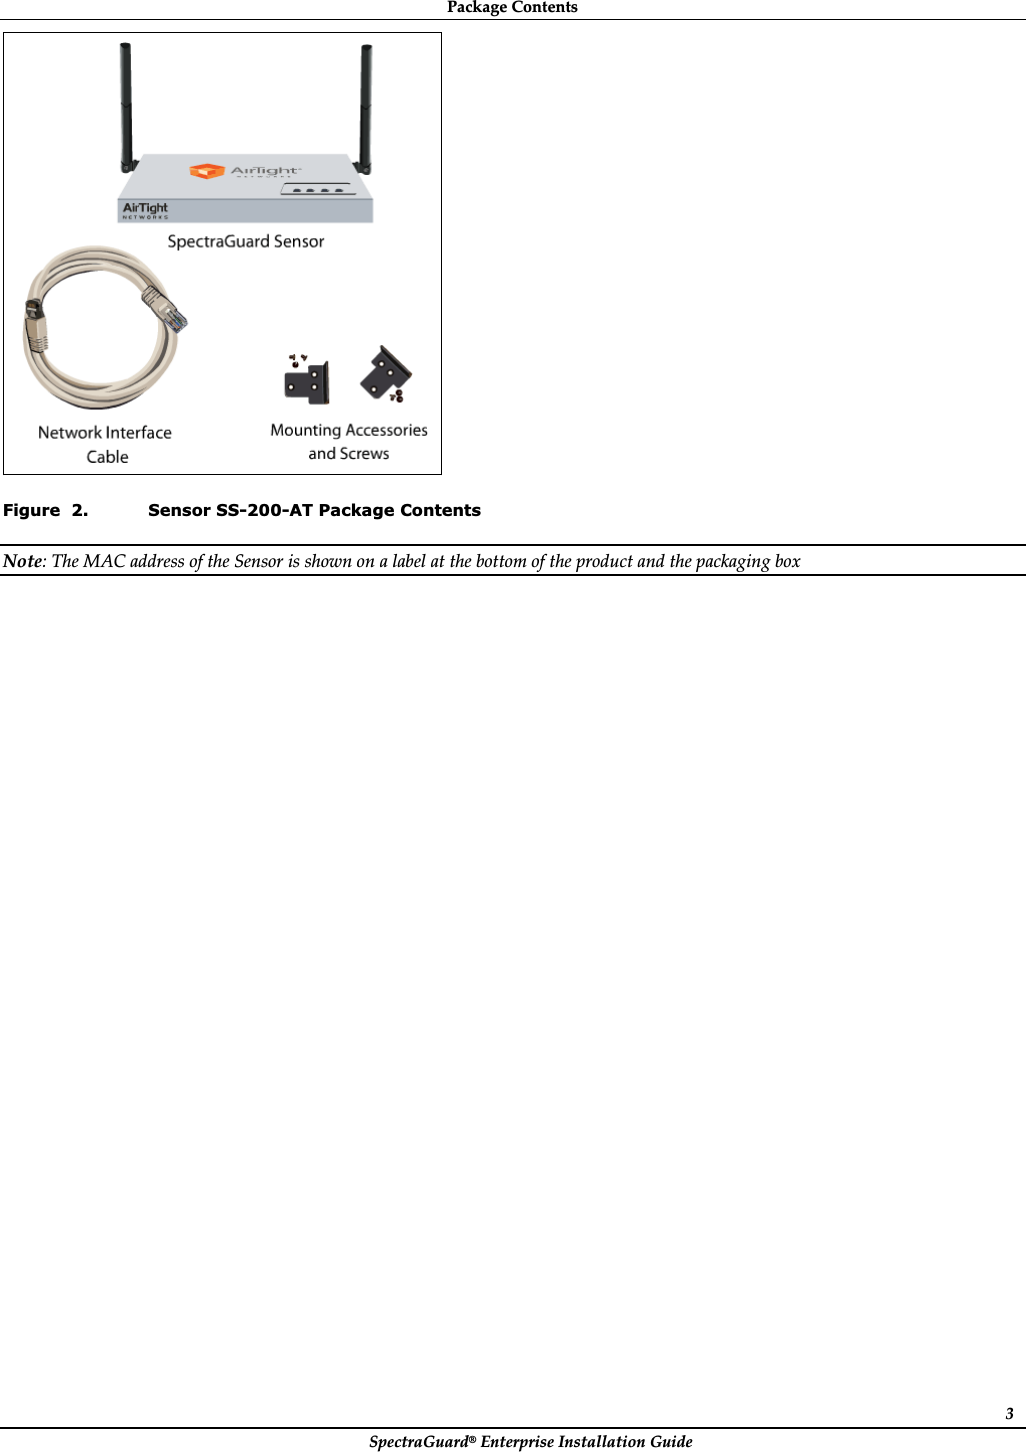
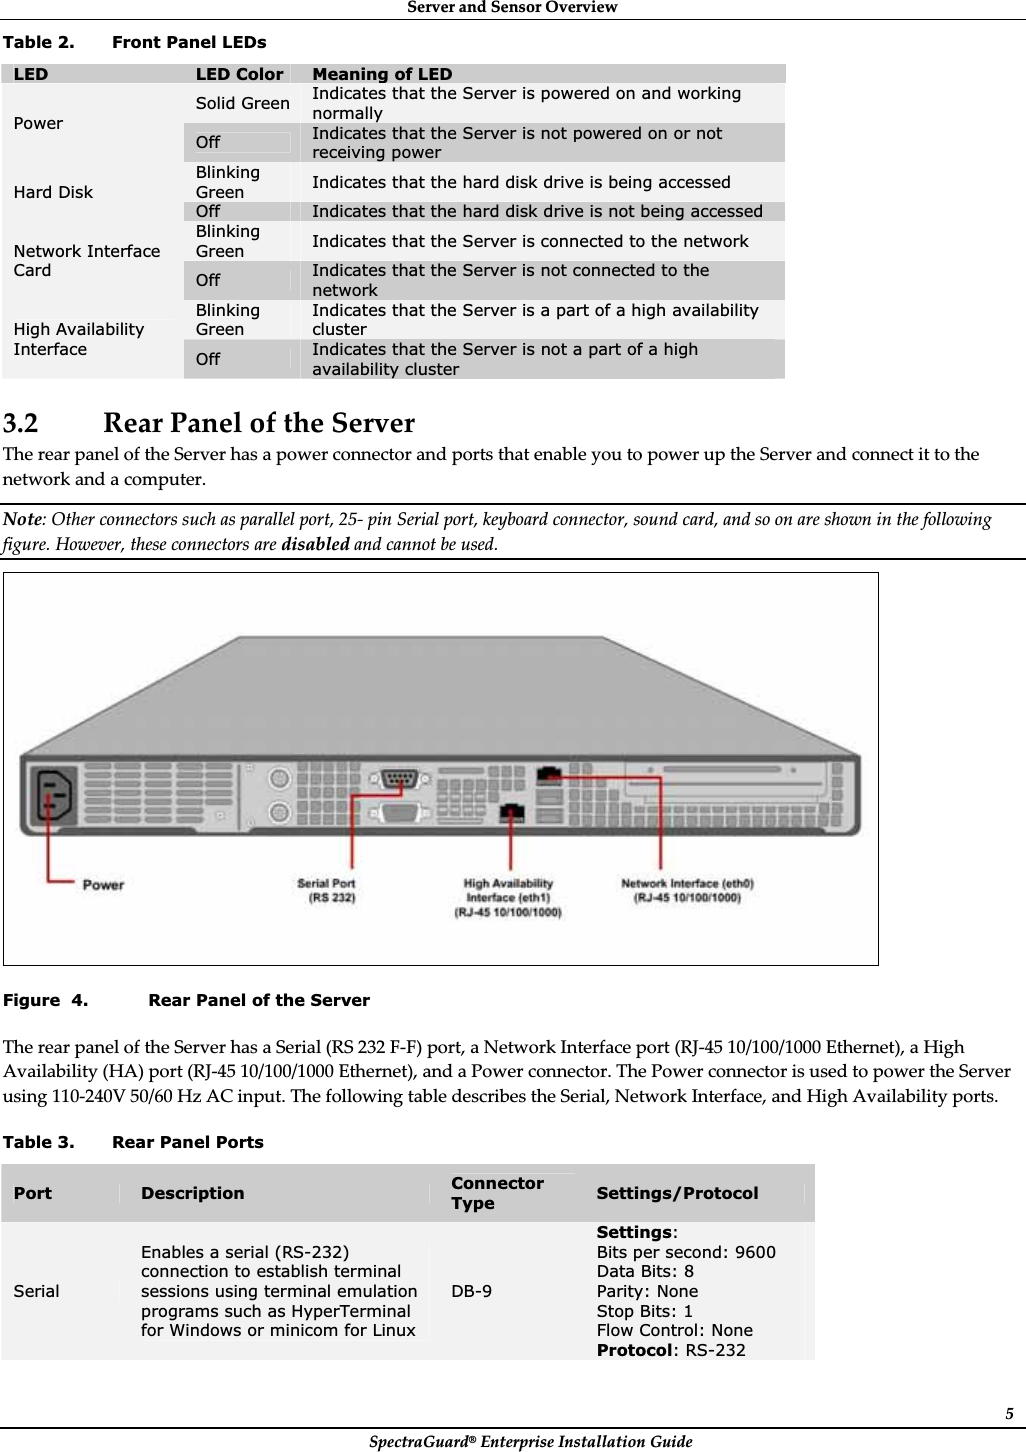
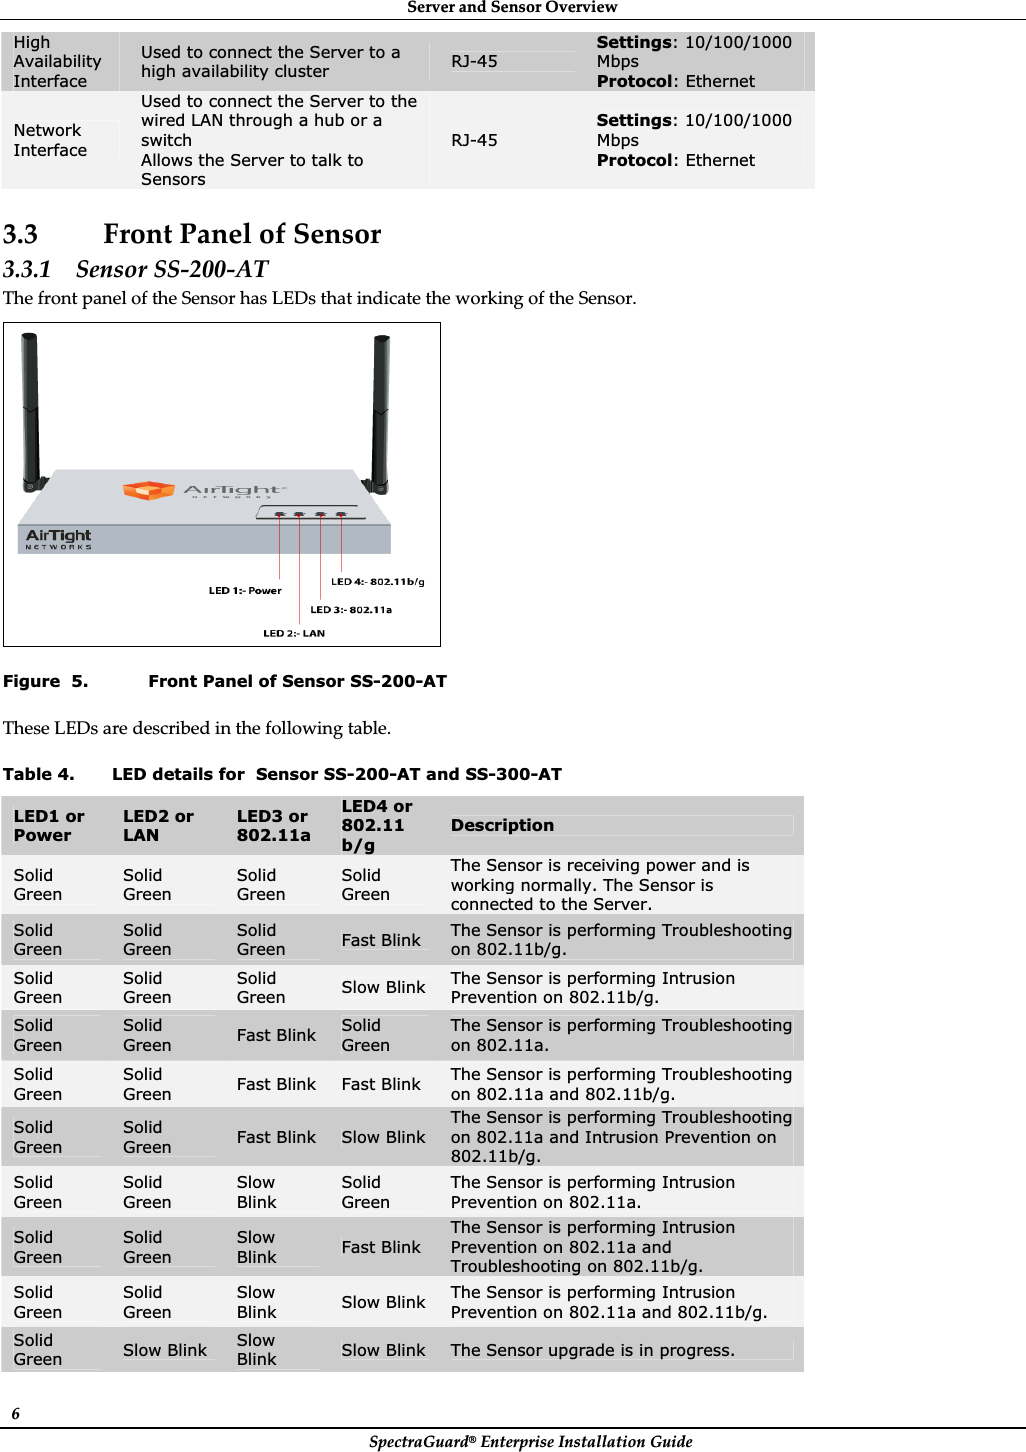
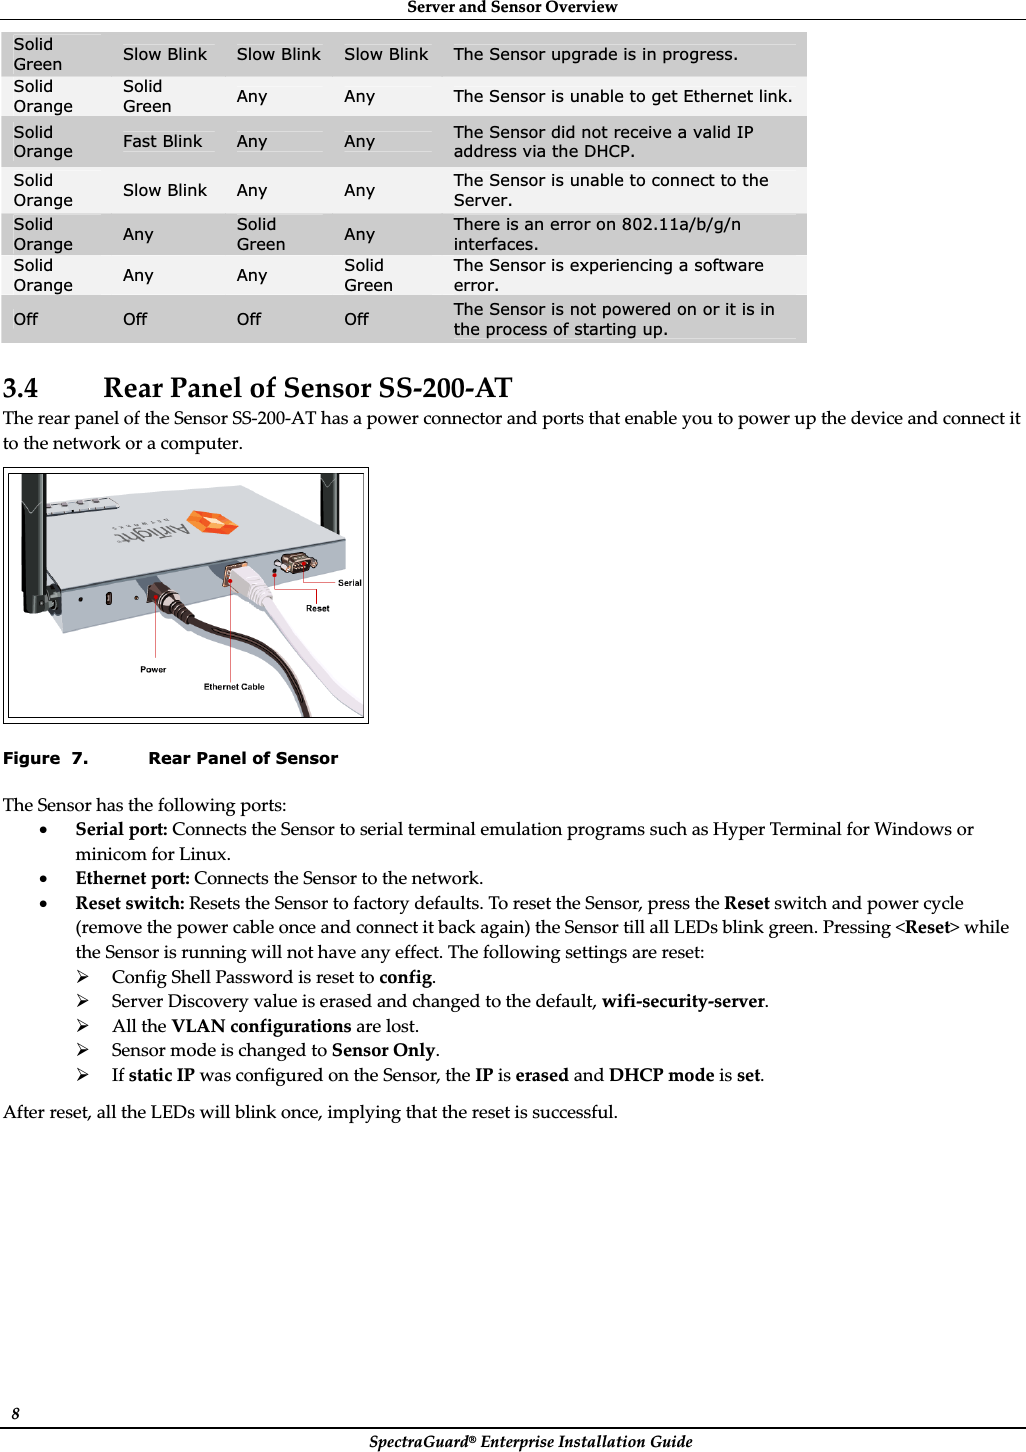
Arista Networks SS300ATC50 SPECTRAGUARD SENSOR User Manual USERS MANUAL
AirTight Networks, Inc. SPECTRAGUARD SENSOR USERS MANUAL
UserManual.wiki
>
Arista Networks
>
SS300ATC50 User Manual
USERS MANUAL
Navigation menu
Upload a User Manual
Namespaces
Wiki Guide
HTML
PDF
Info
Views
User Manual
Discussion / Help
Navigation
![DisclaimerȱSpectraGuard®ȱEnterpriseȱInstallationȱGuideȱiiiFCCȱRadiationȱExposureȱStatement:ȱThisȱequipmentȱcompliesȱwithȱFCCȱradiationȱexposureȱlimitsȱsetȱforthȱforȱanȱuncontrolledȱenvironment.ȱThisȱequipmentȱshouldȱbeȱinstalledȱandȱoperatedȱwithȱminimumȱdistanceȱ20ȱcmȱbetweenȱtheȱradiatorȱ&ȱyourȱbody.ȱIfȱthisȱdeviceȱisȱgoingȱtoȱbeȱoperatedȱinȱ5.15ȱ~ȱ5.25ȱGHzȱfrequencyȱrange,ȱthenȱitȱisȱrestrictedȱinȱindoorȱenvironmentȱonly.ȱThisȱtransmitterȱmustȱnotȱbeȱcoȬlocatedȱorȱoperatingȱinȱconjunctionȱwithȱanyȱotherȱantennaȱorȱtransmitter.ȱThis product must be installed by a professional technician/installer.Operation is subject to the following two conditions: (1) this device may not cause interference, and (2) this device must accept any interference, including interference that may cause undesired operation of the device.The County Code Selection feature is disabled for products marketed in the US/Canada.This Class [B] digital apparatus complies with Canadian ICES-003.Cet appareil numerique de la classe [B] est conforme a la norme NMB-003 du Canada. To reduce potential radio interference to other users, the antenna type and its gain should be so chosen thatthe equivalent isotropically radiated power (EIRP) is not more than that required for successfulcommunication.This device has been designed to operate with an antenna having a maximum gain of [20] dBi. Antennahaving a higher gain is strictly prohibited per regulations of Industry Canada. The required antennaimpedance is 50 ohms.To reduce potential radio interference to other users, the antenna type and its gain should be so chosen thatthe equivalent isotropically radiated power (e.i.r.p.) is not more than that permitted for successfulcommunication.](https://usermanual.wiki/Arista-Networks/SS300ATC50/User-Guide-1353364-Page-5.png)


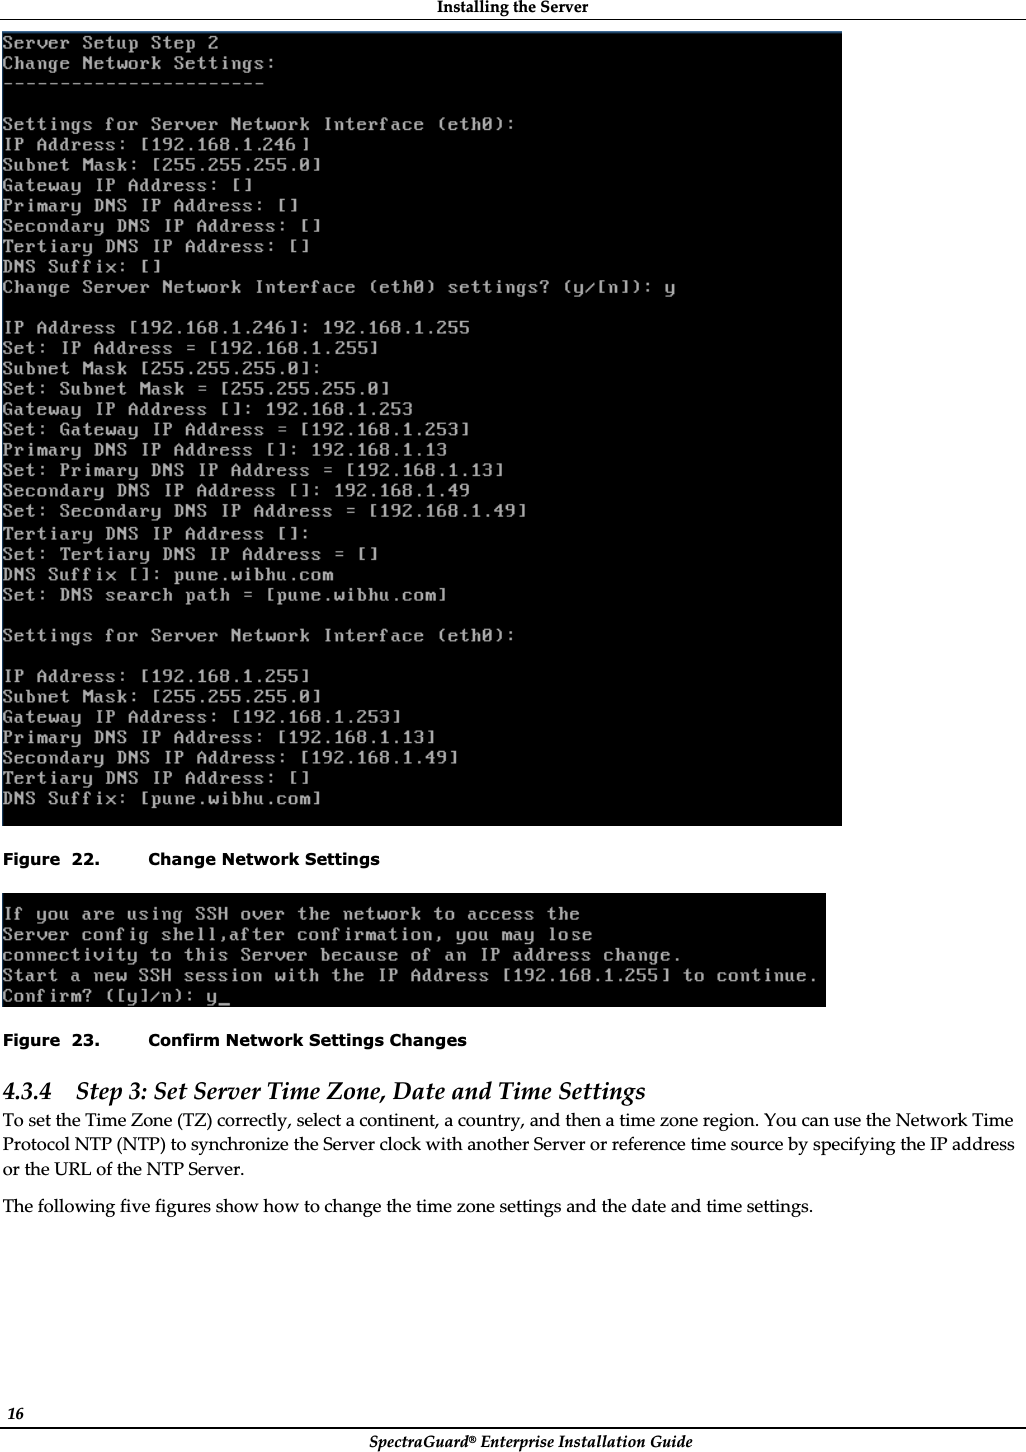
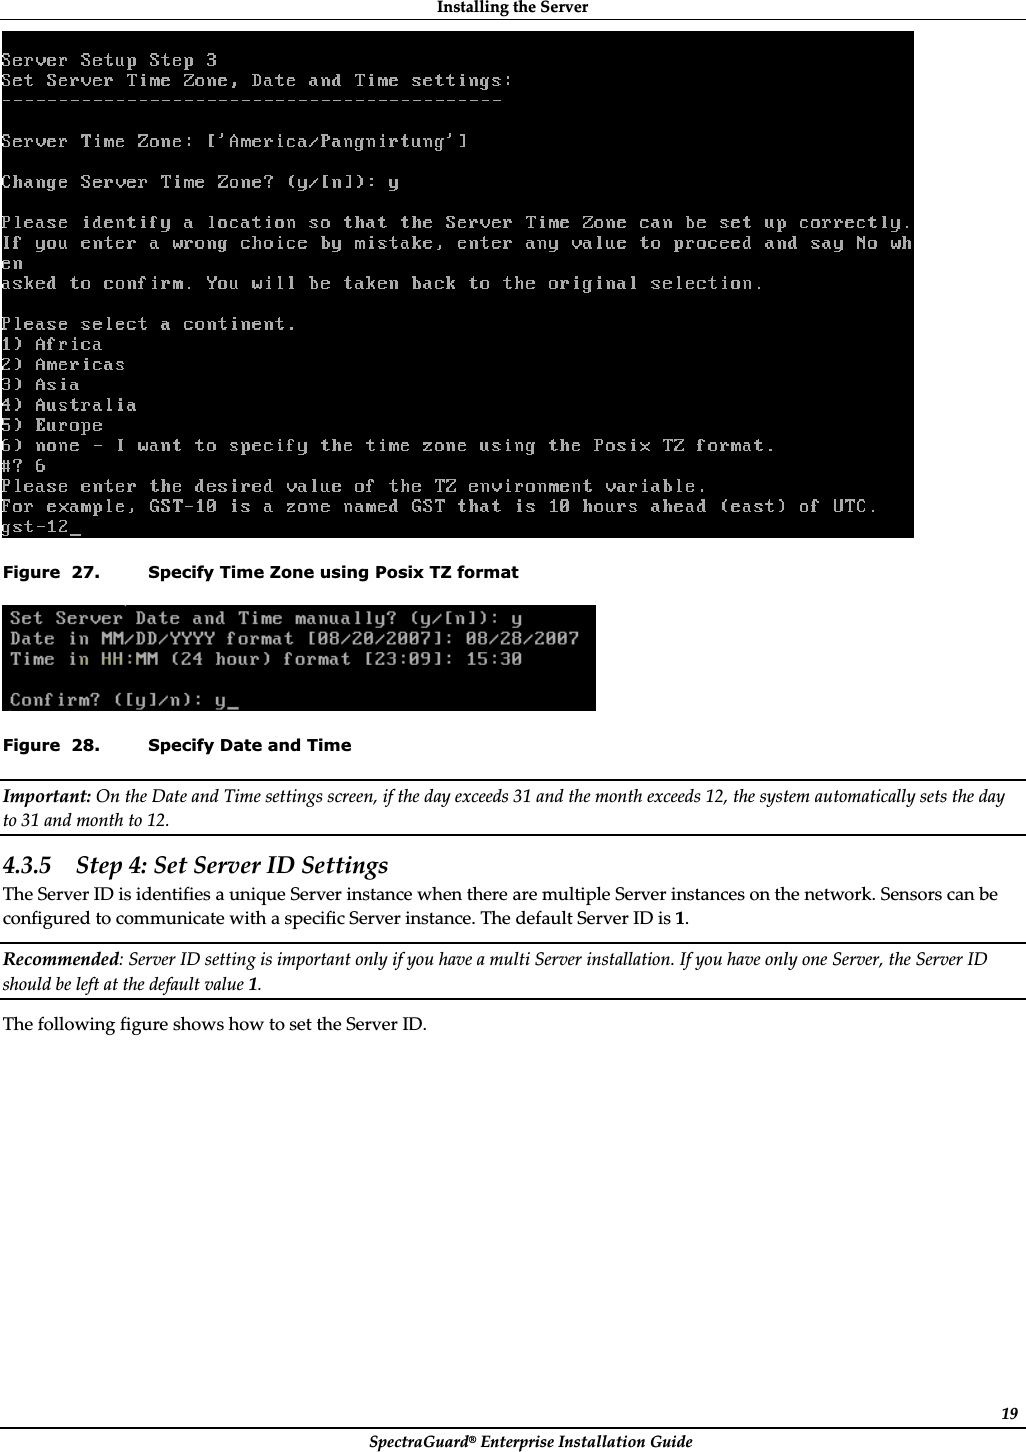
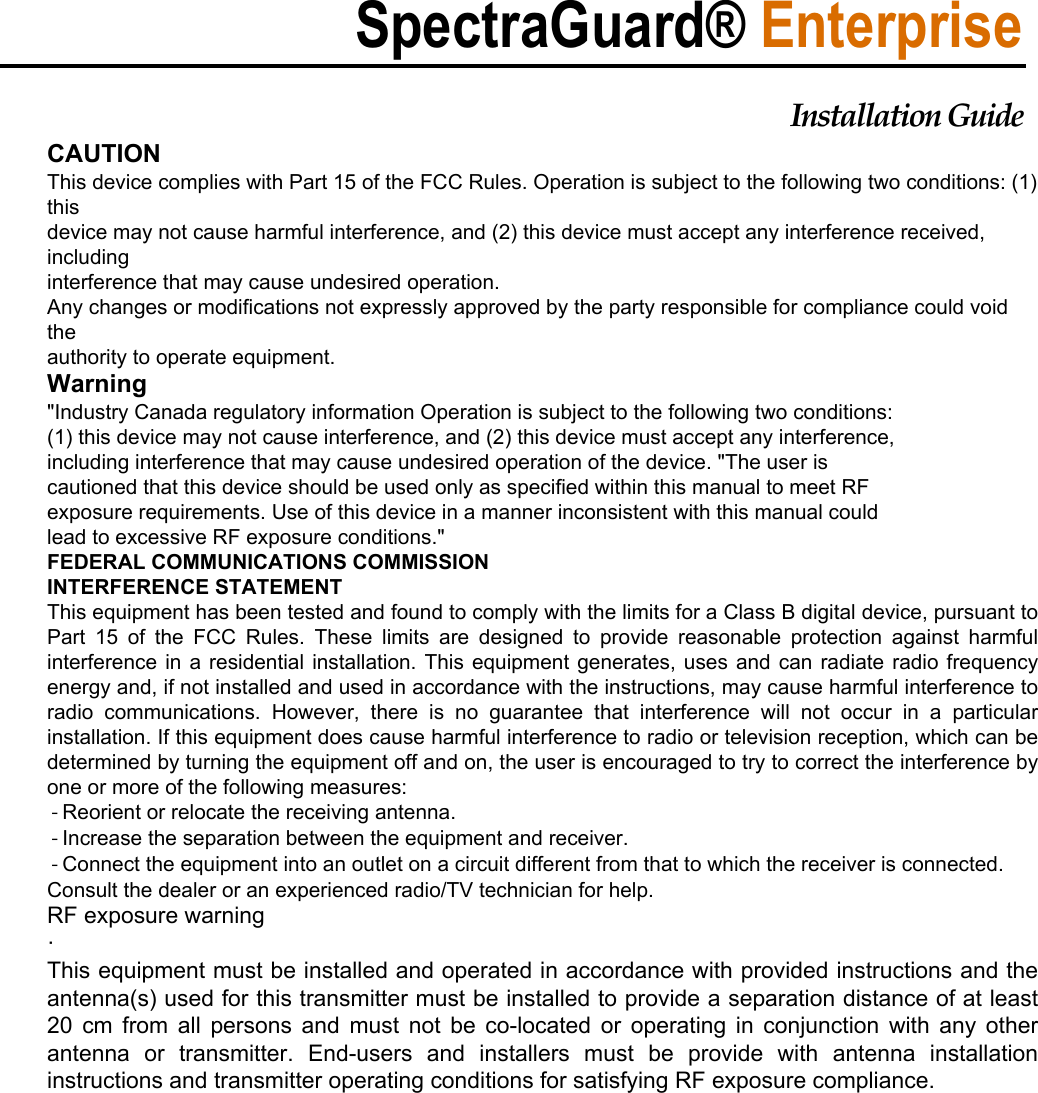
![InstallingȱtheȱServerȱSpectraGuard®ȱEnterpriseȱInstallationȱGuideȱ18ȱȱFigure 25. Select Time Zone Region ȱFigure 26. Specify IP Address of NTP Server for Synchronization YouȱcanȱalsoȱspecifyȱtheȱtimeȱzoneȱusingȱtheȱPosixȱTZȱ1formatȱasȱshownȱinȱtheȱfollowingȱfigure.ȱȱȱȱȱȱȱȱȱȱȱȱȱȱȱȱȱȱȱȱȱȱȱȱȱȱȱȱȱȱȱȱȱȱȱȱȱȱȱȱȱ ȱȱȱȱȱȱȱȱȱȱȱȱȱȱȱȱȱȱȱȱȱȱȱȱȱ1ȱInȱPosixȱTZȱsystems,ȱaȱuserȱcanȱspecifyȱtheȱtimeȱzoneȱbyȱmeansȱofȱtheȱTZȱenvironmentȱvariable.ȱTheȱformatȱusedȱwhenȱthereȱisȱnoȱDaylightȱSavingȱTimeȱ(orȱsummerȱtime)ȱinȱtheȱlocalȱtimeȱzoneȱisȱstdȱoffset,ȱwhereȱ‘std’ȱspecifiesȱtheȱnameȱofȱtheȱtimeȱzoneȱandȱ‘offset’ȱspecifiesȱtheȱtimeȱvalueȱoneȱmustȱaddȱtoȱtheȱlocalȱtimeȱtoȱgetȱaȱCoordinatedȱUniversalȱTimeȱvalue.ȱItȱhasȱaȱsyntaxȱ[+ȱ|Ȭ]ȱhhȱ[:ȱmmȱ[:ȱss]].ȱThisȱisȱpositiveȱifȱtheȱlocalȱtimeȱzoneȱisȱwestȱofȱtheȱPrimeȱMeridianȱandȱnegativeȱifȱitȱisȱeast.ȱTheȱhourȱmustȱbeȱbetweenȱ0ȱandȱ24,ȱandȱtheȱminuteȱandȱsecondsȱbetweenȱ0ȱandȱ59.ȱ](https://usermanual.wiki/Arista-Networks/SS300ATC50/User-Guide-1353364-Page-35.png)