Arris SBX 1000P User Manual 1000P: Quick Start Guide SURFboard GSQ
User Manual: Arris SBX-1000P SBX-1000P: Quick Start Guide
Open the PDF directly: View PDF ![]() .
.
Page Count: 32

Wired Extender with
QUICK START GUIDE
2
What’s in the Box
A

3
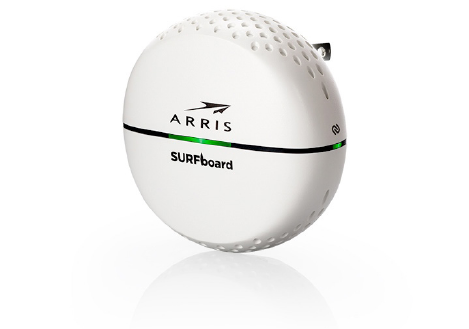
A: SBX‑1000P Wired Extender
B: Ethernet Cable
C: Quick Start Guide
B
C
Wi‑Fi Extender with
QUICK START GUIDE
4
The SBX‑1000P is a RipCurrent Wired Extender that
can be added to an existing RipCurrent network to
connect to additional Ethernet devices or ‑‑ with the
RipCurrent Wi‑Fi Extender (sold separately) ‑‑ create
a RipCurrent network to connect to your existing
network equipment.
Compatible ARRIS products include the
SBR‑AC3200P, SBR ‑AC1900P, or SBR‑AC1200P
Wi‑Fi Routers, the SBX‑AC1200P Wi‑Fi Extender, or
another SBX‑1000P.
5
For Internet connections, you must have a cable,
DSL, or satellite Internet Service Provider (ISP)
service connection to the Internet.
For a video guide to seing up your extender, visit
youtu.be/ARfv2aUypLI.
6
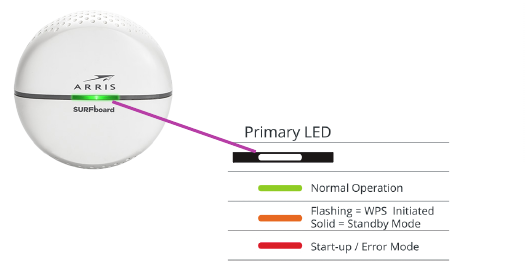
Front Panel Primary LED
7
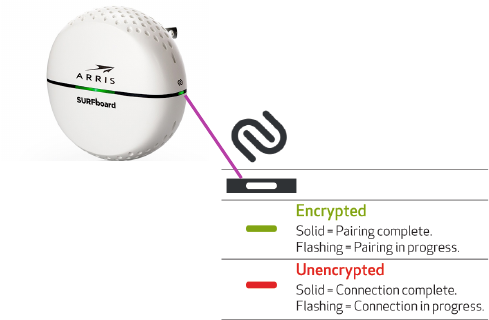
Side Panel LED Status Indicator

8
Introduction
Create a RipCurrent Network 10
Add RipCurrent Extenders to an Existing 20
RipCurrent Network
Troubleshooting 26
1
3
2

10
Create a
Network
1

11

12
This section describes how to set up a new RipCurrent
network. If you already have a RipCurrent product,
go to Add RipCurrent Extenders to an Existing
RipCurrent Network on page 20.
To create a RipCurrent network so that you can connect
to your existing network equipment, you must have
an SBX‑AC1200P RipCurrent Wi‑Fi Extender (sold
separately) in addition to this SBX‑1000P RipCurrent
Wired Extender.
A

13
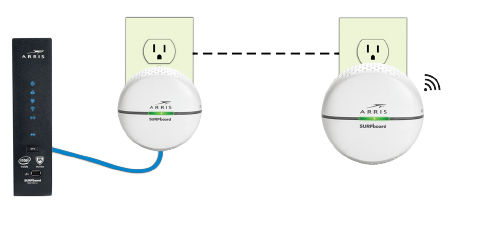
Plug the SBX‑1000P Wired Extender into an AC Outlet
near your main router.
Aach an Ethernet cable between the Wired Extender
and one of the Ethernet ports on the router.
Plug the SBX‑AC1200P Wi‑Fi Extender into an
AC outlet near your main router.
The RipCurrent network connects
automatically in non‑encrypted mode
(indicated by a red status LED on the
side of your Extender).
14
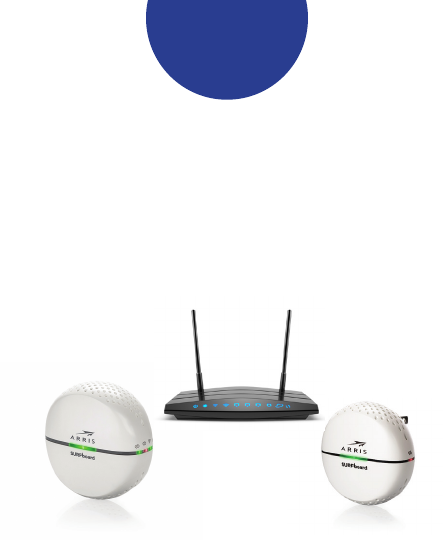
SBX‑1000P
Wired Extender
SBX‑AC1200P
Wi‑Fi Extender
AC wiring
in the home
Plug the SBX‑AC1200P Wi‑Fi Extender into an AC
outlet near your main router. The RipCurrent network
connects automatically in non‑encrypted mode
(indicated by a red status LED on the side of your
Extender).

15
Check the RipCurrent Link Quality LED on the side of
your SBX‑AC1200P Wi‑Fi Extender to determine the
signal strength.
Red = Fair signal
Amber = Good signal
Green = Excellent signal
If the LED is red or amber, consider adjusting the
location to find a beer signal.
Once you’re satisfied with the connection quality,
you can begin installing the next extender, if you have
more than one to install.
B
16
Change the RipCurrent Network Extenders to match
your current Wi‑Fi network name and password by
using an Ethernet cable to connect the port on the
SBX‑AC1200P to a laptop computer.
C

17
Access the Web Manager of the SBX‑AC1200P.
Set up a static IP address on your connected device.
Refer to the SBX‑AC1200P User Guide or the user
guide for your device for more details.
Use 192.168.100.253 for the static IP address.
Open a browser and navigate to
hp://192.168.100.254
Log into the Web Manager
Log in = admin
Password = password
D
18
Use the Quick Start Wizard to set up your Wi‑Fi
network name and passkey, as well as to change
your Web Manager log in credentials (highly
recommended).
To encrypt your RipCurrent network and adjust other
advanced seings, see the SBX‑1000P User Guide at
the ARRIS Support website,
www.SURFboard.com/Support/SBX-1000P.
19

20
Add
Extenders to an
Existing
Network
(sold separately)
2

21

22
This section describes how to add RipCurrent
Extenders to an existing RipCurrent network. If you
need to create a new RipCurrent network, go to Create
a RipCurrent Network on page 10.
A
Plug in your RipCurrent Extender, into an AC outlet
close to the RipCurrent Wi‑Fi Router. The RipCurrent
network will connect automatically in a
non‑encrypted mode, indicated by a red
status LED (located on the back of your
Router or the side of your Extender).

23
Use the SBX‑1000P Wired Extender anywhere you
need to connect an Ethernet device such as a TV or
gaming console to the network.
Relocate the Extender to the room where you want to
connect an Ethernet device.
B

24
Check your RipCurrent signal strength. Rear panel
LEDs on the Router and on RipCurrent Extenders will
indicate the signal strength.
Red = Fair signal
Amber = Good signal
Green = Excellent signal
C
If the LED is red or amber, consider adjusting the
location to find a beer signal.
Once you’re satisfied with the connection quality,
you can begin installing the next extender, if you have
more than one to install.
25

26
Troubleshooting
3

27

28
No Internet Connection

29
Check the status of your Internet modem and the
connecting Ethernet cable.
30

31
© 2017 ARRIS Enterprises LLC. All Rights Reserved.
No part of this publication may be reproduced in any form or by any
means or used to make any derivative work (such as translation,
transformation, or adaptation) without wrien permission from ARRIS
Enterprises LLC. (“ARRIS”). ARRIS reserves the right to revise this
publication and to make changes in content from time to time without
obligation on the part of ARRIS to provide notification of such revision
or change.
ARRIS and the ARRIS logo are all trademarks of ARRIS Enterprises
LLC. Other trademarks and trade names may be used in this document
to refer to either the entities claiming the marks or the names of their
products. ARRIS disclaims proprietary interest in the marks and names
of others.
Apple and the Apple logo are trademarks of Apple Inc., registered in
the U.S. and other countries. App Store is a service mark of Apple Inc.
Android, Google Play and the Google Play logo are trademarks
of Google Inc.
32
For additional assistance with your
SURFboard Extender, ARRIS is here to help.
Visit www.arris.com/selelp for self help, FAQs,
product manuals, and live chat with support staff.
Send us an e‑mail via our consumer web site or give a
call to 1-877-466-8646.
ARSVD01752-B
10/17
