Ascalade Technologies DT19R36 1.9 GHz Cordless DECT Telephone - Base User Manual users manual
Ascalade Technologies, Inc. 1.9 GHz Cordless DECT Telephone - Base users manual
UserManual.wiki
>
Ascalade Technologies
>
DT19R36 User Manual
users manual
Navigation menu
Upload a User Manual
Namespaces
Wiki Guide
HTML
PDF
Info
Views
User Manual
Discussion / Help
Navigation


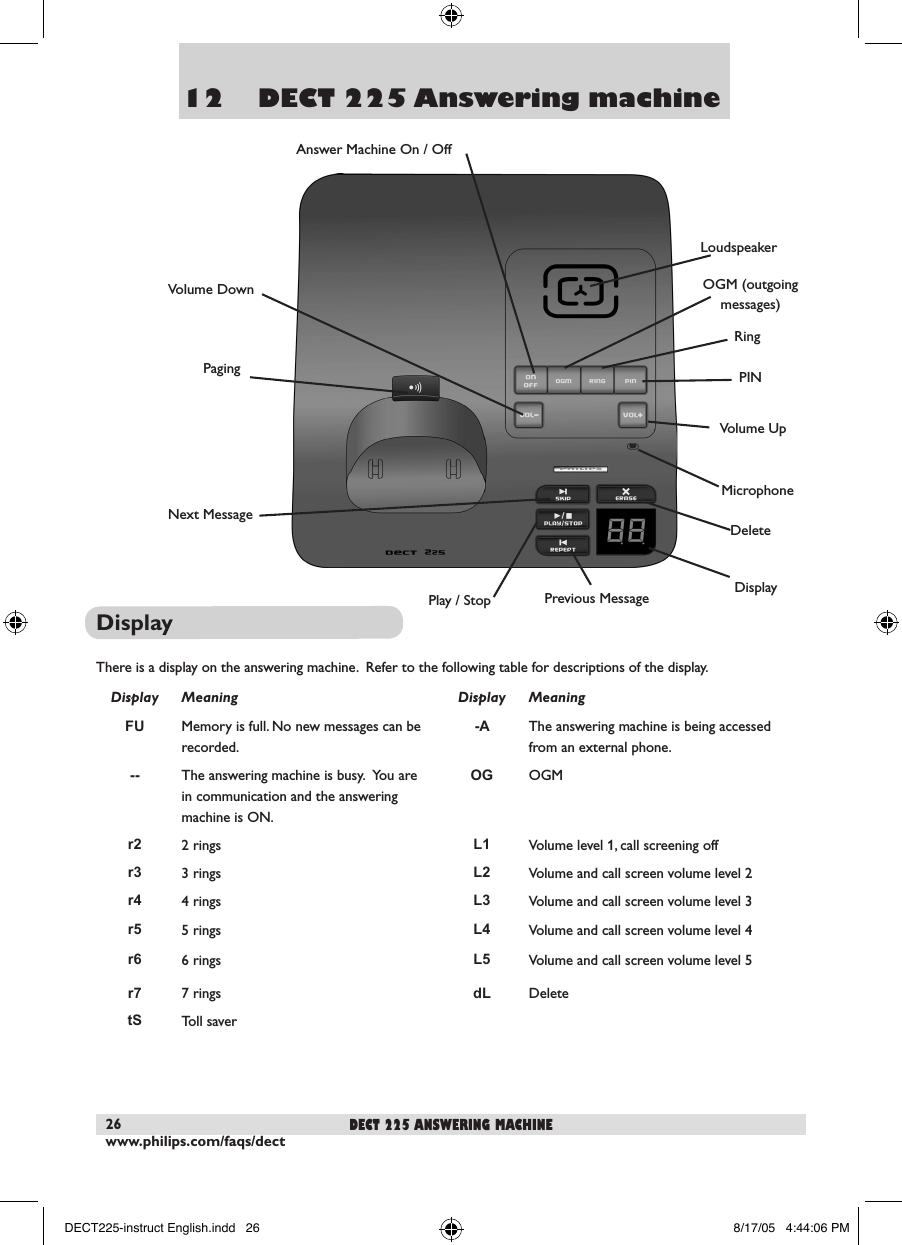
![www.philips.com/faqs/dect27Note: Turning the answering machine on/off does not affect the functionality of the normal phone operations, such as making outgoing calls or receiving incoming calls.Turning the answering machine on/offTo turn the answering machine on/off,1. Press the ON / OFF key during standby mode. The display will be on when the answering machine is turned on.When the answering machine is on, it will answer the call after a certain number of rings depending on the rings setting (See section of Ring Delay Page 29). After answering the call, the answering machine will play the outgoing message (OGM) and record an incoming message (ICM) if any. When the memory is full, no incoming message will be recorded. The answering machine will announce the following outgoing message (OGM) and release the line. “This is an answering machine. Please call back later.”Outgoing messages (OGM)The answering machine announces the OGM when it answers the call. There is a default OGM. You can also record your own OGM.The default OGM reads:“This is an answering machine. Please leave your message after the tone.”When you record your own OGM, it will be used when the answering machine answers the call. If your own OGM is deleted, the default OGM will be restored automatically.Setting the default OGM language*[This section is applicable to models with multi-language option for OGM only.]The language of the default OGM of your answering machine is selected on the handset.1. Press the MENU key.2. Select SETTINGS and press the OK key.3. Select TAM LANG and press the OK key.4. Select the desired language.5. Press the OK key to confirm.dect 225 answering machine Note: The answering machine can only record the incoming message when the memory has enough space. Memory is full when there are already 60 messages recorded or the recorded messages take up all the memory available. FU will be displayed on your base station,DECT225-instruct English.indd 27 8/17/05 4:44:06 PM](https://usermanual.wiki/Ascalade-Technologies/DT19R36/User-Guide-598073-Page-28.png)