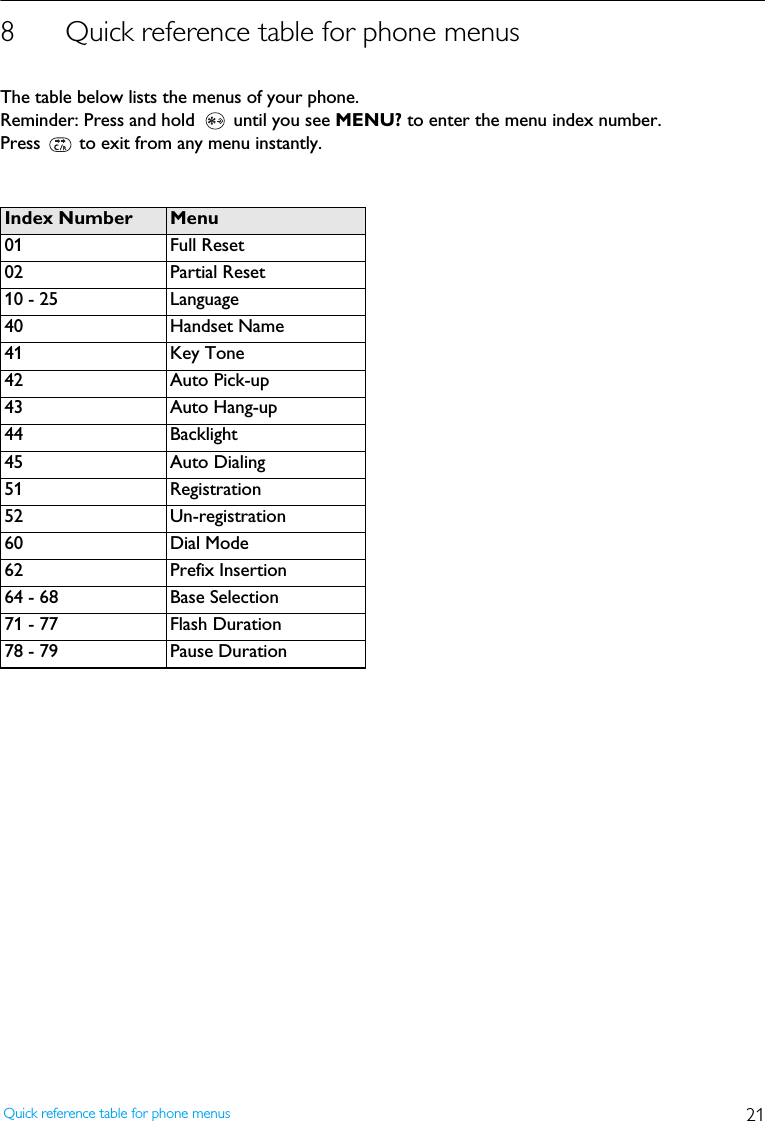
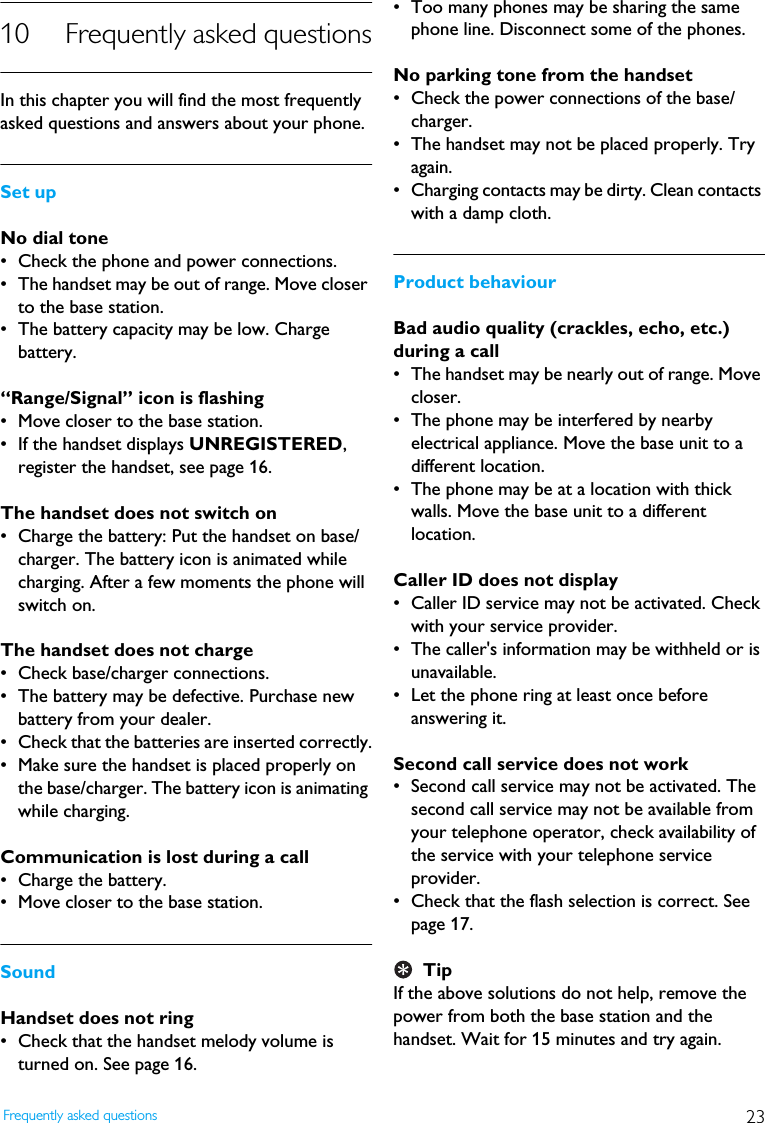
Ascalade Technologies DT19R42H DECT PSTN CORDLESS PHONE - HANDSET User Manual XL340 US EN 3111 285 33711
Ascalade Technologies, Inc. DECT PSTN CORDLESS PHONE - HANDSET XL340 US EN 3111 285 33711
Contents
- 1. USERS MANUAL
- 2. USERS MANUAL 2
- 3. USERS MANUAL 1
USERS MANUAL


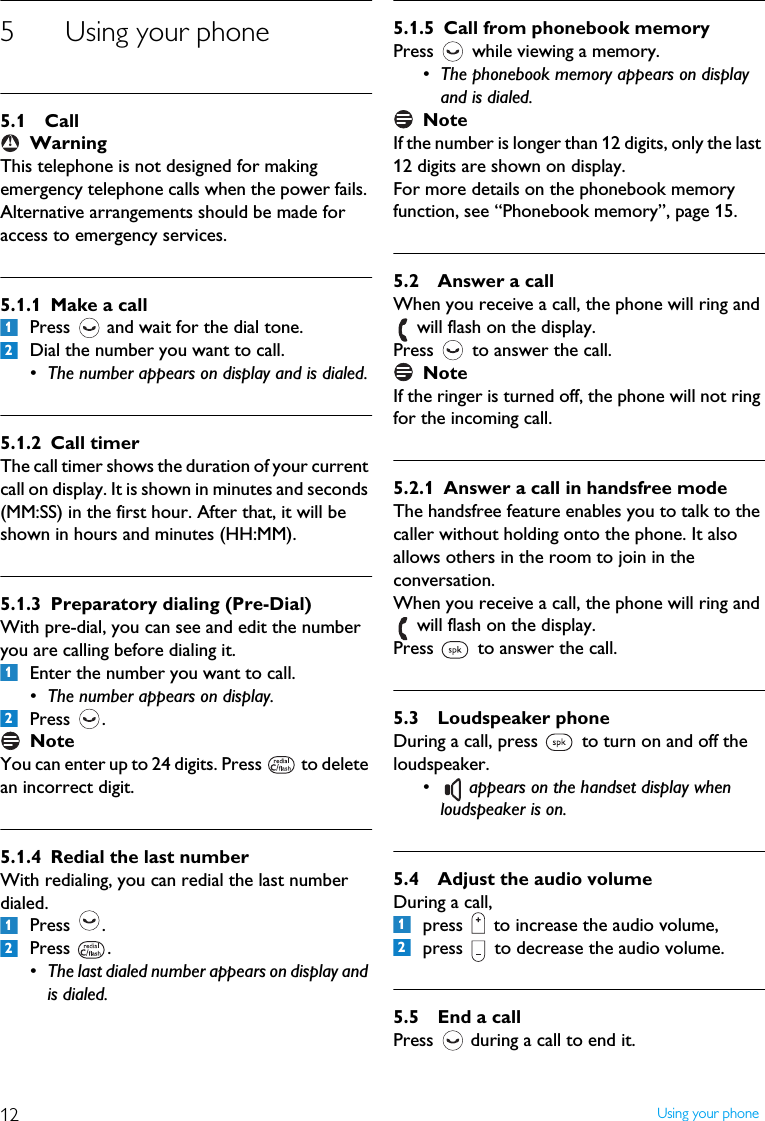
![13Using your phone5.6 Make a second callPress during a call.•R appears and you will hear a dial tone.Enter the number you want to call.After the second call is answered, you can press to toggle between these 2 calls.5.7 Answer a second callDuring a call, if another call comes in, the handset will sound a short beep periodically to notify you. You can answer it without ending the current call.Press when the second call comes in.•R appears on display, the current call will be put on hold, and you are talking with the second caller.Press subsequently to toggle between these 2 calls.5.8 Conference call 5.8.1 Join a conversationDuring a call, another handset can join the conversation by pressing . • A short beep (alert tone) will apply to the original handset to notify the conference call is initiated.5.8.2 Exit from Conference callDuring a conference call, press to exit from the conference call. • The other handset is still connected to the external caller.5.9 Use intercomYou can call someone in the house by using the intercom function.Press and hold .If there are only 2 handsets registered to the base station, the intercom will be made automatically. Otherwise, enter the handset number you want to make the intercom call to.Press to answer the intercom when the phone is ringing.5.10 Text or number entryYou can enter texts and numbers for the phonebook memories and other features.Press corresponding key as many times as necessary to reach the desired character.Press to delete a character.Press and hold to delete all entered characters.Press to switch between uppercase and lowercase.• The characters entered thereafter will be in the alternate case.Example to write "Peter"Press once: PPress once: PPress twice: PePress once: PetPress twice: PetePress three times: Peter1231212Upper case input tableKeys Assigned characters1 [space] 1 , . ! ? : ; ' "2 A B C 2 À Á Â Ä Æ Ç3 D E F 3 È É Ê Ë Œ4 G H I 4 Ì Í Î Ï5J K L 5 [ ]6 M N O 6 Ñ Ò Ó Ö Ø Ω7P Q R S 7 ∆ Θ Λ Ξ Σ8 T U V 8 Ù Ú Û Ü9 W X Y Z 9 Ý Ÿ00 $ € @ _ ( ) < > ~* * # + - / = & %3123123456](https://usermanual.wiki/Ascalade-Technologies/DT19R42H.USERS-MANUAL/User-Guide-753367-Page-14.png)
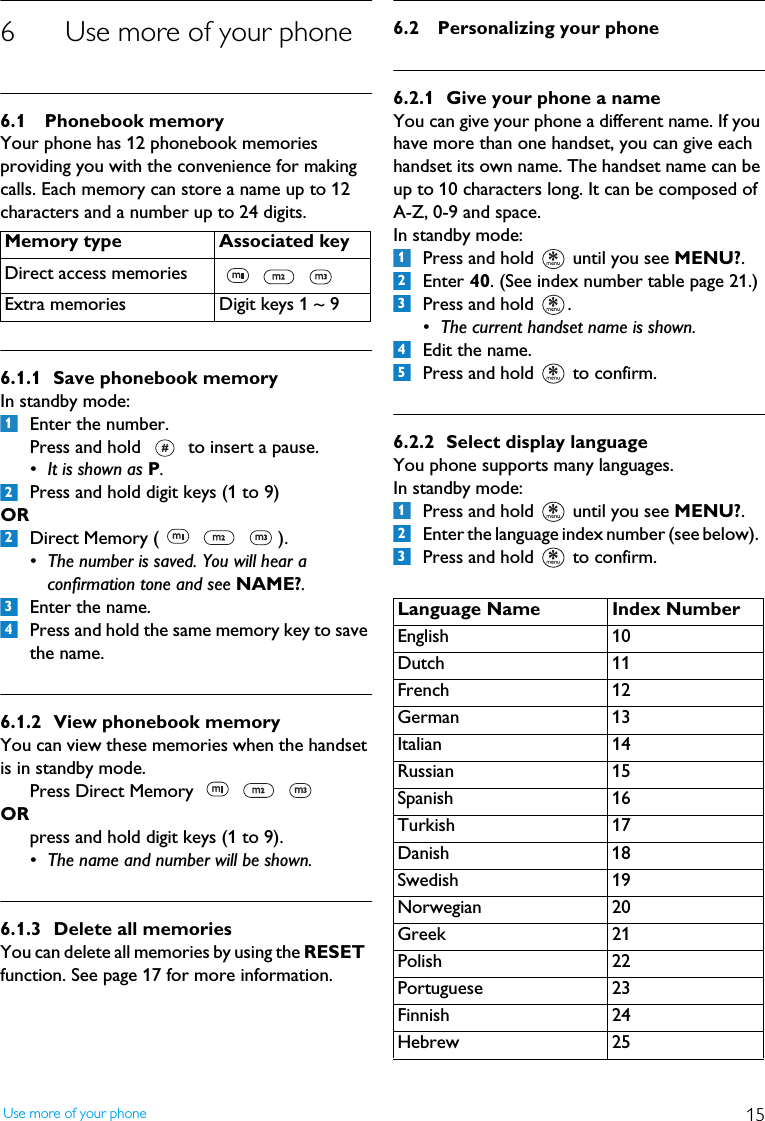
![14 Using your phoneLower case input tableKeys Assigned characters1 [space] 1 , . ! ? : ; ' "2 a b c 2 À Á Â Ä Æ Ç3 d e f 3 È É Ê Ë Œ4 g h i 4 Ì Í Î Ï5j k l 5 [ ]6 m n o 6 Ñ Ò Ó Ö Ø Ω7 p q r s 7 ∆ Θ Λ Ξ Σ8 t u v 8 Ù Ú Û Ü9 w x y z 9 Ý Ÿ00 $ € @ _ ( ) < > ~* * # + - / = & %](https://usermanual.wiki/Ascalade-Technologies/DT19R42H.USERS-MANUAL/User-Guide-753367-Page-15.png)
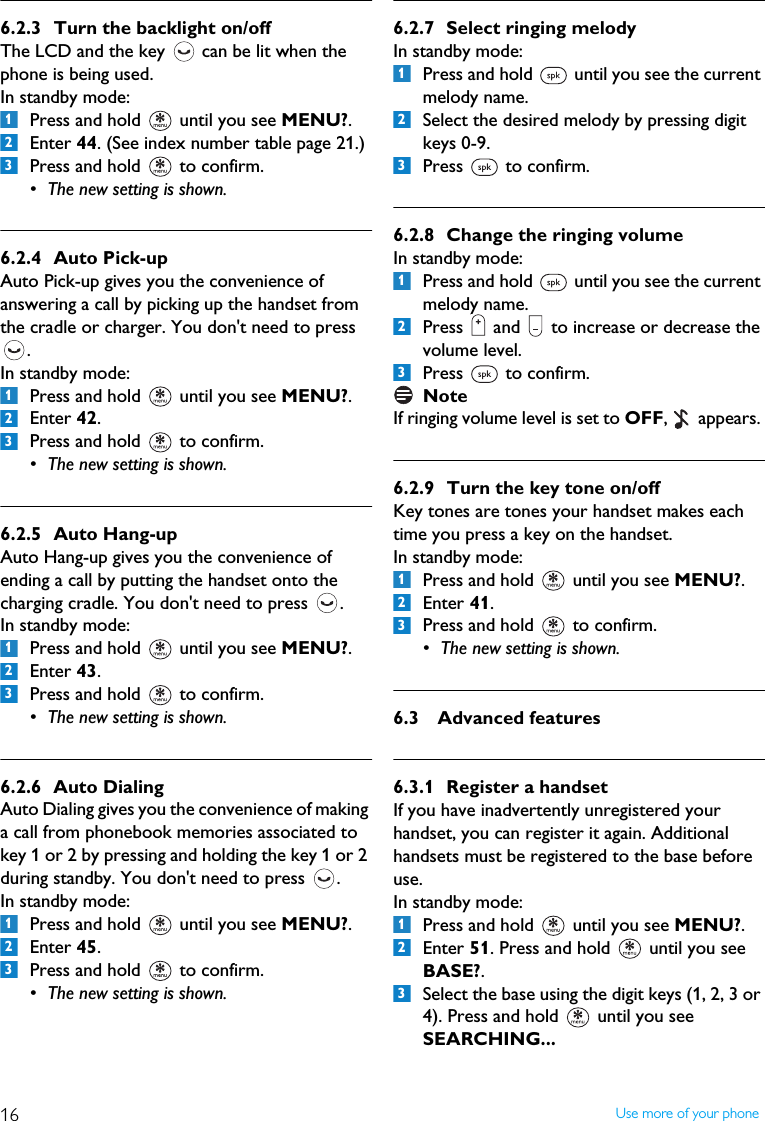
![20 Default settings7 Default settingsThese are the factory pre-programmed settings of your phone.* Country dependent features**These memories will remain unchanged for Reset 02 Functions Settings after ResetDisplay Language* EnglishHandset Name PHILIPSAuto Pick-up OnAuto Hang-up OnBacklight OnDial Mode* ToneKey Tone OnFlash Duration* Flash 2Pause Duration Pause 1Prefix [Empty]Melody Selection RING 1Ring Volume 3 blocksReceiver Volume 3 blocksSpeaker volume 3 blocksMessage Waiting Indication OffBase selection AUTOAuto Dialing* OffLast dialed number [Empty]Phonebook memories** [Empty]](https://usermanual.wiki/Ascalade-Technologies/DT19R42H.USERS-MANUAL/User-Guide-753367-Page-21.png)