Asian Express WB4010T Batwing Performance Stunt Drone User Manual C42 Mini Batwing Manual V1 0 R3
Asian Express Holdings Limited Batwing Performance Stunt Drone C42 Mini Batwing Manual V1 0 R3
Contents
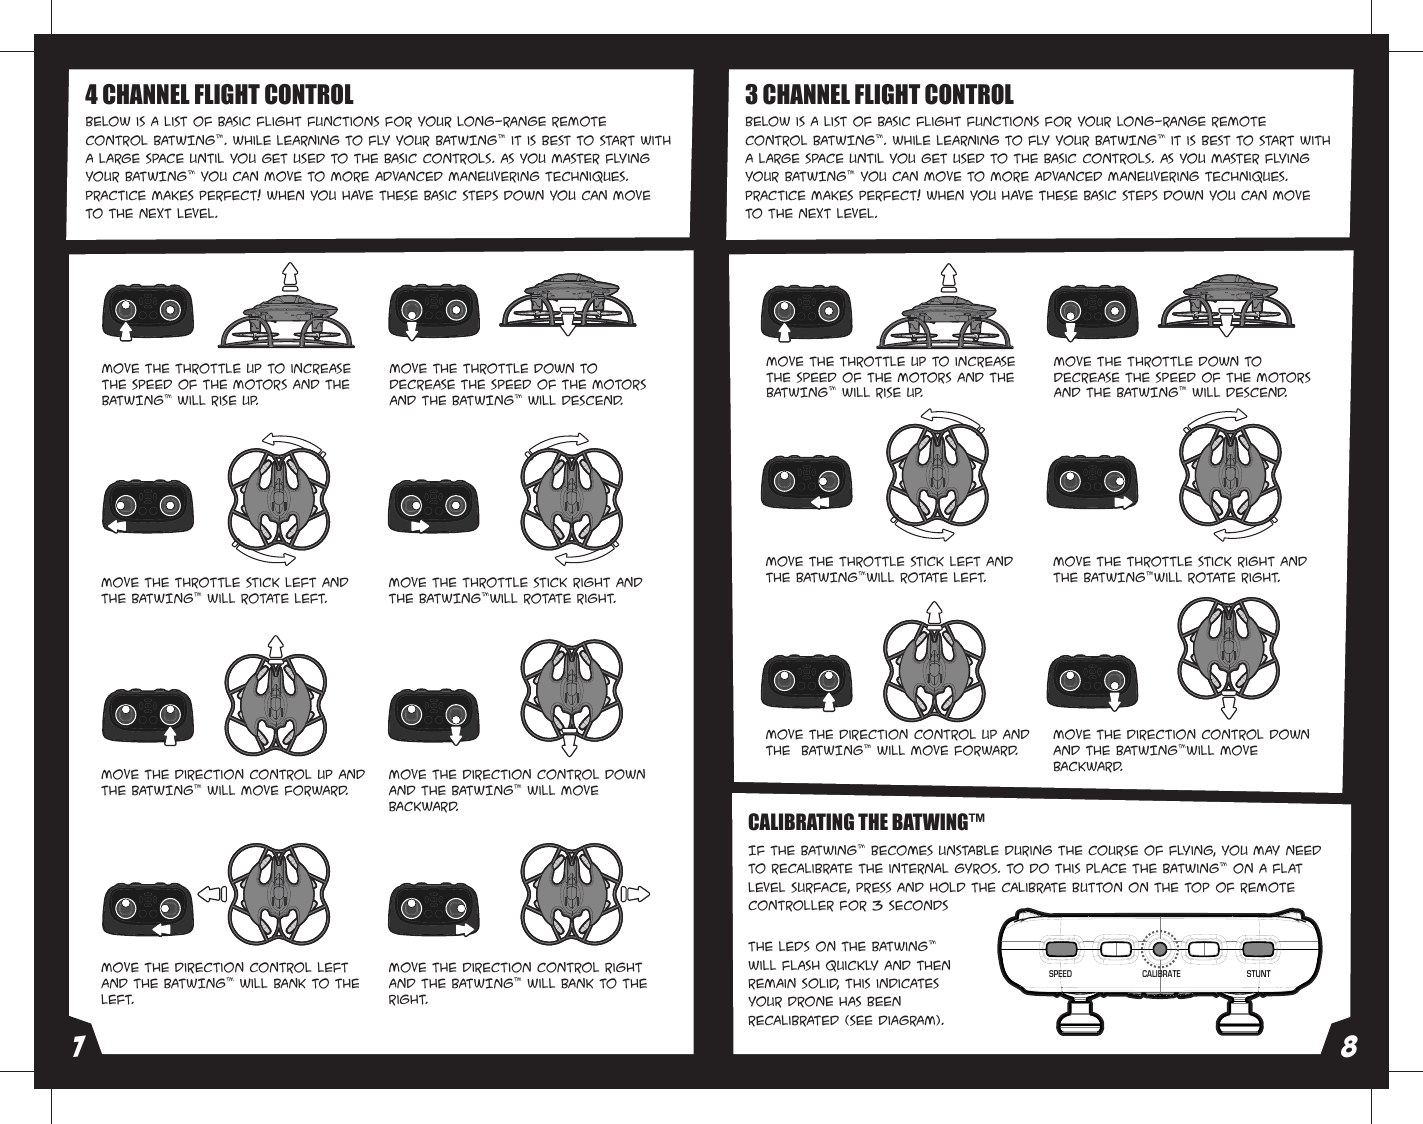
- 1. User manual (1)
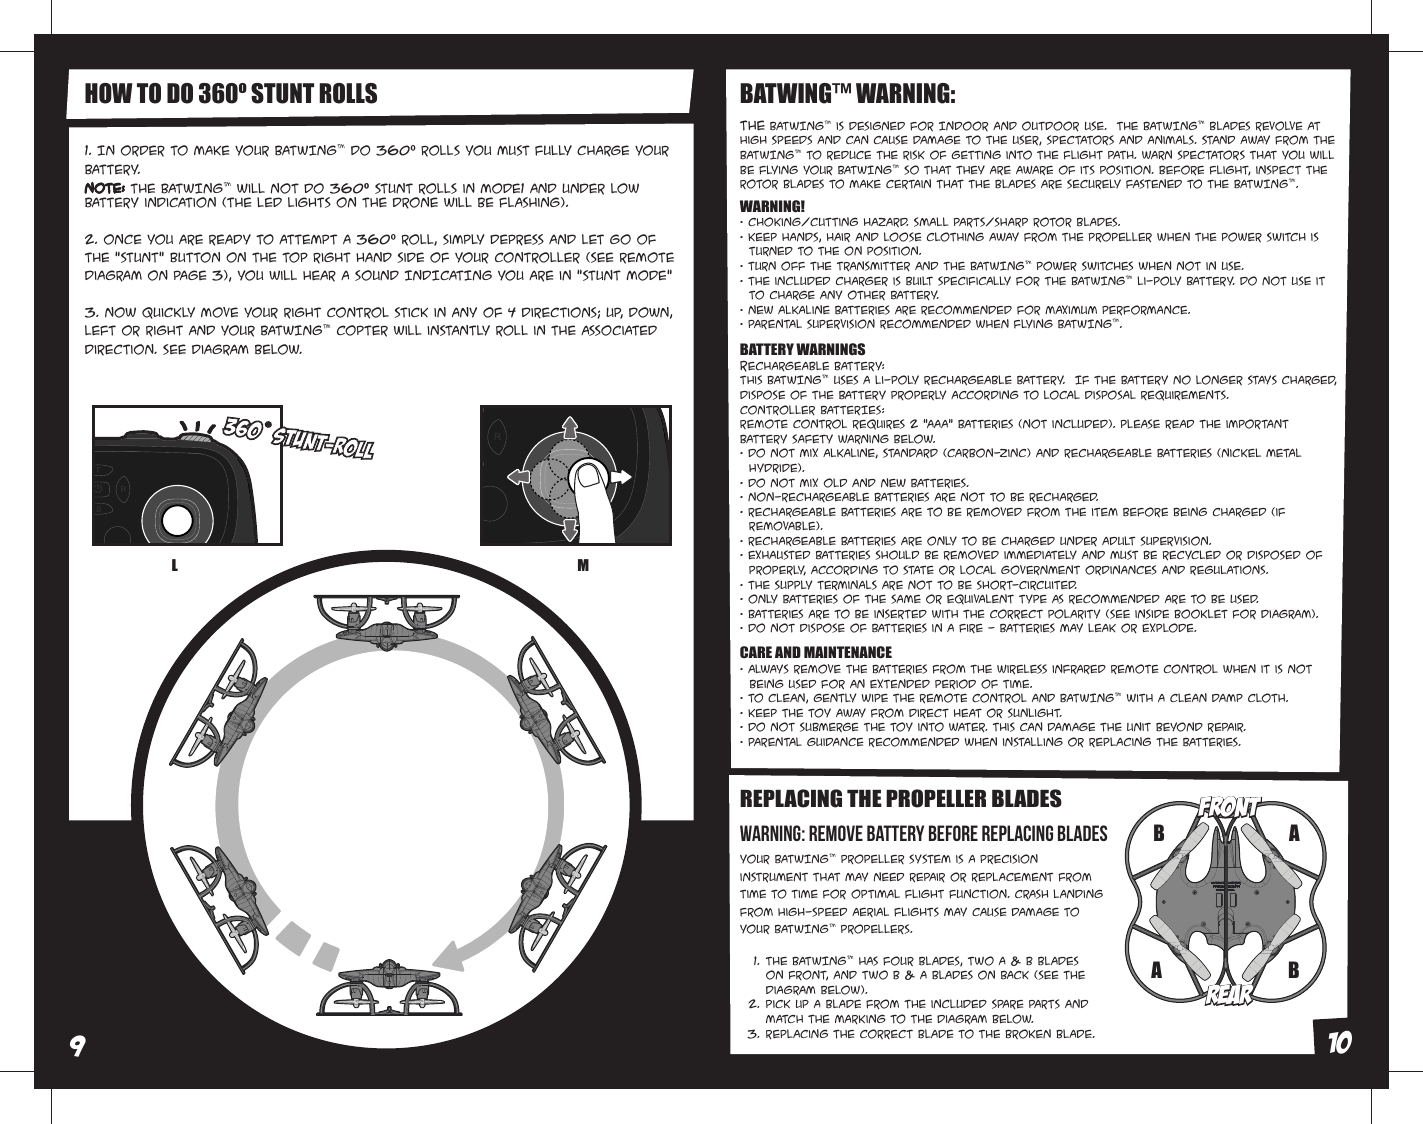
- 2. User manual (2)
User manual (2)