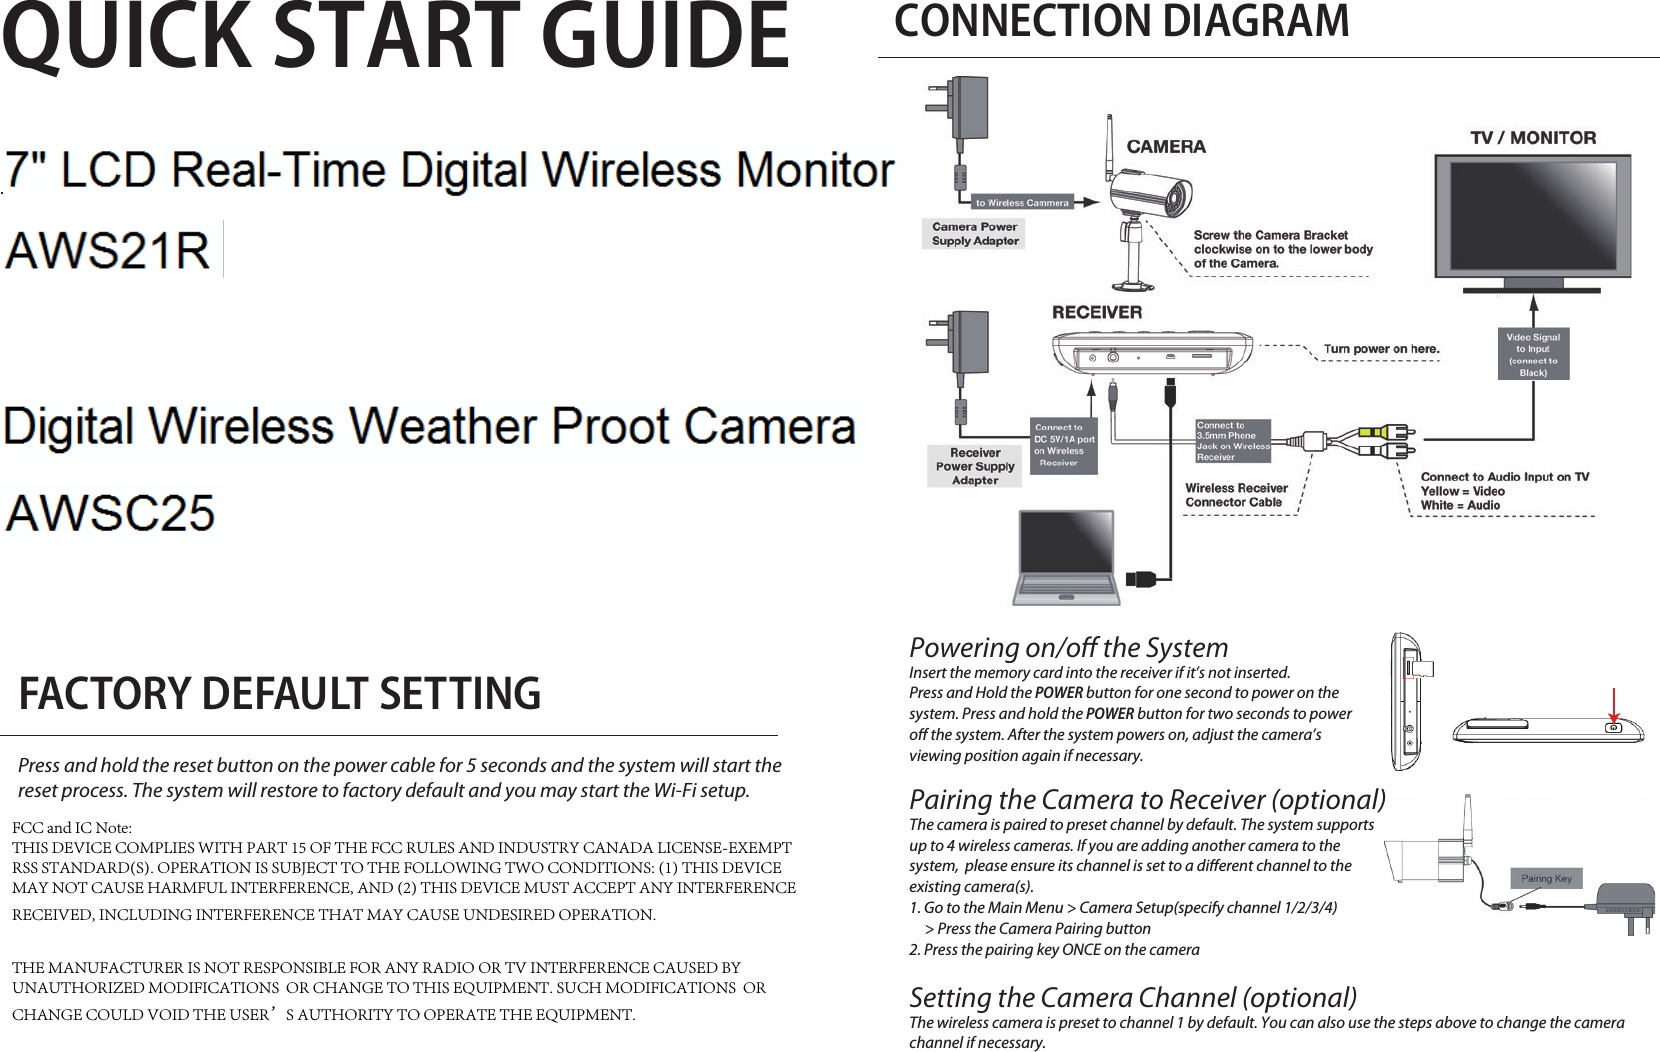
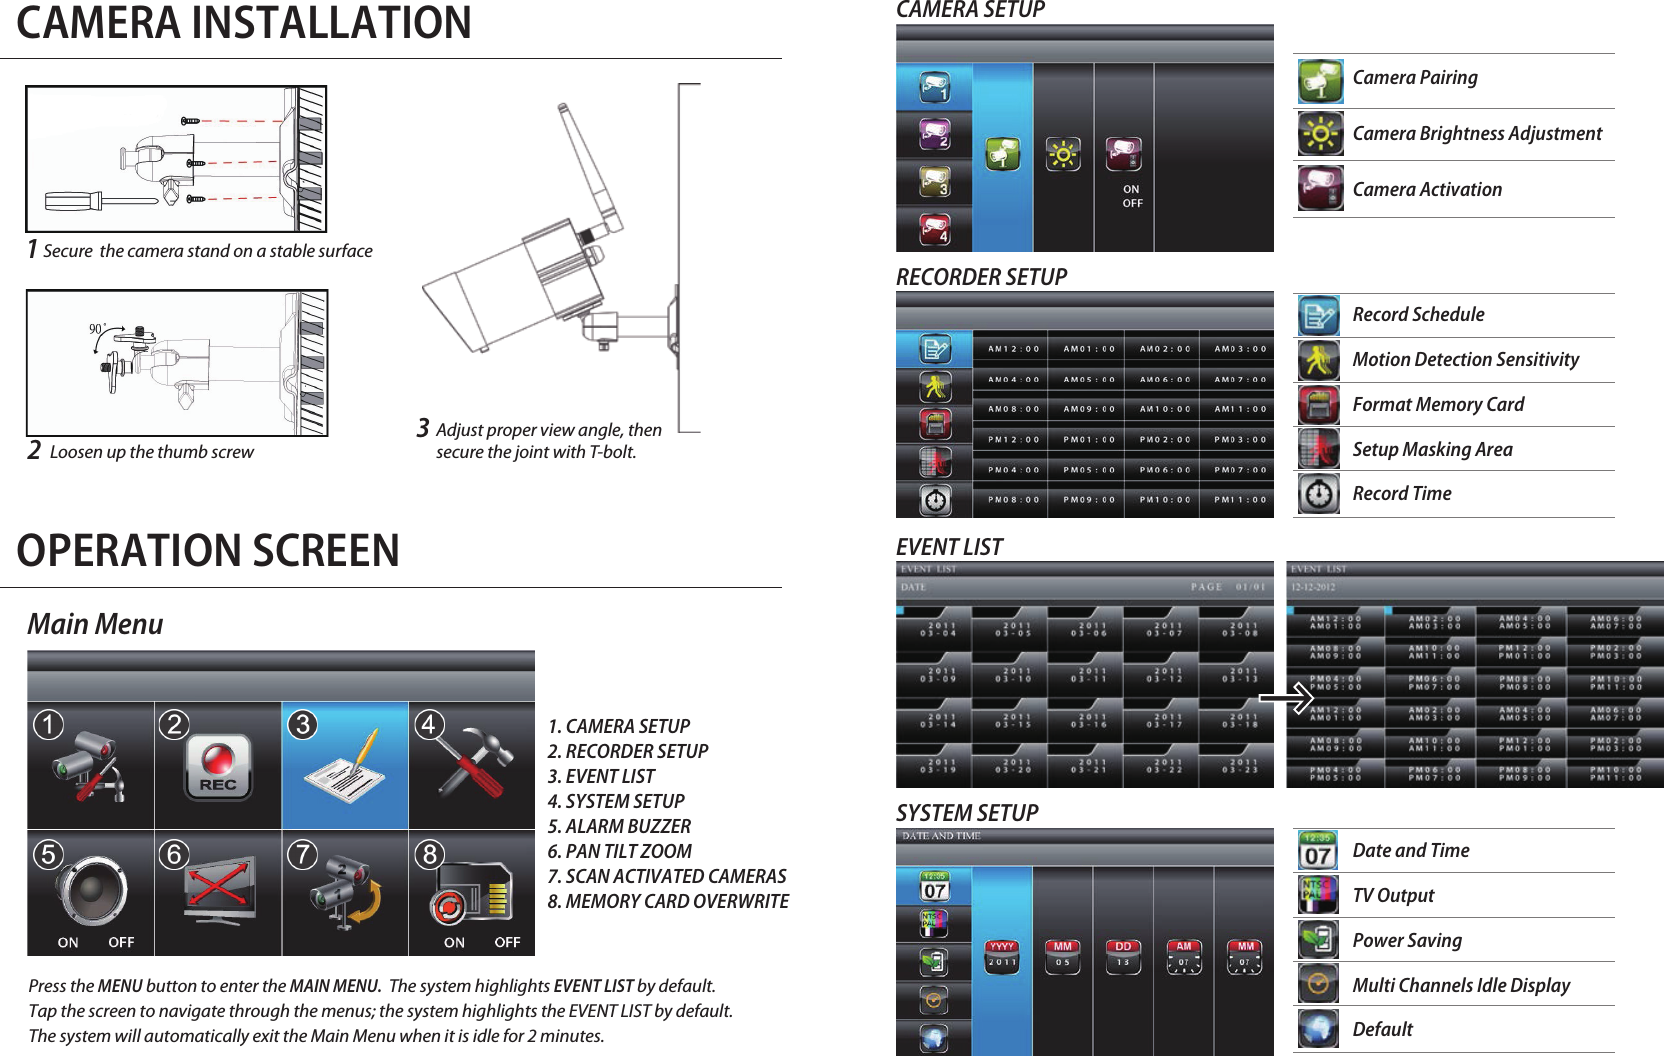
Atoms Labs AWS21R 7 Inch LCD Real-Time Digital Wireless Monitor User Manual QSG DWS S761X 20140603

Atoms Labs LLC 7 Inch LCD Real-Time Digital Wireless Monitor QSG DWS S761X 20140603

User Manual

QUICK START GUIDEKIT CONTENT Digital Wireless Camera Digital Wireless Receiverx 2 x 1Camera Antennax 2 x2Camera Standx 3Power AdapterPress and hold the reset button on the power cable for 5 seconds and the system will start the reset process. The system will restore to factory default and you may start the Wi-Fi setup.FACTORY DEFAULT SETTINGCONNECTION DIAGRAMUSB Cabelx 1Screw Pack x 1AV Cablex 1Powering on/o the SystemInsert the memory card into the receiver if it’s not inserted. Press and Hold the POWER button for one second to power on the system. Press and hold the POWER button for two seconds to power o the system. After the system powers on, adjust the camera’s viewing position again if necessary.Pairing the Camera to Receiver (optional)The camera is paired to preset channel by default. The system supports up to 4 wireless cameras. If you are adding another camera to the system,  please ensure its channel is set to a dierent channel to the existing camera(s).1. Go to the Main Menu > Camera Setup(specify channel 1/2/3/4)      > Press the Camera Pairing button2. Press the pairing key ONCE on the cameraSetting the Camera Channel (optional)The wireless camera is preset to channel 1 by default. You can also use the steps above to change the camera channel if necessary.Quick Start Guidex 1FCC and IC Note:THIS DEVICE COMPLIES WITH PART 15 OF THE FCC RULES AND INDUSTRY CANADA LICENSE-EXEMPT RSS STANDARD(S). OPERATION IS SUBJECT TO THE FOLLOWING TWO CONDITIONS: (1) THIS DEVICE MAY NOT CAUSE HARMFUL INTERFERENCE, AND (2) THIS DEVICE MUST ACCEPT ANY INTERFERENCE RECEIVED, INCLUDING INTERFERENCE THAT MAY CAUSE UNDESIRED OPERATION.THE MANUFACTURER IS NOT RESPONSIBLE FOR ANY RADIO OR TV INTERFERENCE CAUSED BY UNAUTHORIZED MODIFICATIONS  OR CHANGE TO THIS EQUIPMENT. SUCH MODIFICATIONS  OR CHANGE COULD VOID THE USER’S AUTHORITY TO OPERATE THE EQUIPMENT.
CAMERA INSTALLATION OPERATION SCREENMain MenuLoosen up the thumb screw2Adjust proper view angle, then secure the joint with T-bolt.3RECORDER SETUPCamera PairingCamera Brightness AdjustmentCamera Activation Record Schedule Motion Detection Sensitivity Format Memory CardSetup Masking Area Record Time Date and Time TV Output  Power SavingMulti Channels Idle Display Default 1. CAMERA SETUP 2. RECORDER SETUP 3. EVENT LIST 4. SYSTEM SETUP5. ALARM BUZZER6. PAN TILT ZOOM7. SCAN ACTIVATED CAMERAS8. MEMORY CARD OVERWRITECAMERA SETUPEVENT LIST SYSTEM SETUPPress the MENU button to enter the MAIN MENU.  The system highlights EVENT LIST by default.Tap the screen to navigate through the menus; the system highlights the EVENT LIST by default.The system will automatically exit the Main Menu when it is idle for 2 minutes.Secure  the camera stand on a stable surface 1

Navigation menu