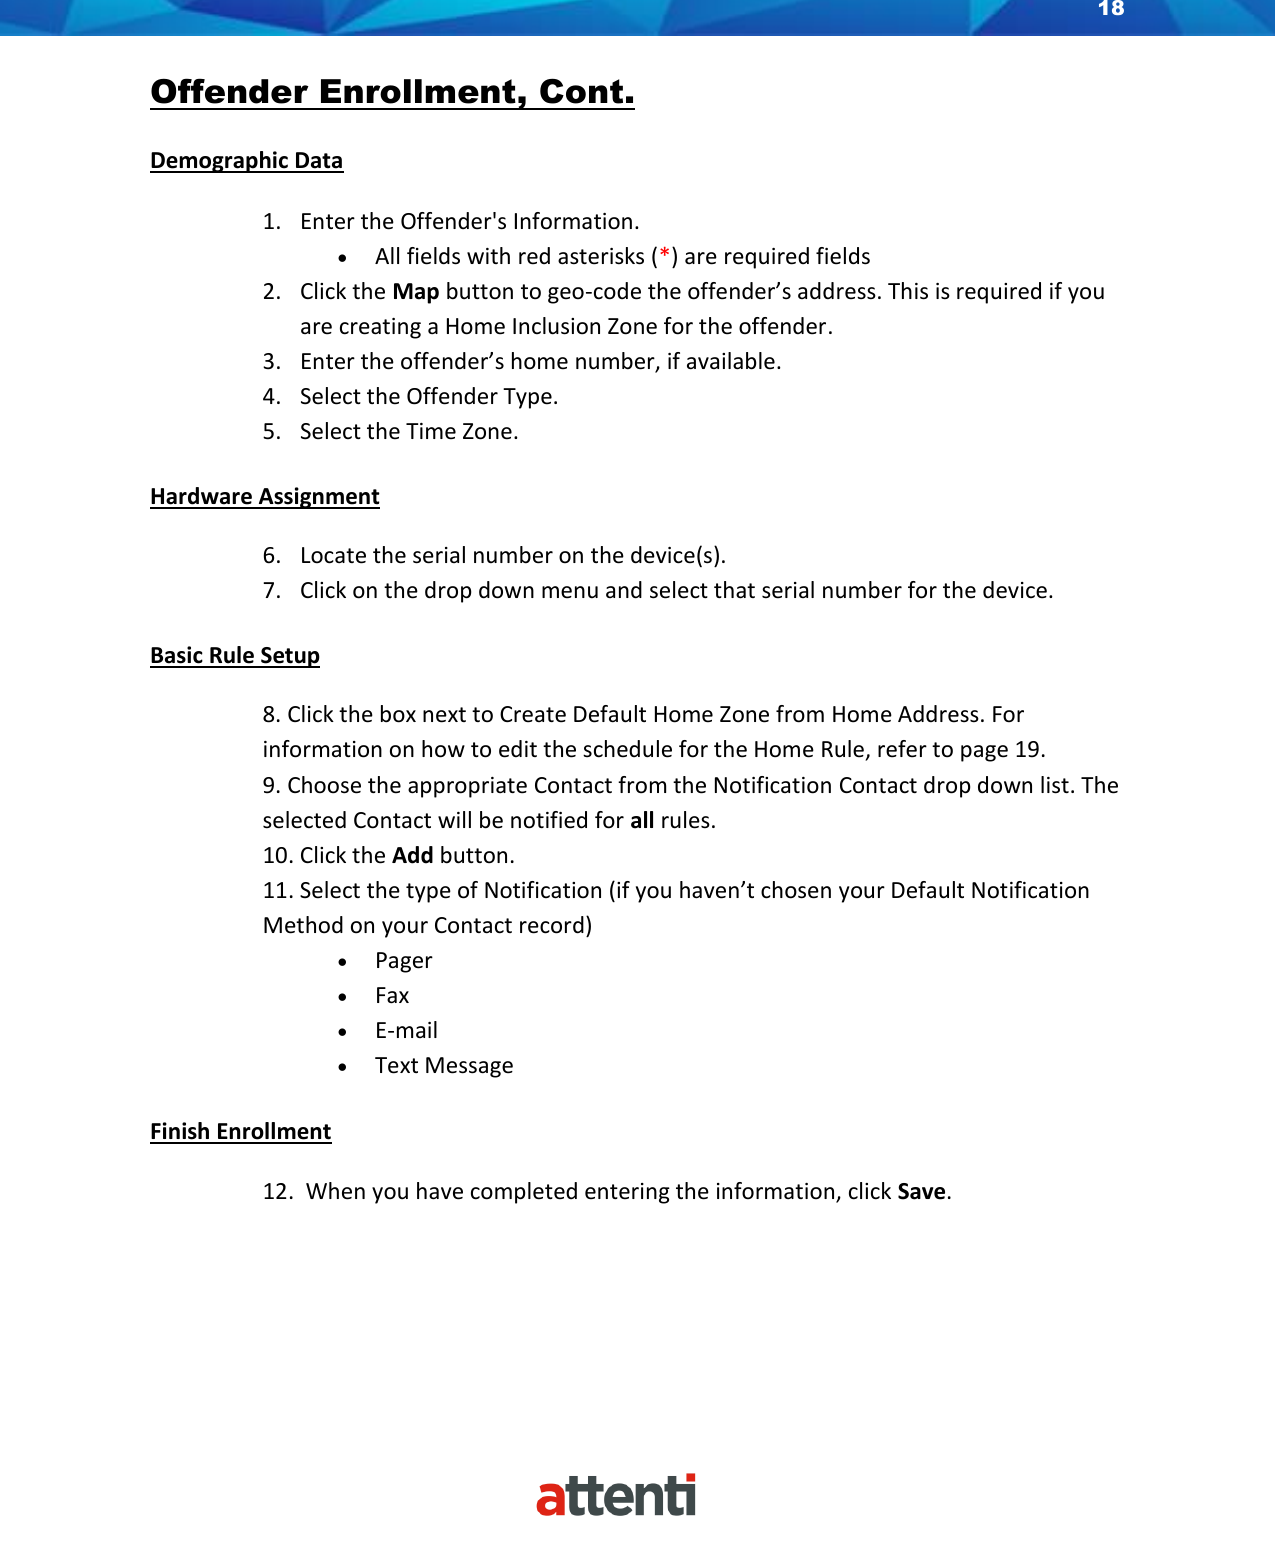
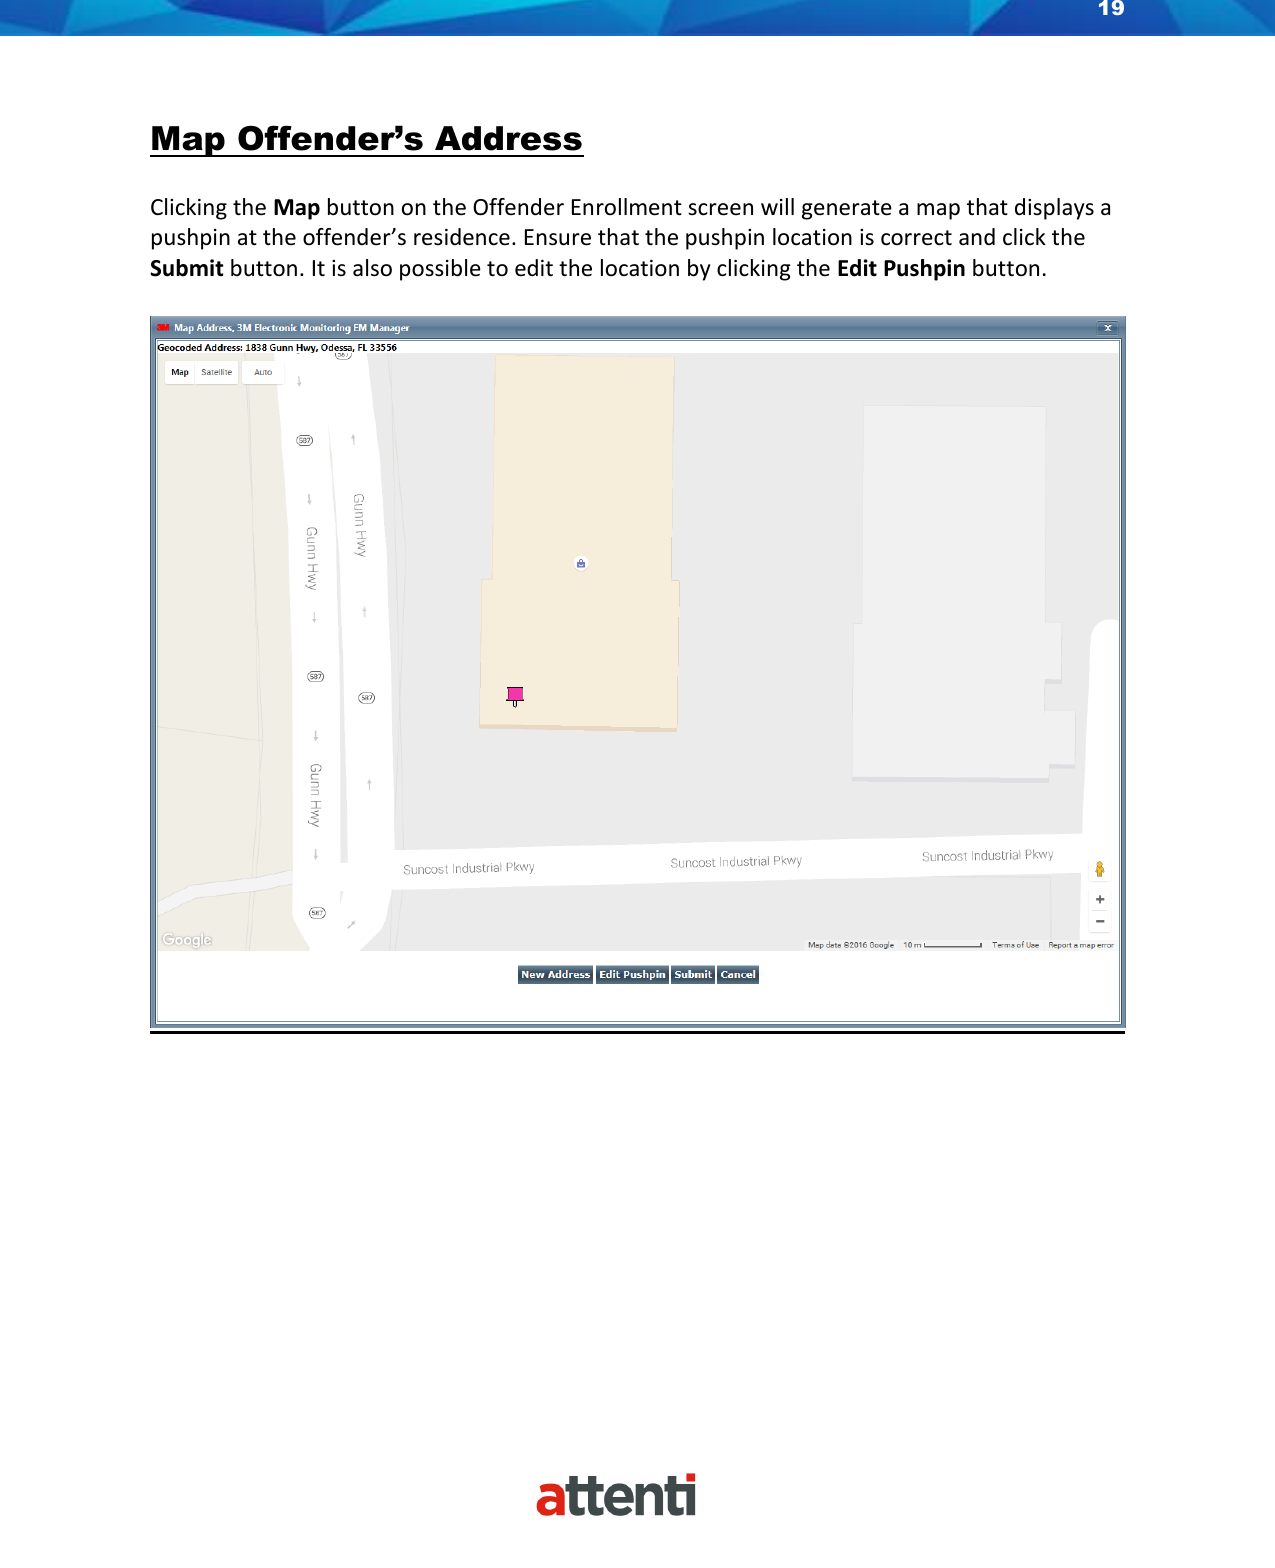
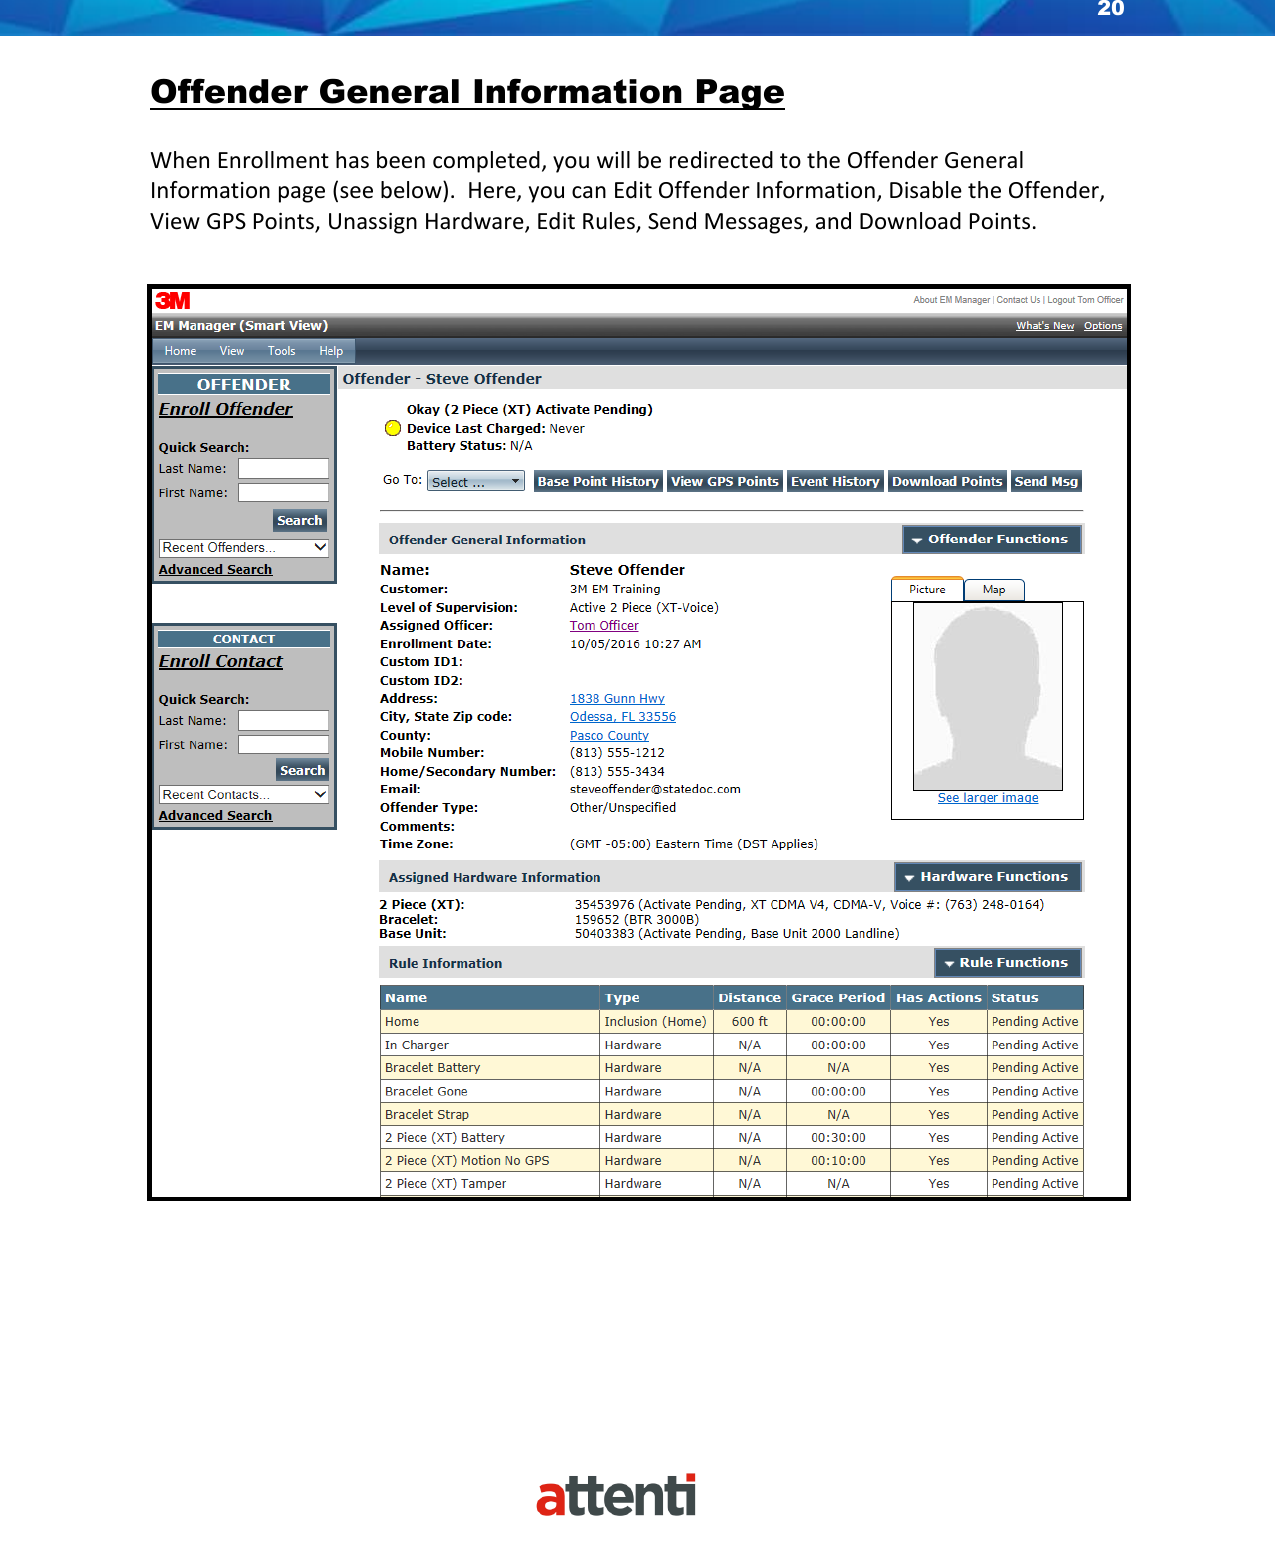
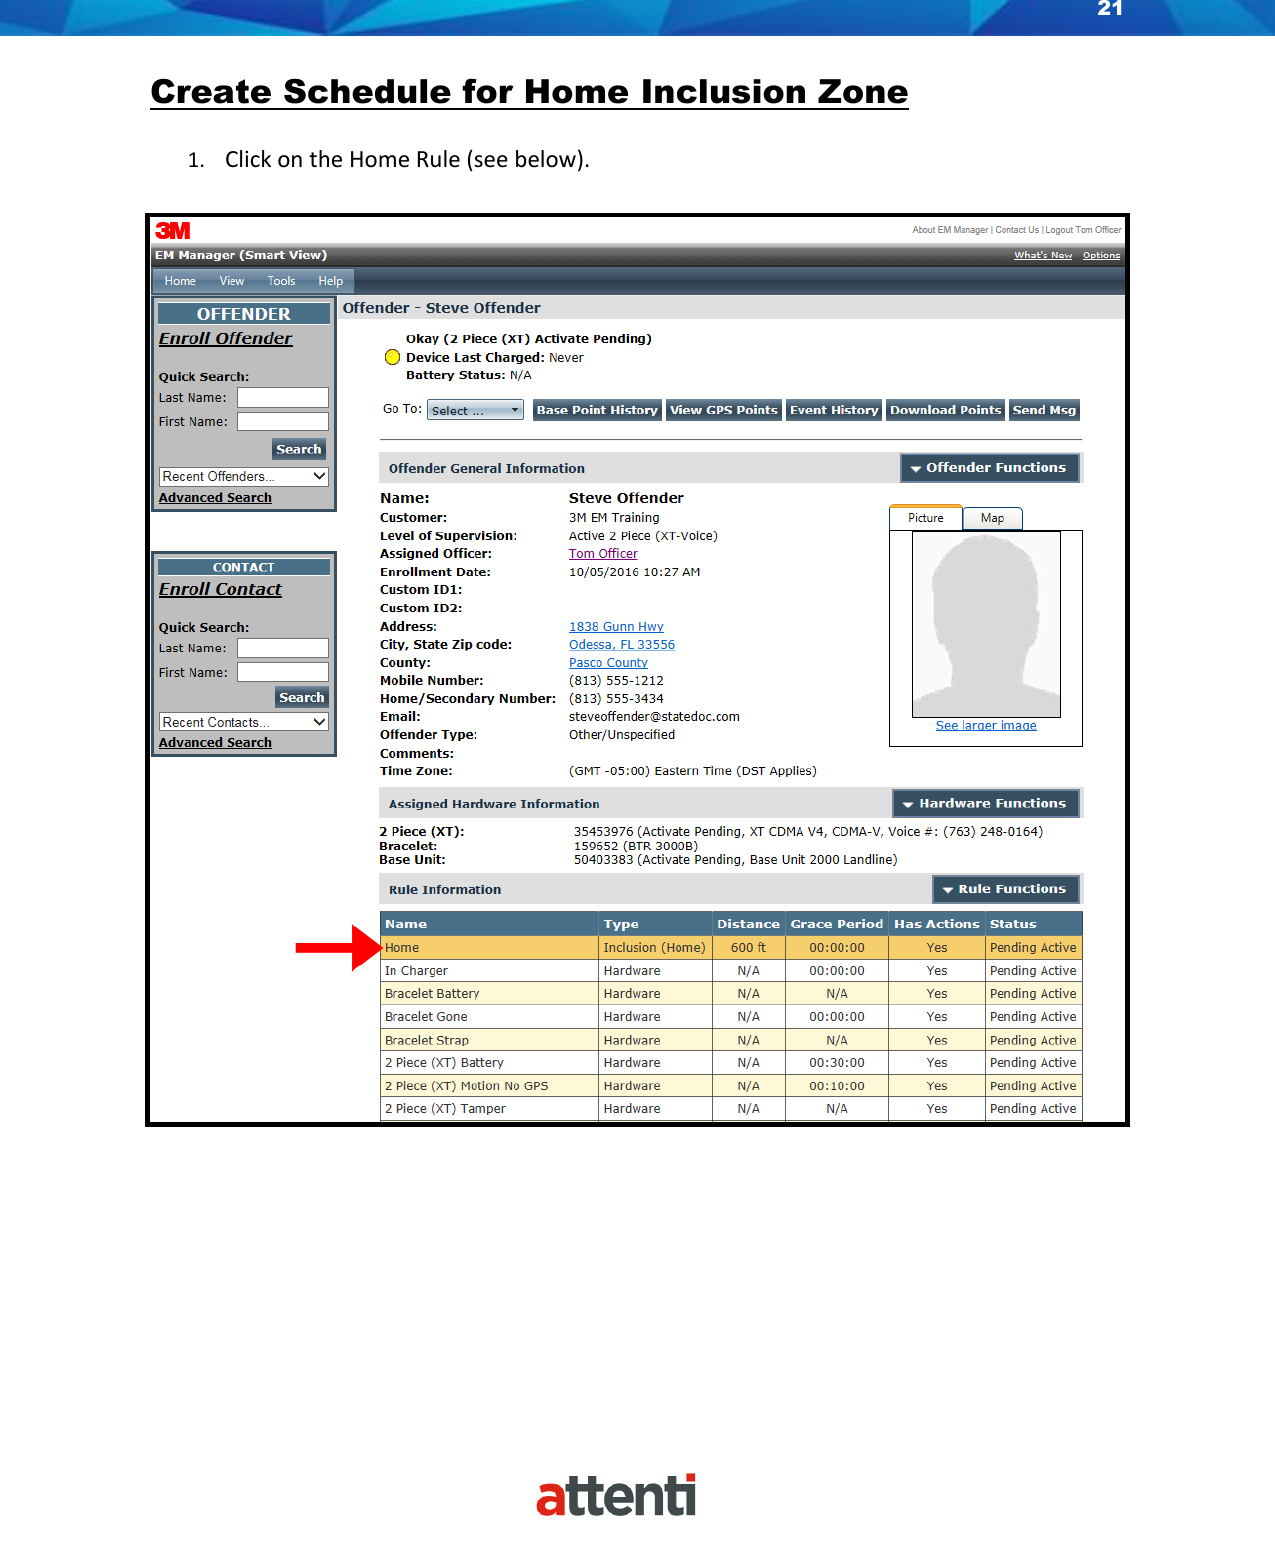
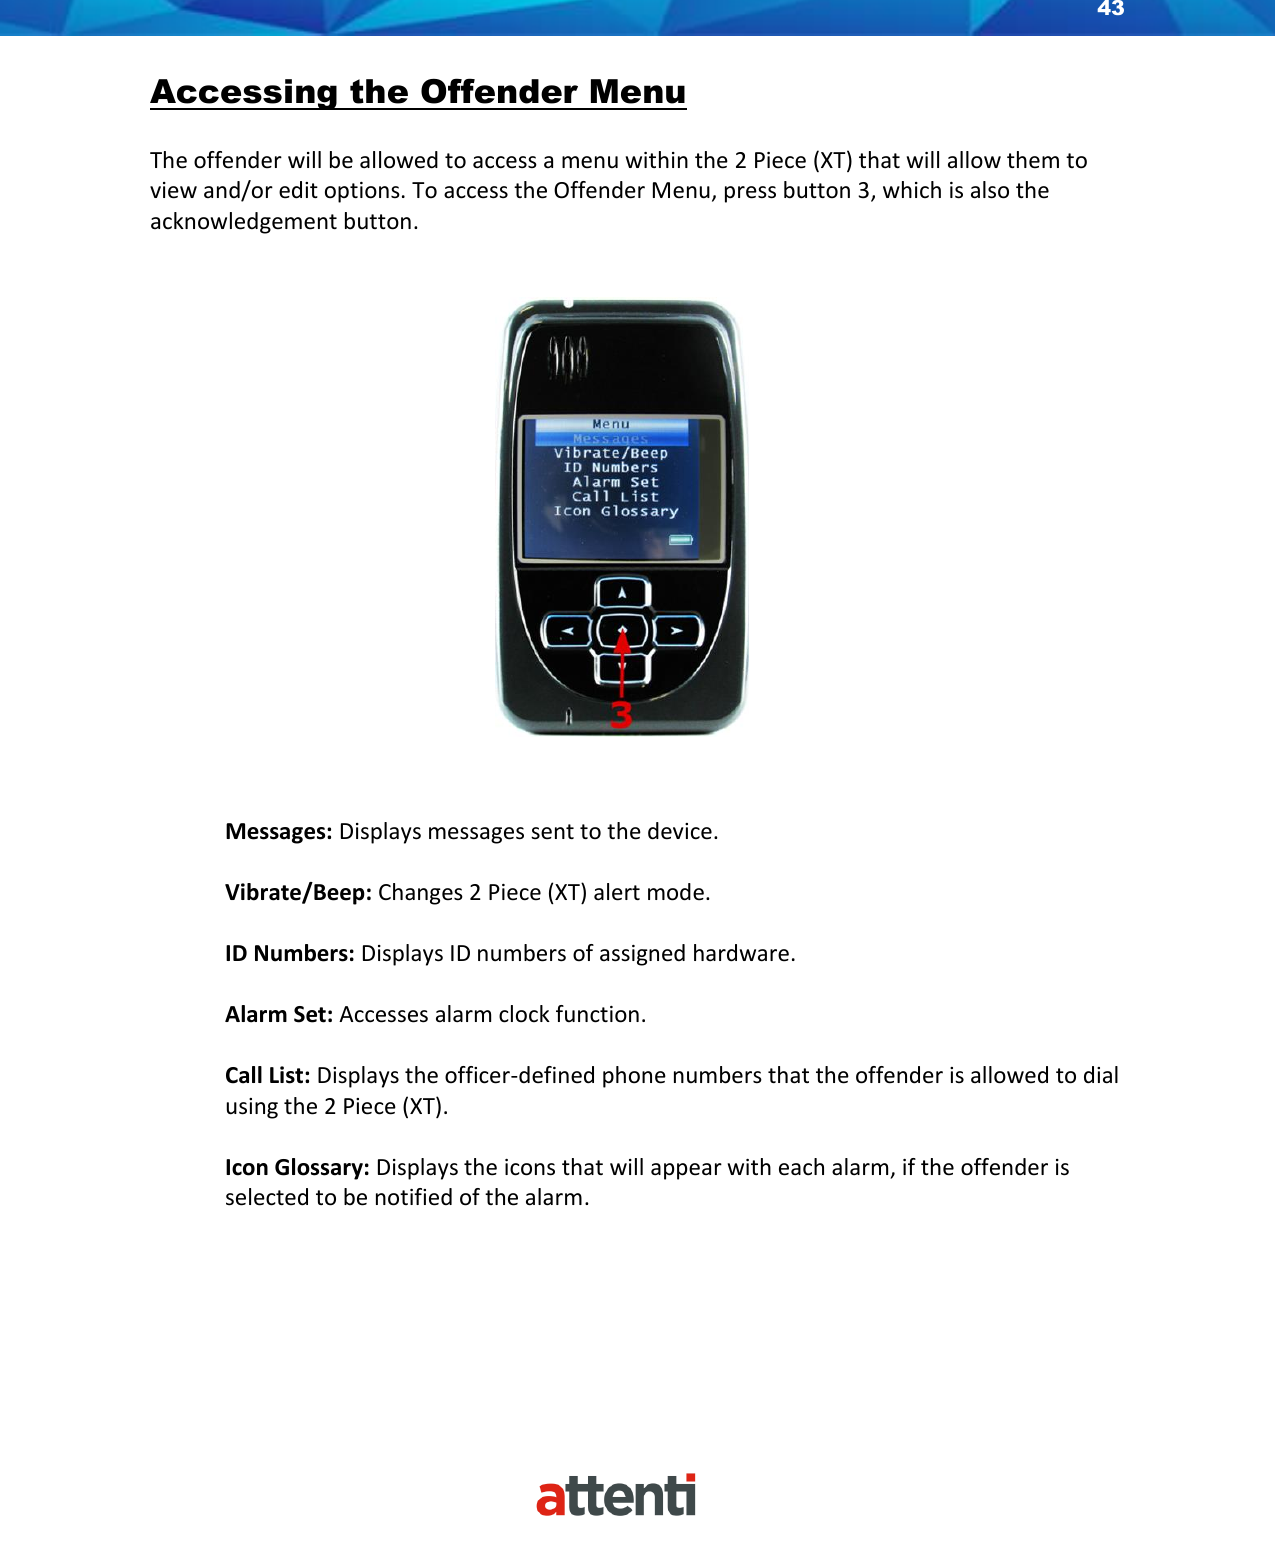
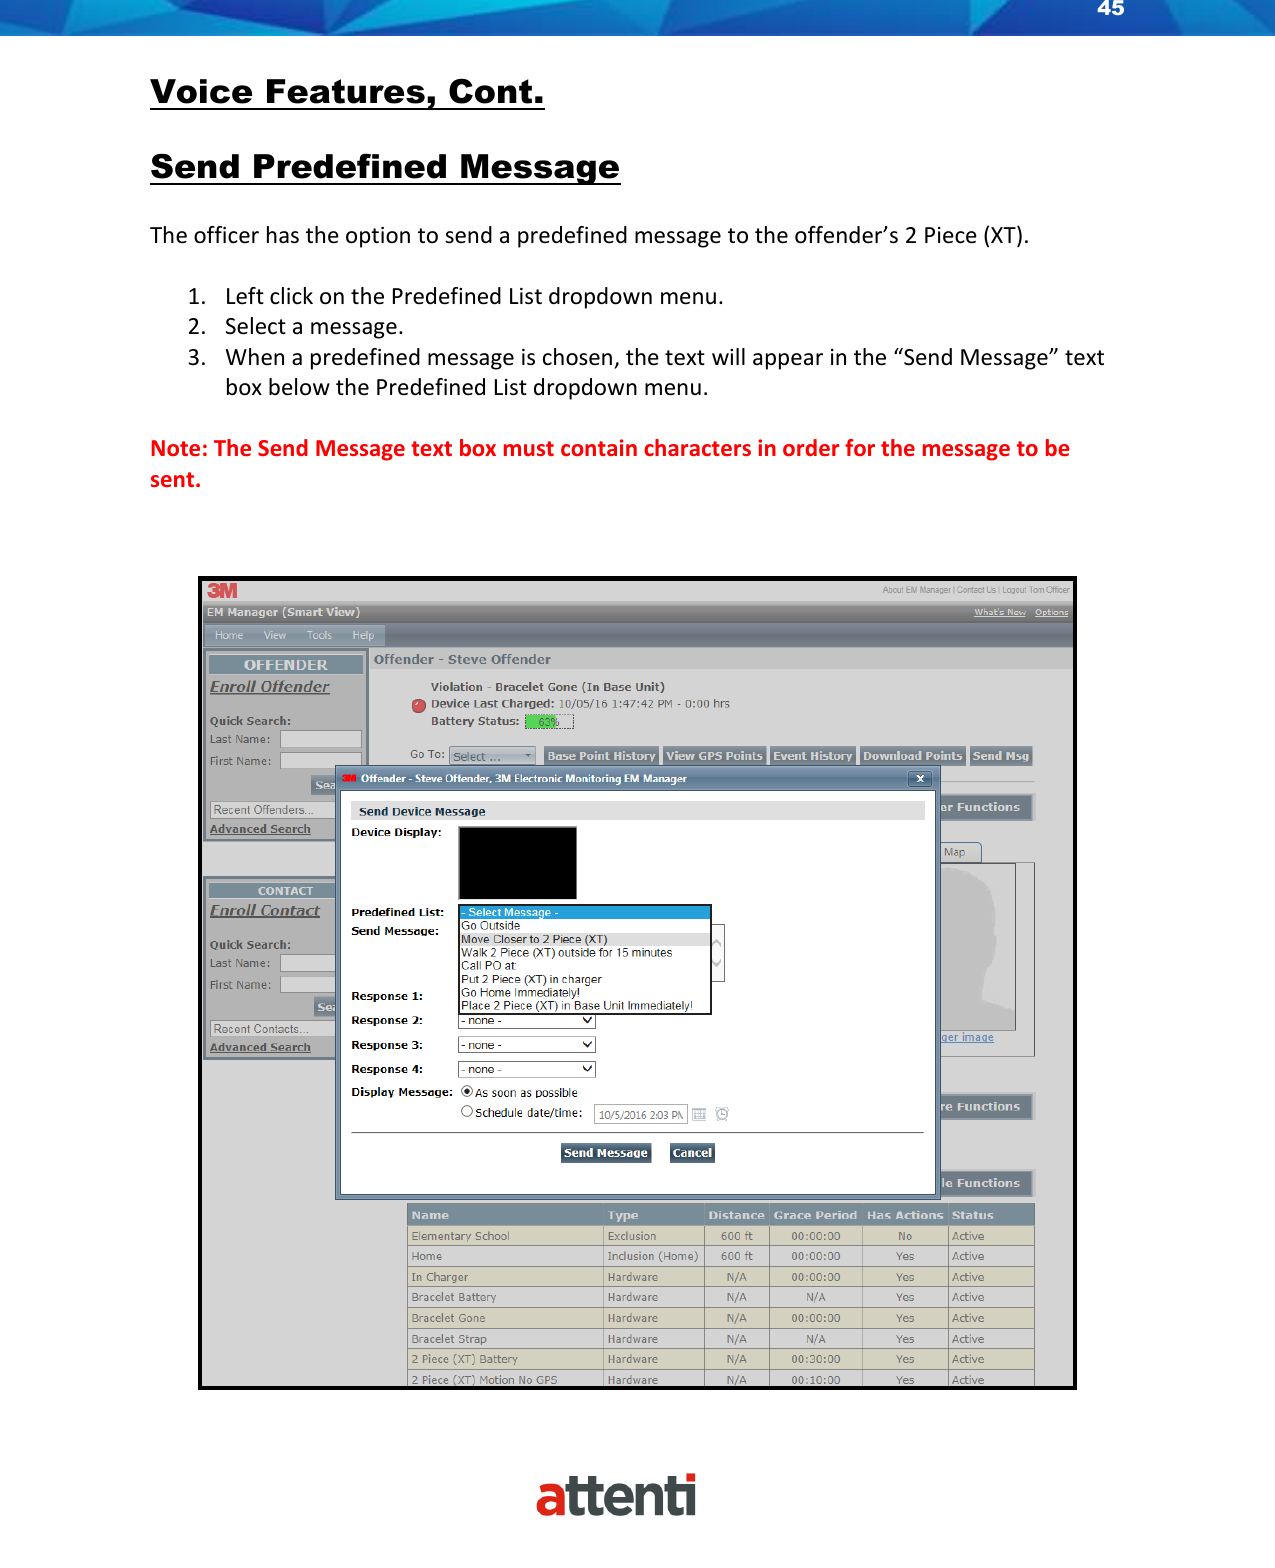
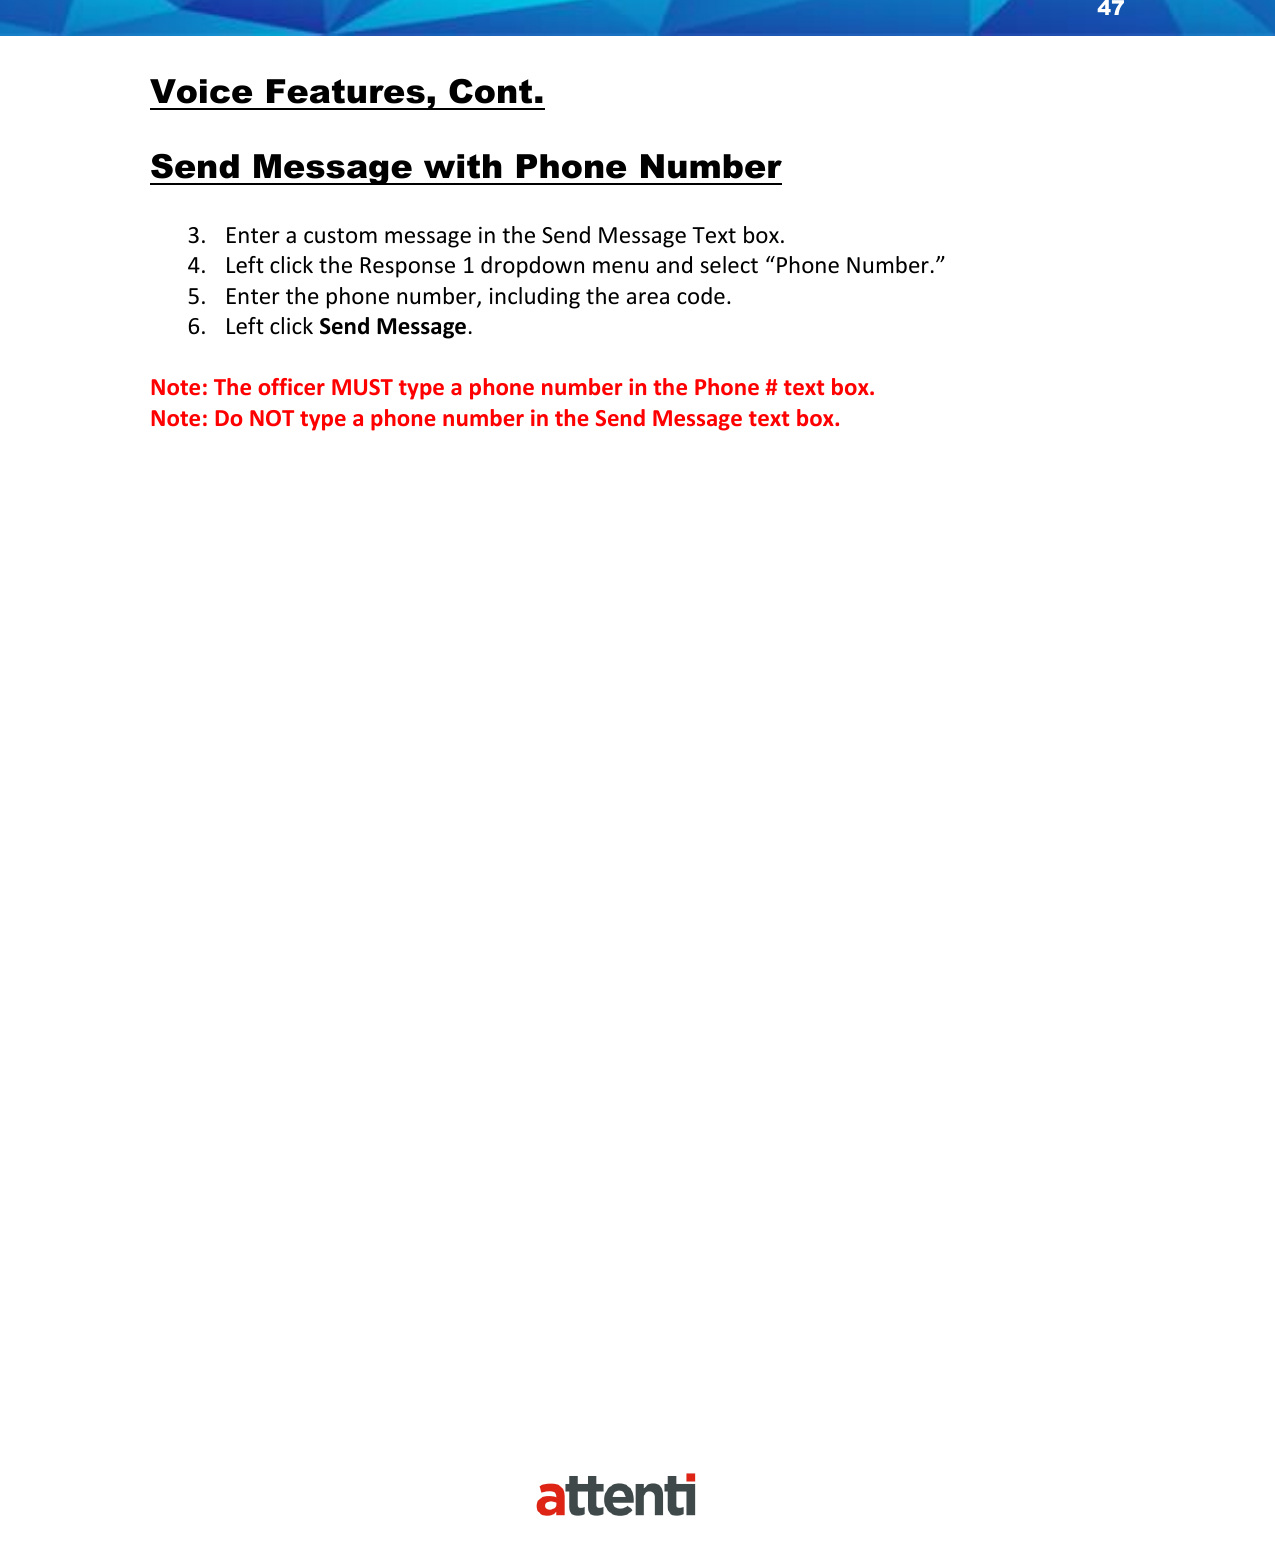
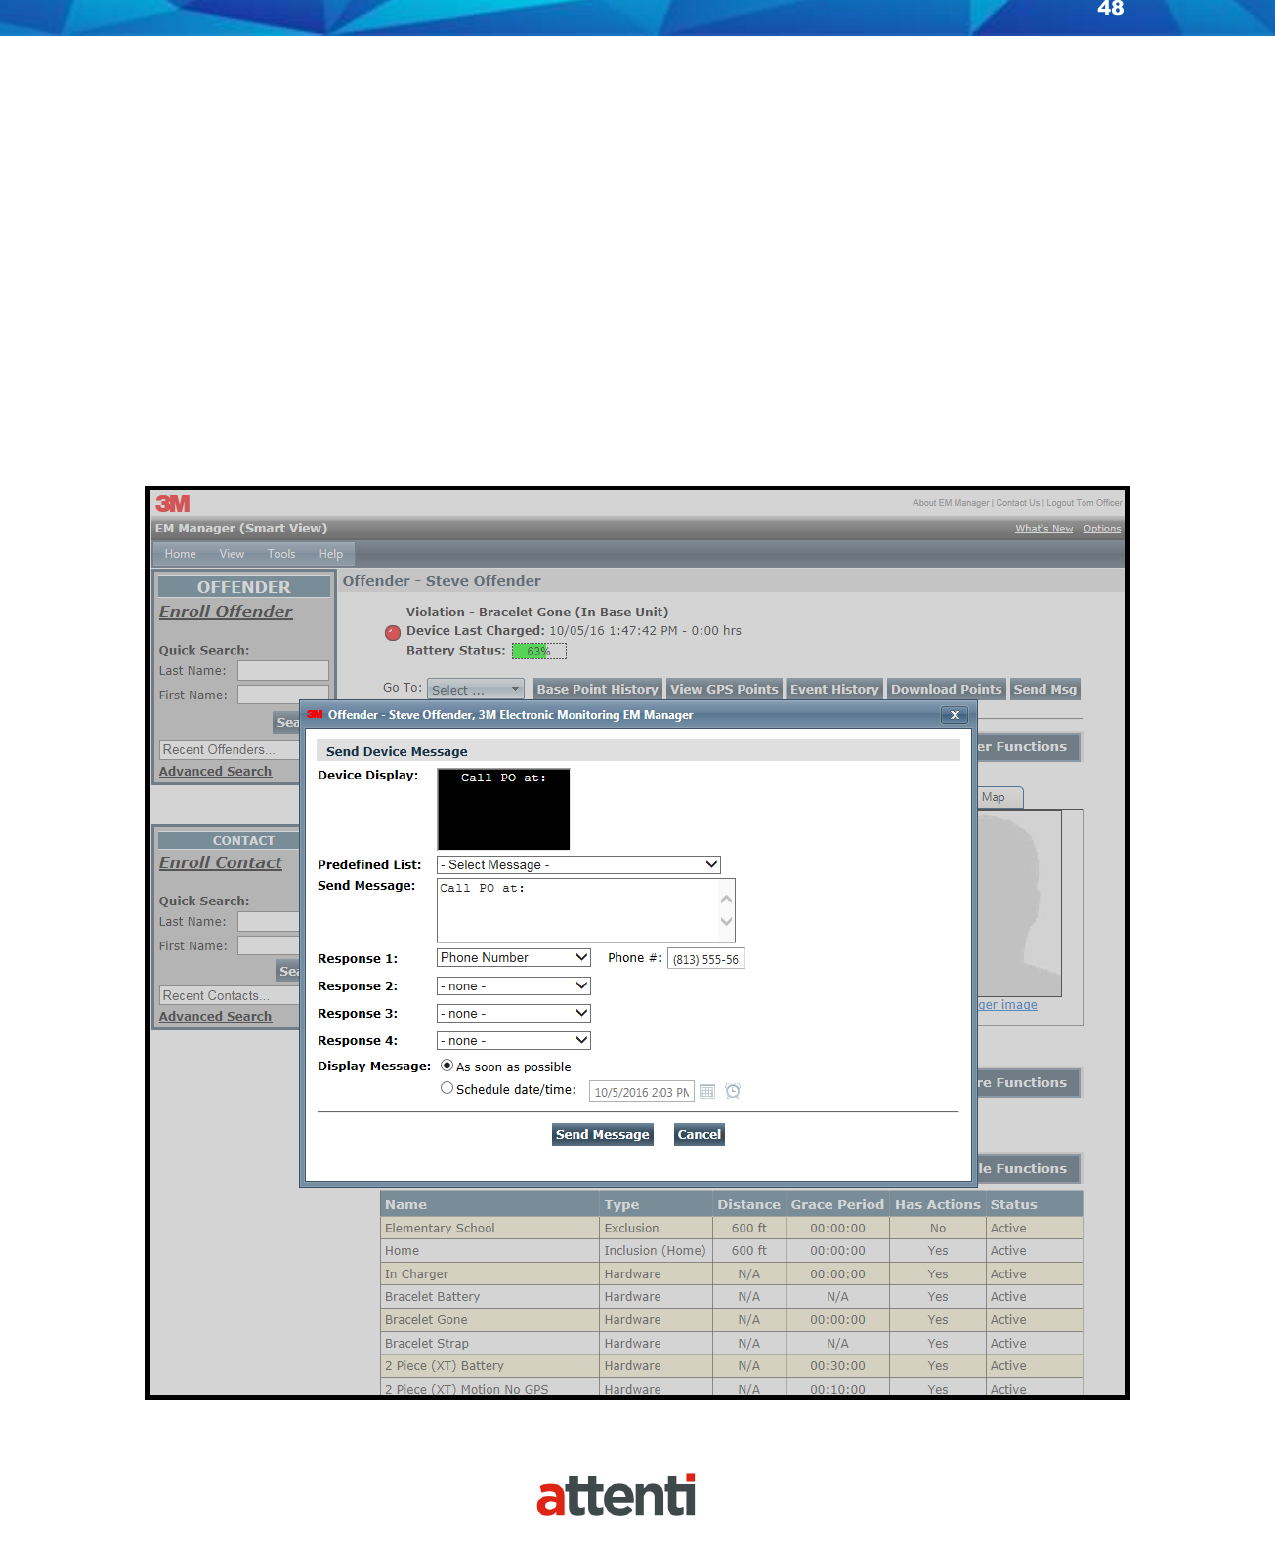
Attenti US TSSDX1044VXU Two - Piece GPS Offender Tracking Device User Manual
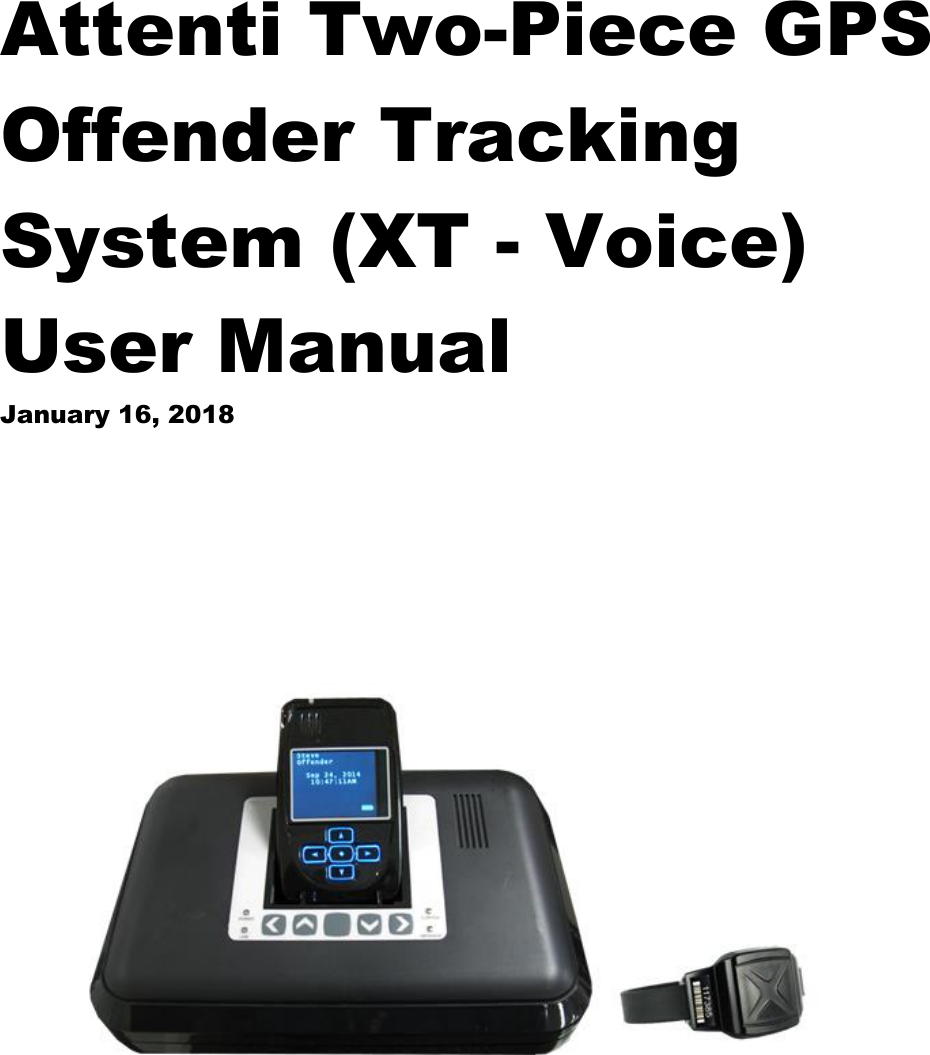
Attenti Two - Piece GPS Offender Tracking Device
UserManual.wiki
>
Attenti US
>
TSSDX1044VXU User Manual
User manual
Navigation menu
Upload a User Manual
Namespaces
Wiki Guide
HTML
PDF
Info
Views
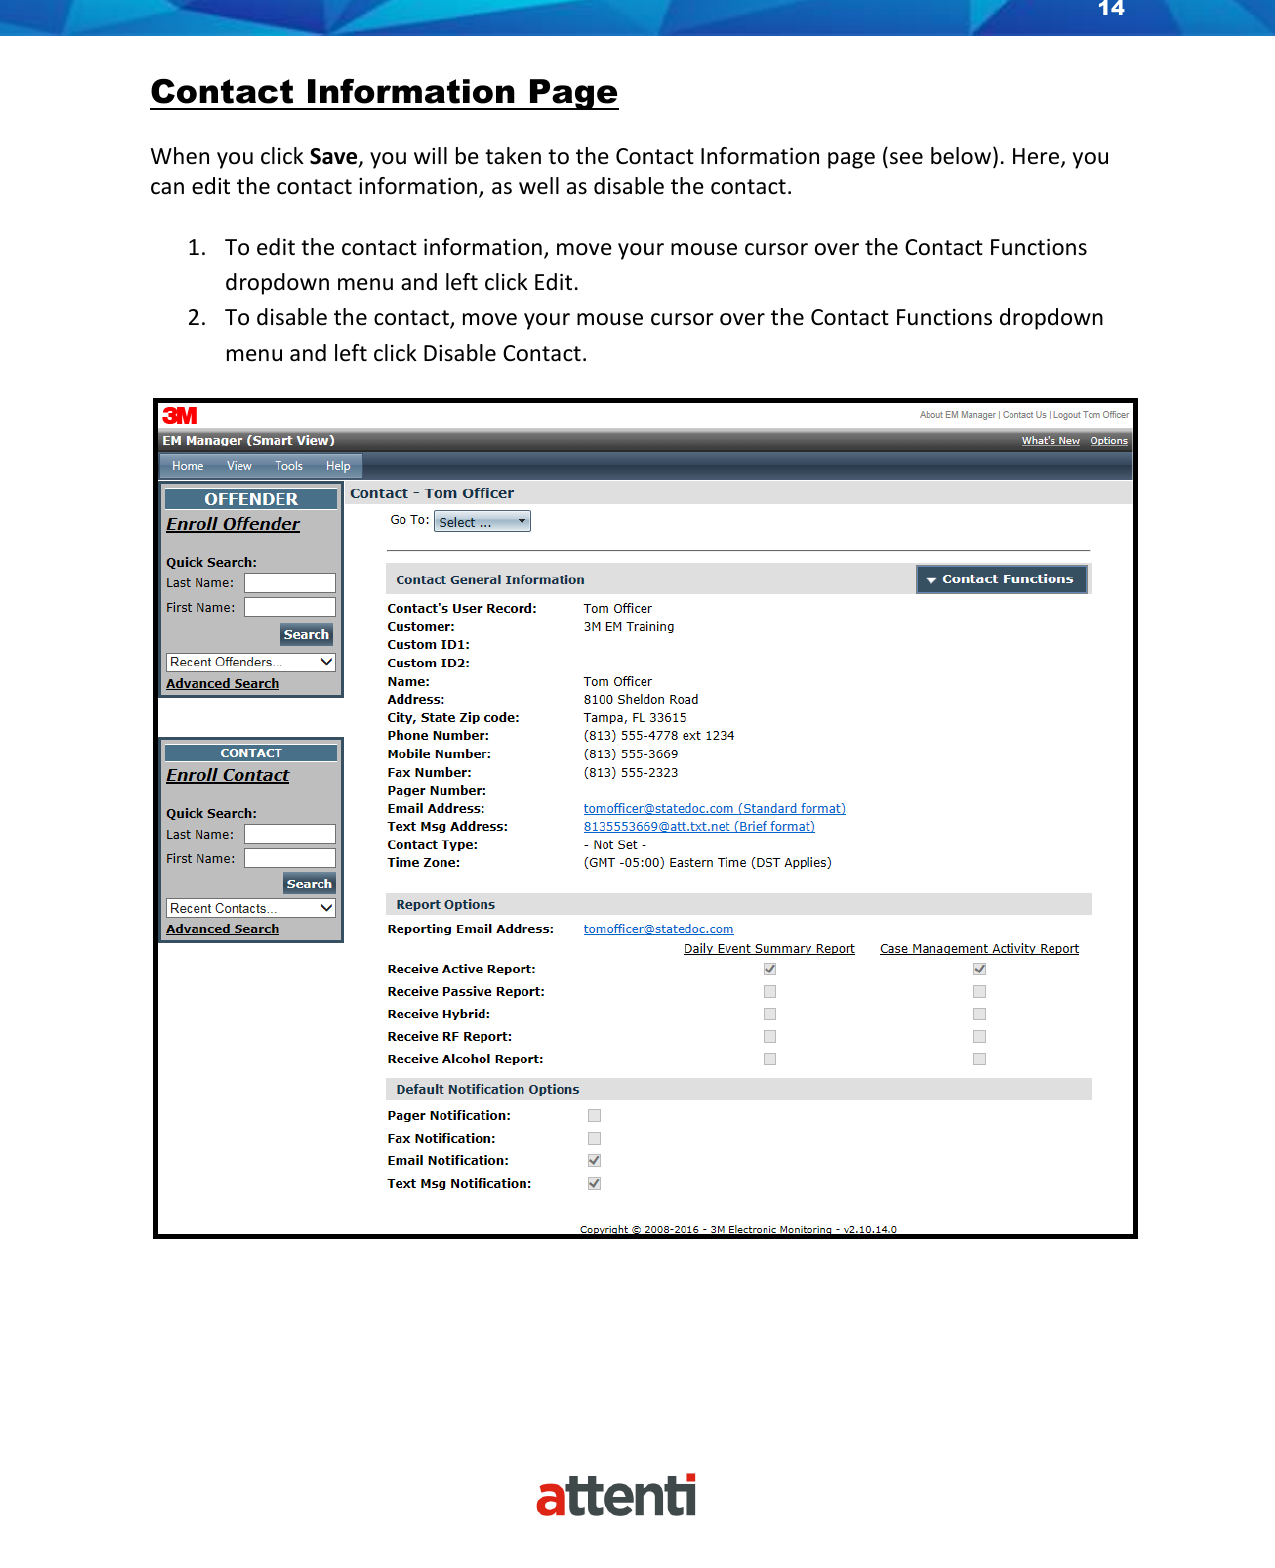
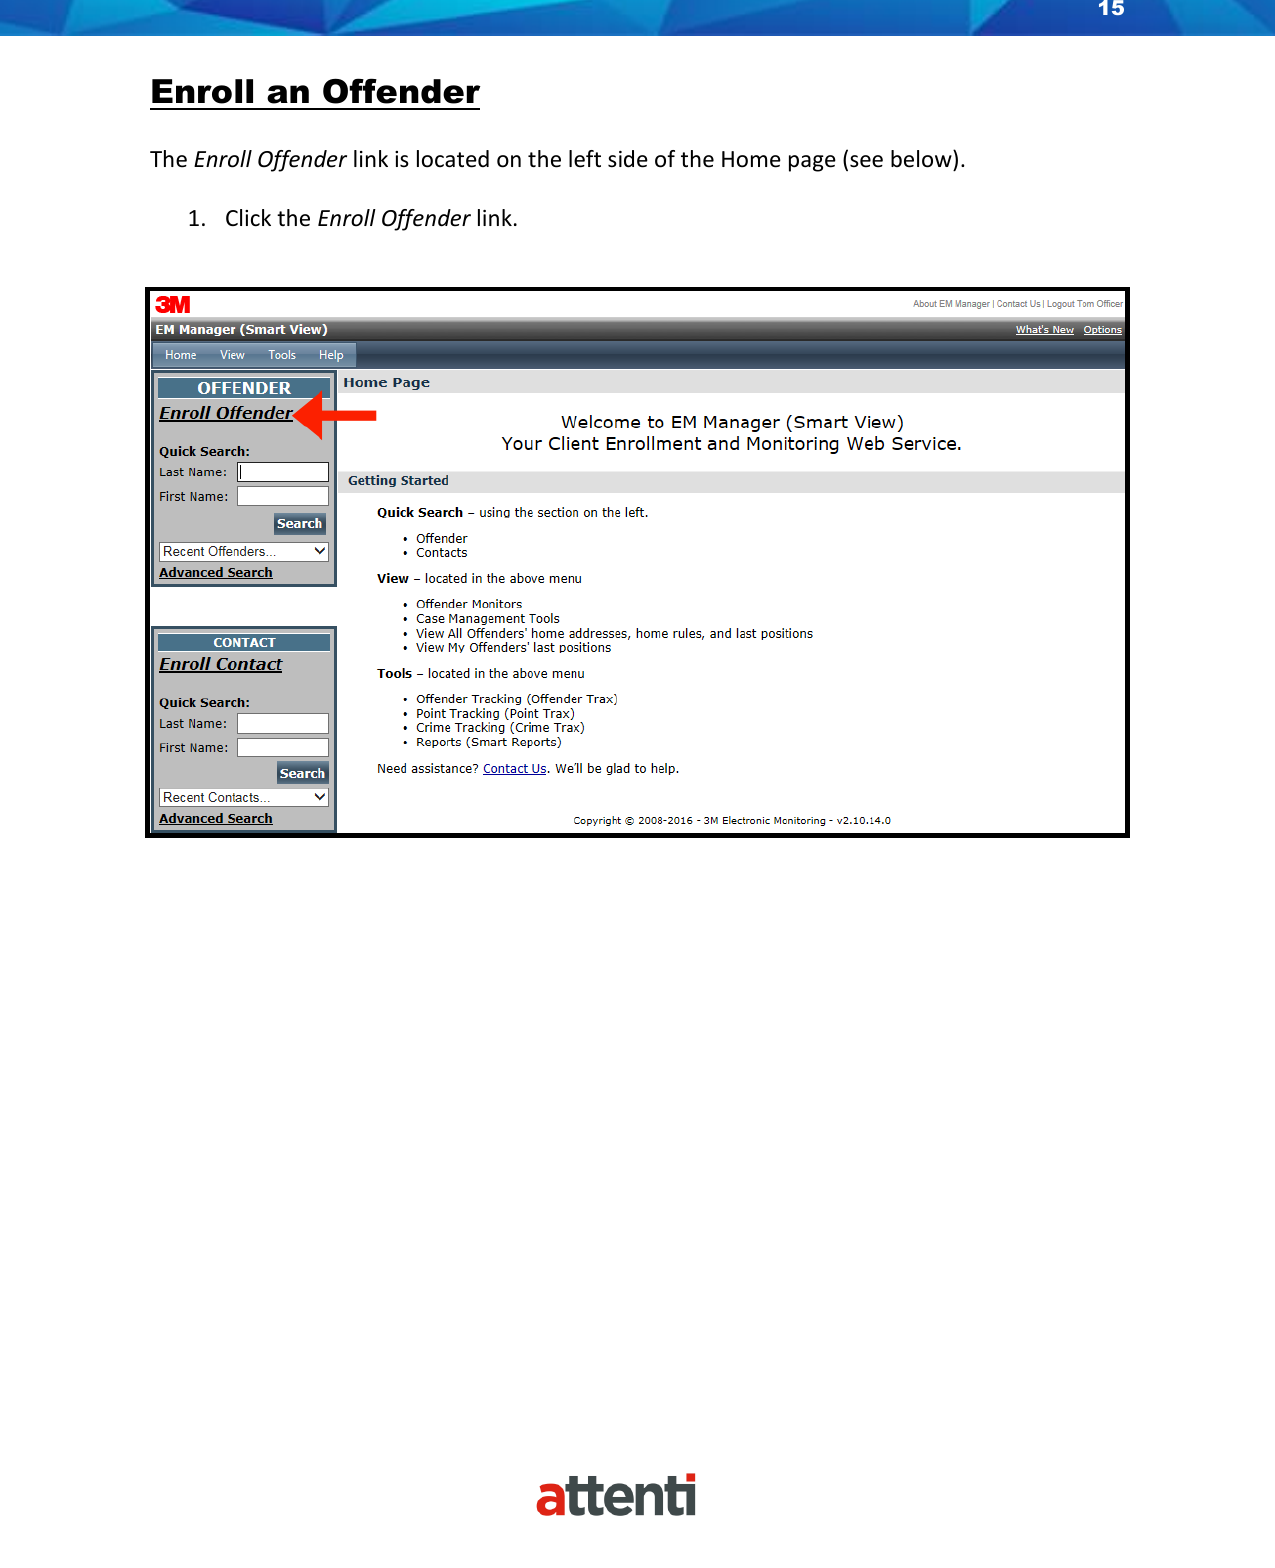
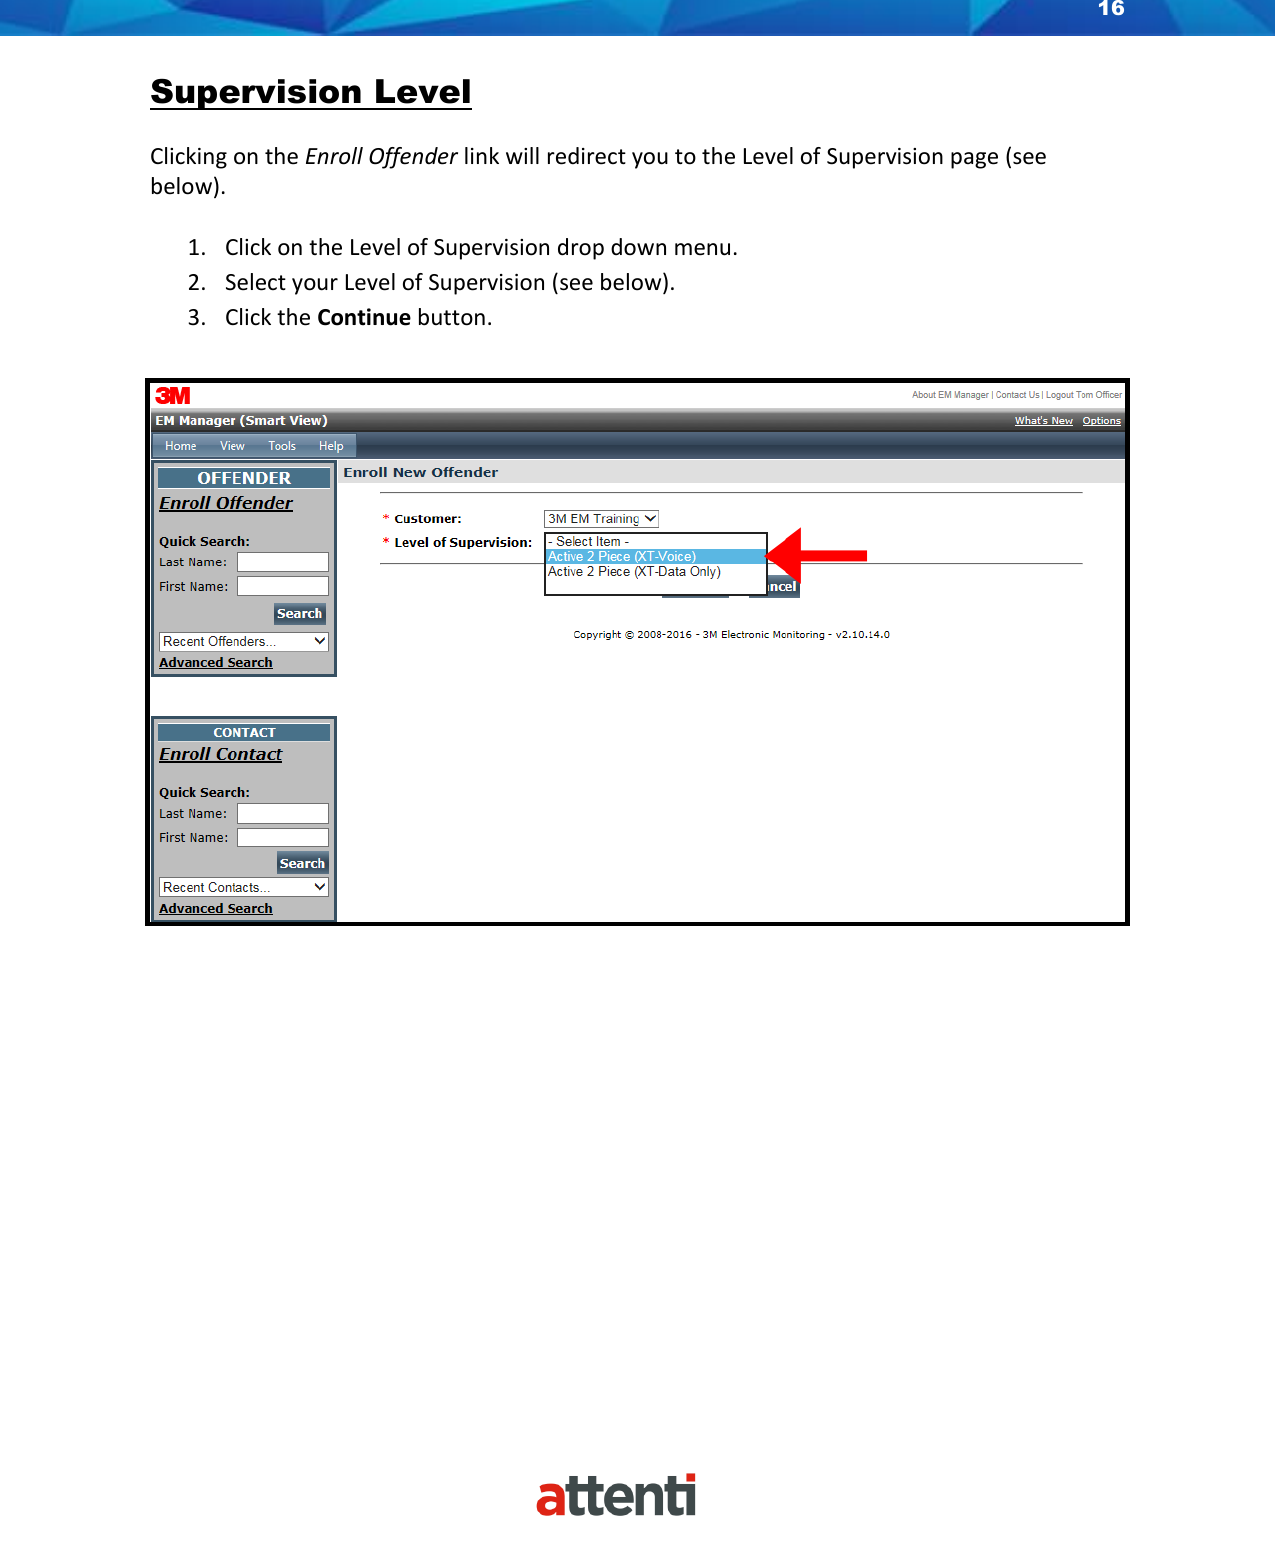
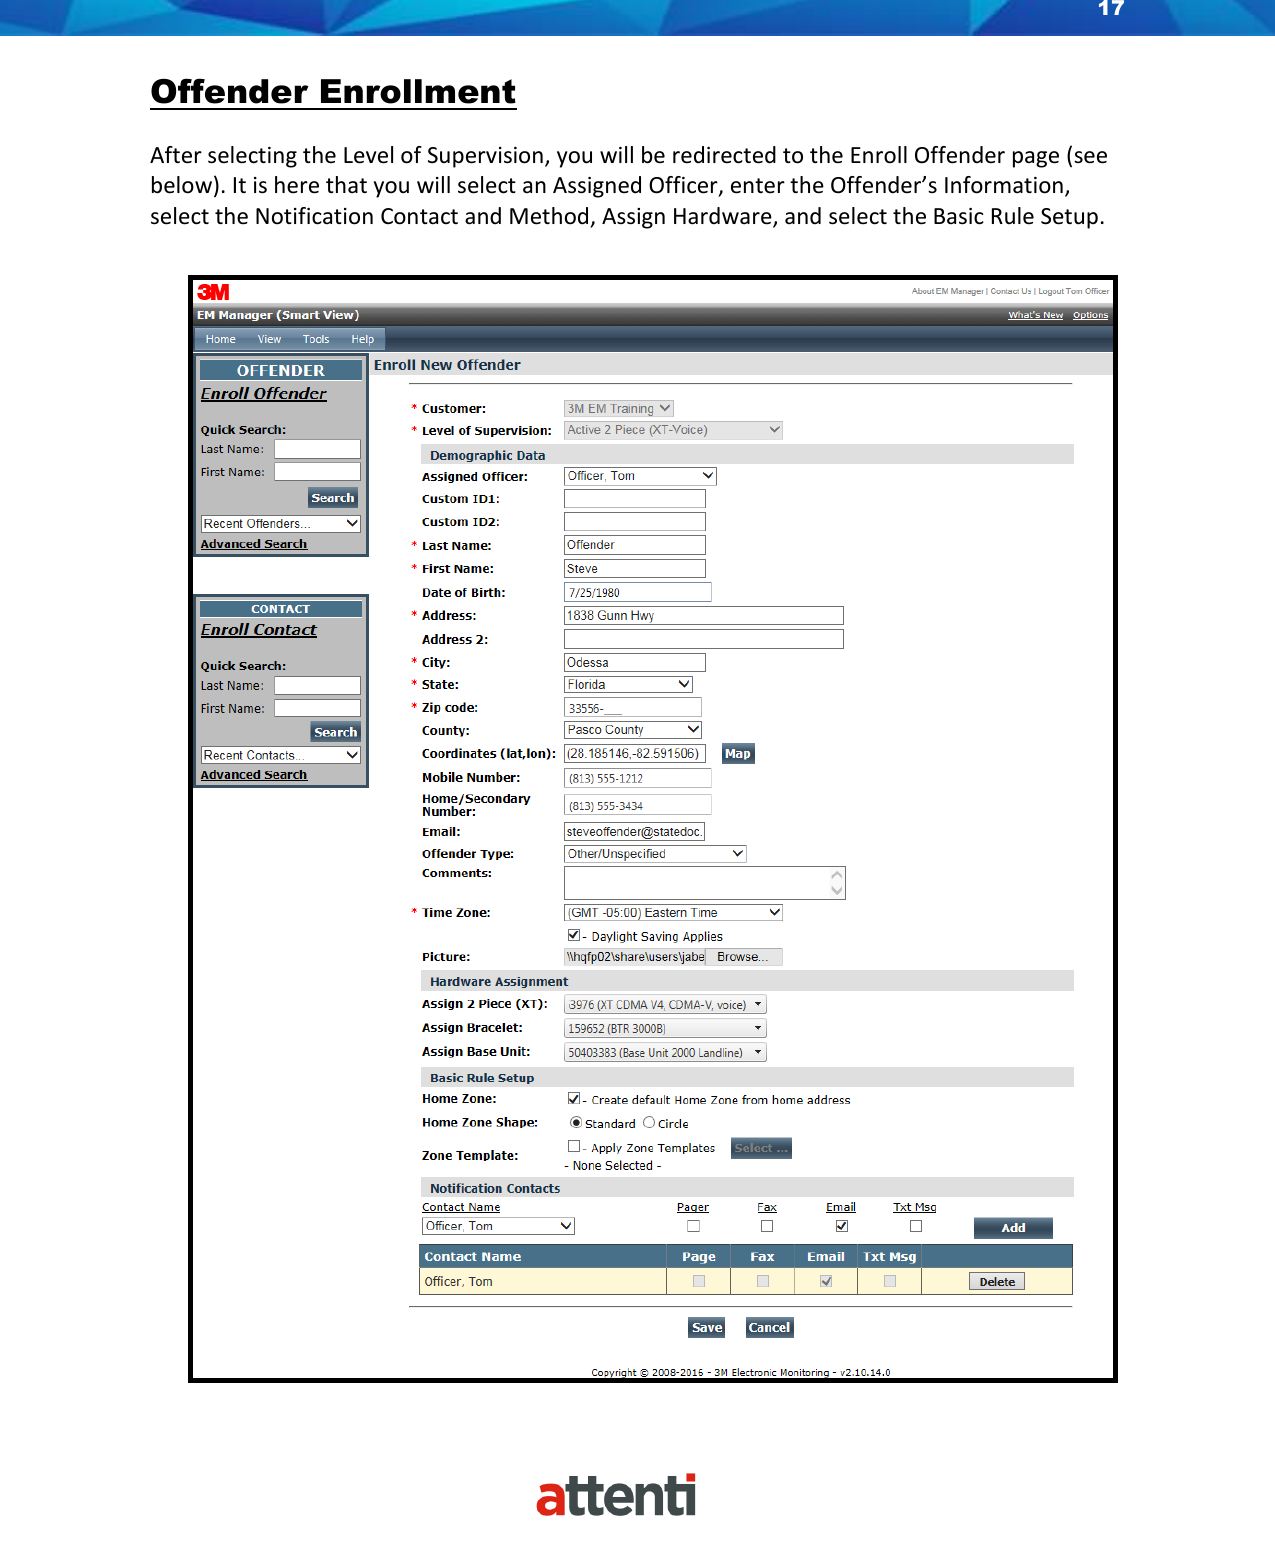
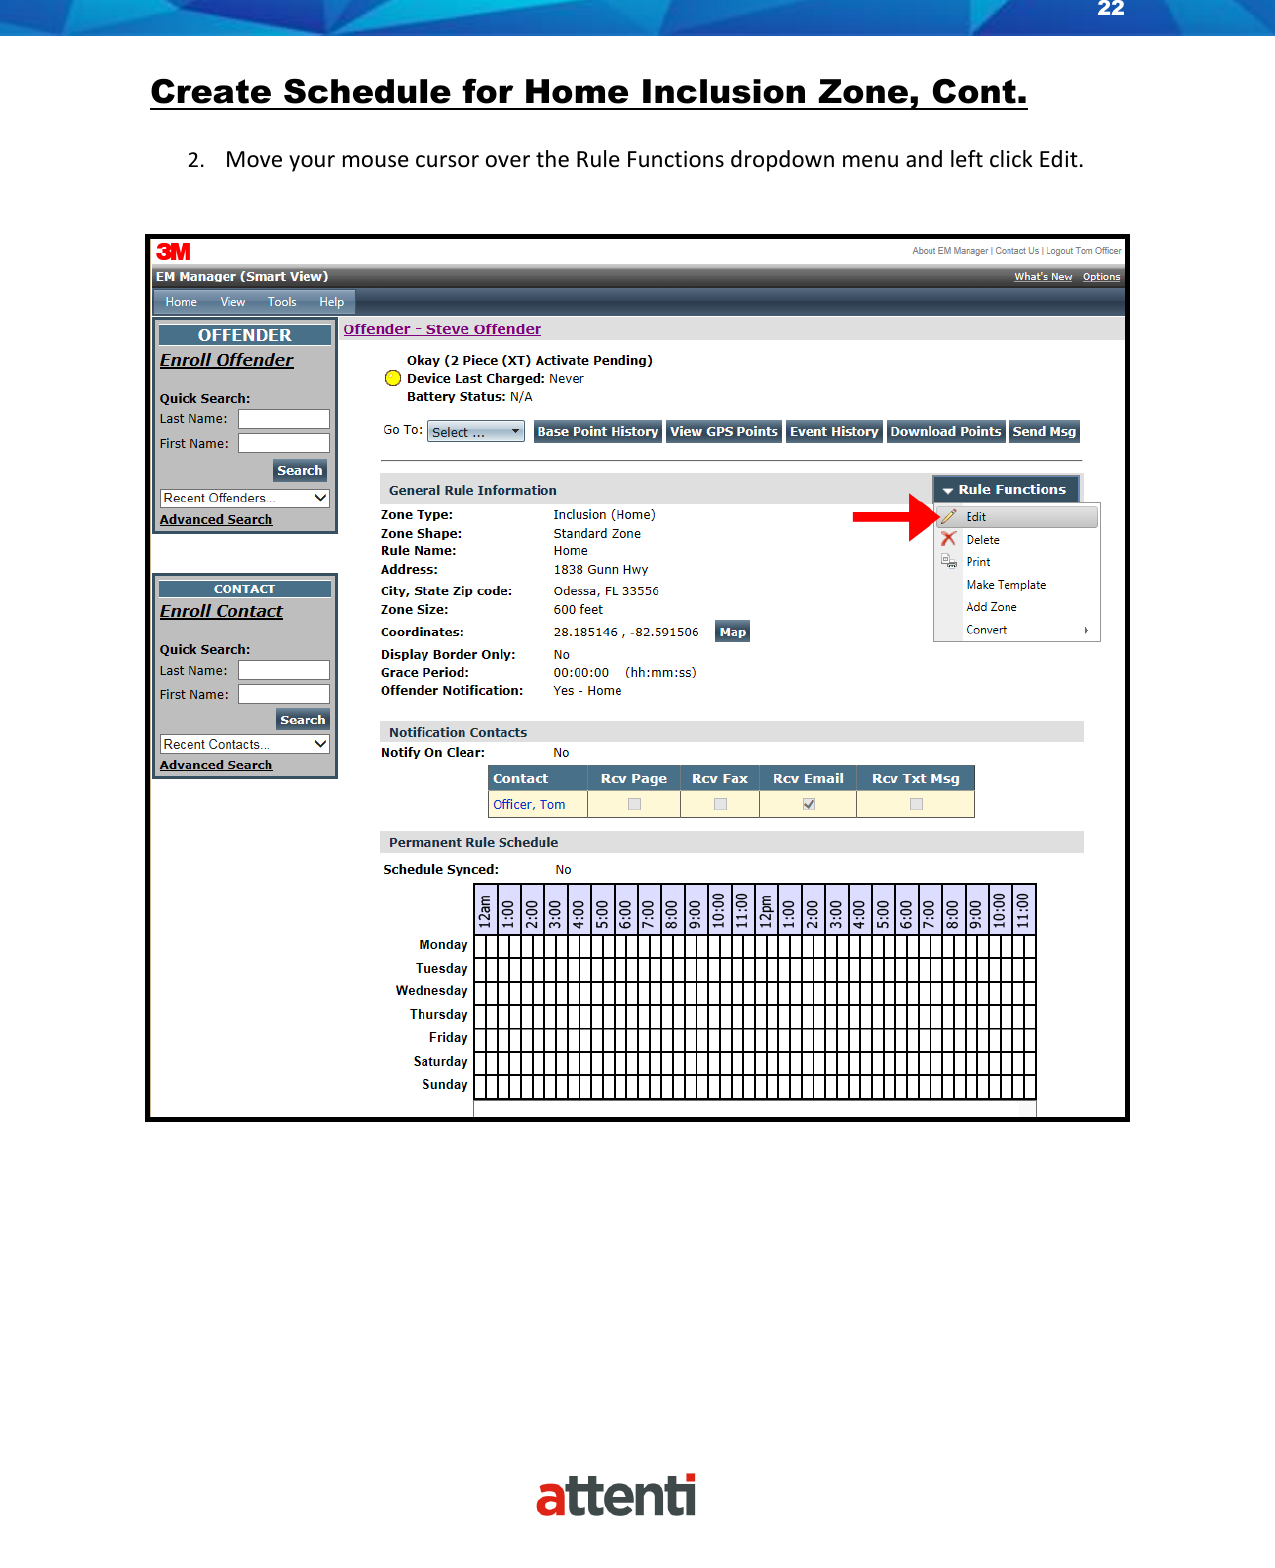
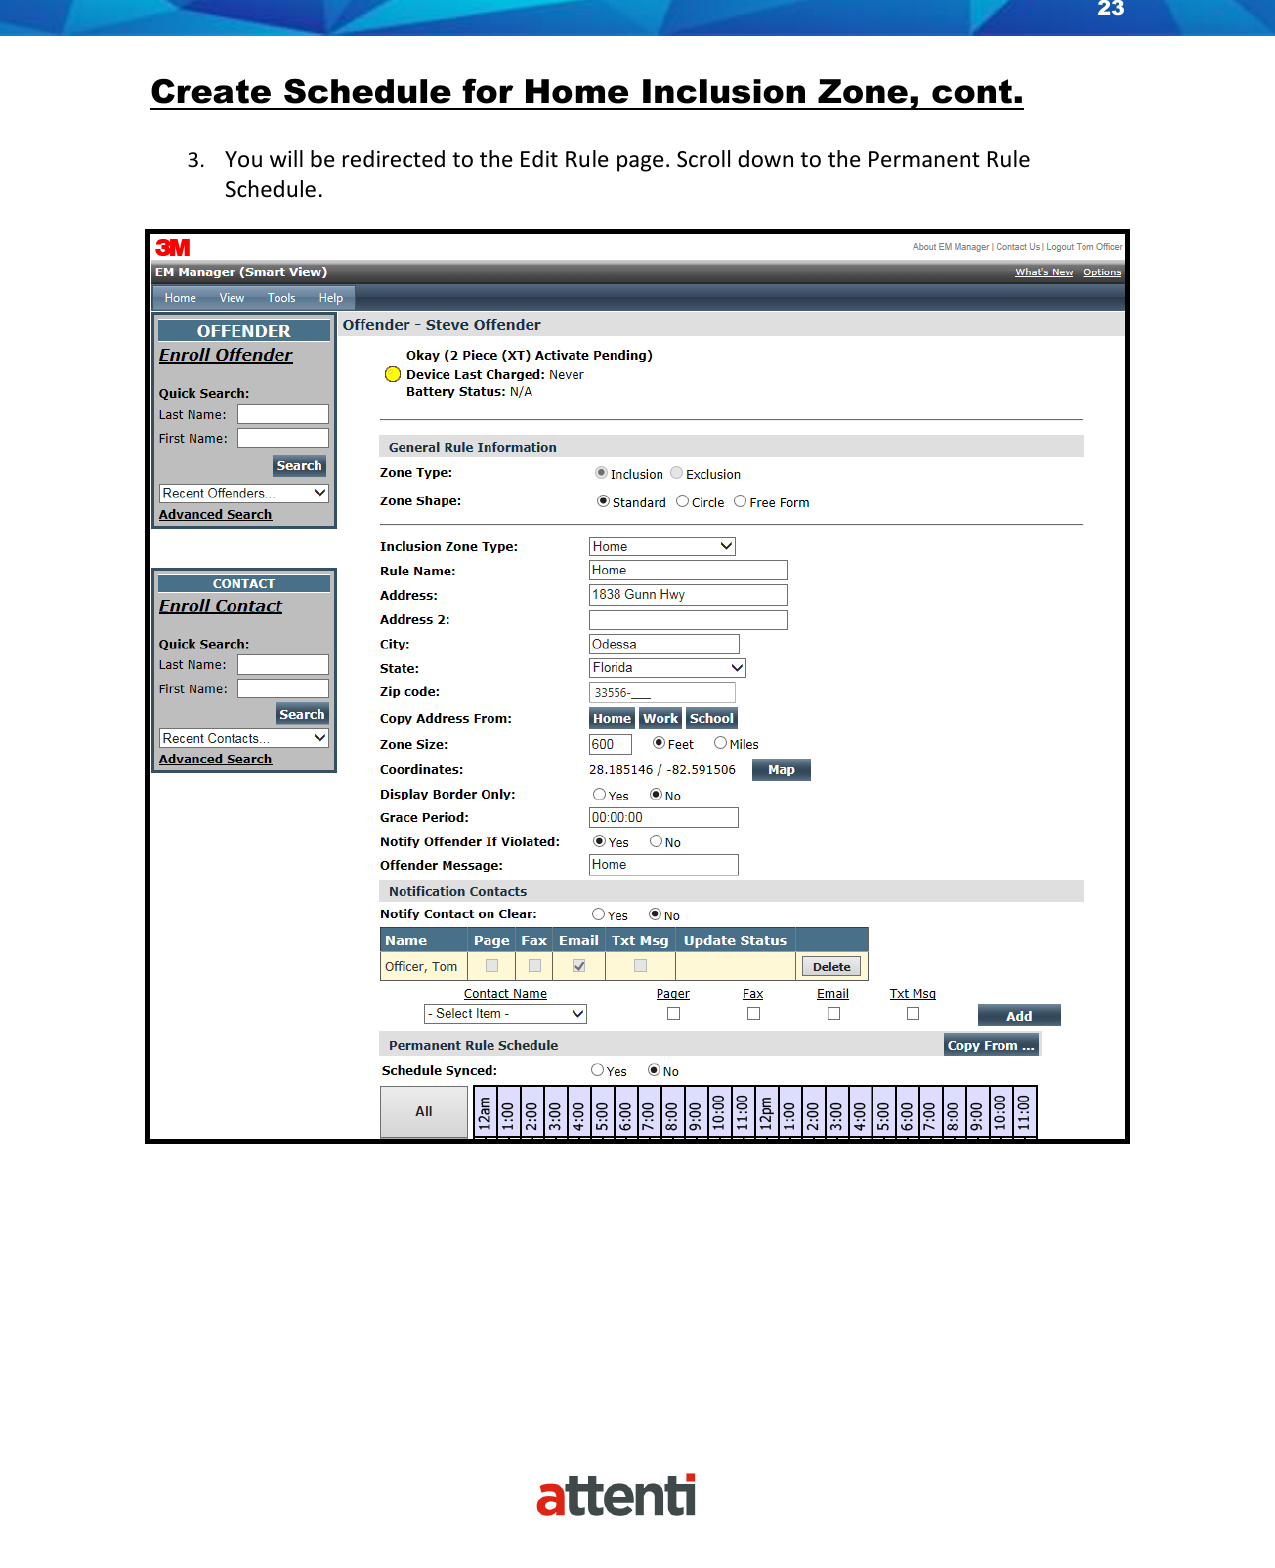
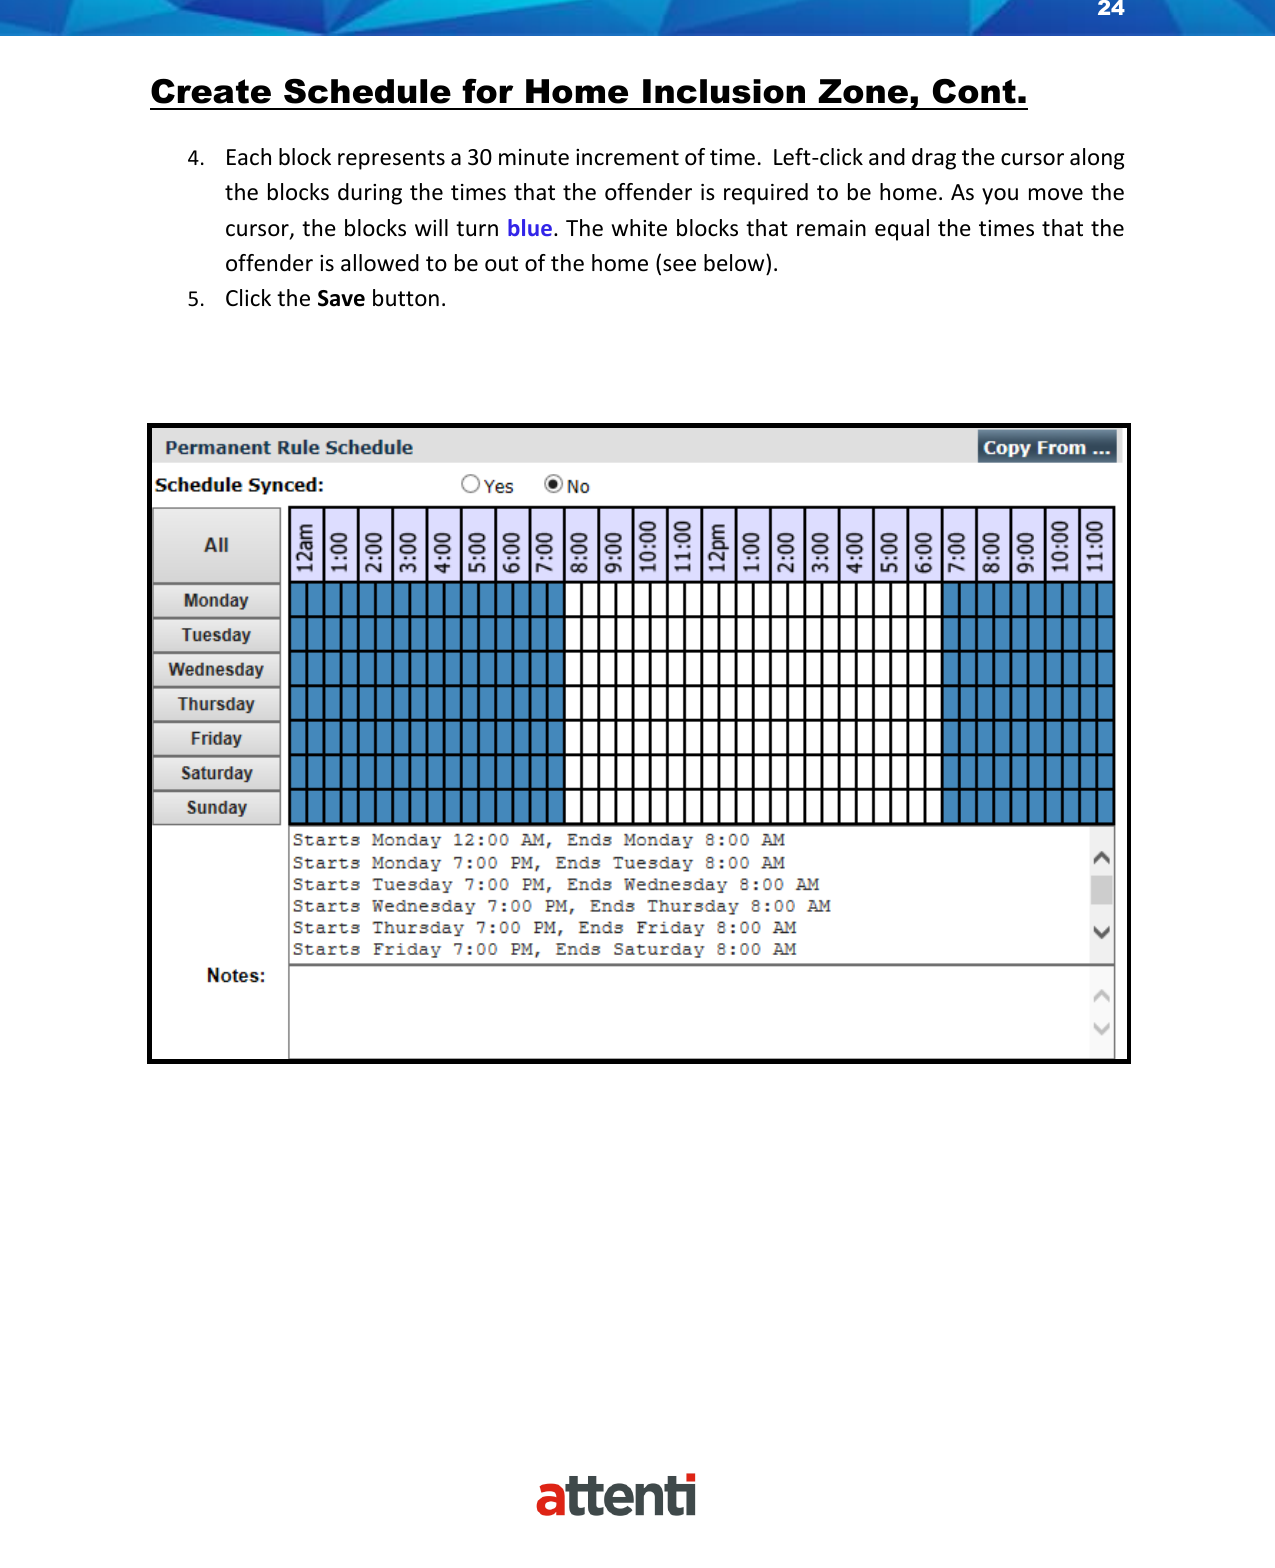
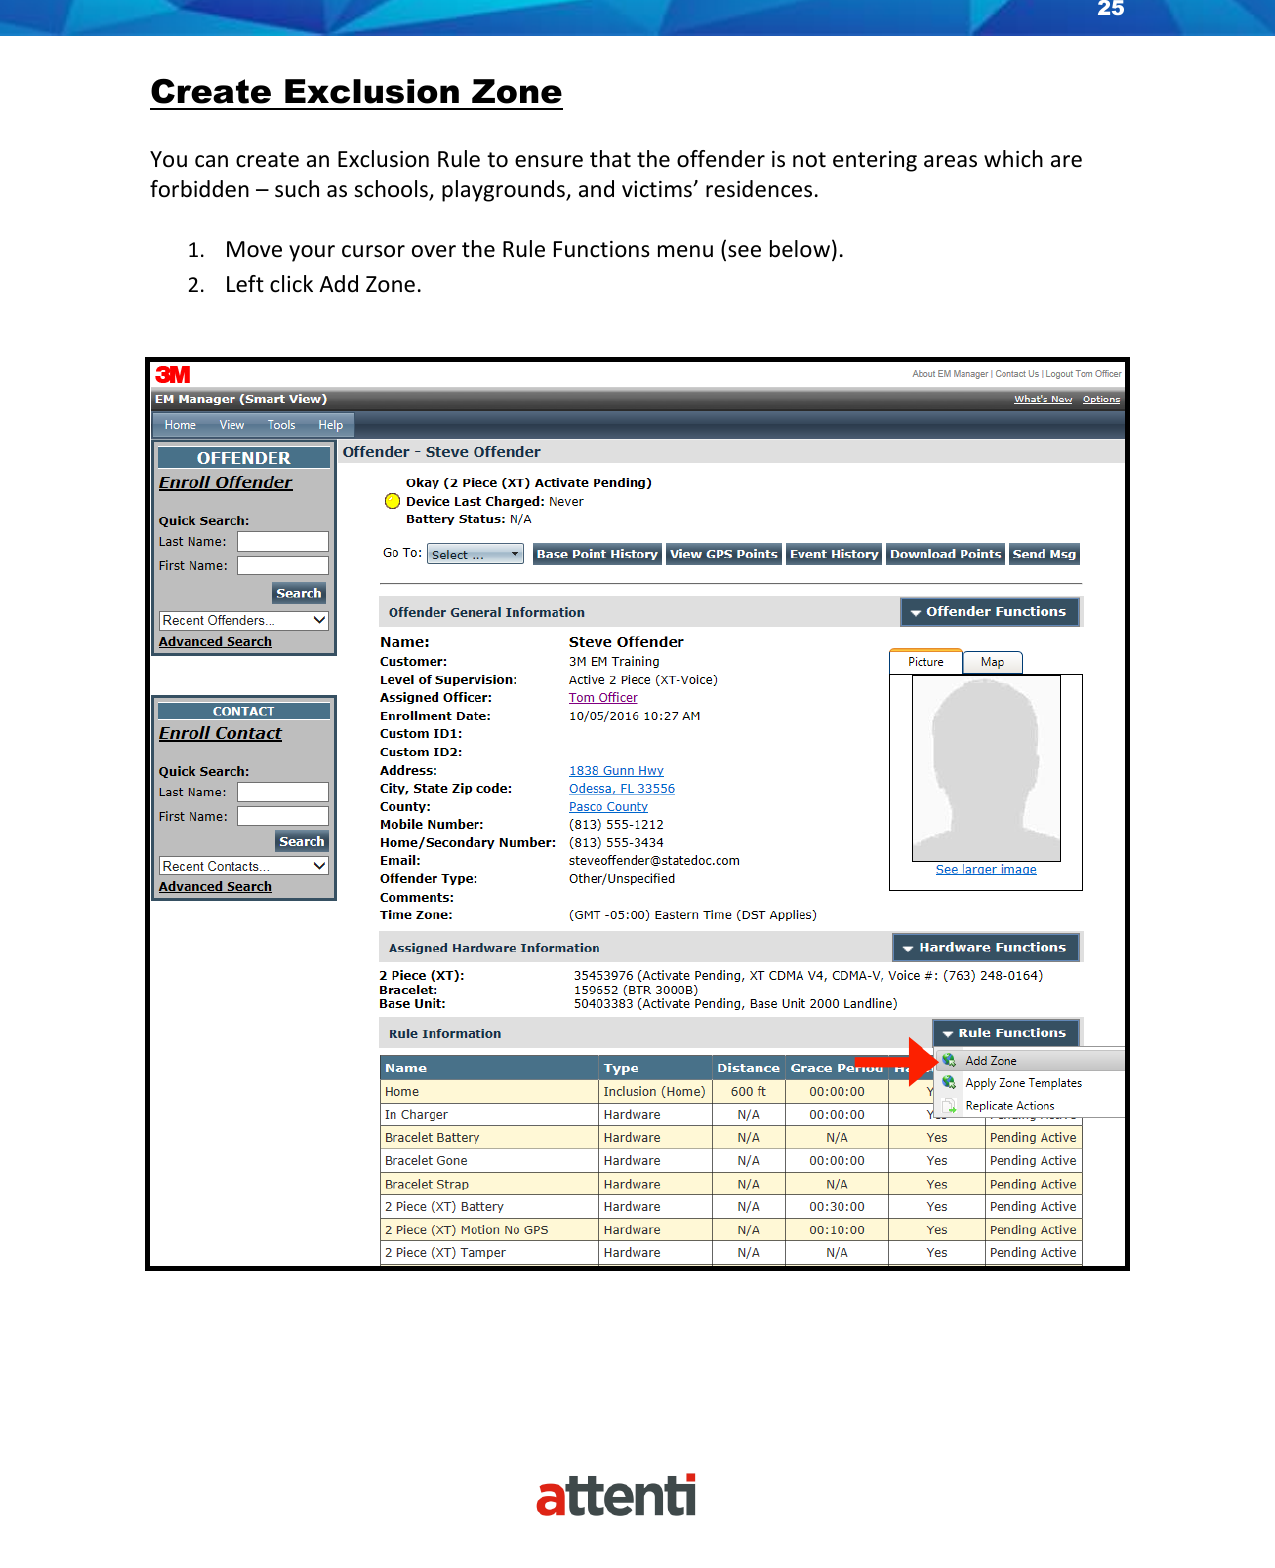
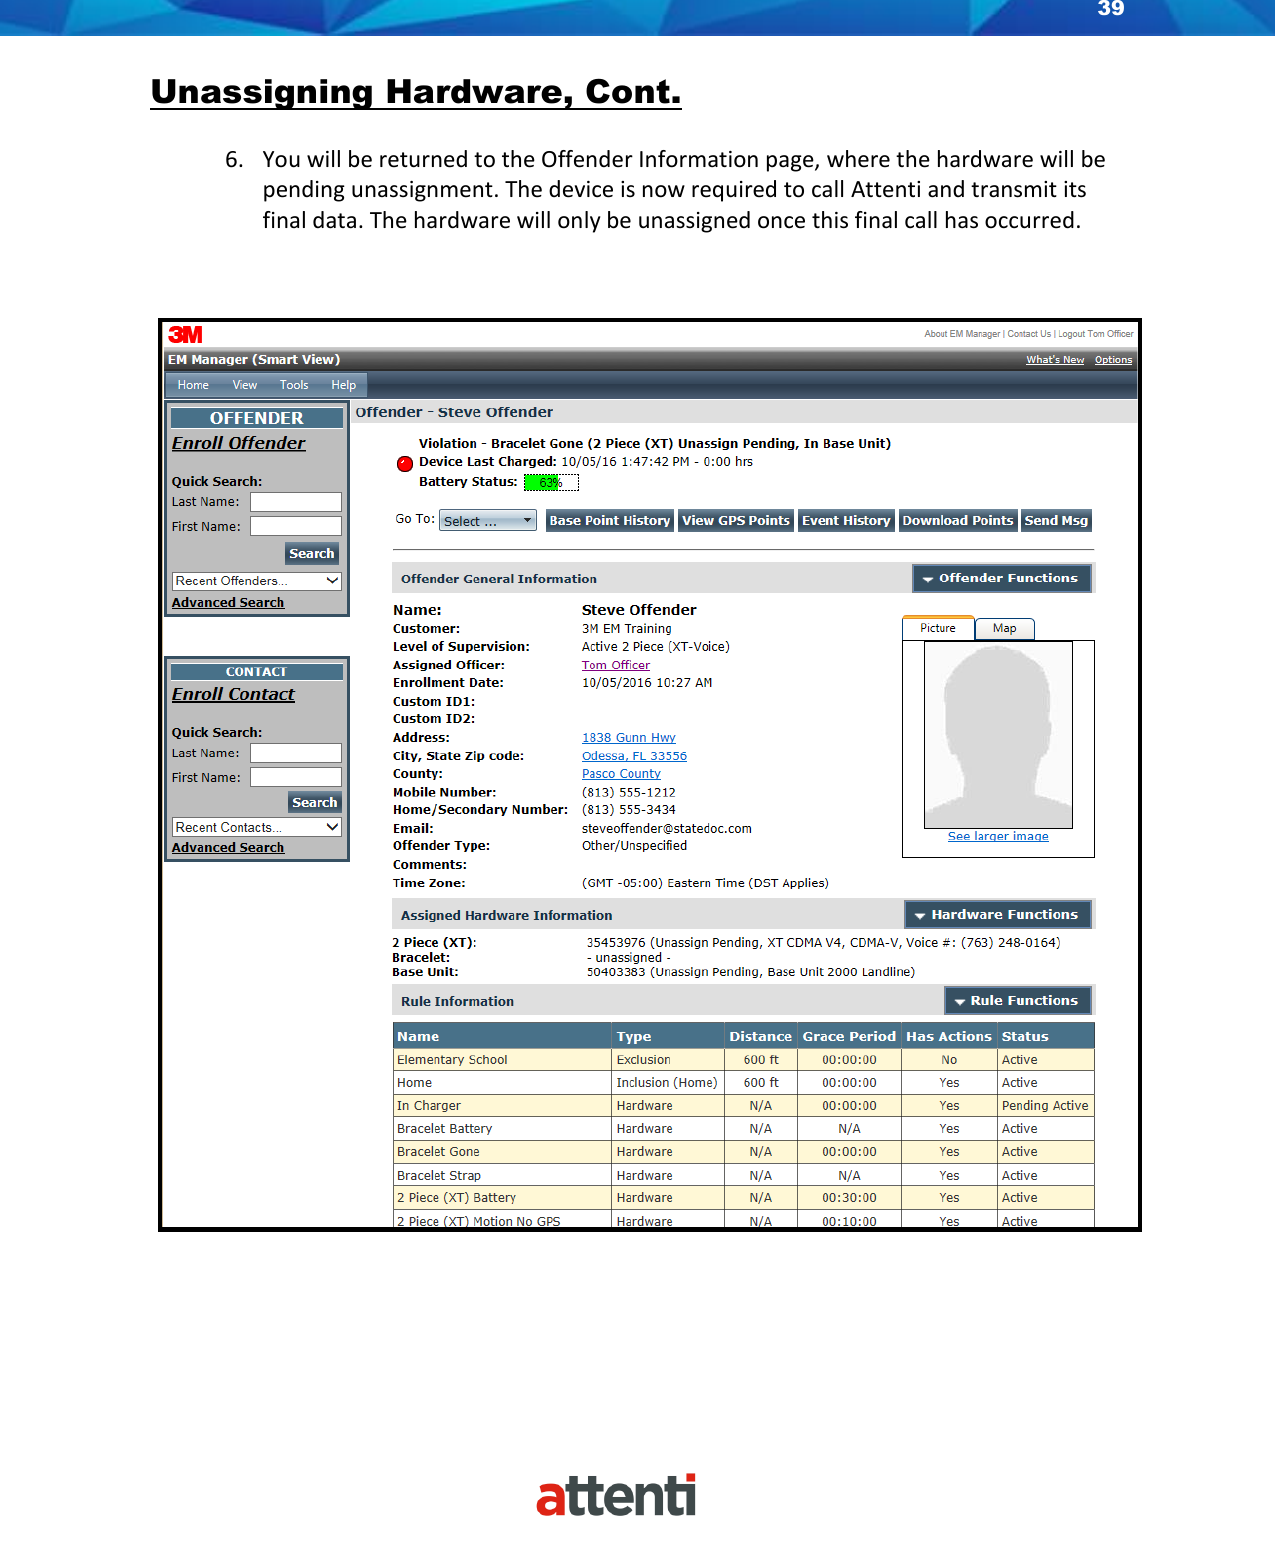
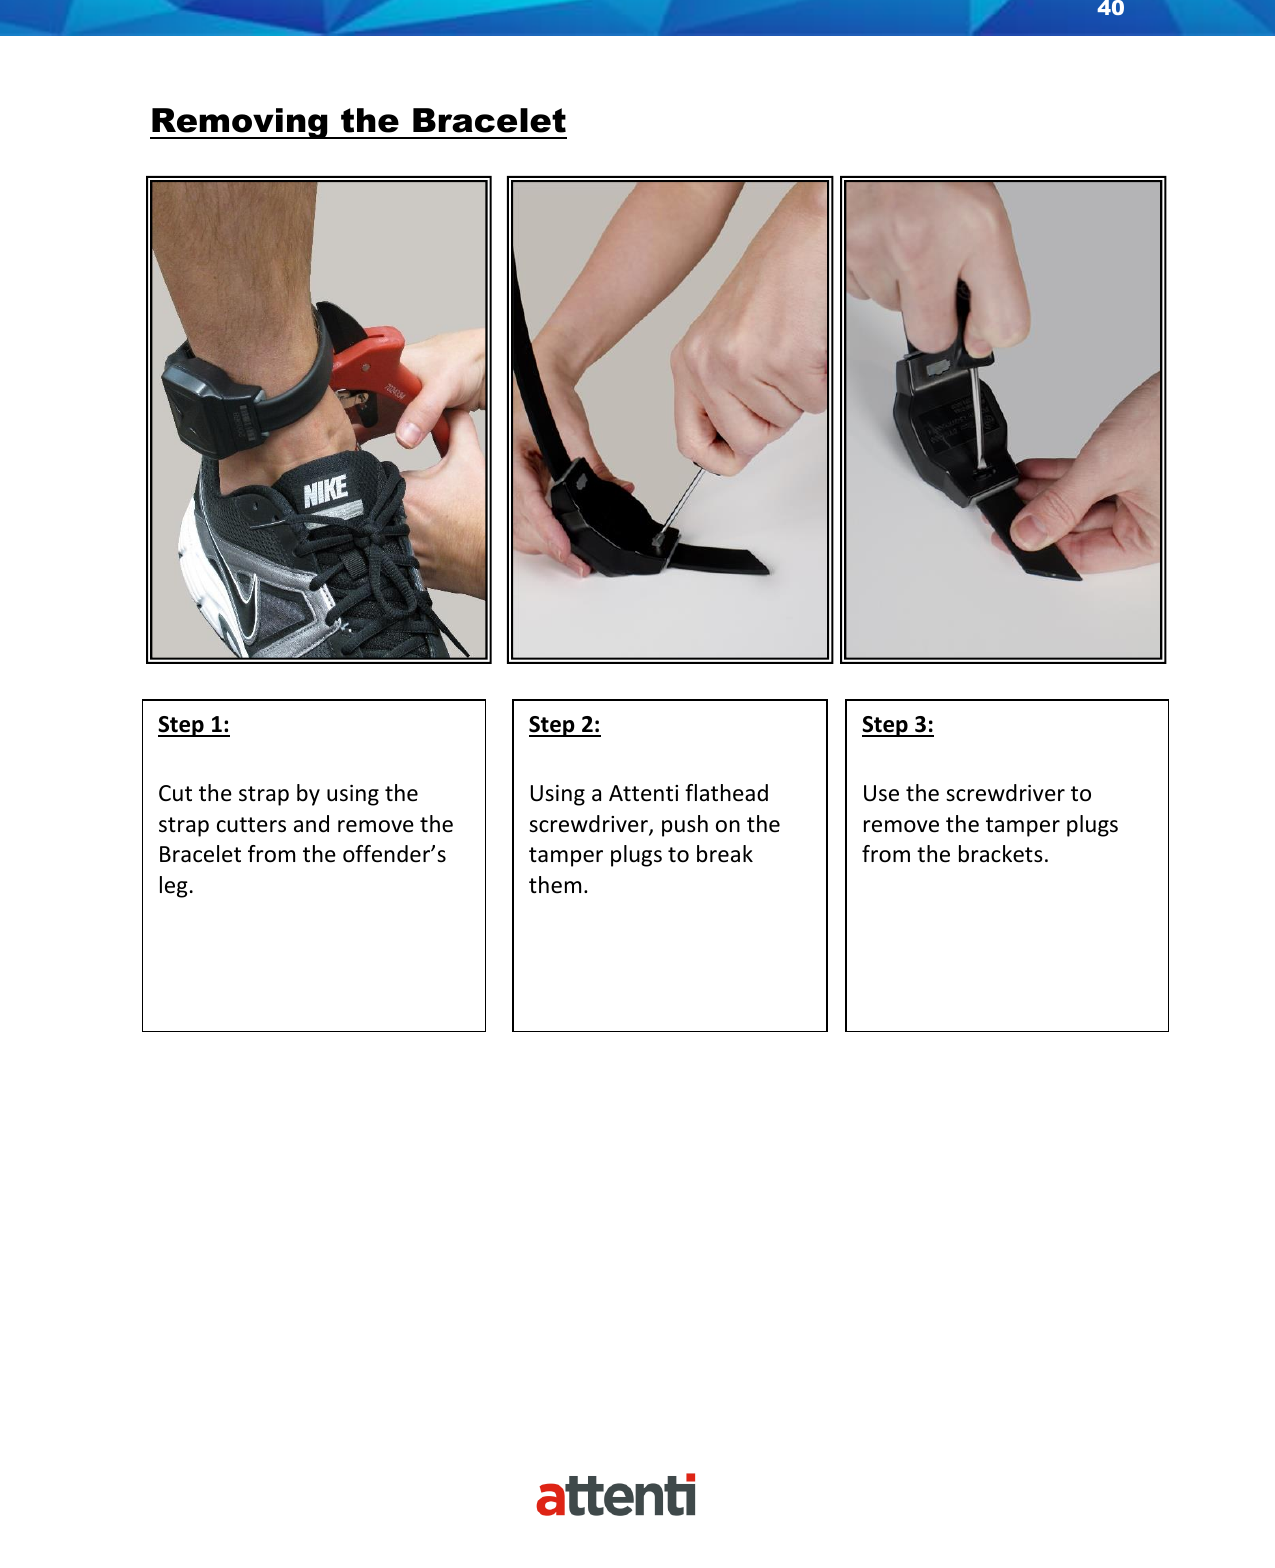
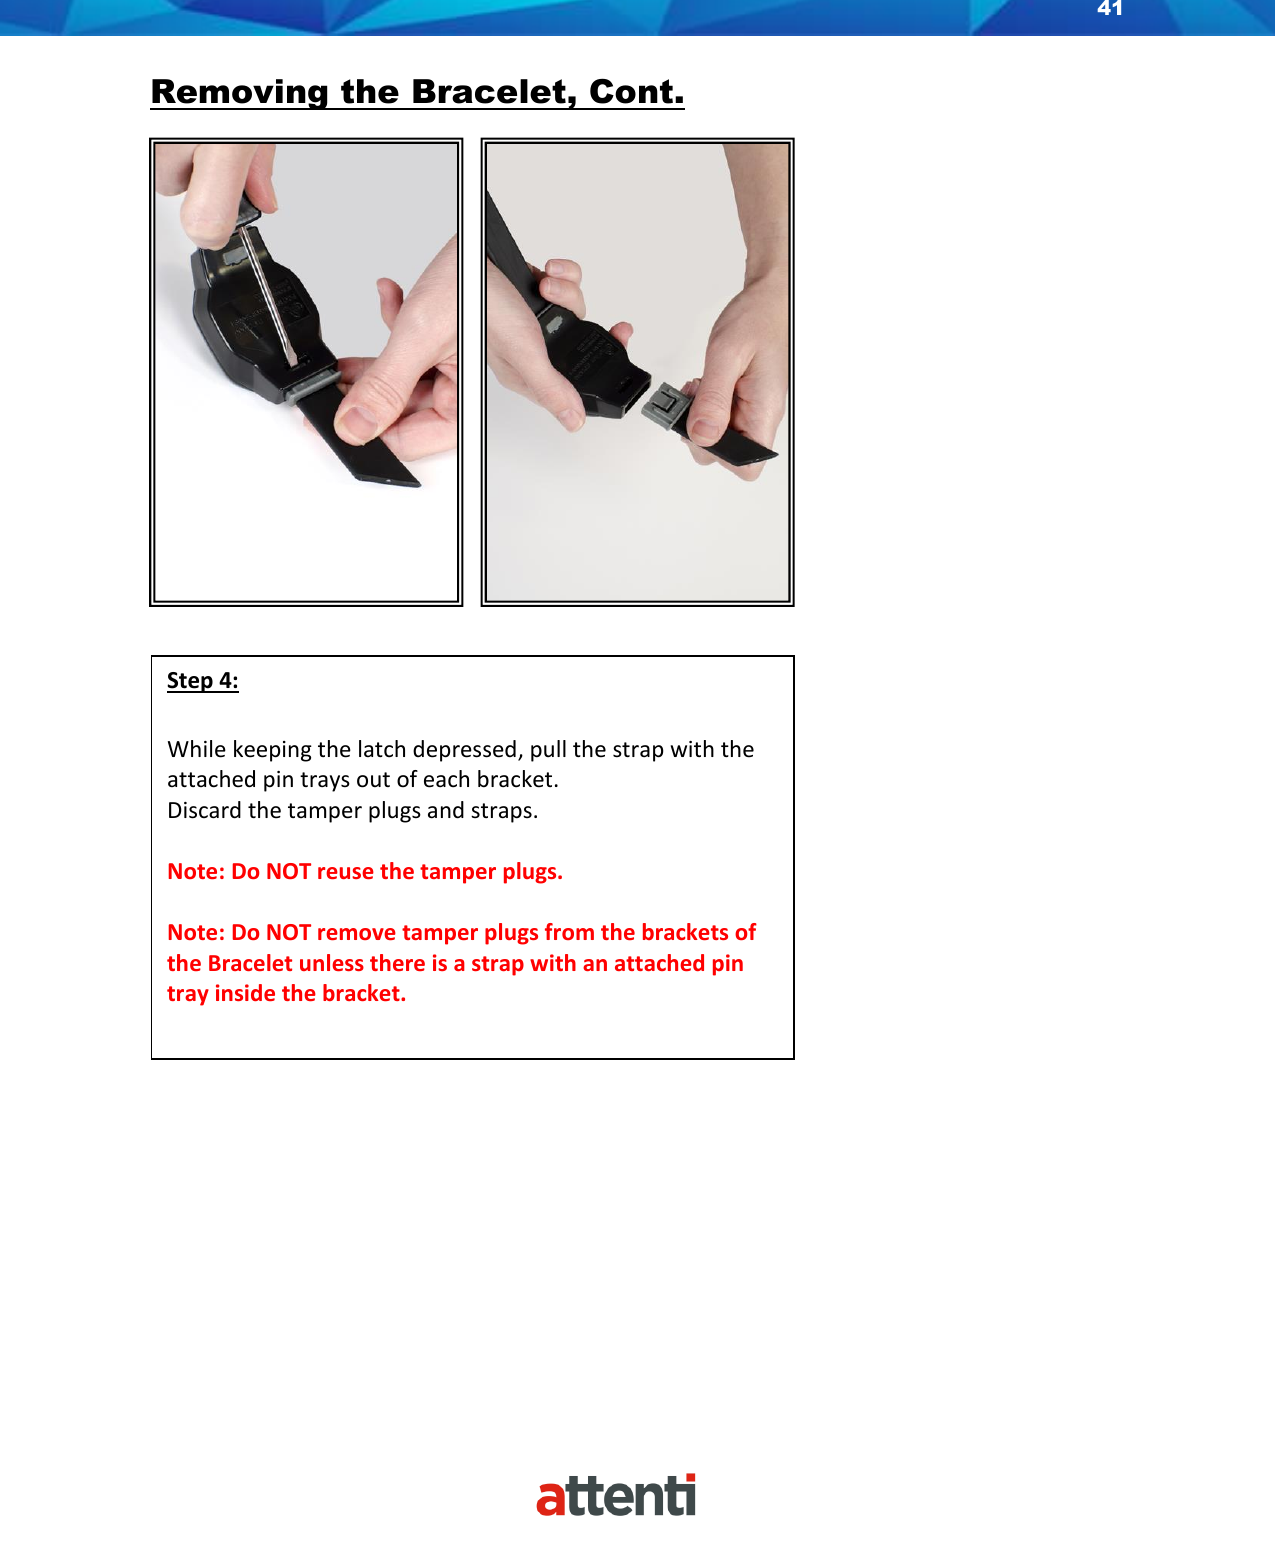
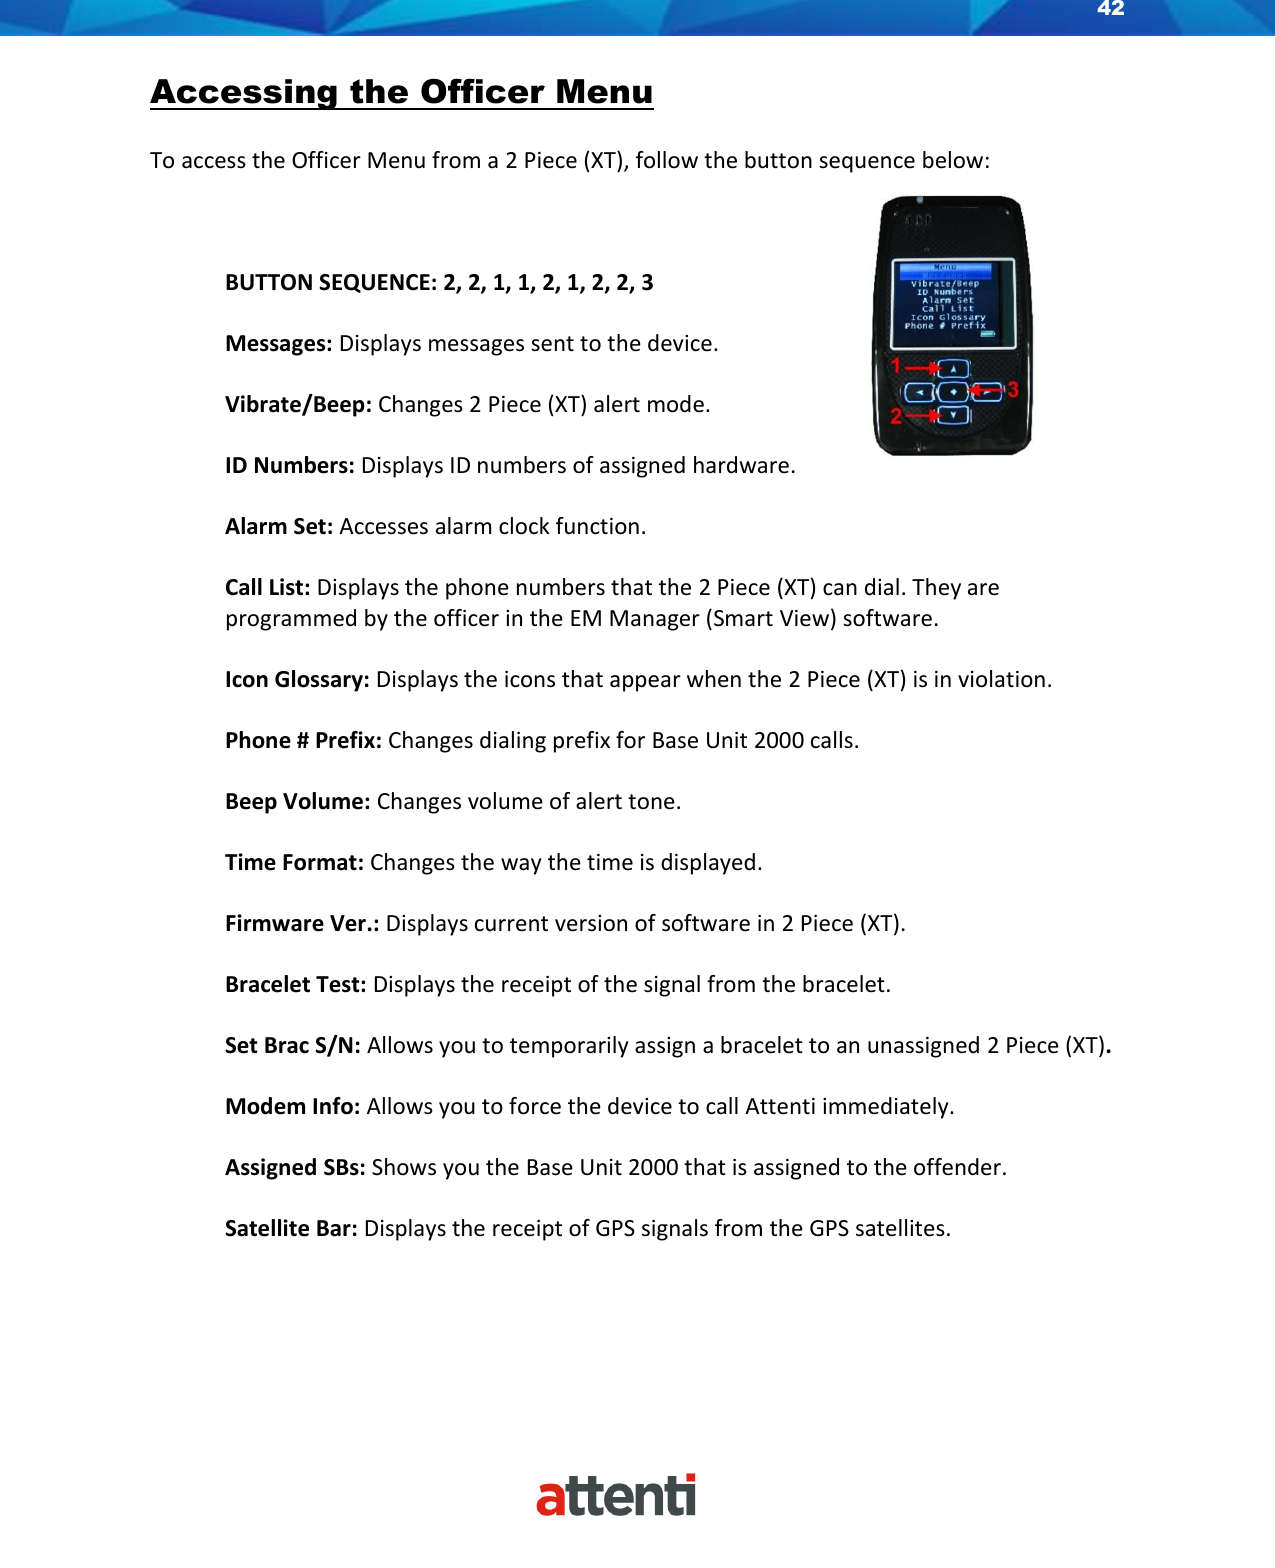
User Manual
Discussion / Help
Navigation