Audio Partnership PLC 752BD-004 150Mbps Wireless Lite N USB Adapter User Manual
Audio Partnership PLC 150Mbps Wireless Lite N USB Adapter
UserManual.wiki
>
Audio Partnership PLC
>
752BD 004 User Manual
User Manual
Navigation menu
Upload a User Manual
Namespaces
Wiki Guide
HTML
PDF
Info
Views
User Manual
Discussion / Help
Navigation


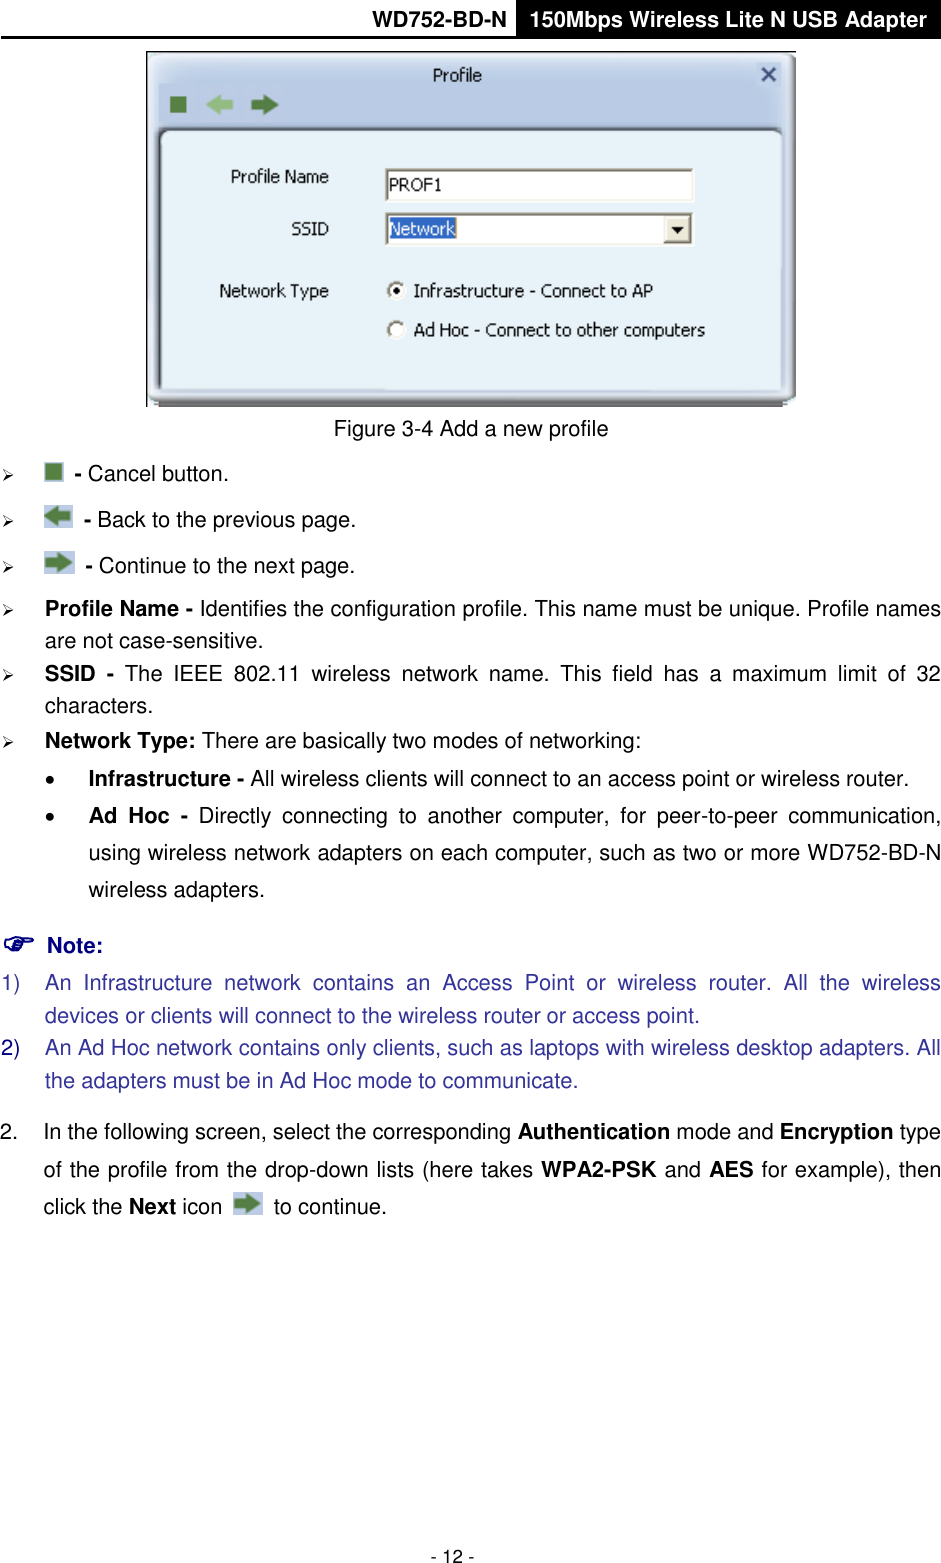
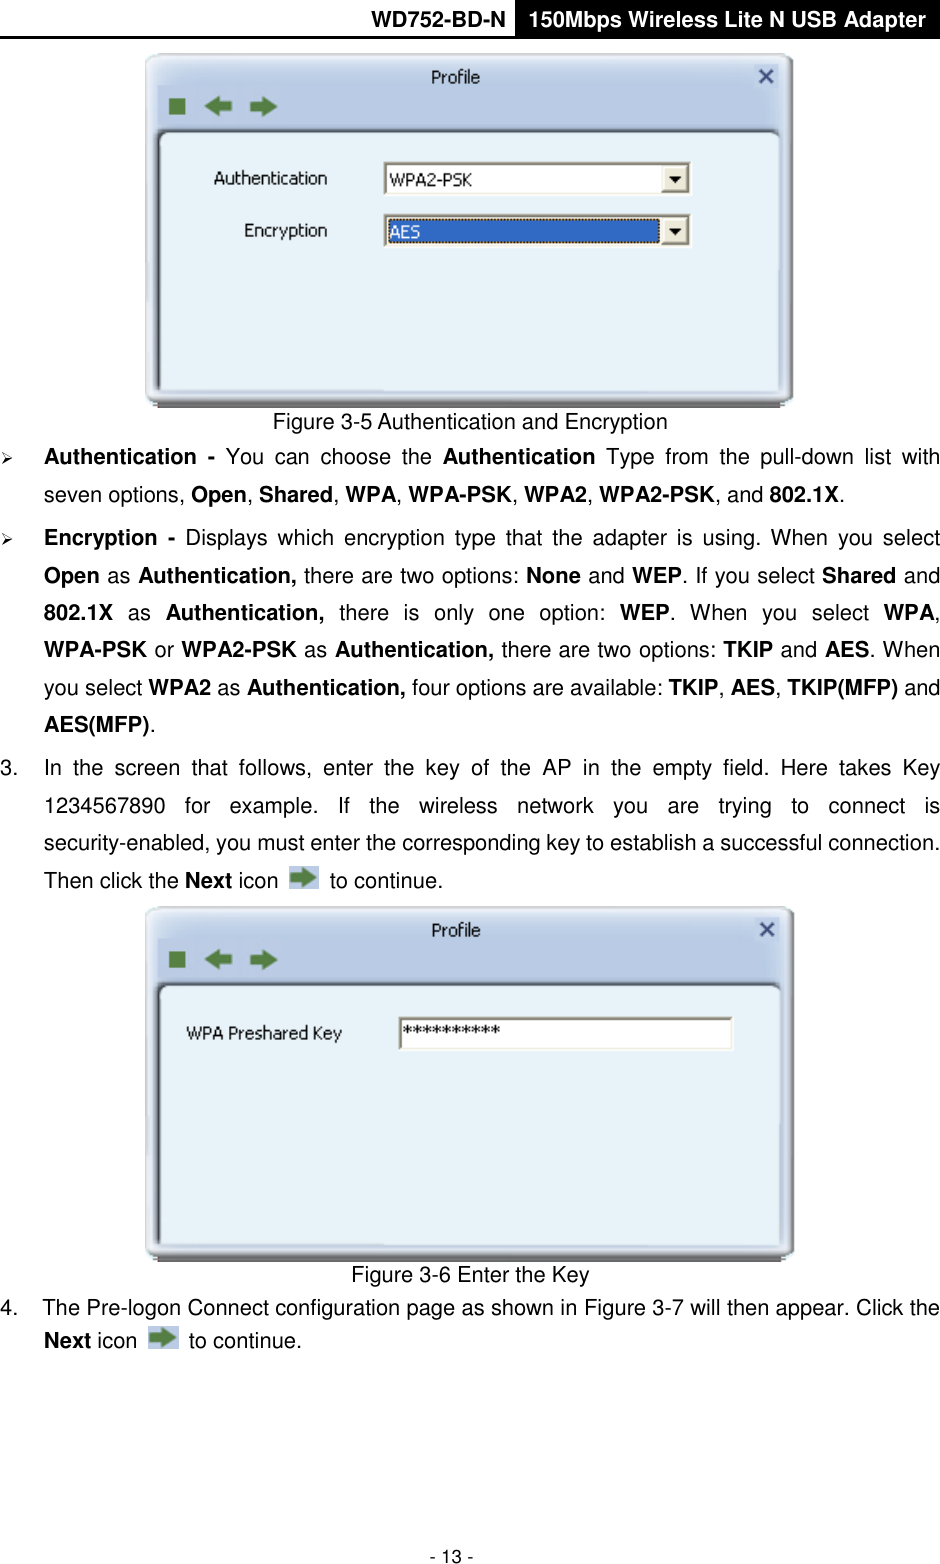
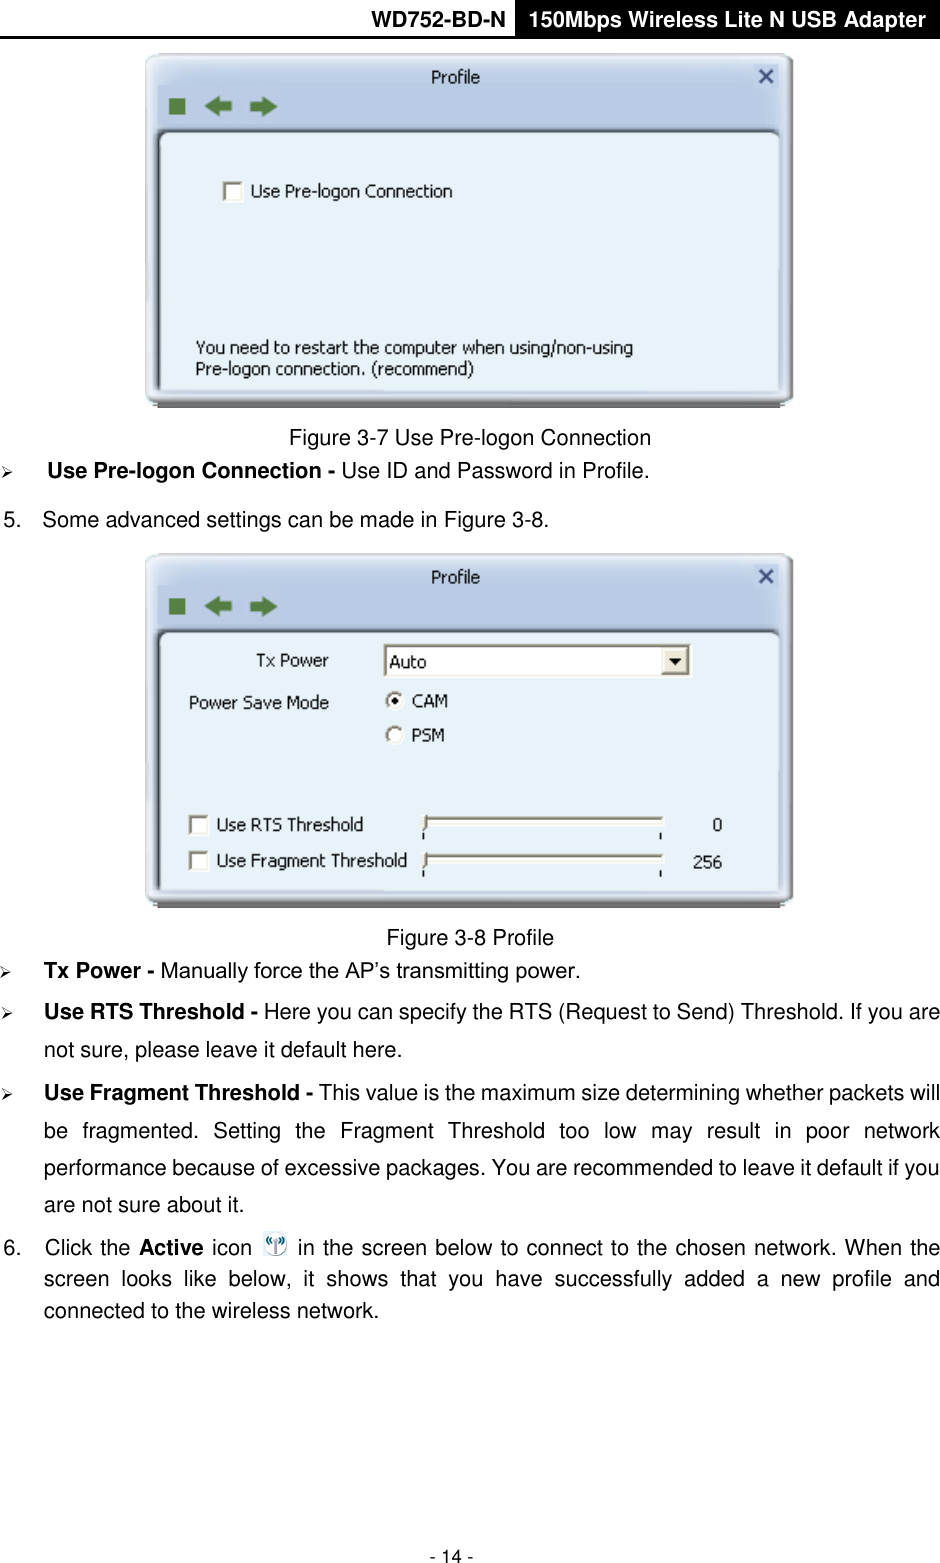
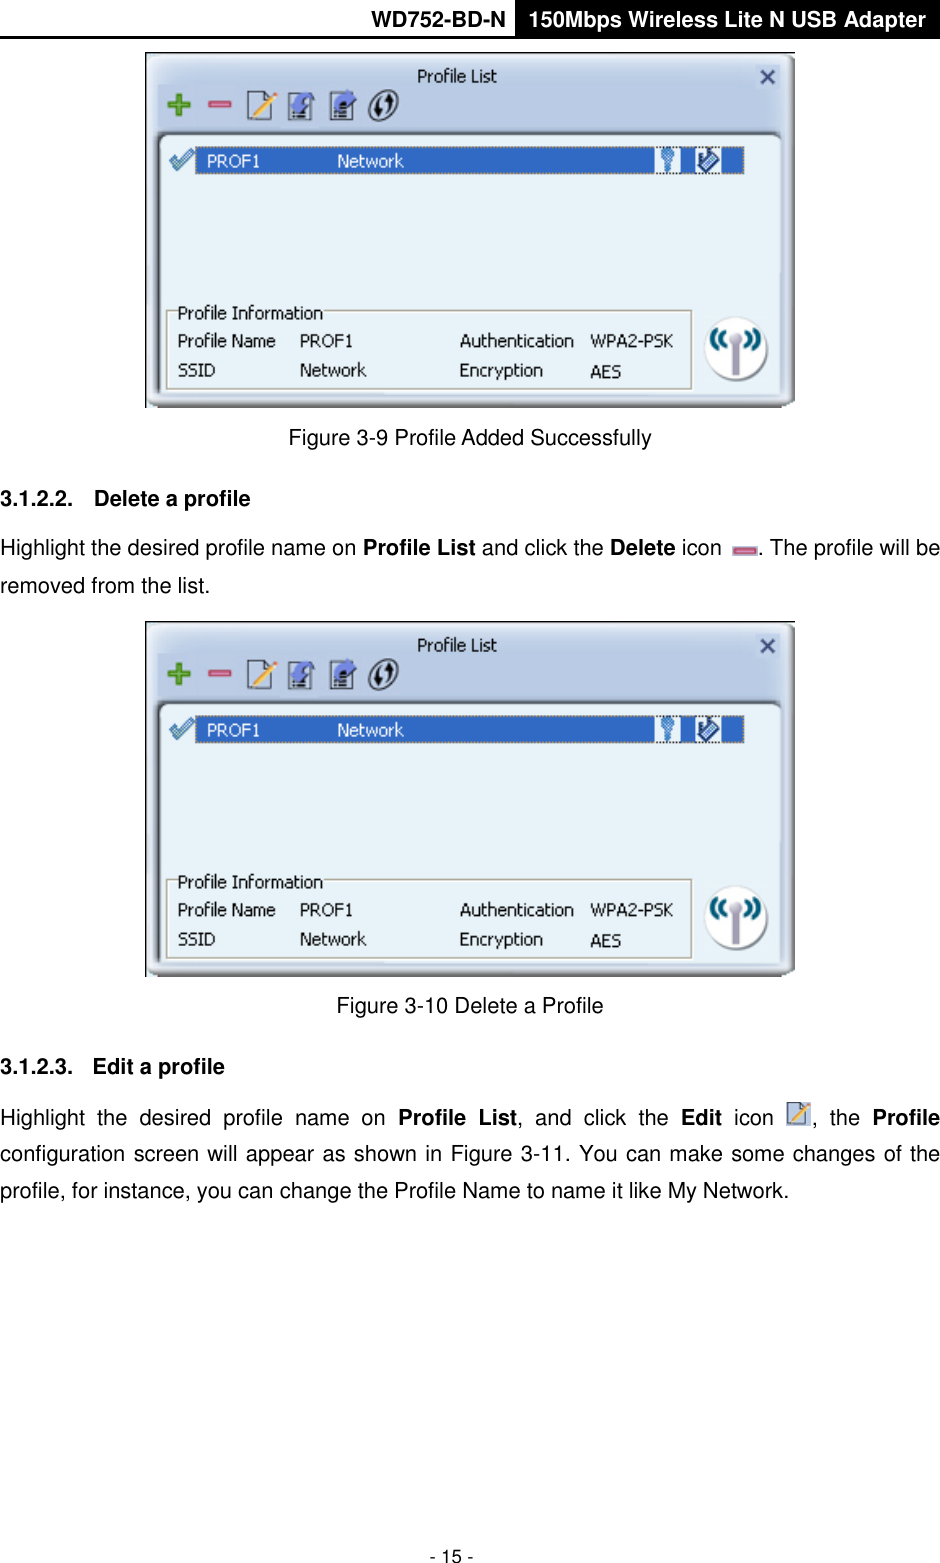
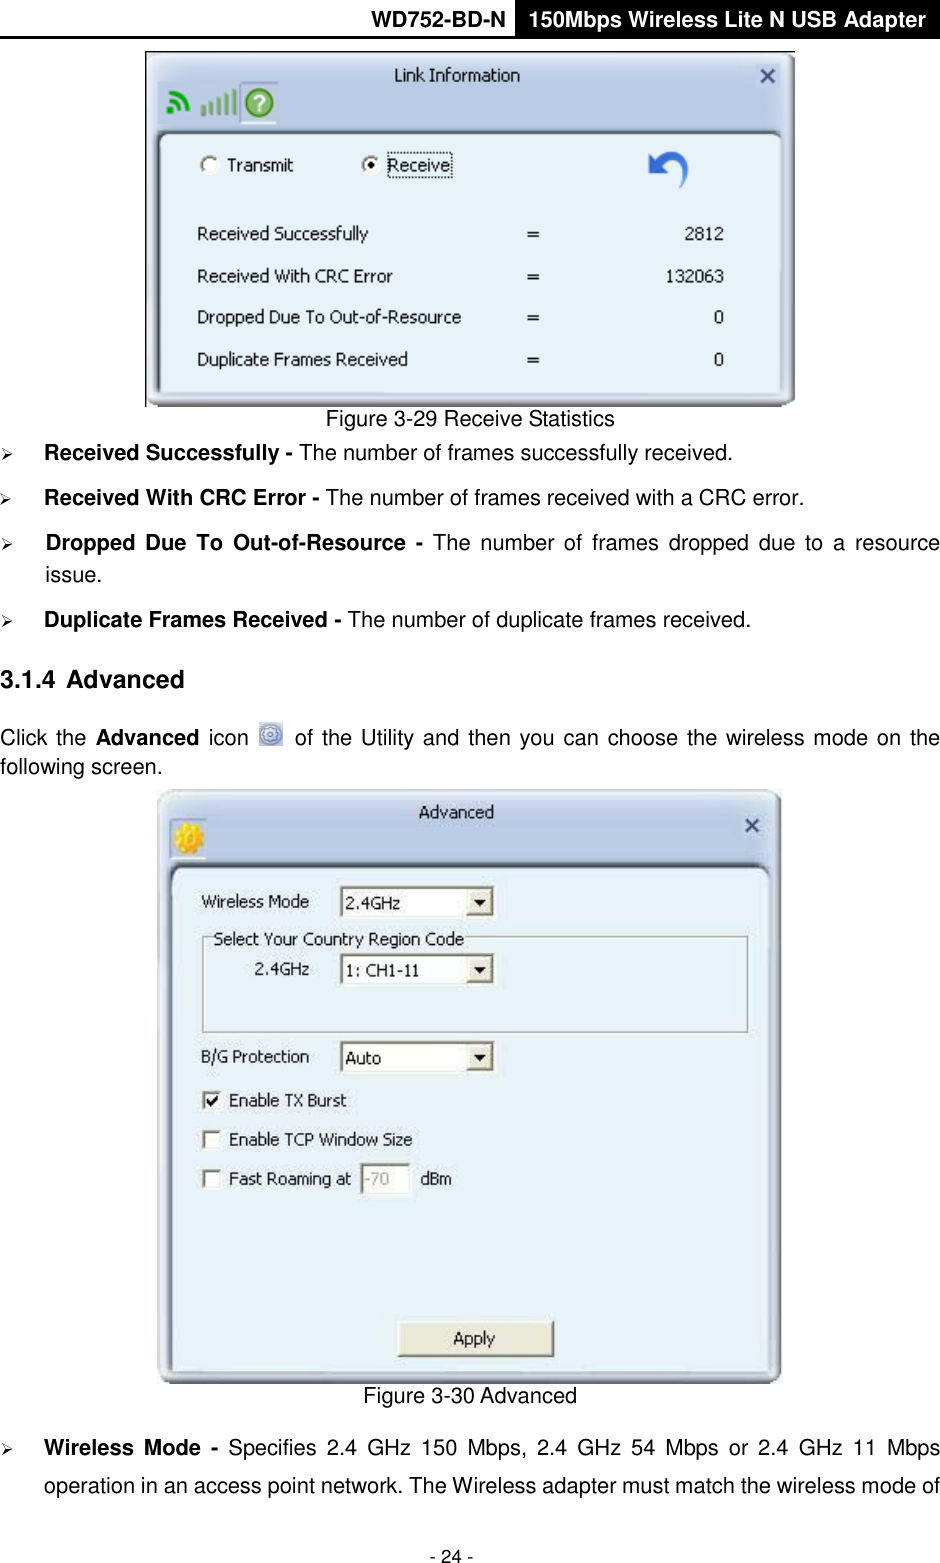
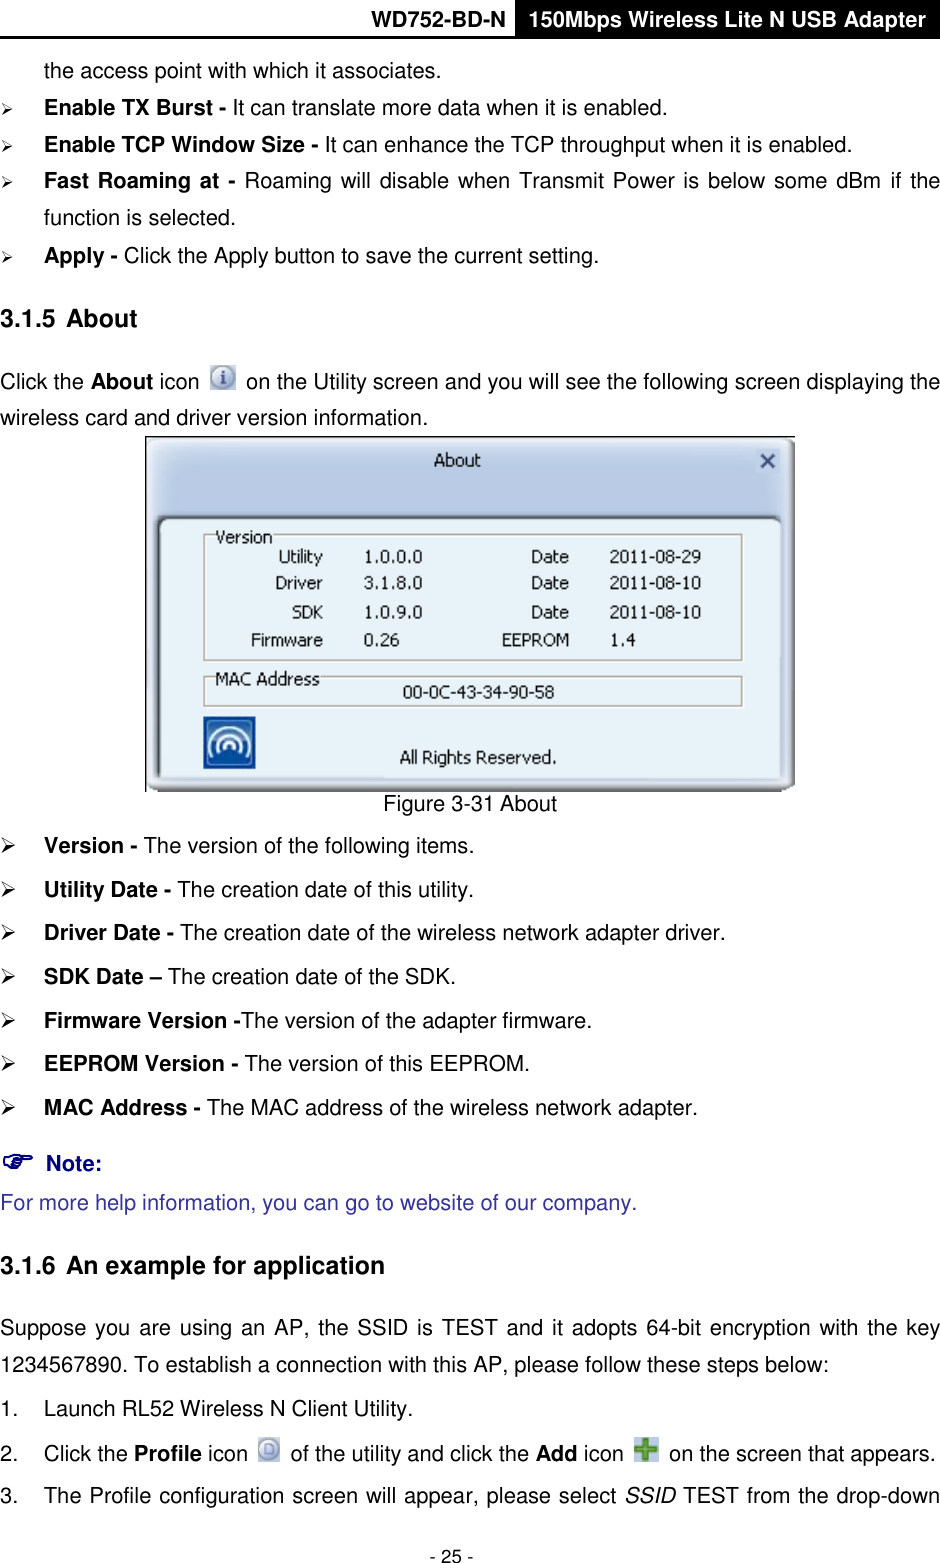


![WD752-BD-N 150Mbps Wireless Lite N USB Adapter - 39 - Appendix A: Glossary 802.11b - The 802.11b standard specifies a wireless networking at 11 Mbps using direct-sequence spread-spectrum (DSSS) technology and operating in the unlicensed radio spectrum at 2.4GHz, and WEP encryption for security. 802.11b networks are also referred to as Wi-Fi networks. 802.11g - Specification for wireless networking at 54 Mbps using direct-sequence spread-spectrum (DSSS) technology, using OFDM modulation and operating in the unlicensed radio spectrum at 2.4GHz, and backward compatibility with IEEE 802.11b devices, and WEP encryption for security. 802.11n - 802.11n builds upon previous 802.11 standards by adding MIMO (multiple-input multiple-output). MIMO uses multiple transmitter and HreceiverH antennas to allow for increased data throughput via spatial multiplexing and increased range by exploiting the spatial diversity, perhaps through coding schemes like Alamouti coding. The Enhanced Wireless Consortium (EWC)HU[3]UH was formed to help accelerate the IEEE 802.11n development process and promote a technology specification for interoperability of next-generation wireless local area networking (WLAN) products. Ad-hoc Network - An ad-hoc network is a group of computers, each with a wireless adapter, connected as an independent 802.11 wireless LAN. Ad-hoc wireless computers operate on a peer-to-peer basis, communicating directly with each other without the use of an access point. Ad-hoc mode is also referred to as an Independent Basic Service Set (IBSS) or as peer-to-peer mode, and is useful at a departmental scale or SOHO operation. DSSS (Direct-Sequence Spread Spectrum) - DSSS generates a redundant bit pattern for all data transmitted. This bit pattern is called a chip (or chipping code). Even if one or more bits in the chip are damaged during transmission, statistical techniques embedded in the receiver can recover the original data without the need for retransmission. To an unintended receiver, DSSS appears as low power wideband noise and is rejected (ignored) by most narrowband receivers. However, to an intended receiver (i.e. another wireless LAN endpoint), the DSSS signal is recognized as the only valid signal, and interference is inherently rejected (ignored). FHSS (Frequency Hopping Spread Spectrum) - FHSS continuously changes (hops) the carrier frequency of a conventional carrier several times per second according to a pseudo-random set of channels. Because a fixed frequency is not used, and only the transmitter and receiver know the hop patterns, interception of FHSS is extremely difficult. Infrastructure Network - An infrastructure network is a group of computers or other devices, each with a wireless adapter, connected as an 802.11 wireless LAN. In infrastructure mode, the wireless devices communicate with each other and to a wired network by first going through an access point. An infrastructure wireless network connected to a wired network is referred to as a Basic Service Set (BSS). A set of two or more BSS in a single network is referred to as an Extended Service Set (ESS). Infrastructure mode is useful at a corporation scale, or when it is necessary to connect the wired and wireless networks.](https://usermanual.wiki/Audio-Partnership-PLC/752BD-004/User-Guide-1893643-Page-44.png)