Audioengine B3 Bluetooth Speaker User Manual A5 p0 1 v2c
Audioengine Ltd Bluetooth Speaker A5 p0 1 v2c
UserManual.wiki
>
Audioengine
>
B3 User Manual
User manual
Navigation menu
Upload a User Manual
Namespaces
Wiki Guide
HTML
PDF
Info
Views
User Manual
Discussion / Help
Navigation


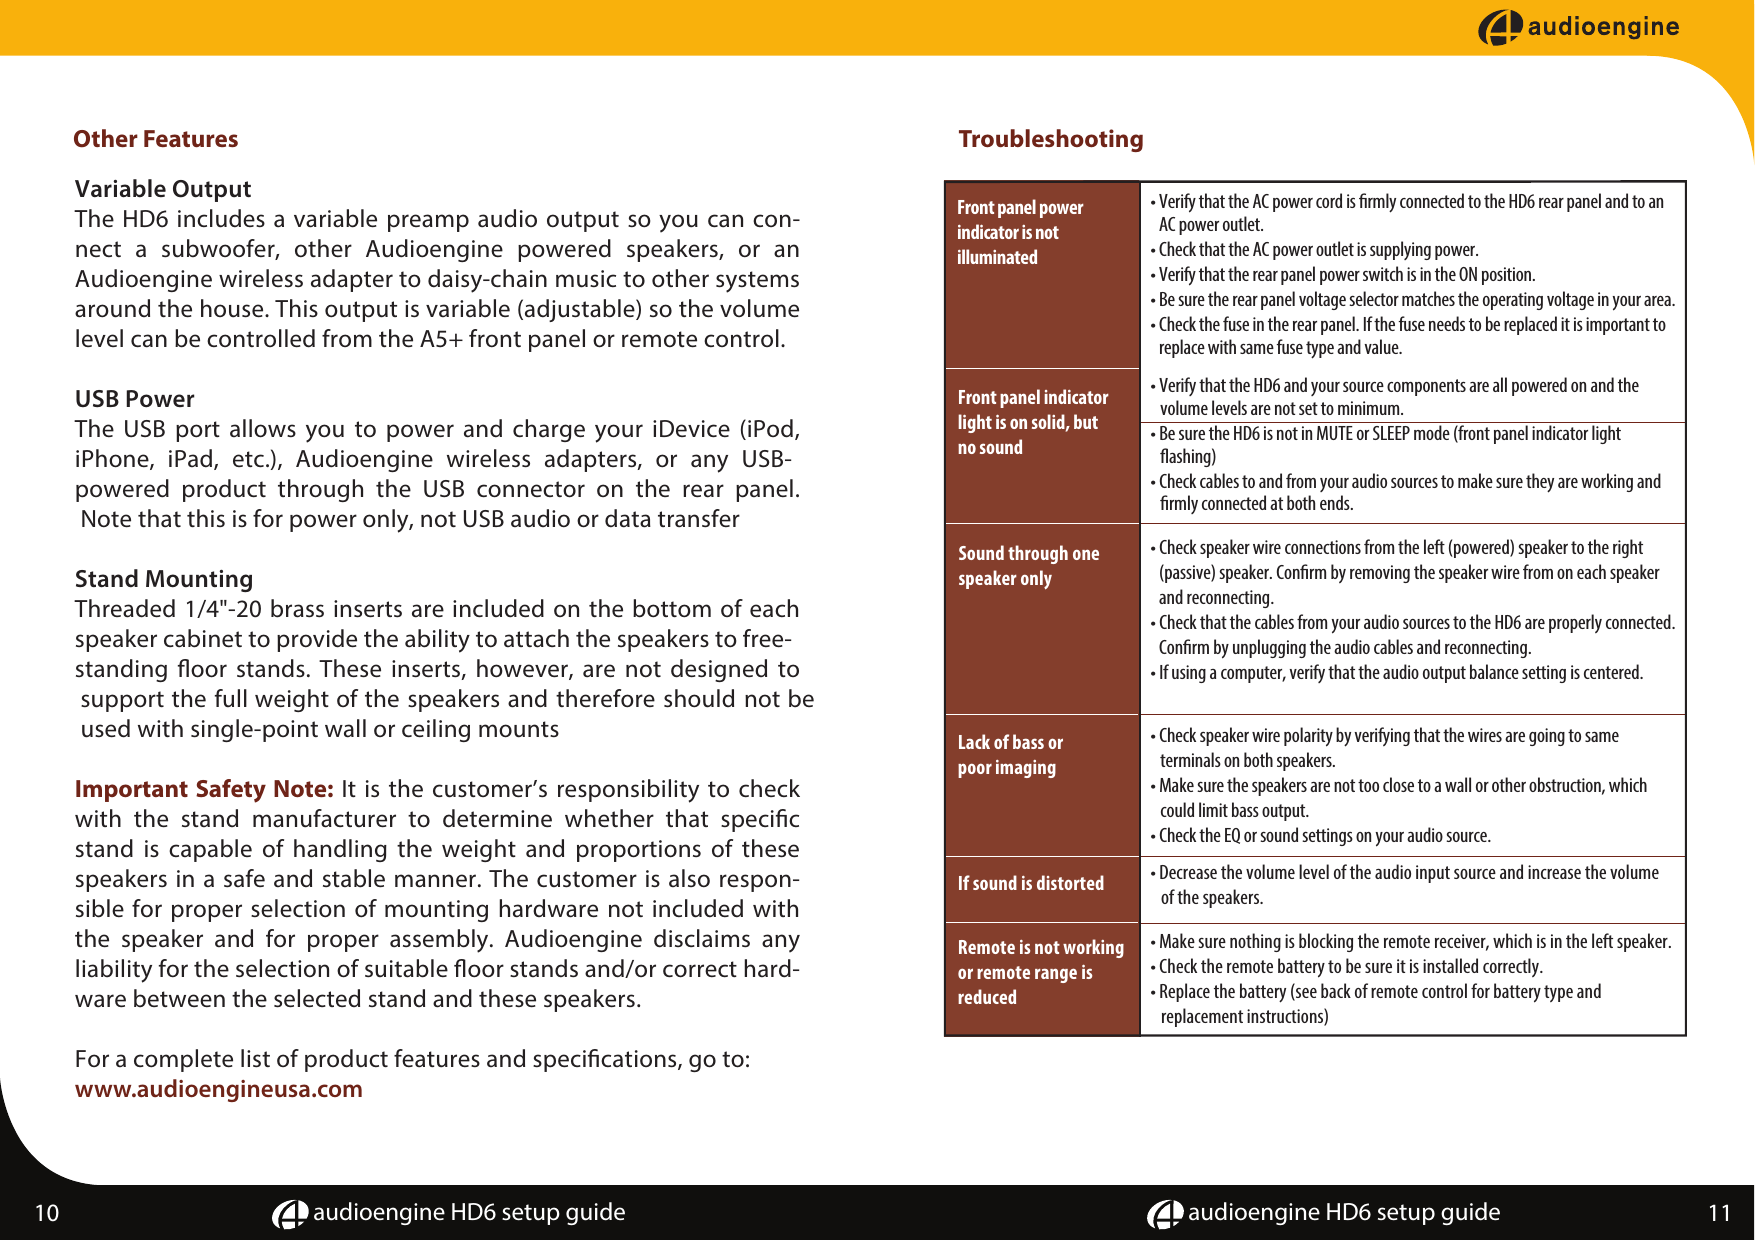
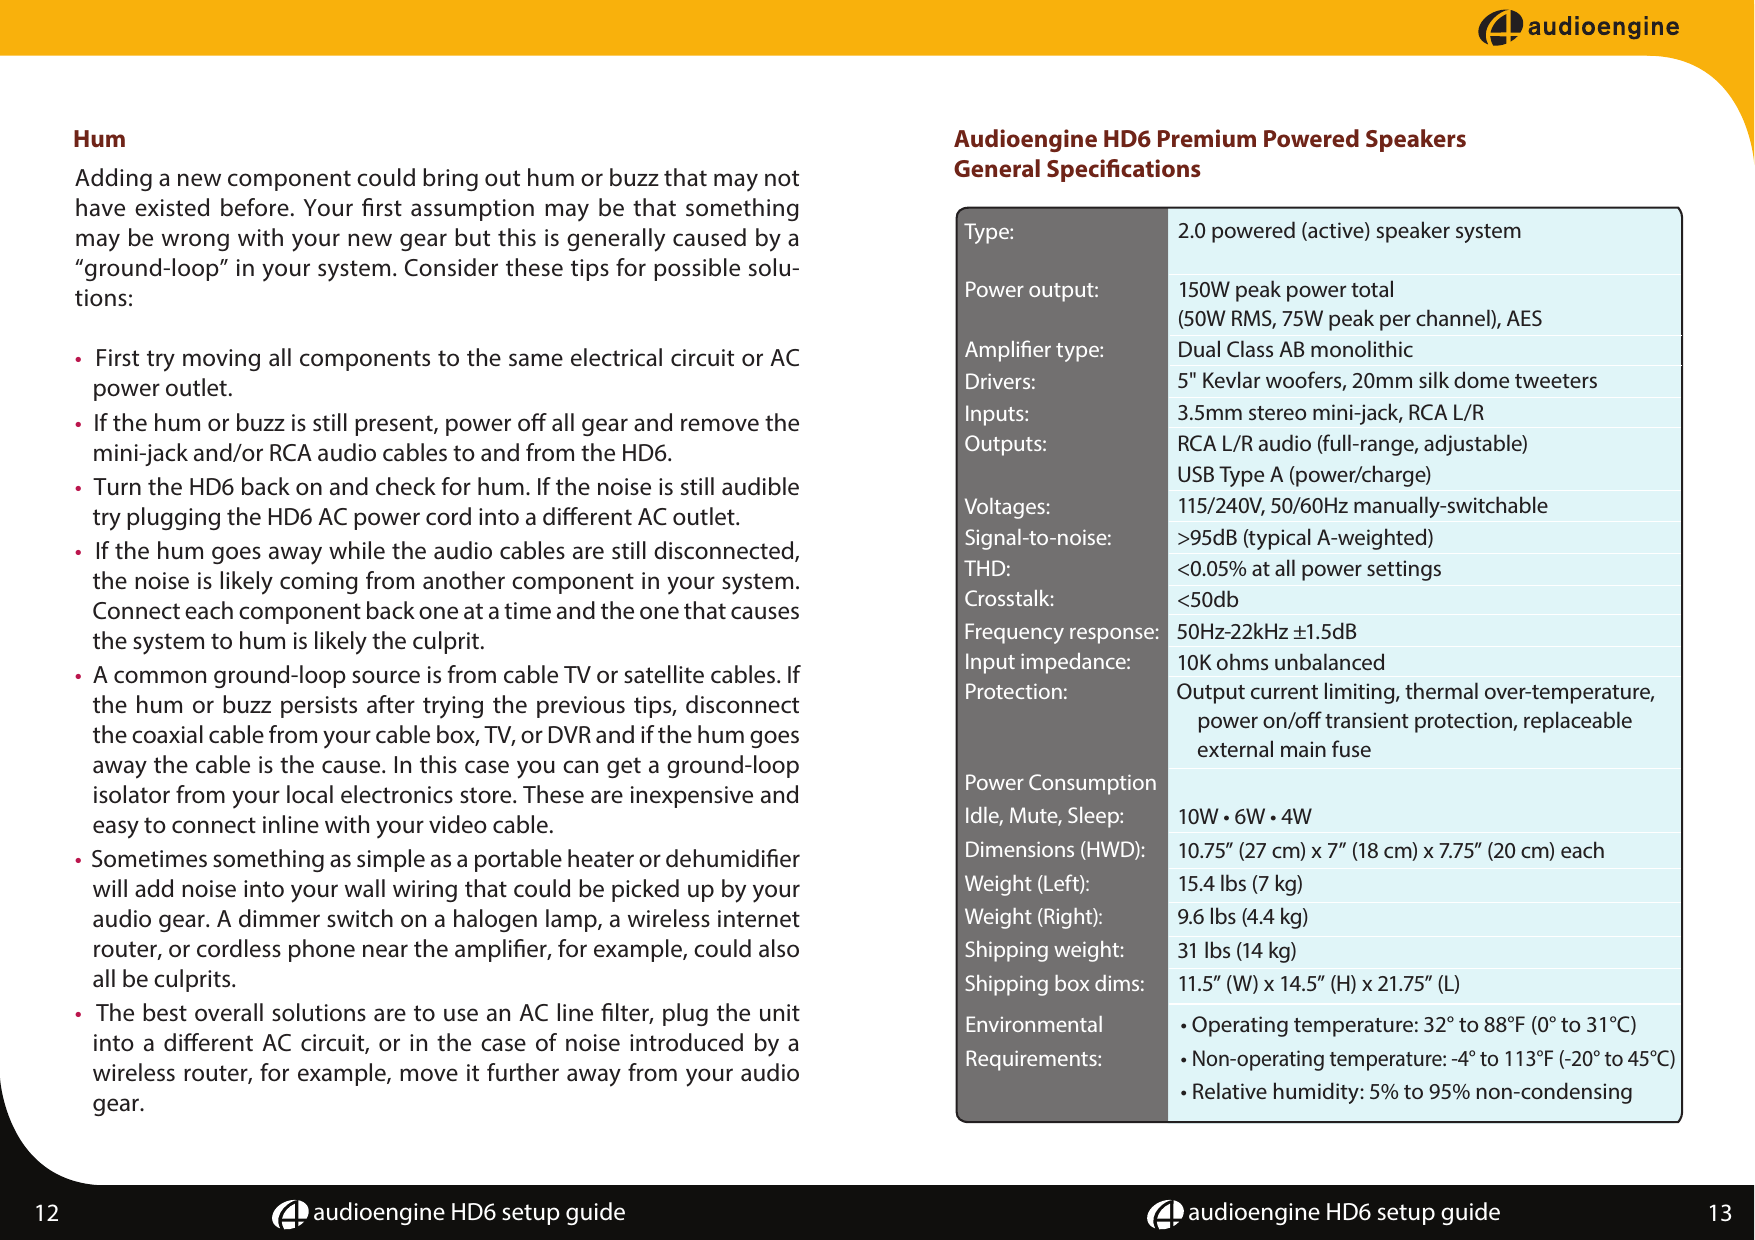
![audioengine HD6 setup guide audioengine HD6 setup guide14 15 Contact Us If you have any questions or feel you may need service, contact the reseller where you purchased your product or feel free to email us directly at: support@audioengineusa.com or call toll-free in the United States: (877) 853-4447About AudioengineAudioengine designs and builds innovative audio products with all your music in mind. Great sound, simple but elegant designs, high-quality materials, and truly useful features are what Audioengine is about. We sincerely hope you get as much enjoyment from our products as we've had creating them! For information about our other products go to: www.audioengineusa.comInformation for Users on Disposal of Old Equipment [European Union]This symbol indicates that the electrical and electronic equip-ment should not be disposed as general household waste at its end-of-life. Instead, the product should be handed over to the applicable collection point for the recycling in accordance with your national legislation. By disposing of this product correctly, you will help to conserve the environment and human health that could otherwise be caused by inappropriate waste handling of this product. For more information about collection point and recycling of this product, please contact your your household waste disposal service or the shop where you purchased the product. Penalties may be applicable for incorrect disposal of this waste, in accordance with national legislation.[Other Countries outside the European Union]If you wish to dispose of this product, please do so in accordance with applicable national legislation or other rules in your country for the treat-ment of old electrical and electronic equipment.WarrantyPeriodAll Audioengine products have a 3-year Limited Warranty on parts and labor from date of purchase. Your warranty is automatic so there is no need to register. This Limited Warranty applies only to Audioengine products purchased in the contiguous United States. For Limited Warranty coverage elsewhere please contact your Audioengine dealer, reseller, or distributor.What is coveredAll defective parts or faulty workmanship.What is not coveredThe Audioengine Limited Warranty does not cover damage caused by accident, misuse, abuse, neglect, excessive moisture, lightning, power surges, other acts of nature, unauthorized product modication or repairs, or failure to follow the instructions outlined in this Setup Guide.What we will doWe will repair or replace any defective parts, at our option, within a reasonable amount of time and free of charge any time during the warranty period. After service, we will ship the product to an address in the contiguous United States at our expense by the shipping method of our choice.What we ask from youYou will be responsible for shipping or transportation charges directly to Audioengine or to anauthorized dealer. We recommend you keep the original shipping materials, as it is impor-tant that you package the product so that it will not be damaged during shipping. Audioen-gine cannot be responsible for any damages incurred during shipping due to poor packing, so please pack well and insure your shipment.How to obtain Audioengine Warranty serviceIf you have any questions about your warranty coverage or you think you may need service, email the Audioengine Authorized Service Center at: support@audioengineusa.com or call toll-free in the United States: (877) 853-4447. We will do everything we can to answer your questions and resolve any issues as quickly as possible.Exclusive RemedyThis Limited Warranty is fully transferable provided that the current owner furnishes the original proof of purchase and that the serial number on the product is intact. THE MAXIMUM LIABILITY OF AUDIOENGINE SHALL NOT EXCEED THE ACTUAL PURCHASE PRICE PAID BY YOU FOR THE PROD-UCT. IN NO EVENT SHALL AUDIOENGINE BE LIABLE FOR SPECIAL, INCIDENTAL, CONSEQUENTIAL OR INDIRECT DAMAGES.Product Returns and Refunds Your satisfaction is guaranteed! Should you have a problem or are not satised with any Audio-engine product, send us an email at: support@audioengineusa.com or call toll-free in the United States: (877) 853-4447.Attention:This symbol is only valid in the European Union.](https://usermanual.wiki/Audioengine/B3/User-Guide-2708656-Page-8.png)