Avantech Mobile CT6508 GSM 900/1800/1900 Mobile Phone User Manual PhilipsXC650 GB 4311 255 58961
Avantech Mobile GSM 900/1800/1900 Mobile Phone PhilipsXC650 GB 4311 255 58961
UserManual.wiki
>
Avantech Mobile
>
CT6508 User Manual
>
User Manual
Contents
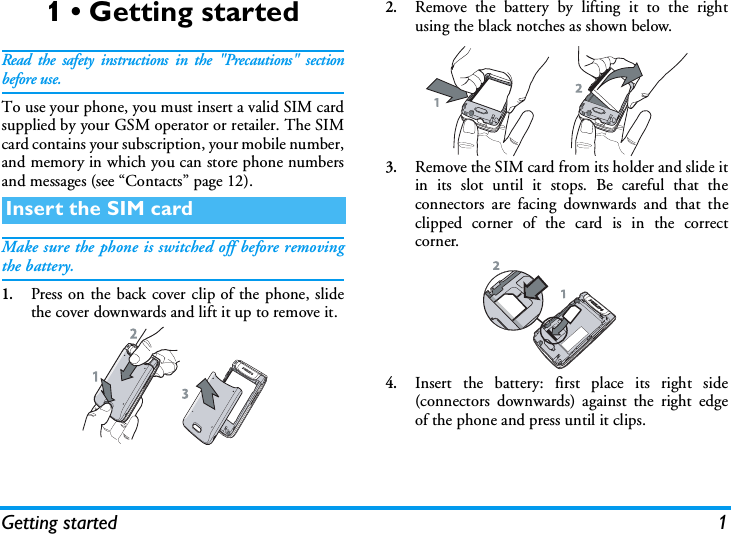
1.
SAR Addendum to User manual
2.
User Manual
User Manual
Navigation menu
Upload a User Manual
Namespaces
Wiki Guide
HTML
PDF
Info
Views
User Manual
Discussion / Help
Navigation


![Messages 311.Select Open mailbox: your phone automaticallyconnects to the e-mail server and downloads thelist of e-mail headers if any (five at a time).2.If Next (or Previous) appears at the end (orbeginning) of the list, other e-mail headers arepending: select one of the available options andpress , to retrieve them.An e-mail without any attachment may beautomatically displayed in the details screen.3.Select a header, and press ,to display theDetails. The following status icons may appear inregards to each header:4.Press , and select Get mail to download thee-mail. Repeat this operation to download eache-mail corresponding to each selected header.If the e-mail is too big (over 50 KB), it is rejected andthe download is cancelled.5.If the e-mail you have received containsattachments (picture, text or another e-mail),they are characterised by a specific icon:[Noicon]The e-mail can be downloaded.The e-mail size is too large, it cannotbe downloaded.The e-mail is marked to be deleted.Contains the details of the e-mail header(date and time, sender’s e-mail address, etc.),press , to display these details.The text of the e-mail itself can be viewed asan attachment, press , to read it (noadvanced options in this case).A text file (text only, ".txt" format) isattached to the e-mail, press , to read it(no advanced options in this case).The application needed to manage thisattachment isn’t available in your phone, orthe e-mail is too large to be uploaded.Another e-mail is attached to the one youreceived (up to five e-mails can be attachedone after the other, no advanced options inthis case).A picture is attached to this e-mail. Select itin the list and press , twice to store it inyour phone (you can rename it if you wish).](https://usermanual.wiki/Avantech-Mobile/CT6508.User-Manual/User-Guide-466290-Page-37.png)