Avaya Administering Aura Session Manager Release 6 1 Users Manual Aura®
2015-06-01
: Avaya Avaya-Administering-Aura-Session-Manager-Release-6-1-Users-Manual-734350 avaya-administering-aura-session-manager-release-6-1-users-manual-734350 avaya pdf
Open the PDF directly: View PDF ![]() .
.
Page Count: 532 [warning: Documents this large are best viewed by clicking the View PDF Link!]
- Contents
- Chapter 1: Getting started
- Introduction
- Overview of System Manager
- Log on to System Manager
- Password and security policies for users with username admin
- Password aging policy enforcement
- Password strength policy enforcement
- Password history policy enforcement
- Password lockout policy enforcement
- Inactive session termination policy
- Logon warning banner
- Editing password policies
- Editing Session Properties
- Security settings
- Editing the login warning banner
- Password policies field descriptions
- Session Properties field descriptions
- SIP Application Server
- Overview of SIP Application Server
- Starting the SIP Application Server management console
- SIP A/S Connection Details field descriptions
- About SIP Application Server Management Console
- Viewing Service Director Statistics
- Statistics: Service Directors field descriptions
- Service Director Statistics field descriptions
- Viewing Service Host Instance Statistics
- Statistics: Service Hosts field descriptions
- Service Host Statistics field descriptions
- Chapter 2: Synchronizing Communication Manager and messaging data with System Manager
- Chapter 3: Managing Security
- Introduction
- Setting SCEP enrollment password
- Adding a Session Manager application
- Viewing trusted certificates
- Adding trusted certificates
- Exporting the Session Manager Certificate
- Removing trusted certificates
- Refreshing CA Certificate List
- Viewing identity certificates
- Enrollment Password field descriptions
- Manage Elements field descriptions
- Application Details field descriptions
- Trusted Certificates field descriptions
- Add Trusted Certificate field descriptions
- View Trust Certificate field descriptions
- Delete Trusted Certificate Confirmation field descriptions
- Identity Certificates field descriptions
- Chapter 4: Managing Users
- Introduction
- Adding users
- Managing communication profiles
- Creating a new communication profile
- Deleting a communication profile
- Creating a new communication address for a communication profile
- Modifying a communication address of a communication profile
- Deleting a communication address from a communication profile
- Session Manager Communication profile administration
- Station and Messaging profiles of a user
- Adding a messaging profile for a user
- Modifying a messaging profile of a user
- Removing association between a subscriber mailbox and a user
- Deleting a subscriber mailbox
- Adding an endpoint profile for a user
- Modifying a endpoint profile of a user
- Removing association between an endpoint and a user
- Deleting an endpoint profile of a user
- Modifying user accounts
- Viewing details of a user
- Removing user accounts
- Creating duplicate users
- Filtering users
- Searching for users
- Viewing deleted users
- Restoring a deleted user
- New User Profile field descriptions
- User Profile Edit field descriptions
- User Profile View field descriptions
- User Delete Confirmation field descriptions
- Managing bulk importing and exporting
- Bulk importing users
- Scheduling a user import job
- Aborting a user import job on first error
- Canceling a user import job
- Deleting an importing job
- Viewing a user importing job in Scheduler
- Viewing details of a user importing job
- List of XML Schema Definitions and sample XMLs for bulk import
- Attribute details defined in Import user XSD
- Attribute details defined in Delete User XSD
- Attribute details defined in the Endpoint profile XSD
- Attribute details defined in the Messaging communication profile XSD
- Attribute details defined in the Session Manager communication profile XSD
- Import Users field descriptions
- Import Users – Job Details field descriptions
- Job Details field descriptions
- Quick start to importing users
- Chapter 5: Managing Session Manager routing
- Overview of Session Manager routing
- Prerequisites for Routing Setup
- Routing
- Domains
- Locations
- Adaptations
- SIP Entities
- About SIP Entities
- Authentication of trusted SIP entities
- IP and transport layer validation
- TLS layer validation
- Creating SIP Entities
- Modifying SIP entities
- Deleting SIP Entities
- Delete Confirmation field descriptions
- SIP Entities field descriptions
- SIP Entity Details field descriptions
- SIP Entity List field descriptions
- Bulk import for SIP Entities
- SIP Entity References
- Entity Links
- Time Ranges
- Routing Policies
- Dial Patterns
- Regular Expressions
- About Regular Expressions
- Creating Regular Expressions
- Modifying Regular Expressions
- Deleting Regular Expressions
- Delete Confirmation field descriptions
- Regular Expressions field descriptions
- Regular Expression Details field descriptions
- Regular Expression List field descriptions
- Bulk import for Regular Expressions
- Defaults
- Chapter 6: Configuring and monitoring Session Manager instances
- Dashboard
- About Session Manager Dashboard
- Session Manager Dashboard page field descriptions
- Confirm Accept New Service Confirmation for Session Managers page field descriptions
- Confirm Deny New Service for Session Managers page field descriptions
- Confirm Shutdown for Session Managers page field descriptions
- Confirm Reboot for Session Managers page field descriptions
- Session Manager Administration
- About Session Manager Administration
- About E911 Services
- About NIC Bonding
- Adding a SIP entity as a Session Manager instance
- Viewing the Session Manager administration settings
- Modifying the Session Manager administration settings
- Deleting a Session Manager instance
- Administering ELIN Server
- Delete Confirmation page field descriptions
- Session Manager Administration page field descriptions
- Session Manager page field descriptions
- Saving Global Session Manager Settings
- Branch Session Manager Administration
- About Branch Session Manager
- Administering Branch Session Manager
- Adding a SIP entity as a Branch Session Manager instance
- Viewing the Branch Session Manager administration settings
- Modifying the Branch Session Manager administration settings
- Deleting a Branch Session Manager instance
- Delete Confirmation page field descriptions
- Branch Session Manager page field descriptions
- Communication Profile Editor
- Network Configuration
- Device and Location Configuration
- Device Settings Groups
- Device Settings Groups
- Viewing Device Settings Groups
- Creating a Device Settings Group - Location Group
- Modifying a Device Settings Group - Location Group
- Removing Device Settings Groups - Location Groups
- Creating a Device Settings Group - Terminal Group
- Modifying a Device Settings Group - Terminal Group
- Removing Device Settings Group - Terminal Group
- Purpose and usage of SIP subscriptions
- Device Settings Groups field descriptions
- Device Settings Group - Default Group field descriptions
- Device Settings Group - Location Group field descriptions
- Device Settings Group - Terminal Group field descriptions
- Location Settings
- Device Settings Groups
- Application Configuration
- Applications
- Application Sequences
- Application Sequences
- Viewing application sequences
- Creating an Application Sequence
- Modifying an Application Sequence
- Removing Application Sequences
- Rearranging Applications in an Application Sequence
- Adding Applications in an existing Application Sequence
- Application Sequences field descriptions
- Application Sequence Editor field descriptions
- Implicit Users
- Session Manager Network Connect Service
- System Status
- System Tools
- Maintenance Tests
- About Maintenance Tests
- Maintenance Tests page field descriptions
- Test network connections to each Session Manager
- Test data distribution and redundancy link
- Test Call Processing status
- Test Service Host status
- Test Service Director Status
- Test SIP A/S Management Server Status
- Test sanity of Secure Access Link (SAL) agent
- Test management link functionality
- Test Security Module Status
- Test Postgres database sanity
- Running maintenance tests
- SIP Tracer Configuration
- SIP Trace Viewer
- Call Routing Test
- Maintenance Tests
- Dashboard
- Chapter 7: Managing events
- Chapter 8: Managing system data
- Administering backup and restore
- Backup and Restore
- Creating a data backup on a local server
- Scheduling a data backup on a local server
- Restoring a data backup from a local server
- Viewing data retention rules
- Modifying data retention rules
- Accessing the Data Retention Rules service
- Viewing loggers for a log file
- Assigning an appender to a logger
- Editing a logger in a log file
- Modifying an appender
- Removing an appender from a logger
- Backup and Restore field descriptions
- Backup field descriptions
- Schedule Backup field descriptions
- Restore field descriptions
- Data Retention field descriptions
- Logging Settings field descriptions
- Edit Logger field descriptions
- Edit Appender field descriptions
- Attach Appender field descriptions
- Data Replication Service
- Data Replication Service
- Viewing replica groups
- Viewing replica nodes in a replica group
- Repairing a replica node
- Repairing all replica nodes in a replica group
- Viewing replication details for a replica node
- Removing a replica node
- Removing a replica node from queue
- Replica Groups field descriptions
- Replica Nodes field descriptions
- Data Replication field descriptions
- Managing scheduled jobs
- Scheduler
- Accessing scheduler
- Viewing pending jobs
- Viewing completed jobs
- Viewing details of a pending job
- Viewing details of a completed job
- Viewing details of a pending job
- Viewing logs for a job
- Viewing completed jobs
- Filtering Jobs
- Editing a job
- Deleting a job
- Disabling a job
- Enabling a job
- Stopping a Job
- Pending Jobs field descriptions
- Completed Jobs field descriptions
- Job Scheduling-View Job field descriptions
- Job Scheduling-Edit Job field descriptions
- Job Scheduling-On Demand Job field descriptions
- Disable Confirmation field descriptions
- Stop Confirmation field descriptions
- Delete Confirmation field descriptions
- Administering backup and restore
- Appendix A: Default certificates used for SIP-TLS
- Appendix B: Regular Expression constructs
- Index

Administering Avaya Aura® Session
Manager
Issue 1.1
03-603324
Release 6.1
November 2010

© 2010 Avaya Inc.
All Rights Reserved.
Notice
While reasonable efforts have been made to ensure that the
information in this document is complete and accurate at the time of
printing, Avaya assumes no liability for any errors. Avaya reserves the
right to make changes and corrections to the information in this
document without the obligation to notify any person or organization of
such changes.
Documentation disclaimer
“Documentation” means information published by Avaya in varying
mediums which may include product information, operating instructions
and performance specifications that Avaya generally makes available
to users of its products. Documentation does not include marketing
materials. Avaya shall not be responsible for any modifications,
additions, or deletions to the original published version of
documentation unless such modifications, additions, or deletions were
performed by Avaya. End User agrees to indemnify and hold harmless
Avaya, Avaya's agents, servants and employees against all claims,
lawsuits, demands and judgments arising out of, or in connection with,
subsequent modifications, additions or deletions to this documentation,
to the extent made by End User.
Link disclaimer
Avaya is not responsible for the contents or reliability of any linked Web
sites referenced within this site or documentation provided by Avaya.
Avaya is not responsible for the accuracy of any information, statement
or content provided on these sites and does not necessarily endorse
the products, services, or information described or offered within them.
Avaya does not guarantee that these links will work all the time and has
no control over the availability of the linked pages.
Warranty
Avaya provides a limited warranty on its Hardware and Software
(“Product(s)”). Refer to your sales agreement to establish the terms of
the limited warranty. In addition, Avaya’s standard warranty language,
as well as information regarding support for this Product while under
warranty is available to Avaya customers and other parties through the
Avaya Support Web site: http://support.avaya.com. Please note that if
you acquired the Product(s) from an authorized Avaya reseller outside
of the United States and Canada, the warranty is provided to you by
said Avaya reseller and not by Avaya.
Licenses
THE SOFTWARE LICENSE TERMS AVAILABLE ON THE AVAYA
WEBSITE, HTTP://SUPPORT.AVAYA.COM/LICENSEINFO/ ARE
APPLICABLE TO ANYONE WHO DOWNLOADS, USES AND/OR
INSTALLS AVAYA SOFTWARE, PURCHASED FROM AVAYA INC.,
ANY AVAYA AFFILIATE, OR AN AUTHORIZED AVAYA RESELLER
(AS APPLICABLE) UNDER A COMMERCIAL AGREEMENT WITH
AVAYA OR AN AUTHORIZED AVAYA RESELLER. UNLESS
OTHERWISE AGREED TO BY AVAYA IN WRITING, AVAYA DOES
NOT EXTEND THIS LICENSE IF THE SOFTWARE WAS OBTAINED
FROM ANYONE OTHER THAN AVAYA, AN AVAYA AFFILIATE OR AN
AVAYA AUTHORIZED RESELLER; AVAYA RESERVES THE RIGHT
TO TAKE LEGAL ACTION AGAINST YOU AND ANYONE ELSE
USING OR SELLING THE SOFTWARE WITHOUT A LICENSE. BY
INSTALLING, DOWNLOADING OR USING THE SOFTWARE, OR
AUTHORIZING OTHERS TO DO SO, YOU, ON BEHALF OF
YOURSELF AND THE ENTITY FOR WHOM YOU ARE INSTALLING,
DOWNLOADING OR USING THE SOFTWARE (HEREINAFTER
REFERRED TO INTERCHANGEABLY AS “YOU” AND “END USER”),
AGREE TO THESE TERMS AND CONDITIONS AND CREATE A
BINDING CONTRACT BETWEEN YOU AND AVAYA INC. OR THE
APPLICABLE AVAYA AFFILIATE ( “AVAYA”).
Avaya grants End User a license within the scope of the license types
described below. The applicable number of licenses and units of
capacity for which the license is granted will be one (1), unless a
different number of licenses or units of capacity is specified in the
Documentation or other materials available to End User. “Designated
Processor” means a single stand-alone computing device. “Server”
means a Designated Processor that hosts a software application to be
accessed by multiple users. “Software” means the computer programs
in object code, originally licensed by Avaya and ultimately utilized by
End User, whether as stand-alone Products or pre-installed on
Hardware. “Hardware” means the standard hardware originally sold by
Avaya and ultimately utilized by End User.
Concurrent User License
Concurrent User License (CU). End User may install and use the
Software on multiple Designated Processors or one or more Servers,
so long as only the licensed number of Units are accessing and using
the Software at any given time. A “Unit” means the unit on which Avaya,
at its sole discretion, bases the pricing of its licenses and can be,
without limitation, an agent, port or user, an e-mail or voice mail account
in the name of a person or corporate function (e.g., webmaster or
helpdesk), or a directory entry in the administrative database utilized
by the Software that permits one user to interface with the Software.
Units may be linked to a specific, identified Server.
Copyright
Except where expressly stated otherwise, no use should be made of
materials on this site, the Documentation, Software, or Hardware
provided by Avaya. All content on this site, the documentation and the
Product provided by Avaya including the selection, arrangement and
design of the content is owned either by Avaya or its licensors and is
protected by copyright and other intellectual property laws including the
sui generis rights relating to the protection of databases. You may not
modify, copy, reproduce, republish, upload, post, transmit or distribute
in any way any content, in whole or in part, including any code and
software unless expressly authorized by Avaya. Unauthorized
reproduction, transmission, dissemination, storage, and or use without
the express written consent of Avaya can be a criminal, as well as a
civil offense under the applicable law.
Third-party components
Certain software programs or portions thereof included in the Product
may contain software distributed under third party agreements (“Third
Party Components”), which may contain terms that expand or limit
rights to use certain portions of the Product (“Third Party Terms”).
Information regarding distributed Linux OS source code (for those
Products that have distributed the Linux OS source code), and
identifying the copyright holders of the Third Party Components and the
Third Party Terms that apply to them is available on the Avaya Support
Web site: http://support.avaya.com/Copyright.
Preventing Toll Fraud
“Toll fraud” is the unauthorized use of your telecommunications system
by an unauthorized party (for example, a person who is not a corporate
employee, agent, subcontractor, or is not working on your company's
behalf). Be aware that there can be a risk of Toll Fraud associated with
your system and that, if Toll Fraud occurs, it can result in substantial
additional charges for your telecommunications services.
Avaya Toll Fraud Intervention
If you suspect that you are being victimized by Toll Fraud and you need
technical assistance or support, call Technical Service Center Toll
Fraud Intervention Hotline at +1-800-643-2353 for the United States
and Canada. For additional support telephone numbers, see the Avaya
Support Web site: http://support.avaya.com. Suspected security
vulnerabilities with Avaya products should be reported to Avaya by
sending mail to: securityalerts@avaya.com.
Trademarks
Avaya® and Avaya Aura® are registered trademarks of Avaya Inc. in
the United States of America and/or other jurisdictions.
All non-Avaya trademarks are the property of their respective owners,
and “Linux” is a registered trademark of Linus Torvalds.
2 Administering Avaya Aura ® Session Manager November 2010
Comments? infodev@avaya.com

Downloading Documentation
For the most current versions of Documentation, see the Avaya
Support Web site: http://support.avaya.com.
Contact Avaya Support
Avaya provides a telephone number for you to use to report problems
or to ask questions about your Product. The support telephone number
is 1-800-242-2121 in the United States. For additional support
telephone numbers, see the Avaya Web site: http://support.avaya.com.
Administering Avaya Aura® Session Manager November 2010 3

Contents
Chapter 1: Getting started.................................................................................................. 13
Introduction............................................................................................................................................... 13
Overview of System Manager................................................................................................................... 13
Log on to System Manager....................................................................................................................... 15
Logging on to System Manager Web interface................................................................................ 15
Login information for users with user name admin........................................................................... 16
Password and security policies for users with username admin............................................................... 17
Password aging policy enforcement................................................................................................. 17
Password strength policy enforcement............................................................................................ 17
Password history policy enforcement............................................................................................... 18
Password lockout policy enforcement.............................................................................................. 18
Inactive session termination policy................................................................................................... 18
Logon warning banner...................................................................................................................... 18
Editing password policies................................................................................................................. 19
Editing Session Properties............................................................................................................... 19
Security settings............................................................................................................................... 20
Editing the login warning banner...................................................................................................... 20
Password policies field descriptions................................................................................................. 20
Session Properties field descriptions............................................................................................... 22
SIP Application Server.............................................................................................................................. 23
Overview of SIP Application Server................................................................................................. 23
Starting the SIP Application Server management console............................................................... 23
SIP A/S Connection Details field descriptions.................................................................................. 24
About SIP Application Server Management Console....................................................................... 24
Viewing Service Director Statistics................................................................................................... 25
Statistics: Service Directors field descriptions.................................................................................. 25
Service Director Statistics field descriptions..................................................................................... 26
Viewing Service Host Instance Statistics.......................................................................................... 27
Statistics: Service Hosts field descriptions....................................................................................... 27
Service Host Statistics field descriptions.......................................................................................... 29
Chapter 2: Synchronizing Communication Manager and messaging data with System
Manager............................................................................................................................... 31
Introduction............................................................................................................................................... 31
Creating a Communication Manager instance.......................................................................................... 31
Creating a messaging instance................................................................................................................. 32
Initializing Synchronization........................................................................................................................ 33
Synchronizing Messaging Data................................................................................................................ 33
Manage Elements field descriptions......................................................................................................... 33
Application Details field descriptions......................................................................................................... 35
Chapter 3: Managing Security........................................................................................... 43
Introduction............................................................................................................................................... 43
Setting SCEP enrollment password.......................................................................................................... 43
Adding a Session Manager application..................................................................................................... 44
Viewing trusted certificates....................................................................................................................... 44
Administering Avaya Aura® Session Manager November 2010 5
Adding trusted certificates......................................................................................................................... 45
Exporting the Session Manager Certificate............................................................................................... 46
Removing trusted certificates.................................................................................................................... 47
Refreshing CA Certificate List................................................................................................................... 47
Viewing identity certificates....................................................................................................................... 48
Enrollment Password field descriptions.................................................................................................... 48
Manage Elements field descriptions......................................................................................................... 49
Application Details field descriptions......................................................................................................... 50
Trusted Certificates field descriptions....................................................................................................... 56
Add Trusted Certificate field descriptions.................................................................................................. 57
View Trust Certificate field descriptions.................................................................................................... 59
Delete Trusted Certificate Confirmation field descriptions........................................................................ 60
Identity Certificates field descriptions........................................................................................................ 60
Chapter 4: Managing Users................................................................................................ 63
Introduction............................................................................................................................................... 63
Adding users............................................................................................................................................. 64
Managing communication profiles............................................................................................................ 67
Creating a new communication profile............................................................................................. 67
Deleting a communication profile..................................................................................................... 67
Creating a new communication address for a communication profile.............................................. 68
Modifying a communication address of a communication profile..................................................... 69
Deleting a communication address from a communication profile................................................... 69
Session Manager Communication profile administration................................................................. 70
Station and Messaging profiles of a user......................................................................................... 70
Adding a messaging profile for a user.............................................................................................. 71
Modifying a messaging profile of a user........................................................................................... 72
Removing association between a subscriber mailbox and a user.................................................... 73
Deleting a subscriber mailbox.......................................................................................................... 73
Adding an endpoint profile for a user............................................................................................... 74
Modifying a endpoint profile of a user.............................................................................................. 75
Removing association between an endpoint and a user.................................................................. 76
Deleting an endpoint profile of a user............................................................................................... 76
Modifying user accounts........................................................................................................................... 77
Viewing details of a user........................................................................................................................... 78
Removing user accounts........................................................................................................................... 78
Creating duplicate users........................................................................................................................... 79
Filtering users............................................................................................................................................ 79
Searching for users................................................................................................................................... 80
Viewing deleted users............................................................................................................................... 81
Restoring a deleted user........................................................................................................................... 81
New User Profile field descriptions........................................................................................................... 82
User Profile Edit field descriptions............................................................................................................ 92
User Profile View field descriptions........................................................................................................... 103
User Delete Confirmation field descriptions.............................................................................................. 111
Managing bulk importing and exporting.................................................................................................... 111
Bulk importing users......................................................................................................................... 111
Scheduling a user import job............................................................................................................ 113
6 Administering Avaya Aura® Session Manager November 2010
Aborting a user import job on first error............................................................................................ 114
Canceling a user import job.............................................................................................................. 114
Deleting an importing job.................................................................................................................. 115
Viewing a user importing job in Scheduler....................................................................................... 115
Viewing details of a user importing job............................................................................................. 115
List of XML Schema Definitions and sample XMLs for bulk import.................................................. 116
Attribute details defined in Import user XSD.................................................................................... 172
Attribute details defined in Delete User XSD.................................................................................... 181
Attribute details defined in the Endpoint profile XSD........................................................................ 183
Attribute details defined in the Messaging communication profile XSD........................................... 210
Attribute details defined in the Session Manager communication profile XSD................................. 219
Import Users field descriptions......................................................................................................... 221
Import Users – Job Details field descriptions................................................................................... 225
Job Details field descriptions............................................................................................................ 226
Quick start to importing users........................................................................................................... 227
Chapter 5: Managing Session Manager routing............................................................... 235
Overview of Session Manager routing...................................................................................................... 235
Prerequisites for Routing Setup................................................................................................................ 236
Routing...................................................................................................................................................... 236
Routing............................................................................................................................................. 236
Routing of a call using routing policy data........................................................................................ 237
Administering initial setup of the Session Manager.......................................................................... 237
Routing import and export Overview................................................................................................ 238
Saving, Committing, and Synchronizing configuration changes...................................................... 242
Duplicating Routing entity data......................................................................................................... 242
Domains.................................................................................................................................................... 242
About Domains................................................................................................................................. 242
Creating domains............................................................................................................................. 243
Modifying domains........................................................................................................................... 243
Deleting domains.............................................................................................................................. 244
Delete Confirmation field descriptions.............................................................................................. 244
Domain Management field descriptions........................................................................................... 244
Domain Details field descriptions..................................................................................................... 245
Bulk import for Domains................................................................................................................... 246
Locations................................................................................................................................................... 246
About Locations................................................................................................................................ 246
Creating Locations........................................................................................................................... 247
Modifying Locations.......................................................................................................................... 248
Deleting Locations............................................................................................................................ 248
Delete Confirmation field descriptions.............................................................................................. 249
CAC Overview.................................................................................................................................. 249
Location field descriptions................................................................................................................ 253
Location Details field descriptions.................................................................................................... 254
Bulk import for Locations.................................................................................................................. 257
Adaptations............................................................................................................................................... 258
About Adaptations............................................................................................................................ 258
Adaptation module administration.................................................................................................... 259
Administering Avaya Aura® Session Manager November 2010 7
Creating Adaptations........................................................................................................................ 261
Adaptation example.......................................................................................................................... 263
Modifying Adaptations...................................................................................................................... 265
Deleting Adaptations........................................................................................................................ 267
Delete Confirmation field descriptions.............................................................................................. 267
Installed vendor adapters................................................................................................................. 268
Adaptations field descriptions........................................................................................................... 271
Adaptation Details field descriptions................................................................................................ 272
Bulk import for Adaptations.............................................................................................................. 275
SIP Entities................................................................................................................................................ 276
About SIP Entities............................................................................................................................ 276
Authentication of trusted SIP entities............................................................................................... 277
IP and transport layer validation....................................................................................................... 277
TLS layer validation.......................................................................................................................... 277
Creating SIP Entities........................................................................................................................ 278
Modifying SIP entities....................................................................................................................... 280
Deleting SIP Entities......................................................................................................................... 282
Delete Confirmation field descriptions.............................................................................................. 282
SIP Entities field descriptions........................................................................................................... 282
SIP Entity Details field descriptions.................................................................................................. 284
SIP Entity List field descriptions....................................................................................................... 286
Bulk import for SIP Entities............................................................................................................... 286
SIP Entity References............................................................................................................................... 289
About SIP Entity References............................................................................................................ 289
Displaying SIP Entity References..................................................................................................... 289
Overview of References to SIP Entities field descriptions................................................................ 289
Entity Links................................................................................................................................................ 290
About Entity Links............................................................................................................................. 290
Creating Entity Links........................................................................................................................ 291
Modifying entity links........................................................................................................................ 291
Deleting Entity Links......................................................................................................................... 292
Delete Confirmation field descriptions.............................................................................................. 292
Entity Links field descriptions........................................................................................................... 292
Bulk import for Entity Links............................................................................................................... 294
Time Ranges............................................................................................................................................. 294
About the Time Ranges.................................................................................................................... 294
Creating Time Ranges...................................................................................................................... 295
Modifying Time Ranges.................................................................................................................... 295
Deleting Time Ranges...................................................................................................................... 296
Delete Confirmation field descriptions.............................................................................................. 296
Time Ranges field descriptions........................................................................................................ 296
Time Range List field descriptions.................................................................................................... 297
Bulk import for Time Ranges............................................................................................................ 298
Routing Policies........................................................................................................................................ 299
About Routing Policies..................................................................................................................... 299
Creating Routing Policies................................................................................................................. 300
Modifying Routing Policies............................................................................................................... 301
8 Administering Avaya Aura® Session Manager November 2010
Deleting Routing Policies................................................................................................................. 302
Delete Confirmation field descriptions.............................................................................................. 302
Routing Policies field descriptions.................................................................................................... 302
Routing Policy Details field descriptions........................................................................................... 303
Routing Policy List field descriptions................................................................................................ 306
Bulk import for Routing Policies....................................................................................................... 307
Dial Patterns.............................................................................................................................................. 307
About Dial Patterns.......................................................................................................................... 307
Creating Dial Patterns...................................................................................................................... 309
Modifying Dial Patterns.................................................................................................................... 310
Deleting Dial Patterns....................................................................................................................... 311
Delete Confirmation field descriptions.............................................................................................. 311
Dial Patterns field descriptions......................................................................................................... 311
Dial Pattern Details field descriptions............................................................................................... 313
Pattern List field descriptions........................................................................................................... 314
Denied Location field descriptions.................................................................................................... 315
Bulk Import for Dial Patterns............................................................................................................ 316
Regular Expressions................................................................................................................................. 317
About Regular Expressions.............................................................................................................. 317
Creating Regular Expressions.......................................................................................................... 317
Modifying Regular Expressions........................................................................................................ 318
Deleting Regular Expressions.......................................................................................................... 319
Delete Confirmation field descriptions.............................................................................................. 319
Regular Expressions field descriptions............................................................................................ 320
Regular Expression Details field descriptions.................................................................................. 321
Regular Expression List field descriptions........................................................................................ 322
Bulk import for Regular Expressions................................................................................................ 322
Defaults..................................................................................................................................................... 323
Modifying the default settings........................................................................................................... 323
Default Settings field descriptions.................................................................................................... 324
Chapter 6: Configuring and monitoring Session Manager instances............................ 327
Dashboard................................................................................................................................................. 327
About Session Manager Dashboard................................................................................................ 327
Session Manager Dashboard page field descriptions...................................................................... 327
Confirm Accept New Service Confirmation for Session Managers page field descriptions............. 329
Confirm Deny New Service for Session Managers page field descriptions..................................... 330
Confirm Shutdown for Session Managers page field descriptions................................................... 331
Confirm Reboot for Session Managers page field descriptions....................................................... 331
Session Manager Administration.............................................................................................................. 332
About Session Manager Administration........................................................................................... 332
About E911 Services........................................................................................................................ 333
About NIC Bonding........................................................................................................................... 333
Adding a SIP entity as a Session Manager instance........................................................................ 334
Viewing the Session Manager administration settings..................................................................... 336
Modifying the Session Manager administration settings.................................................................. 336
Deleting a Session Manager instance.............................................................................................. 340
Administering ELIN Server............................................................................................................... 340
Administering Avaya Aura® Session Manager November 2010 9
Delete Confirmation page field descriptions..................................................................................... 341
Session Manager Administration page field descriptions................................................................. 341
Session Manager page field descriptions......................................................................................... 344
Saving Global Session Manager Settings........................................................................................ 348
Branch Session Manager Administration.................................................................................................. 349
About Branch Session Manager....................................................................................................... 349
Administering Branch Session Manager.......................................................................................... 350
Adding a SIP entity as a Branch Session Manager instance........................................................... 351
Viewing the Branch Session Manager administration settings......................................................... 354
Modifying the Branch Session Manager administration settings...................................................... 354
Deleting a Branch Session Manager instance................................................................................. 357
Delete Confirmation page field descriptions..................................................................................... 357
Branch Session Manager page field descriptions............................................................................ 358
Communication Profile Editor.................................................................................................................... 361
About Communication Profile Editor................................................................................................ 361
Viewing Communication Profiles...................................................................................................... 362
Modifying Communication Profiles................................................................................................... 362
Viewing background edit job status.................................................................................................. 363
Viewing Communication Profile edit failures.................................................................................... 363
Communication Profile Editor field descriptions............................................................................... 364
Communication Profile Edit Confirmation page field descriptions.................................................... 366
Network Configuration............................................................................................................................... 368
Local Host Name Resolution............................................................................................................ 368
SIP Firewall...................................................................................................................................... 374
Device and Location Configuration........................................................................................................... 390
Device Settings Groups.................................................................................................................... 390
Location Settings.............................................................................................................................. 403
Application Configuration.......................................................................................................................... 404
Applications...................................................................................................................................... 404
Application Sequences..................................................................................................................... 408
Implicit Users.................................................................................................................................... 413
Session Manager Network Connect Service.................................................................................... 416
System Status........................................................................................................................................... 421
SIP Entity Monitoring........................................................................................................................ 421
Managed Bandwidth Usage............................................................................................................. 426
Security Module Status.................................................................................................................... 428
Registration Summary...................................................................................................................... 434
User Registrations............................................................................................................................ 438
System Tools............................................................................................................................................. 445
Maintenance Tests........................................................................................................................... 445
SIP Tracer Configuration.................................................................................................................. 449
SIP Trace Viewer.............................................................................................................................. 452
Call Routing Test.............................................................................................................................. 455
Chapter 7: Managing events.............................................................................................. 459
Managing alarms....................................................................................................................................... 459
Alarming........................................................................................................................................... 459
Viewing alarms................................................................................................................................. 459
10 Administering Avaya Aura® Session Manager November 2010
Changing status of an alarm............................................................................................................ 460
Exporting alarms.............................................................................................................................. 460
Filtering alarms................................................................................................................................. 460
Searching for alarms........................................................................................................................ 461
Alarming field descriptions............................................................................................................... 462
Alarming field descriptions............................................................................................................... 462
Managing logs........................................................................................................................................... 466
Logging............................................................................................................................................. 466
Log Types......................................................................................................................................... 466
Viewing log details............................................................................................................................ 467
Searching for logs............................................................................................................................ 467
Filtering logs..................................................................................................................................... 468
Logging field descriptions................................................................................................................. 469
Logging field descriptions................................................................................................................. 472
Chapter 8: Managing system data..................................................................................... 475
Administering backup and restore............................................................................................................ 475
Backup and Restore......................................................................................................................... 475
Creating a data backup on a local server......................................................................................... 475
Scheduling a data backup on a local server..................................................................................... 476
Restoring a data backup from a local server.................................................................................... 476
Viewing data retention rules............................................................................................................. 476
Modifying data retention rules.......................................................................................................... 477
Accessing the Data Retention Rules service................................................................................... 477
Viewing loggers for a log file............................................................................................................. 477
Assigning an appender to a logger................................................................................................... 478
Editing a logger in a log file.............................................................................................................. 478
Modifying an appender..................................................................................................................... 479
Removing an appender from a logger.............................................................................................. 479
Backup and Restore field descriptions............................................................................................. 479
Backup field descriptions.................................................................................................................. 480
Schedule Backup field descriptions.................................................................................................. 481
Restore field descriptions................................................................................................................. 482
Data Retention field descriptions...................................................................................................... 483
Logging Settings field descriptions................................................................................................... 484
Edit Logger field descriptions........................................................................................................... 485
Edit Appender field descriptions....................................................................................................... 486
Attach Appender field descriptions................................................................................................... 487
Data Replication Service........................................................................................................................... 488
Data Replication Service.................................................................................................................. 488
Viewing replica groups..................................................................................................................... 488
Viewing replica nodes in a replica group.......................................................................................... 489
Repairing a replica node.................................................................................................................. 489
Repairing all replica nodes in a replica group.................................................................................. 490
Viewing replication details for a replica node................................................................................... 490
Removing a replica node.................................................................................................................. 491
Removing a replica node from queue.............................................................................................. 491
Replica Groups field descriptions..................................................................................................... 491
Administering Avaya Aura® Session Manager November 2010 11
Replica Nodes field descriptions...................................................................................................... 492
Data Replication field descriptions................................................................................................... 494
Managing scheduled jobs......................................................................................................................... 495
Scheduler......................................................................................................................................... 495
Accessing scheduler........................................................................................................................ 495
Viewing pending jobs........................................................................................................................ 496
Viewing completed jobs.................................................................................................................... 496
Viewing details of a pending job....................................................................................................... 496
Viewing details of a completed job................................................................................................... 497
Viewing details of a pending job....................................................................................................... 497
Viewing logs for a job....................................................................................................................... 497
Viewing completed jobs.................................................................................................................... 498
Filtering Jobs.................................................................................................................................... 498
Editing a job...................................................................................................................................... 499
Deleting a job................................................................................................................................... 500
Disabling a job.................................................................................................................................. 501
Enabling a job................................................................................................................................... 501
Stopping a Job................................................................................................................................. 502
Pending Jobs field descriptions........................................................................................................ 502
Completed Jobs field descriptions.................................................................................................... 505
Job Scheduling-View Job field descriptions..................................................................................... 507
Job Scheduling-Edit Job field descriptions....................................................................................... 509
Job Scheduling-On Demand Job field descriptions.......................................................................... 511
Disable Confirmation field descriptions............................................................................................ 511
Stop Confirmation field descriptions................................................................................................. 513
Delete Confirmation field descriptions.............................................................................................. 514
Appendix A: Default certificates used for SIP-TLS.......................................................... 517
Appendix B: Regular Expression constructs................................................................... 523
Index..................................................................................................................................... 525
12 Administering Avaya Aura® Session Manager November 2010

Chapter 1: Getting started
Introduction
This book provides information on administration, ongoing management of Avaya Aura™
Session Manager and includes procedures for
• Using System Manager Common Console
• Creating user accounts
• Administering routing for Session Manager and various SIP entities
• Configuring, and monitoring Session Manager instances
Required skills and knowledge
The audience is expected to have some experience installing Avaya products and be able to
perform administration procedures. They must also have a basic understanding and working
knowledge of the following areas:
Operating systems in
general TCP/IP SSH SIP
Graphical and
command line
interfaces such as
Windows and Linux
FTP and SFTP LAN/WAN Hostname/DNS
Overview of System Manager
System Manager is a central management system that delivers a set of shared management
services and a common console across multiple products. System Manager includes the
following shared management services categorized as follows:
• Under Users
- Administrators
Manage administrative users within Avaya Unified Communications Management.
- Groups & Roles
Administering Avaya Aura® Session Manager November 2010 13

Manage groups, roles and assign roles to users.
- Synchronize and Import
Synchronize users with the enterprise directory, import users from file.
- User Management
Manage users, public contact lists, shared user resources, system level presence
access control lists.
• Under Elements
- Application Management
Manage application instances and application certificates
- Communication Manager
Manage Communication Manager objects such as Call Center, Call Coverage,
Endpoints and others.
- Conferencing
Manage Conferencing Application Services.
- Inventory
Manage, discover, and navigate to elements, update element software.
- Messaging
Manage Messaging System objects.
- Presence
Manage Presence based configuration properties, classes and access levels.
- Routing
Configure network configuration using Network Routing Policy.
- SIP AS 8.1
SIP AS Management Console
- Session Manager
Session Manager Management Console.
• Under Services
- Backup and Restore
Backup and restore System Manager database.
- Configurations
Manage system wide configurations.
Getting started
14 Administering Avaya Aura ® Session Manager November 2010
Comments? infodev@avaya.com

- Events
Manage alarms, view and harvest logs generated by System Manager and other
components of System Manager.
- Licenses
View and configure licenses for individual components of Avaya Aura Unified
Communication System.
- Replication
Track data replication nodes, repair replication nodes.
- Scheduler
Schedule, track, cancel, update and delete jobs.
- Security
Manage Security Certificates.
- Templates
Manage Templates for Communication Manager and Messaging System objects.
System Manager Common Console is the management interface for Session Manager. You
must log on to the System Manager Common Console to perform any administration or
configuration.
Log on to System Manager
Logging on to System Manager Web interface
The System Manager Web interface is the main interface of Avaya Aura System Manager. You
must log on to the System Manager Web console before you can perform any tasks.
Before you begin
A user account to log on to the System Manager Web interface. If you do not have a user
account, contact your system administrator to create your account.
Procedure
1. On the browser, open the System Manager URL (https://<SERVER_NAME>/
SMGR).
2. In the User ID field, enter the user name.
Log on to System Manager
Administering Avaya Aura® Session Manager November 2010 15

3. In the Password field, enter the password.
4. Click Log On.
If your user name and password:
• Match an authorized System Manager user account, the System Manager
home page appears with the System Manager version_number. The System
Manager home page displays a navigation menu. This menu provides access
to shared services with which you can perform various operations supported
by System Manager. The tasks you can perform depends on your user role.
• If you enter incorrect login credentials on the System Manager login page,
System Manager displays an error message and prompts you to re-enter the
user name and password so that you can log in again.
Login information for users with user name admin
This login information applies only to users with log-on name admin.
• When you log on to System Manager for the first time after a fresh installation or an
upgrade, enter admin123 as the default password.
• After you log on, the system displays the Forced Change Password page. There is no
Cancel button on this page. You must change your password when you log on using the
default password.
•If you access System Manager through IP address, and you log on as “admin” for the first
time, you must use the Change Password link to change the password manually.
Your password should contain a combination of alphanumeric and special characters. To know
more about the password strength policy, see Password strength policy enforcement on
page 17.
Note:
In System Manager 6.1, you require two separate administrator user IDs for managing
System Manager and UCM. Users with the log-on name admin can manage both using the
same ID.
Getting started
16 Administering Avaya Aura ® Session Manager November 2010
Comments? infodev@avaya.com
Password and security policies for users with username
admin
Password aging policy enforcement
Note:
All password policies are applicable ONLY for users with the log-on name “admin”.
The password aging policy has the following time-based password thresholds that the network
administrator can configure as the number of days:
• Minimum password age
• Password expiration warning
• Password expiration
The following table describes what occurs when a user logs on to System Manager when the
password aging policy thresholds expire.
Password threshold What occurs when the threshold expires
Minimum password age You cannot change the password until the minimum
password age has been reached. For example, you cannot
change the password for three days after the last change was
made.
Password expiration
warning You receive a password expiration warning when the
password is about to expire and before the password
expires.
Password expiration period You are forced to change the password after the threshold for
the password expires and before the threshold to disable the
account. The password is locked until it is reset by the
network administrator.
Password strength policy enforcement
Passwords must contain a combination of alphanumeric and special characters as defined by
the network administrator. The password strength policy enforces the following constraints:
Password and security policies for users with username admin
Administering Avaya Aura® Session Manager November 2010 17
• Passwords must have a total character length from 6 to 25. Default is eight.
• Passwords are not required to have a minimum character type; however, the default is
one lower- and upper case character, one numeric character, and one special character,
such as exclamation mark (!). The sum cannot exceed the minimum total length.
After you enable the password strength policy, ensure that the following standards are met:
• Password must not have a character repeated more than twice consecutively.
• Passwords must not be your user ID, in forward or reverse order.
If a password does not contain the required parameters for password requirements, the system
rejects the password.
Note:
You can disable the password strength policy.
Password history policy enforcement
The password history policy verifies that a password is new. The previous blocked passwords
can range from 1 to 99. The default is six.
Password lockout policy enforcement
The lockout policy provides a limit for the number of attempts to access System Manager. The
user is locked out of System Manager when the specified number of logon attempts is reached.
By default, the user is locked out for two minutes after five failed attempts if the consecutive
attempts occur within a ten-minute period.
Inactive session termination policy
By default, the system suspends a user session after 30 minutes of inactivity. A user must log
on to System Manager again when this occurs.
Logon warning banner
System Manager provides the text for the logon warning banner that a network administrator
can change.
Getting started
18 Administering Avaya Aura ® Session Manager November 2010
Comments? infodev@avaya.com

Editing password policies
About this task
Administrators can edit the password settings through this procedure.
Procedure
1. On the System Manager console, under Services, click UCM Services.
2. Click Security > Policies in the left navigation pane.
3. In the Password Policy section, click Edit.
4. Edit the required fields on the Password Policy page.
5. Click Save.
Click Cancel to undo your changes and return to the previous page.
Important:
An invalid logon message appears for the following scenarios:
• A logon attempt is made on a disabled account
• The password is invalid.
• The maximum number of logon attempts is reached.
• The password is expired.
For each scenario, the system responds with a message that invalid logon
credentials were used. You must contact the network administrator for additional
information.
Related topics:
Password policies field descriptions on page 20
Editing Session Properties
Procedure
1. On the System Manager console, under Services, click UCM Services.
2. Click Security > Policies in the left navigation pane.
3. On the Policies page, in the Session Properties section, click Edit.
4. On the Session Properties page, edit the required fields.
Password and security policies for users with username admin
Administering Avaya Aura® Session Manager November 2010 19
5. Click Save.
Related topics:
Session Properties field descriptions on page 22
Security settings
System Manager provides a customizable logon banner that appears when a user logs on to
the system. The customizable banner is intended for use by customers with security policies
that require network equipment to display a specific message to users when they log on.
Editing the login warning banner
Procedure
1. On the System Manager console, under Services, click UCM Services.
2. Click Security > Policies in the left navigation pane.
3. Click Security > Policies in the left navigation pane.
4. On the Policies page, in the Security Settings section, click Edit.
5. On the Security Settings page, edit the text as required in the Login Warning Banner
text area.
Note:
The maximum number of characters allowed is 2500.
6. Click Save.
Password policies field descriptions
This page is applicable only for users with the user name “admin”.
Aging section
Name Description
Enforce password aging policies Select this check box if you want to enforce
the aging policies.
Getting started
20 Administering Avaya Aura ® Session Manager November 2010
Comments? infodev@avaya.com

Name Description
Enable expired password change Select this check box if you want to allow
users to change password after it expires.
Expiration period Specifies the maximum allowable days to
maintain the password. Default value is 90.
You can enter values from 1 to 365.
Expiration warning Sends a warning to the user if the password
is about to expire. You can type in any value
from 1 to 15. The default value is 7.
Minimum age Minimum allowable days for password age.
You can type in a number from 0 to 7. The
default value is 3. Ensure that the number for
the expiration period is greater than the
minimum password age number.
History section
Name Description
History Select this check box to enforce policies
against previously used passwords.
Previous passwords blocked The number of passwords maintained in the
history. You cannot reset your password to
these values. The default value is 6.
Strength section
Name Description
Strength Select this check box to enforce password
content standards.
Minimum Total Length Minimum number of characters required for
the password. The default value is 8. You can
set the value from 6 to 25.
Minimum by character Type: Lower case Minimum number of lower case characters
required in the password. Default value is
1.
Minimum by character Type: Upper case Minimum number of upper case characters
required in the password. Default value is
1.
Minimum by character Type: Numeric
case Minimum number of numeric characters
required in the password. Default value is
1.
Password and security policies for users with username admin
Administering Avaya Aura® Session Manager November 2010 21
Name Description
Minimum by character Type: Special case Minimum number of special characters
required in the password. Default value is
1.
Lockout section
Name Description
Lockout Select this check box if you want to enforce
lockout after failed login attempts.
Consecutive Invalid Login Attempts Number of failed attempts before lockout.
You can set values from 1 to 20 attempts.
Default value is 3.
Interval for Consecutive Invalid Login
Attempts Time interval in minutes between invalid
login attempts. You can set values from 0 to
120 minutes. Default value is 10 minutes.
Lockout Time Number of minutes the account is locked
after invalid login attempts. You can set
values from 0 to 120 minutes. Default value
is 2 minutes.
Button Description
Save Saves all your entries in the Edit Password
Policies page.
Cancel Cancels your changes and takes you back to
the previous page.
Session Properties field descriptions
Name Description
Maximum Session Time Maximum time a session can remain active.
Type any value from 0 to 1440.
Maximum Idle Time Maximum time a session can remain idle.
Type any value between 0 to 1440.
Note:
This value cannot exceed Maximum
Session Time.
Getting started
22 Administering Avaya Aura ® Session Manager November 2010
Comments? infodev@avaya.com
Button Description
Save Saves your entries in the Session Properties
page.
Cancel Cancels your entries and takes you to the
previous page.
SIP Application Server
Overview of SIP Application Server
The SIP Application Server (SIP A/S) is a scalable, highly available and high-performance
server for the development and deployment of real-time, multimedia, presence-enabled IP
communications applications. The SIP Application Server is composed of the following
components:
• Service Director — This performs decision-based routing of incoming SIP messages to
the Service Host for processing.
•Service Host — This hosts applications and interacting with external entities. It processes
SIP messages received from Service Directors and other SIP end points.
• Management Server — This hosts the SIP Application Server management console for
monitoring component statistics.
Session Manager software is an application that runs on the SIP A/S.
Starting the SIP Application Server management console
Procedure
1. On the System Manager console, under Elements, click SIP AS 8.1.
2. On the SIP A/S Connection Details page, enter the host name and administration
port of the Management Access Point Hostname / IP of the Session Manager.
The default port as 5759 is filled in. This should not be changed.
3. Click Connect.
For more information, see the Avaya Aura® System Manager online Help system.
SIP Application Server
Administering Avaya Aura® Session Manager November 2010 23
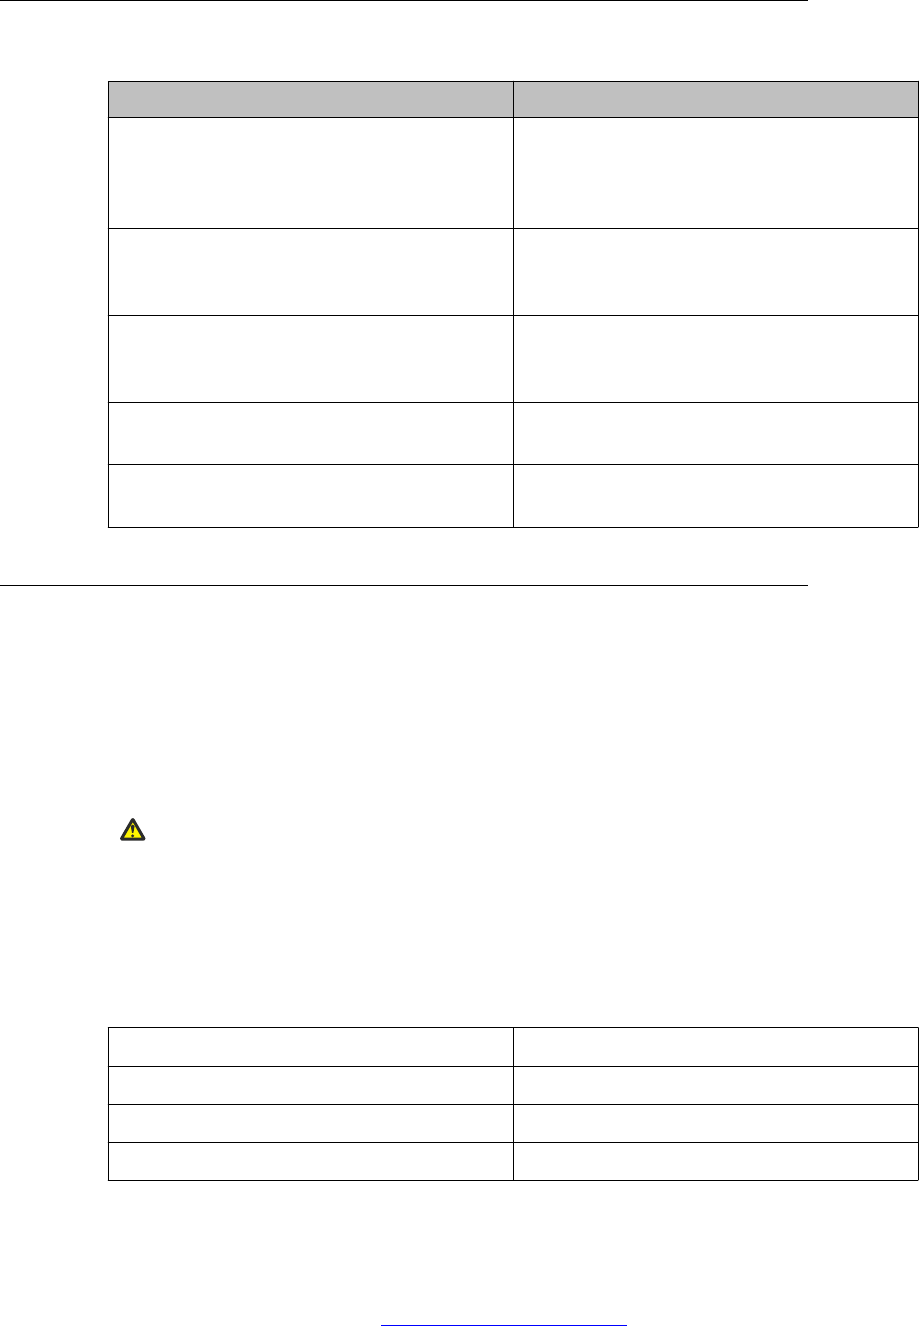
SIP A/S Connection Details field descriptions
Name Description
Primary Hostname The name of the machine hosting the primary
Management Server of the SIP Application
Server cluster to which you are connecting.
This is mandatory.
Primary Port The administration port of the primary
Management Server.
This is mandatory.
Backup Hostname The name of the machine hosting the backup
Management Server of the SIP Application
Server cluster to which you are connecting.
Backup Port The administration port of the backup
Management Server.
Connect Connect to the SIP Application Server
cluster.
About SIP Application Server Management Console
The SIP Application Server Management Console enables viewing of the following details:
• System Status
• Service Director statistics
• Service Host statistics
Warning:
Changing the existing configurations using the SIP Application Server Management Console
voids your product warranty.
The System Status page of the SIP Application Server Management Console shows a graphic
representation of the SIP Application Server cluster. A status icon next to each cluster element
node specifies the operational status of that element, as defined in the following table.
Status Icon Cluster element status
Green check symbol The cluster element is running.
Red cross mark symbol The cluster element is in an error state.
Yellow triangle symbol Other configuration error.
Getting started
24 Administering Avaya Aura ® Session Manager November 2010
Comments? infodev@avaya.com
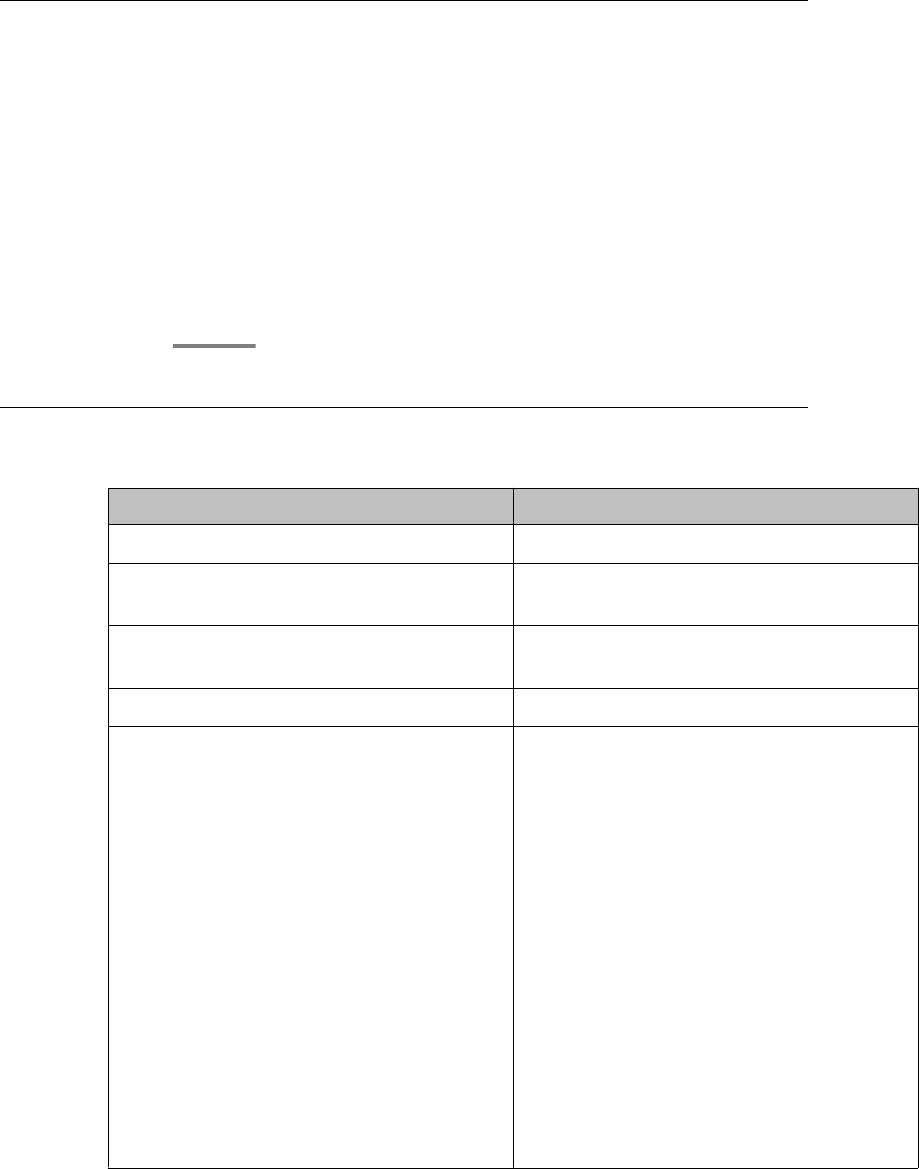
Viewing Service Director Statistics
Procedure
1. On the SIP Application Server Management Console, click Monitoring > Statistics
> Service Directors.
The Statistics: Service Directors page opens showing details of the listed Service
Director.
2. Select the Service Director instance and click View.
The Service Director Statistics page opens where you can view statistics for the
selected Service Director instance.
Statistics: Service Directors field descriptions
Name Description
Id A number assigned to the Service Director.
Host Name The host name or IP address of the Service
Director.
Administrator Port The administration port number of the
Service Director.
Version The version of SIP Application Server.
Status The operational state of each the Service
Director.
Options include:
•RUNNING: The Service Director has been
started and is operating normally.
• DOWN: The Service Director is
unavailable.
• UNKNOWN: The operational status of the
Service Director cannot be determined.
• RESTARTING: The Service Director is
rebooting from a previously up state and
will soon become available.
• STARTING: The Service Director is
starting up from a down state and will soon
become available.
SIP Application Server
Administering Avaya Aura® Session Manager November 2010 25
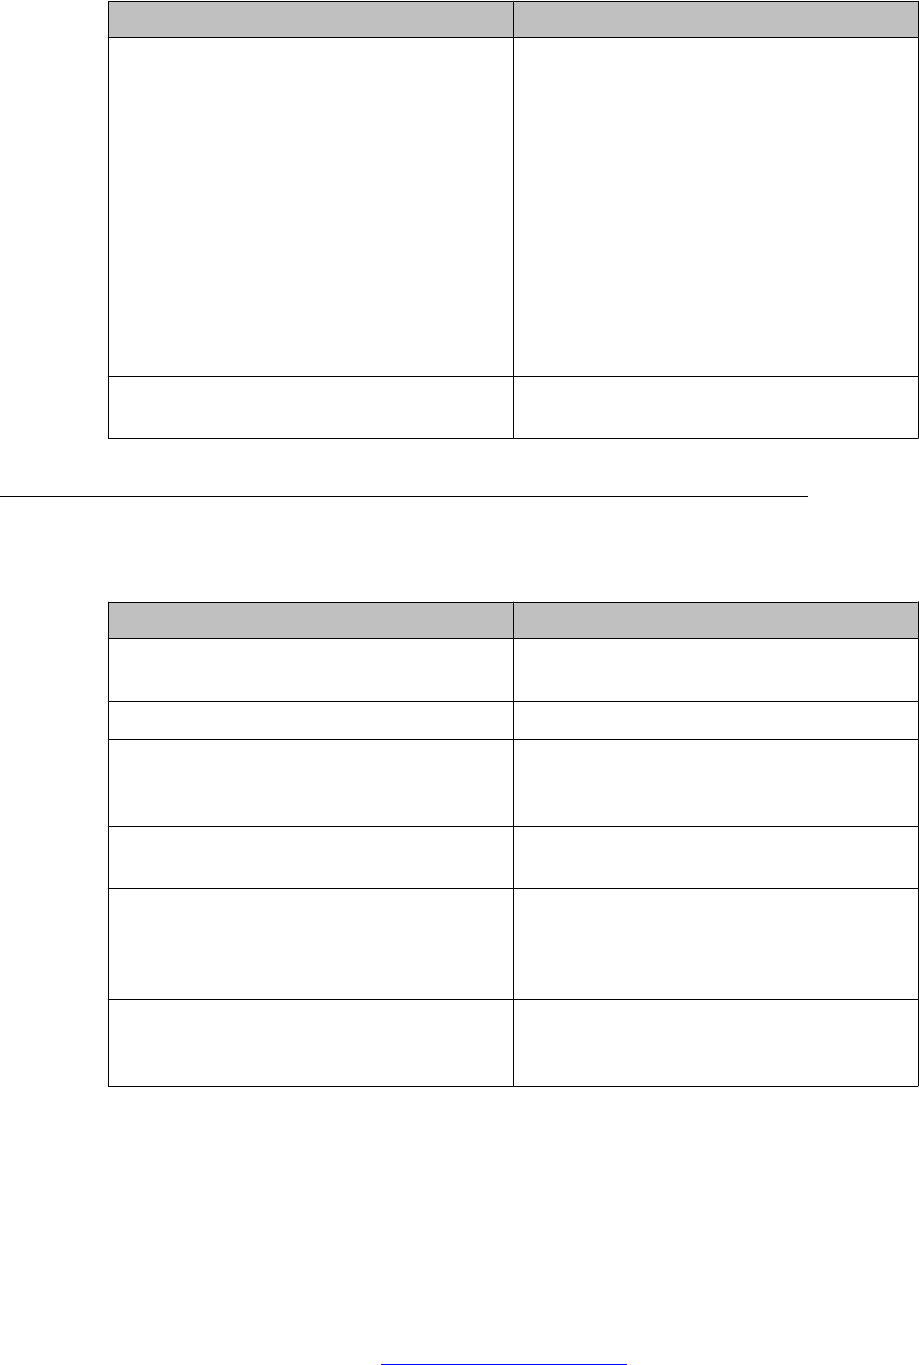
Name Description
• TESTING: The Service Director is in
testing mode.
• HALTED: The Service Director is
stopped.
• HALTING: The Service Director is
stopping.
• DISABLED: The Service Director is
disabled but can still receive
configuration.
• BOOTERROR: The Service Director has
encountered an error during start-up.
Restart Req? Indicates whether the Service Director
requires a restart.
Service Director Statistics field descriptions
Some of the important fields are listed below:
Name Description
Status The operational state of the Service
Director.
Up Time The time since Service Director start-up.
Received Request Count The number of SIP request messages
received by the Service Director since start-
up.
Sent Response Count The number of SIP response messages sent
by the Service Director since start-up.
Dropped Requests Count The number of requests not forwarded to a
Service Host as a result of traffic throttling
initiated by Self Awareness and Preservation
rules.
Bounced Requests Count The number of 503 responses sent as a
result of traffic throttling initiated by Self
Awareness and Preservation rules.
Getting started
26 Administering Avaya Aura ® Session Manager November 2010
Comments? infodev@avaya.com
Viewing Service Host Instance Statistics
Procedure
1. On the SIP Application Server Management Console, click Monitoring > Statistics
> Service Hosts.
The Statistics: Service Hosts page opens showing the list of Service Hosts.
2. In the section Service Host Instance Statistics, select a Service Host instance and
click View.
The Service Host Statistics page opens where you can view statistics for the
selected Service Host instance.
3. In the section View Statistics from Last 24 Hours, select a statistic record to view
and click View Data.
The Statistics Detail View page opens where you can view the 24 hour details for
the selected statistics.
4. On the Statistics Detail View page, click Export CSV to export the data into comma-
separated value format for display in a spreadsheet application.
Statistics: Service Hosts field descriptions
Name Description
Id A number assigned to each Service Host.
Host Name The host name or IP address of the Service
Host.
Administrator Port The administration port number of the
Service Host.
Version The version of SIP Application Server.
Status The operational state of each Service Host.
Options include:
• RUNNING: The Service Host has been
started and is operating normally.
• DOWN: The Service Host is unavailable.
• UNKNOWN: The operational status of the
Service Host cannot be determined for
some reason.
SIP Application Server
Administering Avaya Aura® Session Manager November 2010 27

Name Description
• RESTARTING: The Service Host is
rebooting from a previously up state and
will soon become available.
•STARTING: The Service Host is starting up
from a down state and will soon become
available.
• TESTING: The Service Host is in testing
mode.
• HALTED: The Service Host is stopped.
• HALTING: The Service Host is stopping.
• DISABLED: The Service Host is disabled
but can still receive configuration.
• BOOTERROR: The Service Host has
encountered an error during start-up.
Restart Req? Indicates whether the Service Host requires
a restart.
View Statistics from Last 24 Hours
Statistic The statistic being monitored.
Peak (Cross-Cluster Total) The highest value observed for this attribute
from totalling the attribute values across all
Service Hosts.
Peak (Individual) The highest individual value observed for this
attribute over the last 24 hours, amongst all
individual Service Hosts.
Average The current average of the attribute's values
totalled across all Service Hosts over the last
24 hours.
Some of the important fields are listed below:
CPU Usage Percentage The percentage CPU usage on the Service
Host installation platform.
Total number of requests received Total number of SIP message requests
received by the Service Host.
Active SIP Transactions The number of new active transactions
currently being processed by the Service
Host.
Getting started
28 Administering Avaya Aura ® Session Manager November 2010
Comments? infodev@avaya.com
Free Physical Memory (Mb) The amount of free physical memory
available on the Service Host hardware
platform.
Container Sip Application Sessions The number of SIP application sessions
currently being processed by the Service
Host. This equals the sum of the number of
sessions which represent subscriptions from
endpoints and the number of currently active
calls handled by the Session Manager.
Service Host Statistics field descriptions
Some of the important fields are listed below:
Name Description
SIP Protocol Version The SIP protocol version used by the Service
Host.
Status The operational state of the Service Host.
Up Time The time since Service Host initialization.
Running The running state of the Service Host.
SIP Application Sessions The number of SIP Application Sessions
currently being processed by the Service
Host.
Active SIP Application Sessions The number of SIP transactions currently
being processed by the Service Host.
Summary Statistics
Name Description
SIP Initial Requests Per Second In SIP initial requests per second received by
the Service Host since last reported.
SIP Initial Requests Per Second Out SIP initial requests per second sent from the
Service Host since last reported.
Unsupported URI Count The total number of unsupported URIs that
have sent SIP requests to the Service Host.
Total Requests In The total number of SIP requests received by
the Service Host.
Total Requests Out The total number of SIP requests sent by the
Service Host.
SIP Application Server
Administering Avaya Aura® Session Manager November 2010 29

Name Description
Total Responses In The total number of SIP responses received
by the Service Host.
Total Responses Out The total number of SIP responses sent by
the Service Host.
Transaction Quantity The total number of transactions that have
taken place through the Service Host.
Getting started
30 Administering Avaya Aura ® Session Manager November 2010
Comments? infodev@avaya.com

Chapter 2: Synchronizing Communication
Manager and messaging data
with System Manager
Introduction
This chapter explains how to use Communication System Manager feature to synchronize
Communication Manager station data to the System Manager database. The system
automatically connects to System Manager and Communication Manager in the core and
synchronizes provisioning data in the System Manager database with each managed
Communication Manager system. You can synchronize the endpoint data in a scheduled and
incremental basis as follows:
1. Administration of each Communication Manager as an entity or application
instance.
2. Initialization of the synchronization of Communication Manager and messaging
data with System Manager.
Creating a Communication Manager instance
Procedure
1. On the System Manager console, under Elements, click Inventory.
2. Click Inventory > Manage Elements in the left navigation pane.
3. On the Manage Elements page, click New and select a “CM” entity instance.
4. On the New CM Instance page, enter the appropriate details:
a. In the Node field, specify the management IP address for the Communication
Manager (this is the address used for SSH SAT login).
b. Select “default (none)” for the SNMP Attributes section
c. Under Attributes section, enter the SSH SAT login for the Login field and the
associated password in the Password field.
Administering Avaya Aura® Session Manager November 2010 31

5. Click Commit .
When you add an application entity through RTS (Runtime Topology Service), it in
turn starts a synchronization job in the background to bring all the relevant data from
the application instances to the Communication System Management database.
You can check the status of this synchronization job on the System Manager
console by accessing System Manager Data > Scheduler or in the log files on the
Communication System Management server.
Creating a messaging instance
Procedure
1. On the System Manager console, under Elements, click Inventory.
2. Click Inventory > Manage Elements in the left navigation pane.
3. On the Manage Elements page, click New and select a “Messaging” entity
instance.
4. On the New Messaging Instance page, enter the details as described below:
• The details (FQDN or IP address) in the Node field for a messaging instance
should correspond to that of MSS (Messaging Storage Server) and not MAS
(Messaging Application Server).
•You have to add the System Manager or Communication System Management
server details in the Trusted Server list on the Messaging box (in Messaging
Administration / Trusted Servers screen), before adding the Messaging box in
the System Manager applications.
•The login credentials between the Messaging box trusted servers screen and
the Session Manager application, entity, or attributes for a Messaging type of
application have to match.
• The Trusted Server Name field on the Trusted Server page is mapped to the
Login field in the Attributes section. Similarly the Password field on the Trusted
Server page is mapped to the Password field in the Attributes section.
•You should set the LDAP Access Allowed field on the trusted server page to
yes, to allow LDAP access to this Messaging box from the trusted server that
you add.
5. Click Commit .
When you add an application entity through RTS (Runtime Topology Service), it in
turn starts a synchronization job in the background to bring all the relevant data from
the application instances to the Communication System Management database.
You can check the status of this synchronization job on the System Manager
Synchronizing Communication Manager and messaging data with System Manager
32 Administering Avaya Aura ® Session Manager November 2010
Comments? infodev@avaya.com

console by accessing Scheduler under Services in the System Manager console
or the log files on the Communication System Management server.
Initializing Synchronization
Procedure
1. On the System Manager console, under Elements, click Inventory.
2. Click Synchronization > Communication System in the left navigation pane.
3. Select the Communication Managers you want to synchronize.
4. Select Initialize data for selected devices.
5. Click Now to perform the initializing synchronization or do one of the following:
• Click Schedule to perform the synchronization at a specified time.
• Click Cancel to cancel the synchronization.
Synchronizing Messaging Data
Procedure
1. On the System Manager console, under Elements, click Inventory.
2. Click Synchronization > Messaging Data in the left navigation pane.
3. Select the messaging systems you want to synchronize.
4. Click Now to perform the synchronization or do one of the following:
• Click Schedule to perform the synchronization at a specified time.
• Click Cancel to cancel the synchronization.
Manage Elements field descriptions
Use this page to view the create, edit, view, and delete instances of the application.
Initializing Synchronization
Administering Avaya Aura® Session Manager November 2010 33

Name Description
Name Displays the name of the application
instance.
Node Displays the node on which the application
runs.
Type Displays the type of the application to which
the instance belongs. You can view this field
only if you access the Manage Elements
page through the Inventory menu.
Version Displays the version of the application
instance. You can view this field only if you
access the Manage Elements page through
the Inventory menu .
Description Displays a brief description about the
application instance.
Button Description
View Opens the View Other Applications Instance
page. Use this page to view the details of the
selected application instance.
Edit Opens the Edit Other Applications Instance
page. Use this page to modify the information
of the instance.
New Opens the New Other Applications Instance
page. Use this page to create a new
application instance.
Delete Opens the Delete Other Applications
Instance Confirmation page. Use this page
to delete a selected application instance.
More Actions > Configure Trusted
Certificates Opens the Trusted Certificates page. Use
this page to view, add and delete the trusted
certificates for the application instance.
More Actions > Configure Identity
Certificates Opens the Identity Certificates page. Use
this page to view and replace the identity
certificates for the application instance.
More Actions > Import Opens the Import Applications page. Use
this page to bulk import application data from
a valid xml file.
Filter: Enable Displays fields under select columns that you
can use to set filter criteria. This is a toggle
button.
Synchronizing Communication Manager and messaging data with System Manager
34 Administering Avaya Aura ® Session Manager November 2010
Comments? infodev@avaya.com
Button Description
Filter: Disable Hides the column filter fields. This is a toggle
button.
Filter: Apply Filters application instances based on the
filter criteria.
Select: All Selects all the application instances in the
table.
Select: None Clears the selection for the users that you
have selected.
Refresh Refreshes the application instance
information in the table.
Application Details field descriptions
Use this page to add and edit an application instance.
Application
Name Description
Name Displays the name of the application
instance.
Type Displays the type of the application to which
the application instance belongs.
Description Displays a brief description about the
application instance.
Node Displays the node on which you want to run
the application instance.
Note:
The system displays this field when you
select Other from the Node field.
Port
Name Description
Name Displays the name of the port.
Port Displays the port on which the application
instance is running.
Application Details field descriptions
Administering Avaya Aura® Session Manager November 2010 35
Name Description
Protocol Displays the protocol associated with the
corresponding port.
Description Displays a brief description about the port.
Button Description
New Displays fields in the Port section that you
can use to add a port.
Edit Displays fields in the Port section with port
information. You can modify the port details
in the port mode.
Delete Deletes the selected configured port.
Save Saves the port details.
Note:
The section displays this button only when
you click Add or Edit in the Port section.
Cancel Cancels the operation of creating or editing
an access point and hides the fields that you
use to enter or modify the port information.
Note:
The section displays this button only when
you click Add or Edit in the Port section.
Access Point
Name Description
Name Displays the name of the access point.
Access Point Type Displays the type of the access point.
The options are:
•EMURL: Use this option to create a URL
type access point .
•WS: Use this option to create a Webservice
access point.
•GUI: Use this option to create any GUI
access point.
•Other
Protocol Displays the protocol that the application
instance supports to communicate with other
communication devices.
Synchronizing Communication Manager and messaging data with System Manager
36 Administering Avaya Aura ® Session Manager November 2010
Comments? infodev@avaya.com

Name Description
Host Displays the name of the host on which the
application instance is running.
Port Displays the port on which the application
instance is running.
Order Displays the order in which the access points
are accessed.
Button Description
New Displays fields in the Access Point section
that you can use to add port details.
Edit Displays fields in the Access Point section
that allows you to modify the selected port
details.
Delete Deletes the selected access point.
These fields appear when you click Add or Edit in the Access Point section.
Name Description
Name Displays the name of the access point.
Access Point Type Displays the type of the access point.
The options are:
•EMURL: Use this option to create a URL
type access point .
•WS: Use this option to create a Webservice
access point.
•GUI: Use this option to create any GUI
access point.
•Other
Protocol Displays the protocol for communicating with
the application instance.
Host Displays the name of the host on which the
application instance is running.
Port Displays the port on which the application
instance is running.
Order Displays the order in which the access points
are accessed.
Button Description
Save Saves the access point details.
Application Details field descriptions
Administering Avaya Aura® Session Manager November 2010 37
Button Description
Note:
This button is visible only when you click
Add and Edit in the Access Point
section.
Cancel Cancels the operation of creating or editing
an access point and hides the fields that you
use to enter or modify the access point
information.
Note:
This button is available only when you
click Add and Edit in the Access Point
section.
Attributes
This section provides information about attributes fields that you can configure for the selected
application. This section appears only if the ApplicationType is defined to have Attributes
through EP metadata.
Name Description
Login Login name to be used for connecting to the
application instance.
Note:
craft, craft2, dadmin, inads, init,
rasaccess, sroot, and tsc are the
restricted logins when you configure a
Communication Manager system.
Note:
Do not use this login to connect to
Communication Manager from any other
application or to connect to the
Communication Manager SAT terminal
using CLI.
Password Password which authenticates the SSH/
Telnet login name on the application
instance. This field is not required for ASG
login.
Is SSH Connection Use this check box to specify whether the
SSH connection should be used to connect
to the application instance. By default this is
selected. If you clear the check box, the
connection with the application instance is
made using Telnet.
Synchronizing Communication Manager and messaging data with System Manager
38 Administering Avaya Aura ® Session Manager November 2010
Comments? infodev@avaya.com

Name Description
Port The port on which the service provided by the
application instance is running. The default
SSH port is 5022.
Alternate IP Address Alternate IP address of the application
instance. This is the IP address of the
standby server in case of duplex servers.
RSA SSH Fingerprint (Primary IP) The RSA SSH key of the Communication
Manager Server. In case of Duplex servers,
RSA SSH Key is the key of the Active
server.
RSA SSH Fingerprint (Alternate IP) The DSA SSH Key of the CM Server used
only in case of Duplex servers. This is the key
of the Standby server.
Is ASG Enabled Use this check box to enable ASG. If you
select the Is ASG enabled check box, then
you should enter the ASG key. Password is
not required.
ASG Key The ASG key used to authenticate the ASG
login. You do not have to enter any value in
this field if non-ASG login is used.
Location Displays the location of the application
instance.
The following fields provides information about attributes related to messaging.
Name Description
Login Displays the name as given in the Trusted
Server Name field of the Trusted Servers
page on the Messaging Box for this server.
Password Password for the login name as given in the
Password field of the Trusted Servers page
on the Messaging Box for this server.
Confirm Password You should retype the password for
confirmation.
Messaging Type Displays the type of the Messaging box. The
following are the types of messaging:
•MM: for Modular Messaging systems
•CMM: for Communication Manager
Embedded Messaging systems
Version Displays the version of the Messaging Box.
Supported versions are 5.0 and above.
Application Details field descriptions
Administering Avaya Aura® Session Manager November 2010 39

Name Description
Secured LDAP Connection Use this check box to specify whether
Secure LDAP connection is to be used.
Select this check box to use secure LDAP
connection, else LDAP will be used.
Port Displays the port on which the LDAP or
secure LDAP service provided by the
application instance is running. For LDAP the
port is 389 and for secure LDAP the port is
636.
Location Displays the location of the application
instance.
SNMP Attributes
You set some basic parameters for specific devices or a range of devices in the SNMP
Attributes section. You can choose either SNMP protocol V1 or V3. Based on your selection
of SNMP protocol, you can then set certain basic SNMP parameters.
Name Description
Version Specifies the SNMP protocol type.
Read Community Displays the read community of the device.
Only applicable for SNMP protocol V1.
Write Community Displays the write community of the device.
Only applicable for SNMP protocol V1.
Retries Displays the number of times an application
polls a device without receiving a response
before timing out.
Timeout Displays the number of milliseconds an
application polls a device without receiving a
response before timing out.
Device Type Specifies the type of the device
Assign Applications
Name Description
Name Displays the name of the application
instance.
Type Displays the type of application.
Description Displays a brief description about the
application instance.
Synchronizing Communication Manager and messaging data with System Manager
40 Administering Avaya Aura ® Session Manager November 2010
Comments? infodev@avaya.com
Button Description
Assign Applications Opens the Assign Applications page. Use
the page to assign an application instance to
another application instance.
Unassign Applications Removes an assigned application.
Button Description
Commit Creates or modifies an instance by saving
the instance information to the database.
Note:
This button is visible only when you click
New and Edit on the Application
Management page.
Cancel Closes the page without saving the
information and takes you back to the
Application Management page.
Application Details field descriptions
Administering Avaya Aura® Session Manager November 2010 41


Chapter 3: Managing Security
Introduction
Trust Management provisions certificates to applications enabling them to have a secure inter-
element communication. It provides Identity and Trusted (root) certificates with which mutually
authenticated TLS sessions can be established.
For administering third-party trusted certificates for Session Manager, a "Session Manager"
application needs to be added for a specific Session Manager or Branch Session Manager
instance. This application is administered with the “Management Access Point” IP address of
the Session Manager instance. Using the Trust Management service, you can perform the
following operations for the application instance:
• View trusted and identity certificates currently installed on the Session Manager server.
• Add and remove trusted certificates installed on the Session Manager server.
Note:
Adding, removing and replacing of certificates is not currently supported for either Identity
Certificates or for non-third party certificates that is the default certificates provided by Avaya
cannot be changed.
Setting SCEP enrollment password
About this task
You can use this functionality to generate the simple certificate enrollment password (SCEP)
for adopting products. The adopting products require the SCEP password to request
certificates from Trust Management.
Procedure
1. On the System Manager console, under Services, click Security.
2. Click Certificates > Enrollment Password in the left navigation pane.
3. On the Enrollment Password page, select the expiration of password in hours in the
Password expires in field.
Administering Avaya Aura® Session Manager November 2010 43

4. Click Generate.
The password field displays the generated password.
5. Click Commit.
Note:
When you click Commit, the time displayed next to the Time remaining label is
updated by the value selected in the Password expires in field.
Adding a Session Manager application
Procedure
1. On the System Manager console, under Elements, click Inventory.
2. Click Inventory > Manage Elements in the left navigation pane.
3. On the Manage Elements page, click New and select a “Session Manager” entity
instance.
4. On the New Session Manager Instance page, enter the following details:
a. Under Application section, enter a name in the Name field for this Session
Manager.
b. Enter the Management Access Point IP address of this Session Manager in the
Node field, which is same as the value entered for Session Manager instance
during Session Manager administration.
c. Under Access Point section, select the pre-populated Access Point in the table
and click Edit. Enter name in the Name field, Management Access Point IP
address in the Host field and any text in the URI field. The default values for
the Protocol field is “jnp” and Port field is 1299.
You need not change other default values and specifically for protocol and port,
the default values should not be changed.
d. Click Save.
5. Click Commit .
Viewing trusted certificates
Before you begin
You must have permission to view certificates of an application instance.
Managing Security
44 Administering Avaya Aura ® Session Manager November 2010
Comments? infodev@avaya.com

Procedure
1. On the System Manager console, under Elements, click Inventory.
2. Click Inventory > Manage Elements in the left navigation pane.
3. On the Manage Elements page , select a Session Manager instance and click More
Actions > Configure Trusted Certificates.
4. On the Trusted Certificates page, click View.
Result
The View Trust Certificate page displays the details of the selected certificate.
Adding trusted certificates
About this task
You need to import the certificates that you want to add as trusted certificate in the trust store
of the application. The following are the four methods of importing a trusted certificate in the
trust store for an application instance:
1. Import from existing
2. Import from file
3. Import as PEM Certificate
4. Import using TLS
You can add a trusted certificate from a list of an existing certificates, a file, a remote location
using TLS connection and by copying the content from a PEM file.
Procedure
1. On the System Manager console, under Elements, click Inventory.
2. Click Inventory > Manage Elements in the left navigation pane.
3. On the Manage Elements page , select a Session Manager instance and click More
Actions > Configure Trusted Certificates.
4. On the Trusted Certificates page, click Add.
5. On the Add Trusted Certificate page, select store type from the Store Type field
as SM_SECURITY_MODULE and perform one of the following steps:
• To import certificates from existing certificates:
i. Click Import from existing .
ii. Select the certificate from the Global Trusted Certificate section.
Adding trusted certificates
Administering Avaya Aura® Session Manager November 2010 45
iii. Click Commit.
• To import certificates from a file (in .cer format):
i. Click Import from file .
ii. Enter the name of the file. You can also click Browse to select a
file.
iii. Click Retrieve Certificate.
iv. Click Commit.
• To import certificates in the PEM format:
i. Locate the PEM certificate.
ii. Open the certificate in the Notepad application.
iii. Select all the contents in the file.
iv. Perform a copy operation.
v. Click Import as PEM Certificate .
vi. Perform a paste operation in the box provided at the bottom of the
page.
Note:
You may include the start and end tags: -----BEGIN
CERTIFICATE-----" and "-----END CERTIFICATE----.
vii. Click Commit.
• To import using TLS:
i. Click Import using TLS .
ii. Enter the IP Address of the computer in the IP Address field.
iii. Enter the port of the computer in the Port field.
iv. Click Retrieve Certificate.
v. Click Commit.
Exporting the Session Manager Certificate
Procedure
1. On the System Manager console, under Elements, click Inventory.
2. Click Inventory > Manage Elements in the left navigation pane.
Managing Security
46 Administering Avaya Aura ® Session Manager November 2010
Comments? infodev@avaya.com

3. On the Manage Elements page , select a Session Manager instance and click More
Actions > Configure Trusted Certificates.
4. Select SM_SECURITY_MODULE and click Export to save it.
Removing trusted certificates
Procedure
1. On the System Manager console, under Elements, click Inventory.
2. Click Inventory > Manage Elements in the left navigation pane.
3. On the Manage Elements page , select a Session Manager instance and click More
Actions > Configure Trusted Certificates.
4. On the Trusted Certificates page, select the certificates and click Remove.
Result
Trust Management removes the certificates from the list of trusted certificates for the Session
Manager instance instance.
Refreshing CA Certificate List
About this task
To enable the security module to refresh the list of CA certificates and include the newly added
ones, do the following steps:
Procedure
1. On the System Manager console, under Elements, click Session Manager.
2. Click System Status > Security Module Status.
3. Select the Session Manager instance and click Update Installed Certificates.
4. Click Confirm.
Removing trusted certificates
Administering Avaya Aura® Session Manager November 2010 47
Viewing identity certificates
Procedure
1. On the System Manager console, under Elements, click Inventory.
2. Click Inventory > Manage Elements in the left navigation pane.
3. On the Manage Elements page , select a Session Manager instance and click More
Actions > Configure Identity Certificates.
4. On the Identity Certificates page, click View.
Result
The Identity Certificate page displays the identity certificates.
Enrollment Password field descriptions
Use this page to generate a simple certificate enrollment password (SCEP).
Name Description
Existing Password The current simple certificate enrollment
password (SCEP) that the external SCEP
clients use to request certificates.
Time Remaining Specifies the time in hours and minutes
remaining for expiration of the current
password.
Password expires in Specifies the duration in hours for which the
existing password is valid.
Password The password that the external SCEP clients
use to request a certificate. Trust Manager
generates this password when you click
Generate.
Button Description
Generate Generates a random password.
Commit Updates the Existing Password and Time
Remaining fields.
Managing Security
48 Administering Avaya Aura ® Session Manager November 2010
Comments? infodev@avaya.com

Manage Elements field descriptions
Use this page to view the create, edit, view, and delete instances of the application.
Name Description
Name Displays the name of the application
instance.
Node Displays the node on which the application
runs.
Type Displays the type of the application to which
the instance belongs. You can view this field
only if you access the Manage Elements
page through the Inventory menu.
Version Displays the version of the application
instance. You can view this field only if you
access the Manage Elements page through
the Inventory menu .
Description Displays a brief description about the
application instance.
Button Description
View Opens the View Other Applications Instance
page. Use this page to view the details of the
selected application instance.
Edit Opens the Edit Other Applications Instance
page. Use this page to modify the information
of the instance.
New Opens the New Other Applications Instance
page. Use this page to create a new
application instance.
Delete Opens the Delete Other Applications
Instance Confirmation page. Use this page
to delete a selected application instance.
More Actions > Configure Trusted
Certificates Opens the Trusted Certificates page. Use
this page to view, add and delete the trusted
certificates for the application instance.
More Actions > Configure Identity
Certificates Opens the Identity Certificates page. Use
this page to view and replace the identity
certificates for the application instance.
Manage Elements field descriptions
Administering Avaya Aura® Session Manager November 2010 49
Button Description
More Actions > Import Opens the Import Applications page. Use
this page to bulk import application data from
a valid xml file.
Filter: Enable Displays fields under select columns that you
can use to set filter criteria. This is a toggle
button.
Filter: Disable Hides the column filter fields. This is a toggle
button.
Filter: Apply Filters application instances based on the
filter criteria.
Select: All Selects all the application instances in the
table.
Select: None Clears the selection for the users that you
have selected.
Refresh Refreshes the application instance
information in the table.
Application Details field descriptions
Use this page to add and edit an application instance.
Application
Name Description
Name Displays the name of the application
instance.
Type Displays the type of the application to which
the application instance belongs.
Description Displays a brief description about the
application instance.
Node Displays the node on which you want to run
the application instance.
Note:
The system displays this field when you
select Other from the Node field.
Managing Security
50 Administering Avaya Aura ® Session Manager November 2010
Comments? infodev@avaya.com
Port
Name Description
Name Displays the name of the port.
Port Displays the port on which the application
instance is running.
Protocol Displays the protocol associated with the
corresponding port.
Description Displays a brief description about the port.
Button Description
New Displays fields in the Port section that you
can use to add a port.
Edit Displays fields in the Port section with port
information. You can modify the port details
in the port mode.
Delete Deletes the selected configured port.
Save Saves the port details.
Note:
The section displays this button only when
you click Add or Edit in the Port section.
Cancel Cancels the operation of creating or editing
an access point and hides the fields that you
use to enter or modify the port information.
Note:
The section displays this button only when
you click Add or Edit in the Port section.
Access Point
Name Description
Name Displays the name of the access point.
Access Point Type Displays the type of the access point.
The options are:
•EMURL: Use this option to create a URL
type access point .
•WS: Use this option to create a Webservice
access point.
Application Details field descriptions
Administering Avaya Aura® Session Manager November 2010 51

Name Description
•GUI: Use this option to create any GUI
access point.
•Other
Protocol Displays the protocol that the application
instance supports to communicate with other
communication devices.
Host Displays the name of the host on which the
application instance is running.
Port Displays the port on which the application
instance is running.
Order Displays the order in which the access points
are accessed.
Button Description
New Displays fields in the Access Point section
that you can use to add port details.
Edit Displays fields in the Access Point section
that allows you to modify the selected port
details.
Delete Deletes the selected access point.
These fields appear when you click Add or Edit in the Access Point section.
Name Description
Name Displays the name of the access point.
Access Point Type Displays the type of the access point.
The options are:
•EMURL: Use this option to create a URL
type access point .
•WS: Use this option to create a Webservice
access point.
•GUI: Use this option to create any GUI
access point.
•Other
Protocol Displays the protocol for communicating with
the application instance.
Host Displays the name of the host on which the
application instance is running.
Managing Security
52 Administering Avaya Aura ® Session Manager November 2010
Comments? infodev@avaya.com
Name Description
Port Displays the port on which the application
instance is running.
Order Displays the order in which the access points
are accessed.
Button Description
Save Saves the access point details.
Note:
This button is visible only when you click
Add and Edit in the Access Point
section.
Cancel Cancels the operation of creating or editing
an access point and hides the fields that you
use to enter or modify the access point
information.
Note:
This button is available only when you
click Add and Edit in the Access Point
section.
Attributes
This section provides information about attributes fields that you can configure for the selected
application. This section appears only if the ApplicationType is defined to have Attributes
through EP metadata.
Name Description
Login Login name to be used for connecting to the
application instance.
Note:
craft, craft2, dadmin, inads, init,
rasaccess, sroot, and tsc are the
restricted logins when you configure a
Communication Manager system.
Note:
Do not use this login to connect to
Communication Manager from any other
application or to connect to the
Communication Manager SAT terminal
using CLI.
Password Password which authenticates the SSH/
Telnet login name on the application
Application Details field descriptions
Administering Avaya Aura® Session Manager November 2010 53

Name Description
instance. This field is not required for ASG
login.
Is SSH Connection Use this check box to specify whether the
SSH connection should be used to connect
to the application instance. By default this is
selected. If you clear the check box, the
connection with the application instance is
made using Telnet.
Port The port on which the service provided by the
application instance is running. The default
SSH port is 5022.
Alternate IP Address Alternate IP address of the application
instance. This is the IP address of the
standby server in case of duplex servers.
RSA SSH Fingerprint (Primary IP) The RSA SSH key of the Communication
Manager Server. In case of Duplex servers,
RSA SSH Key is the key of the Active
server.
RSA SSH Fingerprint (Alternate IP) The DSA SSH Key of the CM Server used
only in case of Duplex servers. This is the key
of the Standby server.
Is ASG Enabled Use this check box to enable ASG. If you
select the Is ASG enabled check box, then
you should enter the ASG key. Password is
not required.
ASG Key The ASG key used to authenticate the ASG
login. You do not have to enter any value in
this field if non-ASG login is used.
Location Displays the location of the application
instance.
The following fields provides information about attributes related to messaging.
Name Description
Login Displays the name as given in the Trusted
Server Name field of the Trusted Servers
page on the Messaging Box for this server.
Password Password for the login name as given in the
Password field of the Trusted Servers page
on the Messaging Box for this server.
Confirm Password You should retype the password for
confirmation.
Managing Security
54 Administering Avaya Aura ® Session Manager November 2010
Comments? infodev@avaya.com

Name Description
Messaging Type Displays the type of the Messaging box. The
following are the types of messaging:
•MM: for Modular Messaging systems
•CMM: for Communication Manager
Embedded Messaging systems
Version Displays the version of the Messaging Box.
Supported versions are 5.0 and above.
Secured LDAP Connection Use this check box to specify whether
Secure LDAP connection is to be used.
Select this check box to use secure LDAP
connection, else LDAP will be used.
Port Displays the port on which the LDAP or
secure LDAP service provided by the
application instance is running. For LDAP the
port is 389 and for secure LDAP the port is
636.
Location Displays the location of the application
instance.
SNMP Attributes
You set some basic parameters for specific devices or a range of devices in the SNMP
Attributes section. You can choose either SNMP protocol V1 or V3. Based on your selection
of SNMP protocol, you can then set certain basic SNMP parameters.
Name Description
Version Specifies the SNMP protocol type.
Read Community Displays the read community of the device.
Only applicable for SNMP protocol V1.
Write Community Displays the write community of the device.
Only applicable for SNMP protocol V1.
Retries Displays the number of times an application
polls a device without receiving a response
before timing out.
Timeout Displays the number of milliseconds an
application polls a device without receiving a
response before timing out.
Device Type Specifies the type of the device
Application Details field descriptions
Administering Avaya Aura® Session Manager November 2010 55
Assign Applications
Name Description
Name Displays the name of the application
instance.
Type Displays the type of application.
Description Displays a brief description about the
application instance.
Button Description
Assign Applications Opens the Assign Applications page. Use
the page to assign an application instance to
another application instance.
Unassign Applications Removes an assigned application.
Button Description
Commit Creates or modifies an instance by saving
the instance information to the database.
Note:
This button is visible only when you click
New and Edit on the Application
Management page.
Cancel Closes the page without saving the
information and takes you back to the
Application Management page.
Trusted Certificates field descriptions
Use this page to view and delete the trusted certificates listed on the page. You can also use
this page to add more certificates in the existing list of trusted certificates
Name Description
Certificate Name Specifies the name of the trusted
certificate.
Store Type Specifies the type of the store associated
with the certificate.
Subject Name Specifies the name of the certificate holder.
Managing Security
56 Administering Avaya Aura ® Session Manager November 2010
Comments? infodev@avaya.com
Button Description
View Opens the View Trust Certificate page. Use
this page to view the certificate details.
Add Opens the Adds Trusted Certificate page.
use this page to import certificates from the
selected resource.
Remove Removes the selected certificate from the list
of trusted certificates.
Exports Exports the selected certificate from the list
of trusted certificates.
Related topics:
Removing trusted certificates
Viewing trusted certificates
Adding trusted certificates
Add Trusted Certificate field descriptions
Use this page to add a trusted certificate.
Name Description
Store Type Specifies the type of store based on inbound
and outbound connection. The options are:
• All
• TM_INBOUND_TLS
• TM_OUTBOUND_TLS
• TM_INBOUND_TLS_PEM
Import from existing Use this option to import a certificate from
your local machine.
Import from file Use this option to import a certificate from a
file. The file format is .cer.
Import as PEM Certificate Use this option to import a certificate in .pem
format.
Import using TLS Use this option to import a certificate if the
application instance requires to contact the
certificate provider to obtain the certificate.
Global Trusted Certificate:
Add Trusted Certificate field descriptions
Administering Avaya Aura® Session Manager November 2010 57

The page displays the following fields when you select the Import from existing option.
Name Description
Certificate Name Specifies the fully qualified domain name of
the certificate.
Subject Name Specifies the fully qualified domain name of
the certificate holder.
Valid To Specifies the date until which the certificate
is valid.
Filter: Enable Displays fields under select columns that you
can use to set filter criteria. This is a toggle
button.
Filter: Disable Hides the column filter fields without
resetting the filter criteria. This is a toggle
button.
Filter: Clear Clears the filter criteria.
Filter: Apply Filters certificates based on the filter
criteria.
Select: All Select all the certificates in the table.
Select: None Clears all the check box selections.
Refresh Refreshes the certificates information .
The page displays these fields when you select the Import from file option.
Name/Button Description
Please select a file The file that contains the certificates.
Browse Opens the choose file dialog box. Use this
dialog box to choose the file from which you
want to import the certificates.
Retrieve Certificate Retrieves the certificate from the file and
displays the details of the certificate in the
Certificate Details section.
Certificate Details:
The page displays these fields when you click Retrieve.
Name Description
Subject Details Specifies the details of the certificate
holder.
Valid From Specifies the date and time from which the
certificate is valid.
Managing Security
58 Administering Avaya Aura ® Session Manager November 2010
Comments? infodev@avaya.com
Name Description
Valid To Specifies the date and time until which the
certificate is valid.
Key Size Specifies the size of the key in bits for
encryption.
Issuer Name Specifies the name of the issuer of the
certificate.
Finger Print Specifies the finger print that authenticates
the certificate.
The page displays these fields when you select the Import using TLS option.
Field/Button Description
IP Address Specifies the IP address of the certificate
provider that is to be contacted for retrieving
the certificate.
Port Specifies the port of the server to be used for
obtaining the certificate.
Retrieve Certificate Retrieves the certificate and displays the
details of the certificate in the Certificate
Details section.
Related topics:
Adding trusted certificates
View Trust Certificate field descriptions
Use this page to view details of a selected certificate.
Name Description
Subject Details Specifies the details of the certificate
holder.
Valid From Specifies the date and time from which the
certificate is valid.
Valid To Specifies the date and time until which the
certificate is valid.
Key Size Specifies the size of the key in bits for
encryption.
View Trust Certificate field descriptions
Administering Avaya Aura® Session Manager November 2010 59
Name Description
Issuer Name Specifies the name of the issuer of the
certificate.
Finger Print Specifies the finger print that authenticates
the certificate.
Button Description
Done Closes the page and takes you back to the
Trusted Certificates page.
Related topics:
Viewing trusted certificates
Delete Trusted Certificate Confirmation field descriptions
Use this page to delete a trusted certificate from the list of trusted certificate maintained by the
application instance.
Name Description
Store Description Describes the store associated with the
certificate.
Store Type Specifies the type of the store associated
with the certificate.
Subject Name Specifies the name of the certificate holder.
Button Description
Delete Deletes the trusted certificate from the
corresponding store.
Cancel Cancels the delete operation and takes you
back to the Add Trusted Certificate page.
Related topics:
Removing trusted certificates
Identity Certificates field descriptions
Use this page to view the identity certificates for the application instance.
Managing Security
60 Administering Avaya Aura ® Session Manager November 2010
Comments? infodev@avaya.com

Name Description
Service Name Specifies the name of the service that uses
the identity certificate.
Common Name Specifies the common name to identify the
service.
Valid To Specifies the date until which the certificate
is valid.
Service Description A brief description about the service.
Button Description
Replace Opens the Replace Identity Certificate page.
Use this page to replace a selected identity
certificate with a new certificate.
Cancel Closes the Identity Certificates page and
takes you back to the Application
Management page.
Identity Certificates field descriptions
Administering Avaya Aura® Session Manager November 2010 61


Chapter 4: Managing Users
Introduction
This chapter explains adding a user profile for accessing enhanced enterprise call handling
facilities using:
• application sequencing (with Communication Manager Feature Server and other
applications)
• modular messaging mailbox
• telephone set
Following are the pre-administration steps required for adding the Session Manager Profile of
a user:
1. Administer Primary Session Manager by adding a SIP entity of type “Session
Manager” and Session Manager instance (with listen ports). See the topics Creating
SIP Entities on page 278 and Adding a SIP entity as a Session Manager
instance on page 334 for details.
2. Administer Secondary Session Manager by adding a SIP entity of type “Session
Manager” and Session Manager instance (with listen ports). See the topics Creating
SIP Entities on page 278 and Adding a SIP entity as a Session Manager
instance on page 334 for details.
Note:
This is an optional step required only for redundancy purposes.
3. Add SIP Domains — Administer the SIP domain using the Routing application. See
the topic Creating domains on page 243 .
4. Add applications to be added in the Origination and Termination Application
Sequences.
a. Add Communication Manager Feature Server as an Application
• Add the Communication Manager Feature Server SIP entity. See
the topics Creating SIP Entities on page 278.
• Administer the Communication Manager Feature Server as an
application instance for associating the CM System for SIP entity.
Administering Avaya Aura® Session Manager November 2010 63

See the topic Creating a Communication Manager instance on
page 31 for details.
• Add the Communication Manager Feature Server as an
Application. See the topic Creating an application on page 405 for
details.
b. Similarly add other Applications to be added in the Application
Sequence.
5. Create Application Sequence from existing Applications for specifying “Origination
Application Sequence” and “Termination Application Sequence”. See the topic
Creating an Application Sequence on page 408 for details.
6. To use a Branch Session Manager as a Survivability Server, add a SIP entity of type
“Session Manager” and Branch Session Manager instance (with listen ports). See
the topics Creating SIP Entities on page 278 and Adding a SIP entity as a Branch
Session Manager instance on page 351 for details.
7. For Home Location which is a mandatory selection, the valid values are those of
the configured “Locations”. For adding a new value, add a “Location”. See the topic
Creating Locations on page 247 for details.
Note:
Session Manager Profiles should be defined only for SIP endpoints. Avaya also
recommends the assignment of a SIP handle for all Communication Manager (CM)
endpoints.
Before adding user, you need to synchronize Communication Manager station data and
messaging data to the System Manager as follows:
1. Administer each Communication Manager and messaging application as an
application instance. See the topics Creating a Communication Manager
instance on page 31 and Creating a messaging instance on page 32 for details.
2. Synchronize Communication Manager and messaging data with System Manager.
See the topics Initializing Synchronization on page 33 and Synchronizing
Messaging Data on page 33 for details.
Add a User Profile (SIP end-point). See the topics Adding users on page 64 for details.
Adding users
About this task
The following are the steps for adding users. Any input fields not mentioned in the steps can
be ignored. There are a number of input fields which are not necessary for Session Manager
user administration.
Managing Users
64 Administering Avaya Aura ® Session Manager November 2010
Comments? infodev@avaya.com

A user may have more than one Communication Profile. For more information regarding the
fields, see the on-line help.
Procedure
1. On the System Manager console, under Users, click User Management.
2. In the User Management page, click New.
3. Under Identity tab, enter the user's last name and first name.
4. Enter a description in the Description field. This field is optional.
5. Enter a Login Name name.
This is the unique system login name given to the user. It takes the form of
username@domain (enterprise canonical number).
6. The Authentication Type should be Basic
7. Enter the Localized Display Name of the user. This is the name that is displayed
as the calling party.
8. Enter the full text name of the user for Endpoint Display Name.
9. Under Communication Profile tab, the Communication Profile Password must
be administered. This is the password that is used when logging in to the phone.
10. Click on the show/hide button for Communication Profile.
11. Click on the show/hide button for Communication Address.
Note:
When adding a non-sip user, for example H.323, DCP etc., always enter a
communication address of type Avaya E.164 for the user.
12. For each SIP handle:
a. Click New.
b. Select Avaya SIP from the drop-down menu for Type if it is not set already.
c. In the Fully Qualified Address field, enter the extension number.
d. Click Add.
13. Assign the user to a Communication Manager station:
Note:
This step cannot be done until synchronization of the data has completed. To
view the synchronization status, navigate to Communication System
Management > Telephony on the System Manager console. The status is
displayed in the Sync Status column.
a. Check the box to the left of Endpoint Profile
b. Select the Communication Manager from the System drop-down menu.
c. Check Use Existing Endpoints if the station already exists on the
Communication Manager that is associated with this user.
Adding users
Administering Avaya Aura® Session Manager November 2010 65
The box must be checked in order to associate the user with the selected
Communication Manager station settings. Otherwise, leave the box unchecked
to create a station automatically .
d. Enter the extension that is administered on Communication Manager for the
existing or new station in the Extension field. Click Endpoint Editor to modify
the CM station data.
e. Select a phone template for the use's phone in the Template field. This selection
is required only in case when existing station is not used.
f. Enter a port in the Port field.
g. Select the Delete Endpoint on Unassign of Endpoint from User or on Delete
User box. This optional step applies only if the station is required to be deleted
when the user is deleted.
14. In the Session Manager Profile section:
a. Make sure the Session Manager Profile check box is checked.
b. Select the appropriate Primary Session Manager instance from the drop-down
menu in the Primary Session Manager field.
c. Select the appropriate Secondary Session Manager instance from the drop-
down menu in the Secondary Session Manager field. This is an optional step
required only for redundancy purposes.
d. Select the origination application sequencing from the drop-down menu in the
Origination Application Sequence field.
e. Select the termination application sequencing from the drop-down menu in the
Termination Application Sequence field.
f. Specifying a survivability server (e.g. Branch Session Manager) in the
Survivability Server field. This is optional and is required only for
survivability.
g. Home Location is a mandatory input field to support mobile users. You can
administer locations using Routing > Locations.
15. Select Commit.
Note:
For details on other sections of the User Management page, refer to the System
Manager online help.
Related topics:
New User Profile field descriptions on page 82
Managing Users
66 Administering Avaya Aura ® Session Manager November 2010
Comments? infodev@avaya.com

Managing communication profiles
Creating a new communication profile
Procedure
1. On the System Manager console, under Users, click User Management.
2. Click Manage Users in the left navigation pane.
3. On the User Management page, perform one of the following steps:
• If you are creating a new user account, click New.
• If you want to add a communication profile to an existing user, select a user
and click Edit.
4. On the New User Profile or the User Profile Edit page, click the Communication
Profile tab.
5. In the communication profile section, click New.
6. In the Name field, enter the name of the new communication profile.
7. If you want to mark the profile as default, select the Default check box.
8. Click Done.
9. Click Commit.
Related topics:
New User Profile field descriptions on page 82
Deleting a communication profile
About this task
You cannot delete default communication profiles.
Procedure
1. On the System Manager console, under Users, click User Management.
2. Click Manage Users in the left navigation pane.
3. Perform one of the following steps:
Managing communication profiles
Administering Avaya Aura® Session Manager November 2010 67

• On the User Management page, select a user and click Edit.
• On the User Management page, select a user and click View > Edit.
4. On the User Profile Edit page, click the Communication Profile tab.
5. In the Communication Profile section, click a profile.
6. Click Delete.
7. Click Commit.
Result
When you delete a communication profile, System Manager deletes all the communication
addresses associated with the communication profile.
Creating a new communication address for a communication
profile
Procedure
1. On the System Manager console, under Users, click User Management.
2. Click Manage Users in the left navigation pane.
3. On the User Management page, perform one of the following steps:
• If you are creating a new user account, click New.
•If you want to add a communication profile address to an existing user, select
the user and click Edit.
4. On the New User Profile or the User Profile Edit page, click the Communication
Profile tab.
5. In the Communication Profile section, click a communication profile.
6. In the Communication Address section, click New.
7. In the Type field, enter a communication protocol.
8. In the Fully Qualified Address field, enter a contact address in the format
supported by the value that you selected in the Type field. A contact address can
be an e-mail ID, instant messenger ID, SIP address of a SIP-enabled device, and
so on.
9. Enter the domain name from the field next to Fully Qualified Address field.
10. Click Add.
11. Click Commit.
Managing Users
68 Administering Avaya Aura ® Session Manager November 2010
Comments? infodev@avaya.com

Related topics:
New User Profile field descriptions on page 82
User Profile Edit field descriptions on page 92
Modifying a communication address of a communication profile
Procedure
1. On the System Manager console, under Users, click User Management.
2. Click Manage Users in the left navigation pane.
3. Perform one of the following steps:
• On the User Management page, select a user and click Edit.
• On the User Management page, select a user and click View > Edit.
4. On the User Profile Edit page, click the Communication Profile tab.
5. In the Communication Profile section, select a profile.
6. In the Communication Address section, select a communication address.
7. Click Edit.
8. Modify the information in the respective fields.
9. Click Add.
10. Click Commit.
Related topics:
New User Profile field descriptions on page 82
User Profile Edit field descriptions on page 92
Deleting a communication address from a communication profile
Procedure
1. On the System Manager console, under Users, click User Management.
2. Click Manage Users in the left navigation pane.
3. On the User Management page, perform one of the following:
• Select a user and click Edit.
• Select a user and click View > Edit.
Managing communication profiles
Administering Avaya Aura® Session Manager November 2010 69

4. On the User Profile Edit page, click the Communication Profile tab.
5. In the Communication Profile section, click a communication profile.
6. In the Communication Address section, select a communication address from the
table.
7. Click Delete.
8. Click Commit.
Related topics:
New User Profile field descriptions on page 82
User Profile Edit field descriptions on page 92
Session Manager Communication profile administration
The Session Manager Profile sub-section of the Communication Profile section enables
associating a primary Session Manager instance as a home server for the currently displayed
Communication Profile. As a home server, the selected primary Session Manager instance will
be used as the default access point for connecting devices associated with the Communication
Profile to the Aura network.
All Communication Addresses (handles) of type SIP for the Communication Profile will be
associated with the Aura network. If a secondary Session Manager instance has been
selected, it will provide continued service to SIP devices associated with this Communication
Profile in the event that the primary Session Manager is not available.
Application Sequences may be specified to be invoked when routing calls from (origination
application sequence) or to (termination application sequence) the currently displayed user.
For local survivability, a Survivability Server can be specified to provide survivability
communication services for devices associated with a Communication Profile in the event that
local connectivity to Session Manager instances in the Aura Core is lost. If a Branch Session
Manager is selected, and the termination and origination application sequences contain a
Communication Manager application, sequencing to this application will continue locally to the
Communication Manager LSP resident with the Branch Session Manager.
A home location can be specified to support mobility for the currently displayed user. When
this user calls numbers that are not associated with an administered user, dial-plan rules will
be applied to complete the call based on this home location regardless of the physical location
of the SIP device used to make the call.
Station and Messaging profiles of a user
With User Profile Management, you can create the following two types of communication
profiles for a user:
Managing Users
70 Administering Avaya Aura ® Session Manager November 2010
Comments? infodev@avaya.com

• Station Profile: to create an association between a station and a user
• Messaging Profile: to create an association between a subscriber mailbox and a user
You can add, view, modify, and delete station and messaging profiles. You can go to Station
or Subscriber Management to modify any of the station or subscriber fields that are not
available through User Profile Management.
Login name of station or messaging profile
The login name in the Identity section on the New User Profile and Edit User Profile pages is
the user name that is associated with the communication profile (station and messaging). This
user name appears in the User column in the Station List or Subscriber List.
For stations, the Localized Display Name and Endpoint Display Name fields in the Identity
section of the User Profile Management user profile map to the Name and Native Name fields
of Station. The Localized Display Name and Endpoint Display Name fields are optional.
They default to the Last Name and First Name as given in the General section of the User
Profile Management user profile. You can also fill in any other name of your choice.
For Subscribers, the Last Name and First Name fields in the General section of User Profile
Management user profile directly map to the Last Name and First Name fields in Subscriber.
The Localized Display Name and Endpoint Display Name fields are not applicable for
Subscribers.
Creating stations and messaging profiles
You can create one default or primary Communication Profile for a user. To this default profile,
you can add one station and one messaging profile. In addition, you can add two more station
profiles. You can add a maximum of three station profiles and one messaging profile per
user.
Adding a messaging profile for a user
Procedure
1. On the System Manager console, under Users, click User Management.
2. Click Manage Users in the left navigation pane.
3. On the User Management page, perform one of the following steps:
• If you are creating a messaging profile for a new user profile, click New.
•If you are creating a messaging profile for an existing user, select the user and
click Edit.
4. Click the Communication Profile tab.
5. In the Messaging Profile section, select the check box next to the Messaging
Profile label.
6. In the Messaging Profile section, complete the relevant fields.
Managing communication profiles
Administering Avaya Aura® Session Manager November 2010 71

Note:
Select the Delete Messaging on Unassign of Subscriber from User or Delete
User check box if you want to delete the subscriber mailbox from the
communication management device after removing the association between the
subscriber and the user.
7. Click Commit to add the messaging profile or, click Cancel to return to return to the
previous page.
The field names that are marked with an asterisk (*) are mandatory fields. You must
enter valid information in these fields for the successful creation of the station
profile.
Note:
You should add the messaging devices through Runtime Topology System (RTS)
before you add a messaging profile for a user. Once you create the user-
subscriber association, the user name appears in the User column in the
Subscriber list.
Related topics:
New User Profile field descriptions on page 82
Modifying a messaging profile of a user
Procedure
1. On the System Manager console, under Users, click User Management.
2. Click Manage Users in the left navigation pane.
3. On the User Management page, select a user and perform one of the following
steps:
• Click Edit.
• Click View > Edit.
4. On the User Profile Edit page, click the Communication Profile tab.
5. In the Messaging Profile section, modify the relevant information in the fields.
6. Click Commit to save the changes to the database.
If you want to cancel the action and return to the previous page, click Cancel.
Related topics:
New User Profile field descriptions on page 82
Managing Users
72 Administering Avaya Aura ® Session Manager November 2010
Comments? infodev@avaya.com

Removing association between a subscriber mailbox and a user
Before you begin
The Delete Subscriber on Unassign of Subscriber from User or Delete User check box is
clear while associating a mailbox with a user.
Procedure
1. On the System Manager console, under Users, click User Management.
2. Click Manage Users in the left navigation pane.
3. On the User Management page, select a user and perform one of the following
steps:
• Click Edit.
• Click View > Edit.
4. On the User Profile Edit page, click the Communication Profile tab.
5. In the Messaging Profile tab, clear the check box next to the Messaging Profile
label.
6. Click Commit.
Result
The system removes the association between the subscriber mailbox and the user. The
subscriber mailbox is still provisioned on the communication management device.
Related topics:
New User Profile field descriptions on page 82
Deleting a subscriber mailbox
Before you begin
You have selected the Delete Subscriber on Unassign of Subscriber from User or on
Delete User check box while associating a subscriber mailbox to a user.
About this task
This functionality deletes the subscriber mailbox from the messaging device after removing
the association between the subscriber mailbox and the user.
Procedure
1. On the System Manager console, under Users, click User Management.
Managing communication profiles
Administering Avaya Aura® Session Manager November 2010 73
2. Click Manage Users in the left navigation pane.
3. On the User Management page, select a user and perform one of the following
steps:
• Click Edit.
• Click View > Edit.
4. On the User Profile Edit page, click the Communication Profile tab.
5. In the Messaging Profile tab, clear the check box next to the Messaging Profile
label.
6. Click Commit .
Note:
You can delete only those subscribers that are associated with a user through
User Management. You can delete non-user associated subscriber mailboxes
only through Subscriber Management.
Related topics:
New User Profile field descriptions on page 82
Adding an endpoint profile for a user
Procedure
1. On the System Manager console, under Users, click User Management.
2. Click Manage Users in the left navigation pane.
3. On the User Management page, perform one of the following steps:
• If you are creating a endpoint profile for a new user profile, click New.
• If you are creating a endpoint profile for an existing user, select the user and
click Edit.
4. Click the Communication Profile tab.
5. In the Endpoint Profile section, select the check box next to the Endpoint Profile
label.
6. Enter the relevant information in the Endpoint Profile section.
Note:
You must select the Delete Endpoint on Unassign of Endpoint from User or
on Delete User check box if you want to delete the endpoint from the
communication management device after removing the association between the
endpoint and the user.
Managing Users
74 Administering Avaya Aura ® Session Manager November 2010
Comments? infodev@avaya.com

7. Click Commit to add the endpoint profile.
The field names that are marked with asterisk (*) are mandatory fields. You must
enter valid information in these fields for the successful creation of the endpoint
profile. If you want to cancel the action and return to the previous page, click
Cancel.
Through User Management, you can create or add endpoint. After you select the
Communication Manager in which you want add a endpoint, the system allows you
to complete the fields for creating a new endpoint.
Note:
You should add Communication Manager through Runtime Topology System
before you add the endpoint profile for the users. Once you create the user-
endpoint association, the user name appears in the User column in the Endpoint
list.
Related topics:
New User Profile field descriptions on page 82
Modifying a endpoint profile of a user
Procedure
1. On the System Manager console, under Users, click User Management.
2. Click Manage Users in the left navigation pane.
3. On the User Management page, select a user and perform one of the following
steps:
• Click Edit.
• Click View > Edit.
4. On the User Profile Edit page, click the Communication Profile tab.
5. In the Endpoint Profile section, modify the relevant information in the fields.
6. Click Commit to save the changes to the database.
If you want to cancel the action and return to the previous page, click Cancel.
Related topics:
New User Profile field descriptions on page 82
Managing communication profiles
Administering Avaya Aura® Session Manager November 2010 75

Removing association between an endpoint and a user
Before you begin
Ensure that you have not selected the Delete Endpoint on Unassign of Endpoint from User
or Delete User check box while associating a station with a user.
Procedure
1. On the System Manager console, under Users, click User Management.
2. Click Manage Users in the left navigation pane.
3. On the User Management page, select a user and perform one of the following
steps:
• Click Edit.
• Click View > Edit.
4. On the User Profile Edit page, click the Communication Profile tab.
5. In the Endpoint Profile section, clear the check box next to the Endpoint Profile
label.
6. Click Commit.
Result
The system removes the association between the endpoint and the user. The endpoint is still
provisioned on the communication management device.
Deleting an endpoint profile of a user
Before you begin
You have selected the Delete Endpoint on Unassign of Endpoint from User or Delete User
check box while associating a endpoint to a user.
About this task
This functionality deletes the endpoint from the communication management device after
removing the association between the endpoint and the user.
Procedure
1. On the System Manager console, under Users, click User Management.
2. Click Manage Users in the left navigation pane.
3. On the User Management page, select a user and perform one of the following
steps:
Managing Users
76 Administering Avaya Aura ® Session Manager November 2010
Comments? infodev@avaya.com
• Click Edit.
• Click View > Edit.
4. On the User Profile Edit page, click the Communication Profile tab.
5. In the Endpoint Profile , clear the check box next to the Endpoint Profile label.
6. Click Commit .
Note:
You can delete only those endpoints that are associated with a user through User
Management. You can delete non-user associated endpoints through endpoint
management.
Related topics:
New User Profile field descriptions on page 82
Modifying user accounts
You must have permission to modify the user. The Edit button for modifying a user details is
not available if you select a user for which you do not have the permission to modify the
details.
Before you begin
Permission to modify the user.
Procedure
1. On the System Manager console, under Users, click User Management.
2. Click Manage Users in the left navigation pane.
3. On the User Management page, select a user.
You can edit only one user account at one time.
4. To edit a user account, perform one of the following steps:
• Click Edit.
• Click View > Edit.
5. On the User Profile Edit page, modify the required information.
6. Click Commit to save the changes to the database.
Modifying user accounts
Administering Avaya Aura® Session Manager November 2010 77

Related topics:
User Profile Edit field descriptions on page 92
Viewing details of a user
Before you begin
The permission to view the details of the selected user.
Procedure
1. On the System Manager console, under Users, click User Management.
2. Click Manage Users in the left navigation pane.
3. On the User Management page, select a user.
4. Click View to view details of the selected user account.
You can view details of only one user account at a time.
Related topics:
User Profile View field descriptions on page 103
Removing user accounts
About this task
When you remove a user, the system marks the user as deleted and stores them in a list of
deleted users. Removing a user removes the roles associated with the user but retains the
contacts, addresses, and communication profiles of the user.
Procedure
1. On the System Manager console, under Users, click User Management.
2. Click Manage Users in the left navigation pane.
3. On the User Management page, select one or more users from the table, and click
Delete.
4. On the User Delete Confirmation page, click Delete.
Managing Users
78 Administering Avaya Aura ® Session Manager November 2010
Comments? infodev@avaya.com

Note:
This operation marks the deleted users as deleted and stores them in the
database in a list of deleted users. However, the deleted users can be
permanently deleted.
You cannot delete users with the login name “admin” through user
management.
Creating duplicate users
Use this capability to create a new user account by copying information from an existing user
account. This capability does not copy confidential information, such as addresses, private
contacts, contact members in the contact list, password, and log-in name of the source user.
Before you begin
Permission to create duplicate users.
Procedure
1. On the System Manager console, under Users, click User Management.
2. Click Manage Users in the left navigation pane.
3. On the User Management page, select the user account that you want to
duplicate.
4. Click Duplicate.
5. On the User Profile Duplicate page, enter the appropriate information, and click
Commit.
Filtering users
About this task
You can apply filter to:
• Status of the user
• Name of the user
• Login Name of the user
• E164 Handle
Creating duplicate users
Administering Avaya Aura® Session Manager November 2010 79

You may apply one or more filters to view users that match the filter criteria.
Procedure
1. On the System Manager console, under Users, click User Management.
2. Click Manage Users in the left navigation pane.
3. On the User Management page, click Filter: Enable.
You can find the button at the upper-right corner of the table displaying users.
4. Enter information for one or more of the following filter criteria:
• To filter users by status, select a status from the drop-down under the Status
column suggesting the presence-related status.
•To filter users by name, enter the name of the user in the field under the Name
column.
To filter names that start with a particular letter, enter the letter in the field. You
can enter a string of letters to filter names that start with that string.
•To filter users by login name, enter the login name in the field under the Login
Name column.
To filter login names that start with a particular letter, enter the letter in the field.
You can enter a string of letters to filter login names that start with that string.
• To filter users by the E164 handle, enter the E164 handle of the user in the
field under the E164 Handle column.
5. Click Apply.
To hide the column filters, click Disable. This action does not clear any filter criteria
that you have set.
To clear the filter criteria, click Clear.
Result
The table displays only those users that match the filter criteria.
Searching for users
Procedure
1. On the System Manager console, under Users, click User Management.
2. Click Manage Users in the left navigation pane.
3. On the User Management page, click Advanced Search at the upper-right corner
of the page.
Managing Users
80 Administering Avaya Aura ® Session Manager November 2010
Comments? infodev@avaya.com

4. In the Criteria section, do the following:
a. Select the search criterion from the first field.
b. Select the operator from the second field.
c. Enter the search value in the third field.
If you want to add another search condition, click + and repeat substeps a through
c listed in Step 3.
If you want to delete a search condition, click - next to the search condition. This
button is available only if there is more than one search condition.
5. Click Search.
Result
The Users table lists the users that match the search criteria.
Viewing deleted users
When you remove a user from the User Management page using the Delete functionality, the
system removes the user temporarily and stores this user in the Deleted Users table. You can
use the Show Deleted Users functionality to view the temporarily deleted users.
Procedure
1. On the System Manager console, under Users, click User Management.
2. Click Manage Users in the left navigation pane.
3. On the User Management page, click More Actions > Show Deleted Users.
The Deleted Users table displays the temporarily deleted users on the Deleted
Users page.
Restoring a deleted user
You can use this functionality to restore a user that you deleted using Delete on the User
Management page.
Before you begin
Permission to restore the selected deleted user.
Viewing deleted users
Administering Avaya Aura® Session Manager November 2010 81
Procedure
1. On the System Manager console, under Users, click User Management.
2. Click Manage Users in the left navigation pane.
3. On the User Management page, click More Actions > Show Deleted Users.
4. On the Deleted Users page, select the user you want to restore, and click
Restore.
5. On the User Restore Confirmation page, click Restore.
6. On the User Profile Edit page, enter a new password in the Password field.
7. In the Confirm Password field, enter the same password that you entered in Step
5.
8. Click Commit.
New User Profile field descriptions
Use this page to create a new user. This page has four tabs:
•Identity
•Communication Profile
•Membership
•Contacts
Note:
The fields that are marked with an asterisk are mandatory and you must enter appropriate
information in these fields.
Identity tab — Identity section
Name Description
Last Name Displays the last name of the user.
First Name Displays the first name of the user.
Middle Name Displays the middle name of the user, if
any.
Description Displays a brief description about the user.
Login Name A unique system login name for users that
includes the users marked as deleted. It
Managing Users
82 Administering Avaya Aura ® Session Manager November 2010
Comments? infodev@avaya.com

Name Description
takes the form of username@domain. It is
used to create the user's primary handle.
You cannot edit this field for users with the
login name “admin”.
Authentication Type Displays the authentication type that defines
how the system performs user's
authentication. The options are:
•Enterprise: User's login is authenticated
by the enterprise.
•Basic: User's login is authenticated by an
Avaya Authentication Service.
Password The password you want to use.
Confirm Password Retype the password for confirmation.
Localized Display Name Displays the localized display name of a
user. It is typically the localized full name.
Endpoint Display Name Displays the full text name of the user
represented in ASCII. It supports displays
that cannot handle localized text, for
example, some endpoints.
Honorific Displays the personal title for address a user.
This is typically a social title and not the work
title.
Language Preference Displays the user's preferred written or
spoken language.
Time Zone Displays the preferred time zone of the
user.
Identity tab — Address section
Name Description
Select check box Use this check box to select a address in the
table.
Name The name of the addressee.
Address Type Displays the type of address. The values are:
•Office
•Home
Street Displays the name of the street.
Locality Name Displays the name of the city or town.
New User Profile field descriptions
Administering Avaya Aura® Session Manager November 2010 83

Name Description
Postal Code Displays the postal code used by postal
services to route mail to a destination. In
United States this is Zip code.
Province Displays the full name of the province.
Country Displays the name of the country.
Button Description
New Opens the Add Address page. Use the page
to add the address details.
Edit Allows you to modify the address.
Delete Deletes the selected address.
Choose Shared Address Opens the Choose Address page that you
can use to choose a shared or common
address.
Communication Profile tab — Communication profile section
Use this section to create, modify and delete a communication profile for the user. Each
communication profile may contain one or more communication addresses for a user.
Name Description
Communication Profile Password Type your Communication profile password
in this field.
Confirm Password Reenter the Communication profile
password for confirmation.
Option button Use this button to view the details of the
selected communication profile.
Name Name of the communication profile.
Button Description
New Creates a new communication profile for the
user.
Delete Deletes the selected communication profile.
Done Saves the communication profile information
that you updated or added for a profile.
Cancel Cancels the operation for adding a
communication profile.
The system enables the following fields when you click the New button in the Communication
Profile section.
Managing Users
84 Administering Avaya Aura ® Session Manager November 2010
Comments? infodev@avaya.com

Name Description
Name Displays the name of the communication
profile for the user.
Default Displays the profile that is made default is the
active profile. There can be only one active
profile at a time.
Communication Profile tab — Communication Address section
Use this section to create, modify and delete one or more communication addresses for the
user.
Name Description
Type Displays the type of the handle.
Handle A unique communication address of the
user.
Domain Displays the name of the domain with which
the handle is registered.
Button Description
New Displays the fields for adding a new
communication address.
Edit Use this button to edit the information of a
selected communication address.
Delete Deletes the selected communication
address.
The page displays the following fields when you click New and Edit in the Communication
Address section. The following fields define the communication address for the user.
Name Description
Type Displays the type of the handle. The different
types of handles are:
•Avaya SIP: Indicates that the handle
supports Avaya SIP-based
communication.
•Avaya E.164: Indicates that the handle
refers to an E.164 formatted address.
E.164 numbers can have a maximum of
fifteen digits and are usually written with a
+ prefix.
•Microsoft OCS SIP: Indicates that the
handle supports OCS SIP-based
communication.
New User Profile field descriptions
Administering Avaya Aura® Session Manager November 2010 85

Name Description
•Microsoft Exchange: Signifies that the
handle is an e-mail address and supports
communication with Microsoft SMTP
server.
•Lotus Notes: Indicates that the handle is
for Lotus Notes and domino calender.
•IBM Sametime: Indicates that the handle
is for IBM Sametime.
•Jabber: Indicates that the handle supports
Extensible Messaging and Presence
Protocol (XMPP)-based communication
with the Jabber service.
•GoogleTalk: Indicates that the handle
supports XMPP-based communication
with the Google Talk service.
•Other Email: Indicates that the handle is
an e-mail address other than MS
Exchange e-mail addresses.
•Other SIP: Indicates that the handle
supports other SIP-based communication
than the ones mentioned above.
•Other XMPP: Indicates that the handle
supports other XMPP-based
communication than the ones mentioned
above.
Fully Qualified Address The fully qualified domain name or uniform
resource identifier. The address can be an e-
mail address, IM user or an address of an
communication device using which user can
send or receive messages.
Button Description
Add Saves the new communication address or
modified communication address
information in the database.
Cancel Cancels the adding a communication
address operation.
Communication Profile tab — Session Manager
Note:
You may see these fields only if a communication profile for the user can be configured using
the product.
Managing Users
86 Administering Avaya Aura ® Session Manager November 2010
Comments? infodev@avaya.com

Name Description
Primary Session Manager Select the Session Manager instance that
should be used as the home server for the
currently displayed Communication Profile.
As a home server, the selected primary
Session Manager instance will be used as
the default access point for connecting
devices associated with the Communication
Profile to the Aura network. A selection is
required.
Secondary Session Manager If a secondary Session Manager instance is
selected, this Session Manager will provide
continued service to SIP devices associated
with this Communication Profile in the event
that the primary Session Manager is not
available. A selection is optional.
Origination Application Sequence Select an Application Sequence that will be
invoked when calls are routed from this user.
A selection is optional. Note: if both an
origination and a termination application
sequence are specified and each contains a
CM application, the CM should be the same
in both sequences.
Termination Application Sequence Select an Application Sequence that will be
invoked when calls are routed to this user. A
selection is optional.
Note:
If both an origination and a termination
application sequence are specified and
each contains a CM application, the CM
should be the same in both sequences.
Survivability Server For local survivability, a Survivability Server
can be specified to provide survivability
communication services for devices
associated with a Communication Profile in
the event that local connectivity to Session
Manager instances in the Aura Core is lost.
If a Branch Session Manager is selected, and
the termination and origination application
sequences contain a CM application,
sequencing to this application will continue,
locally, to the CM LSP resident with the
Branch Session Manager. A selection is
optional. Note: if a termination or origination
application sequence contains a CM
application, the CM associated with the
application must be the main CM for the CM
New User Profile field descriptions
Administering Avaya Aura® Session Manager November 2010 87

Name Description
LSP that is resident with the Branch Session
Manager.
Home Location A Home Location can be specified to support
mobility for the currently displayed user. This
is used by Session Manager specially in
cases when the ip-address of the calling
phone does not match any IP Address
Pattern of any of the location.
Communication Profile tab — Endpoint Profile
Note:
You may see these fields only if an endpoint profile can be configured for the user .
Name/Button Description
System The Communication Manager on which you
need to add the endpoint.
Profile Type The type of the endpoint profile you want to
create.
Use Existing Endpoints Use the check box if you want to use an
existing endpoint extension to associate with
this profile. If you do not select this check
box, the available extensions are used.
Extension The extension of the endpoint you want to
associate.
The field lists the endpoints (existing or
available) based on check box status of the
Use Existing Endpoints field.
Template The template (system defined or user
defined) you want to associate with the
endpoint. Select the template based on the
set type you want to add.
Set Type The set type of the endpoint you want to
associate. When you select a template, the
system populates the corresponding set
types.
Security Code The security code for authorized access to
the endpoint.
Port The relevant port for the set type you
select.
The field lists the possible ports based on the
selected set type.
Managing Users
88 Administering Avaya Aura ® Session Manager November 2010
Comments? infodev@avaya.com

Name/Button Description
Voice Mail Number The voice mail number of the endpoint you
want to associate.
Delete Endpoint on Unassign of Endpoint
from User or Delete User Use this check box to specify whether you
want to delete the endpoint from the
Communication Manager device when you
remove the association between the
endpoint and the user or when you delete the
user.
Communication Profile tab — Messaging Profile
Note:
You may see these fields only if a messaging profile can be configured for the user.
Name Description
System The Messaging System on which you need
to add the subscriber.
Use Existing Subscriber on System Use this check box to specify whether to use
an existing subscriber mailbox number to
associate with this profile.
Mailbox Number The mailbox number of the subscriber.
The field takes existing mailbox number that
you want to associate with this profile. This
value in the field is valid only if you select the
Use Existing Subscriber on System check
box.
Template The template (system defined and user
defined) you want to associate with the
subscriber.
Password The password for logging into the mailbox.
Delete Subscriber on Unassign of
Subscriber from User or Delete User Use this check box to specify whether you
want to delete the subscriber mailbox from
the Messaging Device or Communication
System Management when you remove this
messaging profile or when you delete the
user.
Membership tab — Roles section
Name Description
check box Use this check box to select a role. Use the
check box displayed in the first column of the
New User Profile field descriptions
Administering Avaya Aura® Session Manager November 2010 89

Name Description
header row to select all the roles assigned to
the user account.
Name The name of the role.
Description A brief description about the role.
Button Description
Assign Roles Opens the Assign Role page that you can
use to assign the roles to the user account.
Unassign Roles Removes the selected role from the list of
roles associated with the user account.
Membership tab — Group Membership section
Name Description
check box Use this check box to select the group.
Name Name of the group.
Type Group type based on the resources.
Hierarchy Position of the group in the hierarchy.
Description A brief description about the group.
Button Description
Add To group Opens the Assign Groups page that you can
use to add the user to a group.
Remove From Group Removes the user from the selected group.
Contacts tab — Default Contact List
Name Description
Description A brief description of the contact list.
Contacts tab — Associated Contacts
Name Description
Last Name Last name of the contact.
First Name First name of the contact.
Scope Categorization of the contact based on
whether the contact is a public or private
contact.
Managing Users
90 Administering Avaya Aura ® Session Manager November 2010
Comments? infodev@avaya.com

Name Description
Speed Dial The value specifies whether the speed dial is
set for the contact or not.
Speed Dial Entry The reduced number that represents the
speed dial number.
Presence Buddy The value specifies whether you can monitor
the presence information of the contact or
not. A false value indicates that you can not
track the presence of the contact.
Button Description
Edit Opens the Edit Contact List Member page.
Use this page to modify the information of the
selected contact.
Add Opens the Attach Contacts page. Use this
page to select one or more contacts from the
list of contacts.
Remove Removes one or more selected contacts
from the list of the associated contacts.
Filter: Disable Hides the column filter fields without
resetting the filter criteria. This is a toggle
button.
Filter: Enable Displays text fields under the columns that
you can use to set the filter criteria. This is a
toggle button.
Filter: Apply Filters contacts based on the filter criteria.
Contacts tab — Private Contacts
Use this section to add new private contacts, modify and deletes existing contacts.
Name Description
Last Name Last name of the private contact.
First Name First name of the private contact.
Display Name Display name of the private contact.
Contact Address Address of the private contact.
Description A brief description about the contact.
Button Description
Edit Opens the Edit Private Contact page. Use
this page to modify the information of the
contact you selected.
New User Profile field descriptions
Administering Avaya Aura® Session Manager November 2010 91
Button Description
New Opens the New Private Contact page. Use
this page to add a new private contact.
Delete Deletes the selected contacts.
Filter: Disable Hides the column filter fields without
resetting the filter criteria. This is a toggle
button.
Filter: Enable Displays text fields under the columns that
you can use to set the filter criteria. This is a
toggle button.
Filter: Apply Filters contacts based on the filter criteria.
Common buttons
Button Description
Commit Creates the user account.
Cancel Cancels the user creation operation.
Related topics:
Adding users on page 64
Creating a new communication profile on page 67
Creating a new communication address for a communication profile on page 68
Modifying a communication address of a communication profile on page 69
Deleting a communication address from a communication profile on page 69
Adding a messaging profile for a user on page 71
Modifying a messaging profile of a user on page 72
Removing association between a subscriber mailbox and a user on page 73
Deleting a subscriber mailbox on page 73
Adding an endpoint profile for a user on page 74
Modifying a endpoint profile of a user on page 75
Deleting an endpoint profile of a user on page 76
User Profile Edit field descriptions
Use this page to modify the details of a user account.
Managing Users
92 Administering Avaya Aura ® Session Manager November 2010
Comments? infodev@avaya.com

The User Profile Edit page has the following four tabs:
•Identity
•Communication Profile
•Membership
•Contacts
Identity tab — Identity section
Name Description
Last Name Displays the last name of the user.
First Name Displays the first name of the user.
Middle Name Displays the middle name of the user, if
any.
Description Displays a brief description about the user.
Status Displays the login status of the user
Update Time Displays the time when the user details were
last modified.
Login Name Displays the unique system login name given
to the user. It takes the form of
username@domain. It is used to create the
user's primary handle.
You cannot edit this field for users with the
login name “admin”.
Authentication Type Authentication type defines how the system
performs user authentication. The options
are:
•Enterprise: User's login is authenticated
by the enterprise.
•Basic: User's login is authenticated by an
Avaya Authentication Service.
Change Password Displays the type in the new password which
you want to change.
Source Specifies the entity that created this user
record. The possible values for this field is
either an IP Address/Port, or a name
representing an enterprise LDAP, or Avaya.
Localized Display Name Displays the localized display name of a
user. It is typically the localized full name.
Endpoint Display Name Displays the full text name of the user
represented in ASCII. It supports displays
User Profile Edit field descriptions
Administering Avaya Aura® Session Manager November 2010 93

Name Description
that cannot handle localized text, for
example, some endpoints.
Honorific Displays the personal title for address a user.
This is typically a social title and not the work
title.
Language Preference Displays the user's preferred written or
spoken language.
Time Zone Displays the preferred time zone of the
user.
Identity tab — Address section
Name Description
Select check box Use this check box to select the address.
Name Displays the unique label that identifies the
name of the address.
Address Type Displays the type of address. The values are:
• Office
• Home
Street Displays the name of the street.
Locality Name Displays the name of the city or town.
Postal Code Displays the postal code used by postal
services to route mail to a destination. In
United States, this is Zip code.
Province Displays the full name of the province.
Country Displays the name of the country.
Button Description
New Opens the Add Address page that you can
use to add the address details.
Edit Opens the Edit Address page that you can
use to modify the address details.
Delete Deletes the selected address.
Choose Shared Address Opens the Choose Address page that you
can use to choose a common address.
Managing Users
94 Administering Avaya Aura ® Session Manager November 2010
Comments? infodev@avaya.com

Communication Profile tab — Communication Profile section
Use this section to create, modify and delete a communication profile for the user. Each
communication profile may contain one or more communication addresses for a user.
Name Description
Communication Profile Password Specifies the password for the
communication profile.
Option button Use this button to view the details of the
selected communication profile.
Name Displays the name of the communication
profile.
Button Description
New Creates a new communication profile for the
user.
Delete Deletes the selected communication profile.
Done Saves the communication profile information
that you updated or added for a profile.
Cancel Cancels the operation for adding a
communication profile.
The system enables the following fields when you click the New button in the Communication
Profile section.
Name Description
Name Displays the name of the communication
profile for the user.
Default Displays the profile that is made default as
the active profile. There can be only one
active profile at a time.
Communication Profile tab — Communication Address section
Use this section to create, modify and delete one or more communication addresses for the
user.
Name Description
Type Displays the type of the handle.
Handle Displays the unique communication address
for the user.
Domain Displays the name of the domain with which
the handle is registered.
User Profile Edit field descriptions
Administering Avaya Aura® Session Manager November 2010 95

Button Description
New Displays the fields for adding a new
communication address.
Edit Use this button to edit the information of a
selected communication address.
Delete Deletes the selected communication
address.
The page displays the following fields when you click New or Edit in the Communication
Address section.
Name Description
Type Displays the type of the handle. The different
types of handles are:
•Avaya SIP: Indicates that the handle
supports SIP-based communication.
•Avaya E.164: Indicates that the handle
refers to an E.164 formatted address.
E.164 numbers can have a maximum of
fifteen digits and are usually written with a
+ prefix.
•Microsoft Exchange: Indicates that the
handle is an e-mail address and supports
communication with Microsoft SMTP
server.
•Microsoft OCS SIP: Indicates that the
handle supports OCS SIP-based
communication.
•Lotus Notes: Indicates that the handle is
for Lotus Notes and domino calender.
•IBM Sametime: Indicates that the handle
is for IBM Sametime.
•Jabber: Indicates that the handle supports
Extensible Messaging and Presence
Protocol (XMPP)-based communication
with the Jabber service.
•Google Talk: Indicates that the handle
supports XMPP-based communication
with the Google Talk service.
•Other Email: Indicates that the handle is
an e-mail address other than MS
Exchange e-mail addresses.
Managing Users
96 Administering Avaya Aura ® Session Manager November 2010
Comments? infodev@avaya.com
Name Description
•Other SIP: Indicates that the handle
supports other SIP-based communication
than the ones mentioned above.
•Other XMPP: Indicates that the handle
supports other XMPP-based
communication than the ones mentioned
above.
Fully Qualified Address Displays the fully qualified domain name or
uniform resource identifier. The address can
be an e-mail address, IM user, or of a
communication device using which user can
send or receive messages.
Button Description
Add Saves the new communication address or
modified communication address
information to the database.
Cancel Cancels the adding a communication
address operation.
Communication Profile tab — Session Manager
Note:
The page displays the following fields if a communication profile of the user exists for the
product.
Name Description
Primary Session Manager Select the Session Manager instance that
should be used as the home server for the
currently displayed Communication Profile.
As a home server, the selected primary
Session Manager instance will be used as
the default access point for connecting
devices associated with the Communication
Profile to the Avaya Aura network. A
selection is required.
Secondary Session Manager If a secondary Session Manager instance is
selected, this Session Manager will provide
continued service to SIP devices associated
with this Communication Profile in the event
that the primary Session Manager is not
available. A selection is optional.
User Profile Edit field descriptions
Administering Avaya Aura® Session Manager November 2010 97
Name Description
Origination Application Sequence Select an Application Sequence that will be
invoked when calls are routed from this user.
A selection is optional.
Note:
If both an origination and a termination
application sequence are specified and
each contains a Communication Manager
application, the Communication Manager
should be the same in both sequences.
Termination Application Sequence Select an Application Sequence that will be
invoked when calls are routed to this user. A
selection is optional.
Note:
If both an origination and a termination
application sequence are specified and
each contains a Communication Manager
application, the Communication Manager
should be the same in both sequences.
Survivability Server For local survivability, a Survivability Server
can be specified to provide survivability
communication services for devices
associated with a Communication Profile in
the event that local connectivity to Session
Manager instances in the Aura Core is lost.
If a Branch Session Manager is selected, and
the termination and origination application
sequences contain a Communication
Manager application, sequencing to this
application will continue, locally, to the
Communication Manager LSP resident with
the Branch Session Manager. A selection is
optional.
Note:
If a termination or origination application
sequence contains a CM application, the
CM associated with the application must
be the main CM for the CM LSP that is
resident with the Branch Session
Manager.
Home Location A Home Location can be specified to support
mobility for the currently displayed user. This
is used by Session Manager specially in
cases when the IP address of the calling
Managing Users
98 Administering Avaya Aura ® Session Manager November 2010
Comments? infodev@avaya.com

Name Description
phone does not match any IP Address
Pattern of any of the location.
Communication Profile tab — Endpoint Profile
Note:
The page displays the following fields if an endpoint profile exists for the user.
Name/Button Description
System Displays the Communication Manager on
which you need to add the endpoint.
Use Existing Endpoints Select this check box if you want to use an
existing endpoint extension to associate with
this profile. If you do not select this check
box, the available extensions are used.
Extension Displays the extension of the endpoint you
want to associate.
The field lists the existing or available
endpoints based on check box status of the
Use Existing Endpoints field.
Template Displays the system-defined or user-defined
template you want to associate with the
endpoint. Select the template based on the
set type you want to add.
Set Type Displays the set type of the endpoint you
want to associate. When you select a
template, the system populates the
corresponding set types.
Security Code Displays the security code for authorized
access to the endpoint.
Port Displays the relevant port for the set type you
select.
The field lists the possible ports based on the
selected set type.
Voice Mail Number Displays the voice mail number of the
endpoint you want to associate.
Delete Endpoint on Unassign of Endpoint
from User or on Delete User Select this check box to specify whether you
want to delete the endpoint from the
Communication Manager device when you
remove the association between the
endpoint and the user or when you delete the
user.
User Profile Edit field descriptions
Administering Avaya Aura® Session Manager November 2010 99
Communication Profile tab — Messaging Profile section
Note:
The page displays the following fields if a messaging profile exists for the user.
Name Description
System Displays the Messaging System on which
you need to add the subscriber.
Template Displays the system-defined or user-defined
template you want to associate with the
subscriber.
Use Existing Subscriber on System Select this check box to specify whether to
use an existing subscriber mailbox number
to associate with this profile.
Mailbox Number Displays the mailbox number of the
subscriber.
The field lists the existing subscriber if you
select the Use Existing Subscriber on
System check box.
Password This the password for logging into the
mailbox.
Delete Subscriber on Unassign of
Subscriber from User or on Delete User Select this check box to specify whether you
want to delete the subscriber mailbox from
the Messaging device or Communication
System Management when you remove this
messaging profile or when you delete the
user.
Membership tab — Roles section
Name Description
Select check box Use this check box to select a role. Use the
check box displayed in the first column of the
header row to select all the roles assigned to
the user account.
Name Displays the name of the role.
Description Displays a brief description about the role.
Button Description
Assign Roles Opens the Assign Role page that you can
use to assign roles to the user account.
UnAssign Roles Removes the selected role from the list of
roles associated with the user account.
Managing Users
100 Administering Avaya Aura ® Session Manager November 2010
Comments? infodev@avaya.com

Membership tab — Group Membership section
Name Description
Select check box Use this check box to select the group.
Name Displays the name of the group.
Type Displays the group type based on the
resources.
Hierarchy Displays the position of the group in the
hierarchy.
Description Displays a brief description about the
group.
Button Description
Add To group Opens the Assign Groups page that you can
use to add the user to a group.
Remove From Group Removes the user from the selected group.
Contacts tab — Default Contact List
Name Description
Description Displays a brief description of the contact
list.
Contacts tab — Associated Contacts
Name Description
Last Name Displays the last name of the contact.
First Name Displays the first name of the contact.
Scope Displays the categorization of the contact
based on whether the contact is a public or
private contact.
Speed Dial Displays the value that specifies whether
speed dial is set for the contact.
Speed Dial Entry Displays the reduced number that
represents the speed dial number.
Presence Buddy Displays the value that specifies whether you
can monitor the presence information of the
contact or not. False indicates that you can
not track the presence of the contact.
User Profile Edit field descriptions
Administering Avaya Aura® Session Manager November 2010 101

Button Description
Edit Opens the Edit Contact List Member page.
Use this page to modify the information of the
selected contact.
Add Opens the Attach Contacts page. Use this
page to select one or more contacts from the
list of contacts.
Remove Removes one or more contacts from the list
of the associated contacts.
Filter: Disable Hides the column filter fields without
resetting the filter criteria. This is a toggle
button.
Filter: Enable Displays text fields under the columns that
you can use to set the filter criteria. This is a
toggle button.
Filter: Apply Filters contacts based on the filter criteria.
Contacts tab — Private Contacts
Use this section to add new private contacts, modify and deletes existing contacts.
Name Description
Last Name Displays the last name of the private
contact.
First Name Displays the first name of the private
contact.
Display Name Display name of the private contact.
Contact Address Displays the address of the private contact.
Description Displays a brief description about the
contact.
Button Description
Edit Opens the Edit Private Contact page. Use
this page to modify the information of the
selected contact.
New Opens the New Private Contact page. Use
this page to add a new private contact.
Delete Deletes the selected contacts.
Filter: Disable Hides the column filter fields without
resetting the filter criteria. This is a toggle
button.
Managing Users
102 Administering Avaya Aura ® Session Manager November 2010
Comments? infodev@avaya.com
Button Description
Filter: Enable Displays text fields under the columns that
you can use to set the filter criteria. This is a
toggle button.
Filter: Apply Filters contacts based on the filter criteria.
Common buttons
Button Description
Commit Modifies the user account.
Note:
While restoring a deleted user, use this
button to restore a deleted user.
Cancel Cancels the operation of modifying the user
information and takes you back to the User
Management or User Profile View page.
Related topics:
Creating a new communication address for a communication profile on page 68
Modifying a communication address of a communication profile on page 69
Deleting a communication address from a communication profile on page 69
Modifying user accounts on page 77
User Profile View field descriptions
Use this page to view the details of the selected user account.
The User Profile View page has the following four tabs:
•Identity
•Communication Profile
•Membership
•Contacts
Identity tab — Identity section
Name Description
Last Name Displays the last name of the user.
First Name Displays the first name of the user.
User Profile View field descriptions
Administering Avaya Aura® Session Manager November 2010 103

Name Description
Middle Name Displays the middle name of the user.
Description A brief description of the user.
Status Displays the login status of the user.
Update Time Displays the time when the user details were
last modified.
Login Name Displays the unique system login name given
to the user. It takes the form of
username@domain. You can use the login
name to create the user's primary handle.
You cannot edit the login name for users with
the login name “admin”.
Authentication Type Authentication type defines how the system
performs user authentication. The options
are:
•Enterprise: User's login is authenticated
by the enterprise.
•Basic: User's login is authenticated by an
Avaya Authentication Service.
Source Specifies the entity that created this user
record. The possible values for this field is
either an IP Address/Port, or a name
representing an enterprise LDAP, or Avaya.
Localized Display Name Displays the localized display name of a
user. It is typically the localized full name.
Endpoint Display Name Displays the full text name of the user
represented in ASCII. It supports displays
that cannot handle localized text, for
example, some endpoints.
Honorific Displays the personal title for address a user.
This is typically a social title and not the work
title.
Language Preference Displays the user's preferred written or
spoken language.
Time Zone Displays the preferred time zone of the
user.
Managing Users
104 Administering Avaya Aura ® Session Manager November 2010
Comments? infodev@avaya.com

Identity tab — Address section
Name Description
Name Displays the unique label that identifies the
address.
Address Type Displays the type of the address. Types of
addresses are:
• Office
• Home
Street Displays the name of the street.
Locality Name Displays the name of the city or town.
Postal Code Displays the postal code used by postal
services to route mail to a destination. In
United States this is Zip code.
Province Displays the full name of the province.
Country Displays the name of the country.
Communication Profile tab — Communication Profile section
Name Description
Option button Use this button to view the details of the
selected communication profile.
Name Displays the name of the communication
profile.
Name Description
Name Displays the name of the communication
profile for the user.
Default Displays the profile that is made default as
the active profile. There can be only one
active profile at a time.
Communication Profile tab — Communication Address section
Name Description
Type Displays the type of the handle.
Handle Displays the unique communication address
for the user.
Domain Displays the name of the domain with which
the handle is registered.
User Profile View field descriptions
Administering Avaya Aura® Session Manager November 2010 105
Communication Profile tab — Session Manager section
Note:
The page displays the following fields if a communication profile of the user exists for the
product.
Name Description
Primary Session Manager Select the Session Manager instance that
you want to use as home server for the
currently displayed Communication Profile.
As a home server, the selected primary
Session Manager instance will be used as
the default access point for connecting
devices associated with the Communication
Profile to the Avaya Aura network. A
selection is required.
Secondary Session Manager If a secondary Session Manager instance is
selected, this Session Manager will provide
continued service to SIP devices associated
with this Communication Profile in the event
that the primary Session Manager is not
available. A selection is optional.
Origination Application Sequence Select an Application Sequence that will be
invoked when calls are routed from this user.
A selection is optional.
Note:
If both an origination and a termination
application sequence are specified and
each contains a Communication Manager
application, the Communication Manager
should be the same in both sequences.
Termination Application Sequence Select an Application Sequence that will be
invoked when calls are routed to this user. A
selection is optional.
Note:
If both an origination and a termination
application sequence are specified and
each contains a Communication Manager
application, the Communication Manager
should be the same in both sequences.
Survivability Server For local survivability, a Survivability Server
can be specified to provide survivability
communication services for devices
associated with a Communication Profile in
the event that local connectivity to Session
Managing Users
106 Administering Avaya Aura ® Session Manager November 2010
Comments? infodev@avaya.com

Name Description
Manager instances in the Aura Core is lost.
If a Branch Session Manager is selected, and
the termination and origination application
sequences contain a Communication
Manager application, sequencing to this
application will continue, locally, to the
Communication Manager LSP resident with
the Branch Session Manager. A selection is
optional.
Note:
If a termination or origination application
sequence contains a Communication
Manager application, the Communication
Manager associated with the application
must be the main Communication
Manager for the Communication Manager
LSP that is resident with the Branch
Session Manager.
Home Location This field is specified to support mobility for
the currently displayed user. This is used by
Session Manager when the IP address of the
calling phone does not match any IP address
pattern of any location.
Communication Profile tab — Endpoint Profile
Note:
The page displays the following fields if an endpoint profile exists for the user.
Name/Button Description
System Displays the Communication Manager on
which you need to add the endpoint.
Profile Type Displays the type of the profile for the user.
Extension Displays the extension of the endpoint you
want to associate.
View Endpoint Lists the existing or available endpoints
based on check box status of the Use
Existing Endpoints field.
Set Type Displays the set type of the endpoint you
want to associate. When you select a
template, the system populates the
corresponding set types.
User Profile View field descriptions
Administering Avaya Aura® Session Manager November 2010 107

Name/Button Description
Security Code Displays the security code for authorized
access to the endpoint.
Port Displays the relevant port for the set type you
select.
Voice Mail Number Displays the voice mail number of the
endpoint you want to associate.
Delete Endpoint on Unassign of Endpoint
from User or Delete User Provides the option to specify whether you
want to delete the endpoint from the
Communication Manager device when you
remove the association between the
endpoint and the user or when you delete the
user.
Communication Profile tab — Messaging Profile
Note:
The page displays the following fields if a messaging profile exists for the user.
Name Description
System Displays the Messaging System on which
you need to add the subscriber.
Template Displays the template, system-defined or
user-defined, you want to associate with the
subscriber.
Mailbox Number Displays the mailbox number of the
subscriber.
Password The password for logging on to the mailbox.
Delete Subscriber on Unassign of
Subscriber from User Provides the option to specify whether you
want to delete the subscriber mailbox from
the Messaging device or Communication
System Management when you remove this
messaging profile or when you delete the
user.
Membership tab — Roles section
Name Description
Name Displays the name of the role.
Description Displays a brief description about the role.
Managing Users
108 Administering Avaya Aura ® Session Manager November 2010
Comments? infodev@avaya.com

Membership tab — Group Membership section
Name Description
Name Displays the name of the group.
Type Displays the group type based on the
resources.
Hierarchy Displays the position of the group in the
hierarchy.
Description Displays a brief description about the
group.
Contacts tab — Default Contact List section
Name Description
Description Displays a brief description of the contact
list.
Contacts tab — Associated Contacts section
Name Description
Last Name Displays the last name of the contact.
First Name Displays the first name of the contact.
Scope Displays the categorization of the contact
based on whether the contact is a public or
private contact.
Speed Dial Displays the value that specifies whether the
speed dial is set for the contact.
Speed Dial Entry Displays the reduced number that
represents the speed dial number.
Presence Buddy Displays the value that specifies whether you
can monitor the presence information of the
contact or not. False indicates that you
cannot track the presence of the contact.
Button Description
Filter: Disable Hides the column filter fields without
resetting the filter criteria. This is a toggle
button.
Filter: Enable Displays text fields under the columns that
you can use to set the filter criteria. This is a
toggle button.
User Profile View field descriptions
Administering Avaya Aura® Session Manager November 2010 109

Button Description
Filter: Apply Filters contacts based on the filter criteria.
Contacts tab — Private Contacts section
Use this section to add new private contacts, modify and deletes existing contacts.
Name Description
Last Name Displays the last name of the private
contact.
First Name Displays the first name of the private
contact.
Display Name Display name of the private contact.
Contact Address Displays the address of the private contact.
Description Displays a brief description about the
contact.
Button Description
Filter: Disable Hides the column filter fields without
resetting the filter criteria. This is a toggle
button.
Filter: Enable Displays text fields under the columns that
you can use to set the filter criteria. This is a
toggle button.
Filter: Apply Filters contacts based on the filter criteria.
Common buttons
Button Description
Edit Opens the User Profile Edit page. Use the
User Profile Edit page to modify the details
of the user account.
Done Closes the User Profile View page and takes
you back to the User Management page.
Related topics:
Viewing details of a user on page 78
Managing Users
110 Administering Avaya Aura ® Session Manager November 2010
Comments? infodev@avaya.com
User Delete Confirmation field descriptions
Use this page to delete an user account.
Name Description
Login Name Displays the login name of the user you want
to delete.
Status Indicates whether the user status is currently
online or offline.
Name Displays the localized display name of a
user. It is typically the localized full name.
Last login Displays the date and time of last successful
login on to System Manager.
Button Description
Delete Deletes a user.
Cancel Closes the User Delete Confirmation page
and takes you back to the User Management
page.
Managing bulk importing and exporting
Bulk importing users
About this task
You can use this functionality to import users in bulk with their attributes from an XML file. With
this functionality, you can:
•Abort or continue the import process when the import user operation encounters first error
in the user input file.
•Skip importing the users that already exist in the database. Use this option when you want
to import new users and retain the existing users.
• Replace the users in the database with the new users from the imported file.
User Delete Confirmation field descriptions
Administering Avaya Aura® Session Manager November 2010 111

• Update and merge the user attributes data from the imported file to the existing data.
• Delete the user records from the database that match the records in the input XML file.
See the “XML Schema Definition for bulk importing users” and “Sample XML for bulk importing
users” sections in the “List of XML Schema Definitions and Sample XMLs for bulk Import” topic
for details on the user imported attributes.
See the “XML Schema Definition for bulk deleting users” and “Sample XML for bulk deleting
users” sections in the “List of XML Schema Definitions and Sample XMLs for bulk Import” topic
for details on the user imported attributes.
Procedure
1. On the System Manager console, under Services, click Bulk Import and
Export.
2. Click Import > User Management > Users.
3. On the Import Users page, enter the complete path of the file in the Select File
field.
You can also use the Browse button to locate and select a file.
4. Select one of the following error configuration options:
•Abort on first error
•Continue processing other records
5. Select Complete as the import type.
6. Select one of the following import options:
• Click Skip to skip users in import file that match existing user records in the
database.
• Click Replace to replace the users in the database with the new users from
the imported file. Use this option when you want to import new users and retain
the existing users.
• Click Merge to update and merge the user attributes data from the imported
file to the existing data.
•Click Delete to delete the user records in the database that match the records
in the imported file.
7. Under Job Schedule, select one of the following options to run the job:
• Click Run immediately to import the users immediately.
• Click Schedule later, and set date and time to import the users at a specified
time.
8. Click Import.
Note:
The operations, Communication Manager Synchronization and Bulk Import of
users, should not overlap in time. If Bulk Import of users is in progress and
Managing Users
112 Administering Avaya Aura ® Session Manager November 2010
Comments? infodev@avaya.com

Communication Manager Synchronization is started, the current records being
processed will fail. After the synchronization is complete, the remaining bulk
import records will be processed successfully. You have to re-import the records
that have failed during synchronization.
Scheduling a user import job
Procedure
1. On the System Manager console, under Services, click Bulk Import and
Export.
2. Click Import > User Management > Users.
3. On the Import Users page, enter the complete path of the file in the Select File
field.
You can also use the Browse button to select a file.
4. Choose one of the following error configuration options:
•Abort on first error
•Continue processing other records
5. Choose one of the options if a matching record is found:
•Skip
•Merge
•Replace
•Delete
6. In the Job Schedule section:
a. Click Schedule later.
If you want to run the user import job immediately, click Run immediately. After
you select this option, the fields related to scheduling become unavailable.
b. Enter the date in the Date field.
You can use the calender icon to select a date.
c. Enter time in the Time field in HH:MM:SS format.
d. Enter time zone in the Time Zone field.
7. Click Import.
The page displays the scheduled job in the Manage Jobs section.
Managing bulk importing and exporting
Administering Avaya Aura® Session Manager November 2010 113

Aborting a user import job on first error
About this task
The user import process may encounter errors at the time of importing users. Use this feature
to abort the user import process on encountering the first error.
Procedure
1. On the System Manager console, under Services, click Bulk Import and
Export.
2. Click Import > User Management > Users.
3. On the Import Users page, enter the complete path of the file in the Select File
field.
You can also use the Browse button to select a file.
4. Click Abort on first error to choose error configuration options.
5. Choose or enter the appropriate information for remaining fields.
6. Click Import.
Canceling a user import job
Before you begin
You can cancel a job only when it is in the PENDING EXECUTION or RUNNING state.
Procedure
1. On the System Manager console, under Services, click Bulk Import and
Export.
2. Click Import > User Management > Users.
3. On the Import Users page, select the job you want to cancel from the table in the
Manage Job section.
4. Click Cancel Job.
Managing Users
114 Administering Avaya Aura ® Session Manager November 2010
Comments? infodev@avaya.com

Deleting an importing job
Before you begin
You can delete only successful jobs.
Procedure
1. On the System Manager console, under Services, click Bulk Import and
Export.
2. Click Import > User Management > Users.
3. On the Import Users page, select the job you want to delete from the table in the
Manage Job section.
4. Click Delete Job.
Viewing a user importing job in Scheduler
Procedure
1. On the System Manager console, under Services, click Bulk Import and
Export.
2. Click Import > User Management > Users.
3. On the Import Users page, select a job from the table in the Manage Job section.
4. Click the link displayed under the Job Name column.
The Scheduler page displays the details of the job. You can perform operations on
the job that the Scheduler supports for the job.
Viewing details of a user importing job
Procedure
1. On the System Manager console, under Services, click Bulk Import and
Export.
2. Click Import > User Management > Users.
3. On the Import Users page, select the job you want to view from the table in the
Manage Job section.
Managing bulk importing and exporting
Administering Avaya Aura® Session Manager November 2010 115

4. Click View Job.
The Job Detail page displays the details of the selected job.
List of XML Schema Definitions and sample XMLs for bulk import
Following is the list of XML Schema Definition and XML code snippets for bulk importing users,
global setting records, roles, elements, endpoint profiles, messaging profiles, and Session
Manager profiles:
XML Schema Definition for bulk importing users
Sample XML for bulk importing users with minimal attributes
Sample XML for bulk importing users with all attributes
XML Schema Definition for bulk deleting users
Sample XML for bulk deleting users
XML Schema Definition for bulk importing Session Manager profiles
Sample XML for bulk importing Session Manager profiles
XML Schema Definition for bulk importing endpoint profiles
Sample XML for bulk importing endpoint profiles
XML Schema Definition for bulk importing messaging profiles
Sample XML for bulk importing messaging profiles
Note:
The following characters cannot be used as is in the XML file. You need to modify these
characters as mentioned here to use them in the import XML files:
• Less-than character (<) as <
• Ampersand character (&) as &
• Greater-than character (>) as >
• Double-quote character (") as "
• Apostrophe or single-quote character (') as '
XML Schema Definition for bulk importing users
<?xml version="1.0" encoding="UTF-8" standalone="yes"?>
<xs:schema xmlns:tns="http://xml.avaya.com/schema/import" xmlns:ext="http://
xml.avaya.com/schema/import" xmlns:xs="http://www.w3.org/2001/XMLSchema"
targetNamespace="http://xml.avaya.com/schema/import" version="1.0">
<"http://www.w3.org/2001/XMLSchema" targetNamespace="http://xml.avaya.com/schema/
import" version="1.0">
<xs:element name="secureStore" type="tns:xmlSecureStore"/xs:element>
<xs:element name="user" type="tns:xmlUser"/>
Managing Users
116 Administering Avaya Aura ® Session Manager November 2010
Comments? infodev@avaya.com

<xs:element name="users">
<xs:complexType>
<xs:sequence>
<xs:element name="secureStore" type="tns:xmlSecureStore"
minOccurs="0" maxOccurs="1"/>
xs:element name="user" type="tns:xmlUser" minOccurs="0"
maxOccurs="unbounded"/>
</xs:complexType>
</xs:element>
<xs:complexType name="xmlUser">
<xs:sequence>
<xs:element name="authenticationType"
type="xs:string" minOccurs="1" maxOccurs="1" />
<xs:element name="description" type="xs:string"
minOccurs="0" />
<xs:element name="displayName" type="xs:string"
minOccurs="0" />
<xs:element name="displayNameAscii" type="xs:string"
minOccurs="0" />
<xs:element name="dn" type="xs:string" minOccurs="0" />
<xs:element name="isDuplicatedLoginAllowed"
type="xs:boolean" minOccurs="0" />
<xs:element name="isEnabled" type="xs:boolean" minOccurs="0"
maxOccurs="1" />
<xs:element name="isVirtualUser" type="xs:boolean"
minOccurs="0" />
<xs:element name="givenName" type="xs:string" maxOccurs="1"
minOccurs="1" />
<xs:element name="honorific" type="xs:string" minOccurs="0" />
<xs:element name="loginName" maxOccurs="1" minOccurs="1">
<xs:simpleType>
<xs:restriction base="xs:string">
<xs:maxLength value="128"/xs:maxLength>
</xs:restriction>
</xs:simpleType>
</xs:element>
<xs:element name="middleName" type="xs:string"
minOccurs="0" />
<xs:element name="managerName" type="xs:string"
minOccurs="0" />
<xs:element name="preferredGivenName" type="xs:string"
minOccurs="0" />
<xs:element name="preferredLanguage" type="xs:string"
minOccurs="0" />
<xs:element name="source" type="xs:string" minOccurs="0"
maxOccurs="1" />
<xs:element name="sourceUserKey" type="xs:string"
minOccurs="0" maxOccurs="1" />
<xs:element name="status" type="xs:string"
minOccurs="0" />
<xs:element name="suffix" type="xs:string" minOccurs="0" />
<xs:element name="surname" type="xs:string" minOccurs="1"
maxOccurs="1" />
<xs:element name="timeZone" type="xs:string" minOccurs="0" />
<xs:element name="title" type="xs:string" minOccurs="0" />
<xs:element name="userName" type="xs:string" maxOccurs="1"
minOccurs="0" />
<xs:element name="userPassword" type="xs:string"
minOccurs="0" />
<xs:element name="commPassword" type="xs:string"
minOccurs="0" />
<xs:element name="userType" type="xs:string"
Managing bulk importing and exporting
Administering Avaya Aura® Session Manager November 2010 117

minOccurs="0" maxOccurs="unbounded" />
<xs:element name="roles" minOccurs="0">
<xs:complexType>
<xs:sequence>
<xs:element name="role" type="xs:string"
minOccurs="0" maxOccurs="unbounded" />
</xs:sequence>
</xs:complexType>
</xs:element>
<xs:element name="address" type="tns:xmlAddress"
minOccurs="0" maxOccurs="unbounded" />
<xs:element name="securityIdentity"
type="tns:xmlSecurityIdentity" minOccurs="0" maxOccurs="unbounded" />
<!-- Contact list Entries -->
<xs:element name="ownedContactLists" minOccurs="0"
maxOccurs="1">
<xs:complexType>
<xs:sequence>
<xs:element name="contactList"
type="tns:xmlContactList" maxOccurs="1" />
</xs:sequence>
</xs:complexType>
</xs:element>
<xs:element name="ownedContacts" minOccurs="0">
<xs:complexType>
<xs:sequence>
<xs:element name="contact" type="tns:xmlContact"
maxOccurs="unbounded" />
</xs:sequence>
</xs:complexType>
</xs:element>
<!-- Presence ACL User Entries -->
<xs:element name="presenceUserDefault"
type="tns:xmlPresUserDefaultType" minOccurs="0" />
<xs:element name="presenceUserACL"
type="tns:xmlPresUserACLEntryType" minOccurs="0"
maxOccurs="unbounded" />
<xs:element name="presenceUserCLDefault"
type="tns:xmlPresUserCLDefaultType" minOccurs="0" maxOccurs="1" />
<xs:element name="commProfileSet"
type="tns:xmlCommProfileSetType" maxOccurs="unbounded" minOccurs="0">
</xs:element>
</xs:sequence>
</xs:complexType>
<xs:complexType name="xmlSecurityIdentity">
<xs:sequence>
<xs:element name="identity" type="xs:string" maxOccurs="1" minOccurs="1"/
>
<xs:element name="realm" type="xs:string" minOccurs="0"/>
<xs:element name="type" type="xs:string" minOccurs="1" maxOccurs="1"/>
</xs:sequence>
</xs:complexType>
<xs:complexType name="xmlPresInfoTypeAccessType">
<xs:sequence>
<xs:element name="infoType" type="tns:xmlPresInfoTypeType" maxOccurs="1"
minOccurs="1"/>
<xs:element name="access" type="xs:string" maxOccurs="1" minOccurs="0"/>
</xs:sequence>
</xs:complexType>
<xs:complexType name="xmlPresACRuleType">
<xs:sequence>
<xs:element name="infoTypeAccess" type="tns:xmlPresInfoTypeAccessType"
minOccurs="0" maxOccurs="unbounded"/>
</xs:sequence>
</xs:complexType>
Managing Users
118 Administering Avaya Aura ® Session Manager November 2010
Comments? infodev@avaya.com

<xs:complexType name="xmlPresUserDefaultType">
<xs:complexContent>
<xs:extension base="tns:xmlPresACRuleType"/>
</xs:complexContent>
</xs:complexType>
<xs:complexType name="xmlPresUserCLDefaultType">
<xs:complexContent>
<xs:extension base="tns:xmlPresACRuleType"/>
</xs:complexContent>
</xs:complexType>
<xs:complexType name="xmlPresUserACLEntryType">
<xs:complexContent>
<xs:extension base="tns:xmlPresACRuleType">
<xs:sequence>
<xs:choice>
<xs:element name="watcherLoginName" type="xs:string"
minOccurs="0"/>
<xs:element name="watcherDisplayName" type="xs:string"
minOccurs="0"/>
</xs:choice>
</xs:sequence>
</xs:extension>
</xs:complexContent>
</xs:complexType>
<xs:complexType name="xmlPresInfoTypeType">
<xs:sequence>
<xs:element name="label" type="xs:string" maxOccurs="1" />
<xs:element name="filter" type="xs:string" maxOccurs="1"/>
<xs:element name="specFlags" type="xs:string" minOccurs="0"/>
</xs:sequence>
</xs:complexType> <!-- Contact List entries -->
<xs:complexType name="xmlContactList">
<xs:sequence>
<xs:element name="name" type="xs:string" maxOccurs="1" minOccurs="1"/>
<xs:element name="description" type="xs:string" minOccurs="0"/>
<xs:element name="isPublic" type="xs:boolean" maxOccurs="1"
minOccurs="1"/>
<xs:element name="members" type="tns:xmlContactListMember" minOccurs="0"
maxOccurs="unbounded"/>
<xs:element name="contactListType" type="xs:string" maxOccurs="1"
minOccurs="1"/>
</xs:sequence>
</xs:complexType>
<xs:complexType name="xmlContactListMember">
<xs:sequence>
<xs:choice>
<xs:sequence>
<xs:element name="memberContact" type="xs:string" minOccurs="0"/>
<xs:element name="speedDialContactAddress"
type="tns:xmlContactAddress" minOccurs="0"/>
</xs:sequence>
<xs:sequence>
<xs:element name="memberUser" type="xs:string" minOccurs="0"/>
<xs:element name="speedDialHandle" type="tns:xmlHandle"
minOccurs="0"/>
</xs:sequence>
</xs:choice>
<xs:element name="isFavorite" type="xs:boolean" maxOccurs="1"
minOccurs="1"/>
<xs:element name="isSpeedDial" type="xs:boolean" minOccurs="1"/>
<xs:element name="speedDialEntry" type="xs:int" minOccurs="0"/>
<xs:element name="isPresenceBuddy" type="xs:boolean" maxOccurs="1"
minOccurs="1"/>
Managing bulk importing and exporting
Administering Avaya Aura® Session Manager November 2010 119

<xs:element name="label" type="xs:string" minOccurs="0"/>
<xs:element name="altLabel" type="xs:string" minOccurs="0"/>
<xs:element name="description" type="xs:string" minOccurs="0"/>
<xs:element name="priorityLevel" type="xs:int" minOccurs="0"/>
</xs:sequence>
</xs:complexType>
<xs:complexType name="xmlContactAddress">
<xs:sequence>
<xs:element name="address" type="xs:string" maxOccurs="1" minOccurs="1"/>
<xs:element name="altLabel" type="xs:string" minOccurs="0"/>
<xs:element name="contactCategory" type="xs:string" maxOccurs="1"
minOccurs="1"/>
<xs:element name="contactType" type="xs:string" maxOccurs="1"
minOccurs="1"/>
<xs:element name="label" type="xs:string" minOccurs="0"/>
</xs:sequence>
</xs:complexType>
<xs:complexType name="xmlAddress">
<xs:sequence>
<xs:element name="addressType" type="xs:string" minOccurs="1"
maxOccurs="1"/>
<xs:element name="name" type="xs:string" minOccurs="1" maxOccurs="1"/>
<xs:element name="building" type="xs:string" minOccurs="0"/>
<xs:element name="localityName" type="xs:string" minOccurs="0"/>
<xs:element name="postalCode" type="xs:string" minOccurs="0"/>
<xs:element name="room" type="xs:string" minOccurs="0"/>
<xs:element name="stateOrProvince" type="xs:string" minOccurs="0"/>
<xs:element name="country" type="xs:string" minOccurs="0"/>
<xs:element name="street" type="xs:string" minOccurs="0"/>
<xs:element name="postalAddress" minOccurs="0">
<xs:simpleType>
<xs:restriction base="xs:string">
<xs:maxLength value="1024"/>
</xs:restriction>
</xs:simpleType>
</xs:element>
<xs:element name="isPrivate" type="xs:boolean" minOccurs="0"/>
</xs:sequence>
</xs:complexType>
<xs:complexType name="xmlContact">
<xs:sequence>
<xs:element name="company" type="xs:string" minOccurs="0"/>
<xs:element name="description" type="xs:string" minOccurs="0"/>
<xs:element name="displayName" type="xs:string" maxOccurs="1"
minOccurs="1"/>
<xs:element name="displayNameAscii" type="xs:string" maxOccurs="1"
minOccurs="1"/>
<xs:element name="dn" type="xs:string" minOccurs="0"/>
<xs:element name="givenName" type="xs:string" maxOccurs="1"
minOccurs="1"/>
<xs:element name="initials" type="xs:string" minOccurs="0"/>
<xs:element name="middleName" type="xs:string" minOccurs="0"/>
<xs:element name="preferredGivenName" type="xs:string" maxOccurs="1"
minOccurs="0"/>
<xs:element name="preferredLanguage" type="xs:string" minOccurs="0"/>
<xs:element name="isPublic" type="xs:boolean" maxOccurs="1"
minOccurs="1"/>
<xs:element name="source" type="xs:string" maxOccurs="1" minOccurs="1"/>
<xs:element name="sourceUserKey" type="xs:string" maxOccurs="1"
minOccurs="1"/>
<xs:element name="suffix" type="xs:string" minOccurs="0"/>
<xs:element name="surname" type="xs:string" maxOccurs="1" minOccurs="1"/>
<xs:element name="title" type="xs:string" minOccurs="0"/>
<xs:element name="ContactAddress" type="tns:xmlContactAddress"
Managing Users
120 Administering Avaya Aura ® Session Manager November 2010
Comments? infodev@avaya.com

minOccurs="0" maxOccurs="unbounded"/>
<xs:element name="addresses" type="tns:xmlAddress" minOccurs="0"
maxOccurs="unbounded"/>
</xs:sequence>
</xs:complexType>
<xs:complexType name="xmlHandle">
<xs:sequence>
<xs:element name="handleName" type="xs:string" maxOccurs="1"
minOccurs="1">
</xs:element>
<xs:element name="handleType" type="xs:string" maxOccurs="1"
minOccurs="1">
<xs:element>
<xs:element name="handleSubType" type="xs:string"
maxOccurs="1" minOccurs="0">
</xs:element>
<xs:element name="domainName" type="xs:string" maxOccurs="1"
minOccurs="0">
</xs:element>
</xs:sequence>
</xs:complexType>
<xs:complexType name="xmlCommProfileType">
<xs:sequence>
<xs:element name="commProfileType" type="xs:string"
maxOccurs="1" minOccurs="1">
</xs:element>
<xs:element name="commProfileSubType" type="xs:string" maxOccurs="1"
minOccurs="0"/xs:element>
</xs:sequence>
</xs:complexType>
<xs:complexType name="xmlCommProfileSetType">
<xs:sequence>
<xs:element name="commProfileSetName" type="xs:string"
maxOccurs="1" minOccurs="1">
</xs:element>
<xs:element name="isPrimary" type="xs:boolean" maxOccurs="1"
minOccurs="1">
</xs:element>
<xs:element name="handleList" minOccurs="0">
<xs:complexType>
<xs:sequence>
<xs:element name="handle" type="tns:xmlHandle"
maxOccurs="unbounded" />
</xs:sequence>
</xs:complexType>
</xs:element>
<xs:element name="commProfileList" minOccurs="0">
<xs:complexType>
<xs:sequence>
<xs:element name="commProfile"
type="tns:xmlCommProfileType" maxOccurs="unbounded" />
</xs:sequence>
</xs:complexType>
</xs:element>
</xs:sequence>
Managing bulk importing and exporting
Administering Avaya Aura® Session Manager November 2010 121

</xs:complexType>
<xs:complexType name="ForgeinCommProfileType">
<xs:complexContent>
<xs:extension base="ext:xmlCommProfileType">
<xs:sequence>
<xs:element name="csEncryptionKeyId" type="xs:long"
maxOccurs="1" minOccurs="0" />
<xs:element name="servicePassword" type="xs:string" maxOccurs="1"
minOccurs="0"/>
<xs:element name="serviceData" type="xs:string" maxOccurs="1"
minOccurs="0"/>
</xs:sequence>
</xs:extension>
</xs:complexContent>
</xs:complexType>
<xs:complexType name="xmlSecureStore">
<xs:sequence>
<xs:element name="secureStoreData" type="xs:base64Binary"
maxOccurs="1" minOccurs="1">
</xs:element>
<xs:element name="passwordEncrypted" type="xs:boolean"/xs:element>
</xs:sequence>
</xs:complexType>
</xs:schema>
Sample XML for bulk importing users with minimal attributes
<?xml version="1.0" encoding="UTF-8"?>
<!-- Root Element 'Users' represent collection of user (containing 1 or more
users)-->
<tns:users xmlns:tns="http://xml.avaya.com/schema/import" xmlns:xsi="http://
www.w3.org/2001/XMLSchema-instance" xsi:schemaLocation="http://xml.avaya.com/
schema/import userimport.xsd" >
<tns:user>
<authenticationType>Basic</authenticationType>
<givenName>John</givenName>
<loginName>jmiller@avaya.com</loginName>
<surname>Miller</surname>
<userPassword>mypassword</userPassword>
</tns:user>
</tns:users>
Sample XML for bulk importing users with all attributes
<?xml version="1.0" encoding="UTF-8"?>
<!-- Root Element 'Users' represent collection of user (containing 1 or more
users)-->
<tns:users xmlns:tns="http://xml.avaya.com/schema/import" xmlns:xsi="http://
www.w3.org/2001/XMLSchema-instance" xsi:schemaLocation="http://xml.avaya.com/
schema/import userimport.xsd" >
<!-- authenticationType: This defines the type of authentication that this user
will undergo at runtime to obtain access to the system.Possible Values:
BASIC,ENTERPRISE
description:A text description of the user. Human readable description of this
user instance.
displayName:The localized name of a user to be used when displaying. It will
typically be the localized full name. This value may be provisioned from the users
Managing Users
122 Administering Avaya Aura ® Session Manager November 2010
Comments? infodev@avaya.com

enterprise directory entry. If it does not exist, synchronization rules can be used
to populate it for other fields e.g. Surname, GivenName, or LoginName.
displayNameAscii:The full text name of the user represented in ASCII. It is used
to support display (e.g. endpoints) that cannot handle localized text.
dn:The distinguished name of the user. The DN is a sequence of relative
distinguished names (RDN) connected by commas. An RDN is an attribute with an
associated value in the form of attribute=value, normally expressed in a UTF-8
string format.The dn can be used to identify the user and may be used for
authentication subject mapping. Note the dn is changeable.
isDuplicatedLoginAllowed:A boolean indicator showing whether this user is
allowed a duplicate concurrent logins.A true stipulates that the user is allow to
have duplicate logins. Default value is true.
isEnabled:A boolean indicator showing whether or not the user is active. Users
with AuthenticationType equals Basic will fail if this value is false.This attribute
can be used to disable access between login attempts. A running sessions login will
not be revocable. Alternatively the administrator can always modify the password to
disable the user from logging in.A true stipulates this is an active user, a false
used for a disabled user. Default value is false.
isVirtualUser:A boolean indicator showing whether or not the record is being
used for a non-human entity such as an application, service, software agent, etc.
This is to be used where the entity will behave as a user and needs to have subset
of the user profile populated. If the entity does not behave as a user and has a
different trust relationship e.g. a trust certificate it should not be treated as a
virtual user. A virtual user can represent an Avaya or external non-human entity.
This attribute is provided as a convenience to track such accounts.A true stipulates
this is a virtual users, a false is used for human users. Default value is false.
givenName:The first name of the user.
honorific:The personal title used to address a user. This is typically a social
title and not the work title which is contained in the title attribute. This
attribute can map to PersonalTitle.
loginName:This is the unique system login name given to the user. It can take
the form of username@domain or just username.This may vary across customers. It can
be used to help provision default user handles in the CSHandle table.The username
is an alphanumeric value that must comply with the userinfo related portion of a URI
as described in rfc2396. However, it is further restricted as ASCII characters with
only the _ and . special characters supported. This is the rfc2798 uid attribute.
middleName:The middle name of the user
managerName:Text name of the users manager. This is a free formed field and does
not require the users manager to also be a user of the solution. This attribute was
requested to support reporting needs.
preferredGivenName:The preferred first name of the user.
preferredLanguage:The individuals preferred written or spoken language.Values
will conform to rfc4646 and the reader should refer to rfc4646 for syntax.This
format uses the ISO standard Language ISO639 and region ISO3166 codes In the absence
of a value the clients locale should be used, if no value is set, en-US should be
defaulted.
source:Free format text field that identifies the entity that created this user
record. The format of this field will be either a IP Address/Port or a name
representing an enterprise LDAP or Avaya.
sourceUserKey:The key of the user from the source system. If the source is an
Enterprise Active Directory server, this value with be the objectGUID.
status:This information is to help manage provisioning activities such as
correcting or completing the provisioning of a user instance. It can also signify
that approval is needed (PENDINGAUTHZ) before a user account is sufficiently
configured to be a valid user (PROVISIONED). Possible Values:
AUTHPENDING;PENDINGAUTHZ;PROVISIONED
suffix:The text appended to a name e.g. Jr., III.
surname:The users last name, also called the family name.
timeZone:The preferred time zone of the user. For example: (-12:0)
International Date Line West.
title:The job function of a person in their organizational context.
userName:This is the username portion of the loginName field. It is an
alphanumeric value that must comply with the userinfo related portion of a URI as
described in rfc2396. However, it is further restricted as ASCII characters with
only the _ and . special characters supported. This is the rfc2798 uid attribute.
Managing bulk importing and exporting
Administering Avaya Aura® Session Manager November 2010 123

userPassword:The encrypted password for this users account.A null password is
used when the user is authenticated by the enterprise such as with a separate source
such as the enterprise LDAP.
commPassword:The encrypted subscriber or communication password with which the
user logs can use to authentication with on to any CommProfile SIP and non SIP.
This attribute is meant to be a shared across different communication profiles and
thus different communication services.
userType:This enumerates the possible primary user application types. A User can
be associated with multiple user types. Possible values are
ADMINISTRATOR;COMMUNICATION USER;AGENT;SUPERVISOR;RESIDENT EXPERT;SERVICE
TECHNICIAN;LOBBY PHONE
roles:Text name of a role.This value needs to pre-exist in SMGR DB
address:The address of the user.
securityIdentity:The SecurityIdentity is used to hold any additional identities
for a user that can be used for authentication such as their loginName, Kerberos
account name, or their X509 certificate name.
ownedContactLists:It is a collection of internal or external contacts.
ContactList is owned by a specific user and has a name that a unique name within the
context of its owner.
ownedContacts:It represents a non Avaya application user (external) contact.
Contacts can be collected together along with User entities into a contact list.
Contacts can be created by an administrator or an end user.
presenceUserDefault:These are personal rules that are set by presentities to
define how much presence information can be shown to watchers that are not
explicitly mentioned in an ACL. There may be one User Default rule per presentity
(User), or none.
presenceUserACL:These are personal rules defined by presentities themselves on
who can monitor their presence information. There may be several entries in the list
for a given presentity, each entry corresponding to one watcher.
presenceUserCLDefault:This is a personal rule that is set by presentities to
define how much presence information can be shown to watchers that belong to the
userss contact list. There may be one User Contact List Default rule per presentity
(Person) or none.
commProfileSet:A user will have a default commprofile set.A commprofile set can
exist without any handles or commprofiles referencing it. I.e. you can create a
commprofile set without needing to also create either a handle or a commprofile.A
commprofile set can contain multiple commprofiles, but only one of each specific
type. This is enforced by having the CSCommProfile uniqueness constraint include
type, cs_commprofile_set_id.
-->
<tns:user>
<authenticationType>BASIC</authenticationType>
<description>this is description</description>
<displayName> John Miller</displayName>
<displayNameAscii></displayNameAscii>
<dn>dc=acme,dc=org</dn>
<isDuplicatedLoginAllowed>true</isDuplicatedLoginAllowed>
<isEnabled>true</isEnabled>
<isVirtualUser>false</isVirtualUser>
<givenName>John</givenName>
<honorific>Mr</honorific>
<loginName>jmiller@avaya.com</loginName>
<middleName></middleName>
<managerName>Jay Smith</managerName>
<preferredGivenName>John</preferredGivenName>
<preferredLanguage>English</preferredLanguage>
<source>LDAP</source>
<sourceUserKey>18966</sourceUserKey>
<status>AUTHPENDING</status>
<suffix>Mr</suffix>
<surname>Miller</surname>
<timeZone>(-12:00) International Date Line West</timeZone>
<title>Mr</title>
<userName>jmiller</userName>
<userPassword>password</userPassword>
Managing Users
124 Administering Avaya Aura ® Session Manager November 2010
Comments? infodev@avaya.com

<commPassword>mycommPassword</commPassword>
<userType>ADMINISTRATOR</userType>
<roles>
<role>End-User</role>
</roles>
<!--addressType:Specifies the role of the address. Examples: Home, business.
name:The Name property defines the unique label by which the address is known.
Default format for user specific address should include user name place address type.
building:The name or other designation of a structure
localityName:The name of a locality, such as a city, county or other
geographic region.
postalCode:A code used by postal services to route mail to a destination. In the
United States this is the zip code.
room:Name or designation of a room.
stateOrProvince:The full name of a state or province.
country:A country.
street:The physical address of the object such as an address for package delivery
postalAddress:A free formed text area for the complete physical delivery
address. It may be used in place of the specific fields in this table.
isPrivate:A boolean indicator to specify if this address could be shared across
multiple users.True is private, false is sharable. Default is false.
-->
<address>
<addressType>OFFICE</addressType>
<name>Avaya Office</name>
<building>building 11</building>
<localityName>Magarpatta</localityName>
<postalCode>411028</postalCode>
<room>room 502</room>
<stateOrProvince>Maharashtra</stateOrProvince>
<country>India</country>
<street>street</street>
<postalAddress></postalAddress>
<isPrivate>true</isPrivate>
</address>
<!-- SecurityIdentity:Represents the possible external identities that a user
may have for the purpose of authentication. The type and format of an identity
depends on the external Identity Provider and can include X.509 certificates or
Kerberos user accounts
identity:The unique external identity of the user. This is a free text field and
no format is enforced. The format will depend on the identity type. Kerberos user
account can take the form of: username@domainName
e.g. jsmith@acme.org
realm:The name of the security domain that this identity is valid in.
type:The text representation of the type of identity. Possible values are:
principalname,X509 and Kerberos
-->
<securityIdentity>
<identity>jmiller@acme.org </identity>
<realm>acme</realm>
<type>principalname</type>
</securityIdentity>
<!--ContactList:The ContactList is a collection of personal or public groups
containing external contacts and/or Avaya users.
name:The text name of the list. This in the context of the owner must be unique.
description:A free text description of this member.
isPublic:Defines if the contact is public or personal. Default = false.
members:Represents the list of users or contacts that belong to contact list
contactListType:Specifies the type categorizing this list.
-->
<ownedContactLists>
<contactList>
<name>MycontactList</name>
<description>This is my contactList</description>
<isPublic>false</isPublic>
Managing bulk importing and exporting
Administering Avaya Aura® Session Manager November 2010 125

<!--
memberContact:This represents the name of the Contact.A
ContactListMember can either be a Contact o User
speedDialContactAddress:A Contact Address added as a favorite entry
memberUser:This represents the loginname of the User.A
ContactListMember can either be a Contact or User
speedDialHandle:A handle added as a favorite entry
isFavorite:A boolean indicator that reflects whether this contact
is a favorite entry. If true, the value of entryindex would show which position to
place this entry in any display.
isSpeedDial:Each contact list member can also be flagged as a favorite
(a.k.a. speed dial)
speedDialEntry:For either a presence buddy or favorite entry, a
specific communication address to use can be pointed to.
isPresenceBuddy:Each contact list member can also be flagged as a
presence buddy
label:A free text short word or phrase for classifying this contact
list member.
altLabel:A free text short word or phrase for classifying this
contact. This is similar to label, but it is used to store alternate language
representations.
description:A free text description of this member.
-->
<members>
<memberContact>Phil Bath</memberContact>
<speedDialContactAddress>
<address>+44-1234568</address>
<altLabel>Phone</altLabel>
<contactCategory>OFFICE</contactCategory>
<contactType>PHONE</contactType>
<label>Phone</label>
</speedDialContactAddress>
<isFavorite>true</isFavorite>
<isSpeedDial>true</isSpeedDial>
<speedDialEntry>1234</speedDialEntry>
<isPresenceBuddy>true</isPresenceBuddy>
<label>My Contact in Dublin office</label>
<altLabel>Phone Number for contacting Denver office</altLabel>
<description>Contact Details</description>
<priorityLevel>0</priorityLevel>
</members>
<contactListType>CONTACTCENTER</contactListType>
</contactList>
</ownedContactLists>
<!-- Contact:An entity that represents a non Avaya application user (external)
contact. Contacts can be collected together along with User entities into a contact
list. Contacts can be created by an administrator or an end user. Contacts have name
attributes, and owner, and can be public or personal.A contact also includes one or
more contact addresses that can be used for establishing an interaction with the
contact. Contacts can be designated as being a users presence buddy or added as a
favorite entry (i.e. speed dial).
company:The organization that the contact belongs to.
description:A free text field containing human readable text providing
information on this entry.
displayName:The localized name of a contact to be used when displaying. It will
typically be the localized full name. This value may be provisioned from the users
enterprise directory entry. If it does not exist, synchronization rules can be used
to populate it for other fields e.g. Surname, GivenName, or LoginName.
displayNameAscii:The full text name of the contact represented in ASCII. It is
used to support display (e.g. endpoints) that cannot handle localized text.
dn:The distinguished name of the user. The DN is a sequence of relative
distinguished names (RDN) connected by commas. An RDN is an attribute with an
associated value in the form of attribute=value, normally expressed in a UTF-8
string format.The dn can be used to uniquely identify this record. Note the dn is
changeable.
Managing Users
126 Administering Avaya Aura ® Session Manager November 2010
Comments? infodev@avaya.com

givenName:The first name of the contact.
initials:Initials of the contact
middleName:The middle name of the contact.
preferredGivenName:The nick name of the contact.
preferredLanguage:The individuals preferred written or spoken language. Values
will conform to rfc4646 and the reader should refer to rfc4646 for syntax. This
format uses the ISO standard Language ISO639 and region ISO3166 codes In the absence
of a value the clients locale should be used, if no value is set, en-US should be
defaulted.
isPublic:Defines if the contact is public or personal. Default = false.
source:Free format text field that identifies the entity that created this user
record. The format o this field will be either a IP Address/Port or a name
representing an enterprise LDAP or Avaya.
sourceUserKey:The key of the user from the source system. If the source is an
Enterprise Active Directory server, this value with be the objectGUID.
suffix:The text appended to a name e.g. Jr., III.
surname:The users last name, also called the family name.
title:The job function of a person in their organizational context.Examples:
supervisor, manager
ContactAddress:Represents a contacts address.
addresses:A fully qualified URI for interacting with this contact. Any addresses
added to this table should contain a qualifier e.g. sip, sips, tel, mailto. The
address should be syntactically valid based on the qualifier. It must be possible
to add via the GUI and Interface. The application must do validation.
-->
<ownedContacts>
<contact>
<company>ABC</company>
<description>Company ABC description</description>
<displayName>Phil Bath</displayName>
<displayNameAscii></displayNameAscii>
<dn>dc=acme,dc=org</dn>
<givenName>John</givenName>
<initials>Mr</initials>
<middleName>M</middleName>
<preferredGivenName>Phil</preferredGivenName>
<preferredLanguage>English</preferredLanguage>
<isPublic>false</isPublic>
<source>ldap</source>
<sourceUserKey>123546</sourceUserKey>
<suffix>Jr.</suffix>
<surname>Bath</surname>
<title>Manager</title>
<!--
type:The value reflecting the type of handle this is. Possible values are
username, e164, and privatesubsystem
category:The value representing a further qualification to the contact
address. Possible values inlcude Office, Home, Mobile.
handle:This is the name given to the user to allow communication to be
established with the user. It is an alphanumeric value that must comply with the
userinfo related portion of a URI as described in rfc2396. However, it is further
restricted as ASCII characters with only the + prefix to signify this is an E.164
handle and _ and . special characters supported.The handle and type together are
unique within a specific domain. Note, the handle plus domain can be used to
construct a users Address of Record.
label:A free text description for classifying this contact.
altLabel:A free text description for classifying this contact. This is
similar to ContactLabel, but it is used to store alternate language representations.
-->
<ContactAddress>
<address>+44-1234568</address>
<altLabel>Phone</altLabel>
<contactCategory>OFFICE</contactCategory>
<contactType>PHONE</contactType>
Managing bulk importing and exporting
Administering Avaya Aura® Session Manager November 2010 127

<label>Phone</label>
</ContactAddress>
<addresses>
<!--
addressType:The unique text name of the address type. Possible values are:
Home, business.
name: The Name property defines the unique label by which the address is
known. Default format for user specific address should include user name place
address type.
building:The name or other designation of a structure.
localityName:The name of a locality, such as a city, county or other
geographic region.
postalCode:A code used by postal services to route mail to a destination.
In the United States this is the zip code.
room:Name or designation of a room.
stateOrProvince:The full name of a state or province.
country:A country.
street:The physical address of the object such as an address for package
delivery
postalAddress:A free formed text area for the complete physical delivery
address. It may be used in place of the specific fields in this table.
-->
<addressType>office</addressType>
<name>Phil Bath</name>
<building>building A</building>
<localityName>Magarpatta</localityName>
<postalCode>411048</postalCode>
<room>room 123</room>
<stateOrProvince>MH</stateOrProvince>
<country>India</country>
<street>Hadapsar</street>
<isPrivate>true</isPrivate>
</addresses>
</contact>
</ownedContacts>
<!-- PresUserDefault:These are personal rules that are set by presentities
to define how much presence information can be shown to watchers that are not
explicitly mentioned in an ACL. There may be one User Default rule per presentity
(User), or none.presentity (User), or none.
presentity (User), or none.
label:A unique string that names this info type (e.g. Telephony Presence).
filter:Internal definition of which part of presence information is covered
by this info type. The value of this field should be treated as opaque string; it
is maintained and used only by Presence services.
specFlags:This field is empty for regular info types, but for special info
types it contains a comma separated list of keywords that identify these types. In
this version only FULL that represents full presence information is supported.
-->
<presenceUserDefault>
<infoTypeAccess>
<infoType>
<label>Telephony Presence</label>
<filter>filter</filter>
<specFlags>FULL</specFlags>
</infoType>
<access>BLOCK</access>
</infoTypeAccess>
</presenceUserDefault>
<!--UserACLEntry:These are personal rules defined by presentities themselves on
who can monitor their presence information. There may be several entries in the list
for a given presentity, each entry corresponding to one watcher.
label:A unique string that names this info type (e.g. Telephony Presence).
filter:Internal definition of which part of presence information is covered
Managing Users
128 Administering Avaya Aura ® Session Manager November 2010
Comments? infodev@avaya.com

by this info type. The value of this field should be treated as opaque string; it
is maintained and used only by Presence services.
specFlags:This field is empty for regular info types, but for special info
types it contains a comma separated list of keywords that identify these types. In
this version only FULL that represents full presence information is supported.
-->
<presenceUserACL>
<infoTypeAccess>
<infoType>
<label>ALL</label>
<filter>filter</filter>
<specFlags>FULL</specFlags>
</infoType>
<access>BLOCK</access>
</infoTypeAccess>
<watcherLoginName>admin</watcherLoginName>
</presenceUserACL>
<!--PresUserCLDefault:This is a personal rule that is set by presentities to
define how much presence information can be shown to watchers that belong to the
users contact list. There may be one User Contact List Default rule per presentity
(Person) or none.
-->
<presenceUserCLDefault>
<infoTypeAccess>
<infoType>
<label>Telephony</label>
<filter>filter</filter>
<specFlags>FULL</specFlags>
</infoType>
<access>BLOCK</access>
</infoTypeAccess>
</presenceUserCLDefault>
<!--commProfileSet:A user will have a default commprofile set.A commprofile set can
exist without any handles or commprofiles referencing it. I.e. you can create a
commprofile set without needing to also create either a handle or a commprofile.A
commprofile set can contain multiple commprofiles, but only one of each specific
type. This is enforced by having the CommProfile uniqueness constraint include type,
commprofile_set_id.
HandleName:This is the name given to the user to allow communication to be
established with the user. It is an alphanumeric value that must comply with the
userinfo related portion of a URI as described in rfc2396. However, it is further
restricted as ASCII characters with only the + prefix to signify this is an E.164
handle and _ and . special characters supported.Note, the handle plus domain can be
used to construct a users Address of Record.
handleType:The value reflecting the type of handle this is. Possible values are
sip,smtp,ibm,and xmpp.
handleSubType:This is an additional qualify on the handle type to help specify
which private subsystem this handle belongs to.Possible values are e
164,username,msrtc,googletalk,jabber,ibmsametime,lotousnotes,msexchage.
domainName:The text name of the domain.
-->
<commProfileSet>
<commProfileSetName>Primary</commProfileSetName>
<isPrimary>true</isPrimary>
<handleList>
<handle>
<handleName>sip:abc@yahoo.com</handleName>
<handleType>sip</handleType>
<handleSubType>msrtc</handleSubType>
</handle>
</handleList>
<!--The below is extended communication profile-->
<!--
<commProfileList>
<commProfile xsi:type="ext:ASMCommProfile" xmlns:ext="http://xml.avaya.com/
Managing bulk importing and exporting
Administering Avaya Aura® Session Manager November 2010 129

schema/import1">
<commProfileType>ASM</commProfileType>
<ext:forkingPolicy>Sequential</ext:forkingPolicy>
<ext:origApplicationSet>Default Denever Origination</
ext:origApplicationSet>
<ext:termApplicationSet>Default Denever Termination</
ext:termApplicationSet>
<ext:userCommunity>Denever</ext:userCommunity>
<ext:subscriptionSet>subscriptionSet</ext:subscriptionSet>
</commProfile>
</commProfileList>
-->
</commProfileSet>
</tns:user>
</tns:users>
XML Schema Definition for bulk deleting users
<?xml version="1.0" encoding="UTF-8" standalone="yes"?>
<xs:schema xmlns:tns="http://xml.avaya.com/schema/bulkdelete"
targetNamespace="http://xml.avaya.com/schema/bulkdelete"
elementFormDefault="qualified" version="1.0" xmlns:xs="http://www.w3.org/
2001/XMLSchema" >
<xs:element name="user" type="tns:xmlUserDelete" />
<xs:element name="deleteType" type="tns:xmlDeleteType" />
<xs:element name="deleteUsers">
<xs:complexType>
<xs:sequence>
<xs:element name="deleteType" type="tns:xmlDeleteType" maxOccurs="1"
minOccurs="1"/>
<xs:element minOccurs="1" maxOccurs="unbounded" name="user"
type="tns:xmlUserDelete" />
</xs:sequence>
</xs:complexType>
</xs:element>
<xs:complexType name="xmlUserDelete">
<xs:sequence>
<xs:element name="loginName" minOccurs="1" maxOccurs="1">
<xs:simpleType>
<xs:restriction base="xs:string">
<xs:maxLength value="128"></xs:maxLength>
</xs:restriction>
</xs:simpleType>
</xs:element>
<xs:element name="id" type="xs:string" maxOccurs="1" minOccurs="0"></
xs:element>
</xs:sequence>
</xs:complexType>
<xs:simpleType name="xmlDeleteType">
<xs:restriction base="xs:string"></xs:restriction>
</xs:simpleType>
</xs:schema>
Sample XML for bulk deleting users
<?xml version="1.0" encoding="UTF-8"?>
<tns:deleteUsers xmlns:tns="http://xml.avaya.com/schema/bulkdelete"
xmlns:xsi="http://www.w3.org/2001/XMLSchema-instance" xsi:schemaLocation="http://
xml.avaya.com/schema/bulkdelete UserProfileSchemaDefinitionForBulkDelete.xsd ">
Managing Users
130 Administering Avaya Aura ® Session Manager November 2010
Comments? infodev@avaya.com

<tns:deleteType>soft</tns:deleteType>
<tns:user>
<tns:loginName>jmiller@avaya.com</tns:loginName>
</tns:user>
</tns:deleteUsers>
XML Schema Definition for bulk importing elements
<?xml version="1.0" encoding="UTF-8"?>
<xs:schema targetNamespace="http://www.avaya.com/rts"
xmlns="http://www.avaya.com/rts"
xmlns:xs="http://www.w3.org/2001/XMLSchema"
elementFormDefault="qualified" attributeFormDefault="unqualified">
<!-- <xs:schema xmlns:xs="http://www.w3.org/2001/XMLSchema"> -->
<xs:element name="RTSElements">
<xs:complexType>
<xs:sequence>
<xs:element name="ApplicationSystems" minOccurs="0"
maxOccurs="unbounded">
<xs:annotation>
<xs:documentation>
Application System Types
</xs:documentation>
</xs:annotation>
<xs:complexType>
<xs:sequence>
<xs:element name="ApplicationSystem"
type="ApplicationSystem" maxOccurs="unbounded">
</xs:element>
</xs:sequence>
</xs:complexType>
</xs:element>
<xs:element name="ApplicationSystemAssigns"
minOccurs="0" maxOccurs="unbounded">
<xs:complexType>
<xs:sequence>
<xs:element name="Source" type="Source"
minOccurs="1" maxOccurs="unbounded" />
</xs:sequence>
</xs:complexType>
</xs:element>
</xs:sequence>
</xs:complexType>
</xs:element>
<xs:complexType name="ApplicationSystem">
<xs:annotation>
<xs:documentation></xs:documentation>
</xs:annotation>
<xs:sequence>
<xs:element name="Host" type="Host" minOccurs="1"
maxOccurs="1">
</xs:element>
<xs:element name="ApplicationSystemType"
type="ApplicationSystemType" minOccurs="1" maxOccurs="1">
</xs:element>
<xs:element name="SecureStoreData" type="SecureStoreData" minOccurs="0"
maxOccurs="1"/>
<xs:element name="AccessPoints" minOccurs="0"
maxOccurs="unbounded">
Managing bulk importing and exporting
Administering Avaya Aura® Session Manager November 2010 131

<xs:complexType>
<xs:sequence>
<xs:element name="AccessPoint"
type="AccessPoint" minOccurs="1" maxOccurs="unbounded" />
</xs:sequence>
</xs:complexType>
</xs:element>
<xs:element name="Ports" minOccurs="0"
maxOccurs="unbounded">
<xs:complexType>
<xs:sequence>
<xs:element name="Port" type="Port"
minOccurs="1" maxOccurs="unbounded" />
</xs:sequence>
</xs:complexType>
</xs:element>
<xs:element name="SNMPAttributes" type="SNMPAttributes" minOccurs="0"
maxOccurs="1">
</xs:element>
<xs:element name="Attributes" minOccurs="0"
maxOccurs="unbounded">
<xs:complexType>
<xs:sequence>
<xs:element name="Attribute" type="Attribute"
minOccurs="1" maxOccurs="unbounded" />
</xs:sequence>
</xs:complexType>
</xs:element>
</xs:sequence>
<xs:attribute name="name" type="xs:string" use="required">
</xs:attribute>
<xs:attribute name="description" type="xs:string">
</xs:attribute>
<xs:attribute name="displaykey" type="xs:string"></xs:attribute>
<xs:attribute name="isTrusted" type="xs:boolean"></xs:attribute>
</xs:complexType>
<xs:complexType name="SNMPAttributes">
<xs:annotation>
<xs:documentation></xs:documentation>
</xs:annotation>
<xs:attribute name="snmpVersion" type="snmpVersionType" use="required">
</xs:attribute>
<xs:attribute name="readCommunity" type="xs:string">
</xs:attribute>
<xs:attribute name="writeCommunity" type="xs:string">
</xs:attribute>
<xs:attribute name="userName" type="xs:string">
</xs:attribute>
<xs:attribute name="authenticationProtocol"
type="authenticationProtocolType">
</xs:attribute>
Managing Users
132 Administering Avaya Aura ® Session Manager November 2010
Comments? infodev@avaya.com

<xs:attribute name="authenticationPassword" type="xs:string">
</xs:attribute>
<xs:attribute name="privacyProtocol" type="privacyProtocolType">
</xs:attribute>
<xs:attribute name="privacyPassword" type="xs:string">
</xs:attribute>
<xs:attribute name="snmpRetries" type="xs:int" use="required">
</xs:attribute>
<xs:attribute name="snmpTimeout" type="xs:long" use="required">
</xs:attribute>
<xs:attribute name="deviceTypeName" type="xs:string"> </xs:attribute>
<xs:attribute name="sysOid" type="xs:string">
</xs:attribute>
</xs:complexType>
<xs:complexType name="Host">
<xs:annotation>
<xs:documentation></xs:documentation>
</xs:annotation>
<xs:attribute name="ipaddress" type="xs:string"
use="required">
</xs:attribute>
<xs:attribute name="description" type="xs:string">
</xs:attribute>
<xs:attribute name="ostype" type="xs:string"></xs:attribute>
</xs:complexType>
<xs:complexType name="ApplicationSystemType">
<xs:annotation>
<xs:documentation></xs:documentation>
</xs:annotation>
<xs:attribute name="name" type="xs:string" use="required">
</xs:attribute>
<xs:attribute name="version" type="xs:string" use="required">
</xs:attribute>
</xs:complexType>
<xs:complexType name="AccessPoint">
<xs:annotation>
<xs:documentation></xs:documentation>
</xs:annotation>
<xs:attribute name="name" type="xs:string" use="required">
</xs:attribute>
<xs:attribute name="description" type="xs:string">
</xs:attribute>
<xs:attribute name="displaykey" type="xs:string"></xs:attribute>
<xs:attribute name="type" type="AccessPointType"
use="required">
</xs:attribute>
Managing bulk importing and exporting
Administering Avaya Aura® Session Manager November 2010 133

<xs:attribute name="uri" type="xs:string"></xs:attribute>
<xs:attribute name="host" type="xs:string" use="required">
</xs:attribute>
<xs:attribute name="port" type="xs:string"></xs:attribute>
<xs:attribute name="protocol" type="xs:string"></xs:attribute>
<xs:attribute name="loginid" type="xs:string"></xs:attribute>
<xs:attribute name="password" type="xs:string"></xs:attribute>
<xs:attribute name="containerType" type="ContainerType"></xs:attribute>
<xs:attribute name="order" type="xs:int" use="required">
</xs:attribute>
</xs:complexType>
<xs:complexType name="Port">
<xs:annotation>
<xs:documentation></xs:documentation>
</xs:annotation>
<xs:attribute name="name" type="xs:string" use="required">
</xs:attribute>
<xs:attribute name="description" type="xs:string">
</xs:attribute>
<xs:attribute name="protocol" type="xs:string" use="required"></xs:attribute>
<xs:attribute name="port" type="xs:int" use="required"></xs:attribute>
</xs:complexType>
<xs:complexType name="Source">
<xs:sequence>
<xs:element name="Assignment" minOccurs="1"
maxOccurs="unbounded">
<xs:complexType>
<xs:attribute name="name" type="xs:string">
</xs:attribute>
<xs:attribute name="targetAppSystemName"
type="xs:string" use="required">
</xs:attribute>
<xs:attribute name="targetAppSystemTypeName"
type="xs:string" use="required">
</xs:attribute>
<xs:attribute name="targetAppSystemTypeVersion"
type="xs:string" use="required">
</xs:attribute>
<xs:attribute name="targetAppSystemHost"
type="xs:string" use="required">
</xs:attribute>
<xs:attribute name="priority" type="xs:int"></xs:attribute>
</xs:complexType>
</xs:element>
</xs:sequence>
Managing Users
134 Administering Avaya Aura ® Session Manager November 2010
Comments? infodev@avaya.com

<xs:attribute name="sourceApplicationSystemName"
type="xs:string" use="required">
</xs:attribute>
<xs:attribute name="sourceAppSystemTypeName" type="xs:string"
use="required">
</xs:attribute>
<xs:attribute name="sourceAppSystemTypeVersion" type="xs:string"
use="required">
</xs:attribute>
<xs:attribute name="sourceAppSystemHost" type="xs:string"
use="required">
</xs:attribute>
</xs:complexType>
<xs:complexType name="Attribute">
<xs:attribute name="name" type="xs:string" use="required"></xs:attribute>
<xs:attribute name="value" type="xs:string" use="required"></xs:attribute>
<!-- added for secure store integration. -->
<xs:attribute name="isencrypted" type="xs:boolean" use="optional"
default="false"></xs:attribute>
</xs:complexType>
<xs:complexType name="SecureStoreData">
<xs:attribute name="name" type="xs:string" use="required"></xs:attribute>
<xs:attribute name="value" type="xs:string" use="required"></
xs:attribute>
</xs:complexType>
<xs:simpleType name="AccessPointType">
<xs:restriction base="xs:string">
<xs:enumeration value="TrustManagement" />
<xs:enumeration value="EMURL" />
<xs:enumeration value="WS" />
<xs:enumeration value="GUI" />
<xs:enumeration value="Other" />
</xs:restriction>
</xs:simpleType>
<xs:simpleType name="ContainerType">
<xs:restriction base="xs:string">
<xs:enumeration value="JBOSS" />
<xs:enumeration value="SIPAS" />
</xs:restriction>
</xs:simpleType>
<xs:simpleType name="authenticationProtocolType">
<xs:restriction base="xs:string">
<xs:enumeration value="MD5" />
<xs:enumeration value="SHA" />
</xs:restriction>
</xs:simpleType>
<xs:simpleType name="privacyProtocolType">
<xs:restriction base="xs:string">
<xs:enumeration value="DES"/>
<xs:enumeration value="3DES"/>
<xs:enumeration value="AES128"/>
<xs:enumeration value="AES192"/>
<xs:enumeration value="AES256"/>
</xs:restriction>
</xs:simpleType>
Managing bulk importing and exporting
Administering Avaya Aura® Session Manager November 2010 135

<xs:simpleType name="snmpVersionType">
<xs:restriction base="xs:int">
<xs:enumeration value="1"/>
<xs:enumeration value="3"/>
</xs:restriction>
</xs:simpleType>
</xs:schema>
XML Schema Definition for bulk importing Session Manager profiles
<?xml version="1.0" encoding="UTF-8" ?>
<xsd:schema xmlns:xsd="http://www.w3.org/2001/XMLSchema"
xmlns:smgr="http://xml.avaya.com/schema/import"
targetNamespace="http://xml.avaya.com/schema/import_sessionmanager"
elementFormDefault="qualified">
<xsd:import namespace="http://xml.avaya.com/schema/import"
schemaLocation="userimport.xsd"/>
<xsd:complexType name="SessionManagerCommProfXML">
<xsd:complexContent>
<xsd:extension base="smgr:xmlCommProfileType" >
<xsd:sequence>
<xsd:element name="primarySM" type="xsd:string"/>
<xsd:element name="secondarySM" type="xsd:string" minOccurs="0" />
<xsd:element name="terminationAppSequence" type="xsd:string"
minOccurs="0" />
<xsd:element name="originationAppSequence" type="xsd:string"
minOccurs="0" />
<xsd:element name="survivabilityServer" type="xsd:string"
minOccurs="0" />
<xsd:element name="homeLocation" type="xsd:string" />
</xsd:sequence>
</xsd:extension>
</xsd:complexContent>
</xsd:complexType>
Sample XML for bulk importing Session Manager profiles
<?xml version="1.0" encoding="UTF-8"?>
<tns:users xmlns:tns="http://xml.avaya.com/schema/import"
xmlns:xsi="http://www.w3.org/2001/XMLSchema-instance"
xsi:schemaLocation="http://xml.avaya.com/schema/import userimport.xsd ">
<!-- User Record for: 5555555@domain.com -->
<tns:user>
(Other user elements are required here - consult the main user record XML schema
reference)
<!-- This is the password for any SIP endpoints (phones)
associated with the user’s Session Manager Profile -->
<commPassword>123456</commPassword>
(Other user elements may be required here - consult the main user record XML schema
reference)
<!-- Here, a Communication Profile is defined for the user -->
<commProfileSet>
<commProfileSetName>Primary</commProfileSetName>
<isPrimary>true</isPrimary>
Managing Users
136 Administering Avaya Aura ® Session Manager November 2010
Comments? infodev@avaya.com

<!-- The user must be given one or more handles of type “SIP”
to associate SIP devices with the Session Manager
Profile. In this case, a SIP phone will be registered
with a Session Manager as 5555555@domain.com -->
<handleList>
<handle>
<handleName>5555555</handleName>
<handleType>sip</handleType>
<handleSubType>username</handleSubType>
<domainName>domain.com</domainName>
</handle>
</handleList>
<!-- Here, one or more product-specific profiles may be
Defined -->
<commProfileList>
<!-- A Session Manager Profile is defined to associate
the SIP phone, 5555555@domain.com, with a primary
and secondary Session Mananger instance
(“Primary SM” and “Secondary SM”),
origination and termination application
sequences (both are “Sequence to My CM”),
a Survivability Server (“BSM”), and the user
is given the Home Location, “My Home” -->
<commProfile xsi:type="sm:SessionManagerCommProfXML"
xmlns:sm="http://xml.avaya.com/schema/import_sessionmanager">
<commProfileType>SessionManager</commProfileType>
<sm:primarySM>Primary SM</sm:primarySM>
<sm:secondarySM>Secondary SM</sm:secondarySM>
<sm:terminationAppSequence>Sequence to My CM
</sm:terminationAppSequence>
<sm:originationAppSequence>Sequence to My CM
</sm:originationAppSequence>
<sm:survivabilityServer>BSM
</sm:survivabilityServer>
<sm:homeLocation>My Home</sm:homeLocation>
</commProfile>
<!-- A CM Station Profile is associated with this
Communication Profile. The application
sequence, “Sequence to My CM”, invoked by
Session Manager for calls to and from
5555555@domain.com, sequences calls to the
CM, “My CM”. SIP devices associated
with this Communication Profile are associated
with the CM Station that has number 555-5555. The
CM Station, 555-5555, already exists on the CM, so the
“useExistingExtension” element has value “true”. -->
<commProfile xsi:type="ipt:xmlStationProfile"
xmlns:ipt="http://xml.avaya.com/schema/import_csm_cm">
<commProfileType>CM</commProfileType>
<ipt:cmName>My CM</ipt:cmName>
<ipt:useExistingExtension>true</ipt:useExistingExtension>
<ipt:extension>5555555</ipt:extension>
</commProfile>
</commProfileList>
</commProfileSet>
</tns:user>
</tns:users>
Managing bulk importing and exporting
Administering Avaya Aura® Session Manager November 2010 137

XML Schema Definition for bulk importing endpoint profiles
<?xml version="1.0" encoding="UTF-8" ?>
<xs:schema xmlns:xs="http://www.w3.org/2001/XMLSchema" xmlns:one="http://
xml.avaya.com/schema/import" elementFormDefault="qualified"
targetNamespace="http://xml.avaya.com/schema/import_csm_cm" xmlns:csm="http://
xml.avaya.com/schema/import_csm_cm">
<xs:import namespace="http://xml.avaya.com/schema/import"
schemaLocation="userimport.xsd"/>
<!--Changes in xsd file need to generate jaxb src using this xsd-->
<xs:complexType name="xmlStationProfile">
<xs:complexContent>
<xs:extension base="one:xmlCommProfileType" >
<xs:sequence>
<!-- CM Name as it appears under 'Applications/Application Management/
Entities -->
<xs:element name="cmName" type="xs:string" maxOccurs="1"
minOccurs="1"/>
<!-- 'true' if already created extension is to be used. 'false' if
available extension is to be used. -->
<xs:element name="useExistingExtension" type="xs:boolean"
maxOccurs="1" minOccurs="0"/>
<!-- Station extension number that need to be assigned to the user. -->
<xs:element name="extension" maxOccurs="1" minOccurs="1">
<xs:simpleType>
<xs:restriction base="xs:string">
<xs:pattern value="[0-9]+([.-][0-9]+)*"/>
</xs:restriction>
</xs:simpleType>
</xs:element>
<!-- Template name to be used to create station. Values defined in
Template will be used if not provided. -->
<xs:element name="template" type="xs:string" maxOccurs="1"
minOccurs="0"/>
<!-- Specifies the set type of the station -->
<xs:element name="setType" type="xs:string" maxOccurs="1"
minOccurs="0"/>
<!-- Security code for station. Value can be digit only. -->
<xs:element name="securityCode" maxOccurs="1" minOccurs="0">
<xs:simpleType>
<xs:restriction base="xs:string">
<xs:pattern value="[0-9]*"/>
</xs:restriction>
</xs:simpleType>
</xs:element>
<!-- Valid values for port -->
<!--01 to 64 First and second numbers are the cabinet number -->
<!--A to E Third character is the carrier -->
<!--01 to 20 Fourth and fifth characters are the slot number -->
<!--01 to 32 Sixth and seventh characters are the circuit number -->
<!--x or X Indicates that there is no hardware associated with the
port assignment since the switch was set up, and the administrator expects that the
extension would have a non-IP set. Or, the extension had a non-IP set, and it
dissociated. Use x for Administered WithOut Hardware (AWOH) and Computer Telephony
(CTI) stations, as well as for SBS Extensions. -->
<!--IP Indicates that there is no hardware associated with the port
assignment since the switch was set up, and the administrator expects that the
extension would have an IP set. This is automatically entered for certain IP station
Managing Users
138 Administering Avaya Aura ® Session Manager November 2010
Comments? infodev@avaya.com

set types, but you can enter for a DCP set with softphone permissions. This changes
to the s00000 type when the set registers. -->
<xs:element name="port" type="xs:string" maxOccurs="1" minOccurs="0" /
>
<!-- Whether the station should be deleted if it unassigned from the
user. -->
<xs:element name="deleteOnUnassign" type="xs:boolean" maxOccurs="1"
minOccurs="0"/>
<!-- true/false to enable/disable lock messages feature. -->
<xs:element name="lockMessages" type="xs:boolean" maxOccurs="1"
minOccurs="0" />
<!-- A coverage path is a prioritized sequence of extensions to which
your voice system will route an unanswered call. -->
<!-- Valid values: Path Number between 1-2000, time of day table,
t1-t999, or blank. -->
<xs:element name="coveragePath1" maxOccurs="1" minOccurs="0">
<xs:simpleType>
<xs:restriction base="xs:string">
<xs:pattern value="(t[1-9][0-9]{0,2})|([1-9][0-9]{0,2}|
1[0-9]{3}|2000)"/>
</xs:restriction>
</xs:simpleType>
</xs:element>
<!-- A coverage path is a prioritized sequence of extensions to which
your voice system will route an unanswered call. -->
<!-- Valid values: Path Number between 1-2000, time of day table,
t1-t999, or blank. -->
<xs:element name="coveragePath2" maxOccurs="1" minOccurs="0">
<xs:simpleType>
<xs:restriction base="xs:string">
<xs:pattern value="(t[1-9][0-9]{0,2})|([1-9][0-9]{0,2}|
1[0-9]{3}|2000)"/>
</xs:restriction>
</xs:simpleType>
</xs:element>
<!-- The extension the system should hunt to for this telephone when
the telephone is busy. A station hunting chain can be created by assigning a hunt-
to station to a series of telephones. -->
<xs:element name="huntToStation" type="xs:string" maxOccurs="1"
minOccurs="0" />
<!-- Provides for partitioning of attendant groups and/or stations
and trunk groups. -->
<!-- Typically this is used for multiple tenants in a building or
multiple departments within a company or organization. -->
<!-- Valid values: 1 to 100 -->
<xs:element name="tn" maxOccurs="1" minOccurs="0">
<xs:simpleType>
<xs:restriction base="xs:int">
<xs:minInclusive value="0" />
<xs:maxInclusive value="100" />
</xs:restriction>
</xs:simpleType>
</xs:element>
<!-- Typically this is used for multiple tenants in a building or
multiple departments within a company or organization. -->
<!-- Typically this is used for multiple tenants in a building or
multiple departments within a company or organization. -->
<!-- Valid values: 0 to 995 -->
Managing bulk importing and exporting
Administering Avaya Aura® Session Manager November 2010 139

<xs:element name="cor" maxOccurs="1" minOccurs="0">
<xs:simpleType>
<xs:restriction base="xs:int">
<xs:minInclusive value="0"/>
<xs:maxInclusive value="995"/>
</xs:restriction>
</xs:simpleType>
</xs:element>
<!-- Class of Service lets you define groups of users and control
those groups' access to features -->
<!-- Valid values: 1 to 15 -->
<xs:element name="cos" maxOccurs="1" minOccurs="0">
<xs:simpleType>
<xs:restriction base="xs:int">
<xs:minInclusive value="0" />
<xs:maxInclusive value="15" />
</xs:restriction>
</xs:simpleType>
</xs:element>
<xs:element name="tests" type="xs:boolean" maxOccurs="1"
minOccurs="0" />
<xs:element name="dataModule" type="xs:boolean" maxOccurs="1"
minOccurs="0" />
<!-- Controls the behavior of speakerphones. -->
<xs:element name="speakerphone" maxOccurs="1" minOccurs="0">
<xs:simpleType>
<xs:restriction base="xs:string">
<xs:enumeration value="none"/>
<xs:enumeration value="1-way"/>
<xs:enumeration value="2-way"/>
</xs:restriction>
</xs:simpleType>
</xs:element>
<!-- The language that displays on stations -->
<!-- Time of day is displayed in 24-hour format (00:00 - 23:59) for
all languages except English, which is displayed in 12-hour format (12:00 a.m. to
11:59 p.m.). -->
<!-- unicode: Displays English messages in a 24-hour format . If no
Unicode file is installed, displays messages in English by default. -->
<xs:element name="displayLanguage" maxOccurs="1" minOccurs="0">
<xs:simpleType>
<xs:restriction base="xs:string">
<xs:enumeration value="english"/>
<xs:enumeration value="french"/>
<xs:enumeration value="italian"/>
<xs:enumeration value="spanish"/>
<xs:enumeration value="unicode"/>
<xs:enumeration value="user-defined"/>
</xs:restriction>
</xs:simpleType>
</xs:element>
<!-- Defines the personalized ringing pattern for the station.
Personalized Ringing allows users of some telephones to have one
of 8 ringing patterns for incoming calls.
For virtual stations, this field dictates the ringing pattern
on its mapped-to physical telephone.
-->
<!-- L = 530 Hz, M = 750 Hz, and H = 1060 Hz -->
Managing Users
140 Administering Avaya Aura ® Session Manager November 2010
Comments? infodev@avaya.com

<!-- Valid Entries Usage
1 MMM (standard ringing)
2 HHH
3 LLL
4 LHH
5 HHL
6 HLL
7 HLH
8 LHL
-->
<xs:element name="personalizedRingingPattern" maxOccurs="1"
minOccurs="0">
<xs:simpleType>
<xs:restriction base="xs:int">
<xs:minInclusive value="0" />
<xs:maxInclusive value="8" />
</xs:restriction>
</xs:simpleType>
</xs:element>
<!-- The Message Lamp Extension associated with the current extension
-->
<xs:element name="messageLampExt" maxOccurs="1" minOccurs="0">
<xs:simpleType>
<xs:restriction base="xs:string">
<xs:pattern value="[0-9]+([.-][0-9]+)*"/>
</xs:restriction>
</xs:simpleType>
</xs:element>
<!-- Enables or disables the mute button on the station. -->
<xs:element name="muteButtonEnabled" type="xs:boolean" maxOccurs="1"
minOccurs="0" />
<!--
When used with Multi-media Call Handling, indicates which extension
is
assigned to the data module of the multimedia complex. Users can
dial
this extension to place either a voice or a data call, and voice
conversion, coverage, and forwarding apply as if the call were
made to
the 1-number.
-->
<!--
Valid Entry Usage A valid BRI data extension For MMCH, enter the
extension of the data module that is part of this multimedia
complex.
H.323 station extension For 4600 series IP Telephones, enter the
corresponding H.323 station. For IP Softphone, enter the
corresponding
H.323 station. If you enter a value in this field, you can register
this station for either a road-warrior or telecommuter/Avaya IP
Agent
application. blank Leave this field blank for single-connect IP
applications.
-->
<xs:element name="mediaComplexExt" maxOccurs="1" minOccurs="0" >
<xs:simpleType>
<xs:restriction base="xs:string">
<xs:pattern value="[0-9]+([.-][0-9]+)*"/>
</xs:restriction>
</xs:simpleType>
</xs:element>
Managing bulk importing and exporting
Administering Avaya Aura® Session Manager November 2010 141

<!-- Whether this is IP soft phone. -->
<xs:element name="ipSoftphone" type="xs:boolean" maxOccurs="1"
minOccurs="0" />
<!--
Survivable GK Node Name Identifies the existence of other H.323
gatekeepers located within gateway products that offer survivable
call
features. For example, the MultiTech MVPxxx-AV H.323 gateway family
and the SLS function within the H.248 gateways. When a valid IP node
name is entered into this field, Communication Manager adds the IP
address of this gateway to the bottom of the Alternate Gatekeeper
List
for this IP network region. As H.323 IP stations register with
Communication Manager, this list is sent down in the registration
confirm message. This allows the IP station to use the IP address of
this Survivable Gatekeeper as the call controller of last resort to
register with. Available only if the station type is an H.323
station
(46xxor 96xx models).
Valid Entry Usage
Valid IP node name Any valid previously-administered IP
node name.
blank There are no external gatekeeper nodes
within a customer's network. This is the default value.
-->
<xs:element name="survivableGkNodeName" type="xs:string"
maxOccurs="1" minOccurs="0" />
<!--
Sets a level of restriction for stations to be used with the
survivable dial plan to limit certain users to only to certain types
of calls. You can list the restriction levels in order from the most
restrictive to least restrictive. Each level assumes the calling
ability of the ones above it. This field is used by PIM module
of the
Integrated Management to communicate with the Communication Manager
administration tables and obtain the class of service information.
PIM
module builds a managed database to send for Standard Local
Survivability (SLS) on the H.248 gateways. Available for all analog
and IP station types.
Valid Entries Usage
emergency This station can only be used to place
emergency calls.
internal This station can only make intra-switch
calls. This is the default.
local This station can only make calls that are
defined as locl, op, svc, or hnpa in the Survivable Gateway Call Controller's
routing tables.
toll This station can place any national toll
calls that are defined as fnpa or natl on the Survivable Gateway Call Controller's
routing tables.
unrestricted This station can place a call to any number
defined in the Survivable Gateway Call Controller's routing tables. Those strings
marked as deny are also denied to these users.
-->
<xs:element name="survivableCOR" maxOccurs="1" minOccurs="0">
<xs:simpleType>
<xs:restriction base="xs:string">
<xs:enumeration value="emergency"/>
<xs:enumeration value="internal"/>
<xs:enumeration value="local"/>
Managing Users
142 Administering Avaya Aura ® Session Manager November 2010
Comments? infodev@avaya.com

<xs:enumeration value="toll"/>
<xs:enumeration value="unrestricted"/>
</xs:restriction>
</xs:simpleType>
</xs:element>
<!--
Designates certain telephones as not being allowed to receive
incoming
trunk calls when the Media Gateway is in survivable mode. This field
is used by the PIM module of the Integrated Management to
successfully
interrogate the Communication Manager administration tables and
obtain
the class of service information. PIM module builds a managed
database
to send for SLS on the H.248 gateways. Available for all analog
and IP
station types.
Valid Entry Usage
true Allows this station to be an incoming trunk
destination while the Media Gateway is running in survivability mode. This is the
default.
false Prevents this station from receiving
incoming trunk calls when in survivable mode.
-->
<xs:element name="survivableTrunkDest" type="xs:boolean"
maxOccurs="1" minOccurs="0" />
<!-- Enter the complete Voice Mail Dial Up number. -->
<xs:element name="voiceMailNumber" maxOccurs="1" minOccurs="0" >
<xs:simpleType>
<xs:restriction base="xs:string">
<xs:pattern value="[0-9]{0,23}[0-9]|[*]|[#]|~p|~w|~W|~m|
~s"/>
</xs:restriction>
</xs:simpleType>
</xs:element>
<!-- Analog telephones only. -->
<!--
Valid entries Usage
true Enter true if this telephone is not located in
the same building with the system. If you enter true, you must complete R Balance
Network.
false Enter false if the telephone is located in the
same building with the system.
-->
<xs:element name="offPremisesStation" type="xs:boolean" maxOccurs="1"
minOccurs="0" />
<!-- If a second line on the telephone is administered on the I-2
channel, enter analog. Otherwise, enter data module if applicable or none. -->
<xs:element name="dataOption" maxOccurs="1" minOccurs="0">
<xs:simpleType>
<xs:restriction base="xs:string">
<xs:enumeration value="analog"/>
<xs:enumeration value="data-module"/>
<xs:enumeration value="none"/>
</xs:restriction>
</xs:simpleType>
</xs:element>
Managing bulk importing and exporting
Administering Avaya Aura® Session Manager November 2010 143

<xs:element name="displayModule" type="xs:boolean" maxOccurs="1"
minOccurs="0" />
<!-- if led or neon then messageLampExt should be enable otherwise
its blank -->
<xs:element name="messageWaitingIndicator" maxOccurs="1"
minOccurs="0" >
<xs:simpleType>
<xs:restriction base="xs:string">
<xs:enumeration value="led"/>
<xs:enumeration value="neon"/>
<xs:enumeration value="none"/>
</xs:restriction>
</xs:simpleType>
</xs:element>
<!-- Enter true to use this station as an endpoint in a remote office
configuration. -->
<xs:element name="remoteOfficePhone" type="xs:boolean" maxOccurs="1"
minOccurs="0" />
<!-- Defines the source for Leave Word Calling (LWC) messages. -->
<!--
Valid entries Usage
audix If LWC is attempted, the messages are
stored in AUDIX.
spe If LWC is attempted, the messages are stored
in the system processing element (spe).
none If LWC is attempted, the messages are not stored.
-->
<xs:element name="lwcReception" maxOccurs="1" minOccurs="0">
<xs:simpleType>
<xs:restriction base="xs:string">
<xs:enumeration value="audix"/>
<xs:enumeration value="msa"/>
<xs:enumeration value="spe"/>
<xs:enumeration value="none"/>
</xs:restriction>
</xs:simpleType>
</xs:element>
<!--
Enter true to allow internal telephone users to leave short LWC
messages
for this extension. If the system has hospitality, enter true for
guest-room telephones if the extension designated to receive failed
wakeup messages should receive LWC messages that indicate the wakeup
calls failed. Enter true if LWC Reception is audix.
-->
<xs:element name="lwcActivation" type="xs:boolean" maxOccurs="1"
minOccurs="0" />
<xs:element name="lwcLogExternalCalls" type="xs:boolean"
maxOccurs="1" minOccurs="0" />
<xs:element name="cdrPrivacy" type="xs:boolean" maxOccurs="1"
minOccurs="0" />
<xs:element name="redirectNotification" type="xs:boolean"
maxOccurs="1" minOccurs="0" />
<xs:element name="perButtonRingControl" type="xs:boolean"
maxOccurs="1" minOccurs="0" />
<xs:element name="bridgedCallAlerting" type="xs:boolean"
maxOccurs="1" minOccurs="0" />
Managing Users
144 Administering Avaya Aura ® Session Manager November 2010
Comments? infodev@avaya.com

<xs:element name="bridgedIdleLinePreference" type="xs:boolean"
maxOccurs="1" minOccurs="0" />
<xs:element name="confTransOnPrimaryAppearance" type="xs:boolean"
maxOccurs="1" minOccurs="0" />
<xs:element name="customizableLabels" type="xs:boolean" maxOccurs="1"
minOccurs="0" />
<xs:element name="expansionModule" type="xs:boolean" maxOccurs="1"
minOccurs="0" />
<xs:element name="ipVideoSoftphone" type="xs:boolean" maxOccurs="1"
minOccurs="0" />
<xs:element name="activeStationRinging" maxOccurs="1" minOccurs="0">
<xs:simpleType>
<xs:restriction base="xs:string">
<xs:enumeration value="single"/>
<xs:enumeration value="continuous"/>
<xs:enumeration value="if-busy-single"/>
<xs:enumeration value="silent"/>
</xs:restriction>
</xs:simpleType>
</xs:element>
<!-- Defines how call rings to the telephone when it is on-hook. -->
<!--
Valid entries Usage
continuous Enter continuous to cause all calls
to this telephone to ring continuously.
if-busy-single Enter if-busy-single to cause calls
to this telephone to ring continuously when the telephone is off-hook and idle and
calls to this telephone to
receive one ring cycle and then ring
silently when the telephone is off-hook and active.
silent-if-busy Enter silent-if-busy to cause calls
to ring silently when this station is busy.
single Enter single to cause calls to this
telephone to receive one ring cycle and then ring silently.
-->
<xs:element name="idleActiveRinging" type="xs:string" maxOccurs="1"
minOccurs="0" /> <!-- not found in xhtml -->
<!-- Must be set to true when the Type field is set to H.323. -->
<xs:element name="switchhookFlash" type="xs:boolean" maxOccurs="1"
minOccurs="0" />
<!-- If this field is true, the short switch-hook flash (50 to 150)
from a 2500-type set is ignored. -->
<xs:element name="ignoreRotaryDigits" type="xs:boolean" maxOccurs="1"
minOccurs="0" />
<!--
H.320 Conversion — Valid entries are true and false (default).
This field is
optional for non-multimedia complex voice stations and for Basic
multimedia complex voice stations. It is mandatory for Enhanced
multimedia complex voice stations. Because the system can only
handle
a limited number of conversion calls, you might need to limit the
number of telephones with H.320 conversion. Enhanced multimedia
complexes must have this flag set to true.
-->
<xs:element name="h320Conversion" type="xs:boolean"
maxOccurs="1" minOccurs="0" />
<!--
The service link is the combined hardware and software multimedia
Managing bulk importing and exporting
Administering Avaya Aura® Session Manager November 2010 145

connection between an Enhanced mode complex’s H.320 DVC system
and the
Avaya DEFINITY Server which terminates the H.320 protocol. A service
link is never used by a Basic mode complex H.320 DVC system.
Connecting a service link will take several seconds. When the
service
link is connected, it uses MMI, VC and system timeslot resources.
When
the service link is disconnected it does not tie up any resources.
The
Service Link Mode can be administered as either ‘as-needed’ or
‘permanent’ as described below: - As-Needed - Most non-call
center
multimedia users will be administered with this service link
mode. The
as-needed mode provides the Enhanced multimedia complex with a
connected service link whenever a multimedia call is answered by the
station and for a period of 10 seconds after the last multimedia
call
on the station has been disconnected. Having the service link stay
connected for 10 seconds allows a user to disconnect a multimedia
call
and then make another multimedia call without having to wait for the
service link to disconnect and re-establish. - Permanent -
Multimedia
call center agents and other users who are constantly making or
receiving multimedia calls might want to be administered with this
service link mode. The permanent mode service link will be connected
during the station’s first multimedia call and will remain in a
connected state until the user disconnects from their PC’s
multimedia
application or the Avaya DEFINITY Server restarts. This provides a
multimedia user with a much quicker video cut-through when
answering a
multimedia call from another permanent mode station or a multimedia
call that has been early answered. â— Multimedia Mode - There
are two
multimedia modes, Basic and Enhanced, as
-->
<xs:element name="serviceLinkMode" maxOccurs="1" minOccurs="0" >
<xs:simpleType>
<xs:restriction base="xs:string">
<xs:enumeration value="as-needed"/>
<xs:enumeration value="permanent"/>
</xs:restriction>
</xs:simpleType>
</xs:element>
<!--
There are two multimedia modes, Basic and Enhanced, as described
below:
Basic - A Basic multimedia complex consists of a
BRI-connected multimedia-equipped PC and a non-BRI-connected
multifunction telephone set. When in Basic mode, users place voice
calls at the multifunction telephone and multimedia calls from the
multimedia equipped PC. Voice calls will be answered at the
multifunction telephone and multimedia calls will alert first at the
PC and if unanswered will next alert at the voice station if it is
administered with H.320 enabled. A Basic mode complex has limited
multimedia feature capability.
Enhanced - An Enhanced multimedia complex consists of a
BRI-connected multimedia-equipped PC and a non-BRI-connected
multifunction telephone. The Enhanced mode station acts as though
the
PC were directly connected to the multifunction telephone; the
Managing Users
146 Administering Avaya Aura ® Session Manager November 2010
Comments? infodev@avaya.com

service
link provides the actual connection between the Avaya DEFINITY
Server
and the PC. Thus, voice and multimedia calls are originated and
received at the telephone set. Voice and multimedia call status are
also displayed at the telephone set. An Enhanced mode station allows
multimedia calls to take full advantage of most call control
features
-->
<xs:element name="multimediaMode" maxOccurs="1" minOccurs="0" >
<xs:simpleType>
<xs:restriction base="xs:string">
<xs:enumeration value="basic"/>
<xs:enumeration value="enhanced"/>
</xs:restriction>
</xs:simpleType>
</xs:element>
<!-- Controls the auditing or interrogation of a served user’s
message waiting indicator (MWI).
Valid entries Usage
fp-mwi Use if the station is a served user of
an fp-mwi message center.
qsig-mwi Use if the station is a served user of a
qsig-mwi message center.
blank Leave blank if you do not want to audit
the served user’s MWI or
if the user is not a served user of either
an fp-mwi or qsig-mwi message center.
-->
<xs:element name="mwiServedUserType" maxOccurs="1" minOccurs="0" >
<xs:simpleType>
<xs:restriction base="xs:string">
<xs:enumeration value="fp-mwi"/>
<xs:enumeration value="qsig-mwi"/>
<xs:enumeration value="sip-adjunct"/>
</xs:restriction>
</xs:simpleType>
</xs:element>
<!-- The AUDIX associated with the station.
Must contain a user-defined adjunct name that was previously
administered.
-->
<xs:element name="audixName" type="xs:string" maxOccurs="1"
minOccurs="0" />
<!--
Automatic Moves allows a DCP telephone to be unplugged from one
location and moved to a new location without additional
Communication
Manager administration. Communication Manager automatically
associates
the extension to the new port.
**********CAUTION**********
When a DCP telephone is unplugged and
moved to another physical location, the Emergency Location
Extension
field must be changed for that extension or the USA Automatic
Location
Identification data base must be manually updated. If the Emergency
Location Extension field is not changed or if the USA Automatic
Location Identification data base is not updated, the DID number
sent
Managing bulk importing and exporting
Administering Avaya Aura® Session Manager November 2010 147

to the Public Safety Network could send emergency response personnel
to the wrong location.
Valid entries Usage
always Enter always and the DCP telephone can be
moved anytime without
additional administration by unplugging from one
location and plugging
into a new location.
once Enter once and the DCP telephone can be unplugged
and plugged into a
new location once. After a move, the field is
set to done the next time that
routine maintenance runs on the DCP telephone.
Use once when moving a large number of DCP
telephones so each
extension is removed from the move list. Use
once to prevent automatic
maintenance replacement.
no Enter no to require administration in order
to move the DCP telephone.
done Done is a display-only value. Communication
Manager sets the field to
done after the telephone is moved and routine
maintenance runs on the
DCP telephone.
error Error is a display-only value. Communication
Manager sets the field to
error, after routine maintenance runs on the DCP
telephone, when a
non-serialized telephone is set as a movable
telephone.
-->
<xs:element name="automaticMoves" maxOccurs="1" minOccurs="0" >
<xs:simpleType>
<xs:restriction base="xs:string">
<xs:enumeration value="always"/>
<xs:enumeration value="no"/>
<xs:enumeration value="once"/>
</xs:restriction>
</xs:simpleType>
</xs:element>
<!--
Tells Communication Manager how to handle emergency calls from
the IP
telephone.
**********CAUTION**********
An Avaya IP endpoint can dial
emergency calls (for example, 911 calls in the U.S.). It only
reaches
the local emergency service in the Public Safety Answering Point
area
where the telephone system has local trunks. Please be advised
that an
Avaya IP endpoint cannot dial to and connect with local emergency
service when dialing from remote locations that do not have local
trunks. Do not use an Avaya IP endpoint to dial emergency numbers
for
emergency services when dialing from remote locations. Avaya Inc. is
not responsible or liable for any damages resulting from misplaced
emergency calls made from an Avaya endpoint. Your use of this
product
indicates that you have read this advisory and agree to use an
alternative telephone to dial all emergency calls from remote
Managing Users
148 Administering Avaya Aura ® Session Manager November 2010
Comments? infodev@avaya.com

locations. Please contact your Avaya representative if you have
questions about emergency calls from IP telephones. Available
only if
the station is an IP Softphone or a remote office station.
Valid entries Usage
as-on-local Type as-on-local to achieve the
following results:
If the administrator chooses to leave
the Emergency Location
Extension fields (that correspond to
this station's IP address) on
the IP Address Mapping screen blank, the
value as-on-local
sends the extension entered in the
Emergency Location
Extension field in the Station screen
to the Public Safety
Answering Point (PSAP).
If the administrator populates the IP
Address Mapping screen with
emergency numbers, the value as-on-local
functions as follows:
- If the Emergency Location Extension
field in the Station screen
is the same as the Emergency Location
Extension field in the
IP Address Mapping screen, the value as-
on-local sends the
extension to the Public Safety Answering
Point (PSAP).
- If the Emergency Location Extension
field in the Station screen
is different from the Emergency Location
Extension field in the
IP Address Mapping screen, the value as-
on-local sends the
extension in the IP Address Mapping
screen to the Public Safety
Answering Point (PSAP).
block Enter block to prevent the completion
of emergency calls. Use this entry
for users who move around but always
have a circuit-switched telephone
nearby, and for users who are farther
away from the Avaya S8XXX Server
than an adjacent area code served by the
same 911 Tandem office.
When users attempt to dial an emergency
call from an IP Telephone and
the call is blocked, they can dial 911
from a nearby circuit-switched
telephone instead.
cesid Enter cesid to allow Communication
Manager to send the CESID
information supplied by the IP Softphone
to the PSAP. The end user
enters the emergency information into
the IP Softphone.
Use this entry for IP Softphones with
road warrior service that are near
enough to the Avaya S8XXX Server that
an emergency call routed over
Managing bulk importing and exporting
Administering Avaya Aura® Session Manager November 2010 149

the it’s trunk reaches the PSAP that
covers the server or switch.
If the server uses ISDN trunks for
emergency calls, the digit string is the
telephone number, provided that the
number is a local direct-dial number
with the local area code, at the physical
location of the IP Softphone. If the
server uses CAMA trunks for emergency
calls, the end user enters a
specific digit string for each IP Softphone
location, based on advice from
the local emergency response personnel.
option Enter option to allow the user to
select the option (extension, block, or
cesid) that the user selected during
registration and the IP Softphone
reported. Use this entry for extensions
that can be swapped back and
forth between IP Softphones and a telephone
with a fixed location.
The user chooses between block and cesid
on the softphone. A DCP or
IP telephone in the office automatically
selects extension.
-->
<xs:element name="remoteSoftphoneEmergencyCalls" maxOccurs="1"
minOccurs="0" >
<xs:simpleType>
<xs:restriction base="xs:string">
<xs:enumeration value="as-on-local"/>
<xs:enumeration value="block"/>
<xs:enumeration value="cesid"/>
<xs:enumeration value="option"/>
</xs:restriction>
</xs:simpleType>
</xs:element>
<!--
This field allows the system to properly identify the location of a
caller who dials a 911 emergency call from this station. An entry in
this field must be of an extension type included in the dial
plan, but
does not have to be an extension on the local system. It can be a UDP
extension. The entry defaults to blank. A blank entry typically
would
be used for an IP softphone dialing in through PPP from somewhere
outside your network. If you populate the IP Address Mapping screen
with emergency numbers, the feature functions as follows: If the
Emergency Location Extension field in the Station screen is the same
as the Emergency Location Extension field in the IP Address Mapping
screen, the feature sends the extension to the Public Safety
Answering
Point (PSAP). If the Emergency Location Extension field in the
Station
screen is different from the Emergency Location Extension field
in the
IP Address Mapping screen, the feature sends the extension in the IP
Address Mapping screen to the Public Safety Answering Point (PSAP).
-->
<xs:element name="emergencyLocationExt" maxOccurs="1" minOccurs="0" >
<xs:simpleType>
<xs:restriction base="xs:string">
Managing Users
150 Administering Avaya Aura ® Session Manager November 2010
Comments? infodev@avaya.com

<xs:pattern value="[0-9]+([.-][0-9]+)*"/>
</xs:restriction>
</xs:simpleType>
</xs:element>
<!--
A softphone can register no matter what emergency call handling
settings
the user has entered into the softphone. If a softphone dials
911, the
administered Emergency Location Extension is used. The softphone's
user-entered settings are ignored. If an IP telephone dials 911, the
administered Emergency Location Extension is used. If a call center
agent dials 911, the physical station extension is displayed,
overriding the administered LoginID for ISDN Display . Does not
apply
to SCCAN wireless telephones, or to extensions administered as type
h.323.
-->
<xs:element name="alwaysUse" type="xs:boolean" maxOccurs="1"
minOccurs="0" />
<!-- Activates or deactivates Precedence Call Waiting for this station
-->
<xs:element name="precedenceCallWaiting" type="xs:boolean"
maxOccurs="1" minOccurs="0" />
<!--
Enables or disables automatic selection of any idle appearance for
transferred or conferenced calls. Communication Manager first
attempts
to find an idle appearance that has the same extension number as the
call being transferred or conferenced has. If that attempt fails,
Communication Manager selects the first idle appearance.
-->
<xs:element name="autoSelectAnyIdleAppearance"
type="xs:boolean" maxOccurs="1" minOccurs="0" />
<!--
Allows or denies users in the telephone’s Coverage Path to
retrieve
Leave Word Calling (LWC) messages for this telephone. Applies
only if
the telephone is enabled for LWC Reception.
-->
<xs:element name="coverageMsgRetrieval" type="xs:boolean"
maxOccurs="1" minOccurs="0" />
<!--
In EAS environments, the auto answer setting for the Agent LoginID
can
override a station’s setting when an agent logs in.
Valid Entry Usage
all All ACD and non-ACD calls terminated to an
idle station cut through immediately.
Does not allow automatic hands-free answer
for intercom calls. With non-ACD calls,
the set is also rung while the call is cut
through. The ring can be prevented by activating
the ringer-off feature button when the Allow
Ringer-off with Auto-Answer is enabled for the system.
acd Only ACD split /skill calls and direct agent
calls to auto answer. Non-ACD calls terminated to a station ring audibly.
For analog stations, the station is off-hook
and idle, only the ACD split/skill calls and direct agent calls
Managing bulk importing and exporting
Administering Avaya Aura® Session Manager November 2010 151

auto answer; non-ACD calls receive busy
treatment. If the station is active on an ACD call and
a non-ACD call arrives, the Agent receives
call-waiting tone.
none All calls terminated to this station receive
an audible ringing treatment.
icom Allows a telephone user to answer an intercom
call from the same intercom group without pressing the intercom
button.
-->
<xs:element name="autoAnswer" maxOccurs="1" minOccurs="0" >
<xs:simpleType>
<xs:restriction base="xs:string">
<xs:enumeration value="acd"/>
<xs:enumeration value="all"/>
<xs:enumeration value="icom"/>
<xs:enumeration value="none"/>
</xs:restriction>
</xs:simpleType>
</xs:element>
<!--
Enables or disables data restriction that is used to prevent
tones, such as call-waiting tones, from interrupting data calls.
Data restriction provides permanent protection and cannot be
changed by the telephone user. Cannot be assigned if Auto Answer
is administered as all or acd. If enabled, whisper page to this
station is denied.
-->
<xs:element name="dataRestriction" type="xs:boolean" maxOccurs="1"
minOccurs="0" />
<!--
Indicates which call appearance is selected when the user lifts
the handset and there is an incoming call.
Valid Entry Usage
true The user connects to an idle call
appearance instead of the ringing call.
false The Alerting Appearance Preference
is set and the user connects to the ringing call appearance.
-->
<xs:element name="idleAppearancePreference" type="xs:boolean"
maxOccurs="1" minOccurs="0" />
<!--
enable/disable call waiting for this station
-->
<xs:element name="callWaitingIndication" type="xs:boolean"
maxOccurs="1" minOccurs="0" />
<!--
Attendant call waiting allows attendant-originated or attendant-
extended calls to a busy
single-line telephone to wait and sends distinctive call-waiting
tone to the single-line user.
Enable/disable attendant call waiting
-->
<xs:element name="attCallWaitingIndication" type="xs:boolean"
maxOccurs="1" minOccurs="0" />
<!--
Enter true so the telephone can receive the 3 different types
of ringing patterns which identify the type of incoming calls.
Distinctive ringing might not work properly for off-premises
telephones. -->
Managing Users
152 Administering Avaya Aura ® Session Manager November 2010
Comments? infodev@avaya.com

<xs:element name="distinctiveAudibleAlert" type="xs:boolean"
maxOccurs="1" minOccurs="0" />
<!--
Valid Entries Usage
true Restricts the last idle call appearance
used for incoming priority calls and outgoing call originations only.
false Last idle call appearance is used for
incoming priority calls and outgoing call originations.
-->
<xs:element name="restrictLastAppearance" type="xs:boolean"
maxOccurs="1" minOccurs="0" />
<!--
Valid entries Usage
true Analog disconnect signal is sent
automatically to the port after a call terminates. Analog devices
(such as answering machines and
speakerphones) use this signal to turn the devices off after a call terminates.
false Hunt group agents are alerted to incoming
calls. In a hunt group environment, the disconnect
signal blocks the reception of zip tone
and incoming call notification by an auto-answer station when a call
is queued for the station.
-->
<xs:element name="adjunctSupervision" type="xs:boolean" maxOccurs="1"
minOccurs="0" />
<!--
Send Calling Number.
Valid Entries Usage
y All outgoing calls from the station
will deliver the Calling Party Number
(CPN) information as "Presentation Allowed."
n No CPN information is sent for the call
r Outgoing non-DCS network calls from the
station will deliver the Calling
Party Number information as "Presentation
Restricted."
-->
<xs:element name="perStationCpnSendCallingNumber" maxOccurs="1"
minOccurs="0" >
<xs:simpleType>
<xs:restriction base="xs:string">
<xs:enumeration value="r"/>
<xs:enumeration value="n"/>
<xs:enumeration value="y"/>
</xs:restriction>
</xs:simpleType>
</xs:element>
<!--
Appears on the Station screen for analog telephones, only if the
Without Flash field in the
ANALOG BUSY AUTO CALLBACK section of the Feature-Related System
Parameters
screen is set to true. The Busy Auto Callback without Flash field
then defaults to true for all analog
telephones that allow Analog Automatic Callback.
Set true to provide automatic callback for a calling analog
station without flashing the hook.
-->
<xs:element name="busyAutoCallbackWithoutFlash" type="xs:boolean"
maxOccurs="1" minOccurs="0" />
Managing bulk importing and exporting
Administering Avaya Aura® Session Manager November 2010 153

<!-- Provides audible message waiting. -->
<xs:element name="audibleMessageWaiting" type="xs:boolean"
maxOccurs="1" minOccurs="0" />
<!--
Only administrable if Hospitality is enabled on the System
Parameters
Customer-Options (Optional Features) screen. This field affects the
telephone display on calls that originated from a station with
Client
Room Class of Service. Note: For stations with an audix station
type, AUDIX Voice Power ports, or ports for any other type of
messaging that needs display information, Display Client
Redirection
must be enabled.
Set true to redirect information for a call originating from a
Client Room and terminating to this station displays.
-->
<xs:element name="displayClientRedirection" type="xs:boolean"
maxOccurs="1" minOccurs="0" />
<!--
Valid Entries Usage
true Indicates that a station’s line selection
is not to be moved from the currently selected line button
to a different, non-alerting line button.
If you enter true, the line selection on an on-hook station only moves from the last
used line button to a line button with an
audibly alerting call. If there are no alerting calls, the line selection
remains on the button last used for a call.
false The line selection on an on-hook station
with no alerting calls can be moved to a different line button, which might be
serving a different
extension.
-->
<xs:element name="selectLastUsedAppearance" type="xs:boolean"
maxOccurs="1" minOccurs="0" />
<!-- Whether an unanswered forwarded call is provided coverage
treatment. -->
<xs:element name="coverageAfterForwarding" type="xs:string"
maxOccurs="1" minOccurs="0" />
<!-- Allow/disallow direct audio connections between IP endpoints. -->
<xs:element name="directIpIpAudioConnections" type="xs:boolean"
maxOccurs="1" minOccurs="0" />
<!-- Allows IP endpoints to be connected through the server’s IP
circuit pack. -->
<xs:element name="ipAudioHairpinning" type="xs:boolean" maxOccurs="1"
minOccurs="0" />
<xs:element name="primeAppearancePreference" type="xs:string"
maxOccurs="1" minOccurs="0" />
<!-- Elements with complex data type. Please refer the appropriate
elements for more details. -->
<xs:element name="stationSiteData" type="csm:xmlStationSiteData"
maxOccurs="1" minOccurs="0" />
<xs:element name="abbrList"
type="csm:xmlStationAbbreviatedDialingData" maxOccurs="unbounded" minOccurs="0" />
<xs:element name="buttons" type="csm:xmlButtonData" maxOccurs="24"
minOccurs="0" />
<xs:element name="featureButtons" type="csm:xmlButtonData"
Managing Users
154 Administering Avaya Aura ® Session Manager November 2010
Comments? infodev@avaya.com

maxOccurs="24" minOccurs="0" />
<xs:element name="expansionModuleButtons" type="csm:xmlButtonData"
maxOccurs="72" minOccurs="0" />
<xs:element name="softKeys" type="csm:xmlButtonData" maxOccurs="15"
minOccurs="0" />
<xs:element name="displayButtons" type="csm:xmlButtonData"
maxOccurs="unbounded" minOccurs="0" />
<xs:element name="stationDataModule" type="csm:xmlStationDataModule"
maxOccurs="1" minOccurs="0" />
<xs:element name="hotLineData" type="csm:xmlStationHotLineData"
maxOccurs="1" minOccurs="0" />
<xs:element name="nativeName" type="csm:xmlNativeNameData"
maxOccurs="1" minOccurs="0"/>
<!-- Number of button modules -->
<xs:element name="buttonModules" maxOccurs="1" minOccurs="0" >
<xs:simpleType>
<xs:restriction base="xs:int">
<xs:minInclusive value="0" />
<xs:maxInclusive value="3" />
</xs:restriction>
</xs:simpleType>
</xs:element>
<xs:element name="unconditionalInternalDest" maxOccurs="1"
minOccurs="0" >
<xs:simpleType>
<xs:restriction base="xs:string">
<xs:pattern value="[*][0-9]{1,16}[#]|[0123456789]{1,17}
[#]|[*][0-9]{1,17}|[0-9]{1,18}|[*][#]|"/>
</xs:restriction>
</xs:simpleType>
</xs:element>
<xs:element name="unconditionalInternalActive" type="xs:boolean"
maxOccurs="1" minOccurs="0" />
<xs:element name="unconditionalExternalDest" maxOccurs="1"
minOccurs="0" >
<xs:simpleType>
<xs:restriction base="xs:string">
<xs:pattern value="[*][0-9]{1,16}[#]|[0123456789]{1,17}
[#]|[*][0-9]{1,17}|[0-9]{1,18}|[*][#]|"/>
</xs:restriction>
</xs:simpleType>
</xs:element>
<xs:element name="unconditionalExternalActive" type="xs:boolean"
maxOccurs="1" minOccurs="0" />
<xs:element name="busyInternalDest" maxOccurs="1" minOccurs="0" >
<xs:simpleType>
<xs:restriction base="xs:string">
<xs:pattern value="[*][0-9]{1,16}[#]|[0123456789]{1,17}
[#]|[*][0-9]{1,17}|[0-9]{1,18}|[*][#]|"/>
</xs:restriction>
</xs:simpleType>
</xs:element>
<xs:element name="busyInternalActive" type="xs:boolean" maxOccurs="1"
minOccurs="0" />
Managing bulk importing and exporting
Administering Avaya Aura® Session Manager November 2010 155

<xs:element name="busyExternalDest" maxOccurs="1" minOccurs="0" >
<xs:simpleType>
<xs:restriction base="xs:string">
<xs:pattern value="[*][0-9]{1,16}[#]|[0123456789]{1,17}
[#]|[*][0-9]{1,17}|[0-9]{1,18}|[*][#]|"/>
</xs:restriction>
</xs:simpleType>
</xs:element>
<xs:element name="busyExternalActive" type="xs:boolean" maxOccurs="1"
minOccurs="0" />
<xs:element name="noReplyInternalDest" maxOccurs="1" minOccurs="0" >
<xs:simpleType>
<xs:restriction base="xs:string">
<xs:pattern value="[*][0-9]{1,16}[#]|[0123456789]{1,17}
[#]|[*][0-9]{1,17}|[0-9]{1,18}|[*][#]|"/>
</xs:restriction>
</xs:simpleType>
</xs:element>
<xs:element name="noReplyInternalActive" type="xs:boolean"
maxOccurs="1" minOccurs="0" />
<xs:element name="noReplyExternalDest" maxOccurs="1" minOccurs="0" >
<xs:simpleType>
<xs:restriction base="xs:string">
<xs:pattern value="[*][0-9]{1,16}[#]|[0123456789]{1,17}
[#]|[*][0-9]{1,17}|[0-9]{1,18}|[*][#]|"/>
</xs:restriction>
</xs:simpleType>
</xs:element>
<xs:element name="noReplyExternalActive" type="xs:boolean"
maxOccurs="1" minOccurs="0" />
<xs:element name="sacCfOverride" maxOccurs="1" minOccurs="0" >
<xs:simpleType>
<xs:restriction base="xs:string">
<xs:enumeration value="a"/>
<xs:enumeration value="n"/>
<xs:enumeration value="y"/>
</xs:restriction>
</xs:simpleType>
</xs:element>
<xs:element name="lossGroup" maxOccurs="1" minOccurs="0" >
<xs:simpleType>
<xs:restriction base="xs:int">
<xs:minInclusive value="1" />
<xs:maxInclusive value="19" />
</xs:restriction>
</xs:simpleType>
</xs:element>
<xs:element name="timeOfDayLockTable" maxOccurs="1" minOccurs="0" >
<xs:simpleType>
<xs:restriction base="xs:int">
<xs:minInclusive value="1" />
<xs:maxInclusive value="5" />
</xs:restriction>
</xs:simpleType>
</xs:element>
<xs:element name="emuLoginAllowed" type="xs:boolean" maxOccurs="1"
Managing Users
156 Administering Avaya Aura ® Session Manager November 2010
Comments? infodev@avaya.com

minOccurs="0" />
<xs:element name="ec500State" maxOccurs="1" minOccurs="0" >
<xs:simpleType>
<xs:restriction base="xs:string">
<xs:enumeration value="enabled"/>
<xs:enumeration value="disabled"/>
</xs:restriction>
</xs:simpleType>
</xs:element>
<xs:element name="type3pccEnabled" maxOccurs="1" minOccurs="0" >
<xs:simpleType>
<xs:restriction base="xs:string">
<xs:enumeration value="None"/>
<xs:enumeration value="Avaya"/>
</xs:restriction>
</xs:simpleType>
</xs:element>
<xs:element name="sipTrunk" maxOccurs="1" minOccurs="0" >
<xs:simpleType>
<xs:restriction base="xs:string">
<xs:pattern value="aar|ars|[1-9]|[1-9][0-9]|[1-9]([0-9])
{2}|[1]([0-9]){3}|2000"/>
</xs:restriction>
</xs:simpleType>
</xs:element>
<xs:element name="multimediaEarlyAnswer" type="xs:boolean"
maxOccurs="1" minOccurs="0" />
<xs:element name="bridgedApprOrigRestr" type="xs:boolean"
maxOccurs="1" minOccurs="0" />
<xs:element name="callApprDispFormat" maxOccurs="1" minOccurs="0" >
<xs:simpleType>
<xs:restriction base="xs:string">
<xs:enumeration value="inter-location"/>
<xs:enumeration value="intra-location"/>
<xs:enumeration value="disp-param-default"/>
</xs:restriction>
</xs:simpleType>
</xs:element>
<xs:element name="ipPhoneGroupId" maxOccurs="1" minOccurs="0">
<xs:simpleType>
<xs:restriction base="xs:int">
<xs:minInclusive value="0" />
<xs:maxInclusive value="999" />
</xs:restriction>
</xs:simpleType>
</xs:element>
<xs:element name="xoipEndPointType" maxOccurs="1" minOccurs="0" >
<xs:simpleType>
<xs:restriction base="xs:string">
<xs:enumeration value="auto"/>
<xs:enumeration value="fax"/>
<xs:enumeration value="modem"/>
<xs:enumeration value="tty"/>
</xs:restriction>
</xs:simpleType>
</xs:element>
<xs:element name="xid" type="xs:boolean" maxOccurs="1" minOccurs="0" /
Managing bulk importing and exporting
Administering Avaya Aura® Session Manager November 2010 157

>
<xs:element name="stepClearing" type="xs:boolean" maxOccurs="1"
minOccurs="0" />
<xs:element name="fixedTei" type="xs:boolean" maxOccurs="1"
minOccurs="0" />
<xs:element name="tei" maxOccurs="1" minOccurs="0" >
<xs:simpleType>
<xs:restriction base="xs:string">
<xs:pattern value="[0-6][0-3]"/>
</xs:restriction>
</xs:simpleType>
</xs:element>
<xs:element name="countryProtocol" maxOccurs="1" minOccurs="0" >
<xs:simpleType>
<xs:restriction base="xs:string">
<xs:enumeration value="1"/>
<xs:enumeration value="2"/>
<xs:enumeration value="3"/>
<xs:enumeration value="6"/>
<xs:enumeration value="etsi"/>
</xs:restriction>
</xs:simpleType>
</xs:element>
<xs:element name="endptInit" type="xs:boolean" maxOccurs="1"
minOccurs="0" />
<xs:element name="spid" maxOccurs="1" minOccurs="0" >
<xs:simpleType>
<xs:restriction base="xs:string">
<xs:pattern value="[0-9]{1,10}"/>
</xs:restriction>
</xs:simpleType>
</xs:element>
<xs:element name="endptId" maxOccurs="1" minOccurs="0" > <!-- 00 to
62 -->
<xs:simpleType>
<xs:restriction base="xs:string">
<xs:pattern value="[0-6][0-2]"/>
</xs:restriction>
</xs:simpleType>
</xs:element>
<xs:element name="isMCTSignalling" type="xs:boolean" maxOccurs="1"
minOccurs="0" />
<xs:element name="isShortCallingPartyDisplay" type="xs:boolean"
maxOccurs="1" minOccurs="0" />
<xs:element name="passageWay" type="xs:boolean" maxOccurs="1"
minOccurs="0" />
<xs:element name="dtmfOverIp" maxOccurs="1" minOccurs="0" >
<xs:simpleType>
<xs:restriction base="xs:string">
<xs:enumeration value="in-band"/>
<xs:enumeration value="in-band-g711"/>
<xs:enumeration value="out-of-band"/>
</xs:restriction>
</xs:simpleType>
</xs:element>
<xs:element name="location" type="xs:string" maxOccurs="1"
minOccurs="0" />
</xs:sequence>
Managing Users
158 Administering Avaya Aura ® Session Manager November 2010
Comments? infodev@avaya.com

</xs:extension>
</xs:complexContent>
</xs:complexType>
<xs:complexType name="xmlStationSiteData">
<xs:sequence>
<xs:element name="room" maxOccurs="1" minOccurs="0" >
<xs:simpleType>
<xs:restriction base="xs:string">
<xs:maxLength value="10"/>
</xs:restriction>
</xs:simpleType>
</xs:element>
<xs:element name="jack" maxOccurs="1" minOccurs="0" >
<xs:simpleType>
<xs:restriction base="xs:string">
<xs:maxLength value="5"/>
</xs:restriction>
</xs:simpleType>
</xs:element>
<xs:element name="cable" maxOccurs="1" minOccurs="0" >
<xs:simpleType>
<xs:restriction base="xs:string">
<xs:maxLength value="5"/>
</xs:restriction>
</xs:simpleType>
</xs:element>
<xs:element name="floor" type="xs:string" maxOccurs="1" minOccurs="0" />
<xs:element name="building" type="xs:string" maxOccurs="1" minOccurs="0" />
<xs:element name="headset" type="xs:boolean" maxOccurs="1" minOccurs="0" />
<xs:element name="speaker" type="xs:boolean" maxOccurs="1" minOccurs="0" />
<xs:element name="mounting" maxOccurs="1" minOccurs="0" >
<xs:simpleType>
<xs:restriction base="xs:string">
<xs:enumeration value="d"/>
<xs:enumeration value="w"/>
</xs:restriction>
</xs:simpleType>
</xs:element>
<xs:element name="cordLength" maxOccurs="1" minOccurs="0" >
<xs:simpleType>
<xs:restriction base="xs:int">
<xs:minInclusive value="0" />
<xs:maxInclusive value="99" />
</xs:restriction>
</xs:simpleType>
</xs:element>
<xs:element name="setColor" type="xs:string" maxOccurs="1" minOccurs="0" />
</xs:sequence>
</xs:complexType>
<xs:complexType name="xmlStationAbbreviatedDialingData">
<xs:sequence>
<xs:element name="listType" maxOccurs="1" minOccurs="1" >
<xs:simpleType>
<xs:restriction base="xs:string">
<xs:enumeration value="enhanced"/>
<xs:enumeration value="group"/>
Managing bulk importing and exporting
Administering Avaya Aura® Session Manager November 2010 159

<xs:enumeration value="personal"/>
<xs:enumeration value="system"/>
</xs:restriction>
</xs:simpleType>
</xs:element>
<xs:element name="number" type="xs:int" maxOccurs="1" minOccurs="1" />
</xs:sequence>
</xs:complexType>
<xs:complexType name="xmlButtonData">
<xs:sequence>
<xs:element name="number" type="xs:int" maxOccurs="1" minOccurs="1" /><!--
*******Must present****** -->
<xs:element name="type" type="xs:string" maxOccurs="1" minOccurs="1" /><!--
*******Must present****** -->
<xs:element name="data1" type="xs:string" maxOccurs="1" minOccurs="0" />
<xs:element name="data2" type="xs:string" maxOccurs="1" minOccurs="0" />
<xs:element name="data3" type="xs:string" maxOccurs="1" minOccurs="0" />
<xs:element name="data4" type="xs:string" maxOccurs="1" minOccurs="0" />
<xs:element name="data5" type="xs:string" maxOccurs="1" minOccurs="0" />
<xs:element name="data6" type="xs:string" maxOccurs="1" minOccurs="0" />
</xs:sequence>
</xs:complexType>
<xs:complexType name="xmlStationDataModule">
<xs:sequence>
<xs:element name="dataExtension" maxOccurs="1" minOccurs="1" ><!--
*******Must present****** -->
<xs:simpleType>
<xs:restriction base="xs:string">
<xs:pattern value="[0-9]+([.-][0-9]+)*"/>
</xs:restriction>
</xs:simpleType>
</xs:element>
<xs:element name="name" maxOccurs="1" minOccurs="0" >
<xs:simpleType>
<xs:restriction base="xs:string">
<xs:maxLength value="29"/>
</xs:restriction>
</xs:simpleType>
</xs:element>
<xs:element name="cor" maxOccurs="1" minOccurs="1" ><!-- *******Must
present****** -->
<xs:simpleType>
<xs:restriction base="xs:int">
<xs:minInclusive value="0" />
<xs:maxInclusive value="995" />
</xs:restriction>
</xs:simpleType>
</xs:element>
<xs:element name="cos" maxOccurs="1" minOccurs="1" ><!-- *******Must
present****** -->
<xs:simpleType>
<xs:restriction base="xs:int">
<xs:minInclusive value="0" />
<xs:maxInclusive value="15" />
</xs:restriction>
</xs:simpleType>
</xs:element>
<xs:element name="itc" maxOccurs="1" minOccurs="1" ><!-- *******Must
present****** -->
<xs:simpleType>
<xs:restriction base="xs:string">
Managing Users
160 Administering Avaya Aura ® Session Manager November 2010
Comments? infodev@avaya.com

<xs:enumeration value="restricted"/>
<xs:enumeration value="unrestricted"/>
</xs:restriction>
</xs:simpleType>
</xs:element>
<xs:element name="tn" maxOccurs="1" minOccurs="1" ><!-- *******Must
present****** -->
<xs:simpleType>
<xs:restriction base="xs:int">
<xs:minInclusive value="0" />
<xs:maxInclusive value="100" />
</xs:restriction>
</xs:simpleType>
</xs:element>
<xs:element name="listType" maxOccurs="1" minOccurs="0" >
<xs:simpleType>
<xs:restriction base="xs:string">
<xs:enumeration value="enhanced"/>
<xs:enumeration value="group"/>
<xs:enumeration value="personal"/>
<xs:enumeration value="system"/>
</xs:restriction>
</xs:simpleType>
</xs:element>
<xs:element name="listId" type="xs:int" maxOccurs="1" minOccurs="0" />
<xs:element name="specialDialingOption" maxOccurs="1" minOccurs="0" >
<xs:simpleType>
<xs:restriction base="xs:string">
<xs:enumeration value="default"/>
<xs:enumeration value="hot-line"/>
</xs:restriction>
</xs:simpleType>
</xs:element>
<xs:element name="specialDialingAbbrDialCode" maxOccurs="1" minOccurs="0" >
<xs:simpleType>
<xs:restriction base="xs:string">
<xs:maxLength value="4"/>
</xs:restriction>
</xs:simpleType>
</xs:element>
</xs:sequence>
</xs:complexType>
<xs:complexType name="xmlStationHotLineData">
<xs:sequence>
<xs:element name="hotLineDestAbbrevList" maxOccurs="1" minOccurs="0" >
<xs:simpleType>
<xs:restriction base="xs:int">
<xs:minInclusive value="1" />
<xs:maxInclusive value="3" />
</xs:restriction>
</xs:simpleType>
</xs:element>
<xs:element name="hotLineAbbrevDialCode" maxOccurs="1" minOccurs="0" >
<xs:simpleType>
<xs:restriction base="xs:string">
<xs:pattern value="[0-9]*"/>
</xs:restriction>
</xs:simpleType>
</xs:element>
</xs:sequence>
</xs:complexType>
Managing bulk importing and exporting
Administering Avaya Aura® Session Manager November 2010 161

<xs:complexType name="xmlNativeNameData">
<xs:sequence>
<xs:element name="locale" type="xs:string" maxOccurs="1" minOccurs="1" />
<xs:element name="name" maxOccurs="1" minOccurs="1" >
<xs:simpleType>
<xs:restriction base="xs:string">
<xs:maxLength value="27"/>
</xs:restriction>
</xs:simpleType>
</xs:element>
</xs:sequence>
</xs:complexType>
</xs:schema>
Sample XML for bulk importing endpoint profiles
<?xml version="1.0" encoding="UTF-8"?>
<tns:users xmlns:tns="http://xml.avaya.com/schema/import"
xmlns:xsi="http://www.w3.org/2001/XMLSchema-instance"
xsi:schemaLocation="http://xml.avaya.com/schema/import userimport.xsd">
<tns:user>
<authenticationType>BASIC</authenticationType>
<description>description</description>
<displayName>displayname</displayName>
<displayNameAscii>displayNameAscii</displayNameAscii>
<dn>dn</dn>
<isDuplicatedLoginAllowed>true</isDuplicatedLoginAllowed>
<isEnabled>true</isEnabled>
<isVirtualUser>false</isVirtualUser>
<givenName>givenName00</givenName>
<honorific>honorific</honorific>
<loginName>user00_00xyz@avaya.com</loginName>
<middleName>middleName</middleName>
<managerName>managerName</managerName>
<preferredGivenName>preferredGivenName</preferredGivenName>
<preferredLanguage>preferredLanguage</preferredLanguage>
<source>local</source>
<sourceUserKey>sourceUserKey</sourceUserKey>
<status>AUTHPENDING</status>
<suffix>suffix</suffix>
<surname>surname</surname>
<timeZone>timeZone</timeZone>
<title>title</title>
<userName>userName00</userName>
<userPassword>userPassword</userPassword>
<commPassword>commPassword</commPassword>
<userType>ADMINISTRATOR</userType>
<commProfileSet>
<commProfileSetName>
commProfileSetName00
</commProfileSetName>
<isPrimary>true</isPrimary>
<commProfileList>
<commProfile xsi:type="ipt:xmlStationProfile"
xmlns:ipt="http://xml.avaya.com/schema/import_csm_cm">
<commProfileType>CM</commProfileType>
<ipt:cmName>PUIM81</ipt:cmName>
<ipt:useExistingExtension>
false
</ipt:useExistingExtension>
<ipt:extension>7100000</ipt:extension>
<ipt:template>DEFAULT_4620_CM_6_0</ipt:template>
<ipt:setType>4620</ipt:setType>
<ipt:securityCode>78974231</ipt:securityCode>
Managing Users
162 Administering Avaya Aura ® Session Manager November 2010
Comments? infodev@avaya.com

<ipt:port>IP</ipt:port>
<ipt:coveragePath1>1</ipt:coveragePath1>
<ipt:tn>1</ipt:tn>
<ipt:cor>10</ipt:cor>
<ipt:cos>4</ipt:cos>
<ipt:dataModule>false</ipt:dataModule>
<ipt:speakerphone>1-way</ipt:speakerphone>
<ipt:displayLanguage>english</ipt:displayLanguage>
<ipt:ipSoftphone>false</ipt:ipSoftphone>
<ipt:survivableCOR>internal</ipt:survivableCOR>
<ipt:survivableTrunkDest>
true
</ipt:survivableTrunkDest>
<ipt:offPremisesStation>
false
</ipt:offPremisesStation>
<ipt:dataOption>none</ipt:dataOption>
<ipt:displayModule>false</ipt:displayModule>
<ipt:lwcReception>spe</ipt:lwcReception>
<ipt:lwcActivation>true</ipt:lwcActivation>
<ipt:lwcLogExternalCalls>
false
</ipt:lwcLogExternalCalls>
<ipt:cdrPrivacy>false</ipt:cdrPrivacy>
<ipt:redirectNotification>
true
</ipt:redirectNotification>
<ipt:perButtonRingControl>
false
</ipt:perButtonRingControl>
<ipt:bridgedCallAlerting>
false
</ipt:bridgedCallAlerting>
<ipt:bridgedIdleLinePreference>
false
</ipt:bridgedIdleLinePreference>
<!-- <ipt:confTransOnPrimaryAppearance></
ipt:confTransOnPrimaryAppearance>
<ipt:customizableLabels></ipt:customizableLabels> -->
<ipt:expansionModule>true</ipt:expansionModule>
<ipt:ipVideoSoftphone>false</ipt:ipVideoSoftphone>
<ipt:activeStationRinging>
single
</ipt:activeStationRinging>
<!-- <ipt:idleActiveRinging></ipt:idleActiveRinging>
<ipt:switchhookFlash></ipt:switchhookFlash>
<ipt:ignoreRotaryDigits></ipt:ignoreRotaryDigits>-->
<ipt:h320Conversion>false</ipt:h320Conversion>
<ipt:serviceLinkMode>as-needed</ipt:serviceLinkMode>
<ipt:multimediaMode>enhanced</ipt:multimediaMode>
<!-- <ipt:mwiServedUserType></ipt:mwiServedUserType> -->
<!-- <ipt:audixName></ipt:audixName> -->
<!-- <ipt:automaticMoves></ipt:automaticMoves> -->
<ipt:remoteSoftphoneEmergencyCalls>
as-on-local
</ipt:remoteSoftphoneEmergencyCalls>
<!-- <ipt:alwaysUse></ipt:alwaysUse> -->
<ipt:precedenceCallWaiting>
false
</ipt:precedenceCallWaiting>
<ipt:autoSelectAnyIdleAppearance>
false
</ipt:autoSelectAnyIdleAppearance>
<ipt:coverageMsgRetrieval>
true
Managing bulk importing and exporting
Administering Avaya Aura® Session Manager November 2010 163

</ipt:coverageMsgRetrieval>
<ipt:autoAnswer>none</ipt:autoAnswer>
<ipt:dataRestriction>false</ipt:dataRestriction>
<ipt:idleAppearancePreference>
false
</ipt:idleAppearancePreference>
<!-- <ipt:attCallWaitingIndication></
ipt:attCallWaitingIndication> -->
<!-- <ipt:distinctiveAudibleAlert></ipt:distinctiveAudibleAlert>
-->
<ipt:restrictLastAppearance>
true
</ipt:restrictLastAppearance>
<!-- <ipt:adjunctSupervision></ipt:adjunctSupervision> -->
<!-- <ipt:perStationCpnSendCallingNumber></
ipt:perStationCpnSendCallingNumber> -->
<!-- <ipt:busyAutoCallbackWithoutFlash></
ipt:busyAutoCallbackWithoutFlash> -->
<ipt:audibleMessageWaiting>
false
</ipt:audibleMessageWaiting>
<ipt:displayClientRedirection>
false
</ipt:displayClientRedirection>
<ipt:selectLastUsedAppearance>
false
</ipt:selectLastUsedAppearance>
<ipt:coverageAfterForwarding>
system
</ipt:coverageAfterForwarding>
<ipt:directIpIpAudioConnections>
true
</ipt:directIpIpAudioConnections>
<ipt:ipAudioHairpinning>
false
</ipt:ipAudioHairpinning>
<!-- <ipt:primeAppearancePreference></
ipt:primeAppearancePreference> -->
</commProfile>
</commProfileList>
</commProfileSet>
</tns:user>
</tns:users>
XML Schema Definition for bulk importing messaging profiles
<?xml version="1.0" encoding="UTF-8"?>
<xs:schema xmlns:xs="http://www.w3.org/2001/XMLSchema" xmlns:one="http://
xml.avaya.com/schema/import" elementFormDefault="qualified"
targetNamespace="http://xml.avaya.com/schema/import_csm_mm" xmlns:csm="http://
xml.avaya.com/schema/import_csm_mm">
<xs:import namespace="http://xml.avaya.com/schema/import"
schemaLocation="userimport.xsd"/>
<!--Changes in xsd file need to generate jaxb src using this xsd-->
<xs:complexType name="xmlMessagingProfile">
<xs:complexContent>
<xs:extension base="one:xmlCommProfileType" >
<xs:sequence>
<!--
Specifies the messaging system of the subscriber you want
to add.
You can choose this option from the drop-down box.
-->
<xs:element name="messagingName" type="xs:string" maxOccurs="1"
Managing Users
164 Administering Avaya Aura ® Session Manager November 2010
Comments? infodev@avaya.com

minOccurs="1" />
<xs:element name="useExisting" type="xs:boolean" maxOccurs="1"
minOccurs="0"/><!-- use existing -->
<!-- Specifies the messaging template of a subscriber. -->
<xs:element name="messagingTemplate" type="xs:string"
maxOccurs="1" minOccurs="0" />
<xs:element name="mailboxNumber" maxOccurs="1" minOccurs="1" >
<xs:simpleType>
<xs:restriction base="xs:string">
<xs:pattern value="[0-9]{1,10}"/>
</xs:restriction>
</xs:simpleType>
</xs:element>
<!--
Specifies the default password the subscriber must use to
log in to his or her mailbox.
The password can be from one digit in length to a maximum
of 15 digits.
-->
<xs:element name="password" maxOccurs="1" minOccurs="1">
<xs:simpleType>
<xs:restriction base="xs:string">
<xs:pattern value="[0-9]{1,15}"/>
</xs:restriction>
</xs:simpleType>
</xs:element>
<xs:element name="deleteOnUnassign" type="xs:boolean"
maxOccurs="1" minOccurs="0"/>
<!-- follows overrriding subscriber data -->
<!--
The class of service for this subscriber.
The COS controls subscriber access to many features and
provides general settings,
such as mailbox size.
-->
<xs:element name="cos" maxOccurs="1" minOccurs="0" > <!-- MM/CMM
field -->
<xs:simpleType>
<xs:restriction base="xs:string">
<xs:pattern value="[0-9]|[0-9]{2}|[0-4][0-9]{2}|[5]
[0-4][0-9]|[5][5][0-1]"/>
</xs:restriction>
</xs:simpleType>
</xs:element>
<!--
Specifies the default community ID for the subscriber.
Community IDs are used to control message sending and receiving
among groups of subscribers.
The default value is 1.
-->
<xs:element name="communityID" maxOccurs="1" minOccurs="0" >
<!-- MM/CMM field -->
<xs:simpleType>
<xs:restriction base="xs:string">
<xs:pattern value="[0-9]|[0-1][0-5]"/>
</xs:restriction>
</xs:simpleType>
</xs:element>
Managing bulk importing and exporting
Administering Avaya Aura® Session Manager November 2010 165

<!--
Specifies the name that appears before the machine name and
domain in the subscriber's e-mail address.
The machine name and domain are automatically added to the
handle you enter when the subscriber sends or
receives an e-mail.
-->
<xs:element name="emailHandle" maxOccurs="1" minOccurs="0" >
<!-- MM/CMM field -->
<xs:simpleType>
<xs:restriction base="xs:string">
<xs:pattern value="^[a-zA-Z0-9\w\.-]*"/>
</xs:restriction>
</xs:simpleType>
</xs:element>
<!--
Specifies the display name of the subscriber in address book
listings,
such as those for e-mail client applications.
The name you enter can be 1 to 64 characters in length.
-->
<xs:element name="commonName" type="xs:string" maxOccurs="1"
minOccurs="0" /> <!-- MM/CMM field -->
<!--
Specifies one or more alternate number to reach a subscriber.
You can use secondary extensions to specify a telephone
number for direct reception of faxes,
to allow callers to use an existing Caller Application, or to
identify each line appearance on the subscriber's telephone
set if they have different telephone numbers.
-->
<xs:element name="secondaryExtension" maxOccurs="1" minOccurs="0"
> <!-- MM/CMM field -->
<xs:simpleType>
<xs:restriction base="xs:string">
<xs:pattern value="[0-9]{10}"/>
</xs:restriction>
</xs:simpleType>
</xs:element>
<xs:element name="mmSpecific" type="csm:xmlMMSpecific"
maxOccurs="1" minOccurs="0" />
<xs:element name="cmmSpecific" type="csm:xmlCMMSpecific"
maxOccurs="1" minOccurs="0" />
</xs:sequence>
</xs:extension>
</xs:complexContent>
</xs:complexType>
<xs:complexType name="xmlMMSpecific">
<xs:sequence>
<!--
Specifies a unique address in the voice mail network.
The numeric address can be from 1 to 50 digits and can contain the
Mailbox Number.
-->
<xs:element name="numericAddress" maxOccurs="1" minOccurs="0"> <!-- MM
field -->
<xs:simpleType>
<xs:restriction base="xs:string">
<xs:pattern value="([0-9])*"/>
Managing Users
166 Administering Avaya Aura ® Session Manager November 2010
Comments? infodev@avaya.com

</xs:restriction>
</xs:simpleType>
</xs:element>
<!-- The primary telephone extension of the subscriber. -->
<xs:element name="pbxExtension" maxOccurs="1" minOccurs="0" > <!-- MM
field -->
<xs:simpleType>
<xs:restriction base="xs:string">
<xs:pattern value="([+0-9])*"/>
</xs:restriction>
</xs:simpleType>
</xs:element>
<!--
The telephone number of the subscriber as displayed in address book
listings and client applications.
The entry can be a maximum of 50 characters in length and can contain
any combination of
digits (0-9), period (.), hyphen (-), plus sign (+), and left and
right parentheses ([) and (]).
-->
<xs:element name="telephoneNumber" maxOccurs="1" minOccurs="0" > <!--
MM field -->
<xs:simpleType>
<xs:restriction base="xs:string">
<xs:pattern value="([-+\.()0-9])*"/>
</xs:restriction>
</xs:simpleType>
</xs:element>
<!--
If the subscriber name is entered in multi-byte character format,
then this field specifies the ASCII translation of the subscriber name.
-->
<xs:element name="asciiVersionOfName" type="xs:string" maxOccurs="1"
minOccurs="0" /> <!-- MM field -->
<!--
Specifies whether your password expires or not. You can choose one
of the following:
- yes: for password to expire
- no: if you do not want your password to expire
-->
<xs:element name="expirePassword" type="csm:xmlyesNoType" maxOccurs="1"
minOccurs="0"/> <!-- MM field -->
<!--
Specifies whether you want your mailbox to be locked.
A subscriber mailbox can become locked after two unsuccessful login
attempts.
You can choose one of the following:
- no: to unlock your mailbox
- yes: to lock your mailbox and prevent access to it
-->
<xs:element name="mailBoxLocked" type="csm:xmlyesNoType" maxOccurs="1"
minOccurs="0" /> <!-- MM field -->
<!--
Specifies the mailbox number or transfer dial string of the
subscriber's personal operator or assistant.
This field also indicates the transfer target when a caller to this
subscriber presses 0 while listening to the subscriber's greeting.
-->
<xs:element name="personalOperatorMailbox" maxOccurs="1" minOccurs="0">
Managing bulk importing and exporting
Administering Avaya Aura® Session Manager November 2010 167

<!-- MM field -->
<xs:simpleType>
<xs:restriction base="xs:string">
<xs:pattern value="[0-9]+([*#,][0-9]+)*"/>
</xs:restriction>
</xs:simpleType>
</xs:element>
<!--
Specifies when to route calls to the backup operator mailbox.
The default value for this field is Always Active.
-->
<xs:element name="personalOperatorSchedule" type="xs:string"
maxOccurs="1" minOccurs="0" /> <!-- MM field -->
<!--
Specifies the order in which the subscriber hears the voice messages.
You can choose one of the following:
- urgent first then newest: to direct the system to play any
messages marked as urgent prior to playing non-urgent messages. Both the urgent and
non-urgent messages are played in the reverse order of how they were received.
- oldest messages first: to direct the system to play messages
in the order they were received.
- urgent first then oldest: to direct the system to play any
messages marked as urgent prior to playing non-urgent messages. Both the urgent and
non-urgent messages are played in the order of how they were received.
- newest messages first: to direct the system to play messages
in the reverse order of how they were received.
-->
<xs:element name="tuiMessageOrder" maxOccurs="1" minOccurs="0" > <!--
MM field -->
<xs:simpleType>
<xs:restriction base="xs:string">
<xs:enumeration value="urgent first then newest"/>
<xs:enumeration value="oldest messages first"/>
<xs:enumeration value="newest messages first"/>
<xs:enumeration value="urgent first then oldest"/>
</xs:restriction>
</xs:simpleType>
</xs:element>
<!--
Specifies the intercom paging settings for a subscriber. You can
choose one of the following:
- paging is off: to disable intercom paging for this subscriber.
- paging is manual: if the subscriber can modify, with Subscriber
Options or the TUI,
the setting that allows callers to page the
subscriber.
- paging is automatic: if the TUI automatically allows callers
to page the subscriber.
-->
<xs:element name="intercomPaging" maxOccurs="1" minOccurs="0" > <!-- MM
field -->
<xs:simpleType>
<xs:restriction base="xs:string">
<xs:enumeration value="paging is off"/>
<xs:enumeration value="paging is manual"/>
<xs:enumeration value="paging is automatic"/>
</xs:restriction>
</xs:simpleType>
</xs:element>
<!--
Specifies whether a subscriber can receive messages, e-mail messages
Managing Users
168 Administering Avaya Aura ® Session Manager November 2010
Comments? infodev@avaya.com

and call-answer messages from other subscribers.
You can choose one of the following:
- yes: to allow the subscriber to create, forward, and receive
messages.
- no: to prevent the subscriber from receiving call-answer
messages and to hide the subscriber from
the telephone user interface (TUI). The subscriber cannot
use the TUI to access the mailbox, and other TUI users cannot address messages to
the subscriber.
-->
<xs:element name="voiceMailEnabled" type="csm:xmlTrueFalseType"
maxOccurs="1" minOccurs="0" />
<!--
Specifies additional, useful information about a subscriber.
Entries in this field are for convenience and are not used by the
messaging system.
-->
<xs:element name="miscellaneous1" type="csm:xmlLength51Type"
maxOccurs="1" minOccurs="0" />
<!--
Specifies additional, useful information about a subscriber.
Entries in this field are for convenience and are not used by the
messaging system.
-->
<xs:element name="miscellaneous2" type="csm:xmlLength51Type"
maxOccurs="1" minOccurs="0" />
<!--
Specifies additional, useful information about a subscriber.
Entries in this field are for convenience and are not used by the
messaging system.
-->
<xs:element name="miscellaneous3" type="csm:xmlLength51Type"
maxOccurs="1" minOccurs="0" />
<!--
Specifies additional, useful information about a subscriber.
Entries in this field are for convenience and are not used by the
messaging system.
-->
<xs:element name="miscellaneous4" type="csm:xmlLength51Type"
maxOccurs="1" minOccurs="0" />
</xs:sequence>
</xs:complexType>
<xs:complexType name="xmlCMMSpecific">
<xs:sequence>
<!--
Specifies the number of the switch on which this subscriber's
extension is administered.
You can enter "0" through "99", or leave this field blank.
- Leave this field blank if the host switch number should be used.
- Enter a "0" if no message waiting indicators should be sent
for this subscriber.
You should enter 0 when the subscriber does not have a phone
on any switch in the network.
-->
<xs:element name="switchNumber" maxOccurs="1" minOccurs="0" > <!-- CMM
field -->
<xs:simpleType>
<xs:restriction base="xs:string">
<xs:pattern value="[0-9]|[0-9][0-9]"/>
Managing bulk importing and exporting
Administering Avaya Aura® Session Manager November 2010 169

</xs:restriction>
</xs:simpleType>
</xs:element>
<!--
Specifies the Subscriber Account Code.
The Subscriber Account Code is used to create Call Detail Records
on the switch for calls placed by the voice ports.
The value you enter in this field can contain any combination of
digits from 0 to 9.
If an account code is not specified, the system will use the
subscriber's mailbox extension as the account code.
-->
<xs:element name="accountCode" maxOccurs="1" minOccurs="0" > <!-- CMM
field -->
<xs:simpleType>
<xs:restriction base="xs:string">
<xs:pattern value="([0-9])*"/>
</xs:restriction>
</xs:simpleType>
</xs:element>
<!--
Specifies the number to be used as the default destination for the
Transfer Out of Messaging feature.
You can enter 3 to 10 digits in this field depending on the length
of the system's extension, or leave this field blank.
-->
<xs:element name="coveringExtension" maxOccurs="1" minOccurs="0"> <!--
CMM field -->
<xs:simpleType>
<xs:restriction base="xs:string">
<xs:pattern value="[0-9]{10}"/>
</xs:restriction>
</xs:simpleType>
</xs:element>
<!--
Specifies additional, useful information about a subscriber.
Entries in this field are for convenience and are not used by the
messaging system.
-->
<xs:element name="miscellaneous1" type="csm:xmlLength11Type"
maxOccurs="1" minOccurs="0" />
<!--
Specifies additional, useful information about a subscriber.
Entries in this field are for convenience and are not used by the
messaging system.
-->
<xs:element name="miscellaneous2" type="csm:xmlLength11Type"
maxOccurs="1" minOccurs="0" />
<!--
Specifies additional, useful information about a subscriber.
Entries in this field are for convenience and are not used by the
messaging system.
-->
<xs:element name="miscellaneous3" type="csm:xmlLength11Type"
maxOccurs="1" minOccurs="0" />
<!--
Specifies additional, useful information about a subscriber.
Entries in this field are for convenience and are not used by the
messaging system.
Managing Users
170 Administering Avaya Aura ® Session Manager November 2010
Comments? infodev@avaya.com

-->
<xs:element name="miscellaneous4" type="csm:xmlLength11Type"
maxOccurs="1" minOccurs="0" />
</xs:sequence>
</xs:complexType>
<xs:simpleType name="xmlyesNoType">
<xs:restriction base="xs:string">
<xs:enumeration value="Yes" />
<xs:enumeration value="No" />
</xs:restriction>
</xs:simpleType>
<xs:simpleType name="xmlTrueFalseType">
<xs:restriction base="xs:string">
<xs:enumeration value="TRUE" />
<xs:enumeration value="FALSE" />
</xs:restriction>
</xs:simpleType>
<xs:simpleType name="xmlLength11Type">
<xs:restriction base="xs:string">
<xs:maxLength value="11"/>
</xs:restriction>
</xs:simpleType>
<xs:simpleType name="xmlLength51Type">
<xs:restriction base="xs:string">
<xs:maxLength value="51"/>
</xs:restriction>
</xs:simpleType>
</xs:schema>
Sample XML for bulk importing messaging profiles
<?xml version="1.0" encoding="UTF-8"?>
<tns:users xmlns:tns="http://xml.avaya.com/schema/import"
xmlns:xsi="http://www.w3.org/2001/XMLSchema-instance"
xsi:schemaLocation="http://xml.avaya.com/schema/import userimport.xsd">
<tns:user>
<authenticationType>BASIC</authenticationType>
<description>description</description>
<displayName>displayname</displayName>
<displayNameAscii>displayNameAscii</displayNameAscii>
<dn>dn</dn>
<isDuplicatedLoginAllowed>true</isDuplicatedLoginAllowed>
<isEnabled>true</isEnabled>
<isVirtualUser>false</isVirtualUser>
<givenName>givenName00</givenName>
<honorific>honorific</honorific>
<loginName>user00_00xyz@avaya.com</loginName>
<middleName>middleName</middleName>
<managerName>managerName</managerName>
<preferredGivenName>preferredGivenName</preferredGivenName>
<preferredLanguage>preferredLanguage</preferredLanguage>
<source>local</source>
<sourceUserKey>sourceUserKey</sourceUserKey>
<status>AUTHPENDING</status>
<suffix>suffix</suffix>
<surname>surname</surname>
<timeZone>timeZone</timeZone>
<title>title</title>
<userName>userName00</userName>
<userPassword>userPassword</userPassword>
<commPassword>commPassword</commPassword>
Managing bulk importing and exporting
Administering Avaya Aura® Session Manager November 2010 171

<userType>ADMINISTRATOR</userType>
<commProfileSet>
<commProfileSetName>
commProfileSetName00
</commProfileSetName>
<isPrimary>true</isPrimary>
<commProfileList>
<commProfile xsi:type="ipt:xmlMessagingProfile"
xmlns:ipt="http://xml.avaya.com/schema/import_csm_mm">
<commProfileType>Messaging</commProfileType>
<ipt:messagingName>MM-155-187</ipt:messagingName>
<ipt:useExisting>false</ipt:useExisting>
<ipt:messagingTemplate>
DEFAULT_MM_5_2
</ipt:messagingTemplate>
<ipt:mailboxNumber>3201</ipt:mailboxNumber>
<ipt:password>534456346</ipt:password>
<ipt:cos>0</ipt:cos>
<ipt:communityID>1</ipt:communityID>
<ipt:mmSpecific>
<ipt:numericAddress>3201</ipt:numericAddress>
<ipt:pbxExtension>32134</ipt:pbxExtension>
<ipt:telephoneNumber>42342</ipt:telephoneNumber>
<!--<ipt:expirePassword></ipt:expirePassword>-->
<ipt:tuiMessageOrder>1</ipt:tuiMessageOrder>
<ipt:intercomPaging>1</ipt:intercomPaging>
<ipt:voiceMailEnabled>
FALSE
</ipt:voiceMailEnabled>
<ipt:miscellaneous1>
Miscellaneous
</ipt:miscellaneous1>
</ipt:mmSpecific>
</commProfile>
</commProfileList>
</commProfileSet>
</tns:user>
</tns:users>
Attribute details defined in Import user XSD
Attribute Attribute Description Mandatory/
Optional Validation
Constraints
authenticationTyp
eThis defines the type of
authentication the user
undergoes at runtime to
obtain access to the
system.
Mandatory Possible values:
• BASIC
• ENTERPRISE
description This is a text description of
the user; a human
readable description of this
user instance.
Optional
displayName This is the localized name
of the user to be used Optional
Managing Users
172 Administering Avaya Aura ® Session Manager November 2010
Comments? infodev@avaya.com

Attribute Attribute Description Mandatory/
Optional Validation
Constraints
when displaying. It will
typically be the localized
full name. This value may
be provisioned from the
user’s enterprise directory
entry. If it does not exist,
synchronization rules can
be used to populate it for
other fields. For example:
Surname, GivenName, or
LoginName.
displayNameAsci
iThis is the full text name of
the user represented in
ASCII. It is used to support
display (e.g. endpoints)
that cannot handle
localized text.
Optional
dn This is the distinguished
name (DN) of the user. DN
is a sequence of relative
distinguished names
(RDN) connected by
commas. RDN is an
attribute with an
associated value in the
form of attribute=value,
typically expressed in a
UTF-8 string format. DN
can be used to identify the
user and may be used for
authentication subject
mapping. Note that DN is
changeable.
Optional
isDuplicatedLogi
nAllowed This is a boolean indicator
showing whether this user
is allowed a duplicate
concurrent logins. A true
stipulates that the user is
allow to have duplicate
logins.
Optional Default value is
true.
isEnabled This is a boolean indicator
showing whether or not the
user is active. Users with
AuthenticationType=Basic
will fail if this value is false.
This attribute can be used
Optional Default value is
false.
Managing bulk importing and exporting
Administering Avaya Aura® Session Manager November 2010 173

Attribute Attribute Description Mandatory/
Optional Validation
Constraints
to disable access between
login attempts. A running
session’s login will not be
revocable. Alternatively,
the administrator can
always modify the
password to disable the
user from logging in. A true
stipulates this is an active
user, a false used for a
disabled user.
isVirtualUser A boolean indicator
showing whether or not the
record is being used for a
non-human entity such as
an application, service,
software agent, etc. This is
to be used where the entity
will behave as a user and
needs to have subset of
the user profile populated.
If the entity does not
behave as a user and has
a different trust
relationship e.g. a trust
certificate it should not be
treated as a virtual user. A
virtual user can represent
an Avaya or an external
non-human entity. This
attribute is provided as a
convenience to track such
accounts. A true stipulates
this is a virtual users, a
false is used for human
users.
Optional Default value is
false.
givenName This is the first name of the
user. Mandatory
honorific This is the personal title
used to address a user.
This is typically a social
title and not the work title
which is contained in the
title attribute. This attribute
can map to
"PersonalTitle".
Optional
Managing Users
174 Administering Avaya Aura ® Session Manager November 2010
Comments? infodev@avaya.com

Attribute Attribute Description Mandatory/
Optional Validation
Constraints
loginName This is the unique system
login name given to the
user. It can take the form of
username@domain or just
username. This may vary
across customers. It can
be used to help provision
default user handles in the
CSHandle table. The
username is an
alphanumeric value that
must comply with the
userinfo related portion of
a URI as described in
rfc2396. However, it is
further restricted as ASCII
characters with only the "_"
and "." special characters
supported. This is the
rfc2798 "uid" attribute.
Mandatory
middleName This is the middle name of
the user. Optional
managerName This is the text name of the
user’s manager. This is a
free formed field and does
not require the user’s
manager to also be a user
of the solution. This
attribute was requested to
support reporting needs.
Optional
preferredGivenN
ame This is the preferred first
name of the user. Optional
preferredLangua
ge This is the individual's
preferred written or spoken
language.Values will
conform to rfc4646. Refer
to rfc4646 for syntax. This
format uses the ISO
standard Language
(ISO-639) and region
(ISO-3166) codes In the
absence of a value the
client’s locale should be
used, if no value is set, en-
US should be defaulted.
Optional
Managing bulk importing and exporting
Administering Avaya Aura® Session Manager November 2010 175

Attribute Attribute Description Mandatory/
Optional Validation
Constraints
source Free format text field that
identifies the entity that
created this user record.
The format of this field will
be either a IP Address/Port
or a name representing an
enterprise LDAP or
Avaya.
Optional User Management
will populate the
source field with the
name of the file.
sourceUserKey This is the key of the user
from the source system. If
the source is an Enterprise
Active Directory server,
this value with be the
objectGUID.
Optional By default the value
for will be “none”
status This information is to help
manage provisioning
activities such as
correcting or completing
the provisioning of a user
instance. It can also signify
that approval is needed
(PENDINGAUTHZ) before
a user account is
sufficiently configured to
be a valid user
(PROVISIONED).
Optional Possible Values:
AUTHPENDING;
PENDINGAUTHZ;
PROVISIONED
suffix This is the text appended
to a name e.g. Jr., III. Optional
surname This is the user's last
name, also called the
family name.
Mandatory
timeZone This is the preferred time
zone of the user. For
example: America/
New_York, Europe/
Dublin.The application
consuming this
information would need to
know how to translate e.g.
in Java it would be
TimeZone.getTimeZone("
Europe/Moscow");In the
absence of a value the
local services timezone
will be used.
Optional (-12:0)International
Date Line West
(-11:0)Midway
Island, Samoa
(-10:0)Hawaii
(-9:0)Alaska
(-8:0)Pacific Time
(US & Canada);
Tijuana
(-7:0)Mountain
Time (US &
Canada);
Chihuahua, La Paz
(-7:0)Arizona
Managing Users
176 Administering Avaya Aura ® Session Manager November 2010
Comments? infodev@avaya.com

Attribute Attribute Description Mandatory/
Optional Validation
Constraints
Note:
You need to consider
Daylight saving time
(DST) and summer time
adjustments while using
the suggested values
for timeZone. Typically
you have to add one
hour to the offset.
Note:
The following
characters cannot be
used as is in the xml.
Modify these characters
as mentioned while
using them in the import
xml files:
• less-than character
(<) as < <
• ampersand character
(&) as &
• greater-than
character (>) as >
• double-quote
character (") as
"
• apostrophe or single-
quote character (') as
'
(-6:0)Central Time
(US & Canada);
Guadalajara,
Mexico City
(-6:0)Central
America;
Saskatchewan
(-5:0)Indiana (East);
Bogota, Lima, Quito
(-5:0)Eastern Time
(US & Canada)
(-4:0)Caracas, La
Paz
(-4:0)Atlantic Time
(Canada); Santiago,
Manaus
(-3:30)Newfoundlan
d
(-3:0)Georgetown
(-3:0)Brasilia,
Greenland, Buenos
Aires, Montevideo
(-2:0)Mid-Atlantic
(-1:0)Azores
(-1:0)Cape Verde
Is.
(0:0)Monrovia,
Reykjavik
(0:0)GMT : Dublin,
Edinburgh, Lisbon,
London,
Casablanca
(+1:0)West Central
Africa
(+1:0)Amsterdam,
Berlin, Rome,
Belgrade, Prague,
Brussels, Sarajevo
(+2:0)Harare,
Pretoria
(+2:0)Amman,
Athens, Minsk,
Beirut, Cairo,
Jerusalem, Helsinki,
Windhoek
(+3:0)Baghdad,
Kuwait, Riyadh,
Nairobi, Tbilisi
Managing bulk importing and exporting
Administering Avaya Aura® Session Manager November 2010 177

Attribute Attribute Description Mandatory/
Optional Validation
Constraints
(+3:0)Moscow, St.
Petersburg,
Volgograd
(+3:30)Tehran
(+4:0)Abu Dhabi,
Muscat, Caucasus
Standard Time
(+4:0)Baku, Tbilisi,
Yerevan
(+4:30)Kabul
(+5:0)Islamabad,
Karachi, Tashkent,
Ekaterinburg
(+5:30)Chennai,
Kolkata, Mumbai,
New Delhi, Sri
Jayawardenepura
(+5:45)Kathmandu
(+6:0)Astana,
Dhaka, Almaty,
Novosibirsk
(+6:30)Rangoon
(+7:0)Bangkok,
Hanoi, Jakarta,
Krasnoyarsk
(+8:0)Beijing, Hong
Kong, Singapore;
Taipei
(+8:0)Perth; Irkutsk,
Ulaan Bataar
(+9:0)Seoul, Osaka,
Sapporo, Tokyo
(+9:0)Yakutsk
(+9:30)Darwin,
Adelaide
(+10:0)Brisbane,
Guam, Port
Moresby
(+10:0)Canberra,
Melbourne, Sydney,
Hobart, Vladivostok
(+11:0)Magadan,
Solomon Is., New
Caledonia
(+12:0)Auckland,
Wellington
Managing Users
178 Administering Avaya Aura ® Session Manager November 2010
Comments? infodev@avaya.com

Attribute Attribute Description Mandatory/
Optional Validation
Constraints
(+12:0)Fiji,
Kamchatka,
Marshall Is.
(+13:0)Nuku'alofa
title This is the job function of a
person in their
organizational context.
Optional
userName This is the username
portion of the loginName
field. It is an alphanumeric
value that must comply
with the userinfo related
portion of a URI as
described in rfc2396.
However, it is further
restricted as ASCII
characters with only the "_"
and "." special characters
supported. This is the
rfc2798 "uid" attribute.
Mandatory
userPassword This is the encrypted
password for this user's
account.A null password is
used when the user is
authenticated by the
enterprise such as with a
separate source such as
the enterprise LDAP.
Optional Need not specified
value for Enterprise
User.If the value is
not specified for the
Basic user, the user
will be disabled.
commPassword This is the encrypted
“subscriber” or
communication password
with which the user logs
can use to authentication
with on to any
CommProfile SIP and non
SIP. This attribute is meant
to be a shared across
different communication
profiles and thus different
communication services.
Optional
userType This enumerates the
possible primary user
application types. A User
can be associated with
multiple user types.
Optional Possible values are
administrator,
communication_us
er, agent,
supervisor,
Managing bulk importing and exporting
Administering Avaya Aura® Session Manager November 2010 179

Attribute Attribute Description Mandatory/
Optional Validation
Constraints
resident_expert,
service_technician,
lobby_phone
roles This is the text name of a
role. This value needs to
pre-exist in SMGR DB.
Optional
address This is the address of the
user. Optional
securityIdentity This is the SecurityIdentity
is used to hold any
additional identities for a
user that can be used for
authentication such as
their loginName, Kerberos
account name, or their
X509 certificate name.
Optional
ownedContactLis
ts It is a collection of internal
or external contacts.
ContactList is owned by a
specific user and has a
name that a unique name
within the context of its
owner.
Optional A default contactlist
per user will be
created.
ownedContacts It represents a non Avaya
application user (external)
contact. Contacts can be
collected together along
with User entities into a
contact list. Contacts can
be created by an
administrator or an end
user.
Optional
presenceUserDef
ault These are personal rules
that are set by presentities
to define how much
presence information can
be shown to watchers that
are not explicitly
mentioned in an ACL.
There may be one User
Default rule per presentity
(User), or none.
Optional
presenceUserAC
LThese are personal rules
defined by presentities Optional
Managing Users
180 Administering Avaya Aura ® Session Manager November 2010
Comments? infodev@avaya.com

Attribute Attribute Description Mandatory/
Optional Validation
Constraints
themselves on who can
monitor their presence
information. There may be
several entries in the list for
a given presentity, each
entry corresponding to one
watcher.
presenceUserCL
Default This is a personal rule that
is set by presentities to
define how much presence
information can be shown
to watchers that belong to
the user’s contact list.
There may be one User
Contact List Default rule
per presentity (Person) or
none.
Optional
commProfileSet A user will have a default
Commprofile set.A
commprofile set can exist
without any handles or
commprofiles referencing
it. I.e. you can create a
commprofile set without
needing to also create
either a handle or a
commprofile.A
commprofile set can
contain multiple
commprofiles, but only one
of each specific type. This
is enforced by having the
CommProfile uniqueness
constraint include type,
commprofile_set_id.
Optional A user will have a
default commprofile
set.
Attribute details defined in Delete User XSD
Attribute Attribute
description Mandatory/Optional Validation
constraints
deleteType This defines the
delete type of the
user. If the user
Mandatory Possible values:
Managing bulk importing and exporting
Administering Avaya Aura® Session Manager November 2010 181

Attribute Attribute
description Mandatory/Optional Validation
constraints
selects “soft”, the
user record is not
permanently deleted
and the user record
can be recovered. If
the user selects
“delete”, all attributes
associated with the
user and the links to
public contacts and
shared addresses is
permanently
deleted.
• soft
• delete
loginName This is the unique
system login name
assigned to the user
in the format of
username@domain
or username.
Mandatory
id This is the unique
identifier for a user
record. This field is
optional. This is
added in XSD for
future enhancement.
This is not used in
System Manager 6.0
release.
Optional In earlier version of
System Manager 6.0,
the id tag was not
optional. In case of
an error such
as,“Failed to parse
XML user:
cvccomplex-
type.2.4.b: The
content of element
'tns:user' is not
complete. One of
'{"http://
xml.avaya.com/
schema/bulkdelete":
id}' is expected.
Invalid XML file”, use
a dummy value for
the id “1234”.
Managing Users
182 Administering Avaya Aura ® Session Manager November 2010
Comments? infodev@avaya.com

Attribute details defined in the Endpoint profile XSD
Attribute details defined in the Endpoint profile XSD
Attribute Attribute
Description Mandator y/
Optional Validation
Constraints
CM Name
cmName CM Name as it
appears under
'Applications/
Application
Management/
Entities
Mandatory
Use Existing
Extension
useExistingExtensio
n
'true' if already
created extension is
to be used. 'false' if
available extension is
to be used.
Optional
Template Name
template Template name to be
used to create
station. Values
defined in Template
will be used if not
provided.
Optional
Set Type
setType Specifies the set type
of the station Optional
Port
port Valid values for port Optional 01 to 64 First and
second numbers are
the cabinet number A
to E Third character
is the carrier 01 to 20
Fourth and fifth
characters are the
slot number 01 to 32
Sixth and seventh
characters are the
circuit number x or X
Indicates that there is
no hardware
associated with the
port assignment
since the switch was
set up, and the
administrator
expects that the
extension would
Managing bulk importing and exporting
Administering Avaya Aura® Session Manager November 2010 183

Attribute Attribute
Description Mandator y/
Optional Validation
Constraints
have a non-IP set.
Or, the extension had
a non-IP set, and it
dissociated. Use x for
Administered
WithOut Hardware
(AWOH) and
Computer Telephony
(CTI) stations, as well
as for SBS
Extensions. IP
Indicates that there is
no hardware
associated with the
port assignment
since the switch was
set up, and the
administrator
expects that the
extension would
have an IP set. This
is automatically
entered for certain IP
station set types, but
you can enter for a
DCP set with
softphone
permissions. This
changes to the
s00000 type when
the set registers.
Delete station is
unassigned
deleteOnUnassign
Whether the station
should be deleted if it
unassigned from the
user.
Optional
Lock messages
feature.
lockMessages
Enable/ Disable lock
messages feature. Optional true/false to enable/
disable lock
messages feature.
Coverage Path 1
coveragePath1 A coverage path is a
prioritized sequence
of extensions to
which your voice
system will route an
unanswered call.
Optional Valid values: Path
Number between
1-2000, time of day
table, t1-t999, or
blank.
Coverage Path 2 A coverage path is a
prioritized sequence Optional Valid values: Path
Number between
Managing Users
184 Administering Avaya Aura ® Session Manager November 2010
Comments? infodev@avaya.com

Attribute Attribute
Description Mandator y/
Optional Validation
Constraints
of extensions to
which your voice
system will route an
unanswered call.
1-2000, time of day
table, t1-t999, or
blank.
Hunt To Station
huntToStation The extension the
system should hunt
to for this telephone
when the telephone
is busy. A station
hunting chain can be
created by assigning
a hunt-to station to a
series of telephones.
Optional
Tenant Number
tn Provides for
partitioning of
attendant groups
and/or stations and
trunk groups.
Typically this is used
for multiple tenants in
a building or multiple
departments within a
company or
organization.
Optional Valid values: 1 to 100
Class of Restriction
cor This is used for
multiple tenants in a
building or multiple
departments within a
company or
organization.
This is used for
multiple tenants in a
building or multiple
departments within a
company or
organization.
Optional Valid values: 0 to 995
Class of Service
cos Class of Service lets
you define groups of
users and control
those groups' access
to features.
Optional Valid values: 1 to 15
speakerphone Controls the behavior
of speakerphones. Optional Valid values : none,
1-way, 2-way
Display Language
displayLanguage The language that
displays on stations. Optional Time of day is
displayed in 24- hour
Managing bulk importing and exporting
Administering Avaya Aura® Session Manager November 2010 185

Attribute Attribute
Description Mandator y/
Optional Validation
Constraints
format (00:00 -
23:59) for all
languages except
English, which is
displayed in 12-hour
format (12:00 a.m. to
11:59 p.m.). unicode:
Displays English
messages in a 24-
hour format . If no
Unicode file is
installed, displays
messages in English
by default.
Personalized
Ringing Pattern
personalizedRinging
Pattern
Defines the
personalized ringing
pattern for the
station.
Personalized
Ringing allows users
of some telephones
to have one of 8
ringing patterns for
incoming calls.
For virtual stations,
this field dictates the
ringing pattern on its
mapped to physical
telephone.
L = 530 Hz, M = 750
Hz, and H = 1060 Hz
Valid Entries Usage:
1. MMM (standard
ringing)
2. HHH
3. LLL
4. LHH
5. HHL
6. HLL
7. HLH
8. LHL
Message Lamp
Extension
messageLampExt
The Message Lamp
Extension
associated with the
current extension.
Optional
muteButtonEnabled Enables or disables
the mute button on
the station.
Media Complex
Extension
mediaComplexExt
When used with
Multi-media Call
Handling, indicates
which extension is
assigned to the data
module of the
multimedia complex.
Users can dial this
extension to place
Optional Valid Entry Usage A
valid BRI data
extension For
MMCH, enter the
extension of the data
module that is part of
this multimedia
complex.
Managing Users
186 Administering Avaya Aura ® Session Manager November 2010
Comments? infodev@avaya.com

Attribute Attribute
Description Mandator y/
Optional Validation
Constraints
either a voice or a
data call, and voice
conversion,
coverage, and
forwarding apply as if
the call were made to
the 1-number.
H.323 station
extension For 4600
series IP
Telephones, enter
the corresponding
H.323 station. For IP
Softphone, enter the
corresponding H.323
station. If you enter a
value in this field, you
can register this
station for either a
road-warrior or
elecommuter/Avaya
IP Agent application.
blank Leave this field
blank for single-
connect IP
applications.
IP Softphone
ipSoftphone Whether this is IP
soft phone. Optional
Servivable GK Node
Name
survivableGkNodeN
ame
Survivable GK Node
Name Identifies the
existence of other
H.323 gatekeepers
located within
gateway products
that offer survivable
call features. For
example, the
MultiTech MVPxxx-
AV H.323 gateway
family and the SLS
function within the
H.248 gateways.
When a valid IP node
name is entered into
this field,
Communication
Manager adds the IP
address of this
gateway to the
bottom of the
Alternate
Gatekeeper List for
this IP network
region. As H.323 IP
Optional Valid Entry Usage
Valid IP node name
Any valid previously-
administered IP node
name.
Managing bulk importing and exporting
Administering Avaya Aura® Session Manager November 2010 187

Attribute Attribute
Description Mandator y/
Optional Validation
Constraints
stations register with
Communication
Manager, this list is
sent down in the
registration confirm
message. This
allows the IP station
to use the IP address
of this Survivable
Gatekeeper as the
call controller of last
resort to register with.
Available only if the
station type is an
H.323 station (46xxor
96xx models).
Survivable class of
restriction
survivableCOR
Sets a level of
restriction for stations
to be used with the
survivable dial plan
to limit certain users
to only to certain
types of calls. You
can list the restriction
levels in order from
the most restrictive to
least restrictive. Each
level assumes the
calling ability of the
ones above it. This
field is used by PIM
module of the
Integrated
Management to
communicate with
the Communication
Manager
administration tables
and obtain the class
of service
information. PIM
module builds a
managed database
to send for Standard
Local Survivability
(SLS) on the H.248
gateways. Available
Optional Valid Entries Usage
emergency - This
station can only be
used to place
emergency calls.
Internal - This station
can only make intra-
switch calls. This is
the default.
local - This station
can only make calls
that are defined as
locl, op, svc, or hnpa
in the Survivable
Gateway Call
Controller's routing
tables.
toll - This station can
place any national
toll calls that are
defined as fnpa or
natl on the
Survivable Gateway
Call Controller's
routing tables.
unrestricted - This
station can place a
call to any number
defined in the
Survivable Gateway
Call Controller's
Managing Users
188 Administering Avaya Aura ® Session Manager November 2010
Comments? infodev@avaya.com

Attribute Attribute
Description Mandator y/
Optional Validation
Constraints
for all analog and IP
station types. routing tables. Those
strings marked as
deny are also denied
to these users.
Survivable Trunk
Destination
survivableTrunkDest
Designates certain
telephones as not
being allowed to
receive incoming
trunk calls when the
Media Gateway is in
survivable mode.
This field is used by
the PIM module of
the Integrated
Management to
successfully
interrogate the
Communication
Manager
administration tables
and obtain the class
of service
information. PIM
module builds a
managed database
to send for SLS on
the H.248 gateways.
Available for all
analog and IP station
types.
Optional Valid Entry Usage:
true - Allows this
station to be an
incoming trunk
destination while the
Media Gateway is
running in
survivability mode.
This is the default.
false - Prevents this
station from receiving
incoming trunk calls
when in survivable
mode.
Voice Mail Number
voiceMailNumber Enter the complete
Voice Mail Dial Up
number.
Optional String
offPremisesStation Analog telephones
only. Optional Valid entries Usage:
• true - Enter true if
this telephone is
not located in the
same building with
the system. If you
enter true, you
must complete R
Balance Network.
•false - Enter false if
the telephone is
located in the same
Managing bulk importing and exporting
Administering Avaya Aura® Session Manager November 2010 189

Attribute Attribute
Description Mandator y/
Optional Validation
Constraints
building with the
system.
•
dataOption If a second line on the
telephone is
administered on the
I-2 channel, enter
analog. Otherwise,
enter data module if
applicable or none.
Optional Valid entries analog,
none.
Message Waiting
Indicator
messageWaitingIndi
cator
If led or neon, then
messageLampExt
should be enable
otherwise its blank.
Optional Valid entries: led,
neon, none.
remoteOfficePhone Enter true to use this
station as an
endpoint in a remote
office configuration.
Optional Valid entries:
• audix - If LWC is
attempted, the
messages are
stored in AUDIX.
• spe - If LWC is
attempted, the
messages are
stored in the
system processing
element (spe).
• none - If LWC is
attempted, the
messages are not
stored.
lwcActivation Enter true to allow
internal telephone
users to leave short
LWC messages for
this extension. If the
system has
hospitality, enter true
for guest-room
telephones if the
extension
designated to receive
failed wakeup
messages should
receive LWC
Optional Boolean
Managing Users
190 Administering Avaya Aura ® Session Manager November 2010
Comments? infodev@avaya.com

Attribute Attribute
Description Mandator y/
Optional Validation
Constraints
messages that
indicate the wakeup
calls failed. Enter
true if LWC
Reception is audix.
activeStationRinging Active station
Ringing Optional Valid entries:
• single
• continuous
• if-busy-single
• silent
idleActiveRinging Defines how call
rings to the
telephone when it is
on-hook.
Optional Valid entries
• continuous - Enter
continuous to
cause all calls to
this telephone to
ring continuously.
• if-busy-single -
Enter if-busysingle
to cause calls to
this telephone to
ring continuously
when the
telephone is off-
hook and idle and
calls to this
telephone to
receive one ring
cycle and then ring
silently when the
telephone is off-
hook and active.
• silent-if-busy -
Enter silent-if-busy
to cause calls to
ring silently when
this station is busy.
• single - Enter
single to cause
calls to this
telephone to
receive one ring
cycle and then ring
silently.
Managing bulk importing and exporting
Administering Avaya Aura® Session Manager November 2010 191

Attribute Attribute
Description Mandator y/
Optional Validation
Constraints
switchhookFlash Must be set to true
when the Type field is
set to H.323
Optional Boolean
ignoreRotaryDigits If this field is true, the
short switch-hook
flash (50 to 150) from
a 2500-type set is
ignored.
Optional Boolean
h320Conversion H.320 Conversion —
Valid entries are true
and false (default).
This field is optional
for non-multimedia
complex voice
stations and for Basic
multimedia complex
voice stations. It is
mandatory for
Enhanced
multimedia complex
voice stations.
Because the system
can only handle a
limited number of
conversion calls, you
might need to limit
the number of
telephones with
H.320 conversion.
Enhanced
multimedia
complexes must
have this flag set to
true.
Optional Boolean
serviceLinkMode The service link is the
combined hardware
and software
multimedia
connection between
an Enhanced mode
complex’s H.320
DVC system and the
Avaya DEFINITY
Server which
terminates the H.320
protocol. A service
Optional Valid entries as-
needed permenant
Managing Users
192 Administering Avaya Aura ® Session Manager November 2010
Comments? infodev@avaya.com

Attribute Attribute
Description Mandator y/
Optional Validation
Constraints
link is never used by
a Basic mode
complex H.320 DVC
system. Connecting
a service link will take
several seconds.
When the service link
is connected, it uses
MMI, VC and system
timeslot resources.
When the service link
is disconnected it
does not tie up any
resources. The
Service Link Mode
can be administered
as either ‘as-needed’
or ‘permanent’ as
described below: -
As- Needed - Most
non-call center
multimedia users will
be administered with
this service link
mode. The as-
needed mode
provides the
Enhanced
multimedia complex
with a connected
service link
whenever a
multimedia call is
answered by the
station and for a
period of 10 seconds
after the last
multimedia call on
the station has been
disconnected.
Having the service
link stay connected
for 10 seconds
allows a user to
disconnect a
multimedia call and
then make another
multimedia call
Managing bulk importing and exporting
Administering Avaya Aura® Session Manager November 2010 193

Attribute Attribute
Description Mandator y/
Optional Validation
Constraints
without having to wait
for the service link to
disconnect and re-
establish. -
Permanent –
Multimedia call
center agents and
other users who are
constantly making or
receiving multimedia
calls might want to be
administered with
this service link
mode.
The permanent
mode service link will
be connected during
the station’s first
multimedia call and
will remain in a
connected state until
the user disconnects
from their PC’s
multimedia
application or the
Avaya DEFINITY
Server restarts. This
provides a
multimedia user with
a much quicker video
cut-through when
answering a
multimedia call from
another permanent
mode station or a
multimedia call that
has been early
answered.
multimediaMode There are two
multimedia modes,
Basic and
Enhanced,
Optional Basic - A Basic
multimedia complex
consists of a
BRIconnected
multimedia-equipped
PC and a non-BRI-
connected
multifunction
Managing Users
194 Administering Avaya Aura ® Session Manager November 2010
Comments? infodev@avaya.com

Attribute Attribute
Description Mandator y/
Optional Validation
Constraints
telephone set.
Enhanced - An
Enhanced
multimedia complex
consists of a BRI-
connected
multimediaequipped
PC and a non-
BRIconnected
multifunction
telephone.
mwiServedUserType Controls the auditing
or interrogation of a
served user’s
message waiting
indicator (MWI).
Optional Valid entries:
1. fp-mwi - Use if
the station is a
served user of
an fp-mwi
message
center.
2. qsig-mwi - Use if
the station is a
served user of a
qsig-mwi
message
center.
3. blank - Leave
blank if you do
not want to audit
the served
user’s MWI or if
the user is not a
served user of
either an fp-mwi
or qsigmwi
message
center.
audixName The AUDIX
associated with the
station. Must contain
a user-defined
adjunct name that
was previously
administered.
Optional String
automaticMoves Automatic Moves
allows a DCP
telephone to be
Optional Valid entries:
1. always - Enter
always and the
Managing bulk importing and exporting
Administering Avaya Aura® Session Manager November 2010 195

Attribute Attribute
Description Mandator y/
Optional Validation
Constraints
unplugged from one
location and moved
to a new location
without additional
Communication
Manager
administration.
Communication
Manager
automatically
associates the
extension to the new
port.
DCP telephone
can be moved
anytime without
additional
administration
by unplugging
from one
location and
plugging into a
new location.
2. once - Enter
once and the
DCP telephone
can be
unplugged and
plugged into a
new location
once. After a
move, the field is
set to done the
next time that
routine
maintenance
runs on the DCP
telephone. Use
once when
moving a large
number of DCP
telephones so
each extension
is removed from
the move list.
Use once to
prevent
automatic
maintenance
replacement.
3. no - Enter no to
require
administration in
order to move
the DCP
telephone.
4. done - Done is a
display-only
value.
Managing Users
196 Administering Avaya Aura ® Session Manager November 2010
Comments? infodev@avaya.com

Attribute Attribute
Description Mandator y/
Optional Validation
Constraints
Communication
Manager sets
the field to done
after the
telephone is
moved and
routine
maintenance
runs on the DCP
telephone.
5. Error - Error is a
display-only
value.
Communication
Manager sets
the field to error,
after routine
maintenance
runs on the DCP
telephone, when
a non-serialized
telephone is set
as a movable
telephone.
remoteSoftphoneEm
ergencyCalls An Avaya IP endpoint
can dial emergency
calls (for example,
911 calls in the U.S.).
It only reaches the
local emergency
service in the Public
Safety Answering
Point area where the
telephone system
has local trunks.
Optional Valid entries:
1. As-on-local - as-
on-local sends
the extension
entered in the
Emergency
Location
Extension field
in the Station
screen to the
Public Safety
Answering Point
(PSAP)
2. Block - Enter
block to prevent
the completion
of emergency
calls.
3. Cesid - Enter
cesid to allow
Communication
Managing bulk importing and exporting
Administering Avaya Aura® Session Manager November 2010 197

Attribute Attribute
Description Mandator y/
Optional Validation
Constraints
Manager to send
the CESID
information
supplied by the
IP Softphone to
the PSAP.
4. Option - Enter
option to allow
the user to select
the option
(extension,
block, or cesid)
that the user
selected during
registration and
the IP Softphone
reported.
emergencyLocation
Ext This field allows the
system to properly
identify the location
of a caller who dials a
911 emergency call
from this station. An
entry in this field must
be of an extension
type included in the
dial plan, but does
not have to be an
extension on the
local system. It can
be a UDP extension.
The entry defaults to
blank. A blank entry
typically would be
used for an IP
softphone dialing in
through PPP from
somewhere outside
your network. If you
populate the IP
Address Mapping
screen with
emergency numbers,
the feature functions
as follows: If the
Emergency Location
Extension field in the
Optional
Managing Users
198 Administering Avaya Aura ® Session Manager November 2010
Comments? infodev@avaya.com

Attribute Attribute
Description Mandator y/
Optional Validation
Constraints
Station screen is the
same as the
Emergency Location
Extension field in the
IP Address Mapping
screen, the feature
sends the extension
to the Public Safety
Answering Point
(PSAP). If the
Emergency Location
Extension field in the
Station screen is
different from the
Emergency Location
Extension field in the
IP Address Mapping
screen, the feature
sends the extension
in the IP Address
Mapping screen to
the Public Safety
Answering Point
(PSAP).
alwaysUse A softphone can
register no matter
what emergency call
handling settings the
user has entered into
the softphone. If a
softphone dials 911,
the administered
Emergency Location
Extension is used.
The softphone's
user-entered settings
are ignored. If an IP
telephone dials 911,
the administered
Emergency Location
Extension is used. If
a call center agent
dials 911, the
physical station
extension is
displayed, overriding
the administered
Optional Boolean
Managing bulk importing and exporting
Administering Avaya Aura® Session Manager November 2010 199

Attribute Attribute
Description Mandator y/
Optional Validation
Constraints
LoginID for ISDN
Display . Does not
apply to SCCAN
wireless telephones,
or to extensions
administered as type
h.323.
precedenceCallWaiti
ng Activates or
deactivates
Precedence Call
Waiting for this
station.
Optional
autoSelectAnyIdleAp
pearance Enables or disables
automatic selection
of any idle
appearance for
transferred or
conferenced calls.
Communication
Manager first
attempts to find an
idle appearance that
has the same
extension number as
the call being
transferred or
conferenced has. If
that attempt fails,
Optional Boolean
Communication
Manager selects the
first idle appearance.
coverageMsgRetriev
al
Optional Boolean
coverageMsgRetriev
al Allows or denies
users in the
telephone’s
Coverage Path to
retrieve Leave Word
Calling (LWC)
messages for this
telephone. Applies
only if the telephone
is enabled for LWC
Reception.
Optional Boolean
Managing Users
200 Administering Avaya Aura ® Session Manager November 2010
Comments? infodev@avaya.com

Attribute Attribute
Description Mandator y/
Optional Validation
Constraints
autoAnswer In EAS
environments, the
auto answer setting
for the Agent LoginID
can override a
station’s setting
when an agent logs
in.
Optional Valid entries:
1. all: All ACD and
non-ACD calls
terminated to an
idle station cut
through
immediately.
Does not allow
automatic
hands-free
answer for
intercom calls.
With non-ACD
calls, the set is
also rung while
the call is cut
through. The
ring can be
prevented by
activating the
ringer-off feature
button when the
Allow Ringer-off
with Auto-
Answer is
enabled for the
system.
2. acd: Only ACD
split /skill calls
and direct agent
calls to auto
answer. Non-
ACD calls
terminated to a
station ring
audibly. For
analog stations,
the station is off-
hook and idle,
only the ACD
split/skill calls
and direct agent
calls auto
answer; non-
ACD calls
receive busy
treatment. If the
Managing bulk importing and exporting
Administering Avaya Aura® Session Manager November 2010 201

Attribute Attribute
Description Mandator y/
Optional Validation
Constraints
station is active
on an ACD call
and a non-ACD
call arrives, the
Agent receives
call-waiting
tone.
3. none: All calls
terminated to
this station
receive an
audible ringing
treatment.
4. icom: Allows a
telephone user
to answer an
intercom call
from the same
intercom group
without pressing
the intercom
button.
dataRestriction Enables or disables
data restriction that is
used to prevent
tones, such as call-
waiting tones, from
interrupting data
calls. Data restriction
provides permanent
protection and
cannot be changed
by the telephone
user. Cannot be
assigned if Auto
Answer is
administered as all or
acd. If enabled,
whisper page to this
station is denied.
Optional
idleAppearancePref
erence Indicates which call
appearance is
selected when the
user lifts the handset
Optional true - The user
connects to an idle
call appearance
instead of the ringing
call.
Managing Users
202 Administering Avaya Aura ® Session Manager November 2010
Comments? infodev@avaya.com

Attribute Attribute
Description Mandator y/
Optional Validation
Constraints
and there is an
incoming call. false - The Alerting
Appearance
Preference is set and
the user connects to
the ringing call
appearance.
callWaitingIndication enable/disable call
waiting for this
station
Optional
attCallWaitingIndicati
on Attendant call waiting
allows
attendantoriginated
or attendant-
extended calls to a
busy single-line
telephone to wait and
sends distinctive call-
waiting tone to the
single-line user.
Enable/disable
attendant call waiting
Optional Boolean
distinctiveAudibleAle
rt Enter true so the
telephone can
receive the 3 different
types of ringing
patterns which
identify the type of
incoming calls.
Distinctive ringing
might not work
properly for off-
premises
telephones.
Optional
restrictLastAppearan
ce Optional Valid entries:
1. true: Restricts
the last idle call
appearance
used for
incoming priority
calls and
outgoing call
originations
only.
2. false: Last idle
call appearance
Managing bulk importing and exporting
Administering Avaya Aura® Session Manager November 2010 203

Attribute Attribute
Description Mandator y/
Optional Validation
Constraints
is used for
incoming priority
calls and
outgoing call
originations.
adjunctSupervision Enable / Disable
adjunct Supervision. Optional Valid entries:
1. true: Analog
disconnect
signal is sent
automatically to
the port after a
call terminates.
Analog devices
(such as
answering
machines and
speakerphones)
use this signal to
turn the devices
off after a call
terminates.
2. false: Hunt
group agents
are alerted to
incoming calls.
In a hunt group
environment,
the disconnect
signal blocks the
reception of zip
tone and
incoming call
notification by an
auto-answer
station when a
call is queued for
the station.
perStationCpnSend
CallingNumber Send Calling
Number. Optional Valid entries:
1. y: All outgoing
calls from the
station will
deliver the
Calling Party
Number (CPN)
information as
Managing Users
204 Administering Avaya Aura ® Session Manager November 2010
Comments? infodev@avaya.com

Attribute Attribute
Description Mandator y/
Optional Validation
Constraints
"Presentation
Allowed."
2. n: No CPN
information is
sent for the call
3. r: Outgoing non-
DCS network
calls from the
station will
deliver the
Calling Party
Number
information as
"Presentation
Restricted."
busyAutoCallbackWi
thoutFlash Appears on the
Station screen for
analog telephones,
only if the Without
Flash field in the
ANALOG BUSY
AUTO CALLBACK
section of the
Feature-Related
System Parameters
screen is set to true.
The Busy Auto
Callback without
Flash field then
defaults to true for all
analog telephones
that allow Analog
Automatic Callback.
Set true to provide
automatic callback
for a calling analog
station without
flashing the hook.
Optional
audibleMessageWait
ing Provides audible
message waiting Optional Boolean
displayClientRedirec
tion Only administrable if
Hospitality is enabled
on the System
Parameters
Customer- Options
Optional Boolean
Managing bulk importing and exporting
Administering Avaya Aura® Session Manager November 2010 205

Attribute Attribute
Description Mandator y/
Optional Validation
Constraints
(Optional Features)
screen. This field
affects the telephone
display on calls that
originated from a
station with Client
Room Class of
Service. Note: For
stations with an audix
station type, AUDIX
Voice Power ports, or
ports for any other
type of messaging
that needs display
information, Display
Client Redirection
must be enabled. Set
true to redirect
information for a call
originating from a
Client Room and
terminating to this
station displays.
selectLastUsedAppe
arance Optional Valid entries:
1. True: Indicates
that a station’s
line selection is
not to be moved
from the
currently
selected line
button to a
different, non-
alerting line
button. If you
enter true, the
line selection on
an on-hook
station only
moves from the
last used line
button to a line
button with an
audibly alerting
call. If there are
no alerting calls,
the line selection
Managing Users
206 Administering Avaya Aura ® Session Manager November 2010
Comments? infodev@avaya.com

Attribute Attribute
Description Mandator y/
Optional Validation
Constraints
remains on the
button last used
for a call.
2. false: The line
selection on an
on-hook station
with no alerting
calls can be
moved to a
different line
button, which
might be serving
a different
extension.
coverageAfterForwa
rding Whether an
unanswered
forwarded call is
provided coverage
treatment.
Optional
directIpIpAudioConn
ections Allow/disallow direct
audio connections
between IP
endpoints.
Optional
ipAudioHairpinning Allows IP endpoints
to be connected
through the server’s
IP circuit pack.
Optional
primeAppearancePr
eference Set prime
appearance
preference.
Optional
stationSiteData This is complex type
for Site Data fields
room This is field of Site
Data Optional Max length 10
jack This is field of Site
Data Optional Max length 5
cable This is field of Site
Data Optional Max length 5
floor This is field of Site
Data Optional
Managing bulk importing and exporting
Administering Avaya Aura® Session Manager November 2010 207

Attribute Attribute
Description Mandator y/
Optional Validation
Constraints
building This is field of Site
Data Optional
headset This is field of Site
Data Optional
speaker This is field of Site
Data Optional
mounting This is field of Site
Data Optional Valid values d, w.
cordLength This is field of Site
Data Optional Valid range from 0 to
99.
setColor This is field of Site
Data Optional
abbrList This is complex type
for Station
Abbreviated Dialing
Data fields.
Optional
listType This is field of Station
Abbreviated Dialing
Data.
Mandatory Valid values
enhanced, group,
personal, system.
number This is field of Station
Abbreviated Dialing
Data.
Mandatory A number.
buttons This is complex type
for button data Optional
Number This is field of button
data. Mandatory
Type This is field of button
data. Optional
data1 This is field of button
data. Optional
data2 This is field of button
data. Optional
data3 This is field of button
data. Optional
data4 This is field of button
data. Optional
data5 This is field of button
data. Optional
Managing Users
208 Administering Avaya Aura ® Session Manager November 2010
Comments? infodev@avaya.com

Attribute Attribute
Description Mandator y/
Optional Validation
Constraints
data6 This is field of button
data. Optional
stationDataModule This is complex type
for Station Data
module.
Optional
dataExtension This is field of Station
Data module. Mandatory
name This is field of Station
Data module. Optional Max length 29
Class of restriction
cor This is field of Station
Data module. Mandatory Valid range from 0 to
995.
Class of Service
Cos This is field of Station
Data module. Mandatory Valid range from 0 to
15.
itc This is field of Station
Data module. Mandatory Valid values:
1. restricted
2. unrestricted
Tenant Number This is field of Station
Data module. Mandatory Valid range from 0 to
100.
listType This is field of Station
Data module. Optional Valid values:
1. enhanced
2. group
3. personal
4. system
listId This is field of Station
Data module. Optional
specialDialingOption This is field of Station
Data module. Optional Valid values:
1. default
2. hot-line
specialDialingAbbrDi
alCode This is field of Station
Data module. Optional
hotLineDestAbbrevLi
st This is field of Station
Hot Line Data. Optional Valid range 1 to 3
hotLineAbbrevDialC
ode This is field of Station
Hot Line Data. Optional Numeric string
Managing bulk importing and exporting
Administering Avaya Aura® Session Manager November 2010 209

Attribute Attribute
Description Mandator y/
Optional Validation
Constraints
nativeName This is complex type
of Native Name
Data.
Optional
locale This is field of Native
Name Data. Mandatory
Name This is field of Native
Name Data. Mandatory Max length 27
Attribute details defined in the Messaging communication profile
XSD
Attribute Attribute
Description Mandator y/
Optional Validation
Constraints
Messaging System
Name
messagingName
Name of Messaging
System Mandatory
Use Existing Mailbox
number
useExisting
'true' if already
created mailbox
number is to be used.
'false' if available
mailbox number is to
be used.
Optional
Messaging Template
messagingTemplate Specifies the
messaging template
of a subscriber.
Optional
Password
password Specifies the default
password the
subscriber must use
to log in to his or her
mailbox.
Mandatory The password can be
from one digit in
length to a maximum
of 15 digits.
deleteOnUnassign Optional
Class of service
cos The class of service
for this subscriber.
The COS controls
subscriber access to
many features and
provides general
settings, such as
mailbox size.
Optional Valid ranges from 0 to
995
Managing Users
210 Administering Avaya Aura ® Session Manager November 2010
Comments? infodev@avaya.com

Attribute Attribute
Description Mandator y/
Optional Validation
Constraints
Community ID
communityID Specifies the default
community ID for the
subscriber.
Community IDs are
used to control
message sending
and receiving among
groups of
subscribers.
Optional The default value is
1.
Email Handle
emailHandle Specifies the name
that appears before
the machine name
and domain in the
subscriber's e-mail
address. The
machine name and
domain are
automatically added
to the handle you
enter when the
subscriber sends or
receives an e-mail.
Optional
Common Name
commonName Specifies the display
name of the
subscriber in address
book listings, such as
those for e-mail client
applications.
Optional The name you enter
can be 1 to 64
characters in length.
secondaryExtension Specifies one or
more alternate
number to reach a
subscriber. You can
use secondary
extensions to specify
a telephone number
for direct reception of
faxes, to allow callers
to use an existing
Caller Application, or
to identify each line
appearance on the
subscriber's
telephone set if they
have different
telephone numbers.
Optional Valid values 0 to 9
number values of
length 10
Managing bulk importing and exporting
Administering Avaya Aura® Session Manager November 2010 211

Attribute Attribute
Description Mandator y/
Optional Validation
Constraints
mmSpecific This is complex type
for Messaging
specific fields data.
Optional
numericAddress This is field of
Messaging specific
data.
Specifies a unique
address in the voice
mail network. The
numeric address can
be from 1 to 50 digits
and can contain the
Mailbox Number.
Optional
pbxExtension This is field of
Messaging specific
data.
The primary
telephone extension
of the subscriber.
Optional
telephoneNumber This is field of
Messaging specific
data.
The telephone
number of the
subscriber as
displayed in address
book listings and
client applications.
Optional The entry can be a
maximum of 50
characters in length
and can contain any
combination of digits
(0-9), period (.),
hyphen (-), plus sign
(+), and left and right
parentheses ([) and
(]).
asciiVersionOfName This is field of
Messaging specific
data.
If the subscriber
name is entered in
multibyte character
format, then this field
specifies the ASCII
translation of the
subscriber name.
Optional
Managing Users
212 Administering Avaya Aura ® Session Manager November 2010
Comments? infodev@avaya.com

Attribute Attribute
Description Mandator y/
Optional Validation
Constraints
expirePassword This is field of
Messaging specific
data.
Specifies whether
your password
expires or not.
Optional You can choose one
of the following:
• yes: for password
to expire
• no: if you do not
want your
password to expire
mailBoxLocked This is field of
Messaging specific
data.
Specifies whether
you want your
mailbox to be locked.
A subscriber mailbox
can become locked
after two
unsuccessful login
attempts.
Optional You can choose one
of the following:
• no: to unlock your
mailbox
• yes: to lock your
mailbox and
prevent access to it
personalOperatorMa
ilbox This is field of
Messaging specific
data.
Specifies the mailbox
number or transfer
dial string of the
subscriber's
personal operator or
assistant. This field
also indicates the
transfer target when
a caller to this
subscriber presses 0
while listening to the
subscriber's
greeting.
Optional
personalOperatorSc
hedule This is field of
Messaging specific
data.
Specifies when to
route calls to the
backup operator
mailbox. The default
value for this field is
Always Active.
Optional
Managing bulk importing and exporting
Administering Avaya Aura® Session Manager November 2010 213

Attribute Attribute
Description Mandator y/
Optional Validation
Constraints
tuiMessageOrder This is field of
Messaging specific
data.
Specifies the order in
which the subscriber
hears the voice
messages.
Optional You can choose one
of the following:
• urgent first then
newest: to direct
the system to play
any messages
marked as urgent
prior to playing
non-urgent
messages. Both
the urgent and non-
urgent messages
are played in the
reverse order of
how they were
received.
• oldest messages
first: to direct the
system to play
messages in the
order they were
received.
• urgent first then
oldest: to direct the
system to play any
messages marked
as urgent prior to
playing non-urgent
messages. Both
the urgent and non-
urgent messages
are played in the
order of how they
were received.
• newest messages
first: to direct the
system to play
messages in the
reverse order of
how they were
received.
intercomPaging This is field of
Messaging specific
data.
Optional You can choose one
of the following:
• paging is off: to
disable intercom
Managing Users
214 Administering Avaya Aura ® Session Manager November 2010
Comments? infodev@avaya.com

Attribute Attribute
Description Mandator y/
Optional Validation
Constraints
Specifies the
intercom paging
settings for a
subscriber.
paging for this
subscriber.
•paging is manual: if
the subscriber can
modify, with
Subscriber Options
or the TUI, the
setting that allows
callers to page the
subscriber.
• paging is
automatic: if the
TUI automatically
allows callers to
page the
subscriber.
voiceMailEnabled This is field of
Messaging specific
data.
Specifies whether a
subscriber can
receive messages, e-
mail messages and
callanswer
messages from other
subscribers. You can
choose one of the
following: - yes: to
allow the subscriber
to create, forward,
and receive
messages. - no: to
prevent the
subscriber from
receiving call-answer
messages and to
hide the subscriber
from the telephone
user interface (TUI).
The subscriber
cannot use the TUI to
access the mailbox,
and other TUI users
cannot address
messages to the
subscriber.
Optional
Managing bulk importing and exporting
Administering Avaya Aura® Session Manager November 2010 215

Attribute Attribute
Description Mandator y/
Optional Validation
Constraints
miscellaneous1 This is field of
Messaging specific
data.
Specifies additional,
useful information
about a subscriber.
Entries in this field
are for convenience
and are not used by
the messaging
system.
Max length 51
miscellaneous2 This is field of
Messaging specific
data.
Specifies additional,
useful information
about a subscriber.
Entries in this field
are for convenience
and are not used by
the messaging
system.
Max length 51
miscellaneous3 This is field of
Messaging specific
data.
Specifies additional,
useful information
about a subscriber.
Entries in this field
are for convenience
and are not used by
the messaging
system.
Max length 51
miscellaneous4 This is field of
Messaging specific
data.
Specifies additional,
useful information
about a subscriber.
Entries in this field
are for convenience
and are not used by
the messaging
system.
Max length 51
Managing Users
216 Administering Avaya Aura ® Session Manager November 2010
Comments? infodev@avaya.com

Attribute Attribute
Description Mandator y/
Optional Validation
Constraints
cmmSpecific This is field of
Messaging specific
data.
Specifies the number
of the switch on
which this
subscriber's
extension is
administered.
Optional You can enter "0"
through "99", or leave
this field blank.
• Leave this field
blank if the host
switch number
should be used.
• Enter a "0" if no
message waiting
indicators should
be sent for this
subscriber. You
should enter 0
when the
subscriber does
not have a phone
on any switch in the
network.
accountCode This is field of CMM
data.
Specifies the
Subscriber Account
Code. The
Subscriber Account
Code is used to
create Call Detail
Records on the
switch for calls
placed by the voice
ports. The value you
enter in this field can
contain any
combination of digits
from 0 to 9. If an
account code is not
specified, the system
will use the
subscriber's mailbox
extension as the
account code.
Optional
coveringExtension This is field of CMM
data.
Specifies the number
to be used as the
default destination
for the Transfer Out
Optional You can enter 3 to 10
digits in this field
depending on the
length of the
system's extension,
Managing bulk importing and exporting
Administering Avaya Aura® Session Manager November 2010 217

Attribute Attribute
Description Mandator y/
Optional Validation
Constraints
of Messaging
feature. or leave this field
blank.
miscellaneous1 This is field of CMM
data.
Specifies additional,
useful information
about a subscriber.
Entries in this field
are for convenience
and are not used by
the messaging
system.
Optional Max length 11
Miscellaneous2 This is field of CMM
data.
Specifies additional,
useful information
about a subscriber.
Entries in this field
are for convenience
and are not used by
the messaging
system.
Optional Max length 11
Miscellaneous2 This is field of CMM
data.
Specifies additional,
useful information
about a subscriber.
Entries in this field
are for convenience
and are not used by
the messaging
system.
Optional Max length 11
Miscellaneous4 This is field of CMM
data.
Specifies additional,
useful information
about a subscriber.
Entries in this field
are for convenience
and are not used by
the messaging
system.
Optional Max length 11
Managing Users
218 Administering Avaya Aura ® Session Manager November 2010
Comments? infodev@avaya.com

Attribute details defined in the Session Manager communication
profile XSD
Attribute Attribute
Description Mandator y/
Optional Validation
Constraints
Primary Session
Manager
primarySM
Specify the name of
the Session Manager
instance that should
be used as the home
server for a
Communication
Profile. As a home
server, the primary
Session Manager
instance will be used
as the default access
point for connecting
devices associated
with the
Communication
Profile to the Aura
network.
Mandatory
Secondary Session
Manager
secondarySM
If a secondary
Session Manager
instance is specified,
this Session
Manager will provide
continued service to
SIP devices
associated with this
Communication
Profile in the event
that the primary
Session Manager is
not available.
Optional
Origination
Application
Sequence
originationAppSeque
nce
Specify an
Application
Sequence that will be
invoked when calls
are routed from this
user. A selection is
optional. Note: if both
an origination and a
termination
application sequence
Optional
Managing bulk importing and exporting
Administering Avaya Aura® Session Manager November 2010 219

Attribute Attribute
Description Mandator y/
Optional Validation
Constraints
are specified and
each contains a CM
application, the CM
should be the same
in both sequences.
Termination
Application
Sequence
terminationAppSequ
ence
Specify an
Application
Sequence that will be
invoked when calls
are routed to this
user. A selection is
optional. Note: if both
an origination and a
termination
application sequence
are specified and
each contains a CM
application, the CM
should be the same
in both sequences.
Optional
Survivability Server
survivabilityServer For local survivability,
the name of a
Survivability Server
(a SIP Entity) can be
specified to provide
survivability
communication
services for devices
associated with a
Communication
Profile in the event
that local connectivity
to Session Manager
instances in the Aura
Core is lost. If a
Branch Session
Manager is specified,
and the termination
and origination
application
sequences contain a
CM application,
sequencing to this
application will
continue, locally, to
the CM LSP resident
with the Branch
Optional
Managing Users
220 Administering Avaya Aura ® Session Manager November 2010
Comments? infodev@avaya.com

Attribute Attribute
Description Mandator y/
Optional Validation
Constraints
Session Manager. A
selection is optional.
Note: if a termination
or origination
application sequence
contains a CM
application, the CM
associated with the
application must be
the main CM for the
CM LSP that is
resident with the
Branch Session
Manager.
Home Location
homeLocation A Home Location can
be specified (the
name of a Location –
navigate to Routing >
Locations) to support
mobility for a user.
When this user calls
numbers that are not
associated with an
administered user,
dial-plan rules
(Routing > Dial
Patterns) will be
applied to complete
the call based on this
“home” location
regardless of the
physical location of
the SIP device used
to make the call. A
selection is
mandatory.
Mandatory
Import Users field descriptions
Use this page to bulk import users and their attributes from a valid XML file.
Managing bulk importing and exporting
Administering Avaya Aura® Session Manager November 2010 221

File Selection
Name Description
Select File The path and name of the XML file from
which you want to import the users.
Button Description
Browse Opens a dialog box that you can use to select
the file from which you want to import the
users.
General
Name Description
Select Error Configuration The options are:
•Abort on first error: Aborts importing the
user records when the import user
operation encounters the first error in the
import file containing the user records.
•Continue processing other records:
Imports the next user record even if the
import user operation encounters an error
while importing a user record.
Select Import Type The options are:
•Complete: Imports users with all the user
attributes.
•Partial: Imports users with specific user
attributes.
If a matching record already exists The options are:
•Skip: Skips a matching user record that
already exists in the system during an
import operation. Currently, with this option
you can add a new communication profile
to a communication profile set but you
cannot update an existing communication
profile in a communication profile set.
Note:
This option is not available if you select
the Partial option in Select Import
Type.
•Replace: Re-imports or replaces all the
data for a user including access control
Managing Users
222 Administering Avaya Aura ® Session Manager November 2010
Comments? infodev@avaya.com

Name Description
lists, contact lists, and so on. With this
option, you can replace a user and the
associated data of the user.
•Merge: Imports the user data at an even
greater degree of granularity. Using this
option you can simultaneously perform
both add and update operation of users.
For example, add a contact to a contact list
and update a last name.
•Delete: Deletes the user records from the
database that match the records in the
input XML file.
Note:
The system confirms that a user already
exists in the database by matching the
login name of the user in the database
with the login name of the user in the
imported file.
Job Schedule
Name Description
Schedule Job The options for configuring the schedule of
the job:
•Run immediately: Use this option if you
want to run the import job immediately.
•Schedule later: Use this option to run the
job at the specified date and time.
Date The date when you want to run the import
users job. The date format is mm:dd:yyyy.
Use the calendar icon to choose a date.
This field is available when you select the
Schedule later option for scheduling a job.
Time The time of running the import users job. The
time format is hh:mm:ss and 12 (AM or PM)
or 24-hour format.
This field is available when you select the
Schedule later option for scheduling a job.
Time Zone The time zone of your region.
This field is available when you select the
Schedule later option for scheduling a job.
Managing bulk importing and exporting
Administering Avaya Aura® Session Manager November 2010 223

Button Description
Import Imports or schedules the import operation
based on the option you selected.
Manage Job
Name Description
Select check box Use this check box to select a job.
Scheduled Time The time and date of scheduling the job.
Status The current status of the job. The following
are the different status of a job:
1. PENDING EXECUTION: The job is in
queue.
2. RUNNING: The job execution is in
progress.
3. SUCCESSFUL: The job execution is
completed.
4. INTERRUPTED: The job execution is
cancelled.
5. PARTIAL FAILURE: The job execution
has partially failed.
6. FAILED: The job execution has failed.
Job Name A link to the Scheduler user interface. You
can cancel the job from the Scheduler user
interface too.
% Complete The job completion status in percentage.
User Records The total user records in the input file.
Errors Number of user records in the input file that
failed to import.
Button Description
View Job Shows the details of the selected job.
Cancel Job Cancels the import operation for the selected
job. You can cancel a job that is in progress
or queued for import.
Delete Job Deletes the selected job.
Refresh Refreshes the job information in the table.
Show Provides you an option to view all the jobs on
the same page. If the table displaying
Managing Users
224 Administering Avaya Aura ® Session Manager November 2010
Comments? infodev@avaya.com

Button Description
scheduled jobs are spanning multiple pages,
select All to view all the jobs on a single
page.
Select: All Selects all the jobs in the table.
Select: None Clears the check box selections.
Previous Displays jobs in the previous page.
Next Displays jobs in the next page.
Done Takes you back to the User Management
page.
Import Users – Job Details field descriptions
The Import Users-Job Details page displays the details of the selected job.
Name Description
Name Displays the import job that the end user
initiates.
Scheduled by Displays the name of the user who initiates
or schedules the import job
Scheduled at Displays the start time of the import job.
Error Configuration The value that was configured for error while
scheduling the Import Job. The possible
values for this field are Abort on first error
and Continue processing other records.
Import Type The value configured for the Import Type
field while scheduling the import job.
Possible values are Complete and Partial.
Import Option The value that was configured for the If a
matching record already exists field while
scheduling the import job. The possible
values for this field are Skip, Merge,
Replace, and Delete.
End Displays the end date and time of the job.
Status Displays the status of the job.
File Displays the name of the file that is used to
import the user records.
Count Displays the total number of user records in
the input file.
Managing bulk importing and exporting
Administering Avaya Aura® Session Manager November 2010 225

Name Description
Success Displays the total number of user records
that are successfully imported.
Fail Displays the total number of user records
that failed to import.
Message Displays a message that indicates whether
the import is successful or failure.
Completed Displays the percentage completion of the
import.
Name Description
Line Number Displays the line number in the file where the
error occurred.
Login Name Displays the login name of the user record
that failed to be imported.
Error Message Displays a brief description of the error.
Button Description
Download Exports and saves the user import error
records in an XML file to the specified
destination.
Note:
This button is not available if there are no
error records for user Import Jobs or if the
import job type is set to Abort on first
error.
Cancel Takes you back to the Import Users page.
To enable the Download button, on the User bulk import configuration page, set the Enable
Error File Generation attribute to True.
To navigate to the User bulk import configuration page from the System Manager console, click
Services > Configurations > Settings > SMGR > User BulkImport profile.
Job Details field descriptions
The Job Details page displays the details of the selected Job.
Name Description
Name Specifies the name of the import job.
Managing Users
226 Administering Avaya Aura ® Session Manager November 2010
Comments? infodev@avaya.com

Name Description
Scheduled by Name of the user who initiated or scheduled
the import job.
Scheduled at Start time of the scheduled job.
End End date and time of the job.
Status Status of the job.
File Name of the file that is used to import the
global user settings records.
Count Total number of global user settings records
in the input file.
Success Total number of global user settings records
that are successfully imported.
Fail Total number of global user settings records
that failed to import.
Message The message that indicates whether the
import is successful or failure.
Completed Displays the percentage completion of the
import.
Name Description
Record Number Failed XML element in the input XML file.
Name Name of the failed XML element.
Error Message A brief description of the error.
Button Description
Cancel Takes you back to the Import Users page.
Quick start to importing users
Quick start to importing users
This section describes how to quickly create an XML file for importing users in bulk. This XML
file includes user profiles with core attributes as well as with SIP phone (SIP communication
profile).
Managing bulk importing and exporting
Administering Avaya Aura® Session Manager November 2010 227
XML for user with core attributes
Following are the minimal elements for mapping the user import XML with user interface fields:
Table 1: Minimal elements
UI field Description XML tag Possible value
Authentication
Type Specifies the type of
authentication.
<authenticationTy
pe>
...
</
authenticationTyp
e>
>
Basic or Enterprise
First Name Specifies the first
name of the user.
<givenName>
...
</givenName>
First name of the
user.
Login Name Specifies the primary
handle of user.
<loginName>
...
</loginName>
User log-in name.
Last Name Specifies the last
name of the user.
<surname>
...
</surname>
Last name of the
user.
Login Password Specifies the
password used to log
in to System
Manager.
<userPassword>
...
</userPassword>
Log-in password of
the user.
Sample XML with a single user profile
Following is a sample XML for a user profile with basic fields. To create your own XML, replace
the value of the tags explained in the Minimal elements table in XML for user with core
attributes.
<?xml version="1.0" encoding="UTF-8"?>
<!-- Root Element 'Users' represent collection of user (containing 1 or more
users)-->
<tns:users xmlns:tns="http://xml.avaya.com/schema/import" xmlns:xsi="http://
www.w3.org/2001/XMLSchema-instance" xsi:schemaLocation="http://xml.avaya.com/
schema/import userimport.xsd" >
<tns:user>
<authenticationType>Basic</authenticationType>
<givenName>John</givenName>
<loginName>jmiller@avaya.com</loginName>
Managing Users
228 Administering Avaya Aura ® Session Manager November 2010
Comments? infodev@avaya.com
<surname>Miller</surname>
<userPassword>mypassword</userPassword>
</tns:user>
</tns:users>
The highlighted XML tag in the user profile XML represents the data for a single user tag that
starts and ends with
</tns:user>
. To create multiple users in the same XML, repeat the highlighted content multiple times with
different user values.
For example, the following sample XML contains two users, John Miller and Roger Philip. Note
that there are two instances of the
<tns;user>
tag, one for each user.
<?xml version="1.0" encoding="UTF-8"?>
<!-- Root Element 'Users' represent collection of user (containing 1 or more
users)-->
<tns:users xmlns:tns="http://xml.avaya.com/schema/import" xmlns:xsi="http://
www.w3.org/2001/XMLSchema-instance" xsi:schemaLocation="http://xml.avaya.com/
schema/import userimport.xsd" >
<tns:user>
<authentication>TypeBasic</authenticationType>
<givenName>John</givenName>
<loginName>jmiller@avaya.com</loginName>
<surname>Miller</surname>
<userPassword>mypassword</userPassword>
</tns:user>
<tns:user>
<authenticationType>Basic</authenticationType>
<givenName>Roger</givenName>
<loginName>rphilip@avaya.com</loginName>
<surname>Philip</surname>
<userPassword>mypassword</userPassword>
</tns:user>
</tns:users>
Note:
As the XML is a text file, you can edit this XML in any text editor.
Related topics:
XML for user with core attributes on page 228
Bulk import XML for users with SIP phone
To create a user XML, first perform the procedure for bulk importing users in the Bulk importing
users section. If communication address is added to the user, then the commPassword field
is mandatory.
Managing bulk importing and exporting
Administering Avaya Aura® Session Manager November 2010 229
To assign communication address, the mapping of Communication Profile for a new SIP user
is as follows:
Table 2: Mapping of Communication Profile for a new SIP user
UI field Description XML tag Possible value
Name Specifies the name
of the communication
profile.
<commProfileSetNa
me>
...
</
commProfileSetNam
e>
The unique name of
this communication
profile.
Default Indicates whether
this is a default
profile.
<isPrimary>
...
</isPrimary>
True or False.
The attributes to set up the communication address for a user are as follows:
Table 3: User attributes to set up communication address
UI field Description XML tag Possible value
Handle Specifies the
extension number of
the user.
<handleName>
...
</handleName>
Extension number.
Type Specifies the
communication type
of the user profile.
<handleType>
...
</handleType>
Communication type.
For example, sip and
smtp.
SubType Specifies the
communication
subtype of the user
profile.
<handleSubType>
...
</handleSubType>
Communication sub
type. For example,
username, e164, and
msrtc.
Domain Specifies the domain
name of the user.
<domainName>
...
</domainName>
Name of the
configured SIP
domain name.
The following is the mapping of SIP Manager Communication Profile elements with the
corresponding user interface fields.
Table 4: Mapping of SIP Manager Communication Profile elements
UI fField Description XML tag Possible value
Primary Session
Manager Specifies the name
of the primary
Session Manager
<sm:primarySM> Enter the name of
Session Manager.
Managing Users
230 Administering Avaya Aura ® Session Manager November 2010
Comments? infodev@avaya.com
UI fField Description XML tag Possible value
instance that is used
as the home server
for a communication
profile.
...
</sm:primarySM>
>
Origination
Application
Sequence
Specifies the
Application
Sequence that is
invoked when calls
are routed from this
user.
<sm:originationAp
pSequence>
...
</
sm:originationApp
Sequence>
True or False.
Termination
Application
Sequence
Specifies the
Application
Sequence that is
invoked when calls
are routed to this
user.
<sm:terminationAp
pSequence>
...
</
sm:terminationApp
Sequence>
Home Location Specifies the routing
home location.
<sm:homeLocation>
...
</
sm:homeLocation>
The following is the mapping of Station Profile elements with the corresponding user interface
fields.
Table 5: Mapping of Station Profile elements
UI field Description XML tag Possible value
System Specifies the SIP
Entity of the
Communication
Manager.
<ipt:cmName>
...
</ipt:cmName>
Name of the
configured
Communication
Manager.
Use Existing Indicates whether the
station is already
defined in the
system.
<ipt:useExistingE
xtension>
...
</
ipt:useExistingEx
tension>
True or False.
Extension Specifies the
extension number for
this profile.
<ipt:extension>
...
</ipt:extension>
Template Specifies the
template name used
<ipt:template>
Managing bulk importing and exporting
Administering Avaya Aura® Session Manager November 2010 231
UI field Description XML tag Possible value
for creating the
station. ...
</ipt:template>
Set Type Specifies the set type
of the station.
<ipt:setType>
...
</ipt:setType>
Port Specifies the port
number from the list
for the template you
select.
<ipt:port>
...
</ipt:port>
Related topics:
Bulk importing users on page 111
Sample XML file for a user with SIP Communication Profile
Here is the sample XML of a user profile with basic fields. To create your own XML, replace
the value of the tags explained in the Mapping of Station Profile elements table in Bulk import
XML for users with SIP phone.
<?xml version="1.0" encoding="UTF-8"?>
<!-- Root Element 'Users' represent collection of user (containing 1 or more
users)--
tns:users xmlns:tns="http://xml.avaya.com/schema/import" xmlns:xsi="http://
www.w3.org/2001/XMLSchema-instance" xsi:schemaLocation="http://xml.avaya.com/
schema/import userimport.xsd" >
<tns:user>
<authenticationType>BASIC</authenticationType>
<givenName>John</givenName>
<loginName>jmiller@avaya.com</loginName>
<surname>Miller</surname>
<userPassword>mypassword</userPassword>
<commPassword>12345</commPassword>
<commProfileSet>
<commProfileSetName>Primary</commProfileSetName>
<isPrimary>true</isPrimary>
<handleList>
<handle>
<handleName>sip:jmiller@avaya.com</handleName>
<handleType>sip</handleType>
<handleSubType>msrtc</handleSubType>
</handle>
</handleList>
<!--The below is extended communication profile-->
<commProfileList>
<commProfile xsi:type="sm:SessionManagerCommProfXML" xmlns:sm="http://
xml.avaya.com/schema/import_sessionmanager">
<commProfileType>SessionManager</commProfileType>
<sm:primarySM>IBM1-Performance</sm:primarySM>
<sm:terminationAppSequence>Perf_CM_Appl_Seq</sm:terminationAppSequence
<sm:originationAppSequence>Perf_CM_Appl_Seq</sm:originationAppSequence
<sm:homeLocation>SIT Lab</sm:homeLocation>
</commProfile>
Managing Users
232 Administering Avaya Aura ® Session Manager November 2010
Comments? infodev@avaya.com

<commProfile xsi:type="ipt:xmlStationProfile" xmlns:ipt="http://
xml.avaya.com/schema/import_csm_cm">
<commProfileType>CM</commProfileType>
<ipt:cmName>Performance_CM</ipt:cmName>
<ipt:useExistingExtension>false</ipt:useExistingExtension>
<ipt:extension>28000</ipt:extension>
<ipt:template>DEFAULT_9620SIP_CM_5_2</ipt:template>
<ipt:setType>9620SIP</ipt:setType>
<ipt:port>S08012</ipt:port>
</commProfile>
</commProfileList>
</commProfileSet>
</tns:user>
</tns:users>
Related topics:
Bulk import XML for users with SIP phone on page 229
Managing bulk importing and exporting
Administering Avaya Aura® Session Manager November 2010 233


Chapter 5: Managing Session Manager
routing
Overview of Session Manager routing
This section details the procedures that are required to set up Session Manager enterprise
routing. To complete the administrative procedures, you must use the Routing selection from
the System Manager Common Console navigation pane.
Once the initial setup is completed, administrators can use the same screens and procedures
for administering and modifying the various routing entities as well as Session Manager
instances.
The primary task of Session Manager is to route session creation requests from one server to
another based on the address specified in the session creation request.
The addresses which are specified to identify the ultimate destination of a session creation
request are in the form of a SIP Uniform Resource Identifier (URI). It consists mainly of a user
part and a domain part. Session Manager uses both parts in its routing decisions in the
following manner:
• The domain part is normally a DNS domain.
• The user part is an alphanumeric string (or handle). Session Manager has special rules
for efficiently routing and manipulating handles which consist entirely of digits (for
example, telephone numbers).
The servers which send their session creation requests to the Session Manager are called SIP
entities. Session Manager routes these requests to other SIP entities based on the routing
rules you have administered.
Session Manager associates SIP entities with specific locations and can make different routing
decisions based upon the location from which a session creation request arrives.
Administering Avaya Aura® Session Manager November 2010 235
Prerequisites for Routing Setup
This section assumes that the following requirements are met:
• The System Manager server is installed.
• All Session Manager instances are installed.
Refer to the section Session Manager installation for details.
Routing
Routing
Routing tells the system which SIP Entity should receive a call that matches the configured
dial pattern or regular expression. Administrators can use Routing to administer Session
Manager instances and related routing policies. The configuration data is distributed from the
Routing database to each remote Session Manager instance.
All calls originate either from an administered user of the system or a SIP Entity. Routing
policies describe how a call is routed when it comes from a particular location and a distinct
pattern is dialed (or a regular expression is given) during a particular time range with a distinct
ranking/cost for the route to another SIP Entity.
Locations are used for origination-based routing and specifying bandwidth for call admission
control.
Routing and Session Manager allow administrators to define routing:
• by combining several locations
• by combining several dial patterns and domains
• for several ToD and rankings
• for a single routing destination
Managing Session Manager routing
236 Administering Avaya Aura ® Session Manager November 2010
Comments? infodev@avaya.com

Routing of a call using routing policy data
1. Session Manager tries to match the domain to one of the authoritative domains.
2. If Session Manager is authoritative for the domain, then the Session Manager tries
to match the digit pattern.
3. If a digit pattern match is not found, it tries to use the regular expression table.
4. If no regular expression match is found, it sends the request to a Session Manager-
provisioned outbound proxy.
5. If no outbound proxy has been administered for the Session Manager and it is not
authoritative for the domain then it routes the request to the destination in the
request-URI. If the request-URI does not contain an P address, then it uses DNS
or the Local Host Name Resolution table to determine where to route the request.
6. If the hostname cannot be resolved to an IP address then the call fails.
Administering initial setup of the Session Manager
About this task
Once you have completed the initial setup as a part of ongoing administration, you can modify
the created entities or delete them as required.
The recommended order for the initial set up of the Session Manager using the System
Manager Routing screens is as follows.
Procedure
1. Accept or change default settings.
2. Create domains.
3. Create locations.
4. Create adaptations.
5. Create SIP entities, some of which are routing destinations:
• Create other SIP entities.
• Assign locations and adaptations to the SIP entities.
6. Create entity links:
• Between Session Managers.
• Between Session Managers and other SIP entities.
7. Create time ranges.
Routing
Administering Avaya Aura® Session Manager November 2010 237

8. Create routing policies.
9. Create dial patterns and assign them to routing policies and locations.
10. Create regular expressions and assign them to routing policies.
11. Create Session Manager instances using the Session Manager menus on the
System Manager navigation pane.
Routing import and export Overview
Overview of exporting and importing routing element data
The Routing screens allow administering of the Avaya Aura Session Manager SIP routing
rules. The management screens consist of nine configurable elements that relate to each other
in various ways.
It is possible to populate a very large number of the above elements in System Manager by
using XML files. It is also possible to export each of the elements or the entire routing
configuration to XML files.
PREREQUISITES:
• Ensure that System Manager is installed and the server is running.
• Ensure that the user performing the bulk import operation has administrative privileges.
• Before you import a large amount of data, take the backup of the System Manager
database. This backup will provide an easy way to restore the original database in case
you find that the information you imported is substantially incorrect. Refer to the document
Administering Avaya Aura™ System Manager for details about this operation.
• Importing a very large number of elements (thousands and above) can take a very long
time and can be CPU intensive to the System Manager server. This information will also
need to be synchronized with all the Session Managers. It is highly recommended that
you perform large imports at a time where there is reduced platform activity in the network
(for example at night or during a maintenance window).
• When adding subcomponents to an existing element, you must include ALL parameters
associated with that element in the import XML file. In other words, when you add digit
patterns to an adaptation, ensure that the adaptation import includes ALL patterns and
not just the ones being added to the adaptation.
FEATURES:
Managing Session Manager routing
238 Administering Avaya Aura ® Session Manager November 2010
Comments? infodev@avaya.com
System Manager Routing Import/Export supports:
• Routing related data:
- Domains
- Locations
- Adaptations
- SIP Entities
- Entity Links
- Time Ranges
- Routing Policies
- Dial Patterns
- Regular Expressions
• Each element can be imported separately as a single XML file containing many entries.
•It is possible to compress the XMLs using ZIP compression in order to decrease the size
of the files that need to be uploaded to the System Manager server. Note that this is
especially important when importing large files of size exceeding 10 MB or more.
• Several or all the elements can be imported in a single ZIP file containing many XML
files.
• It is possible to export a single type of entity or all the entities. When exporting all the
entities, the exported files are contained in a single ZIP file.
• It is important to note that the Routing elements depend on each other (see specific
elements details in this guide). An import operation will fail if the needed elements do not
already exist in the database or exist in the same import operation. For example: Import
of a Dial Pattern with domain name avaya.com will fail if there is no such domain in the
database, or if an XML file containing this domain is not imported in the same import
operation as the Dial Pattern.
•When importing several entities together (either as a list of XML/ZIP files or inside a single
ZIP file), the System Manager will import them in the correct order to maintain
dependencies. Because of this, it is possible, for example, to import SIP Entities and Entity
Links pointing to these SIP Entities in the same import operation. The import order is
always:
a. Domains
b. Locations
c. Adaptations
d. SIP Entities
e. Entity Links
f. Time Ranges
Routing
Administering Avaya Aura® Session Manager November 2010 239

g. Routing Policies
h. Dial Patterns
i. Regular Expressions
The order is decided by analyzing the files internal structure (it must be a well formed
XML as described in this guide). Any file name can be used as long as its extension is
“xml”.
• The Import operation does not halt if one of the elements fails validation. The failed
element will not be added to the database, and the operation will continue to the next
one.
• An audit log provides details on the failed and successful import operations.
•If an imported element already exists in the System Manager database, which means that
there is an element with the same unique identifiers, then the values in the new element
will overwrite the old element.
-For example: if a domain named “avaya.com” already exist in the database, then the
note, type and default values will be overwritten by the new element.
-Dial Pattern is an exception for this rule. It is not possible to import a dial pattern with
elements such as <digitpattern>,<maxdigits>,<mindigits>,<sipdomainName> and
<routingoriginationName> already present in the database. Such an attempt will
fail.
• Every operation in the Routing application is logged to an audit log including the import
operation. A log entry is added for each element that is imported, even if the operation
succeeds or fails. The log is located at the following file:/var/log/Avaya/mgmt/nrp/
nrpaudit.log. The file is accessible through the System Manager Linux Shell.
Note:
The Routing elements depend on each other. An import operation will fail if the needed
elements do not already exist in the database or exist in the same import operation. For
example import of a Dial Pattern with domain name avaya.com will fail if there is no such
domain in the database, or if an XML file containing this domain is not imported in the same
import operation as the Dial Pattern.
Exporting Routing element data
Procedure
1. On the System Manager console, under Elements, click Routing.
2. Click Routing > <Any Routing element>.
3. From the Routing Entity screen, click More Actions > Export <Routing
Element>.
Managing Session Manager routing
240 Administering Avaya Aura ® Session Manager November 2010
Comments? infodev@avaya.com
For example, to export adaptations, select Routing > Adaptations. From the
Adaptations screen, select More Actions > Export Adaptations.
To export regular expressions, select Routing > Regular Expressions. From the
Regular Expressions screen, click More Actions > Export Regular
Expressions.
4. Select a check box for the entity to be exported from the list of entities on the
screen.
5. To export multiple routing elements, from the routing element screen, click More
Actions > Export all data.
6. Click Browse to specify the location and click Export.
You must export a file in the XML format or multiple files as a zipped file.
Importing Routing element data
Procedure
1. On the System Manager console, under Elements, click Routing.
2. Click Routing > <Any Routing element>.
3. To import a single or multiple routing elements, click More Actions > Import .
For example, to import dial patterns, select Routing > Dial Patterns. From the Dial
Patterns screen, click More Actions > Import.
4. Click Browse to select files from the required location and click Import.
You must import a file in the XML format. This file can be an XML file or a ZIP file
consisting one or more XML files.
Note:
•You cannot import data from the later stages in the routing definition process
without importing data from the earlier stages (e.g. one must import SIP
Entities before or in conjunction with the relevant Entity Links).
• The import operation can accept any routing element XMLs (e.g. you can
import “Locations” even if you clicked on import from the “Domains”
screen).
• The XML files that are created with the “export” operation contains version
information as shown below:
<buildNumber>0</buildNumber>
<implementationVersion>0</implementationVersion>
<specificationVersion>0</specificationVersion>
Routing
Administering Avaya Aura® Session Manager November 2010 241

Saving, Committing, and Synchronizing configuration changes
About this task
Session Manager allows you to save the domain data to the System Manager database and
distribute the changes to all the Session Manager instances.
To save the data to System Manager and distribute it to the Session Managers, click
Commit.
When you click Commit , System Manager saves the data to the System Manager database.
System Manager synchronizes and distributes the data to all the Session Manager instances.
For example, renaming an adaptation also changes that data on the SIP Entities Details
screen, or changing dial pattern data also changes that data in the routing policy where that
dial pattern is used.
Duplicating Routing entity data
About this task
You can use the Duplicate button on the relevant Session Manager Routing screens to
duplicate routing entities. Select the check box for the relevant entity and click Duplicate.
Duplication of data is useful if you want to create entities that are similar and want to rename
them or copy an entity and make minimal changes to the entity attributes.
For example, to use a routing policy and to add a dial pattern to the copied routing policy, you
can duplicate the routing policy and then add the required dial pattern to it.
Domains
About Domains
The Domains screen is used to create a set of domains and sub-domains to enable the Session
Manager enterprise to use domain-based routing. This information is used to determine if a
SIP user is part of the enterprise SIP network. Domains determine if the Session Manager's
dial plan can be used to route a particular call. Sub-domains are automatically checked if not
provisioned. For example, Session Manager needs to check dial patterns for avaya.com if a
request to 123@myserver.avaya.com comes in and myserver.avaya.com is not administered
as a domain.
The administrator can create a SIP domain and sub-domains based on the corporate
requirement.
Managing Session Manager routing
242 Administering Avaya Aura ® Session Manager November 2010
Comments? infodev@avaya.com

• Domain name can be <organization-name.domain>, for example, avaya.com or
abc.org.
• Sub-domain can be named based on the geographical location or any other corporate
requirements such as office location, for example, us.avaya.com and fr.avaya.com can
be sub-domains for Avaya offices in the US and in France, or dr.avaya.com and
br.avaya.com can be sub-domains for Avaya offices in Denver and in Basking Ridge.
Creating domains
About this task
Create a domain or set of domains if you plan to use domain-based routing.
Procedure
1. On the System Manager console, under Elements, click Routing.
2. Click Routing > Domains.
3. Click New.
4. Enter the domain name and notes for the new domain or sub-domain.
5. Select “sip” as the domain type from the drop-down list.
6. Click Commit.
Modifying domains
About this task
You can also edit or delete the domains using the domains option. The Domains screen is
displayed.
Procedure
1. On the System Manager console, under Elements, click Routing.
2. Click Routing > Domains.
3. To edit information for existing domains or sub-domains, select the check boxes for
the domains that you want to edit and click Edit.
4. Make changes to the domain data as required.
5. To copy existing domain data to a new domain, select the domain and click
Duplicate. You can edit the duplicate domain name as required.
Domains
Administering Avaya Aura® Session Manager November 2010 243
6. Click Commit.
Deleting domains
Procedure
1. On the System Manager console, under Elements, click Routing.
2. Click Routing > Domains.
3. To delete an existing domain or domains, select the check boxes for the domains
that you want to edit and click Delete.
4. Click Delete on the confirmation page.
Related topics:
Delete Confirmation field descriptions on page 244
Delete Confirmation field descriptions
Use this page to confirm or cancel the deletion of selected domains.
Button Description
Delete Deletes the selected domains.
Cancel Cancels the deletion of the domains.
Related topics:
Deleting domains on page 244
Domain Management field descriptions
Use this page to create, modify, delete, and manage domains.
Button Description
Edit Opens the Domains page that you can use
to modify the domain details.
New Opens the Domains page that you can use
to create new domains.
Managing Session Manager routing
244 Administering Avaya Aura ® Session Manager November 2010
Comments? infodev@avaya.com

Button Description
Duplicate Creates a duplicate of the selected domain.
Delete Opens the Delete Confirmation page on
which you can confirm or cancel the deletion
of the domain.
More Actions > Refresh all data Refreshes all data. Any unsaved
modifications are lost.
More Actions > Import Opens the Import data page that allows you
to import from XML files or zip file containing
one or more XML files.
More Actions > Export Domains Opens the Export Domains page that allows
you to export the domains data as an XML
file to a specified location.
More Actions > Export all data Opens the Export all data page that allows
you to export the routing entities data as a
zipped file to a specified location.
Name Description
Name Name of the domain.
Type List of the type of domains. Only Domains of
type SIP can be used for routing.
Default Indicates the default domain.
Notes Additional notes about the domain.
Domain Details field descriptions
Name Description
Name Name of the domain.
Type List of the type of domains. Only Domains of
type SIP can be used for routing.
Default Indicates the default domain.
Notes Additional notes about the domain.
Button Description
Commit Saves the domain and distributes it to all the
instances of the Session Manager.
Cancel Cancels the domain creation.
Domains
Administering Avaya Aura® Session Manager November 2010 245

Bulk import for Domains
Please follow these rules when creating an XML bulk import file:
• The domain name must be unique, and is referred to by other elements.
• It is not possible to create a domain with <domainType> of type “sip” that have
<defaultDomain> containing the value “true”.
• The values in <domainType> must appear exactly same (being case sensitive) as they
appear in the System Manager user interface.
Example:
<?xml version="1.0" encoding="UTF-8" standalone="yes"?>
<sipdomainFullTOList>
<SipdomainFullTO>
<notes>this is a test</notes>
<defaultDomain>false</defaultDomain>
<domainName>avaya.com</domainName>
<domainType>sip</domainType>
<name>avaya.com</name>
</SipdomainFullTO>
<SipdomainFullTO>
<notes>this is another test</notes>
<defaultDomain>false</defaultDomain>
<domainName>avaya2.com</domainName>
<domainType>sip</domainType>
<name>avaya2.com</name>
</SipdomainFullTO>
</sipdomainFullTOList>
Locations
About Locations
You can use the Locations screen to set up and configure gateway and user locations. The IP
address of the device determines the current physical location of the caller or the called user.
Session Manager matches the IP address against the patterns defined on location screens. If
a call is from a SIP Entity does not match the IP address pattern then Session Manager uses
the location administered for the SIP Entity.
Session Manager uses the originating location to determine which dial patterns to look at when
routing the call if there are dial patterns administered for specific locations. Locations are also
used to limit the number of calls coming out of or going to a physical location. This is useful for
those locations where the network bandwidth is limited. This is also known as Call Admission
Control (CAC). CAC provides a level of protection by limiting the impact of multimedia traffic
over the most critical network links between enterprise locations, such as the links from branch
Managing Session Manager routing
246 Administering Avaya Aura ® Session Manager November 2010
Comments? infodev@avaya.com

offices to data centers in the network core. The Overall Managed Bandwidth and Per-Call
Bandwidth Parameters sections in the Location Details page allow you to specify the CAC
related details.
Note:
Session Manager logs the result of each rejected multimedia CAC request which enables
the determination of the root cause when multimedia calls fail.
Session Manager allows you to use the following wildcard characters to specify a location:
• “*” (star) is used to specify any number of allowed characters at the end of the string.
• “x” is used to specify a digit.
Note:
Pattern can also accept IP address range. Example: 10.0.0.1-10.0.0.5
IP address mask is also a valid pattern. Example: 135.9.0.0/16
The Locations screen can contain one or several IP addresses. Each SIP entity has a particular
IP address. Depending on the physical and geographic location of each SIP entity, some of
the SIP entities can be grouped into a single location. For example, if there are two
Communication Managers located at Denver, they can form one location named Denver.
Creating Locations
Procedure
1. On the System Manager console, under Elements, click Routing.
2. Click Routing > Locations. The Location Details screen is displayed.
3. Click New.
4. Enter the location name in the Name field.
5. Enter notes about the location, if required.
6. Specify the parameters for the location in the Overall Managed Bandwidth
section.
7. Specify the average bandwidth per call for the location in the Per-Call Bandwidth
Parameters section.
8. To add a location pattern, click Add under Location Pattern.
9. Enter an IP address pattern to match.
10. Enter notes about the location pattern, if required.
11. Continue clicking the Add button until all the required Location Pattern matching
patterns have been configured.
Locations
Administering Avaya Aura® Session Manager November 2010 247

12. Click Commit.
Related topics:
Location Details field descriptions on page 254
Modifying Locations
Procedure
1. On the System Manager console, under Elements, click Routing.
2. Click Routing > Locations.
3. To edit a location name or location matching pattern, select a check box for the
required location and click Edit and make the required changes to the location or
location pattern for that location.
4. If required, modify the parameters for the location in the Overall Managed
Bandwidth section.
5. If required, modify the average bandwidth per call for the location in the Per-Call
Bandwidth Parameters section.
6. To add or remove a location pattern, click Add or Remove under Location
Pattern.
7. Click Commit.
Deleting Locations
Procedure
1. On the System Manager console, under Elements, click Routing.
2. Click Routing > Locations.
3. To delete an existing location or locations, select the respective check boxes and
click Delete.
4. Click Delete on the confirmation page.
Related topics:
Delete Confirmation field descriptions on page 249
Managing Session Manager routing
248 Administering Avaya Aura ® Session Manager November 2010
Comments? infodev@avaya.com

Delete Confirmation field descriptions
Use this page to confirm or cancel the deletion of locations.
Button Description
Delete Deletes the selected location.
Cancel Cancels the deletion of the location.
Related topics:
Deleting Locations on page 248
CAC Overview
Audio and multimedia calls require high bandwidth and low latency for best user experience.
Call Admission Control (CAC), also known as Bandwidth Management, provides an efficient
means to prevent degradation of quality by limiting the number of concurrent calls over limited
bandwidth links. CAC enables in sustaining the network load imposed by the media traffic over
the IP network.
Related topics:
CAC Administration on page 249
Provisioning Session Manager and Communication Manager CAC together on page 251
Recommended modifications for the earlier versions of Session Manager on page 251
CAC Administration
Session Manager allows bandwidth management for a given location by administering the
following details in the Location Details page:
1. Specify managed bandwidth usage for the location in the Overall Managed
Bandwidth section.
2. Specify average bandwidth per call for the location in the Per-Call Bandwidth
Parameters section.
Based on the location level settings as mentioned above, Session Manager provides the
following set of CAC functionality using Session Description Protocol (SDP):
1. Recognizes different types of calls categorized either as audio or multimedia.
Multimedia includes video and other forms of non-audio media sent by endpoints
as part of a session.
2. Provisions a second, lesser limit on the bandwidth usage permitted for a location.
This second limit applies only to multimedia calls (Multimedia Bandwidth) and
Locations
Administering Avaya Aura® Session Manager November 2010 249

prevents such calls from consuming too large a percentage of the available
bandwidth of a location (Total Bandwidth).
3. If the Total Bandwidth is left “BLANK” then Session Manager does not perform
CAC for calls in the Location.
4. Allows audio and multimedia bandwidth sharing at a location by selecting the option
Audio Calls Can Take Video Bandwidth.
•If selected, then Session Manager considers only the Total Bandwidth when
deciding whether a new audio call can proceed.
• If not selected, then Session Manager considers the Total Bandwidth minus
the Multimedia Bandwidth when deciding whether a new audio call can
proceed.
5. Specifies per-call bandwidth limits (as specified in Per-Call Bandwidth
Parameters section), restricting the size of individual multimedia calls. Session
Manager alters the SDP provided by call parties by enforcing the bandwidth limits
as follows:
• Determines how much bandwidth to be reserved for each call and counts the
determined value against the provisioned limit.
• If the multimedia bandwidth is beyond what is provisioned (Maximum
Multimedia Bandwidth (Intra-Location) or Maximum Multimedia
Bandwidth (Inter-Location)), Session Manager can reduce the multimedia
bandwidth as low as the administered multimedia minimum (Minimum
Multimedia Bandwidth) limit. In such cases, users experience a reduction in
media (usually video) quality. Otherwise, calls are either alternate-routed or
denied when limit enforcement cannot be achieved by quality reduction. Audio
call quality is not modified by Session Manager.
• If Session Manager cannot allow the multimedia minimum (Minimum
Multimedia Bandwidth), then multimedia streams are removed from the call
by setting their ports to zero, which results in denying the multimedia portion
of the call
SDP functionality can be enabled by clearing the Global Settings option Ignore SDP for Call
Admission Control in the Session Manager Administration page. This setting changes the
CAC mode from “Ignore SDP” (as in Session Manager 6.0) to “Use SDP” (as in Session
Manager 6.1). This setting takes effect at cluster level in the core and hence all the Session
Manager instances are affected accordingly.
Refer to the topic on “Recommended modifications for the earlier versions of Session Manager”
for understanding the location based configuration changes required in the earlier versions of
Session Manager.
Managing Session Manager routing
250 Administering Avaya Aura ® Session Manager November 2010
Comments? infodev@avaya.com

Provisioning Session Manager and Communication Manager CAC together
For simultaneous use of Session Manager and Communication Manager CAC, following
configurations should be done:
1. Create 1-to-1 mapping of Session Manager Locations to Communication Manager
Network Regions, because Communication Manager uses Network Regions for
CAC. This is limited by the fact that Communication Manager supports no more
than 250 Network Regions, while Session Manager supports thousands of
Locations.
2. As Session Manager maps IP addresses to Locations, Communication Manager
maps IP addresses to Network Regions. These mappings must be synchronized
manually.
3. As part of Communication Manager administration, the SIP trunk to Communication
Manager must be placed within a dummy Network Region for which no CAC limits
are set.
This enables the following changes:
•Calls terminated to non-SIP destinations (H.323 phones, non-SIP trunks) are counted by
Communication Manager CAC for the appropriate Network Regions.
•All calls terminated to SIP destinations (SIP phones, SIP trunks on Session Manager) are
counted by Session Manager CAC for the appropriate Locations.
• SIP trunks on Communication Manager that do not route to Session Manager (not a
recommended configuration) are counted by Communication Manager.
Note:
Communication Manager performs CAC in terms of bandwidth limits between two specific
Network Regions, while Session Manager performs CAC as per limits covering all traffic into
or out of a Location, regardless of the far-end location.
Recommended modifications for the earlier versions of Session Manager
1. For CAC in Session Manager 6.0 used for counting calls
CAC may have been provisioned in Session Manager 6.0 by setting the "Average Bandwidth
per Call" limit to 1 kbps which provides a simple call count limit of X simultaneous calls in the
location. In such case, clearing Ignore SDP for Call Admission Control option (“Use SDP”
CAC mode) drastically reduces the number of calls allowed in the location since the common
codec G.711-Mu uses 83 kbps which limits the number of calls allowed to change from X to
X/83.
For Session Manager 6.1, CAC does not enforce a limit on the number of calls per location
but applies a limit on the bandwidth usage. The limits for each location should be multiplied by
the determined average bandwidth per call Y (in kbps). If there are no multimedia users in the
Locations
Administering Avaya Aura® Session Manager November 2010 251

environment, Y is likely to be 83, because Avaya endpoints (as well as many others) use G.711-
Mu as their primary audio codec. For multimedia (video) users, a more complex analysis is
required as suggested below.
Example:
Given A = percentage of calls that are audio (ex: 80%) B = percentage of calls that are
multimedia (ex: 20%) C = average bandwidth used by an audio call (kbps) (ex: 83) D = average
bandwidth used by a multimedia call (kbps) (ex: 768).
Then Y = AC + BD kbps (ex: 220).
The calculated value Y allows approximately the same number of calls to be permitted for the
location after the CAC mode is changed from “Ignore SDP” (in Session Manager 6.0) to “Use
SDP” (in Session Manager 6.1). For example, to allow more than 20% of a location's available
bandwidth to be used by multimedia calls, after changing CAC modes you need to provision
the Multimedia Bandwidth value for the location to be 20% of the Total Bandwidth value.
Multimedia calls are rejected by CAC if the multimedia limit is exceeded regardless of other
call traffic. If you donot want to specify a specific limit on multimedia calls, the Multimedia
Bandwidth value may be left blank, and only the Total Bandwidth limit can be used.
2. For video endpoints used in Session Manager 6.0
In Session Manager 6.0, the average bandwidth used for audio calls and video calls need to
be determined separately, and then a location can be split into two locations and provisioned
accordingly. IP address ranges can be associated with different endpoint types for different
locations, and the desired bandwidth limit is split between the locations accordingly.
If Average Bandwidth per call for audio calls is 80 kbps, and Average Bandwidth per call for
video calls is 768 kbps for location “New York”, and the Managed Bandwidth for “New York” is
50 mbps, then “New York” is split into two locations.
• “New York Audio” has a Managed Bandwidth limit of 30 mbps and Average Bandwidth
per call limit of 80 kbps per call.
•“New York Video” has a limit of Managed Bandwidth of 20 mbps and Average Bandwidth
per call limit of 768 kbps per call.
Implications:
• The ratio of audio to video in these limits depends on the site analysis.
•This requires duplication of the logical location, as well as associated digit maps and other
administration.
• The IP address mapping of endpoints in the location is complex.
With current release, a single location can handle both audio and multimedia endpoints, and
enforce a single limit.
Immediately after clearing the Ignore SDP for Call Admission Control option (“Use SDP”
CAC mode), a user with split locations should recombine them as follows:
1. Ensure that digit maps and other administration associated with the two locations
(audio and video) other than the location administration page are identical. Note the
administration, including IP address patterns, for the video location. Reassign all
Managing Session Manager routing
252 Administering Avaya Aura ® Session Manager November 2010
Comments? infodev@avaya.com

video locations to the audio location and ensure that none of the SIP Entities are
assigned to the video location.
2. Change the Total Bandwidth value for the audio location to be the sum of the
previous audio location value and the reassigned video location value.
3. Add the IP address pattern values from the video location under the audio location,
combining them with existing patterns to create patterns with broader ranges if
possible.
Note:
Adding identical patterns to the video location is rejected by System Manager
due to duplication. It is recommended to remove the patterns from the video
location first, but care should be taken so that the users to whom the patterns
apply may not get assigned to the wrong locations. This operation requires user
discretion.
4. Remove the all existing video location and also remove other associated
administration settings with the video location.
5. Rename the audio location so as to suggest it is serving all call types.
6. If required, specify a limit for Multimedia Bandwidth for the new location.
Example:
Following illustration shows the usage of the above recommendation for the “New York”
location example:
1. Ensure that “New York Audio” and “New York Video” have identical administration
outside their Location Details pages. Ensure that no SIP Entities are in “New York
Video”.
2. Change the Total Bandwidth for “New York Audio” to 50 mbps.
3. Move/merge all IP address patterns from “New York Video” into “New York
Audio”.
4. Delete the “New York Video” location.
5. Rename the New York Audio location to be simply “New York” .
6. If desired, restrict the amount of New York's bandwidth that can be consumed by
multimedia calls by setting the Multimedia Bandwidth limit to something less than
50 mbps.
For CAC administration recommendations related to specific Session Manager upgrade paths,
refer to the book “Upgrading Avaya Aura™ Session Manager”.
Location field descriptions
Use this page to create, modify, delete, and manage locations.
Locations
Administering Avaya Aura® Session Manager November 2010 253
Button Description
Edit Opens the Location Details page that you
can use to modify the location details.
New Opens the Location Details page that you
can use to create new locations.
Duplicate Creates a duplicate of the selected location
and assigns a new state to it.
Delete Opens the Delete Confirmation page on
which you can confirm or cancel the deletion
of the location.
More Actions > Refresh all data Refreshes all data. Any unsaved
modifications are lost.
More Actions > Import Opens the Import data page that allows you
to import from XML files or zip file containing
one or more XML files.
More Actions > Export Locations Opens the Export Locations page that allows
you to export the location data as an XML file
to a specified location.
More Actions > Export all data Opens the Export all data page that allows
you to export the routing entities data as a
zipped file to a specified location.
Name Description
Name Name of the location.
Notes Notes about the location.
Location Details field descriptions
Use this page to set up and configure locations.
General section
Name Description
Name Name of the location.
Notes Notes about the location.
Managing Session Manager routing
254 Administering Avaya Aura ® Session Manager November 2010
Comments? infodev@avaya.com

Overall Managed Bandwidth section
Name Description
Managed Bandwidth Units Specifies the bandwidth unit for Overall
Managed Bandwidth values.
Total Bandwidth The total bandwidth available for use by any
calls between this location and other
locations. Any attempt to exceed this limit
results in calls being alternate routed or
denied. If no value is specified, the
bandwidth limit is infinite.
Multimedia Bandwidth The bandwidth available for use by
multimedia calls between this location and
other locations. This is a subset of the Total
Bandwidth value. Any attempt to exceed this
limit results in calls being alternate routed or
denied. If no value is specified, the use of the
limit defined for Total Bandwidth depends on
the value of Audio Calls Can Take Multimedia
Bandwidth. If selected, Total Bandwidth can
be used for any call type. If not selected, Total
Bandwidth can be used only for audio calls.
Audio Calls Can Take Multimedia
Bandwidth Specifies the use of multimedia call
bandwidth for audio calls. If this check box is
selected, the bandwidth reserved for
multimedia calls may also be used for audio
calls. If not, this bandwidth may only be used
for multimedia calls.
Per-Call Bandwidth Parameters section
Name Description
Maximum Multimedia Bandwidth (Intra-
Location) The maximum bandwidth allowed for a single
multimedia call within this location. Calls
requesting more bandwidth than this value
are modified to use less bandwidth. Default
value is 1000 Kbit/sec, range is 0-15360 Kbit/
sec.
Maximum Multimedia Bandwidth (Inter-
Location) The maximum bandwidth allowed for a single
multimedia call between this location and
another location. Calls requesting more
bandwidth than this value are modified to use
less bandwidth. Default value is 1000 Kbit/
sec, range is 0-15360 Kbit/sec.
Minimum Multimedia Bandwidth The minimum bandwidth specified per
multimedia media stream that Session
Locations
Administering Avaya Aura® Session Manager November 2010 255

Name Description
Manager uses while reducing the bandwidth
request for a call to or from this location to
enforce any bandwidth restriction. If a
bandwidth restriction requires Session
Manager to reduce a media stream below
this level, the stream is removed from the
call, possibly resulting in the entire call being
blocked. Media requests for bandwidth
beneath this minimum will not be blocked;
this is solely a restriction on Session
Manager’s ability to modify requests. Default
value is 64 Kbit/sec and the range is
64-15360 Kbit/sec.
Default Audio Bandwidth The audio bandwidth assumed to be used by
a call originating in this location that does not
explicitly specify its bandwidth needs using
the Session Description Protocol (SDP).
Such calls are assumed to be of audio type
only. Default value is 80 Kbit/sec and the
range is 0-15360 Kbit/sec.
Location Pattern section
Name Description
IP Address Pattern The IP address pattern that should be
matched for the location. For example,
• 135.12x.121.*
• 13x.1xx.*
• 135.*
• 135.12x.121.123
Note:
Pattern can also accept IP address range.
Example: 10.0.0.1-10.0.0.5
IP address mask is also a valid pattern.
Example: 135.9.0.0/16
Button Description
Add Adds an IP address pattern to match for the
location.
Remove Removes the IP address pattern to match for
the location.
Managing Session Manager routing
256 Administering Avaya Aura ® Session Manager November 2010
Comments? infodev@avaya.com
Button Description
Commit Modifications made to the Location are
saved.
Cancel Modifications made to the Location are not
saved.
Related topics:
Creating Locations on page 247
Bulk import for Locations
Please follow these rules when creating an XML bulk import file:
• Locations are referred to as routing origination in the import XML.
• The name of a location is unique and is referred to by other elements.
• Multiple Routing Origination Patterns <<routingoriginationpatterns>> can be configured
for one Routing Origination Name.
• The values in <ManagedBandwidthUnitOfMeasurement> must appear exactly same
<being case sensitive> as they appear in the System Manager user interface.
Example:
<?xml version="1.0" encoding="UTF-8" standalone="yes"?>
<routingoriginationFullTOList>
<RoutingoriginationFullTO>
<notes>this is a test</notes>
<name>New York</name>
<AverageBandwidthPerCall>80</AverageBandwidthPerCall>
<AverageBandwidthPerCallUnitOfMeasurement>Kbit/sec</
AverageBandwidthPerCallUnitOfMeasurement>
<ManagedBandwidth>500000</ManagedBandwidth>
<ManagedBandwidthUnitOfMeasurement>Kbit/sec</
ManagedBandwidthUnitOfMeasurement>
<cac_can_audio_steal_from_video>true</cac_can_audio_steal_from_video>
<cac_max_bwidth_video_interloc>300</cac_max_bwidth_video_interloc>
<cac_max_bwidth_video_intraloc>384</cac_max_bwidth_video_intraloc>
<cac_min_acceptable_bwidth_video>64</cac_min_acceptable_bwidth_video>
<cac_normal_bwidth_video>50</cac_normal_bwidth_video>
<routingoriginationpatterns>
<notes>this is a test</notes>
<ipaddresspattern>1.2.3.4-1.2.3.10</ipaddresspattern>
</routingoriginationpatterns>
<routingoriginationpatterns>
<notes>this is a test</notes>
<ipaddresspattern>1.2.4.*</ipaddresspattern>
</routingoriginationpatterns>
<TimeToLiveInSec>3600</TimeToLiveInSec>
</RoutingoriginationFullTO>
<RoutingoriginationFullTO>
<notes>this is a test</notes>
<name>Berlin</name>
<AverageBandwidthPerCall>80</AverageBandwidthPerCall>
<AverageBandwidthPerCallUnitOfMeasurement>Kbit/sec</
AverageBandwidthPerCallUnitOfMeasurement>
Locations
Administering Avaya Aura® Session Manager November 2010 257
<cac_can_audio_steal_from_video>true</cac_can_audio_steal_from_video>
<cac_max_bwidth_video_interloc>384</cac_max_bwidth_video_interloc>
<cac_max_bwidth_video_intraloc>384</cac_max_bwidth_video_intraloc>
<cac_min_acceptable_bwidth_video>64</cac_min_acceptable_bwidth_video>
<cac_normal_bwidth_video>40</cac_normal_bwidth_video>
<ManagedBandwidth>900000</ManagedBandwidth>
<ManagedBandwidthUnitOfMeasurement>Kbit/sec</
ManagedBandwidthUnitOfMeasurement>
<routingoriginationpatterns>
<notes>this is a test</notes>
<ipaddresspattern>3.*</ipaddresspattern>
</routingoriginationpatterns>
<routingoriginationpatterns>
<notes>this is a test</notes>
<ipaddresspattern>2.3.4.5</ipaddresspattern>
</routingoriginationpatterns>
<TimeToLiveInSec>3600</TimeToLiveInSec>
</RoutingoriginationFullTO>
</routingoriginationFullTOList>
Adaptations
About Adaptations
You can optionally use Adaptations to modify SIP messages that are leaving a Session
Manager instance (egress adaptation) and that are entering a Session Manager instance
(ingress adaptation). This adaptation function is needed to convert strings containing calling
and called party numbers from the local dialplan of a SIP entity to the dialplan administered
on the Session Manager, and vice-versa. Adaptation is also needed when other SIP entities
require special SIP protocol conventions. Each administered SIP entity may have its own
unique adaptation, or one adaptation can be shared among multiple entities.
Adaptations are implemented as software modules that can be created and deployed to fit the
needs of the system.
Session Manager includes a module called DigitConversionAdapter, which can convert digit
strings in various message headers as well as hostnames in the Request-URI and other
headers. It also contains adaptation modules which do protocol conversions, such as for AT&T,
Verizon, Cisco, and Nortel systems, as well as the digit conversion. All of these adapters allow
for modification of URIs specified using unique name-value pairs for egress adaptation. For
example, these can be used to replace the host name in the Request-URI with an administered
host name during egress adaptation. Details are explained in the Creating Adaptations section.
An adaptation administered using routing specifies the module to use as well as the digit
conversion that is to be performed on headers in the SIP messages. Different digit conversions
can be specified for ingress and egress adaptation.
Additionally, digit conversion can be specified to modify only “origination” type headers, only
“destination” type headers, or both. The origination/source type URIs are:
Managing Session Manager routing
258 Administering Avaya Aura ® Session Manager November 2010
Comments? infodev@avaya.com

• From (see note 1 below)
• P-Asserted-Identity
• History-Info (calling portion)
• Contact (in 3xx response)
The destination type URIs are:
• Request-URI
• To (see note 1 below)
• Message Account (in NOTIFY/message-summary body)
• Refer-To (in REFER message, see note 2 below)
Note:
1. The From and To headers are only modified by adaptation if the “fromto” module
parameter is present and has the value of “true”. See “Adaptation Module
Administration” below.
2. Adaptations are only applied to the Refer-To header in a REFER message if the
host-part of the URI is either the IP address of the Session Manager or a domain
for which the Session Manager is authoritative.
Adaptation module administration
On the Adaptation Details screen, administer the following fields:
•Adaptation Name : This is any name to describe the adaptation.
•Module Name : <Name of adaptation module>
Note:
The available modules are:
a. DigitConversionAdapter
b. AttAdapter
c. CiscoAdapter
d. CS1000Adapter
e. DiversionTypeAdapter
f. NortelAdapter
g. OrangeAdapter
h. VerizonAdapter
Adaptations
Administering Avaya Aura® Session Manager November 2010 259

Refer to the section “Installed vendor adapters” for details.
•Module Parameter : <name1=value1> <name2=value2>
Note:
The list is separated by spaces and not by commas.
Supported adaptation module parameters are:
•fromto: if set to “true”, then adaptation will modify From and To headers of the message.
If omitted or set to any other value, From and To headers will not be modified.
•multipartMIMEsupported ( may be abbreviated to MIME): is an optional parameter and
is applicable to the egress processing only. If the parameter is present and set to “no”
then multipart MIME message bodies will be stripped on egress from Session Manager.
If the multipart MIME message contained an SDP message body, it will be inserted as
the only message body in the outgoing message. If omitted or set to any other value,
message bodies will not be modified.
EGRESS Domain Modification Parameters
•overrideDestinationDomain ( may be abbreviated to odstd): {parameter #1 if not
named}, replaces the domain in Request-URI, To header (if administered), Refer-To
header, and Notify/message-summary body with the given value for egress only. If the
request is a REFER, the domain in the Refer-To header will only be modified if it is the IP
address of the Session Manager or a domain for which the Session Manager is
authoritative.
•overrideSourceDomain ( may be abbreviated to osrcd): replaces the domain in the
From header (if administered), P-Asserted-Identity header and calling part of the History-
Info header with the given value for egress only.
INGRESS Domain Modification Parameters:
•ingressOverrideDestinationDomain ( may be abbreviated to iodstd): replaces the
domain in Request-URI, To header (if administered), and Notify/message-summary body
with the given value for ingress only. If the request is a REFER, the domain in the Refer-
To header will only be modified if it is the IP address of the Session Manager or a domain
for which the Session Manager is authoritative.
•ingressOverrideSourceDomain ( may be abbreviated to iosrcd): replaces the
domain in the From header (if administered), P-Asserted-Identity header and calling part
of the History-Info header with the given value for ingress only.
Example:
Module Name:CiscoAdapter
Module Parameter:osrcd=dr.avaya.com odstd=ny.avaya.com
The same value in verbose form:
Managing Session Manager routing
260 Administering Avaya Aura ® Session Manager November 2010
Comments? infodev@avaya.com

CiscoAdapter overrideSourceDomain=dr.avaya.com
overrideDestinationDomain=ny.avaya.com
All adaptation modules have the ability to replace the domain (also known as host name)
portion of the URI with a specified value for source and destination type URIs on outgoing calls
(egress) and to append parameters to the Request URI on for outgoing calls (egress). This
adaptation functionality is expandable to adapt additional deployments needing further
flexibility.
Phone Context
Phone Context is an optional field for ingress adaptation rules and in egress adaptation
rules.
• During the processing of ingress messages:
If the phone-context field of an ingress adaptation module rule contains a valid value (not
empty), ingress adaptation is applied only if all four trigger fields (Matching Pattern, Min,
Max, and Phone-context) match the header. If the phone-context field is empty, ingress
adaptation is applied based on the remaining fields (Matching Pattern, Min, and Max).
The allowed format for the Phone Context string can either be an E.164 number (which
can contain optional hyphens, periods, or parenthesis) or a domain name (which can
contain only alphanumeric characters, a hyphen, and periods).
• During the processing of egress messages:
If the phone-context field of an egress adaptation module rule contains a valid value (not
empty), the adaptation module modifies the digits and insert phone-context when the
three trigger fields match the criteria, i.e., Matching Pattern, Min, and Max. On the other
hand, if the phone-context field is empty, the egress adaptation module does not insert
phone-context.
Creating Adaptations
Procedure
1. On the System Manager console, under Elements, click Routing.
2. Click Adaptations to open the Adaptation page.
3. Click New. The Adaptation Details page is displayed.
4. Enter the Name, Adaptation Module and any other required fields in the first
section.
a. Enter a descriptive name for the adaptation.
b. Specify an adaptation module.
•Module name field contains only the name
•Module parameter field contain either a single parameter or a list of
“name=value name=value name=value”.
Adaptations
Administering Avaya Aura® Session Manager November 2010 261

Note:
The list is separated by spaces and not by commas
c. Enter a list of URI parameters to append to the Request-URI on egress in the
Egress URI Parameters field.
URI parameters can be added to the Request-URI. For example, the parameter
“user=phone” can be appended for all INVITEs routing to a particular SIP entity.
The egress Request-URI parameters are administered from the Adaptation
Details using the Egress URI Parameters field.
The field's format is the string that should be appended to the Request URI.
The string must conform to the augmented BNF defined for the SIP Request
URI in RFC3261. A leading ';' is optional. Entry “;user=phone;custApp=1” is
equivalent to “user=phone;custApp=1”.
d. Enter description about the adaptation module in the Notes field.
5. Click Add under Digit Conversion for Incoming Calls if you need to configure ingress
digit conversion. Ingress adaptation is used to administer digit manipulation for calls
coming into the Session Manager instance.
6. Enter the matching pattern and other required fields. The Matching Pattern field
can have 1 to 36 characters. Mouse over the input field to view a tool tip describing
valid input.
7. Enter the number of minimum and maximum digits to be matched in the Min and
Max fields respectively.
The minimum value can be 1 or more. The maximum value can be 36.
8. Add Phone Context as an optional parameter for the ingress adaptation rules.
9. Enter the number of digits that you want deleted from left of the dialed number in
the Delete Digits field.
10. Enter the digits that you want inserted before the number in the Insert Digits
field.
11. From the drop-down list, select the value for Address to modify. A setting of both
will look for adaptations on both origination and destination type headers. The digit
conversion applied to a header will be taken from the entry with the longest matching
pattern.
12. Continue clicking the Ingress Adaptation Add button until all the required ingress
matching patterns have been configured.
13. To remove a matching pattern for ingress adaptations, select the check box next to
that pattern and click Remove.
14. Click Add under Digit Conversion for Outgoing Calls if you need to configure
egress digit conversion. Egress adaptation administers digit manipulation for calls
going out of the Session Manager instance.
Managing Session Manager routing
262 Administering Avaya Aura ® Session Manager November 2010
Comments? infodev@avaya.com

15. Enter the matching pattern and other required fields. The Matching Pattern field
can have 1 to 36 characters. Mouse over the input field to view a tool tip describing
valid input.
16. Enter the number of minimum and maximum digits to be matched in the Min and
Max fields respectively.
The minimum value can be 1 or more. The maximum value can be 36.
17. Add Phone Context as an optional parameter for the egress adaptation rules.
18. Enter the number of digits that you want deleted from left of the dialed number in
the Delete Digits field.
19. Enter the digits that you want inserted before the number in the Insert Digits
field.
20. From the drop-down list, select the value for Address to modify. A setting of both
will look for adaptations on both origination and destination type headers. The digit
conversion applied to a header will be taken from the entry with the longest matching
pattern.
21. Continue clicking the Egress Adaptation Add button until all the required egress
matching patterns have been configured.
22. To remove a matching pattern for egress adaptations, select the check box next to
that pattern and click Remove.
23. Click Commit.
Related topics:
Adaptation Details field descriptions on page 272
Adaptation example
Example
In the following example, an adaptation for AT&T service provider is needed at least for
international calls.
For incoming calls, AT&T sends the 10 digit local number. To convert this into E.164, Session
Manager must add a plus sign. Specify the following values:
• Matching pattern = 1
• Min = 10
• Max = 10
• Phone-Context =
• Delete Digits = 0
Adaptations
Administering Avaya Aura® Session Manager November 2010 263

• Insert Digits = +
• Address to modify = both
For outgoing calls to AT&T, Session Manager must convert the E.164 form to a format that
AT&T supports, either 1+10 digits for North America calls, or 011+country code + number for
international calls. For example, for calls to North America, specify the following values:
• Matching Pattern = +1
• Min = 12
• Max = 12
• Phone-Context =
• Delete Digits = 1
• Insert Digits = <None>
• Notes = Calls to North America
For calls to Germany, specify the following values:
• Matching Pattern = +49
• Min = 13
• Max = 13
• Delete Digits = 1
• Insert Digits = 011
• Address to modify = destination
• Notes = Calls to Germany
Example
Following is an example of how to set up adaptation with phone-context:
Ingress adaptation rule:
• Matching pattern = 53
• Min = 4
• Max = 4
• Phone-Context = site1
• Delete Digits = 0
• Insert Digits = 908
• Address to modify = both
Egress adaptation rule:
• Matching pattern = 908
• Min = 7
• Max = 7
Managing Session Manager routing
264 Administering Avaya Aura ® Session Manager November 2010
Comments? infodev@avaya.com
• Phone-Context = site1
• Delete Digits = 3
• Insert Digits =
• Address to modify = both
Input (String prior to the
adaptation processing) Adaptation Processing Output (String after the
adaptation processing)
5335; phone-context =
site1@avaya.com; user =
phone
Ingress adaptation 9085335@avaya.com
9085335@avaya.com Egress adaptation 5335; phone-context =
site1@avaya.com; user =
phone
Modifying Adaptations
Procedure
1. On the System Manager console, under Elements, click Routing.
2. Click Adaptations to open the Adaptation screen.
3. Select the adaptation for modification and click Edit
4. Edit the Name, Adaptation Module and any other required fields in the first section.
Currently there is only one adaptation module named “DigitConversionAdapter”.
a. Enter a descriptive name for the adaptation.
b. Specify an adaptation module.
•Module name field contains only the name
•Module parameter field contain either a single parameter or a list of
“name=value name=value name=value”.
Note:
The list is separated by spaces and not by commas.
c. Enter a list of URI parameters to append to the Request-URI on egress in the
Egress URI Parameters field.
URI parameters can be added to the Request-URI. For example, the parameter
“user=phone” can be appended for all INVITEs routing to a particular SIP entity.
The egress Request-URI parameters are administered from the Adaptation
Details using the Egress URI Parameters field.
The field's format is the string that should be appended to the Request URI.
The string must conform to the augmented BNF defined for the SIP Request
Adaptations
Administering Avaya Aura® Session Manager November 2010 265

URI in RFC3261. A leading ';' is optional. Entry “;user=phone;custApp=1” is
equivalent to “user=phone;custApp=1”.
d. Enter description about the adaptation module in the Notes field.
5. Click Add under Digit Conversion for Incoming Calls if you need to configure
ingress digit conversion. Ingress adaptation is used to administer digit manipulation
for calls coming into the Session Manager instance.
6. Enter the matching pattern and other required fields. The Matching Pattern field
can have 1 to 36 characters. Mouse over the input field to view a tool tip describing
valid input.
7. Enter the number of minimum and maximum digits to be matched in the Min and
Max fields respectively.
The minimum value can be 1 or more. The maximum value can be any number up
to 36.
8. Add Phone Context as an optional parameter for the ingress adaptation rules.
9. Enter the number of digits that you want deleted from left of the dialed number in
the Delete Digits field.
10. Enter the digits that you want inserted before the number in the Insert Digits
field.
11. From the drop-down list, select the value for Address to modify. A setting of both
will look for adaptations on both origination and destination type headers. The digit
conversion applied to a header will be taken from the entry with the longest matching
pattern.
12. Continue clicking the Ingress Adaptation Add button until all the required ingress
matching patterns have been configured.
13. To remove a matching pattern for ingress adaptations, select the check box next to
that pattern and click Remove.
14. Click Add under Digit Conversion for Outgoing Calls if you need to configure
egress digit conversion. Egress adaptation administers digit manipulation for calls
going out of the Session Manager instance.
15. Enter the matching pattern and other required fields. The Matching Pattern field
can have 1 to 36 characters. Mouse over the input field to view a tool tip describing
valid input.
16. Enter the number of minimum and maximum digits to be matched in the Min and
Max fields respectively.
The minimum value can be 1 or more. The maximum value can be any number up
to 36. The minimum value must be less than or equal to the maximum value.
17. Add Phone Context as an optional parameter for the egress adaptation rules.
18. Enter the number of digits that you want deleted from left of the dialed number in
the Delete Digits field.
Managing Session Manager routing
266 Administering Avaya Aura ® Session Manager November 2010
Comments? infodev@avaya.com
19. Enter the digits that you want inserted before the number in the Insert Digits
field.
20. From the drop-down list, select the value for Address to modify. A setting of both
will look for adaptations on both origination and destination type headers. The digit
conversion applied to a header will be taken from the entry with the longest matching
pattern.
21. Continue clicking the Egress Adaptation Add button until all the required egress
matching patterns have been configured.
22. To remove a matching pattern for egress adaptations, select the check box next to
that pattern and click Remove.
23. Click Commit.
Deleting Adaptations
Procedure
1. On the System Manager console, under Elements, click Routing.
2. Click Adaptations to open the Adaptation page.
3. To delete an existing Adaptation or Adaptations, select the respective check boxes
and click Delete.
4. Click Delete on the confirmation page.
Related topics:
Delete Confirmation field descriptions on page 267
Delete Confirmation field descriptions
Use this page to confirm or cancel the deletion of selected adaptations
Button Description
Delete Deletes entries for the selected adaptations
from the database
Cancel Cancels the deletion of the selected
adaptations
Adaptations
Administering Avaya Aura® Session Manager November 2010 267
Related topics:
Deleting Adaptations on page 267
Installed vendor adapters
Cisco Adapter (CiscoAdapter)
The Cisco Adapter provides two basic header manipulations: converting between Diversion
and History-Info headers and converting between P-Asserted-Id and Remote-Party-Id
headers. The Diversion and Remote-Party-Id headers have not been accepted by the IETF.
They are replaced by History-Info and P-Asserted-Identity respectively, but are still used in the
Cisco products. The Cisco Adapter also performs all the conversions available by the Digit
Conversion Adapter.
Note:
DiversionTypeAdapter performs all the conversions similar to Cisco adapter.
Diversion to History-Info Header Adaptation
Cisco requires the use of the Diversion header, rather than the History-Info header to provide
information related to how and why the call arrives to a specific application or user. The
following examples illustrate the adaptations.
Example 1:
Communication Manager user 66600001 forwards to Cisco user 60025.
Communication Manager’s outgoing INVITE has this history-info:
History-Info: "<sip:66600001@ny.avaya.com>;index=1
History-Info: "stn 66600001" <sip:66600001@ny.avaya.com?
Reason=SIP%3Bcause%3D302%3Btext%3D%22Moved%20Temporarily%22
&Reason=Redirection%3Bcause%3DCFI>;index=1.1
History-Info: <sip:600025@ny.avaya.com>;index=1.2
In the message sent to Cisco this is converted to:
Diversion: "stn 66600001" <sip:66600001@ny.avaya.com>;reason=no-
answer;privacy=off;screen=no
Example 2:
Communication Manager user calls Cisco user 60025. The call is routed to Modular Messaging
at extension 688810.
The INVITE message from the Cisco server contains the Diversion Header:
Diversion: "Ken's Desk" <sip:600025@ny.avaya.com>;reason=user-
busy;privacy=off;screen=no
The message is adapted and the outgoing INVITE to MM replaces the Diversion header with
the following:
History-Info: <sip:600025@ny.avaya.com>;index=1
History-Info: "Ken's Desk" <sip:600025@ny.avaya.com?
Managing Session Manager routing
268 Administering Avaya Aura ® Session Manager November 2010
Comments? infodev@avaya.com

Reason=SIP%3Bcause%3D486%3Btext%3D%22Busy%20Here%22
&Reason=Redirection%3Bcause%3DNORMAL%3Bavaya-cm-reason%3D%22
cover-busy%22%3Bavaya-cm-vm-address-digits%3D81080000%3Bavaya-cm-vm-address-
handle%3Dsip:80000%40avaya.com>;index=1.1
History-Info: "MM" <sip:688810@ny.avaya.com>;index=1.2
Remote-Party-Id to P-Asserted-Identity Header Adaptation
Cisco requires information in the P-Asserted-Identity (PAI) header to be received in the
Remote-Party-Id (RPI) header. Any incoming message containing a P-Asserted-Identity
header being routed to Cisco will replace that header with the Remote-Party-Id header.
Similarly, calls from Cisco containing the Remote-Party-Id header will be converted to a P-
Asserted-Identity header when routed to non-Cisco entities.
Example 3:
A call is placed from 12345 at Communication Manager and routed to the Cisco PBX.
The INVITE from Communication Manager contains:
P-Asserted-Identity: “Ryan” <sip:12345@avaya.com>
This header is converted to RPI when the request is sent to the Cisco PBX:
Remote-Party-Id: “Ryan”
<sip:12345@avaya.com>;party=called;screen=no;privacy=off
Example 4:
A call is placed from 23456 at Cisco PBX and routed to Communication Manager.
The INVITE from Cisco PBX contains:
Remote-Party-Id: “Ryan”
<sip:23456@avaya.com>;party=called;screen=no;privacy=off
This header is converted to PAI when the request is sent to Communication Manager:
P-Asserted-Identity: “Ryan” <sip:23456@avaya.com>
Verizon Adapter (VerizonAdapter)
The Verizon adapter requires the same History-Info to Diversion adaptations that the Cisco
Adapter uses. The Verizon Adapter also performs all the conversions available by the Digit
Conversion Adapter.
AT&T Adapter (AttAdapter)
AT&T does not handle the History-Info header. The adaptation module removes, on egress to
AT&T, any History-Info headers in a request or response. Messages from AT&T do not change.
The AT&T Adapter also performs all the conversions available by the Digit Conversion
Adapter.
Adaptations
Administering Avaya Aura® Session Manager November 2010 269
CS1000 Adapter (CS1000Adapter)
The CS1000 Adapter provides two services between formats used by the CS1000 and the
format used by other Avaya equipment:
• translation between History-Info header formats
• Support for CS1000 origination based routing
History-Info header adaptation
Since the CS1000 adapter uses some different formatting for the History-Info header than other
Avaya products, it is necessary to adapt the History-Info header values. Two primary areas of
formatting differences requiring adaptation are index values and reason code values.
Index format: The CS1000 adapter increments its indices by adding a value of 1. For example:
1, 2, 3, 4. This increments its indices by adding a 1/10 value. For example: 1, 1.1, 1.2, 1.3. The
CS1000 adapter on ingress converts the values from the integer format to the decimal format.
The CS1000 adapter on egress converts the values from the decimal format to the integer
format.
Reason Code adaptation: CS1000 adapter uses two reason parameters in its History-Info
header format. The second parameter is labeled Redirection and is inserted on ingress and
removed on egress by the CS1000 adapter. The Redirection phrase also contains a Cause
parameter. The Redirection Cause and avaya-cm-reason are inserted to make the CS1000
History-Info similar to coverage history-info sent from Communication Manager according to
the following mapping:
SIP Cause Redirection Reason avaya-cm-reason
302 CFI send-all-calls
486 CFB cover-busy
480 CFNR cover-no-reply
Example
A conversion from Avaya format to CS1000 format:
Avaya History-Info:
History-Info:<sip:orig@avaya.com>;index=1
History-Info:"Original Destination"<sip:orig@avaya.com?Reason=SIP%3Bcause
%3D302%3Btext%3D%22Moved%20Temporarily%22&Reason=Redirection%3BCause
%3DCFI>;index=1.1
History-Info:"Final Destination"<sip:final@avaya.com>;index=1.2
gets converted to:
CS 1000 History-Info:
History-Info:<sip:orig@avaya.com?Reason=SIP%3Bcause%3D302%3Btext%3B%22Moved
%20Temporarily%22>;index=1, <sip:final@avaya.com>;index=2
Example
A conversion from CS1000 format to Avaya format:
Managing Session Manager routing
270 Administering Avaya Aura ® Session Manager November 2010
Comments? infodev@avaya.com
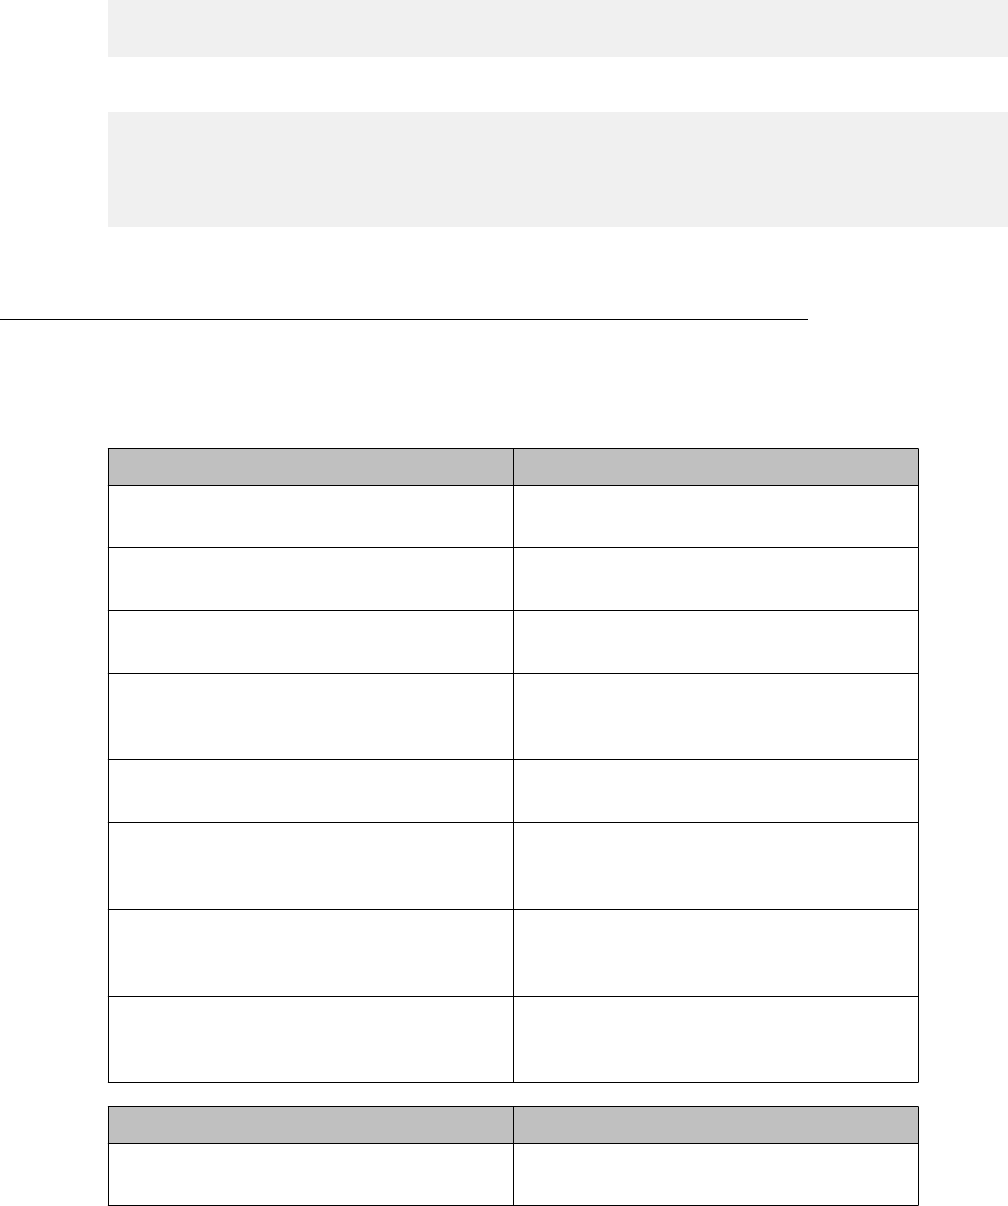
CS1000 History-Info:
History-Info: <sip:7521;phone-context=cdp.udp@testbed1.com;user=phone?reason=%20sip
%3bcause%3d480%3btext%3d%20%Temporarily%20Unavailable%22>; index=1,
<sip:5522;phone-context=cdp.udp@testbed1.com;user=phone>;index=2
gets converted to:
Avaya History-Info: History-Info:<sip:canonically-
adjusted-7521@testbed1.com;user=phone>;index=1
History-Info:<sip:canonically-adjusted-7521@testbed1.com;user=phone? Reason=SIP
%3Bcause%3D480%3Btext%3D%22Temporarily%20Unavailable%22&Reason=Redirection%3Bcause
%3DNORMAL%3avaya-cm-reason%3D%22cover-no-reply%22>;index=1.1
History-Info: <sip:canonically-adjusted-5522@testbed1.com;user=phone>;index=1.2
The CS1000 adapter performs all the conversions available by the DigitConversionAdapter.
Adaptations field descriptions
Use this page to create, modify, delete, and manage adaptations.
Button Description
Edit Opens the Adaptation Details page that you
can use to modify the adaptation details.
New Opens the Adaptation Details page that you
can use to create new adaptations.
Duplicate Creates a duplicate of the selected
adaptation and assigns a new state to it
Delete Opens the Delete Confirmation page on
which you can confirm or cancel the deletion
of the adaptation.
More Actions > Refresh all data Refreshes all data. Any unsaved
modifications are lost.
More Actions > Import Opens the Import data page that allows you
to import from XML files or zip file containing
one or more XML files.
More Actions > Export Adaptations Opens the Export Adaptation page that
allows you to export the adaptation data as
an XML file to a specified location.
More Actions > Export all data Opens the Export all data page that allows
you to export the routing entities data as a
zipped file to a specified location.
Name Description
Name Name of the adaptation. Must be unique and
be between 3 and 64 characters in length.
Adaptations
Administering Avaya Aura® Session Manager November 2010 271
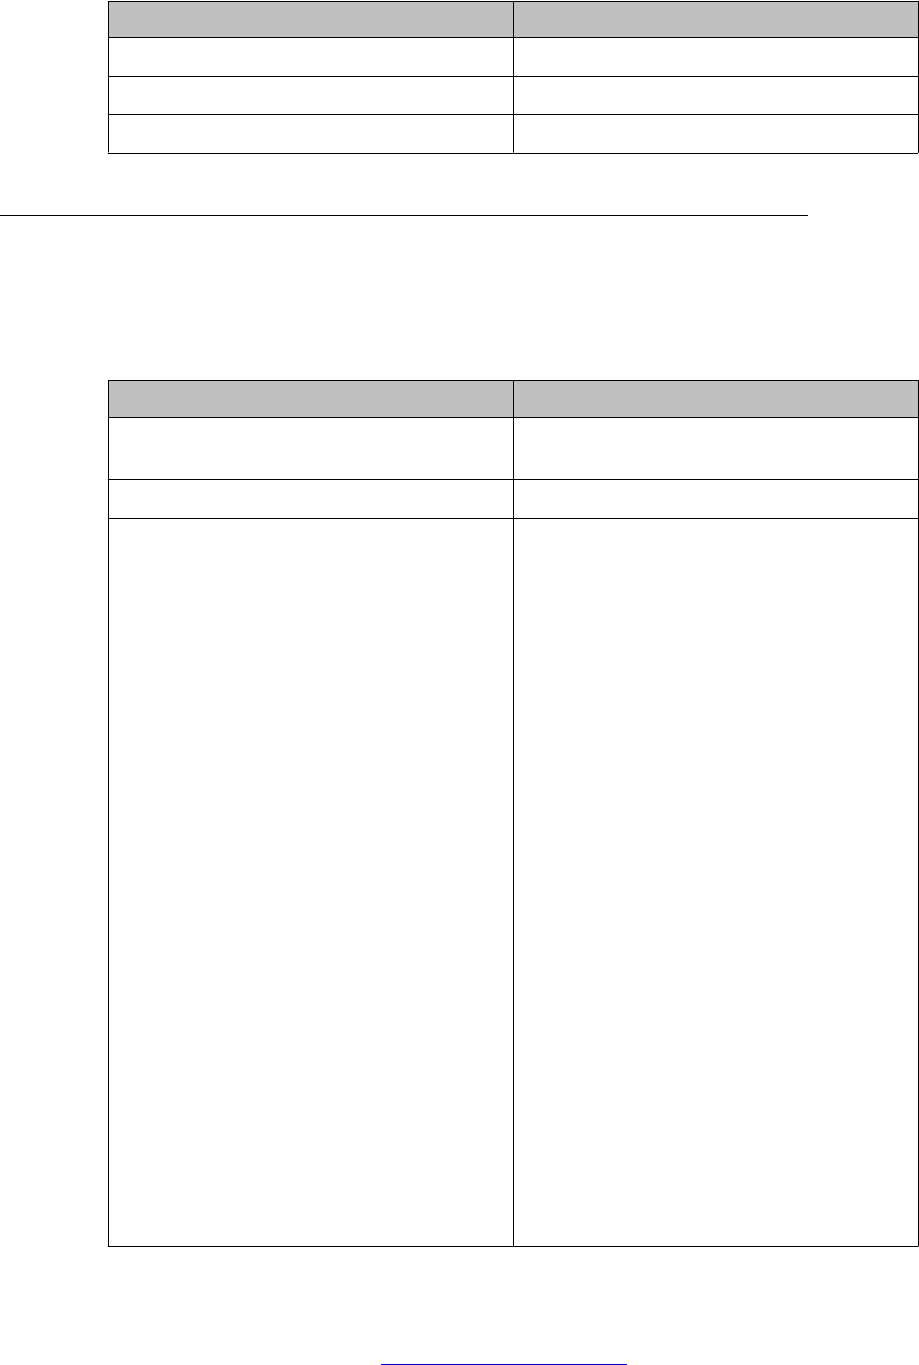
Name Description
Module name The module name contains only the name.
Egress URI Parameters The terminating trunk group parameters.
Notes Other details that you wish to add.
Adaptation Details field descriptions
Use this page to specify the adaptation details.
General section
Name Description
Adaptation Name Name of the adaptation. Must be unique and
be between 3 and 64 characters in length.
Module name The module name contains only the name.
Module parameter The module parameters contain either a
single parameter or a list of “name=value
name=value name=value”.
Supported adaptation module parameters
are:
•fromto: if set to “true”, then adaptation will
modify From and To headers of the
message. If omitted or set to any other
value, From and To headers will not be
modified.
•multipartMIMEsupported (or
abbr. name MIME): is an optional
parameter and is applicable to the egress
processing only. If the parameter is present
and set to “no” then multipart MIME
message bodies will be stripped on egress
from Session Manager. If the multipart
MIME message contained an SDP
message body, it will be inserted as the
only message body in the outgoing
message. If omitted or set to any other
value, message bodies will not be
modified.
EGRESS Domain Modification Parameters
•overrideDestinationDomain ( may
be abbreviated to odstd): {parameter #1
if not named}, replaces the domain in
Managing Session Manager routing
272 Administering Avaya Aura ® Session Manager November 2010
Comments? infodev@avaya.com

Name Description
Request-URI, To header (if administered),
Refer-To header, and Notify/message-
summary body with the given value for
egress only.
•overrideSourceDomain ( may be
abbreviated to osrcd): replaces the
domain in the From header (if
administered), P-Asserted-Identity header
and calling part of the History-Info header
with the given value for egress only.
INGRESS Domain Modification Parameters:
•ingressOverrideDestinationDoma
in ( may be abbreviated to iodstd):
replaces the domain in Request-URI, To
header (if administered), and Notify/
message-summary body with the given
value for ingress only.
•ingressOverrideSourceDomain (
may be abbreviated to iosrcd): replaces
the domain in the From header (if
administered), P-Asserted-Identity header
and calling part of the History-Info header
with the given value for ingress only.
Egress URI Parameters The terminating trunk group parameters.
Notes Other details that you wish to add.
Digit Conversion for Incoming Calls section
Name Description
Select check box Use this check box to select and use the digit
conversion for the incoming calls
Matching Pattern Pattern to match for the incoming calls. The
pattern can have between 1 and 36
characters. Roll over the field for the valid
pattern.
Min Minimum number of digits to be matched
Max Maximum number of digits to be matched
Phone Context Optional parameter for the ingress
adaptation rules.
Delete Digits Number of digits to be deleted from the dialed
number
Adaptations
Administering Avaya Aura® Session Manager November 2010 273

Name Description
Insert Digits Number of digits to be added before the
dialed number
Address to Modify A setting of both will look for adaptations on
both origination and destination type
headers. The digit conversion applied to a
header will be taken from the entry with the
longest matching pattern.
Notes Any other details that you wish to add.
Digit Conversion for Outgoing Calls section
Name Description
Select check box Use this check box to select and use the digit
conversion for the outgoing calls
Matching Pattern Pattern to match for the outgoing calls. The
pattern can have between 1 and 36
characters. Roll over the field for the valid
pattern.
Min Minimum number of digits to be matched.
Max Maximum number of digits to be matched.
Phone Context Optional parameter in the action fields for the
egress adaptation rules.
Delete Digits Number of digits to be deleted from the dialed
number.
Insert Digits Number of digits to be added before the
dialed number.
Address to Modify A setting of both will look for adaptations on
both origination and destination type
headers. The digit conversion applied to a
header will be taken from the entry with the
longest matching pattern.
Notes Any other details that you wish to add.
Button Description
Add Adds digit conversion for incoming or
outgoing calls for the adaptations.
Remove Removes digit conversion from incoming or
outgoing calls for the adaptations.
Managing Session Manager routing
274 Administering Avaya Aura ® Session Manager November 2010
Comments? infodev@avaya.com
Button Description
Commit Saves the adaptation details and distributes
them to the Session Manager instances in
the enterprise.
Cancel Cancels changes to the adaptation details
and returns to the Adaptations page.
Related topics:
Creating Adaptations on page 261
Bulk import for Adaptations
Follow these rules when creating an XML bulk import file:
• The name of an adaptation is unique and is referred to by other elements.
• The value of <adaptationmodule> is a combination of the fields “Module Name” and
“Module Parameters” in the System Manager user interface. The values are separated
by a single space.
• Multiple Ingress and Egress configurations <<EgressadaptationFullTO>,
<IngressadaptationFullTO>> can be configured for one Adaptation name.
• The values in <addressToModify> must appear exactly same (being case sensitive) as
they appear in the System Manager user interface.
Warning:
When you add new digit pattern or adaptation entries to an existing adaptation, you must
include ALL patterns in the adaptation XML file. Importing an adaptation that includes only
the new adaptation patterns cannot be done. When you add new patterns to an existing
adaptation, ensure that you export the current adaptation, add new patterns, and then re-
import the XML file that includes the current and new patterns.
Example:
<?xml version="1.0" encoding="UTF-8" standalone="yes"?>
<adaptationFullTOList>
<AdaptationFullTO>
<notes>this is a test</notes>
<adaptationmodule>VersionModule param1=17 param2=15</adaptationmodule>
<egressuriparameters>uri1</egressuriparameters>
<name>VerisonAdaptation</name>
<EgressadaptationFullTO>
<notes>test</notes>
<deletedigits>1</deletedigits>
<insertdigits>3</insertdigits>
<matchingpattern>809</matchingpattern>
<maxdigits>20</maxdigits>
<mindigits>3</mindigits>
<addressToModify>origination</addressToModify>
</EgressadaptationFullTO>
<EgressadaptationFullTO>
Adaptations
Administering Avaya Aura® Session Manager November 2010 275

<notes>test</notes>
<deletedigits>1</deletedigits>
<insertdigits>3</insertdigits>
<matchingpattern>810</matchingpattern>
<maxdigits>21</maxdigits>
<mindigits>3</mindigits>
<addressToModify>destination</addressToModify>
</EgressadaptationFullTO>
<EgressadaptationFullTO>
<notes>test</notes>
<deletedigits>1</deletedigits>
<insertdigits>3</insertdigits>
<matchingpattern>811</matchingpattern>
<maxdigits>22</maxdigits>
<mindigits>3</mindigits>
<addressToModify>both</addressToModify>
</EgressadaptationFullTO>
<IngressadaptationFullTO>
<notes>test</notes>
<deletedigits>1</deletedigits>
<insertdigits>2</insertdigits>
<matchingpattern>148</matchingpattern>
<maxdigits>25</maxdigits>
<mindigits>3</mindigits>
<addressToModify>origination</addressToModify>
</IngressadaptationFullTO>
<IngressadaptationFullTO>
<notes>test</notes>
<deletedigits>1</deletedigits>
<insertdigits>2</insertdigits>
<matchingpattern>149</matchingpattern>
<maxdigits>26</maxdigits>
<mindigits>3</mindigits>
<addressToModify>destination</addressToModify>
</IngressadaptationFullTO>
<IngressadaptationFullTO>
<notes>test</notes>
<deletedigits>1</deletedigits>
<insertdigits>2</insertdigits>
<matchingpattern>150</matchingpattern>
<maxdigits>27</maxdigits>
<mindigits>3</mindigits>
<addressToModify>both</addressToModify>
</IngressadaptationFullTO>
</AdaptationFullTO>
</adaptationFullTOList>
SIP Entities
About SIP Entities
SIP entities are all the network entities that are a part of the SIP System. SIP entities include
Session Manager instances, Communication Managers, Session Border Controllers (SBCs),
SIP trunks, and so on.
Managing Session Manager routing
276 Administering Avaya Aura ® Session Manager November 2010
Comments? infodev@avaya.com

Authentication of trusted SIP entities
Routing uses the following information for the authentication of SIP entities by performing
validation on IP/Transport Layer and TLS Layer:
• FQDN or IP Address of the SIP entity
• Credential name of the SIP entity
• Protocol of the Entity Links. This is a SIP connection transport type (TCP/TLS/UDP)
• Trust State of the Entity Link (This defines whether the entity link is Trusted or not)
For information about administering these fields, refer to Creating SIP entities.
IP and transport layer validation
When a SIP entity connects to Session Manager over a TCP or TLS port, Session Manager
validates that:
• The IP address matches one of the SIP entities configured in routing that have trusted
entity links with the Session Manager. If the SIP entities are configured as FQDN, Session
Manager performs a DNS resolution before doing the verification.
•Transport for the incoming SIP connection matches with one of the entity links associated
with this SIP entity and the Session Manager. Also, the Trust State of the entity link must
be configured as trusted. Session Manager does not accept connections matching
untrusted entity links.
For SIP packets over UDP, above validation is performed for each packet. For SIP TLS
connections, further validation is performed as described in the next section.
TLS layer validation
Session Manager applies the following additional validations for SIP TLS connections:
1. During a TLS handshake, mutual TLS authentication is performed, that is, Identity
certificate of the SIP entity is validated against the trusted CA certificate repository
in the Session Manager for SIP TLS. If this verification fails, Session Manager does
not accept the connection.
2. If the mutual TLS authentication is successful, further validation is performed on the
SIP entity Identity Certificate as per the Credential Name or the far-end IP
address.
• If the Credential Name string is empty, the connection is accepted.
SIP Entities
Administering Avaya Aura® Session Manager November 2010 277

• If the Credential Name string is not empty, the Credential Name and the IP
address of the far-end is searched for in the following fields in the identity
certificate provided by the SIP entity:
- CN value from the subject
- subjectAltName.dNSName
- subjectAltName.uniformResourceIdentifier (For IP address comparison,
IP address string is converted to SIP:W.X.Y.Z before comparison.
W.X.Y.Z is the remote socket IPV4 address. Also, case insensitive search
is performed in this case)
With entity links from both Session Manager instances, checking the Override Port &
Transport with DNS SRV check box on the SIP entity form indicates that both the Port and
Protocol (Transport) on the SIP entity form are ignored.
• If you select the check box, the port and transport administered in the local host name
resolution table is used, which could override the entity link.
• If the FQDN is not in the local table and DNS is consulted, if you have not selected the
check box, only an A-Record lookup is done in DNS to resolve the host name to an IP
address. Transport and port specified in the entity link are used. If you selected the check
box, a full DNS lookup (as described in RFC 3263) is done, and the transport and port
specified in the entity link could be overridden.
Creating SIP Entities
About this task
Use the SIP entities screen to create SIP entities. To administer minimal routing via Session
Manager, you need to configure a SIP entity of type Communication Manager and a second
SIP entity of type Session Manager.
Procedure
1. On the System Manager console, under Elements, click Routing.
2. Click Elements, click Routing.
3. Click Routing > SIP Entities.
4. Click New.
5. Enter the Name of the SIP entity in the Name field.
6. Enter the FQDN or IP address of the SIP entity in the FQDN or IP Address field.
7. Select the type of SIP entity from the drop-down menu in the Type field.
8. If you need to specify the Location for the SIP entity, click the drop-down selector
for the Location field and select a location.
Managing Session Manager routing
278 Administering Avaya Aura ® Session Manager November 2010
Comments? infodev@avaya.com

9. If the SIP entity Type is “Session Manager” and you need to specify an Outbound
Proxy for the SIP entity, click the drop-down selector for the Outbound Proxy
field.
In cases when Session Manager cannot associate any administered routing
policies, then the request is sent to the SIP entity administered as an outbound
proxy. If no outbound proxy is provisioned, then Session Manager will proxy the
request on its own.
10. Enter a regular expression string in the Credential name field. The Credential name
is used for TLS connection validation by searching for this string in the SIP entity
identity certificate.
•If you do not want to perform the additional validation on the SIP entity identity
certificate or are not using SIP TLS for connecting to the SIP entity, leave this
field empty.
•If you want to verify that a specific string or SIP entity FQDN is present within
the SIP entity identity certificate, enter that string or SIP entity FQDN using the
regular expression syntax.
• If you want to verify that the SIP entity IP address is present within the SIP
entity identity certificate, enter the SIP entity IP address using the regular
expression syntax.
Note:
IP Address is searched by default when any string is configured in the Credential
Name.
The Credential name is a regular expression string and follows Perl version 5.8
syntax. Here are some examples:
For “www.sipentity.domain.com”, use the string “www\.sipentity\.domain\.com”.
For “192.14.11.22”, use string “192\.14\.11\.22”. You can look for a subset of the
string or you can create a wild card search. For example, to look for “domain.com”
as a substring, use the string “domain\.com”
11. Under SIP Link Monitoring, use the drop-down menu to select one of the following:
• Use Session Manager Configuration – Use the settings under Session
Manager > Session Manager Administration
• Link Monitoring Enabled – Enables link monitoring on this SIP entity.
• Link Monitoring Disabled – Link monitoring will be turn off for this SIP entity.
12. If you need to specify the Entity Links, click Add.
13. Enter the name in the Name field.
14. Enter the SIP entity 1 by selecting the required Session Manager SIP entity from
the drop-down list and provide the required port. SIP entity 1 must always be an
Session Manager instance.
SIP Entities
Administering Avaya Aura® Session Manager November 2010 279

The default port for TCP and UDP is 5060. The default port for TLS is 5061.
15. Enter the SIP entity 2 by selecting the required non-Session Manager SIP entity
from the drop-down list and provide the required port.
The port is the port on which you have configured the remote entity to receive
requests for the specified transport protocol.
16. If the SIP entity is trusted, select the Trusted check box. Session Manager does
not accept SIP connection requests or SIP packets from untrusted SIP entities.
17. Select the protocol you require for the link using the Protocol drop-down list.
18. If you need to specify the Port parameters, click Add under Port. When Session
Manager receives a request where the host-part of the request-URI is the IP
address of the Session Manager, it associates one of the administered domains
with the port on which the request was received.
19. Enter the necessary Port and Protocol parameters.
20. To remove an incorrectly added Port, select the respective Port check box and click
Remove.
21. Click Commit.
Related topics:
SIP Entity Details field descriptions on page 284
Modifying SIP entities
Procedure
1. On the System Manager console, under Elements, click Routing.
2. Click Routing > SIP Entities.
3. Select the SIP entity for modification and click Edit .
4. Modify the Name, FQDN (Fully Qualified Domain Name) or IP address of the SIP
entity, Type (Session Manager, SBC, CM, VoicePortal, Gateway, SIP Trunk, or
Other) and any other required fields in the first section.
5. If you need to specify the Location for the SIP entity, click the drop-down selector
for the Location field.
6. If the SIP entity Type is “Session Manager” and you need to specify an Outbound
Proxy for the SIP entity, click the drop-down selector for the Outbound Proxy
field.
7. Select the correct time zone from the Time Zone drop-down list.
Managing Session Manager routing
280 Administering Avaya Aura ® Session Manager November 2010
Comments? infodev@avaya.com

8. Enter or modify a regular expression string in the Credential name field. Credential
name is used for TLS connection validation by searching this string in the SIP entity
identity certificate.
• If you do not want to perform the additional validation on SIP entity identity
certificate or are not using SIP TLS for connecting to the SIP entity, leave this
field empty.
•If you want to verify that a specific string or SIP entity FQDN is present within
the SIP entity identity certificate, enter that string or SIP entity FQDN using the
regular expression syntax.
• If you want to verify that the SIP entity IP address is present within the SIP
entity identity certificate, enter the SIP entity IP address using the regular
expression syntax. Please note that the system looks for the IP Address by
default when any string is configured in the Credential Name.
Note:
The Credential name is a regular expression string and follows Perl version 5.8
syntax. Here are some of the examples:
• For “www.sipentity.domain.com”, use the string “www\.sipentity\.domain
\.com”.
• For “192.14.11.22”, use string “192\.14\.11\.22”.
•You can search a subset of the string or can create a wild card search. For
example, for searching for “domain.com” as a substring, use the string
“*domain\.com*”
9. Under SIP Link Monitoring, the following options are available from the drop-down
menu:
a. Use Session Manager Configuration
b. Link Monitoring Enabled – Enables link monitoring on this SIP entity.
c. Link Monitoring Disabled – Link monitoring will be turn off for this SIP entity.
10. If you need to specify the Entity Links, click Add.
11. Enter the name in the Name field.
12. Enter the SIP entity 1 by selecting the required Session Manager SIP entity from
the drop-down list and provide the required port. SIP entity 1 must always be an
Session Manager instance.
The default port for TCP and UDP is 5060. The default port for TLS is 5061.
13. Enter the SIP entity 2 by selecting the required non-Session Manager SIP entity
from the drop-down list and provide the required port.
The port is the port on which you have configured the remote entity to receive
requests for the specified transport protocol.
14. If the SIP entity is trusted, select the Trusted check box. Session Manager does
not accept SIP connection requests or SIP packets from untrusted SIP entities.
SIP Entities
Administering Avaya Aura® Session Manager November 2010 281
15. Select the protocol you require for the link using the Protocol drop-down list.
16. If you need to specify the Port parameters, click Add under Port. When Session
Manager receives a request where the host-part of the request-URI is the IP
address of the Session Manager, it associates one of the administered domains
with the port on which the request was received.
17. Enter the necessary Port and Protocol parameters.
18. To remove an incorrectly added Port, select the respective Port check box and click
Remove.
19. Click Commit.
Deleting SIP Entities
Procedure
1. On the System Manager console, under Elements, click Routing.
2. Click Routing > SIP Entities.
3. To delete an existing SIP entity or entities, select the respective check boxes and
click Delete.
4. Click Delete or Cancel on the confirmation page.
Delete Confirmation field descriptions
Use this page to confirm or cancel the deletion of the SIP entity.
Button Description
Delete Deletes the selected SIP entity or entities.
Cancel Cancels the deletion of the selected SIP
entity or entities.
SIP Entities field descriptions
Use this page to create, modify, delete, and manage SIP entities.
Managing Session Manager routing
282 Administering Avaya Aura ® Session Manager November 2010
Comments? infodev@avaya.com

Button Description
Edit Opens the SIP Entity Details page that you
can use to modify the SIP entity.
New Opens the SIP Entity Details page that you
can use to create new SIP entities.
Duplicate Creates a duplicate of the selected SIP entity
and assigns a new state to it.
Delete Opens the Delete Confirmation page on
which you can confirm or cancel the deletion
of the SIP entity.
More Actions > Refresh all data Refreshes all data. Any unsaved
modifications are lost.
More Actions > Display SIP Entity
References Opens the Overview of References to SIP
Entities page which displays the routing
policies, adaptations, and locations that
correspond to the SIP entity.
More Actions > Import Opens the Import data page that allows you
to import from XML files or zip file containing
one or more XML files.
More Actions > Export SIP Entities Opens the Export SIP Entities page that
allows you to export the SIP entity data as an
XML file to a specified location.
More Actions > Export all data Opens the Export all data page that allows
you to export data for all routing entities as a
zipped file to a specified location.
Name Description
Name SIP entity name. This name must be unique
and can have between 3 and 64
characters.
FQDN or IP Address Fully qualified domain name or IP address of
the SIP entity.
Type SIP entity type, such as a Session Manager,
Communication Manager, SIP trunk, or a
gateway.
Note:
You can select the SIP entity type as ELIN
Server. This is used by third party E911
services, which determines a user’s
location based on IP address, to send the
new ELIN to Session Manager in case of
SIP Entities
Administering Avaya Aura® Session Manager November 2010 283
Name Description
emergency call. The SIP Entity selected
as the ELIN server should be resolved
through local host name resolution to use
either the primary or secondary IP
address.
Notes Additional notes about the SIP entity.
SIP Entity Details field descriptions
Use this page to specify SIP entity details.
General
Name Description
Name SIP entity name. This name must be unique
and can have between 3 and 64
characters.
FQDN or IP Address Fully qualified domain name or IP address of
the SIP entity.
Type SIP entity type, such as a Session Manager,
Communication Manager, SIP trunk, or a
gateway.
Note:
You can select the SIP entity type as ELIN
Server. This is used by third party E911
services, which determines a user’s
location based on IP address, to send the
new ELIN to Session Manager in case of
emergency call. The SIP Entity selected
as the ELIN server should be resolved
through local host name resolution to use
either the primary or secondary IP
address.
Notes Additional notes about the SIP entity.
Location SIP entity location. Select from previously
defined locations.
Outbound Proxy Outbound proxy if the entity type is Session
Manager, and you wish to specify a proxy.
Time Zone Default time zone to be used for the entity.
Managing Session Manager routing
284 Administering Avaya Aura ® Session Manager November 2010
Comments? infodev@avaya.com

Name Description
Credential name Enter a regular expression string in the
Credential name. Credential name is used
for TLS connection validation by searching
this string in the SIP entity identity
certificate.
SIP Link Monitoring
Name Description
SIP Link Monitoring Select the process for SIP Link monitoring.
Entity Links
Name Description
SIP Entity 1 Select a SIP entity from the drop-down list.
This entity must always be a Session
Manager instance.
Protocol Protocol to be used for the entity link.
Port Port to be used for SIP entity 1.
SIP Entity 2 Select a SIP entity from the drop-down list.
This entity need not be a Session Manager
entity.
Port Port to be used for SIP entity 2.
Trusted Specifies that the link between the two SIP
entities is trusted.
Port Add a listening port for the SIP entity.
Protocol Protocol that the SIP entity uses.
Default Domain The domain of the SIP entity.
Notes Additional notes about the port and port
parameters.
Port
Name Description
Port Add a listening port for the SIP entity.
Protocol Protocol that the SIP entity uses.
Default Domain The domain of the SIP entity.
Notes Additional notes about the port and port
parameters.
SIP Entities
Administering Avaya Aura® Session Manager November 2010 285

Button Description
Add Adds the selected entity.
Remove Removes the selected entity.
Commit Saves the SIP entity and distributes it to the
Session Managers in the enterprise.
Cancel Cancels the creation or modification of the
SIP entity.
Related topics:
Creating SIP Entities on page 278
SIP Entity List field descriptions
Use this page to select and associate SIP entities to a routing policy.
Name Description
Name Select a SIP entity name check box from the
list to associate it to the selected routing
policy.
FQDN or IP Address Displays the fully qualified domain name or
IP address of the SIP entity.
Type Displays the type of the SIP entity such as
Session Manager, SBC, CM, VoicePortal,
Gateway, SIP Trunk, or Other.
Notes Additional notes.
Button Description
Select Confirm selection of the SIP entity for
associating to the routing policy.
Cancel Cancel the selection of the SIP entity.
Bulk import for SIP Entities
Please follow these rules when creating an XML bulk import file:
• The name of a SIP Entity is unique and is referred to by other elements.
•<adaptationName> must either be empty or refer to an existing adaptation with the exact
same name. It must either appear in the System Manager database or in an import file
Managing Session Manager routing
286 Administering Avaya Aura ® Session Manager November 2010
Comments? infodev@avaya.com

that exists in the same import operation as the SIP Entity. SIP Entity of type “ASM” <Avaya
Session Manager> cannot contain an adaptation entry.
•<adaptationName> contains the adaptation module name and parameters separated by
spaces <examples below>.
•Listen ports (<listenports>) are only relevant for SIP Entity of type “ASM”. Do not include
these entries for any other type of SIP Entity.
• Multiple listen ports entries (<listenports>) can be configured for one ASM SIP Entity.
- <sipdomainName> must refer to an existing domain with the exact same name. It
must either appear in the System Manager database or in an import file that exists
in the same import operation as the SIP Entity.
-The values in <transportprotocol> must appear exactly same (being case sensitive)
as they appear in the System Manager user interface.
•The values of <timezoneName> should be same (being case sensitive) as that of the field
“Time Zone” in the SIP Entity user interface in System Manager.
• The field <userfc3263> corresponds to the “Override Port & Transport with DNS SRV”
check box in the SIP entity form.
•The value of <entitytype> must contain one of the following values exactly as they appear
below being case sensitive.
- CM — communication manager (CM in the user interface)
- ASM — Session Manager in the user interface
- Modular Messaging — Session Manager in the user interface
- VP — Voice Portal in the user interface
- Gateway — Gateway in the user interface
- SIP Trunk — SIP Trunk in the user interface
- OTHER — Other in the user interface.
• The values in <cdrSetting> must appear exactly same being case sensitive, as they
appear in the System Manager user interface.
•The field <do_monitoring> corresponds to the field “SIP Link Monitoring” in the SIP Entity
details form. The relation is as follows:
- In order to enable SIP Link monitoring, <do_monitoring> value must be “yes”
- In order to enable SIP Link monitoring, <do_monitoring> value must be “no”
- In order to use the Session Manager configuration, the <do_monitoring> tag must
be completely omitted.
Example:
<?xml version="1.0" encoding="UTF-8" standalone="yes"?>
<sipentityFullTOList>
<SipentityFullTO>
<notes>this is a test</notes>
SIP Entities
Administering Avaya Aura® Session Manager November 2010 287

<entitytype>CM</entitytype>
<fqdnoripaddr>9.8.7.6</fqdnoripaddr>
<name>BerlinCM</name>
<adaptationName>VerisonAdaptation param1=12 param2=14</adaptationName>
<cdrSetting>egress</cdrSetting>
<credentialname>credential test</credentialname>
<do_monitoring>yes</do_monitoring>
<monitor_proactive_secs>900</monitor_proactive_secs>
<monitor_reactive_secs>120</monitor_reactive_secs>
<monitor_retries>1</monitor_retries>
<routingoriginationName>Berlin</routingoriginationName>
<timer_bf_secs>4</timer_bf_secs>
<timezoneName>Europe/Berlin</timezoneName>
<userfc3263>false</userfc3263>
</SipentityFullTO>
<SipentityFullTO>
<notes>this is a test</notes>
<entitytype>CM</entitytype>
<fqdnoripaddr>9.8.7.5</fqdnoripaddr>
<name>NewYorkCM</name>
<adaptationName>VerisonAdaptation param1=7 param2=8</adaptationName>
<cdrSetting>egress</cdrSetting>
<credentialname>credential test</credentialname>
<do_monitoring>yes</do_monitoring>
<monitor_proactive_secs>900</monitor_proactive_secs>
<monitor_reactive_secs>120</monitor_reactive_secs>
<monitor_retries>1</monitor_retries>
<routingoriginationName>New York</routingoriginationName>
<timer_bf_secs>4</timer_bf_secs>
<timezoneName>America/New_York</timezoneName>
<userfc3263>false</userfc3263>
</SipentityFullTO>
<SipentityFullTO>
<notes>this is a test</notes>
<entitytype>ASM</entitytype>
<fqdnoripaddr>4.5.6.7</fqdnoripaddr>
<name>SessionManager1</name>
<cdrSetting>egress</cdrSetting>
<credentialname>credential test</credentialname>
<do_monitoring>use-instance</do_monitoring>
<listenports>
<notes>this is a test</notes>
<portnumber>5067</portnumber>
<sipdomainName>avaya.com</sipdomainName>
<transportprotocol>TLS</transportprotocol>
</listenports>
<monitor_proactive_secs>900</monitor_proactive_secs>
<monitor_reactive_secs>120</monitor_reactive_secs>
<monitor_retries>1</monitor_retries>
<routingoriginationName>New York</routingoriginationName>
<timer_bf_secs>4</timer_bf_secs>
<timezoneName>America/New_York</timezoneName>
<userfc3263>false</userfc3263>
</SipentityFullTO>
</sipentityFullTOList>
Managing Session Manager routing
288 Administering Avaya Aura ® Session Manager November 2010
Comments? infodev@avaya.com

SIP Entity References
About SIP Entity References
Session Manager enables you to see all references to a SIP entity such as its location, the
routing policy that is created for the SIP entity, and adaptations, if any. If a single SIP entity
has more than one combination of these references, Session Manager displays each of the
combinations on a separate row.
Displaying SIP Entity References
Procedure
1. On the System Manager console, under Elements, click Routing.
2. Click Routing > SIP Entities.
3. From the SIP Entity menu, select the check box for a SIP entity whose references
you want to see.
4. From the More Actions drop-down list, select Display SIP Entity References.
Session Manager displays the overview of SIP entity references such as the entity
location, name of the routing policy attached to the entity, and adaptations, if any.
5. Click Back to navigate to the SIP entities.
Related topics:
Overview of References to SIP Entities field descriptions on page 289
Overview of References to SIP Entities field descriptions
Use this page to view information about the SIP entity references associated with the selected
SIP entity
Name Description
SIP Entity Name Lists the names of the SIP entities
SIP Entity References
Administering Avaya Aura® Session Manager November 2010 289
Name Description
Location Name Lists the location associated with the
specified SIP entity
Routing Policy Name Lists the routing policy associated with the
specified SIP entity
Adaptation Name Lists the name of the adaptation associated
with the SIP entity
Button Description
Back Returns to the SIP Entities page
Related topics:
Displaying SIP Entity References on page 289
Entity Links
About Entity Links
Session Manager enables you to create an entity link between the Session Manager and any
other administered SIP entity. You must configure an entity link between a Session Manager
and any entity that you have administered if you want Session Manager to be able to send or
receive messages from that entity directly. To be able to communicate with other SIP entities,
each Session Manager instance must know the port and the transport protocol of its entity link
to these SIP entities in the network. Session Manager does not need to know the port and
transport protocol if the Override Port & Transport box is checked on the SIP entity. Port and
transport must be administered even if the Override Port & Transport is checked on the SIP
entity, although their values will not be used.
Routing entity links connect two SIP entities through the Session Manager. They enable you
to define the network topology for SIP routing.
• Entity Links are configured to connect two SIP entities.
• Trusted Hosts are indicated by assigning theTrust State to the link that connects the
entities.
Managing Session Manager routing
290 Administering Avaya Aura ® Session Manager November 2010
Comments? infodev@avaya.com

Creating Entity Links
Procedure
1. On the System Manager console, under Elements, click Routing.
2. Click Routing > Entity Links.
3. Click New.
4. Enter the name in the Name field.
5. Enter the SIP entity 1 by selecting the required Session Manager SIP entity from
the drop-down list and provide the required port. SIP entity 1 must always be an
Session Manager instance.
The default port for TCP and UDP is 5060. The default port for TLS is 5061.
6. Enter the SIP entity 2 by selecting the required non-Session Manager SIP entity
from the drop-down list and provide the required port.
The port is the port on which you have configured the remote entity to receive
requests for the specified transport protocol.
7. If the SIP entity is trusted, select the Trusted check box. Session Manager does
not accept SIP connection requests or SIP packets from untrusted SIP entities.
8. Select the protocol you require for the link using the Protocol drop-down list.
9. Click Commit.
Modifying entity links
Procedure
1. On the System Manager console, under Elements, click Routing.
2. Click Routing > Entity Links.
3. Select an entity link for modification and click Edit.
4. Modify the name in the Name field if required.
5. If required, modify the SIP entity 1 by selecting the required Session Manager SIP
entity 1 from the drop-down list and provide the required port.
SIP entity 1 must always be a Session Manager instance.
6. If required, modify the SIP entity 2 by selecting the required SIP entity from the drop-
down list and provide the required port.
7. If you want to indicate that the link is a trusted link, select the Trusted check box.
Entity Links
Administering Avaya Aura® Session Manager November 2010 291
8. Select the transport protocol you require for the link using the Protocol drop-down
list.
9. Click Commit.
Deleting Entity Links
Procedure
1. On the System Manager console, under Elements, click Routing.
2. Click Routing > Entity Links.
3. To delete an existing link or links, select the respective check boxes and click
Delete.
4. Click Delete on the confirmation page.
Delete Confirmation field descriptions
Use this page to confirm or cancel the deletion of SIP entity links.
Button Description
Delete Deletes the SIP entity link entries from the
database.
Cancel Cancels the deletion of SIP entity links and
returns to the SIP entity Links page.
Entity Links field descriptions
Use this page to create, modify, delete, and manage entity links.
Button Description
Edit Opens the Entity Links page that you can use
to modify the entity link details.
New Opens the Entity Links page that you can use
to create new entity links.
Managing Session Manager routing
292 Administering Avaya Aura ® Session Manager November 2010
Comments? infodev@avaya.com

Button Description
Duplicate Creates a duplicate of the selected entity link
and assigns a new state to it.
Delete Opens the Delete Confirmation page on
which you can confirm or cancel the deletion
of the entity link.
More Actions > Refresh all data Refreshes all data. Any unsaved
modifications are lost.
More Actions > Import Opens the Import data page that allows you
to import from XML files or zip file containing
one or more XML files.
More Actions > Export Entity Links Opens the Export Entity Links page that
allows you to export the entity links data as
an XML file to a specified location.
More Actions > Export all data Opens the Export all data page that allows
you to export the data for all routing elements
as a zipped file to a specified location.
Name Description
Name Name of the SIP entity link. This name must
be unique and can have 3 to 64 characters.
SIP Entity 1 Select a SIP entity from the drop-down list.
This entity must always be a Session
Manager instance.
Protocol Protocol to be used for the entity link.
Port Port to be used for SIP entity 1.
SIP Entity 2 Select a SIP entity from the drop-down list.
This entity need not be a Session Manager
entity.
Port Port to be used for SIP entity 2.
Trusted Specifies that the link between the two SIP
entities is trusted.
Notes Any details or notes that you wish to add.
Entity Links
Administering Avaya Aura® Session Manager November 2010 293

Bulk import for Entity Links
Please follow these rules when creating an XML bulk import file:
• The name of an Entity Link must be unique.
•<entityName1> , <entityName2> must refer to an existing SIP Entity with the exact same
name. It must either appear in the System Manager database or in an import file that
exists in the same import operation as the Entity Link.
• The values in <transportProtocol> must appear exactly same (being case sensitive) as
they appear in the System Manager user interface.
Example:
<?xml version="1.0" encoding="UTF-8" standalone="yes"?>
<entitylinkFullTOList>
<EntitylinkFullTO>
<notes></notes>
<listenPortEntity1>5061</listenPortEntity1>
<listenPortEntity2>5061</listenPortEntity2>
<name>SessionManager1_BerlinCM_5061_TLS</name>
<transportProtocol>TLS</transportProtocol>
<trusted>true</trusted>
<entityName1>SessionManager1</entityName1>
<entityName2>BerlinCM</entityName2>
</EntitylinkFullTO>
<EntitylinkFullTO>
<notes></notes>
<listenPortEntity1>5061</listenPortEntity1>
<listenPortEntity2>5061</listenPortEntity2>
<name>NewYorkCM-SessionManager1-TLS</name>
<transportProtocol>TLS</transportProtocol>
<trusted>true</trusted>
<entityName1>SessionManager1</entityName1>
<entityName2>NewYorkCM</entityName2>
</EntitylinkFullTO>
</entitylinkFullTOList>
Time Ranges
About the Time Ranges
Time ranges indicate when a particular rank or cost of a routing policy is to be used when
determining the least-cost route. They do not indicate when routing policies are available to
be considered for routing.
You must specify as many time ranges as necessary to cover all hours and days in a week for
each administered routing policy.
Managing Session Manager routing
294 Administering Avaya Aura ® Session Manager November 2010
Comments? infodev@avaya.com

For example, routing policy A can be in effect on all weekdays from 9:00 a.m. to 5:59 p.m.,
routing policy B can be in effect on all weekdays from 6:00 pm. to 9 a.m., and routing policy C
time ranges can be in effect on weekends. These three time ranges together cover how calls
should be routed throughout the week.
Creating Time Ranges
About this task
You can use the Time Ranges screen to administer time ranges with start and end times.
Procedure
1. On the System Manager console, under Elements, click Routing.
2. Click Routing > Time Ranges.
3. Click New.
4. Enter the name, select the required days by entering the start and end times and
notes for the new time range. Start times start with the first second of the
hour:minute. End Times go through the last second of the end hour:minute.
5. Click Commit.
Related topics:
Time Range List field descriptions on page 297
Modifying Time Ranges
Procedure
1. On the System Manager console, under Elements, click Routing.
2. Click Routing > Time Ranges.
3. Select a time range for modification and click Edit.
4. If required, modify the name.
5. If required, modify the days by modifying the start and end times and notes. Start
times start with the first second of the start hour:minute. End Times go through the
last second of the end hour:minute.
6. Click Commit.
Time Ranges
Administering Avaya Aura® Session Manager November 2010 295
Deleting Time Ranges
Procedure
1. On the System Manager console, under Elements, click Routing.
2. Click Routing > Time Ranges.
3. To delete an existing time range or ranges, select the respective check boxes and
click Delete.
4. Click Delete on the confirmation page.
Related topics:
Delete Confirmation field descriptions on page 296
Delete Confirmation field descriptions
Use this page to confirm or cancel the deletion of time ranges.
Button Description
Delete Deletes the selected time ranges from the
database.
Cancel Cancels the deletion of the selected time
ranges.
Related topics:
Deleting Time Ranges on page 296
Time Ranges field descriptions
Use this page to create, modify, delete, and manage time ranges.
Field Description
Name Enter a name for the time range. It can have
between three and 64 characters. The name
cannot contain the following characters:
<, >, ^, %, $, @, #, *
Managing Session Manager routing
296 Administering Avaya Aura ® Session Manager November 2010
Comments? infodev@avaya.com

Field Description
Days (Mo to Su) Select the days of the week for which the
time range should be used.
Start Time Start time for the time range. Use 24–hour
time format.
End Time End time for the time range. Use 24–hour
time format.
Notes Additional notes.
Button Description
Edit Opens the Time Ranges page that you can
use to modify the time range details.
New Opens the Time Ranges page that you can
use to create new time ranges.
Duplicate Creates a duplicate of the selected time
range and assigns a new state to it.
Delete Opens the Delete Confirmation page on
which you can confirm or cancel the deletion
of the time range.
More Actions > Refresh all data Refreshes all data. Any unsaved
modifications are lost.
More Actions > Import Opens the Import data page that allows you
to import from XML files or zip file containing
one or more XML files.
More Actions > Export Time Ranges Opens the Export Time Ranges page that
allows you to export the time ranges data as
an XML file to a specified location.
More Actions > Export all data Opens the Export all data page that allows
you to export data for all the routing entities
as a zipped file to a specified location.
Time Range List field descriptions
Use this page to view time ranges associated to a routing policy.
Name Description
Name Name of the time range. This name must be
unique and can have between 3 and 64
characters. Select the check box to use the
time range for a routing policy.
Time Ranges
Administering Avaya Aura® Session Manager November 2010 297
Name Description
Mon Selected check box indicates that the time
range is used for Mondays. Similarly, other
days of the week for which the time range to
be used are selected.
Start Time Start time for the time range. For a 24–hour
time range, the start time is 0.00.
End Time End time for the time range. For a 24–hour
time range, the end time is 23:59.
Notes Additional notes about the time range.
Button Description
Select Associates the selected time range to the
routing policy.
Cancel Cancels the selection of the time range.
Related topics:
Creating Time Ranges on page 295
Bulk import for Time Ranges
Please follow these rules when creating an XML bulk import file:
• The name of a Time Range must be unique and is referred to by other elements.
Example:
<?xml version="1.0" encoding="UTF-8" standalone="yes"?>
<timerangeFullTOList>
<TimerangeFullTO>
<notes>this is a test</notes>
<includesFriday>true</includesFriday>
<includesMonday>true</includesMonday>
<includesSaturday>false</includesSaturday>
<includesSunday>false</includesSunday>
<includesThursday>true</includesThursday>
<includesTuesday>true</includesTuesday>
<includesWednesday>true</includesWednesday>
<name>regularweek</name>
<startTime>00:00:00</startTime>
<stopTime>23:59:00</stopTime>
</TimerangeFullTO>
<TimerangeFullTO>
<notes></notes>
<includesFriday>false</includesFriday>
<includesMonday>false</includesMonday>
<includesSaturday>true</includesSaturday>
<includesSunday>true</includesSunday>
<includesThursday>false</includesThursday>
<includesTuesday>false</includesTuesday>
<includesWednesday>false</includesWednesday>
Managing Session Manager routing
298 Administering Avaya Aura ® Session Manager November 2010
Comments? infodev@avaya.com

<name>weekend</name>
<startTime>00:00:00</startTime>
<stopTime>23:59:00</stopTime>
</TimerangeFullTO>
<TimerangeFullTO>
<notes>Time Range 24/7</notes>
<includesFriday>true</includesFriday>
<includesMonday>true</includesMonday>
<includesSaturday>true</includesSaturday>
<includesSunday>true</includesSunday>
<includesThursday>true</includesThursday>
<includesTuesday>true</includesTuesday>
<includesWednesday>true</includesWednesday>
<name>24/7</name>
<startTime>00:00:00</startTime>
<stopTime>23:59:00</stopTime>
</TimerangeFullTO>
</timerangeFullTOList>
Routing Policies
About Routing Policies
Use the Routing Policies page to create and modify routing policies.
All “ Routing Policies” together form the “enterprise wide dial plan”.
Routing Policies can include the “Origination of the caller”, the “dialed digits” of the called party,
the “domain” of the called party and the actual time the call occurs.
Optionally, instead of “dialed digits” of the called party and the “domain” of the called party a
“regular expression” can be defined.
Depending on one or multiple of the inputs mentioned above a destination where the call should
be routed is determined.
Optionally, the destination can be qualified by “deny” which means that the call will not be
routed.
Session Manager uses the data configured in the Routing Policy to find the best match against
the number (or address) of the called party.
Note:
If Session Manager cannot match any Dial Patterns, then Session Manager attempts to find
a matching Regular Expression. Each Regular Expression is examined in the administered
Rank Order, and Session Manager determines if it matches the request-URI. During this
comparison, user parameters are not stripped, however, the request-URI is compared
against each Regular Expression twice. The first time, the entire request-URI is compared.
Routing Policies
Administering Avaya Aura® Session Manager November 2010 299

The second time (if there's no match) only user@host is compared, that is the URI scheme
(sip:, sips:, tel:) and any URI parameters appearing after the host-part of the request-URI
are stripped. If there's a match, then the Routing Policies are selected as per the
administered Regular Expressions.
Creating Routing Policies
Procedure
1. On the System Manager console, under Elements, click Routing.
2. Click Routing > Policies.
3. Click New.
4. Enter a routing policy name and notes in the relevant fields in the General section.
Note that the routing policy can be disabled by selecting the Disabled check box.
5. Click Select under the SIP Entities as Destination section. This is where you can
select the destination SIP entity for this routing policy.
6. Select the required destination and click Select.
7. If you need to associate the Time of Day routing parameters with this Routing Policy,
click Add from the Time of Day section.
8. Select the Time of Day patterns that you want to associate with this routing pattern
and press Select.
If there are gaps in the Time of Day coverage that you select, Session Manager
displays a warning message. If such gaps exist in the Time of the Day coverage,
randomness in routing selections may be observed
9. Enter the relative Rankings that you would like associated with each Time Range.
Lower ranking values indicate higher priority.
10. Under Dial Patterns or Regular Expressions, click Add to associate existing Dial
Patterns and Regular Expressions with the Routing Policy. Select a dial pattern from
the pattern list or a regular expression from the regular expression list and click
Select.
This field can be left blank; the routing policy can be added to the dial pattern or
regular expression when you add it.
11. Under Dial Patterns or Regular Expressions, click Remove to dissociate existing
Dial Patterns and Regular Expressions with the Routing Policy. Select a dial pattern
from the pattern list or a regular expression from the regular expression list and click
Select. This field can be left blank; the routing policy can be added to the dial pattern
or regular expression when you add it.
12. Click Commit.
Managing Session Manager routing
300 Administering Avaya Aura ® Session Manager November 2010
Comments? infodev@avaya.com

Related topics:
Routing Policy Details field descriptions on page 303
Modifying Routing Policies
Procedure
1. On the System Manager console, under Elements, click Routing.
2. Click Routing > Policies. The Routing Policies screen is displayed.
3. Select a routing policy for modification and click Edit.
4. If required, modify the routing policy name and notes in the relevant fields in the
General section. Note that the routing policy can be disabled by selecting the
Disabled check box.
5. Click Select under the SIP entities as Destination section. This is where you can
select the destination SIP entity for this routing policy.
6. If required, select or modify the required destination and click Select.
7. If you need to associate the Time of Day routing parameters with this Routing Policy,
click Add from the Time of Day section.
8. Select the Time of Day patterns that you want to associate with this routing pattern
and press Select.
9. Enter the relative rankings that you would like associated with each Time Range.
Lower ranking values indicate higher priority.
10. If you need to dissociate the Time of Day routing parameters from this Routing
Policy, click Remove from the Time of Day section.
11. Under Dial Patterns or Regular Expressions, click Add to associate existing Dial
Patterns and Regular Expressions with the Routing Policy. Select a dial pattern from
the pattern list or a regular expression from the regular expression list and click
Select.
If you have not specified the dial patterns or regular expressions yet, you can add
the routing policy to the dial pattern or regular expression when you add them
later.
12. Under Dial Patterns or Regular Expressions, click Remove to dissociate existing
Dial Patterns and Regular Expressions with the Routing Policy. Select a dial pattern
from the pattern list or a regular expression from the regular expression list and click
Select.
13. Click Commit.
Routing Policies
Administering Avaya Aura® Session Manager November 2010 301
Deleting Routing Policies
Procedure
1. On the System Manager console, under Elements, click Routing.
2. Click Routing > Policies.
3. To delete an existing routing policy or routing policies, select the respective check
boxes and click Delete.
4. Click Delete on the confirmation page.
Note:
If you delete a routing policy, all dial patterns and regular expressions that are
linked only to this routing policy are also deleted.
Related topics:
Delete Confirmation field descriptions on page 302
Delete Confirmation field descriptions
Use this page to confirm or cancel the deletion of the routing policy.
Button Description
Delete Deletes the selected routing policy as well as
any dial patterns and regular expressions
that are associated only with this routing
policy.
Cancel Cancels the deletion of the routing policy.
Related topics:
Deleting Routing Policies on page 302
Routing Policies field descriptions
Use this page to create, modify, delete, and manage routing policies.
Managing Session Manager routing
302 Administering Avaya Aura ® Session Manager November 2010
Comments? infodev@avaya.com
Button Description
Edit Opens the Routing Policy Details page that
you can use to modify the routing policy.
New Opens the Routing Policy Details page that
you can use to create a new routing policy.
Duplicate Creates a duplicate of the selected routing
policy and assigns a new state to it.
Delete Opens the Delete Confirmation page on
which you can confirm or cancel the deletion
of the routing policy.
More Actions > Refresh all data Refreshes all data. Any unsaved
modifications are lost.
More Actions > Import Opens the Import data page that allows you
to import from XML files or zip file containing
one or more XML files.
More Actions > Export Routing Policies Opens the Export Routing Policies page that
allows you to export the routing policy data
as an XML file to a specified location.
More Actions > Export all data Opens the Export all data page that allows
you to export data for all the routing entities
as a zipped file to a specified location.
Name Description
Name Name of the routing policy.
Disabled Specifies that the routing policy is to be
disabled and should not be used.
Destination SIP Entity as Destination.
Notes Additional notes about the routing policy.
Routing Policy Details field descriptions
Use this page to specify the details for creating or modifying a routing policy.
General section
Name Description
Name Name of the routing policy.
Routing Policies
Administering Avaya Aura® Session Manager November 2010 303

Name Description
Disabled Selecting this check box specifies that the
routing policy is to be disabled and should not
be used.
Notes Additional notes about the routing policy.
SIP Entity as Destination section
Button Description
Select Opens the SIP entity List page. You can use
this page to select a SIP entity as a
destination and associate it to the selected
routing policy.
Name Description
Name SIP entity name. This name must be unique
and can have between 3 and 64
characters.
FQDN or IP Address Fully qualified domain name or IP address of
the SIP entity.
Type SIP entity type, such as a Session Manager,
Communication Manager, SIP trunk, or a
gateway.
Notes Additional notes about the SIP entity.
Time of Day section
Button Description
Add Adds a new time of the day to the selected
routing policy.
Remove Removes the selected time of day entry from
the selected routing policy.
View Gaps/Overlaps Selecting a time of day entry and selecting
View Gaps/Overlaps generates a Duration
Lists report and displays if there are any gaps
or overlaps in the time of day entries for each
day of the week.
Name Description
Ranking Ranking of the assigned Time Ranges.
Name Name of the Time Ranges.
Managing Session Manager routing
304 Administering Avaya Aura ® Session Manager November 2010
Comments? infodev@avaya.com

Name Description
Start Time Start Time of the Time Range.
End Time End Time of the Time Range.
Notes Additional notes.
Dial Patterns section
Button Description
Add Adds a new dial pattern to the selected
routing policy.
Remove Removes the selected dial pattern from the
selected routing policy.
Name Description
Pattern Dial pattern to match. The pattern can have
between 1 and 36 characters. Roll over the
field for the valid pattern.
Min Minimum number of digits to be matched.
Max Maximum number of digits to be matched.
Emergency Call Indicate if it is an emergency call.
SIP Domain Domain for which you want to restrict the dial
pattern.
Originating Location Origination Location Name.
Notes Additional Notes.
Regular Expressions section
Button Description
Add Adds a new regular expression to the
selected routing policy.
Remove Removes the selected regular expression
from the selected routing policy.
Name Description
Pattern Regular expression pattern that Session
Manager tries to match.
Rank Order Priority of the pattern. A lower rank order
means higher priority.
Routing Policies
Administering Avaya Aura® Session Manager November 2010 305
Name Description
Deny Denies routing for a matched regular
expression pattern.
Notes Additional Notes.
Button Description
Commit Saves the routing policy changes and
distributes those to the Session Manager
instances in the enterprise.
Cancel Cancels modifications to the routing policy.
Related topics:
Creating Routing Policies on page 300
Routing Policy List field descriptions
Use this page to select a routing policy that the regular expression should be associated
with.
Name Description
Name Name of the routing policy to be associated
with the selected regular expression.
Disabled Denotes that the associated routing policy is
to be disabled for the selected regular
expression.
Destination Destination SIP entity for the routing policy.
Notes Additional notes about the routing policy.
Button Description
Select Confirms the selection of the routing policy
for associating it with the regular
expression.
Cancel Cancels the selection of the routing policy.
Managing Session Manager routing
306 Administering Avaya Aura ® Session Manager November 2010
Comments? infodev@avaya.com

Bulk import for Routing Policies
Please follow these rules when creating an XML bulk import file:
• The name of a routing policy <referred to as routing policy> is unique and is referred to
by other elements.
•<sipentityName> must refer to an existing SIP element with the exact same name. It must
either appear in the System Manager database or in an import file that exists in the same
import operation as the Routing Policy.
• Multiple time of day entries (<timeofdayNames>) can be configured for one Routing
Policy.
-<timerangeName> must refer to an existing Time Range with the exact same name. It
must either appear in the System Manager database or in an import file that exists in
the same import operation as the Routing Policy.
Example:
<?xml version="1.0" encoding="UTF-8" standalone="yes"?>
<routingpolicyFullTOList>
<RoutingpolicyFullTO>
<notes>this is a test</notes>
<disabled>false</disabled>
<name>toBerlin</name>
<sipentityName>BerlinCM</sipentityName>
<timeofdayNames>
<rank>1</rank>
<timerangeName>regularweek</timerangeName>
</timeofdayNames>
<timeofdayNames>
<rank>0</rank>
<timerangeName>24/7</timerangeName>
</timeofdayNames>
</RoutingpolicyFullTO>
</routingpolicyFullTOList>
Dial Patterns
About Dial Patterns
A dial pattern specifies which routing policy or routing policies are used to route a call based
on the digits dialed by a user which match that pattern. Session Manager matches these dialed
digits after applying any administered ingress adaptation.
The originating location of the call, the domain in the request-URI and the Global Settings
option of Prefer Longer Matching Dial Patterns in Location ALL to Shorter Matches in
Originator's Location in the Session Manager Administration page also determine how the
Dial Patterns
Administering Avaya Aura® Session Manager November 2010 307
call gets routed. The dial pattern look up method as per the Global Setting option is explained
below:
1. When the Global Settings option is not selected:
Session Manager compares the user-part of the Request-URI with all dial patterns
valid for the originating location where the domain matches the domain in the
Request-URI. A Dial Pattern is valid for a particular location if :
• the location in the dial pattern matches the originating location, or
• the dial pattern is for “ALL” locations
Dial patterns that match the originating location are considered before dial patterns
for “ALL” locations. If a dial pattern for the originating location matches the digits,
dial patterns for “ALL” locations are ignored.
If no matching dial patterns are found, then the domain in the Request-URI is
modified to remove one level of subdomain until only a top-level domain is left. For
example, if “dr.avaya.com” was tried, then “avaya.com” is tried. If “avaya.com” was
tried, then Session Manager tries “.com” which fails.
If more than one Dial Pattern matches, the one with the longest matching pattern
is selected.
2. When the Global Settings option is selected:
Session Manager compares the user-part of the Request-URI with all dial patterns
valid for the originating location where the domain matches the domain in the
Request-URI. Only dial patterns matching the location are considered. If no
matching dial patterns are found, then the domain in the Request-URI is modified
to remove one level of subdomain until only a top-level domain is left. For example,
if “dr.avaya.com” was tried, then “avaya.com” is tried. If “avaya.com” was tried, then
Session Manager tries “.com” which fails. If more than one dial pattern matches,
the one with the longest matching pattern is selected.
Similarly, dial patterns administered for “ALL” locations are also compared.
This may result in two matching dial patterns, one for “ALL” locations and one for
the specific location. The longest matching pattern is then chosen, thus a longer
pattern administered for “ALL” locations overrides a location-specific pattern. If both
matching patterns are of the same length, then both patterns are examined for
wildcard characters. If one contains a wildcard and the other does not, then the
pattern without a wildcard is selected. If both patterns contain a wildcard, then the
location-specific pattern is selected.
Examples — Global Settings option is selected:
Location Specific Pattern “ALL” Locations Pattern Chosen Pattern
1303538 1303538 Location-Specific
130353 1303538 ALL Locations
Managing Session Manager routing
308 Administering Avaya Aura ® Session Manager November 2010
Comments? infodev@avaya.com
Location Specific Pattern “ALL” Locations Pattern Chosen Pattern
1303538 130353 Location-Specific
130353x 1303538 ALL Locations
1303538 130353x Location-Specific
1x 1303538 ALL Locations
13035xx 130xxxx Location-Specific
1303xxxxx 1303538xx Location-Specific
The pattern matching algorithm works as follows:
• Valid digits are 0-9
• Valid characters for the leading position are,+, *, and #. Any other characters are not
matched.
• x (lowercase only) is a wildcard character that matches a character from the allowed
characters above. White spaces are not allowed.
• Longer matches get a higher priority over shorter matches. For example, +1601555 has
a higher priority as compared to +1601.
•For matches of equal length, exact matches have a higher priority over wildcard matches.
For example, +1601555 has a higher priority as compared to +1xxx555.
• For both routing policies and adaptations, the pattern matching works in the same
manner.
Creating Dial Patterns
About this task
The Dial Patterns screen is used to create Dial Patterns and associate the Dial Patterns to a
Routing Policy and Locations.
Procedure
1. On the System Manager console, under Elements, click Routing.
2. Click Routing > Dial Patterns.
3. Click New. The Dial Pattern Details screen is displayed.
4. Enter the Dial Pattern General information in the General section. Note that a
Domain can be provided to restrict the Dial Pattern to the specified Domain.
5. Click Add under the Originating Locations and Routing Policies section.
6. Select all the required Locations and Routing Policies that you want associated with
the Dial Pattern by selecting the check box in front of each item.
Dial Patterns
Administering Avaya Aura® Session Manager November 2010 309

7. Click Select to indicate that you have completed your selections.
8. If you need to specify that calls from the specified locations will be denied, click Add
under the Denied Locations section.
9. Select all the Locations that are to be denied and click Select to indicate that you
have completed your selections.
10. Click Commit.
Note:
You cannot save a dial pattern unless you add at least a routing policy or a denied
location.
Related topics:
Dial Pattern Details field descriptions on page 313
Modifying Dial Patterns
Procedure
1. On the System Manager console, under Elements, click Routing.
2. Click Routing > Dial Patterns.
3. Select a dial pattern for modification and click Edit. The Dial Pattern Details screen
is displayed.
4. Enter the Dial Pattern General information in the General section. Note that a
Domain can be provided to restrict the Dial Pattern to the specified Domain.
5. Click Add under the Locations and Routing Policies sections one after the other.
6. Select all the required Locations and Routing Policies that you want associated with
the Dial Pattern by selecting the check box in front of each item.
7. Click Select to indicate that you have completed your selections.
8. Similarly, to remove locations, click Remove, select the locations to remove, and
click Select.
9. If you need to specify that calls from the specified locations will be denied, click Add
under the Denied Locations section.
10. Select all the Locations that are to be denied and click Select to indicate that you
have completed your selections.
11. Similarly, to remove locations from the denied list, click Remove, select the
locations to remove, and click Select.
12. Click Commit.
Managing Session Manager routing
310 Administering Avaya Aura ® Session Manager November 2010
Comments? infodev@avaya.com
Note:
You cannot save a dial pattern unless it has at least one routing policy or a denied
location associated to it.
Deleting Dial Patterns
Procedure
1. On the System Manager console, under Elements, click Routing.
2. Click Routing > Dial Patterns.
3. To delete an existing dial pattern or patterns, select the respective check boxes and
click Delete.
4. Click Delete on the confirmation page.
Note:
When you delete a Dial Pattern, it is also deleted from all the Routing Policies
that it is associated to.
Related topics:
Dial Pattern Details field descriptions on page 313
Delete Confirmation field descriptions
Use this page to confirm or cancel the deletion of selected dial patterns.
Button Description
Delete Deletes entries for the selected dial patterns
from the database.
Cancel Cancels the deletion of the selected dial
patterns.
Dial Patterns field descriptions
Use this page to create, modify, delete, and manage dial patterns.
Dial Patterns
Administering Avaya Aura® Session Manager November 2010 311

Button Description
Edit Opens the Dial Pattern Details page that you
can use to modify the dial pattern details.
New Opens the Dial Pattern Details page that you
can use to create new dial patterns.
Duplicate Creates a duplicate of the selected dial
pattern and assigns a new state to it.
Delete Opens the Delete Confirmation page on
which you can confirm or cancel the deletion
of the dial pattern.
More Actions > Refresh all data Refreshes all data. Any unsaved
modifications are lost.
More Actions > Dial Pattern Report Displays Dial Patterns and the
corresponding Locations, Routing Policies
and Domains.
More Actions > Import Opens the Import data page that allows you
to import from XML files or zip file containing
one or more XML files.
More Actions > Import Provider Specific
Data Opens the Import Provider Specific Data
page that allows you to import provider—
specific data from a file that you can specify
by browsing.
More Actions > Export Dial Patterns Opens the Export Dial Patterns page that
allows you to export the dial patterns data as
an XML file to a specified location.
More Actions > Export Provider Specific
Data Opens the Export Provider Specific Data
page that allows you to export provider-
specific data as an XML file to a specified
location.
More Actions > Export all data Opens the Export all data page that allows
you to export data for all the routing entities
as a zipped file to a specified location.
Name Description
Pattern Dial pattern to match. The pattern can have
between 1 and 36 characters. Roll over the
field for the valid pattern.
Min Minimum number of digits to be matched.
Max Maximum number of digits to be matched.
Emergency Call Indicate if it is an emergency call.
Managing Session Manager routing
312 Administering Avaya Aura ® Session Manager November 2010
Comments? infodev@avaya.com
Name Description
SIP Domain Domain for which you want to restrict the dial
pattern.
Notes Other details that you wish to add.
Dial Pattern Details field descriptions
Use this page to specify the dial pattern details.
General section
Name Description
Pattern Dial pattern to match. The pattern can have
between 1 and 36 characters. Roll over the
field for the valid pattern.
Min Minimum number of digits to be matched.
Max Maximum number of digits to be matched.
Emergency Call Indicate if it is an emergency call.
Note:
Some of the important constraints on the
use of this feature are as follows
• Each location should be assigned to
only one emergency dial number.
• This emergency dial number must
match the emergency dial number in the
96xx settings file for all SIP phones in
the identified location. Failure to follow
this guideline can result in users being
unable to dial emergency numbers.
SIP Domain Domain for which you want to restrict the dial
pattern.
Notes Other details that you wish to add.
Originating Locations and Routing Policies section
Name Description
Select check box Use this check box to select and use the digit
conversion for the incoming calls.
Dial Patterns
Administering Avaya Aura® Session Manager November 2010 313
Name Description
Originating Location Name Name of the location to be associated to the
dial pattern.
Originating Location Notes Notes about the selected location.
Routing Policy Name Name of the routing policy to be associated
to the dial pattern.
Rank Rank order.
Routing Policy Disabled Name of the routing policy that should not be
used for the dial pattern.
Routing Policy Destination Destination of the routing policy.
Routing Policy Notes Any other notes about the routing policy that
you wish to add.
Denied Originating Locations section
Name Description
Select check box Use this check box to select denied locations
for the dial pattern match.
Button Description
Add Adds locations, routing policies, or denied
locations for the dial patterns.
Remove Removes locations, routing policies, or
denied locations for the dial patterns.
Commit Saves the dial pattern details and distributes
them to the Session Manager instances in
the enterprise.
Cancel Cancels changes to the dial pattern details
and returns to the Dial Patterns page.
Related topics:
Creating Dial Patterns on page 309
Deleting Dial Patterns on page 311
Pattern List field descriptions
Use this page to view the dial pattern details for associating with the routing policy
Managing Session Manager routing
314 Administering Avaya Aura ® Session Manager November 2010
Comments? infodev@avaya.com
Name Description
Pattern Dial pattern to match. The pattern can have
between 1 and 36 characters. Roll over the
field for the valid pattern.
Min Minimum number of digits to be matched.
Max Maximum number of digits to be matched.
Emergency Call Indicate if it is an emergency call.
Note:
Some of the important constraints on the
use of this feature are as follows
• Each location should be assigned to
only one emergency dial number.
• This emergency dial number must
match the emergency dial number in the
96xx settings file for all SIP phones in
the identified location. Failure to follow
this guideline can result in users being
unable to dial emergency numbers.
Domain Domain for which you want to restrict the dial
pattern.
Notes Other details that you wish to add.
Button Description
Select Associate the selected pattern to the routing
policy.
Cancel Cancel the association of the selected
pattern to the routing policy.
Denied Location field descriptions
Use this page to specify denied locations for the selected dial pattern
Button Description
Select Selects the location as a denied location for
the dial pattern.
Cancel Cancels the selection of the denied
location.
Dial Patterns
Administering Avaya Aura® Session Manager November 2010 315

Bulk Import for Dial Patterns
Please follow these rules when creating an XML bulk import file:
• A dial pattern is identified by a combination of 5 elements below. This combination must
be unique for each dial pattern.
- <digitpattern>
- <maxdigits>
- <mindigits>
- <sipdomainName>
- <routingoriginationName>
• <sipdomainName> must refer to an existing domain with the exact same name. It must
either appear in the System Manager database or in an import file that exists in the same
import operation as the dial pattern.
•<routingpolicyNames> must refer to existing Routing Policies with the exact same name.
It must either appear in the System Manager database or in an import file that exists in
the same import operation as the Dial pattern.
• <routingpolicyNames> must exist if <deny> is false.
• <routingpolicyNames> must exist if <deny> is true.
Example:
<?xml version="1.0" encoding="UTF-8" standalone="yes"?>
<digitmapFullTOList>
<DigitmapFullTO>
<notes>this is a test</notes>
<deny>true</deny>
<digitpattern>123</digitpattern>
<maxdigits>36</maxdigits>
<mindigits>3</mindigits>
<routingoriginationName>New York</routingoriginationName>
<routingpolicyNames>toBerlin</routingpolicyNames>
<sipdomainName>avaya.com</sipdomainName>
<treatasemergency>true</treatasemergency>
</DigitmapFullTO>
<DigitmapFullTO>
<notes>this is a test</notes>
<deny>false</deny>
<digitpattern>123</digitpattern>
<maxdigits>36</maxdigits>
<mindigits>3</mindigits>
<routingoriginationName>Berlin</routingoriginationName>
<routingpolicyNames>toBerlin</routingpolicyNames>
<sipdomainName>avaya.com</sipdomainName>
<treatasemergency>true</treatasemergency>
</DigitmapFullTO>
</digitmapFullTOList>
Managing Session Manager routing
316 Administering Avaya Aura ® Session Manager November 2010
Comments? infodev@avaya.com
Regular Expressions
About Regular Expressions
You can configure routing in Session Manager by creating regular expressions and associating
them with a routing policy.
Regular expression syntax is based on Java syntax.
The asterisk character "*" matches any character string.
The dot character "." matches one character.
The backslash character "\ " makes a character lose its special meaning, if any
Some examples are:
• For “www.sipentity.domain.com”, use the string “www\.sipentity\.domain\.com”
• For “192.14.11.22”, use string “192\.14\.11\.22”.
•The routing policy with a regular expression .*@.*\.de routes all calls requesting a domain
in Germany (for example, name@company.de) to a Frankfurt Gateway.
Related topics:
Regular Expression constructs on page 523
Creating Regular Expressions
About this task
The Regular Expressions screen enables you to create regular expressions and associate
them with routing policies. You cannot save a regular expression unless it has a routing policy
associated to it.
Procedure
1. On the System Manager console, under Elements, click Routing.
2. Click Routing > Regular Expressions.
3. Click New. The Regular Expression Details screen is displayed.
4. Enter the regular expression pattern in the Pattern field.
Regular Expressions
Administering Avaya Aura® Session Manager November 2010 317

5. Specify a rank order for the regular expression. A lower rank order indicates a higher
priority.
6. To deny routing for a matched regular expression pattern, select the Deny check
box.
7. To associate a routing policy for the matched pattern, click Add under the Routing
Policy section.
8. Select the required routing policies that you want associated with the Regular
Expression by selecting the respective check boxes.
9. Click Select to indicate that you have completed your selections.
10. To remove an associated routing policy, select the routing policy and click
Remove.
11. Click Commit.
Modifying Regular Expressions
About this task
The Regular Expressions screen enables you to modify regular expressions and associate
them with routing policies.
Procedure
1. On the System Manager console, under Elements, click Routing.
2. Click Routing > Regular Expressions. The Regular Expressions screen is
displayed.
3. Select a regular expression from the list and click Edit. The Regular Expression
Details screen is displayed.
4. Modify the regular expression pattern in the Pattern field, if required.
5. If required, modify the rank order for the regular expression. A lower rank order
indicates a higher priority.
6. To allow or deny routing for a matched regular expression pattern, select or clear
the Deny check box.
7. To associate a routing policy for the matched pattern, click Add under the Routing
Policy section.
8. Select the required routing policies that you want associated with the Regular
Expression by selecting the respective check boxes.
9. Click Select to indicate that you have completed your selections.
Managing Session Manager routing
318 Administering Avaya Aura ® Session Manager November 2010
Comments? infodev@avaya.com

10. To remove an associated routing policy, select the routing policy and click
Remove.
11. Click Commit.
Note:
You cannot save a regular expression unless it has a routing policy associated
to it.
Deleting Regular Expressions
About this task
Deleting a regular expression deletes it from all of the routing policies that it is associated
with.
Procedure
1. On the System Manager console, under Elements, click Routing.
2. Click Routing > Regular Expressions.
3. To delete existing regular expressions, select the respective check boxes and click
Delete.
4. Click Delete on the confirmation page.
Delete Confirmation field descriptions
Use this page to confirm or cancel the deletion of the regular expression.
Button Description
Delete Confirms the deletion of the regular
expression and also deletes the regular
expression from the routing policy that it is
associated to.
Cancel Cancels the deletion of the regular
expression.
Regular Expressions
Administering Avaya Aura® Session Manager November 2010 319
Regular Expressions field descriptions
Use this page to create, modify, delete, and manage regular expressions.
Button Description
Edit Opens the Regular Expression Details page
that you can use to modify the regular
expressions.
New Opens the Regular Expression Details page
that you can use to create new regular
expressions.
Duplicate Creates a duplicate of the selected regular
expression and assigns a new state to it.
Delete Opens the Delete Confirmation page on
which you can confirm or cancel the deletion
of the regular expression.
More Actions > Refresh all data Refreshes all data. Any unsaved
modifications are lost.
More Actions > Import Opens the Import data page that allows you
to import from XML files or zip file containing
one or more XML files.
More Actions > Export Regular
Expressions Opens the Export Regular Expressions page
that allows you to export the regular
expressions data as an XML file to a
specified location.
More Actions > Export all data Opens the Export all data page that allows
you to export data for all entities as a zipped
file to a specified location.
Name Description
Pattern Regular expression pattern that Session
Manager tries to match.
Rank Order Priority of the pattern. A lower rank order
means higher priority.
Deny Denies routing for a matched regular
expression pattern.
Notes Additional notes about the regular
expression pattern.
Managing Session Manager routing
320 Administering Avaya Aura ® Session Manager November 2010
Comments? infodev@avaya.com
Regular Expression Details field descriptions
Use this page to specify the regular expression details.
General
Name Description
Pattern Regular expression pattern that Session
Manager tries to match. Refer to the
“Appendix B: Regular Expression
constructs” for details.
Rank Order Priority of the pattern. A lower rank order
means higher priority.
Deny Denies routing for a matched regular
expression pattern.
Notes Additional notes about the regular
expression pattern.
Routing Policy
Button Description
Add Associates a routing policy for the matched
pattern.
Remove Dissociates a routing policy from the
matched pattern.
Name Description
Name Name of the routing policy.
Disabled Specifies that the routing policy is to be
disabled and should not be used.
Destination SIP Entity as Destination.
Notes Additional notes about the routing policy.
Button Description
Commit Saves the regular expression and distributes
it to the Session Managers in the
enterprise.
Cancel Cancels the creation or modification of the
regular expression.
Regular Expressions
Administering Avaya Aura® Session Manager November 2010 321

Regular Expression List field descriptions
Use this page to view the regular expression associated with the selected routing policy.
Name Description
Regular Expression Displays the regular expression to be used
for the selected routing policy.
Rank Order Priority of the regular expression. Lower rank
order means a higher priority.
Deny Denies routing for a matched regular
expression.
Notes Additional notes for the regular expression.
Button Description
Select Associates the selected regular expression
to a routing policy or dissociates it based on
the Add or Remove option selected earlier.
Cancel Cancels the association or dissociation of the
regular expression.
Bulk import for Regular Expressions
Please follow these rules when creating an XML bulk import file:
• The pattern of a Regular Expression referred to as <regexpmap> must be unique.
•<routingpolicyNames> must refer to an existing Routing Policy with the exact same name.
It must either appear in the System Manager database or in an import file that exists in
the same import operation as the Regular Expression.
•Multiple Routing Policy entries (<routingpolicyNames>) can be configured for one Regular
Expression.
Example:
<?xml version="1.0" encoding="UTF-8" standalone="yes"?>
<regexpmapFullTOList>
<RegexpmapFullTO>
<notes>this is a test</notes>
<deny>false</deny>
<pattern>*.com</pattern>
<rankorder>0</rankorder>
<routingpolicyNames>toBerlin</routingpolicyNames>
</RegexpmapFullTO>
</regexpmapFullTOList>
Managing Session Manager routing
322 Administering Avaya Aura ® Session Manager November 2010
Comments? infodev@avaya.com

Defaults
Modifying the default settings
You can use the Defaults screen to change the default values or ranges for parameters that
are used by the other Routing menu options
About this task
These values are used as defaults values of admin personal settings when creating new
Routing entities. Modifying these values does not change the values of already created
entities .
Procedure
1. On the System Manager console, under Elements, click Routing.
2. Click Routing > Defaults. The Personal Settings screen is displayed.
3. Under Adaptations, specify the minimum and maximum number of characters for
pattern matching. The default minimum and maximum values are 1 and 36
respectively.
4. Under Dial Patterns, specify the minimum and maximum length for dial pattern.
These values are used by the Dial Patterns option. The default minimum and
maximum values are 1 and 36 respectively.
5. Under Entity Links, specify the port number to be used as a listen port. The default
port is 5060.
6. Under Domain Management, specify a domain suffix.
7. Under SIP Entities, specify the following:
a. Select the default SIP entity type from the Type drop-down menu. The default
type is Session Manager.
b. Select the default time zone from the Time Zone pull-down menu. The default
time zone is America/Denver.
c. Select the default transport protocol for ports. The default protocol is TLS.
d. With entity links from both the Session Manager instances, checking the
Override Port & Transport with DNS SRV check box on the SIP entity form
indicates that both the Port and Protocol (Transport) on the SIP entity form are
ignored.
•If you select the check box, the port and transport administered in the local
host name resolution table is used, which could override the entity link.
Defaults
Administering Avaya Aura® Session Manager November 2010 323
•If the FQDN is not in the local table and DNS is consulted, if you have not
selected the check box, only an A-Record lookup is done in DNS to resolve
the host name to an IP address. Transport and port specified in the entity
link are used. If you selected the check box, a full DNS lookup (as
described in RFC 3263) is done, and the transport and port specified in
the entity link could be overridden.
8. Under Time Ranges, specify the default start time and end time for the time range.
The default is to use a 24-hour time range, that is, the start time is 00:00 hours and
the end time is 23:59 hours.
9. Under Application Settings, select the Show warning message check box to get
a warning message if you try to navigate to another page when a page has unsaved
data or when data import is in progress.
10. Click Apply to save the changes.
Related topics:
Default Settings field descriptions on page 324
Default Settings field descriptions
Use this page to specify default settings for all the Routing menus on the right-hand side pane
and to save them as your default personal settings.
Adaptations
Name Description
Matching Pattern Min Length Minimum length of pattern matched for
adaptations. The minimum value can be 1.
Matching Pattern Max Length Maximum length of pattern matched for
adaptations. The maximum value can be
36.
Dial Patterns
Name Description
Dial Pattern Min Length Minimum length of dial pattern to be
matched. The minimum value can be 1.
Dial Pattern Max Length Maximum length of dial pattern to be
matched. The maximum value can be 36.
Managing Session Manager routing
324 Administering Avaya Aura ® Session Manager November 2010
Comments? infodev@avaya.com

Entity Links
Name Description
Listen Port Number of the port to be used for entity links.
The default port is 5060.
Default Transport Protocol for Entity
Links The default transport protocol that the entity
links use, such as TLS, TCP, or UDP. The
default is TLS.
Domain Management
Name Description
Suffix The default suffix to be used for the domain
name.
SIP Entities
Name Description
Type Type of the SIP entity, such as ASM, CM,
Trunk, Gateway, and so on. The default is
ASM.
Time Zone Default time zone to be used for the entity
link.
Default Transport Protocol for Ports Default transport protocol to be used by the
ports. The default is TLS.
Override Port & Transport with DNS SRV Select check box to override DNS routing.
Time Ranges
Name Description
Time Range Start Time Start time for the time range. Default is 00:00
Time Range End Time End time for the time range. Default is
23:59.
Application Settings
Name Description
Show warning message Displays a warning message if you try to
navigate to another page when the displayed
page has unsaved data or if a data import is
on progress.
Defaults
Administering Avaya Aura® Session Manager November 2010 325

Button Description
Restore Defaults Restores vendor defaults.
Revert Reverts to settings before the last applied
settings.
Apply Saves and applies the modified default
settings.
Related topics:
Modifying the default settings on page 323
Managing Session Manager routing
326 Administering Avaya Aura ® Session Manager November 2010
Comments? infodev@avaya.com
Chapter 6: Configuring and monitoring
Session Manager instances
Dashboard
About Session Manager Dashboard
Session Manager Dashboard provides a snapshot view of the health and summary of all the
administered Session Manager instances. It also enables some of the following maintenance
operations:
Before you start a maintenance operation or an upgrade of a Session Manager, you must:
• Set the Session Manager to block new incoming calls (set the Deny New Service state)
and wait for active calls to terminate.
• Shutdown the system
Similarly, after completing the Session Manager maintenance or upgrade operation, you must:
• Reboot the system
• Set the Session Manager to allow new calls (set the Accept New Service state).
Session Manager Dashboard page field descriptions
The label, As of (time) indicates the time of the last update of information as displayed by the
dashboard. The Refresh link in the table header refreshes the Session Manager Dashboard
page with the most recent values of fields.
Button Description
Service State > Deny New Service Blocks incoming calls for the selected
Session Manager or Session Managers but
leaves active calls “up”.
Service State > Accept New Service Allows incoming calls for the selected
Session Manager or Session Managers
Administering Avaya Aura® Session Manager November 2010 327

Button Description
which were previously blocked using a Deny
New Service request.
Shutdown System > Shutdown Shuts down the selected Session Manager
server or servers.
Shutdown System > Reboot Reboots the selected Session Manager
server or servers.
Name Description
Session Manager Name of administered Session Manager
instance. You can click on the link to go to the
Session Manager Administration page.
Type Type of Session Manager instance. The type
can be Core or Branch Session Manager.
Alarms Count of raised alarms being demarcated on
the basis of status codes as Major & Critical
or Minor or Warning.
Tests Pass The current results for periodic maintenance
tests. Green means pass and red means
fail.
Security Module
Security Module Status Possible states of Security Module matching
existing Security Module Status page. The
states are "Up", "Down", and "---"
(unknown).
You can click on the link to go to the detailed
summary of the selected security module in
the page.
Service State The current service state of the Session
Manager. The service state can be:
• Accept New Service
• Deny New Service
You can click on the link to display the
Session Manager Administration page.
Entity Monitoring The status of monitoring the selected
Session Manager entity, shown as the
number of down links and number of total
links. You can click on the link to display the
Session Manager Entity Link Connection
Status page. Entity Monitoring does not
apply to a Session Manager administered as
BSM, and therefore the status will always be
unknown (---).
Configuring and monitoring Session Manager instances
328 Administering Avaya Aura ® Session Manager November 2010
Comments? infodev@avaya.com
Name Description
Active Call Count The current active call counts for this session
manager instance.
Registrations The registration summary. You can click on
the link to display the Registration Summary
page.
Version Version of the Session Manager software
installed and has the following format:
<major release number>.<minor release
number>.<service pack number>.<patch
number>.<build number>. Clicking on a
version string displays the Session Manager
Version Inventory page for that particular
software version.
Confirm Accept New Service Confirmation for Session Managers
page field descriptions
Button Description
Cancel Cancels the processing of new calls and
maintains call blocking.
Confirm Allows Session Manager to process new
calls
Name Description
Session Manager Name of administered Session Manager
instance. You can click on the link to go to the
Session Manager Administration page.
Type Type of Session Manager instance, either as
Core or Branch Session Manager.
Service State Current service and management state of
the selected Session Manager instance. The
state can be of the following types:
• ME/MD for Management Enabled/
Disabled
•AN/DN for Accept New Service/Deny New
Service
You can click on the link to go to the Session
Manager Administration page.
Dashboard
Administering Avaya Aura® Session Manager November 2010 329
Name Description
Active Call Count The current active call counts for this session
manager instance.
Registrations The registration summary. You can click on
the link to go to the Registration Summary
page.
Confirm Deny New Service for Session Managers page field
descriptions
Button Description
Cancel Cancels the blocking of new calls for
processing. Processing of new calls
continues.
Confirm Blocks new calls from being processed.
Name Description
Session Manager Name of administered Session Manager
instance. You can click on the link to go to the
Session Manager Administration page.
Type The type of Session Manager instance,
either as Core or Branch Session Manager.
Service State Current service and management state of
the selected Session Manager instance. The
state can be of the following types:
• ME/MD for Management Enabled/
Disabled
•AN/DN for Accept New Service/Deny New
Service
You can click on the link to go to the Session
Manager Administration page.
Active Call Count The current active call counts for this session
manager instance.
Registrations The registration summary. You can click on
the link to go to the Registration Summary
page.
Configuring and monitoring Session Manager instances
330 Administering Avaya Aura ® Session Manager November 2010
Comments? infodev@avaya.com
Confirm Shutdown for Session Managers page field descriptions
Button Description
Cancel Cancels the shutdown of the selected
Session Manager instances.
Confirm Confirms the shutdown of the selected
Session Manager instances.
Name Description
Session Manager Name of administered Session Manager
instance. You can click on the link to go to the
Session Manager Administration page.
Type The type of Session Manager instance,
either as Core or Branch Session Manager.
Service State Current service and management state of
the selected Session Manager instance. The
state can be of the following types:
• ME/MD for Management Enabled/
Disabled
•AN/DN for Accept New Service/Deny New
Service
You can click on the link to go to the Session
Manager Administration page.
Active Call Count The current active call counts for this session
manager instance.
Registrations The registration summary. You can click on
the link to go to the Registration Summary
page.
Confirm Reboot for Session Managers page field descriptions
Button Description
Cancel Cancels the rebooting of the selected
Session Manager instances.
Confirm Confirms the rebooting of the selected
Session Manager instances.
Dashboard
Administering Avaya Aura® Session Manager November 2010 331
Name Description
Session Manager Name of administered Session Manager
instance. You can click on the link to go to the
Session Manager Administration page.
Type The type of Session Manager instance,
either as Core or Branch Session Manager.
Service State Current service and management state of
the selected Session Manager instance. The
state can be of the following types:
• ME/MD for Management Enabled/
Disabled
•AN/DN for Accept New Service/Deny New
Service
You can click on the link to go to the Session
Manager Administration page.
Active Call Count The current active call counts for this session
manager instance.
Registrations The registration summary. You can click on
the link to go to the Registration Summary
page.
Session Manager Administration
About Session Manager Administration
Select the Session Manager Administration menu option to add a SIP entity as a Session
Manager instance. Once added, these Session Manager instances form a link with the Session
Manager Element Manager and can be used for obtaining and monitoring the status of that
Session Manager instance.
Data replication and monitoring operations are possible only after these Session Manager
instances are added and configured.
In addition to creating new Session Manager instances, the Session Manager Administration
screen also allows you to view, edit, or delete the Session Manager instances that you have
created.
Configuring and monitoring Session Manager instances
332 Administering Avaya Aura ® Session Manager November 2010
Comments? infodev@avaya.com

About E911 Services
The E911 service enables identification of the physical location of a registered user in the event
of an emergency call. The location is determined through the IP address and port level
discovery as per E911 administration. Session Manager interacts with E911 service upon user
registrations to obtain an Emergency Location Identification Number (ELIN). Each Session
Manager synchronizes with the E911 services server, stores ELIN records for its registered
users, and sends the ELIN to Communication Manager when an emergency call is made.
Session Manager synchronizes with the E911 services server when any of the following events
occurs:
• The server is added to Session Manager in order to initialize or synchronize databases
• The connection between Session Manager and the server is lost and later restored
• User registration and un-registration causes Session Manager to synchronize with the
E911 service.
E911 services operate in a primary and secondary server mode, in which one server is active
and the other is operating in a warm standby mode.
About NIC Bonding
NIC bonding enables two Ethernet interfaces on the Session Manager Security Module to act
as one, providing redundancy. The NIC bonding driver is configured to use "active-backup"
mode in which two Ethernet interfaces can be added as slaves to the NIC bonding driver
interface. Only one slave in the bond is active and the other slave becomes active if, and only
if, the active slave fails. The bond's MAC address is externally visible on only one port (network
adapter) to avoid any conflict with the switch. The NIC bonding interface needs only one IP
Address and uses the public IP address of the Session Manager Security Module. The NIC
bonding interface needs only one MAC address and uses the MAC address of the first slave
Ethernet interface. More than one of the NICs enable bonding so that traffic can traverse either
NIC connected to a separate L2 switch port based on the interface's link state.
The bonding driver supports two schemes for monitoring a slave interface's link state: the ARP
monitor and the MII monitor.
Note:
Following is the mapping of the physical Ethernet interfaces:
• Eth0: Management
• Eth1: Services
• Eth2: Security Module (SIP/PPM) - Physical port 3
• Eth3: Backup interface for NIC bonding - Physical port 4
Session Manager Administration
Administering Avaya Aura® Session Manager November 2010 333

Adding a SIP entity as a Session Manager instance
Before you begin
Before starting this procedure, make sure that the SIP entity that you want to add was created.
For a Session Manager SIP Entity type, you must administer the listen ports on the SIP entity
form. These listen ports are used by endpoints to connect to Session Manager and can be
used to map different ports to different domains.
Procedure
1. On the System Manager console, under Elements, click Session Manager.
2. Click Session Manager Administration in the left navigation pane.
3. On the Session Manager Administration page under Session Manager Instances,
click New.
4. Under the General section, enter the following information:
a. Select the SIP Entity Name from the drop-down list.
b. In the Description field, add a description for this entity.
c. In the Management Access Point Host Name/IP field, enter the IP address
of the management interface (eth0) of the Session Manager server.
d. Select the Direct Routing to Endpoints from the drop-down list.
e. For Adaptation for Trunk Gateway, select None from the drop-down list.
5. Under the Security Module section, enter the following information to configure the
Security Module:
a. In the Network Mask field, enter the value for the network mask associated
with the network that the Security Module network interface will be connected
to.
b. In the Default Gateway field, add the IP address of the default gateway.
c. In the Call Control PHB field, use the default value of 46 (forward with highest
priority).
d. In the QOS Priority field, enter a 802.1q priority value. The default is 6.
e. In the Speed & Duplex field, select a value from the drop-down menu to
configure the security module interface speed and duplex values.
f. In the VLAN ID field, enter an integer value. This is the VLAN that the Session
Manager is to be associated with. Leave this field blank if VLANs are not in
use.
SIP Entity IP Address field is populated as per the IP address of the SIP entity.
6. Under the NIC Bonding section, enable or disable NIC bonding by selecting or
clearing the Enable Bonding check box.
7. Under the NIC Bonding section, select a monitoring mode for NIC bonding from
the drop-down menu for Device Monitoring Mode
Configuring and monitoring Session Manager instances
334 Administering Avaya Aura ® Session Manager November 2010
Comments? infodev@avaya.com

8. If you selected ARP Monitoring for Device Monitoring Mode, enter the following
information:
a. ARP Interval (msecs) — Specifies the ARP link monitoring frequency. The
range is 50 to 1000. The default value is 100.
b. ARP Target IP — Specifies the IP target of the ARP request which is sent to
determine the health of the link to the targets. You can configure up to 3 IP
addresses for ARP monitoring.
Note:
Due to a Red Hat Linux kernel limitation, do not monitor virtual IP addresses when
using ARP monitoring. This affects the Session Manager ARP table updates
causing the virtual IP entity link to be marked as down. However, you can monitor
virtual IP addresses using MII mode.
9. If you selected MII Monitoring for Device Monitoring Mode, enter the following
information:
a. Link Monitoring Frequency (msecs) — Specifies the sampling period. The range
is 50 to 500. The default value is 100.
b. Down Delay (msecs) — Specifies the wait time for disabling a slave if a link
failure is detected. The range is 50 to 1000. The default value is 200.
c. Up Delay (msecs) — Specifies the wait time for enabling a slave if a link
recovery is detected. The range is 50 to 1000. The default value is 200.
10. Under the Monitoring section, enter the following information to configure how this
Session Manager instance should monitor SIP entities:
a. Select or clear the Enable Monitoring check box to enable or disable
monitoring of the SIP entities by this Session Manage instance.
b. In the Proactive cycle time (secs) field, enter a value in seconds. The default
is 900 seconds. Session Manager uses this value for monitoring and polling an
administered SIP entity at this interval until that entity is reachable.
c. In the Reactive cycle time (secs) field, enter a value in seconds. The default
is 120 seconds.
d. Iin the Number of Retries field, enter an integer value. This value specifies the
number of times Session Manager polls a SIP entity before it is deemed
unreachable. The default is 1.
11. Under the CDR section, enter the following information:
a. Select the Enable CDR check box to enable Call Detail Recording.
b. Enter a password that will be used to access the CDR record, and re-enter the
password to confirm it. The password that you enter here becomes the default
password for the CDR_USER user ID.
12. Under the Personal Profile Manager (PPM) - Connection Settings section, enter
the following information:
Session Manager Administration
Administering Avaya Aura® Session Manager November 2010 335

a. Select the Limited PPM Client Connection check box to enable the Maximum
Connection per PPM client field. The default value is enabled.
b. Specify the value of Maximum Connection per PPM client. Valid values are
integers between 1 and 10. The default value is 3.
c. Select the PPM Packet Rate Limiting check box to enable the PPM Packet
Rate Limiting Threshold field. The default value is enabled.
d. Specify the value of PPM Packet Rate Limiting Threshold. This value is
applied per PPM client. The range is 1-500. The default value is 50.
13. Under the Event Server section, select Yes or No for Clear Subscription on
Notification Failure.
14. Click Commit.
Related topics:
Session Manager Administration page field descriptions on page 341
Session Manager page field descriptions on page 344
Viewing the Session Manager administration settings
Procedure
1. On the System Manager console, under Elements, click Session Manager.
2. Click Session Manager Administration in the left navigation pane.
3. Select a Session Manager from the Session Manager Instances list and click
View. The View Session Manager page displays information about the selected
Session Manager instance.
4. After you have viewed the information, click Return.
Related topics:
Session Manager Administration page field descriptions on page 341
Session Manager page field descriptions on page 344
Modifying the Session Manager administration settings
About this task
This option allows you to modify the configuration settings for an already configured Session
Manager.
Configuring and monitoring Session Manager instances
336 Administering Avaya Aura ® Session Manager November 2010
Comments? infodev@avaya.com
Procedure
1. On the System Manager console, under Elements, click Session Manager.
2. Click Session Manager Administration in the left navigation pane.
3. Select a Session Manager instance from the list and click Edit.
4. Under the General section, change the following information, if required:
• Add a comment in the Description field for the Session Manager SIP entity.
•Change the IP address of the host on which the Session Manager is installed
in the Management Access Point Host Name/IP field. This is the IP address
of the domain name of the server that hosts the Session Manager application.
Session Manager passes the address to the SM100 agent to allow the agent
to query the server for the required information. To be a part of the Session
Manager instances network of an enterprise, a Session Manager instance
must first be administered as a management access point.
• Select the Direct Routing to Endpoints from the drop-down list.
5. Under the Security Module section, change the following information, if required
•Modify the network mask in the Network Mask field. Session Manager passes
this network mask to the SM100 agent. The agent configures the network mask
to define the subnet that the SM100 card is to be associated with.
• Modify the IP address in the Default Gateway field.
• Modify the value for Call Control PHB. The Call Control PHB (per hop
behavior) specifies the type of service and priority SIP traffic from SM100 that
you may expect as it travels through the IP network. All packets containing SIP
signaling which leave the SM100 have the specified value in the DSCP
(differentiated service code point) field of the IP header. Intervening routers
may or may not treat packets with this value with a different level of
precedence--they must either support this by default or be specially configured
to do so.
Different DSCP values are specified in RFCs 2597 and 2598. To be consistent
with Communication Manager, Session Manager uses a default DSCP value
of 46 which indicates forwarding with the highest priority.
• Select the Speed & Duplex value to configure the security module interface
speed and duplex values.
•Modify the QOS Priority value. This is the value of 802.1q priority bit (Layer 2
QoS) configuration to be used by Session Manager for any SIP traffic. The
default is 6. Range of this value is 0-7. This value specifies the ability to provide
different priority to different applications, users, or data flows, or to guarantee
a certain level of performance for a call on a local area network. The higher
the priority, the lower the QOS priority number.
Session Manager Administration
Administering Avaya Aura® Session Manager November 2010 337

• Modify the value for VLAN ID. This is the VLAN that the Session Manager is
to be associated with. Call traffic segregation could be based on the VLAN that
the Session Manager is associated with.
6. Under NIC Bonding section, change the following information if required:
•To enable or disable NIC bonding, select or clear the Enable Bonding check
box. NIC bonding slaves interfaces eth2 and eth3 in a bond of interfaces. This
makes all the Network firewall rules related to SM100 agent public IP Address
to be applied on the NIC bonding interface.
•Select one of the following modes of NIC bonding as supported by NIC bonding
driver from the drop-down menu Device Monitoring Mode:
- ARP Monitoring
- MII Monitoring
• Modify the following details related to ARP monitoring:
-ARP Interval (msecs) — Specifies the ARP link monitoring frequency and
range is from 50 to 1000 (default value is 100)
-ARP Target IP — Specifies the IP target of the ARP request which is sent
to determine the health of the link to the targets. You can configure up to
3 IP Addresses for ARP monitoring
Note:
Due to a Red Hat Linux kernel limitation, do not monitor virtual IP addresses
when using ARP monitoring. This affects the Session Manager ARP table
updates causing the virtual IP entity link to be marked as down. However,
you can monitor virtual IP addresses using MII mode.
• Modify the following details related to MII monitoring:
-Link Monitoring Frequency (msecs) — Specifies the sampling period with
range from 50 to 500 (default value is 100).
-Down Delay (msecs) — Specifies the wait time for disabling of a slave in
case of detection of a link failure. The value is a multiple of link monitoring
frequency value and range is from 50 to 1000 (default value is 200).
- Up Delay (msecs) — Specifies the wait time for enabling of a slave in
case of detection of a link recovery. The value is a multiple of link
monitoring frequency value and range is from 50 to 1000 (default value
is 200).
7. Under the Monitoring section, modify the following information as required to
configure how this Session Manager instance should monitor SIP entities:
• To enable or disable monitoring of the SIP entities by this Session Manager
instance, select or clear the Enable Monitoring check box.
Configuring and monitoring Session Manager instances
338 Administering Avaya Aura ® Session Manager November 2010
Comments? infodev@avaya.com
•Type a required value in seconds for Proactive cycle time (secs). The default
is 900 seconds.
• Session Manager uses this value for monitoring and polling an administered
SIP entity at this interval till that entity is reachable.
•Type a required value in seconds for Reactive cycle time (secs). The default
is 120 seconds. This value is used when proactive monitoring detects that an
administered SIP entity is not reachable and changes to a reactive mode.
Reactive monitoring continues till the SIP entity responds again. Typically, the
value for reactive monitoring should be less than the value for proactive
monitoring. The default is 120 seconds.
Session Manager uses these default values for each administered SIP entity
unless overridden by the Monitoring options that you specified on the SIP
Entities screen for a specific entity.
• Type an integer value in Number of Retries. The default is 1. This value
specifies the number of times Session Manager polls a SIP entity before it is
deemed unreachable.
8. Under the CDR section, change the following information, if required
• Select the Enable CDR check box to enable Call Detail Recording. This
enables CDR at the system level for that Session Manager instance. If CDR
is enabled, you can individually control call detail recording for specific SIP
entities using the Call Detail Recording drop-down menu.
• Type a password that must be used to access the CDR record and retype to
confirm the password. This password is used by an external CDR processing
adjunct for connecting to Session Manager and to transfer the generated CDR
files. Normally the adjunct logs in with the “CDR_User” user ID with a default
password. The password that you specify here becomes the default password.
Once the CDR adjunct logs in using “sftp”, it is automatically placed in the
Session Manager CDR home directory of the CDR_User, which is /var/
home/ftp/CDR.
9. Personal Profile Manager (PPM) - Connection Settings section specifies the
global parameters that apply to all Session Manager instances. Under the Personal
Profile Manager (PPM) - Connection Settings section, specify related
information:
a. Select the Limited PPM client connection check box to enable selecting
Maximum Connection per PPM client. Default value is enabled.
b. Specify the value of Maximum Connection per PPM client. Valid values are
integers between 1 and 10. Default value is 3.
c. Select the PPM Packet Rate Limiting check box to enable selecting PPM
Packet Rate Limiting Threshold. Default value is enabled.
d. Specify the value of PPM Packet Rate Limiting Threshold. This value is
applied per PPM client. Value Range: 1-500, default value: 50.
Session Manager Administration
Administering Avaya Aura® Session Manager November 2010 339
10. Event Server section specifies the option to clear Subscription on Notification
Failure.
11. Click Commit.
Related topics:
Session Manager Administration page field descriptions on page 341
Session Manager page field descriptions on page 344
Deleting a Session Manager instance
Procedure
1. On the System Manager console, under Elements, click Session Manager.
2. Click Session Manager Administration in the left navigation pane.
3. Select a Session Manager instance from the list and click Delete.
4. On the Delete Confirmation screen, click Delete to delete the Session Manager
instance.
Note:
Before deleting a Session Manager instance, it should be dissociated from all the
related Communication Profiles or associated users should be deleted.
Related topics:
Delete Confirmation page field descriptions on page 341
Session Manager Administration page field descriptions on page 341
Administering ELIN Server
About this task
This section provides the basic steps of ELIN Server administration.
Procedure
1. In Local Host Name Resolution (LHNR) page, administer the FQDN for the ELIN
Server to have 2 IP address (one primary, one backup) with different priorities.
2. Add a SIP Entity of type ELIN Server using this FQDN.
Configuring and monitoring Session Manager instances
340 Administering Avaya Aura ® Session Manager November 2010
Comments? infodev@avaya.com
3. In the Session Manager Administration page under Global Settings section, select
the administered ELIN Server for “ELIN SIP Entity” field.
4. Create the Entity Links from ELIN Server to all Session Manager SIP Entities.
5. Import certificates using TLS link between Session Manager and ELIN server. This
is required only if the entity link is of “TLS” type.
Note:
OPTIONS monitoring is enabled between Session Manager and ELIN Server.
This applies to all entity links and you should not disable it.
Delete Confirmation page field descriptions
Button Description
Delete Deletes the selectedSession Manager
instance.
Cancel Cancels the deletion of the selected Session
Manager instance
Related topics:
Deleting a Session Manager instance on page 340
Session Manager Administration page field descriptions
Global Settings
Name Description
Save Global Settings Configures global settings of all the
configured session manager instances.
Allow Unauthenticated Emergency Calls Specifies whether to allow unauthenticated
users to make emergency calls.
Allow Unsecured PPM Traffic Enables PPM traffic over HTTP so that it can
continue to process phone login, download
button labels, contact lists, and other
services.
Failback Policy Specifies manual and scheduled failback
support for terminals.
Session Manager Administration
Administering Avaya Aura® Session Manager November 2010 341

Name Description
ELIN SIP Entity Used by third party E911 services, which
determines a user’s location based on IP
address, to send the new ELIN to Session
Manager in case of emergency call. The SIP
Entity selected as the ELIN server should be
resolved through local host name resolution
to use either the primary or secondary IP
address.
Prefer Longer Matching Dial Patterns in
Location ALL to Shorter Matches in
Originator's Location
Specifies how the call gets routed as per Dial
Pattern settings. For details, see “About Dial
Patterns”.
Ignore SDP for Call Admission Control Determines whether call admission control
(CAC) uses the SDP in SIP messages to
determine the bandwidth used by a call.
Session Manager Instances
Button Description
New Opens the Add Session Manager page that
enables you to add a SIP entity as a new
Session Manager instance
View Opens the View Session Manager page that
enables you to view an already added
Session Manager instance
Edit Opens the Edit Session Manager page that
enables you to edit the properties of an
already added Session Manager instance
Delete Opens the Delete Confirmation page that
allows you to delete a SIP entity that is added
as a Session Manager instance
Name Description
Name Name of administered Session Manager
Primary Communication Profiles The number of Communication Profiles that
use this Session Manager as their primary
SIP controller.<n1>
Secondary Communication Profiles The total number of Communication Profiles
that use this Session Manager as their
secondary SIP controller.<n2>
Maximum Active Communication Profiles This Session Manager is the primary server
for n1 Communication Profile(s) and will
support up to additional n2 Communication
Configuring and monitoring Session Manager instances
342 Administering Avaya Aura ® Session Manager November 2010
Comments? infodev@avaya.com

Name Description
Profile(s) if a single other Session Manager
fails.
Branch Session Manager Instances
Button Description
New Opens the Add Branch Session Manager
page that enables you to add a SIP entity as
a new Branch Session Manager instance
View Opens the View Branch Session Manager
page that enables you to view an already
added Branch Session Manager instance
Edit Opens the Edit Branch Session Manager
page that enables you to edit the properties
of an already added Branch Session
Manager instance
Delete Opens the Delete Confirmation page that
allows you to delete a SIP entity that is added
as a Branch Session Manager instance
Name Description
Name Name of administered Branch Session
Manager
Main CM for LSP Main CM for the LSP associated with this
Branch Session Manager
SIP Communication Profiles The number of Communication Profiles
assigned to this Branch Session Manager.
Related topics:
Adding a SIP entity as a Session Manager instance on page 334
Viewing the Session Manager administration settings on page 336
Modifying the Session Manager administration settings on page 336
Deleting a Session Manager instance on page 340
Adding a SIP entity as a Branch Session Manager instance on page 351
Viewing the Branch Session Manager administration settings on page 354
Modifying the Branch Session Manager administration settings on page 354
Deleting a Branch Session Manager instance on page 357
Session Manager Administration
Administering Avaya Aura® Session Manager November 2010 343
Session Manager page field descriptions
General
Name Description
SIP Entity Name Select a name of the SIP entity that you wish
to add as a Session Manager instance. The
entity must be of type Session Manager and
it must be in Sync state.
Description Description of the entity added. Optional.
Management Access Point: Host Name /
IP The IP address of the host on which the
management agent is running, that is, the
host on which the Session Manager is
installed.
Direct Routing to Endpoints Provides the option to enable or disable
direct routing to endpoints.
Security Module
Name Description
SIP Entity IP Address IP address of the Session Manager as
specified in the SIP Entity Details screen.
Network Mask Allows you to enter the value of the Network
mask. The network mask is passed to the
SM100 agent. The agent configures the
network mask to define the subnet that the
SM100 card is to be associated with.
Default Gateway IP address of the default gateway.
Call Control PHB The Call Control PHB (per hop behavior)
specifies the type of service and priority SIP
traffic from SM100 may expect as it travels
through the IP network. All packets
containing SIP signaling which leave the
SM100 have the specified value in the DSCP
(differentiated service code point) field of the
IP header. Intervening routers may or may
not treat packets with this value with a
different level of precedence--they must
either support this by default or be specially
configured to do so.
Different DSCP values are specified in RFCs
2597 and 2598. To be consistent with
Communication Manager, Session Manager
Configuring and monitoring Session Manager instances
344 Administering Avaya Aura ® Session Manager November 2010
Comments? infodev@avaya.com

Name Description
uses a default DSCP value of 46 which
indicates forwarding with the highest
priority.
QOS Priority This value specifies the ability to provide
different priority to different applications,
users, or data flows, or to guarantee a certain
level of performance for a call on a local area
network. The higher the priority, lower the
QOS priority number. This is the value of
802.1q priority bit (Layer 2 QoS)
configuration to be used by Session
Manager for any SIP traffic. The default is 6.
Range of this value is 0-7.
Speed & Duplex Allows the configuring of the security module
interface speed and duplex values. The
drop-down menu contains a list of the valid
values.
VLAN ID The VLAN that the Session Manager should
be associated with. Call traffic segregation
could be based on the VLAN that the Session
Manager is associated with.
NIC Bonding
Name Description
Enable Bonding Enables or disables NIC bonding. NIC
bonding slaves interfaces eth2 and eth3 in a
bond of interfaces. This makes all the
Network firewall rules related to SM100
agent public IP Address to be applied on the
NIC bonding interface.
Device Monitoring Mode Allows you to select ARP Monitoring or MII
Monitoring as the modes of NIC bonding as
supported by NIC bonding driver.
ARP Interval (msecs) Specifies the ARP link monitoring frequency
and range is from 50 to 1000 (default value
is 100).
ARP Target IP Specifies the IP target of the ARP request
which is sent to determine the health of the
link to the targets. You can configure up to 3
IP Addresses for ARP monitoring.
Link Monitoring Frequency (msecs) Specifies the sampling period with range
from 50 to 500 (default value is 100).
Session Manager Administration
Administering Avaya Aura® Session Manager November 2010 345

Name Description
Down Delay (msecs) Specifies the wait time for disabling of a slave
in case of detection of a link failure. The value
is a multiple of link monitoring frequency
value and range is from 50 to 1000 (default
value is 200).
Up Delay (msecs) Specifies the wait time for enabling of a slave
in case of detection of a link recovery. The
value is a multiple of link monitoring
frequency value and range is from 50 to 1000
(default value is 200).
Monitoring
Button Description
Enable Monitoring Select to enable monitoring of the
administered SIP entities by the added
Session Manager instance. Clear the check
box to disable monitoring.
Proactive cycle time (secs) Enter a value in seconds for polling the
administered SIP entities by the added
Session Manager. Monitoring ensures that
the entities are still reachable. Proactive
monitoring occurs as long as no outages are
detected. The default is 900 seconds.
These default values are used for each
administered SIP entity unless overridden by
the Monitoring options that you specified on
the SIP Entities page for a specific entity.
Reactive cycle time (secs) Enter a value in seconds. This value is used
when proactive monitoring detects that an
administered SIP entity is not reachable and
changes to a reactive mode. Reactive
monitoring continues till the SIP entity
responds again. Typically, the value for
reactive monitoring should be less than the
value for proactive monitoring. The default is
120 seconds.
Session Manager uses these default values
for each administered SIP entity unless
overridden by the Monitoring options that you
specified on the SIP Entities page for a
specific entity.
Number of Retries Enter an integer value. This value specifies
the number of times Session Manager polls
Configuring and monitoring Session Manager instances
346 Administering Avaya Aura ® Session Manager November 2010
Comments? infodev@avaya.com

Button Description
a SIP entity before it is deemed unreachable.
The default is 1.
Session Manager uses these default values
for each administered SIP entity unless
overridden by the Monitoring options that you
specified on the SIP Entities page for a
specific entity.
CDR
Name Description
Enable CDR This controls whether CDR is enabled at the
system level for that Session Manager
instance. If CDR is enabled, you can
individually control call detail recording for
specific SIP entities using the Call Detail
Recording drop-down menu.
User User login name for CDR access.
Password This password is used by an external CDR
processing adjunct for connecting to Session
Manager and to transfer the generated CDR
files. Normally the adjunct logs in as
"CDR_User" user ID, with a default
password. The password that you specify
here becomes the default password. Once
the CDR adjunct logs in using "sftp", it is
automatically placed in the Session Manager
CDR home directory of the CDR_User, which
is /var/home/ftp/CDR.
Confirm Password Enter the same password to confirm.
Personal Profile Manager (PPM) - Connection Settings
Name Description
Limited PPM client connection Enables selecting Maximum Connection
per PPM client. Default value is Enabled.
Maximum Connection per PPM client Valid values are integers between 1 and 10.
Default value is 3.
PPM Packet Rate Limiting Enables selecting PPM Packet Rate
Limiting Threshold. Default value is
enabled.
PPM Packet Rate Limiting Threshold This value is applied per PPM client. Value
Range: 1-500, default value: 50.
Session Manager Administration
Administering Avaya Aura® Session Manager November 2010 347
Event Server
Name Description
Clear Subscription on Notification Failure Specifies the option to clear Subscription on
Notification Failure.
Button Description
Cancel Cancels the Session Manager addition
operation.
Commit Saves the added SIP entity as a Session
Manager instance with the selected
configuration options.
Related topics:
Adding a SIP entity as a Session Manager instance on page 334
Viewing the Session Manager administration settings on page 336
Modifying the Session Manager administration settings on page 336
Saving Global Session Manager Settings
Procedure
1. On the System Manager console, under Elements, click Session Manager.
2. Click Session Manager Administration in the left navigation pane.
3. On the Session Manager Administration screen under Global Settings section, click
Save Global Settings to configure global settings of all the configured session
manager instances.
4. Select the Allow Unauthenticated Emergency Calls check box to specify whether
emergency calls (based on dial pattern) need to authenticated or not. Check this
box to allow unauthenticated users to make emergency calls.
5. Select the Allow Unsecured PPM Traffic check box to enable PPM traffic over
HTTP so that it can continue to process phone login, download button labels,
contact lists, and other services.
6. Select the Failback Policy check box to specify manual and scheduled failback
support for terminals. Session Manager sends out unsolicited NOTIFY messages
to terminals that have previously failed over. Phones uses the unsolicited NOTIFY
message to register with the highest priority server in the terminal’s administered
list of servers. The NOTIFY messages are send out to avoid a re-registration and
re-subscription flood upon the failback.
Configuring and monitoring Session Manager instances
348 Administering Avaya Aura ® Session Manager November 2010
Comments? infodev@avaya.com

Branch Session Manager Administration
About Branch Session Manager
The Branch Session Manager provides a SIP-enabled branch survivability solution. It allows
a customer who has deployed SIP phones in a branch to receive LSP-style survivability. For
example, when the core Session Manager is unreachable, the SIP phones receive their
Communication Manager features from the LSP.
The Branch Session Manager supports phones which simultaneously register with both the
primary (and secondary, if configured) Session Managers in the core, and also with the Branch
Session Manager. The phones accept incoming calls from any of these servers. Thus there is
no outage to basic calling when a failure occurs and the phone is ready to receive a call from
any of its servers.
A typical branch setup contains the following components:
1. The Branch Session Manager provides service to users in case there is a WAN
failure between branch and core.
2. The Media Gateway provides among other functions the ability to connect branch
to PSTN and media services such as conferencing, tones, and announcements.
3. The LSP is a survivable processor for branch Media Gateway. The LSP starts to
work when the Media Gateway loses connectivity with Trunk Gateway, and register
itself to LSP.
4. End user devices (phones) register with the primary Session Manager as a primary
controller, but uses the Branch Session Manager as a third controller (in case of
WAN failure).
The Branch Session Manager provides service when the branch loses WAN connectivity. As
the result of WAN failure, there are two simultaneous processes triggered:
• The Branch Media Gateway loss of connectivity with the Trunk Gateway, and registers
itself to the Communication Manager LSP. As the result, the LSP starts to provide
service.
•The phones detect losing connectivity with core Session Manager and register the Branch
Session Manager as the new controller.
The Branch Session Manager has the same specifications as a Session Manager, and
provides local autonomy or survivability for SIP stations, trunks and applications. When
signaling is available to the core Session Manager, the branch SIP users can avail sequenced
applications. If the Branch Session Manager receives a request from (originating phase) or to
(terminating phase) any user then Branch Session Manager handles the request in survivable
mode and all applications in the user's application sequence are skipped except for the
Branch Session Manager Administration
Administering Avaya Aura® Session Manager November 2010 349

Communication Manager. When Communication Manager is detected in the sequence, the
request is sent after substituting the LSP's IP address for the core Communication Manager.
So the LSP is automatically used as the Survivable Feature Server.
It is recommended that the Branch Session Manager be configured to support no more than
2 core session managers. Either of the Session Managers can be configured as a primary or
secondary server for a branch user.
Administering Branch Session Manager
Before you begin
The main Communication Manager Feature Server/Evolution Server (CM-FS/ES) is added as
an Inventory item and all appropriate configurations are done for CM-FS/ES in System
Manager. For details, see Administering Avaya Aura™ Communication Manager Server
Options, 03-603479.
About this task
This section provides the basic steps of Branch Session Manager (BSM) administration.
Procedure
1. Add a SIP Entity for BSM using the IP of the BSM security module.
2. Administer a BSM Instance.
3. Create Entity Links from the BSM to the Main CM server (CM-FS/ES) as per
following information:
a. In case of BSM with CM Feature Server/ Trunk Gateway (CM FS/TG):
• Entity Link 1: BSM to core CM Feature Server
• Entity Link 2: BSM to core CM Trunk Gateway
Each entity link must use the same port and transport as the
corresponding link to the primary Session Manager (SM) in the core. The
ports between the CM and SM entities must be unique.
b. In case of BSM with CM Evolution Server (CM-ES):
A CM-ES can be configured using just one entity link. That entity and
entity link is used for both application sequencing and trunk gateway
routing.
BSM accordingly:
• Creates entity and entity link between the BSM and the LSP for survivability
mode.
• Applies the required adaptations to calls in survivability mode.
Configuring and monitoring Session Manager instances
350 Administering Avaya Aura ® Session Manager November 2010
Comments? infodev@avaya.com

4. If required, create a sequence of applications (application sequence) and specify
call handling by CM-FS/ES which should be the same one as specified on the BSM
Instance form.
5. Administer users using the BSM as the Survivability Server.
Adding a SIP entity as a Branch Session Manager instance
Before you begin
Before starting this procedure, make sure that the SIP entity that you want to add was created.
For a Session Manager type SIP entity, the customer has to administer the listen ports on the
SIP entity form. These listen ports are used by endpoints to connect to Branch Session
Manager and they can be used to map different ports to different domains.
Procedure
1. On the System Manager console, under Elements, click Session Manager.
2. Click Session Manager Administration in the left navigation pane.
3. Click New on the Branch Session Manager Instances section of Session Manager
Administration screen. The system displays the Add Branch Session Manager
screen.
4. Under the General section, enter the following information:
• Select the SIP Entity Name from the drop-down list.
• In the Description field for this entity, add a comment if required.
•In the Management Access Point Host Name/IP field, add the IP address of
the host on which the management agent is running; that is, the host on which
the Branch Session Manager is installed.
•Select the Main CM for LSP from the drop-down list. Click the View / Add CM
Entities link to add new CM applications.
• Select the Direct Routing to Endpoints from the drop-down list.
• Select the Adaptation for Trunk Gateway from the drop-down list. This
selected adaptation is used by the Branch Session Manager for routing calls
to or from the Communication Manager LSP trunk gateway.
Note:
In case of Communication Manager Feature Server (CM-FS) or
Communication Manager Trunk Gateway (CM-TG), the adaptation from the
core CM-TG is used by default. This field adaptation selection overrides the
default CM-TG adaptation and is applied to all calls routed on the trunk
gateway entity to the LSP. For Communication Manager Evolution Server
(CM-ES), the default adaptation is taken from the core Communication
Branch Session Manager Administration
Administering Avaya Aura® Session Manager November 2010 351

Manager entity. The adaptation is applied either to calls that are routed
through the gateway to the LSP and also to calls that are application
sequenced.
Note:
To be a part of the Branch Session Manager instances network of an enterprise,
a Branch Session Manager instance must first be administered as a management
access point. This is the network mask of the domain name of the server that
hosts the Branch Session Manager application. The address is passed to the
security module to allow the agent to query the server for the required
information.
5. Under the Security Module section, enter the following information to configure the
security module:
•In the Network Mask field, enter the value for the network mask. The network
mask is passed to the security module. The agent configures the network mask
to define the subnet that the security module is to be associated with.
• In the Default Gateway field, add the correct IP address.
• In the Call Control PHB field, enter a value.
The Call Control PHB (per hop behavior) specifies the type of service and
priority SIP traffic from security module that you may expect as it travels
through the IP network. All packets containing SIP signaling which leave the
security module have the specified value in the DSCP (differentiated service
code point) field of the IP header. Intervening routers may or may not treat
packets with this value with a different level of precedence—they must either
support this by default or be specially configured to do so.
Different DSCP values are specified in RFCs 2597 and 2598. To be consistent
with Communication Manager, Branch Session Manager uses a default DSCP
value of 46 which indicates forwarding with the highest priority.
• The Speed & Duplex field allows the configuring of the security module
interface speed and duplex values. The drop-down menu contains a list of the
valid values.
• In the QOS Priority field, enter a 802.1q priority value.
This is the value of 802.1q priority bit (Layer 2 QoS) configuration to be used
by Branch Session Manager for any SIP traffic. The default is 6. Range of this
value is 0-7. This value specifies the ability to provide different priority to
different applications, users, or data flows, or to guarantee a certain level of
performance for a call on a local area network. The higher the priority, the lower
the QOS priority number.
• In the VLAN ID field, enter an integer value. This is the VLAN that the Branch
Session Manager is to be associated with. Call traffic segregation could be
based on the VLAN associated with the Branch Session Manager.
Configuring and monitoring Session Manager instances
352 Administering Avaya Aura ® Session Manager November 2010
Comments? infodev@avaya.com

SIP Entity IP Address field is populated as per the IP address of the SIP entity.
6. Under the Monitoring section, enter the following information to configure how this
Branch Session Manager instance should monitor SIP entities:
• To enable or disable monitoring of the SIP entities by this Branch Session
Manage instance, select or clear the Enable Monitoring check box.
•Type a required value in seconds for Proactive cycle time (secs). The default
is 900 seconds. Branch Session Manager uses this value for monitoring and
polling an administered SIP entity at this interval till that entity is reachable.
•Type a required value in seconds for Reactive cycle time (secs). The default
is 120 seconds.
This value is used when proactive monitoring detects that an administered SIP
entity is not reachable and changes to a reactive mode. Reactive monitoring
continues till the SIP entity responds again. Typically, the value for reactive
monitoring should be less than the value for proactive monitoring. The default
is 120 seconds.
Branch Session Manager uses these default values for each administered SIP
entity unless overridden by the Monitoring options that you specified on the
SIP entities screen for a specific entity.
• Type an integer value in Number of Retries. The default is 1. This value
specifies the number of times Branch Session Manager polls a SIP entity
before it is deemed unreachable. The default is 1.
7. Personal Profile Manager (PPM) - Connection Settings section specifies the
global parameters that apply to all Branch Session Manager instances. Under the
Personal Profile Manager (PPM) - Connection Settings section, specify related
information:
a. Select the Limited PPM Client Connection check box to enable selecting
Maximum Connection per PPM client. Default value is enabled.
b. Specify the value of Maximum Connection per PPM client. Valid values are
integers between 1 and 10. Default value is 3.
c. Select the PPM Packet Rate Limiting check box to enable selecting PPM
Packet Rate Limiting Threshold. Default value is enabled.
d. Specify the value of PPM Packet Rate Limiting Threshold. This value is
applied per PPM client. Value Range: 1-500, default value: 50.
During normal operation, Branch Session Manager receives data from a
Communication Manager feature server for synchronization to Avaya SIP
endpoints.
8. Event Server section specifies the option to clear Subscription on Notification
Failure.
9. Click Commit .
Branch Session Manager Administration
Administering Avaya Aura® Session Manager November 2010 353

Related topics:
Session Manager Administration page field descriptions on page 341
Branch Session Manager page field descriptions on page 358
Viewing the Branch Session Manager administration settings
Procedure
1. On the System Manager console, under Elements, click Session Manager.
2. Click Session Manager Administration in the left navigation pane.
3. In the Branch Session Manager Instances section, select a Branch Session
Manager from the Branch Session Manager Instances list and click View. The View
Branch Session Manager screen displays information about the selected Branch
Session Manager instance.
4. After you have viewed the information, click Return.
Related topics:
Session Manager Administration page field descriptions on page 341
Branch Session Manager page field descriptions on page 358
Modifying the Branch Session Manager administration settings
About this task
This option allows you to modify the configuration settings for an already configured Branch
Session Manager.
Procedure
1. On the System Manager console, under Elements, click Session Manager.
2. Click Session Manager Administration in the left navigation pane.
3. Click Edit on the Branch Session Manager Instances section of Session Manager
Administration screen. The system displays the Edit Branch Session Manager
screen.
4. Under the General section, change the following information, if required:
• Add a comment in the Description field for the Branch Session Manager SIP
entity.
• Change the IP address of the host on which the Branch Session Manager is
installed in the Management Access Point Host Name/IP field. This is the IP
address of the domain name of the server that hosts the Branch Session
Configuring and monitoring Session Manager instances
354 Administering Avaya Aura ® Session Manager November 2010
Comments? infodev@avaya.com

Manager application. Branch Session Manager passes the address to the
security module to allow the agent to query the server for the required
information. To be a part of the Branch Session Manager instances network of
an enterprise, a Branch Session Manager instance must first be administered
as a management access point.
•Select the Main CM for LSP from the drop-down list. Click the View / Add CM
Entities link to add new CM applications.
• Select the Direct Routing to Endpoints from the drop-down list.
• Select the Adaptation for Trunk Gateway from the drop-down list. This
selected adaptation is used by the Branch Session Manager during routing
calls to or from the Communication Manager LSP trunk gateway.
Note:
In case of Communication Manager Feature Server (CM-FS) or
Communication Manager Trunk Gateway (CM-TG), the adaptation from the
core CM-TG is used by default. This field adaptation selection overrides the
default CM-TG adaptation and is applied to all calls routed on the trunk
gateway entity to the LSP. For Communication Manager Evolution Server
(CM-ES), the default adaptation is taken from the core Communication
Manager entity. The adaptation is applied either to calls that are routed
through the gateway to the LSP and also to calls that are application
sequenced.
5. Under the Security Module section, change the following information, if required
•Modify the network mask in the Network Mask field. Branch Session Manager
passes this network mask to the security module. The agent configures the
network mask to define the subnet that the security module is to be associated
with.
• Modify the IP address in the Default Gateway field.
• Modify the value for Call Control PHB. The Call Control PHB (per hop
behavior) specifies the type of service and priority SIP traffic from security
module that you may expect as it travels through the IP network. All packets
containing SIP signaling which leave the security module have the specified
value in the DSCP (differentiated service code point) field of the IP header.
Intervening routers may or may not treat packets with this value with a different
level of precedence--they must either support this by default or be specially
configured to do so.
Different DSCP values are specified in RFCs 2597 and 2598. To be consistent
with Communication Manager, Branch Session Manager uses a default DSCP
value of 46 which indicates forwarding with the highest priority.
• Select the Speed & Duplex value to configure the security module interface
speed and duplex values.
•Modify the QOS Priority value. This is the value of 802.1q priority bit (Layer 2
QoS) configuration to be used by Branch Session Manager for any SIP traffic.
Branch Session Manager Administration
Administering Avaya Aura® Session Manager November 2010 355

The default is 6. Range of this value is 0-7. This value specifies the ability to
provide different priority to different applications, users, or data flows, or to
guarantee a certain level of performance for a call on a local area network. The
higher the priority, the lower the QOS priority number.
• Modify the value for VLAN ID. This is the VLAN that the Branch Session
Manager is to be associated with. Call traffic segregation could be based on
the VLAN that the Branch Session Manager is associated with.
6. Under the Monitoring section, modify the following information as required to
configure how this Branch Session Manager instance should monitor SIP entities:
• To enable or disable monitoring of the SIP entities by this Branch Session
Manager instance, select or clear the Enable Monitoring check box.
•Type a required value in seconds for Proactive cycle time (secs). The default
is 900 seconds.
• Branch Session Manager uses this value for monitoring and polling an
administered SIP entity at this interval till that entity is reachable.
•Type a required value in seconds for Reactive cycle time (secs). The default
is 120 seconds. This value is used when proactive monitoring detects that an
administered SIP entity is not reachable and changes to a reactive mode.
Reactive monitoring continues till the SIP entity responds again. Typically, the
value for reactive monitoring should be less than the value for proactive
monitoring. The default is 120 seconds.
Branch Session Manager uses these default values for each administered SIP
entity unless overridden by the Monitoring options that you specified on the
SIP entities screen for a specific entity.
• Type an integer value in Number of Retries. The default is 1. This value
specifies the number of times Branch Session Manager polls a SIP entity
before it is deemed unreachable.
7. Personal Profile Manager (PPM) - Connection Settings section specifies the
global parameters that apply to all Branch Session Manager instances. Under the
Personal Profile Manager (PPM) - Connection Settings section, specify related
information:
a. Select the Limited PPM client connection check box to enable selecting
Maximum Connection per PPM client. Default value is enabled.
b. Specify the value of Maximum Connection per PPM client. Valid values are
integers between 1 and 10. Default value is 3.
c. Select the PPM Packet Rate Limiting check box to enable selecting PPM
Packet Rate Limiting Threshold. Default value is enabled.
d. Specify the value of PPM Packet Rate Limiting Threshold. This value is
applied per PPM client. Value Range: 1-500, default value: 50.
Configuring and monitoring Session Manager instances
356 Administering Avaya Aura ® Session Manager November 2010
Comments? infodev@avaya.com
During normal operation, Branch Session Manager receives data from a
Communication Manager feature server for synchronization to Avaya SIP
endpoints.
8. Event Server section specifies the option to clear Subscription on Notification
Failure.
9. Click Commit.
Related topics:
Session Manager Administration page field descriptions on page 341
Branch Session Manager page field descriptions on page 358
Deleting a Branch Session Manager instance
Procedure
1. On the System Manager console, under Elements, click Session Manager.
2. Click Session Manager Administration in the left navigation pane.
3. Select a Branch Session Manager instance from the list and click Delete.
4. On the Delete Confirmation screen, click Delete to delete the Branch Session
Manager instance.
Note:
Before deleting a Branch Session Manager instance, it should be dissociated
from all the related Communication Profiles or associated users should be
deleted.
Related topics:
Session Manager Administration page field descriptions on page 341
Delete Confirmation page field descriptions on page 357
Delete Confirmation page field descriptions
Button Description
Delete Deletes the selected Branch Session
Manager instance.
Branch Session Manager Administration
Administering Avaya Aura® Session Manager November 2010 357
Button Description
Cancel Cancels the deletion of the selected Branch
Session Manager instance.
Related topics:
Deleting a Branch Session Manager instance on page 357
Branch Session Manager page field descriptions
General
Name Description
SIP Entity Name Select a name of the SIP entity that you wish
to add as a Branch Session Manager
instance. The entity must be of type Session
Manager and it must be in Sync state.
Description Description of the entity added. Optional.
Management Access Point: Host Name /
IP The IP address of the host on which the
management agent is running, that is, the
host on which the Branch Session Manager
is installed.
Main CM for LSP Main CM for the LSP associated with this
Branch Session Manager.
Direct Routing to Endpoints Provides the option to enable or disable
direct routing to endpoints.
Adaptation for Trunk Gateway Enables digit conversion when routing calls
to or from the Communication Manager LSP
trunk gateway.
Security Module
Name Description
SIP Entity IP Address IP address of the Branch Session Manager
as specified in the SIP Entity Details
screen.
Network Mask Allows you to enter the value of the Network
mask. The network mask is passed to the
SM100 agent. The agent configures the
network mask to define the subnet that the
SM100 card is to be associated with.
Default Gateway IP address of the default gateway.
Configuring and monitoring Session Manager instances
358 Administering Avaya Aura ® Session Manager November 2010
Comments? infodev@avaya.com

Name Description
Call Control PHB The Call Control PHB (per hop behavior)
specifies the type of service and priority SIP
traffic from SM100 may expect as it travels
through the IP network. All packets
containing SIP signaling which leave the
SM100 have the specified value in the DSCP
(differentiated service code point) field of the
IP header. Intervening routers may or may
not treat packets with this value with a
different level of precedence--they must
either support this by default or be specially
configured to do so.
Different DSCP values are specified in RFCs
2597 and 2598. To be consistent with
Communication Manager, Branch Session
Manager uses a default DSCP value of 46
which indicates forwarding with the highest
priority.
QOS Priority This value specifies the ability to provide
different priority to different applications,
users, or data flows, or to guarantee a certain
level of performance for a call on a local area
network. The higher the priority, lower the
QOS priority number. This is the value of
802.1q priority bit (Layer 2 QoS)
configuration to be used by Branch Session
Manager for any SIP traffic. The default is 6.
Range of this value is 0-7.
Speed & Duplex Allows the configuring of the security module
interface speed and duplex values. The
drop-down menu contains a list of the valid
values.
VLAN ID The VLAN that the Branch Session Manager
should be associated with. Call traffic
segregation could be based on the VLAN
that the Branch Session Manager is
associated with.
Monitoring
Button Description
Enable Monitoring Select to enable monitoring of the
administered SIP entities by the added
Branch Session Manager instance. Clear the
check box to disable monitoring.
Branch Session Manager Administration
Administering Avaya Aura® Session Manager November 2010 359

Button Description
Proactive cycle time (secs) Enter a value in seconds for polling the
administered SIP entities by the added
Branch Session Manager. Monitoring
ensures that the entities are still reachable.
Proactive monitoring occurs as long as no
outages are detected. The default is 900
seconds.
These default values are used for each
administered SIP entity unless overridden by
the Monitoring options that you specified on
the SIP entities page for a specific entity.
Reactive cycle time ( secs) Enter a value in seconds. This value is used
when proactive monitoring detects that an
administered SIP entity is not reachable and
changes to a reactive mode. Reactive
monitoring continues till the SIP entity
responds again. Typically, the value for
reactive monitoring should be less than the
value for proactive monitoring. The default is
120 seconds.
Branch Session Manager uses these default
values for each administered SIP entity
unless overridden by the Monitoring options
that you specified on the SIP entities page for
a specific entity.
Number of Retries Enter an integer value. This value specifies
the number of times Branch Session
Manager polls a SIP entity before it is
deemed unreachable. The default is 1.
Branch Session Manager uses these default
values for each administered SIP entity
unless overridden by the Monitoring options
that you specified on the SIP entities page for
a specific entity.
Personal Profile Manager (PPM) - Connection Settings
Name Description
Limited PPM client connection Enables selecting Maximum Connection
per PPM client. Default value is Enabled.
Maximum Connection per PPM client Valid values are integers between 1 and 10.
Default value is 3.
PPM Packet Rate Limiting Enables selecting PPM Packet Rate
Limiting Threshold. Default value is
enabled.
Configuring and monitoring Session Manager instances
360 Administering Avaya Aura ® Session Manager November 2010
Comments? infodev@avaya.com
Name Description
PPM Packet Rate Limiting Threshold This value is applied per PPM client. Value
Range: 1-500, default value: 25.
Event Server
Name Description
Clear Subscription on Notification Failure Specifies the option to clear Subscription on
Notification Failure.
Button Description
Cancel Cancels the Branch Session Manager
addition operation.
Commit Saves the added SIP entity as a Branch
Session Manager instance with the selected
configuration options.
Related topics:
Adding a SIP entity as a Branch Session Manager instance on page 351
Viewing the Branch Session Manager administration settings on page 354
Modifying the Branch Session Manager administration settings on page 354
Communication Profile Editor
About Communication Profile Editor
Communication Profile Editor provides users with an enterprise view of all configured Session
Manager Communication Profiles and provides the following set of functionality:
•viewing the listing of all existing Session Manager Communication Profiles with advanced
options of sorting and filtering.
•bulk editing of required Communication Profile attributes across selected Communication
Profiles. For example, replacement of a Session Manager instance across all the selected
Communication Profiles. This is an enhancement over editing of individual profiles using
User Profile Edit screen.
• viewing the background edit job status of bulk editing of Communication Profile.
• viewing Communication Profile edit failures during bulk editing operations.
Communication Profile Editor
Administering Avaya Aura® Session Manager November 2010 361

Important:
A user's SIP phone is added to the Aura Network by assigning the user a Communication
Profile containing a Communication Manager endpoint profile and a Session Manager
profile. The Communication Manager profile associates the user with a station on a
Communication Manager that is in the core network. The Session Manager profile assigns
the user's primary and secondary Session Managers, application sequences and
survivability server. For correct application sequencing to Communication Manager, the
application sequences must reference one and the same Communication Manager as the
Communication Manager endpoint profile. For correct survivability configuration, if a Branch
Session Manager is specified as the survivability server, the Branch Session Manager must
also reference the same Communication Manager as the Communication Manager endpoint
profile.
Viewing Communication Profiles
Procedure
1. On the System Manager console, under Elements, click Session Manager.
2. Click Communication Profile Editor in the left navigation pane to open the
Communication Profile Editor page.
The Communication Profile Editor page displays under the Session Manager
Communication Profiles section the list of all the Session Manager Communication
Profiles provisioned for all the registered users.
3. To view using sorting option, click a column title to sort the information in the table
as the primary sorting order.
4. To view using filtering option, enable Filter option. Filtering can be as a compound
of one or more fields. On filtering, the table displays only those results that match
the filtering criteria.
Modifying Communication Profiles
Procedure
1. On the System Manager console, under Elements, click Session Manager.
2. Click Communication Profile Editor in the left navigation pane to open the
Communication Profile Editor page.
3. In the Session Manager Communication Profiles section, select the rows that need
to be modified. Click the All link at the bottom left of the table to select all of the
rows.
Configuring and monitoring Session Manager instances
362 Administering Avaya Aura ® Session Manager November 2010
Comments? infodev@avaya.com

4. In the New Communication Profile Values section, all fields initially have the default
value as “Use existing values”. Modify the field values to be set as property values
for the selected list of Communication Profiles.
You cannot set the value for Primary Session Manager and Home Location fields
as “None”. For adding a new value for the Home Location field, you need to add
location using Routing > Locations menu selection.
5. Click Commit Changes to save the changes. In the Communication Profile Edit
Confirmation screen, click Commit to save the changes.
Viewing background edit job status
About this task
When the number of simultaneous Communication Profile editing operations exceed 15 then
these operations are queued as batch jobs.
Procedure
1. On the System Manager console, under Elements, click Session Manager.
2. Click Communication Profile Editor in the left navigation pane to open the
Communication Profile Editor page.
3. Under Background Edit Job Status section, you can view the status of all
background edit jobs since the last restart of System Manager.
Viewing Communication Profile edit failures
Procedure
1. On the System Manager console, under Elements, click Session Manager.
2. Click Communication Profile Editor in the left navigation pane to open the
Communication Profile Editor page.
3. Under Background Edit Job Status section, select the edit job which did not finish
running successfully.
4. Click View Profile Edit Failures to view the details of all Communication Profiles
which could not be modified in the selected job run.
The Session Manager Communication Profiles section shows the details of those
existing profiles which could not be edited due to the failed job run.
Communication Profile Editor
Administering Avaya Aura® Session Manager November 2010 363
5. Click Return to View All Profiles for returning to the original Communication Profile
Editor screen.
Communication Profile Editor field descriptions
Session Manager Communication Profiles
Name Description
Login Name Full login name of the user and is a unique
name that gives access to the system.
Address: Handle Handle part of the Communication Address.
Note:
The displayed address can be either the
“E.164 ” or the “Avaya E.164” address as
specified in the User Profile page.
Address: Domain Domain part of the Communication
Address.
Primary Session Manager Name of the primary Session Manager which
acts as the default access point for
connecting devices associated with the
Communication Profile to the Aura network.
This is a mandatory field.
Secondary Session Manager Name of the secondary Session Manager
which provides continued service to SIP
devices associated with this Communication
Profile in the event that the primary Session
Manager is not available.
Origination Application Sequence Defines application sequences for calls from
this user.
Termination Application Sequence Defines application sequences for calls to
this user.
Survivability Server Name of the Survivability Server which
provides survivability communication
services for devices associated with a
Communication Profile in the event that local
connectivity to Session Manager instances
in the Aura Core is lost. For a Branch Session
Manager, if the termination and origination
application sequences contain a CM
application, sequencing to this application
Configuring and monitoring Session Manager instances
364 Administering Avaya Aura ® Session Manager November 2010
Comments? infodev@avaya.com
Name Description
will continue, locally, to the CM LSP resident
with the Branch Session Manager.
Note:
If a termination or origination application
sequence contains a CM application, the
CM associated with the application must
be the main CM for the CM LSP that is
resident with the Branch Session
Manager.
Home Location A Home Location can be specified to support
mobility for the currently displayed user. This
is used by Session Manager specially in
cases when the ip-address of the calling
phone does not match any IP Address
Pattern of any of the location.
This is a mandatory field.
Note:
A user’s call is routed according to the
user’s home location except for the
following cases:
• CAC (Call Admission Control) routes
based on actual location
• Emergency calling routes based on
actual location
The field descriptions for New Communication Profile Values section are same as mentioned
above.
Background Edit Job Status
This section provides a list of Communication Profile editing operations that run as background
jobs since the last restart of System Manager. When the number of simultaneous
Communication Profile editing operations exceed 15 then these operations are queued as
batch jobs.
Name Description
Start Time Start time of the background edit job.
Status Status of completion of the background edit
job.
Percent Completed Percentage completion of the background
edit job.
Total Edits to Perform Number of background edits performed in
the job run.
Communication Profile Editor
Administering Avaya Aura® Session Manager November 2010 365
Name Description
Failed Edits Number of failed background edits during the
job run.
Last Updated Finish time of the background edit job run.
Job Name Name of the background edit job.
Button Description
View Profile Edit Failures Shows the details of all Communication
Profiles which could not be modified in the
selected job run. It also states the reason for
such editing failures.
Stop Job This operation stops the current running
background edit job.
Communication Profile Edit Confirmation page field descriptions
This page has the following sections —
•Message Area section shows the messages related to those Communication Profile edit
operation which run as background jobs.
• New Profile Values and Profiles to Update section shows the new attributes for the
selected list of Communication Profiles. Following table shows the field descriptions —
Name Description
Login Name Full login name of the user and is a unique
name that gives access to the system.
Address: Handle Handle part of the Communication Address.
Note:
The displayed address can be either the
“E.164 ” or the “Avaya E.164” address as
specified in the User Profile page.
Address: Domain Domain part of the Communication
Address.
Primary Session Manager Name of the primary Session Manager which
acts as the default access point for
connecting devices associated with the
Communication Profile to the Aura network.
Secondary Session Manager Name of the secondary Session Manager
which provides continued service to SIP
devices associated with this Communication
Configuring and monitoring Session Manager instances
366 Administering Avaya Aura ® Session Manager November 2010
Comments? infodev@avaya.com

Name Description
Profile in the event that the primary Session
Manager is not available.
Origination Application Sequence Defines application sequences for calls from
this user.
Termination Application Sequence Defines application sequences for calls to
this user.
Survivability Server Name of the Survivability Server which
provides survivability communication
services for devices associated with a
Communication Profile in the event that local
connectivity to Session Manager instances
in the Aura Core is lost. For a Branch Session
Manager, if the termination and origination
application sequences contain a
Communication Manager application,
sequencing to this application will continue,
locally, to the Communication Manager LSP
resident with the Branch Session Manager.
Note:
If a termination or origination application
sequence contains a Communication
Manager application, the Communication
Manager associated with the application
must be the main Communication
Manager for the Communication Manager
LSP that is resident with the Branch
Session Manager.
Home Location A Home Location can be specified to support
mobility for the currently displayed user. This
is used by Session Manager specially in
cases when the ip-address of the calling
phone does not match any IP Address
Pattern of any of the location.
Note:
A user’s call is routed according to the
user’s home location except for the
following cases:
• CAC (Call Admission Control) routes
based on actual location
• Emergency calling routes based on
actual location
Communication Profile Editor
Administering Avaya Aura® Session Manager November 2010 367

Button Description
Commit Saves the changes to the selected Session
Manager Communication Profiles.
Cancel Cancels the changes to the selected Session
Manager Communication Profiles.
Network Configuration
Local Host Name Resolution
About Local Host Name Resolution
Session Manager can locally resolve hostnames into an ordered set of (IP address, port, and
transport) tuples and can assign priority and weights to each tuple. Local Hostname Resolution
is only applied to hostnames provisioned by the administrator and overrides normal DNS
resolution. For example, if the Session Manager is attempting to resolve nj.proxy.avaya.com,
and that hostname is provisioned as a local hostname, the Session Manager will skip DNS
resolution and instead determine the request target using the tuples for nj.proxy.avaya.com
that it has been provisioned with. To route a SIP INVITE, Session Manager needs the IP
addresses corresponding to the Fully Qualified Domain Name (FQDN) in the INVITE. To
resolve a host name by replacing it with its IP address, Session Manager checks for the host
name on the local network. When the host name cannot be resolved through broadcasting on
the local network, Session Manager searches for it in the host names file or by querying the
DNS server that maintains the host name to IP address mapping.
Resolving local host name
About this task
The Local Host Name Resolution screen allows you to create, edit, and delete local host name
entries. Host name entries on this screen override the information provided by DNS.
Procedure
1. On the System Manager console, under Elements, click Session Manager.
2. Click Network Configuration in the left navigation pane.
3. Click Network Configuration > Local Host Name Resolution.
4. To add a host name entry, click New.
Configuring and monitoring Session Manager instances
368 Administering Avaya Aura ® Session Manager November 2010
Comments? infodev@avaya.com

5. Enter host name information on the New Local Host Name Entries screen as
follows.
You can enter a maximum of ten host names.
•Host Name (FQDN): Enter Fully Qualified Domain Name or IP address of the
host. The host name entries override the information provided by DNS.
•IP Address: IP address that the host name is mapped to. A host can be
mapped to more than one IP addresses and each of these mappings are a
separate entry.
•Port: Port number that the host should use for routing using the particular IP
address.
•Priority: If there are multiple IP address entries for a given host, Session
Manager tries the administered IP addresses in the order of the priority.
•Weight: If there are multiple IP address entries for a given host, and if some
entries have the same priority, then for each priority level, Session Manager
picks a host according to the specified weights.
•Transport: The transport protocol that should be used for routing, such as TLS,
TCP, or UDP. The default is TLS.
6. Click Commit to save the host name entry to the host name table.
Note:
You can import or export XML Schema instance file containing LHN entries using
More Actions menu on the Local Host Name Resolution page.
Local Host Name Schema
XML schema provides the format for generation of XML schema instance file in the event of
import of Local Host Name data.
Example
The format of the JAXB-compliant XSD schema of the XML files used in the Local Host Name
Import and Export feature is as follows:
<?xml version="1.0" encoding="UTF-8"?>
<xsd:schema xmlns:xsd="http://www.w3.org/2001/XMLSchema"
xmlns:jxb="http://java.sun.com/xml/ns/jaxb"
jxb:version="2.0">
<xsd:annotation>
<xsd:documentation xml:lang="en">
XML schema definition for 'Local Host Name Resolution' entries.
Copyright Avaya Inc., All Rights Reserved
THIS IS UNPUBLISHED PROPRIETARY SOURCE CODE OF AVAYA INC
The copyright notice above does not evidence any
actual or intended publication of such source code.
Some third-party source code components may have been modified from
Network Configuration
Administering Avaya Aura® Session Manager November 2010 369

their original versions by Avaya Inc.
The modifications are Copyright Avaya Inc., All Rights Reserved.
</xsd:documentation>
</xsd:annotation>
<xsd:element name="LocalHostNameEntries" type="LocalHostNameEntryListType"/>
<xsd:complexType name="LocalHostNameEntryListType">
<xsd:sequence>
<xsd:element name="LocalHostNameEntry" type="LocalHostNameEntryType"
maxOccurs="unbounded"/>
</xsd:sequence>
</xsd:complexType>
<xsd:complexType name="LocalHostNameEntryType">
<xsd:sequence>
<xsd:element name="hostName" type="hostNameType"/>
<xsd:element name="ipAddress" type="ipAddressType"/>
<xsd:element name="port" type="portType"/>
<xsd:element name="priority" type="priorityType"/>
<xsd:element name="weight" type="weightType"/>
<xsd:element name="transport" type="transportType"/>
</xsd:sequence>
</xsd:complexType>
<xsd:simpleType name="hostNameType">
<xsd:restriction base="xsd:string">
<xsd:minLength value="1"/>
<xsd:maxLength value="255"/>
</xsd:restriction>
</xsd:simpleType>
<xsd:simpleType name="ipAddressType">
<xsd:restriction base="xsd:string">
<xsd:minLength value="7"/>
<xsd:maxLength value="15"/>
</xsd:restriction>
</xsd:simpleType>
<xsd:simpleType name="portType">
<xsd:restriction base="xsd:int">
<xsd:minInclusive value="0"/>
<xsd:maxInclusive value="65535"/>
</xsd:restriction>
</xsd:simpleType>
<xsd:simpleType name="priorityType">
<xsd:restriction base="xsd:int">
<xsd:minInclusive value="0"/>
<xsd:maxInclusive value="2147483647"/>
</xsd:restriction>
</xsd:simpleType>
<xsd:simpleType name="weightType">
<xsd:restriction base="xsd:int">
<xsd:minInclusive value="0"/>
<xsd:maxInclusive value="100"/>
</xsd:restriction>
</xsd:simpleType>
<xsd:simpleType name="transportType">
<xsd:restriction base="xsd:string">
<xsd:enumeration value="TLS"/>
<xsd:enumeration value="TCP"/>
<xsd:enumeration value="UDP"/>
Configuring and monitoring Session Manager instances
370 Administering Avaya Aura ® Session Manager November 2010
Comments? infodev@avaya.com
</xsd:restriction>
</xsd:simpleType>
</xsd:schema>
Example
A sample XML Schema file is provided below for reference purpose:
<?xml version="1.0" encoding="UTF-8" standalone="yes"?>
<LocalHostNameEntries>
<LocalHostNameEntry>
<hostName>www.domain1.com</hostName>
<ipAddress>192.168.1.100</ipAddress>
<port>1024</port>
<priority>900</priority>
<weight>50</weight>
<transport>TLS</transport>
</LocalHostNameEntry>
<LocalHostNameEntry>
<hostName>www.domain2.com</hostName>
<ipAddress>192.168.1.101</ipAddress>
<port>1024</port>
<priority>600</priority>
<weight>25</weight>
<transport>TCP</transport>
</LocalHostNameEntry>
</LocalHostNameEntries>
Local Host Name Resolution page field descriptions
Button Description
New Opens the New Local Host Name Entries
page that allows you to add new local hosts
Edit Opens the Edit Local Host Name Entries
page that allows you to modify the selected
local hosts
Delete Opens the Delete Local Host Name Entries
Confirmation page that allows you to confirm
or cancel the deletion of the selected local
hosts
More Actions > Import Local Host Name
Entries Opens Import Local Host Name Entries page
where you can select (for importing or
uploading) an XML Schema instance file
containing a list of LHN entries for adding to
the LHN resolution table.
More Actions > Export Local Host Name
Entries Allows you to Export (download) an XML
Schema instance file containing a list of LHN
entries currently in the LHN resolution
table.
Network Configuration
Administering Avaya Aura® Session Manager November 2010 371

Button Description
More Actions > Get Local Host Name
Schema Allows you to get/retrieve the XML Schema
for the current version of the Session
Manager release. This enables you to
understand the XML schema format for a
creating new XML schema instance file for
import purpose.
Name Description
Host Name (FQDN) Enter Fully Qualified Domain Name or IP
address of the host. The host name entries
override the information provided by DNS.
IP Address Shows the IP address that the host name is
mapped to. A host can be mapped to more
than one IP addresses and each of these
mappings are a separate entry.
Port Shows the port number that the host should
use for routing using the particular IP
address.
Priority If there are multiple IP address entries for a
given host, Session Manager tries the
administered IP addresses in the order of the
priority.
Weight If there are multiple IP address entries for a
given host, and if some entries have the
same priority, then for each priority level,
Session Manager picks a host according to
the specified weights.
Transport Shows the transport protocol that should be
used for routing, such as TLS, TCP, or UDP.
The default is TLS.
New Local Host Name Entries page field descriptions
Name Description
Host Name (FQDN) Enter Fully Qualified Domain Name or IP
address of the host. The host name entries
override the information provided by DNS.
You can add a maximum of ten entries on a
page.
IP address IP address that the host name is mapped to
Configuring and monitoring Session Manager instances
372 Administering Avaya Aura ® Session Manager November 2010
Comments? infodev@avaya.com

Name Description
Port Port number that the host should use for
routing using the particular IP address
Priority If there are multiple IP address entries for a
given host, Session Manager tries the
administered IP addresses in the order of the
priority.
Weight If there are multiple IP address entries for a
given host, and if some entries have the
same priority, then for each priority level,
Session Manager picks a host according to
the specified weights.
Transport The transport protocol that should be used
for routing, such as TLS, TCP, or UDP. The
default is TLS
Button Description
Cancel Cancels the addition of the new host name
entry to the local host name table
Commit Saves the addition of the new host name
entry to the local host name table
Edit Local Host Name Entries page field descriptions
Name Description
Host Name (FQDN) Enter Fully Qualified Domain Name or IP
address of the host. The host name entries
override the information provided by DNS.
IP address IP address that the host name is mapped to.
A host can be mapped to more than one IP
addresses and each of these mappings are
a separate entry.
Port Port number that the host should use for
routing using the particular IP address.
Priority If there are multiple IP address entries for a
given host, Session Manager tries the
administered IP addresses in the order of the
priority.
Weight If there are multiple IP address entries for a
given host, and if some entries have the
same priority, then for each priority level,
Network Configuration
Administering Avaya Aura® Session Manager November 2010 373
Name Description
Session Manager picks a host according to
the specified weights.
Transport The transport protocol that should be used
for routing, such as TLS, TCP, or UDP. The
default is TLS.
Button Description
Cancel Cancels the modification of the host name
entry to the local host name table
Commit Saves the modified host name entry to the
local host name table
Delete Local Host Name Entries Confirmation page field descriptions
Button Description
Cancel Cancels the deletion of the selected local
host name from the local host name entries
table
Delete Deletes the selected local host name from
the local host name entries table
SIP Firewall
About SIP Firewall Configuration
SIP firewall controls the SIP traffic. The SIP firewall sits at the front end of the Session Manager
to control what SIP traffic is allowed into the SIP Application Server. SIP firewall secures the
SIP traffic by using rules to allow or drop SIP messages based on their sender, location, and
other defined criteria.
Session Manager stores the current firewall settings for each Session Manager instance in a
separate file on the System Manager. System Manager uses this file to display the firewall
Configuration. It also stores and displays a previous and default configuration. You can modify
the displayed firewall configuration.
Configuring and monitoring Session Manager instances
374 Administering Avaya Aura ® Session Manager November 2010
Comments? infodev@avaya.com
Configuring the SIP Firewall
Procedure
1. On the System Manager console, under Elements, click Session Manager.
2. Click Network Configuration > SIP Firewall.
3. Click the Session Manager Instances button to display the list of Session Manager
instances.
4. Select a Session Manager instance from the list.
5. Select More Actions to retrieve current, default, or backup configuration or to save
a configuration as a backup configuration. By default, the system displays the
default configuration of the SIP Firewall.
6. To use the default rules: Session Manager instance(s).
a. Click on More Actions
b. Select Retrieve Default Configuration.
c. click Save to save the configuration to the selected Session Manager
instance(s).
7. Under Rules, you can perform the following Rule-based operations:
•New — To create a new rule, click New. You can define up to 50 rules.
•Edit — To modify an existing rule, select the left-most check box and click
Edit.
•Delete — To delete a rule, select a rule and click Delete.
•Enabled — To enable or disable all the rules, select or clear the Enabled
check box.
• Select a rule from the list and click Up or Down to move the rule and change
the order in which it gets executed.
8. Under Blacklist, specify the following:
•Enabled — Select Enabled to drop messages from untrusted hosts.
•Key — Select a key for filtering messages for blacklisting from Remote IP
address, CONTACT, and FROM.
•Value — Value of the Key. Specify the following values.
- Remote IP address — IP address of the host from where the messages
are sent.
- CONTACT — String to look for in the “Contact” SIP Header in the SIP
message. This string need not be an exact match with the “Contact” SIP
header content and can be a subset of the string present in the “Contact”
SIP Header. Its value can be a complete or partial SIP URI, for example,
Network Configuration
Administering Avaya Aura® Session Manager November 2010 375

jdoe@avaya.com for a specific user, or @avaya.com for a domain of
users.
-FROM — String to look for in the “From” SIP Header in the SIP message.
This string need not be an exact match with the “From” SIP header
content and can be a subset of the string present in the “From” SIP
Header. Its value can be a complete or partial SIP URI, for example,
jdoe@avaya.com for a specific user, or @avaya.com for a domain of
users.
•Mask — Specify the Subnet mask only when you have used the Remote IP
address in the Key. This can be used to Blacklist an entire IP subnet.
•New — Create a new rule to drop messages from untrusted hosts. You can
create up to 200 Blacklist rules.
•Delete — Delete a selected blacklist rule.
9. Under Whitelist, specify the following:
•Enabled — Select Enabledto allow messages from trusted hosts to bypass
the SIP Firewall.
•Key — Select a key for filtering messages for whitelisting from Remote IP
address, CONTACT, and FROM.
•Value — Value of the Key. Specify the following values.
- Remote IP address — IP address of the host from where the messages
are sent.
- CONTACT — String to look for in the “Contact” SIP Header in the SIP
message. This string need not be an exact match with the “Contact” SIP
header content and can be a subset of the string present in the “Contact”
SIP Header. Its value can be a complete or partial SIP URI, for example,
jdoe@avaya.com for a specific user, or @avaya.com for a domain of
users.
-FROM — String to look for in the “From” SIP Header in the SIP message.
This string need not be an exact match with the “From” SIP header
content and can be a subset of the string present in the “From” SIP
Header. Its value can be a complete or partial SIP URI, for example,
jdoe@avaya.com for a specific user, or @avaya.com for a domain of
users.
•Mask — Specify the Subnet mask only when you have used the Remote IP
address in the Key. This can be used to Whitelist an entire IP subnet.
•New — Create a new rule to allow messages from trusted hosts.
•Delete — Delete a selected whitelist rule.
10. Before enabling SIP Firewall, you must add the following IP addresses to the
Whitelist.
These IP addresses are used by the Session Manager SIP Server. Adding them to
the Whitelist ensures that SIP filtering rules are not applied on the outgoing traffic
Configuring and monitoring Session Manager instances
376 Administering Avaya Aura ® Session Manager November 2010
Comments? infodev@avaya.com

from Session Manager SIP Server and are only applied to the incoming SIP traffic
from Network.
• 19.2.11.13.2 (added as a part of default rules)
• Session Manager Management IP address
11. Click Save to save the SIP Firewall configuration.
After saving, you can review the results of the configuration changes to the SIP
Firewall using Monitoring > Logging from the System Manager navigation pane.
(See Maintaining and Troubleshooting Avaya Aura® Session Manager for specific
details of the log messages.)
Related topics:
Firewall Configuration page field descriptions on page 377
Blacklist on page 381
Whitelist on page 381
Rules on page 381
Rule precedence and traversal on page 390
Firewall Configuration page field descriptions
General
Name Description
Version The version of the XML file.
Description Description for the SIP firewall.
Session Manager Instances
Button Description
Load ASM Default Configuration Retrieves the default configurations of all
Session Manager instances.
Load BSM Default Configuration Retrieves the default configurations of all
Branch Session Manager instances.
Name Description
More Action > Retrieve Current
Configuration Allows you to retrieve the current
configuration for the selected Session
Manager instance.
More Action > Retrieve Backup
Configuration Allows you to retrieve the backup
configuration for the selected Session
Manager instance.
Network Configuration
Administering Avaya Aura® Session Manager November 2010 377

Name Description
More Action > Save Configuration as
backup Allows you to back up the configuration for
the selected Session Manager instance.
Rules
Button Description
New Opens the Rules page which enables you to
define a new SIP firewall rule.
Edit Opens the Rules page which enables you to
edit the selected SIP firewall rule.
Delete Allows you to delete a selected rule or
rules.
Up Allows you to move a selected rule up in the
list.
Down Allows you to move a selected rule down in
the list.
Name Description
Enabled Allows you to select or clear the check box to
enable or disable rules.
Name Name of the SIP firewall rule. The name can
have a maximum of 80 characters.
Action Type Allows you to select one of the following
action types for the rule:
• None — No specific action required. This
action can be used when you want to only
generate a log or alarm for matching SIP
traffic. Rule traversal continues when a SIP
packet matches a rule with the None
action.
•Permit — If the rule conditions are fulfilled,
allow the SIP message to pass through the
SIP Firewall.
• Drop — If the rule conditions are fulfilled,
drop the SIP message
• Rate Block —If the packets matching the
rule exceed a certain count in a certain
period, block the matching SIP packets for
the duration of timeout (as defined by the
Threshold parameters).
•Rate Limit-If the packets matching the rule
exceed a certain count in a certain period,
Configuring and monitoring Session Manager instances
378 Administering Avaya Aura ® Session Manager November 2010
Comments? infodev@avaya.com

Name Description
drop the additional matching SIP packets
for the duration of remaining period (as
defined by the Threshold parameters).
Log Type Allows you to specify if a log is to be
generated or not, and if an alarm should be
sent. You must specify Log Type when the
Action Type is None.
• No — Do not save the rule to a log file
• Yes — Save the rule to a log file
•Alarm — If it is possible, generate an alarm
when the rule conditions are met
Log Message The message that should be logged when
the log type is “Yes” or “Alarm”
Blacklist
Button Description
New Allows you to create a rule for dropping
messages from untrusted hosts.
Delete Deletes the selected Blacklist rule.
Name Description
Enabled Enables the dropping of messages from
untrusted hosts.
Key Allows you to select a key for filtering
messages for blacklisting from the following:
Remote IP address, CONTACT, and
FROM.
Value Value of the Key
• Remote IP address — IP address of the
host from where the messages are sent.
• CONTACT ——String to look for in the
“Contact” SIP Header in the SIP message.
This string need not be an exact match with
the “Contact” SIP header content and can
be a subset of the string present in the
“Contact” SIP Header. Its value can be a
complete or partial SIP URI, for example,
jdoe@avaya.com for a specific user, or
@avaya.com for a domain of users.
• FROM — String to look for in the “From”
SIP Header in the SIP message. This string
Network Configuration
Administering Avaya Aura® Session Manager November 2010 379

Name Description
need not be an exact match with the “From”
SIP header content and can be a subset of
the string present in the “From” SIP
Header. Its value can be a complete or
partial SIP URI, for example,
jdoe@avaya.com for a specific user, or
@avaya.com for a domain of users.
Mask Specify the Subnet mask only when you
have used the Remote IP address in the Key.
This can be used to Blacklist an entire IP
subnet.
Whitelist
Button Description
New Allows you to create a rule for allowing
messages from trusted hosts to bypass the
SIP firewall.
Delete Deletes the selected Whitelist rule.
Name Description
Enabled Enables the allowing of messages from
trusted hosts to bypass the SIP firewall.
Key Allows you to select a key for filtering
messages for whitelisting from the following:
Remote IP address, CONTACT, and
FROM.
Value Value of the Key
• Remote IP address — IP address of the
host from where the messages are sent.
• CONTACT —String to look for in the
“Contact” SIP Header in the SIP message.
This string need not be an exact match with
the “Contact” SIP header content and can
be a subset of the string present in the
“Contact” SIP Header. Its value can be a
complete or partial SIP URI, for example,
jdoe@avaya.com for a specific user, or
@avaya.com for a domain of users.
• FROM — String to look for in the “From”
SIP Header in the SIP message. This string
need not be an exact match with the “From”
SIP header content and can be a subset of
Configuring and monitoring Session Manager instances
380 Administering Avaya Aura ® Session Manager November 2010
Comments? infodev@avaya.com
Name Description
the string present in the “From” SIP
Header. Its value can be a complete or
partial SIP URI, for example,
jdoe@avaya.com for a specific user, or
@avaya.com for a domain of users.
Mask Subnet mask used for the whitelist
operation.
Button Description
Save Saves the changed SIP firewall configuration
settings.
Related topics:
Configuring the SIP Firewall on page 375
Blacklist
SIP Blacklist enables you to block any known bad SIP elements. The SIP Firewall drops any
SIP packet matching a rule in the Blacklist.
Whitelist
SIP Whitelist enables you to allow any known good SIP elements. SIP Firewall allows any SIP
packets matching a rule in the Whitelist; no other filtering rule is applied.
Rules
Each SIP Firewall rule has the capability to send log or alarm messages to the Secure Access
Link (SAL). You can combine logging with other actions. Avaya recommends that you always
enable logging in each SIP Firewall rule to have a record of what actions were taken by the
SIP Firewall. Logging can be used independently (with the None action) and can generate logs
and alarms for flood-tracking. Note that SIP Firewall log messages are rate-limited. Each rule
can log a maximum of 1 log message per second. This rate-limiting of log messages provides
protection from flooding the logging system which may occur because of bad configuration of
the SIP Firewall rule.
You can apply SIP filtering and DoS protection to:
• SIP gateway/proxy connections (SIP Multiplexed connection/trunk). For example, a SIP
Firewall rule can set rate limit on a number of INVITE messages from a specific user within
a SIP connection from a SIP gateway without affecting the traffic from other users in that
gateway.
• SIP TLS connection. SM100 decrypts all the incoming SIP TLS packets before any
filtering rules are applied by the SIP Firewall.
• Reporting using the Secure Access Link (SAL)
Network Configuration
Administering Avaya Aura® Session Manager November 2010 381

Related topics:
Specifying a new SIP Firewall rule on page 382
Rule page field descriptions on page 385
Deep inspection filtering on page 389
Denial of Service protection on page 389
SIP Firewall default rule set on page 390
Specifying a new SIP Firewall rule
Procedure
1. On the System Manager console, under Elements, click Session Manager.
2. Click Network Configuration > SIP Firewall.
3. On the Firewall Configuration screen, under Rules, click New.
4. Under General, specify the following options:
• Enabled—Select or clear the check box to enable or disable this rule for the
selected Session Manager.
• Name—Name of the rule. The name can have a maximum of 80 characters.
• Action Type—Specify the action to be taken if rule conditions are met. The
valid action types are:
- None—No specific action required. This action can be used when you
want to only generate a log or alarm for matching SIP traffic. Rule
traversal continues when a SIP packet matches a rule with the None
action.
-Permit—If the rule conditions are fulfilled, allow the SIP message to pass
through the SIP Firewall.
- Drop—If the rule conditions are fulfilled, drop the SIP message.
-Rate Block—If the packets matching the rule exceed a certain count in a
certain period, block the matching SIP packets for the duration of timeout
(as defined by the Threshold parameters).
- Rate Limit—If the packets matching the rule exceed a certain count in a
certain period, drop the additional matching SIP packets for the duration
of remaining period (as defined by the Threshold parameters).
•Log Type—Specify if a log is to be generated or not, and if an alarm should be
sent. You must specify Log Type when the Action Type is None.
•Log Message—Specify the log message to display if Log Type is set to Yes or
Alarm.
5. Under IP Layer Match Options, specify the following:
• Protocol—Select a protocol if you want the rule to be used for a specific
protocol.
Configuring and monitoring Session Manager instances
382 Administering Avaya Aura ® Session Manager November 2010
Comments? infodev@avaya.com
• Remote IP Address—For any incoming SIP message, select Any to use the
rule for all IP addresses, or select Specify to use the rule for a specific IP
address.
• IP Address—Type the IP address if you selected Specify for Remote IP
Address.
• Mask—Network mask for the specific IP address.
• Remote Port—For any incoming SIP message, select Any to use the rule for
all ports, select Specify to use a single port, or select Specify Range for a range
of ports.
• Start—For the Specify option, select a port number. For the Specify Range
option, specify the port number to start the range.
•End—For the Specify Range option, specify the port number to end the range.
The range includes both the Start and End port numbers specified.
• Local Port—For any incoming SIP message, select Any to use the rule for all
ports, select Specify to use a single port, or select Specify Range for a range
of ports.
• Start—For the Specify option, select a port number. For the Specify Range
option, specify the port number to start the range.
•End—For the Specify Range option, specify the port number to end the range.
The range includes both the Start and End port numbers specified.
6. Under SIP Layer Match Options, specify the following:
• Key Type—Select the key type that the rule should match from the list. You
can add up to five key type match options. If more than one match options are
defined, then logically, AND of the options is used to create a search pattern.
- All SIP Headers—This option searches for the Value within all the SIP
headers for the SIP packet
- All SIP Headers/Body—This option searches for the Value in the SIP
headers & body portions for the SIP packet
- REQUEST-METHOD, RESPONSE-CODE—All the remaining entries in
the Key Type list are SIP headers and look for the value within the
specified SIP header only.
•Value Type—Specify whether the key type is a string or a regular expression.
You can create regular expressions using the PERL version 5.8 syntax.
•Value—Value of the selected key type. This string need not be an exact match
and can be a subset of the string present in the SIP header being used for
search.
7. Under IP/SIP Layer Track, select an option for tracking SIP messages only if you
have selected either Rate Block or Rate Limit in the Action Type field or with None
in the Action Type with Log Type enabled. You cannot use IP/SIP Layer Track with
Permit/Drop Actions. This option provides advanced flood tracking in the SIP
Network Configuration
Administering Avaya Aura® Session Manager November 2010 383

Firewall. Refer to the SIP Firewall Configuration Section in the Avaya Aura Security
Guide for details and examples on using IP/SIP Layer Track
• None—No tracking used.
• Remote IP address—Track messages for a specific IP address of the remote
host.
• Local Port—Track messages for a specific local port.
• From—Track messages for a specific sender.
• To—Track messages sent to a particular receiver.
• Contact—Track messages for a specific contact.
• Request URI—Track messages for a specific request-URI.
8. Under Threshold, specify the following options only if you have selected either Rate
Block or Rate Limit in the Action Type field or with None in the Action Type with Log
Type enabled. You cannot use Threshold with Permit/Drop Actions.
• Count (packets)—Threshold for the number of matching packets. The value
can range from 10 to 100000. The default value is 20.
• Period (secs)—Threshold for the period for matching packets. The value can
range from 1 to 60. The default value is 20.
• Timeout (secs)—Action timeout in seconds. Specify Timeout only if you have
selected the Rate Block action. The value can range from 30 to 36000. The
default value is 900.
9. Under Connection Type, select from one of the following options:
•Any: This is a default choice. If this option is selected, SIP Firewall rule is
matched against all incoming SIP Traffic
•SIP UA Connection: If this option is selected, SIP Firewall rule is matched
against the incoming SIP traffic from entities that are not the Trusted SIP Entity
(as defined by the Routing Policy). This option is suitable for creating SIP
Firewall filtering rules for SIP telephones that are directly connected to Session
Manager.
•NRP Trusted SIP Entity: If this option is selected, SIP Firewall rule is matched
against the incoming SIP traffic from entities that are marked as Trusted SIP Entity
in the Routing Policy.
Note:
If there are any untrusted SIP Entities connected to the Session Manager (as
defined by Routing Policy), these entities will be treated/filtered as SIP UA
connection by SIP Firewall (if there are any rules defined and enabled in SIP
Firewall with connection type as SIP UA connection). If this behavior is
undesirable, specific rules can be added for the untrusted SIP Entity IP Address/
port. These rules shall be defined before SIP Firewall rules for SIP UA connection
(Note: SIP Firewall traverse rules in the rule list from top to bottom).
Configuring and monitoring Session Manager instances
384 Administering Avaya Aura ® Session Manager November 2010
Comments? infodev@avaya.com

10. Click Commit to save the rule or Cancel to cancel the changes.
This does not save the SIP Firewall configuration to the Session Manager. To save
the configuration to the Session Manager after creating or editing the configuration,
return to the SIP Firewall Configuration screen and click Save.
Related topics:
Rule page field descriptions on page 385
Rule page field descriptions
General:
Name Description
Enabled Allows you to select or clear the check box to
enable or disable this rule.
Name Name of the SIP firewall rule. The name can
have a maximum of 80 characters.
Action Type Allows you to select one of the following
action types for the rule:
• None — No specific action required. This
action can be used when you want to only
generate a log or alarm for matching SIP
traffic. Rule traversal continues when a SIP
packet matches a rule with the None
action.
•Permit — If the rule conditions are fulfilled,
allow the SIP message to pass through the
SIP Firewall.
• Drop — If the rule conditions are fulfilled,
drop the SIP message
• Rate Block —If the packets matching the
rule exceed a certain count in a certain
period, block the matching SIP packets for
the duration of timeout (as defined by the
Threshold parameters).
•Rate Limit-If the packets matching the rule
exceed a certain count in a certain period,
drop the additional matching SIP packets
for the duration of remaining period (as
defined by the Threshold parameters).
Log Type Allows you to specify if a log is to be
generated or not, and if an alarm should be
Network Configuration
Administering Avaya Aura® Session Manager November 2010 385

Name Description
sent. You must specify Log Type when the
Action Type is None.
• No — Do not save the rule to a log file
• Yes — Save the rule to a log file
•Alarm — If it is possible, generate an alarm
when the rule conditions are met
Log Message The message that should be logged when
the log type is “Yes” or “Alarm”
IP Layer Match Options:
Name Description
Protocol Allows you to select the protocol for which the
rule is to be used.
Remote IP Address For any incoming SIP message, you can
select Any for using the rule for all IP
addresses, or select Specify to use the rule
for a specific IP address.
IP Address Allows you to type the IP address if you
selected Specify for Remote IP Address.
Mask Network mask for the specified IP address
RemotePort Allows you to select Any, Specify, or
Specify Range to enter a single port or a
range of ports
Start For the Specify option, you can select a port
number.
For the Specify Range option, you can
specify the port number to start the range.
End For the Specify Range option, you can
specify the port number to end the range.
Local Port Allows you to select Any, Specify, or
Specify Range to enter a single port or a
range of ports.
Start For the Specify option, you can select a port
number.
For the Specify Range option, you can
specify the port number to start the range.
End For the Specify Range option, you can
specify the port number to end the range.
The range includes both the Start and End
port numbers specified.
Configuring and monitoring Session Manager instances
386 Administering Avaya Aura ® Session Manager November 2010
Comments? infodev@avaya.com

SIP Layer Match Options:
Button Description
New Allows you to create up to five SIP layer
match options
Delete Deletes the selected SIP layer match options
Name Description
KeyType Allows you to select the key type that the rule
should match from the list. You can add up to
five key type match options. If more than one
match options are defined, then logically,
AND of the options is used to create a search
pattern.
•All SIP Headers—This option searches for
the Value within all the SIP headers for the
SIP packet
• All SIP Headers/Body—This option
searches for the Value in the SIP headers
& body portions for the SIP packet
• REQUEST-METHOD, RESPONSE-
CODE—All the remaining entries in the
Key Type list are SIP headers and look for
the value within the specified SIP header
only.
ValueType Allows you to specify whether the key type is
a string or a regular expression. You can
create regular expressions using the PERL
version 5.8 syntax.
Value Value of the selected key type. This string
need not be an exact match and can be a
subset of the string present in the SIP header
being used for search.
IP/SIP LayerTrack:
Name Description
Track Allows you to select an option for tracking
SIP messages only if you have selected
either Rate Block or Rate Limit in the Action
Type field or with None in the Action Type
with Log Type enabled. You cannot use IP/
SIP Layer Track with Permit/Drop Actions.
This option provides advanced flood tracking
in the SIP Firewall. Refer to the SIP Firewall
Network Configuration
Administering Avaya Aura® Session Manager November 2010 387

Name Description
Configuration Section in the Avaya Aura
Security Guide for details and examples on
using IP/SIP Layer Track.
• None — No tracking required
•Remote IP address — Track messages for
a specific IP address of the remote host.
•Local Port — Track messages for a specific
local port
• From — Sender of the message
• To — Receiver of the message
•Contact ——Track messages for a specific
contact.
• Request URI — URI of the called party
Threshold:
Name Description
Count (packets) Threshold for matching packets. The value
can range from 10 to 100000. The default
value is 20. Specify this value only for the
Rate Block and Rate Limit Action Types.
Period (secs) Threshold for period for matching packets.
The value can range from 1 to 60. The default
value is 20. Specify this value only for the
Rate Block and Rate Limit Action Types.
Timeout (secs) Action timeout in seconds. The value can
range from 30 to 36000. The default value is
900. Specify this value only for the Rate
Block and Rate Limit Action Types.
Connection:
Name Description
Connection Type Following are the possible connection types:
•Any: This is a default choice. If this option
is selected, SIP Firewall rule is matched
against all incoming SIP Traffic
•SIP UA Connection: If this option is
selected, SIP Firewall rule is matched
against the incoming SIP traffic from
entities that are not the Trusted SIP Entity
(as defined by the Routing Policy). This
Configuring and monitoring Session Manager instances
388 Administering Avaya Aura ® Session Manager November 2010
Comments? infodev@avaya.com
Name Description
option is suitable for creating SIP Firewall
filtering rules for SIP telephones that are
directly connected to Session Manager.
•NRP Trusted SIP Entity: If this option is
selected, SIP Firewall rule is matched
against the incoming SIP traffic from
entities that are marked as Trusted SIP
Entity in the Routing Policy.
Button Description
Cancel Cancels the defining of the rule
Commit Saves the defined rule and saves it when the
SIP firewall configuration is saved
Related topics:
Specifying a new SIP Firewall rule on page 382
Deep inspection filtering
SIP Firewall rules provide the following filters for deep inspection:
• SIP Layer content
• IP/Transport layer parameters such as IP address, protocol, port, and so on
You can combine both SIP Layer content and IP transport layer parameters in a single firewall
rule. For example, a SIP Firewall rule can limit the high rate of INVITE packets from a remote
IP address.
Denial of Service protection
SIP Firewall provides protection from the Denial of Service (DoS) attacks as follows:
• Flood Protection from a specified source
•Advanced Flood Protection—A rule may be defined to detect/mitigate flood attacks within
the live SIP Stream without knowing the flood source in advance. In other words, the host
causing the flood need not be known when the rule is configured. A high performance
database tracks all matched messages.
•Rate-Limiting—A “Rate Limit” action may be configured to limit the number of SIP packets
that are forwarded within a given period. Refer to the section Specifying a new SIP Firewall
rule for details on how to configure Rate Limit rules.
•Rate-Blocking—A “Rate Block” action may be configured to completely block an offending
SIP source once the traffic reaches a specified threshold within a given period. Traffic is
Network Configuration
Administering Avaya Aura® Session Manager November 2010 389
then blocked until the configured timeout expires. Refer to the section Specifying a new
SIP Firewall rule for details on how to configure the Rate Block rules.
• Signature Detection—A rule may be configured to perform signature detection and drop
those packets matching signature. Both simple and regular-expression string searching
is supported across the entire SIP header region of the message or across the full
message (headers and body).
SIP Firewall default rule set
SIP Firewall provides a default rule set. Avaya recommends that default rules be used after
the initial installation of Session Manager.
• 192.11.13.2 (added as a part of default rules)
• Session Manager Management IP address
Rule precedence and traversal
The precedence order for using the rules is:
• Blacklist
• Whitelist
• Rules
Each list above can contain more than one rule. Session Manager traverses the rules within
any of the above lists from top to bottom.
SIP Firewall is a packet-based filtering engine. Any time a packet is matched with a rule, the
rule traversal is stopped and the packet is either permitted or dropped as per the rule action.
The only exception to this is the rules defined with a None Action.
Device and Location Configuration
Device Settings Groups
Device Settings Groups
Device Settings Groups module allows you to manage some of the configuration data for Avaya
terminals. These device settings are associated in groups or in a default group and can be
assigned to one or more terminals or locations. Device Settings Groups of type Location
Groups can be associated with Locations while Device Settings Groups of type Terminal
Groups can only be associated with a terminal respectively having a Terminal Group ID. When
Configuring and monitoring Session Manager instances
390 Administering Avaya Aura ® Session Manager November 2010
Comments? infodev@avaya.com

the terminal is set up for the first time, it is set up with a pre-provisioned group called Default
Group which provides the global settings across locations and terminals.
A terminal can be individually associated with a set of Device Settings which are downloaded
and set as per the following criteria.
• The configuration of a terminal is set as the "Default Device Settings" if the terminal
- does not belong to an “Routing Policy Location”
- or the “Network Routing Policy Location” where the terminal is located has no
specific set of Personal Profile Manager (PPM) attributes
- and the Terminal is not associated with a specific set of Personal Profile Manager
(PPM) attributes
•The configuration of a terminal is set as the set of attributes defined for a “Routing Policy
Location” if the terminal
- is located in that “Routing Policy Location”
- and the terminal is not individually associated with a specific set of PPM attributes
• The configuration of a terminal is set as a specific set of PPM attributes if the terminal
- is individually associated with a set of PPM attributes
- and the selected set of PPM attributes does still exist
Viewing Device Settings Groups
Procedure
1. On the System Manager console, under Elements, click Session Manager.
2. Click Device and Location Configuration > Device Settings Groups to open
Device Settings Groups page. The Device Settings Groups page displays the list
of Device Settings Groups.
Related topics:
Device Settings Groups field descriptions on page 395
Creating a Device Settings Group - Location Group
Procedure
1. On the System Manager console, under Elements, click Session Manager.
Device and Location Configuration
Administering Avaya Aura® Session Manager November 2010 391

2. Click Device and Location Configuration > Device Settings Groups to open
Device Settings Groups page. The Device Settings Groups page displays the list
of Device Settings Groups.
3. Click New > Location Group to open the Device Settings Group screen.
4. On the Device Settings Group screen, enter the appropriate information about the
Location Group.
5. Click Save to create a Location Group.
6. Click Restore to restore the default values of the parameters.
Related topics:
Device Settings Groups field descriptions on page 395
Device Settings Group - Location Group field descriptions on page 399
Modifying a Device Settings Group - Location Group
About this task
You can modify only one Location Device Settings Group at a time.
Procedure
1. On the System Manager console, under Elements, click Session Manager.
2. Click Device and Location Configuration > Device Settings Groups to open
Device Settings Groups page. The Device Settings Groups page displays the list
of Device Settings Groups.
3. Select an Location Group and click Edit to open the Device Settings Group page.
4. On the Device Settings Group page, modify the appropriate information to update
the Location Group details.
5. Click Save to save the changes to the Location Group.
6. Click Restore to restore the default values of the parameters.
Related topics:
Device Settings Groups field descriptions on page 395
Device Settings Group - Location Group field descriptions on page 399
Configuring and monitoring Session Manager instances
392 Administering Avaya Aura ® Session Manager November 2010
Comments? infodev@avaya.com

Removing Device Settings Groups - Location Groups
About this task
You cannot delete the default Location Device Settings Group.
Procedure
1. On the System Manager console, under Elements, click Session Manager.
2. Click Device and Location Configuration > Device Settings Groups to open
Device Settings Groups page. The Device Settings Groups page displays the list
of Device Settings Groups.
3. Select one or more Location Groups and click Delete to delete one or more Location
Groups.
Related topics:
Device Settings Groups field descriptions on page 395
Device Settings Group - Location Group field descriptions on page 399
Creating a Device Settings Group - Terminal Group
Procedure
1. On the System Manager console, under Elements, click Session Manager.
2. Click Device and Location Configuration > Device Settings Groups to open
Device Settings Groups page. The Device Settings Groups page displays the list
of Device Settings Groups.
3. Click New > Terminal Group to open the Device Settings Group page.
4. On the Device Settings Group page, enter the appropriate information of the new
Terminal Group.
5. Click Save to create a new Terminal Group.
6. Click Restore to restore the default values of the parameters.
Related topics:
Device Settings Groups field descriptions on page 395
Device Settings Group - Terminal Group field descriptions on page 400
Device and Location Configuration
Administering Avaya Aura® Session Manager November 2010 393

Modifying a Device Settings Group - Terminal Group
About this task
You can modify only one Terminal Device Settings Group at a time.
Procedure
1. On the System Manager console, under Elements, click Session Manager.
2. Click Device and Location Configuration > Device Settings Groups to open
Device Settings Groups page. The Device Settings Groups page displays the list
of Device Settings Groups.
3. Select an Terminal Device Setting Group and click Edit to open the Device Settings
Group page.
4. On the Device Settings Group page, modify the appropriate information.
5. Click Save to save the changes to the Terminal Device Setting Group.
6. Click Restore to restore the default values of the parameters.
Related topics:
Device Settings Groups field descriptions on page 395
Device Settings Group - Terminal Group field descriptions on page 400
Removing Device Settings Group - Terminal Group
About this task
You cannot delete the default Terminal Device Settings Group.
Procedure
1. On the System Manager console, under Elements, click Session Manager.
2. Click Device and Location Configuration > Device Settings Groups to open
Device Settings Groups page. The Device Settings Groups page displays the list
of Device Settings Groups.
3. Select one or more Terminal Groups and click Delete to delete one or more Terminal
Device Settings Groups.
Related topics:
Device Settings Groups field descriptions on page 395
Device Settings Group - Terminal Group field descriptions on page 400
Configuring and monitoring Session Manager instances
394 Administering Avaya Aura ® Session Manager November 2010
Comments? infodev@avaya.com

Purpose and usage of SIP subscriptions
SIP Subscription and Notification requests update connected SIP endpoints on state changes
related to services that the endpoints consume. For example, when a new voice message
arrives in a mailbox, Session Manager sends a SIP notification request to notify the related
endpoints about the arrival of a new voice mail message.
For an endpoint to receive SIP notifications, it first needs to subscribe to the relevant
subscription package. Each subscription package is related to a specific service that the
network delivers to the endpoint. The SIP endpoints automatically establish all required
subscriptions upon logging into the network.
When a subscription to an event package (service) is established, it is assigned with a
subscription expiration timer. The endpoint continues to receive notifications as long as the
expiration timer does not expire. The endpoints automatically refresh any subscriptions before
their expiration timer expires. A lower subscription expiration timer generates more SIP traffic
related to subscription refresh events. Refreshing a subscription updates the state of the
subscription.
Session Manager allows administration of the subscription expiration timer for each type of
event package.
Device Settings Groups field descriptions
Device Settings Groups page enables the user to create and manage device configuration
groups.
Button Description
Default Group Opens the Device Settings Group page that
allows you to modify the Default Group.
Terminal Groups
Name Description
Name Shows the name of the Terminal Device
Settings Group.
Terminal Group Number Specifies a numeric ID for this group. Using
a group ID you can identify different phones
on your network for ease of administration.
With the exception of the field Group ID,
Group parameters are the same as those for
common phone parameters. Numeric IDs
must be between 0 and 999.
Device and Location Configuration
Administering Avaya Aura® Session Manager November 2010 395

Name Description
Description Shows the details of Terminal Device
Settings Group.
Button Description
Edit Opens the Device Settings Group page that
allows you to modify the selected Terminal
Device Settings Group.
New Opens the Device Settings Group page that
allows you to create a new Terminal Device
Settings Group.
Delete Allows you to delete the selected Terminal
Device Settings Group.
Location Groups
Name Description
Name Shows the name of the Location Device
Settings Group.
Description Shows the details of Location Device
Settings Group.
Button Description
Edit Opens the Device Settings Group page that
allows you to modify the selected Location
Device Settings Group.
New Opens the Device Settings Group page that
allows you to create a new Location Device
Settings Group.
Delete Allows you to delete the selected Location
Device Settings Group.
Related topics:
Viewing Device Settings Groups on page 391
Creating a Device Settings Group - Location Group on page 391
Modifying a Device Settings Group - Location Group on page 392
Removing Device Settings Groups - Location Groups on page 393
Creating a Device Settings Group - Terminal Group on page 393
Modifying a Device Settings Group - Terminal Group on page 394
Removing Device Settings Group - Terminal Group on page 394
Configuring and monitoring Session Manager instances
396 Administering Avaya Aura ® Session Manager November 2010
Comments? infodev@avaya.com

Device Settings Group - Default Group field descriptions
General section
Name Description
Name Specifies a non—editable field as Default
Group.
Description Specifies a non—editable field as Default
Group.
Group Type Specifies a non—editable field as Location
Group
Terminal Group Number Specifies a non—editable field.
Server Timer section
Name Description
Subscription Expiration Timer (secs) Specifies the maximum duration as 86400
and minimum duration as 60 seconds for a
SIP server to keep a SIP client as
subscribed.
Registration Expiration Timer (secs) Specifies the maximum duration as 3600 and
minimum duration as 60 seconds for a SIP
server to keep a SIP client as registered.
Endpoint Timer section
Name Description
Line Reservation Timer (secs) Specifies a required field and specifies the
maximum duration, range is 30 to 240
seconds, for a SIP server that a SIP line
appearance can be reserved for. If no value
is entered, the default value is 30 seconds.
Reactive Monitoring Interval (secs) Specifies the duration after which (in
seconds) the phone attempts to REGISTER
with a proxy server when it is not reachable/
available. Range is 10 to 3600 seconds. The
default is 60 seconds.
Timer B (sec) Specifies the duration (in seconds) that the
phone waits for a provisional response after
transmitting a SIP INVITE to a proxy server
and after not receiving any response from
proxy being unavailable or unreachable,
Device and Location Configuration
Administering Avaya Aura® Session Manager November 2010 397

Name Description
proceeds to another proxy. The range is 0 to
32 seconds. (0 disables this feature.) The
default value is 2.
Maintenance Settings section
Name Description
IP Address For SNMP Queries Specifies the IP address of a server that can
query the phone for SNMP messages. This
server must have the correct community
string. If this field is blank, any server can
query the phone.
SNMP Community Specifies the SNMP community name. This
string is both a challenge and a response for
the server specified in the IP addresses for
SNMP Queries field and the phone. If a
server IP address is specified, both the
server and the phone must have the same
community name administered. Only
alphabetic characters are allowed and length
cannot exceed 32 characters.
Station Admin Password Specifies the code that an administrator must
enter on a SIP phone to log in and administer
the phone. Only numeric values are
accepted as code and length cannot exceed
32 digits.
Quick Login Status: Specifies the whether users must enter a
password when logging in to the phone.
There are 2 choices: Password Entry
Required or Quick Login Allowed
VoIP Monitoring Manager section
Name Description
IP Address Specifies the IP address of the Avaya Voice
over IP Monitoring Manager server.
Port Specifies the port used by the Avaya Voice
over IP Monitoring Manager server. The
range is 1 through 65,535. The default is
5005.
Reporting Period Specifies how often an endpoint should send
its RTCP packets to the Avaya Voice over IP
Monitoring Manager server. The range is 5
through 30 seconds. The default is 5.
Configuring and monitoring Session Manager instances
398 Administering Avaya Aura ® Session Manager November 2010
Comments? infodev@avaya.com

Volume Settings section
Name Description
Receiver Volume Sets the volume in the handset rather than
the speaker. This is a required field and
range is 0-10. The default value is 5.
Ringer Cadence Sets the cadence of the ring tone. This is a
required field and range is 1-8. The default
value is 3.
Ringer Volume Sets the ringer setting for the stations
bridged appearance buttons. This is a
required field and range is 1-10. The default
value is 5.
Speaker Volume Sets the volume on the speaker rather than
the handset. This is a required field and
range is 0-10. The default value is 5.
Button Description
Restore Restores the earlier device settings.
Cancel Cancels the modified device settings.
Save Saves the modified device settings.
Device Settings Group - Location Group field descriptions
General section
Name Description
Name Shows the name of the Location Device
Settings Group.
Description Shows Location Device Settings Group
details.
Group Type Shows a non-editable field specifying the
type of Device Setting as Location Group
Server Timer section
Name Description
Subscription Expiration Timer (secs) Specifies the maximum duration as 86400
and minimum duration as 60 seconds for a
SIP server to keep a SIP client as
subscribed.
Device and Location Configuration
Administering Avaya Aura® Session Manager November 2010 399

Name Description
Registration Expiration Timer (secs) Specifies the maximum duration as 3600 and
minimum duration as 60 seconds for a SIP
server to keep a SIP client as registered.
Assigned Location section
Name Description
Name Is the name of the location to which the
Device Group Settings is associated.
Button Description
Restore Restores the earlier device settings.
Cancel Cancels the modified device settings.
Save Saves the modified device settings.
Related topics:
Creating a Device Settings Group - Location Group on page 391
Modifying a Device Settings Group - Location Group on page 392
Removing Device Settings Groups - Location Groups on page 393
Device Settings Group - Terminal Group field descriptions
General section
Name Description
Name Specifies the name of the Terminal Device
Settings Group.
Description Specifies Terminal Device Settings Group
details.
Group Type Specifies a non editable field specifying the
type of Device Setting as Terminal Group
Terminal Group Number Specifies the Device Settings Group number
Endpoint Timer section
Name Description
Line Reservation Timer (secs) Specifies a required field and specifies the
maximum duration, range is 30 to 240
seconds, for a SIP server that a SIP line
Configuring and monitoring Session Manager instances
400 Administering Avaya Aura ® Session Manager November 2010
Comments? infodev@avaya.com

Name Description
appearance can be reserved for. If no value
is entered, the default value is 30 seconds.
Reactive Monitoring Interval (secs) Specifies the duration after which (in
seconds) the phone attempts to REGISTER
with a proxy server when it is not reachable/
available. Range is 10 to 3600 seconds. The
default is 60 seconds.
Timer B (sec) Specifies the duration (in seconds) that the
phone waits for a provisional response after
transmitting a SIP INVITE to a proxy server
and after not receiving any response from
proxy being unavailable or unreachable,
proceeds to another proxy. The range is 0 to
32 seconds. (0 disables this feature.) The
default value is 2.
Maintenance Settings section
Name Description
IP Address For SNMP Queries Specifies the IP address of a server that can
query the phone for SNMP messages. This
server must have the correct community
string. If this field is blank, any server can
query the phone.
SNMP Community Specifies the SNMP community name. This
string is both a challenge and a response for
the server specified in the IP addresses for
SNMP Queries field and the phone. If a
server IP address is specified, both the
server and the phone must have the same
community name administered. Only
alphabetic characters are allowed and length
cannot exceed 32 characters.
Station Admin Password Specifies the code that an administrator must
enter on a SIP phone to log in and administer
the phone. Only numeric values are
accepted as code and length cannot exceed
32 digits.
Quick Login Status: Specifies the whether users must enter a
password when logging in to the phone.
There are 2 choices: Password Entry
Required or Quick Login Allowed
Device and Location Configuration
Administering Avaya Aura® Session Manager November 2010 401

VoIP Monitoring Manager section
Name Description
IP Address Specifies the IP address of the Avaya Voice
over IP Monitoring Manager server.
Port Specifies the port used by the Avaya Voice
over IP Monitoring Manager server. The
range is 1 through 65,535. The default is
5005.
Reporting Period Specifies how often an endpoint should send
its RTCP packets to the Avaya Voice over IP
Monitoring Manager server. The range is 5
through 30 seconds. The default is 5.
Volume Settings section
Name Description
Receiver Volume Sets the volume in the handset rather than
the speaker. This is a required field and
range is 0-10. The default value is 5.
Ringer Cadence Sets the cadence of the ring tone. This is a
required field and range is 1-8. The default
value is 3.
Ringer Volume Sets the ringer setting for the stations
bridged appearance buttons. This is a
required field and range is 1-10. The default
value is 5.
Speaker Volume Sets the volume on the speaker rather than
the handset. This is a required field and
range is 0-10. The default value is 5.
Button Description
Restore Restores the earlier device settings.
Cancel Cancels the modified device settings.
Save Saves the modified device settings.
Related topics:
Creating a Device Settings Group - Terminal Group on page 393
Modifying a Device Settings Group - Terminal Group on page 394
Removing Device Settings Group - Terminal Group on page 394
Configuring and monitoring Session Manager instances
402 Administering Avaya Aura ® Session Manager November 2010
Comments? infodev@avaya.com

Location Settings
Location Settings
Location Settings module enables you to assign a Device Setting Group to a Location.
Viewing location settings
Procedure
1. On the System Manager console, under Elements, click Session Manager.
2. Click Device and Location Configuration > Location Settings to open Location
Settings page. The Location Settings page displays the list of location settings.
Related topics:
Location Settings field descriptions on page 403
Modifying Location Settings
Procedure
1. On the System Manager console, under Elements, click Session Manager.
2. Click Device and Location Configuration > Location Settings to open Location
Settings page.
3. Associate a location with the respective Device Settings Group.
4. Click Save to save the changes.
Related topics:
Location Settings field descriptions on page 403
Location Settings field descriptions
Name Description
Name Name of the Location.
Device and Location Configuration
Administering Avaya Aura® Session Manager November 2010 403
Name Description
Device Setting Group Name of the Device Setting Group.
Button Description
Save Saves the Location Settings.
Related topics:
Viewing location settings on page 403
Modifying Location Settings on page 403
Application Configuration
Applications
About Applications
Application entries allow you to define and manage single applications with application
attributes for inclusion into one or more application sequence.
Related topics:
Application Sequences on page 408
Viewing applications
Procedure
1. On the System Manager console, under Elements, click Session Manager.
2. Click Application Configuration > Applications to open the Applications page.
The Applications page displays the list of applications.
Configuring and monitoring Session Manager instances
404 Administering Avaya Aura ® Session Manager November 2010
Comments? infodev@avaya.com

Creating an application
Before you begin
Creating a new application entry requires that a non-Session Manager SIP entity first be
administered. Refer to the topic “Creating SIP entities” to create the SIP entity.
Procedure
1. On the System Manager console, under Elements, click Session Manager.
2. Click Application Configuration > Applications to open the Applications page.
3. Click New. The Application Editor page appears.
4. Enter the appropriate information for the new application.
5. Click Commit to create the application.
Related topics:
Applications field descriptions on page 406
Application Editor field descriptions on page 407
Modifying an application
About this task
You can modify only one application at a time.
Procedure
1. On the System Manager console, under Elements, click Session Manager.
2. Click Application Configuration > Applications to open the Applications page.
3. Select an application and click Edit to open the Application Editor page.
4. On the Application Editor screen, modify the appropriate information.
5. Click Commit to save the changes.
Related topics:
Applications field descriptions on page 406
Application Editor field descriptions on page 407
Application Configuration
Administering Avaya Aura® Session Manager November 2010 405

Removing applications
About this task
You cannot delete an application if it is a member of an Application Sequence. If you try to
delete it, a warning appears, and the application entry remains.
Procedure
1. From the navigation pane on the System Manager Common Console, click
Elements > Session Manager > Application Configuration > Applications to
open the Applications screen.
2. Select one or more applications and click Delete . Delete Confirmation screen
appears.
3. On the Delete Confirmation screen, click Delete to remove the application
entries.
Related topics:
Applications field descriptions on page 406
Applications field descriptions
Use each field to sort or filter records by enabling or disabling Filter feature. Records are filtered
on the basis of partial string match and can also be filtered as a combination of one or more
fields.
Name Description
Application Name Name of the application.
SIP Entity Name of the associated SIP Entity.
Description Provides details about the application.
Button Description
New Enables creating a new application entry.
Edit Enables modifying the selected application
entry.
Delete Enables deleting the selected application
entry.
Related topics:
Creating an application on page 405
Configuring and monitoring Session Manager instances
406 Administering Avaya Aura ® Session Manager November 2010
Comments? infodev@avaya.com
Modifying an application on page 405
Removing applications on page 406
Application Editor field descriptions
Application Editor section
Name Description
Name Name of the application entries. This is a
mandatory field.
SIP Entity List of previously provisioned SIP entities.
This is a mandatory field.
CM System for SIP Entity List of previously provisioned CM systems.
This is a mandatory field.
Note:
This selection of CM System for SIP entity
associates a Communication Manager
Feature Server for call sequencing.
Refresh: Updates the list of CM Systems.
View/Add CM Systems: Enables adding
and viewing of currently provisioned CM
Systems.
Description Provides details about the application.
Application Attributes (optional) section — User defined attributes which can
only be updated
Name Description
Application Handle A unique handle for the application. This
handle is inserted in the Route header sent
by Session Manager when it sequences a
call to an application. It is mainly used to
distinguish between multiple applications
running on the same host.
URI Parameters List of URI parameters.
Button Description
Cancel Cancels the changes made to the application
entry.
Commit Saves the changes made to the application
entry.
Application Configuration
Administering Avaya Aura® Session Manager November 2010 407

Related topics:
Creating an application on page 405
Modifying an application on page 405
Application Sequences
Application Sequences
Application Sequence enables defining and managing an ordered set of applications used in
call sequencing. These application sets can be associated as the originating and terminating
application templates for a registered user's "Communication Profile" in the User Management
module and enable routing every incoming, outgoing, or combined call for that user.
Applications are assigned based on the user’s needs and are irrespective of location or the
device used.
Session Manager provides the capability to create a profile for third party PBX users and add
applications to be applied to these users to provide services such as block calls based on user
preferences, direct calls to these users when they move across the enterprise, and augment
caller ID information for incoming and outgoing calls – all without upgrades or code
modifications to existing third party PBX-equipment.
Viewing application sequences
Procedure
1. On the System Manager console, under Elements, click Session Manager.
2. Click Application Configuration > Application Sequences to open the
Application Sequences page. The Application Sequences page displays the list of
Application Sequences.
Creating an Application Sequence
About this task
An Application Sequence can contain a maximum of up to 10 applications.
Procedure
1. On the System Manager console, under Elements, click Session Manager.
Configuring and monitoring Session Manager instances
408 Administering Avaya Aura ® Session Manager November 2010
Comments? infodev@avaya.com

2. Click Application Configuration > Application Sequences to open the
Application Sequences page. The Application Sequences page displays the list of
Application Sequences.
3. Click New. The Application Sequence Editor page appears.
4. Enter the appropriate information.
5. Click Commit to create the Application Sequence.
Related topics:
Application Sequences field descriptions on page 411
Application Sequence Editor field descriptions on page 412
Modifying an Application Sequence
About this task
You can modify only one Application Sequence at a time.
Procedure
1. On the System Manager console, under Elements, click Session Manager.
2. Click Application Configuration > Application Sequences to open the
Application Sequences page.
3. Select an application sequence and click Edit to open the Application Sequence
Editor page.
4. On the Application Sequence Editor screen, modify the appropriate information.
5. Click Commit to save the changes.
Related topics:
Application Sequences field descriptions on page 411
Application Sequence Editor field descriptions on page 412
Removing Application Sequences
About this task
You cannot delete an Application Sequence, if it is defined as an originating or terminating
application set of a communication profile.
Application Configuration
Administering Avaya Aura® Session Manager November 2010 409

Procedure
1. On the System Manager console, under Elements, click Session Manager.
2. Click Application Configuration > Application Sequences to open the
Application Sequences page. The Application Sequences page displays the list of
Application Sequences.
3. Select one or more application sequence and click Delete . Delete Confirmation
page appears.
4. Click Delete to remove the selected application sequences.
Related topics:
Application Sequences field descriptions on page 411
Application Sequence Editor field descriptions on page 412
Rearranging Applications in an Application Sequence
Procedure
1. On the System Manager console, under Elements, click Session Manager.
2. Click Application Configuration > Application Sequences to open the
Application Sequences page.
3. Select an Application Sequence and click Edit to open the Application Sequence
Editor page.
4. In the section Applications in this Sequence do the following:
•Click the buttons in the top panel to move selected Applications to the front or
back of the Application Sequence or to remove Applications from the
Application Sequence.
• Click the buttons under Sequence Order (first to last) to change the relative
sequence order of the Applications or to remove Applications from the
Application Sequence.
Related topics:
Application Sequences field descriptions on page 411
Application Sequence Editor field descriptions on page 412
Configuring and monitoring Session Manager instances
410 Administering Avaya Aura ® Session Manager November 2010
Comments? infodev@avaya.com

Adding Applications in an existing Application Sequence
Procedure
1. On the System Manager console, under Elements, click Session Manager.
2. Click Application Configuration > Application Sequences to open the
Application Sequences page.
3. Select an application sequence and click Edit to open the Application Sequence
Editor page.
4. In the section Available Applications, click the + button to add the application to the
application sequence at the end.
Related topics:
Application Sequences field descriptions on page 411
Application Sequence Editor field descriptions on page 412
Application Sequences field descriptions
The Application Sequence screen enables you to add, edit, or remove sequences of
applications.
Name Description
Name Name of the application sequence.
Description Provides details about the application
sequence.
Button Description
New Enables creating a new application
sequence.
Edit Enables modifying the selected application
sequence.
Delete Enables deleting the selected application
sequence.
Related topics:
Creating an Application Sequence on page 408
Modifying an Application Sequence on page 409
Removing Application Sequences on page 409
Application Configuration
Administering Avaya Aura® Session Manager November 2010 411

Rearranging Applications in an Application Sequence on page 410
Adding Applications in an existing Application Sequence on page 411
Application Sequence Editor field descriptions
Sequence Name section
Name Description
Name Name of the application sequence. This is a
mandatory field.
Description Shows the details about the application
sequence .
Applications in this Sequence section — Buttons at the top panel allow you to
move selected applications to the front or back of the sequence
Name Description
Sequence Order (first to last) Allows you to change the relative sequence
order of the applications or to remove
applications from the application sequence.
Name Name of the selected application.
SIP Entity Name of the SIP entity associated with the
selected application
Mandatory Specifies whether the application is
mandatory or not. If Session Manager fails to
reach the application during the sequencing,
Session Manager will stop sequencing and
send an error response upstream.
Description Shows the description of the selected
application
Available Applications section — This section allows sorting and filtering by
application names or SIP entity name. Default sort is by application name and
then by SIP entity name.
Name Description
+Adds the selected application to the
application sequence in the table Application
in this Set above.
Name Name of the application.
SIP Entity Name of the SIP entity associated with the
application
Configuring and monitoring Session Manager instances
412 Administering Avaya Aura ® Session Manager November 2010
Comments? infodev@avaya.com
Name Description
Description Shows the description of the application
Button Description
Cancel Cancels the changes made to the application
sequence.
Commit Saves the changes made to the application
sequence.
Related topics:
Creating an Application Sequence on page 408
Modifying an Application Sequence on page 409
Removing Application Sequences on page 409
Rearranging Applications in an Application Sequence on page 410
Adding Applications in an existing Application Sequence on page 411
Implicit Users
Implicit Users
Implicit Users allow administering of certain dial patterns for users that do not register or
connect with Session Manager. This functionality enables provisioning a set of originating and
terminating sequenced applications for such users.
Viewing Implicit User Rules
Procedure
1. On the System Manager console, under Elements, click Session Manager.
2. Click Application Configuration > Implicit Users to open Implicit Users page. The
Implicit Users page displays the list of Implicit User rules.
Related topics:
Implicit User Rules field descriptions on page 415
Application Configuration
Administering Avaya Aura® Session Manager November 2010 413

Creating an Implicit User Rule
Procedure
1. On the System Manager console, under Elements, click Session Manager.
2. Click Application Configuration > Implicit Users to open Implicit Users page.
3. Click New. The Implicit User Rule Editor page appears.
4. On the Implicit User Rule Editor page, enter the appropriate information.
5. Click Commit to create a new Implicit User rule.
Related topics:
Implicit User Rules field descriptions on page 415
Implicit User Rule Editor field descriptions on page 416
Modifying an existing Implicit User Rule
Procedure
1. On the System Manager console, under Elements, click Session Manager.
2. Click Application Configuration > Implicit Users to open Implicit Users page.
3. Select an Implicit User rule and click Edit to open the Implicit User Rule Editor
page.
4. On the Implicit User Rule Editor page, modify the appropriate information.
5. Click Commit to save the changes to the Implicit User rule.
Related topics:
Implicit User Rules field descriptions on page 415
Implicit User Rule Editor field descriptions on page 416
Removing existing Implicit User Rules
Procedure
1. On the System Manager console, under Elements, click Session Manager.
2. Click Application Configuration > Implicit Users to open Implicit Users page.
Configuring and monitoring Session Manager instances
414 Administering Avaya Aura ® Session Manager November 2010
Comments? infodev@avaya.com

3. Select one or more Implicit User rules and click Delete to delete one or more Implicit
User rules respectively . Delete Confirmation screen appears.
4. On the Delete Confirmation screen, click Delete to remove the selected Implicit User
rules.
Related topics:
Implicit User Rules field descriptions on page 415
Implicit User Rules field descriptions
Name Description
Pattern Shows the dial pattern with the same pattern
format as the Routing Policy Dial pattern.
Min Shows the minimum value of the dial pattern
matching. Valid values are 1-36.
Max Shows the maximum value of the dial pattern
matching. Valid values are 1-36.
SIP Domain Shows associated SIP Domain
Origination Application Sequence Shows Origination Application Sequence
Termination Application Sequence Shows Termination Application Sequence
Description Shows the description of the Rule
Button Description
New Enables creating a new Implicit User Rule.
Edit Enables modifying the selected Implicit User
Rule.
Delete Enables deleting the selected Implicit User
Rule.
Related topics:
Viewing Implicit User Rules on page 413
Creating an Implicit User Rule on page 414
Modifying an existing Implicit User Rule on page 414
Removing existing Implicit User Rules on page 414
Application Configuration
Administering Avaya Aura® Session Manager November 2010 415
Implicit User Rule Editor field descriptions
The Implicit User Rule Editor screen enables you to define a new pattern rule or to modify an
existing pattern rule.
Name Description
Pattern Shows a dial pattern with the same pattern
format as the Routing Policy Dial pattern.
This is a mandatory field.
Min Shows the minimum value of the dial pattern
matching. Valid values are 1-36. This is
mandatory field. The value must be higher
than the pattern length.
Max Shows the maximum value of the dial pattern
matching. Valid values are 1-36. This is
mandatory field.
Description Shows the description of the Rule.
SIP Domain Shows the name of the SIP Domain
Origination Application Sequence Shows the name of the Origination
Application Sequence
Termination Application Sequence Shows the name of the Termination
Application Sequence
Button Description
Cancel Cancels the changes made to the Implicit
User Rule.
Commit Saves the changes made to the Implicit User
Rule.
Related topics:
Creating an Implicit User Rule on page 414
Modifying an existing Implicit User Rule on page 414
Session Manager Network Connect Service
NRS Proxy Users
Session Manager Network Connect Service (NCS) provides routing services to VoIP endpoints
based on Avaya Communication Server 1000 (CS1000). This service is similar to the services
Configuring and monitoring Session Manager instances
416 Administering Avaya Aura ® Session Manager November 2010
Comments? infodev@avaya.com
provided by Nortel Network Routing Service (NRS). The NRS provides following three
services:
•SIP Proxy Server (SPS): SPS performs two roles in CS1000-based configuration. These
roles are SIP routing proxy and SIP registrar.
• Network Connect Server (NCS): NCS supports the centralized CS1000 solution for IP
clients, that is, IP phones.
• H.323 Gatekeeper (GK): GK provides typical H.323 gatekeeper functions to H.323
endpoints in the solution.
Session Manager provides both the SIP Proxy Server (SPS) and Network Connect Server
(NCS) functionality that are provided by Nortel NRS.
Session Manager provides the following information to each UNIStim phone:
• Primary signaling server
• Secondary signaling server
• Branch Office, Survivable Media Gateway or Survivable Remote Gateway
The Session Manager NCS provides network redirection services for UNIStim phones for
several CS1000 network features, such as geographic redundancy, virtual office, branch office,
and Survivable Remote Gateway. You can define user patterns, which are administered as a
NRS Proxy User Rule in Session Manager, and associate user patterns with up to three CS
1000 Terminal Proxy Servers in priority order. Since a large number of users share the same
server set, you can administer a range for the user pattern to match a large set of users.
Redirecting UNIStim Phones
About this task
In normal conditions, all UNIStim phones in the system should be configured with their Primary
Connect Server, Primary CS 1000, pointing to the local Primary Session Manager and the
Secondary Connect Server, Secondary CS 1000, pointing to the Secondary Session
Manager.
Following are the administration steps:
Procedure
1. Point each SIP Signaling Gateway from the SIP Proxy Server (SPS) to the Session
Manager. See CS1000 documentation.
2. Reconfigure NCS pointing to Session Manager. See CS1000 documentation.
3. Create Terminal Proxy Server instances for Primary signaling server and Secondary
signaling server as per your system requirement.
4. Create Terminal Proxy Server instances for each Branch Office, Survivable Media
Gateway, or Survivable Remote Gateway 50.
Application Configuration
Administering Avaya Aura® Session Manager November 2010 417

5. Create an NRS Proxy User Rule.
Creating Terminal Proxy Server instance
Procedure
1. On the System Manager console, in Elements, click Inventory.
2. From the left navigation pane, click Inventory > Manage Elements.
3. On the Manage Elements page, click New and select a “CS 1000 Terminal Proxy
Server” entity instance.
4. On the New CS 1000 Terminal Proxy Server page, enter the following details:
• In the Name field, enter the H323 ID value of the Main or Primary Signaling
Server.
• Enter the Node IP address of the Main or Primary Signaling Server.
5. Click Commit.
When you add an application entity through Runtime Topology Service (RTS), it in
turn starts a synchronization job in the background to bring all the relevant data from
the application instances to the Communication System Management database.
You can check the status of this synchronization job on the System Manager
console by accessing Scheduler in Services.
Creating a NRS Proxy User Rule
Procedure
1. On the System Manager console, in Elements, click Session Manager.
2. To open the NRS Proxy Users page, click Application Configuration > NRS Proxy
Users .
3. Click New and enter the appropriate information for the new NRS Proxy User
Rule.
4. Click Commit.
Note:
Terminal Proxy Server should be administered using Elements > Inventory >
Manage Elements.
Configuring and monitoring Session Manager instances
418 Administering Avaya Aura ® Session Manager November 2010
Comments? infodev@avaya.com
Modifying NRS Proxy User Rule
Procedure
1. On the System Manager console, in Elements, click Session Manager.
2. To open the NRS Proxy Users page, click Application Configuration > NRS Proxy
Users.
3. Select the NRS Proxy User Rule to be modified and click Edit.
4. On the NRS Proxy User Rule Editor page, modify the information and click Commit
to save the changes.
Note:
Terminal Proxy Server must be administered using Elements > Inventory >
Manage Elements.
Deleting NRS Proxy User rule
Procedure
1. On the System Manager console, in Elements, click Session Manager.
2. To open NRS Proxy Users page, click Application Configuration > NRS Proxy
Users.
3. Select one or more NRS Proxy User rule from the list and click Delete.
4. On the Delete Confirmation screen, click Delete to delete the selected NRS Proxy
User rules.
Delete Confirmation page field descriptions
Button Description
Cancel Cancels the deletion of the selected NRS
Proxy User rule.
Delete Deletes the selected NRS Proxy User rule.
Application Configuration
Administering Avaya Aura® Session Manager November 2010 419

NRS Proxy Users field descriptions
Name Description
Pattern User Pattern type.
Primary Terminal Proxy Server The administered Terminal Proxy Server.
This field is a required field.
Secondary Terminal Proxy Server The administered Terminal Proxy Server.
Survivable Terminal Proxy Server The administered Terminal Proxy Server.
Button Description
New Adds a new entry.
Edit Saves the changes of the modified entry.
Delete Deletes the selected entry.
NRS Proxy User Rule Editor field descriptions
Name Description
Pattern Specifies the User Pattern. This field is a
required field.
The prefix can include the numbers 0 to 9,
and the hash (#), the hyphen (-), and the
question mark (?) symbols. The prefix can
have a length of up to 30 characters, but the
first character must be numeric. Routing
entries can be categorized in the following
way:
• Basic digits: Any number of digits can be
used to make a simple entry. For example,
570
•Range of digits: Two basic digit entries can
be used to build a range entry. The range
will have a dash between the two ranges
and each range will have the same number
of digits. For example, 467 – 486 is valid
but 467 – 4866 is invalid.
•Length delimited: A basic digit entry can be
terminated with the hash "#" symbol to
Configuring and monitoring Session Manager instances
420 Administering Avaya Aura ® Session Manager November 2010
Comments? infodev@avaya.com
Name Description
force a specific length match. For example,
5703360#.
•Wild card: The wild card digit character "?"
can be appended to a basic digit entry.
Multiple wild cards may be appended, but
each wild card character matches only one
digit. For example, 57033??.
Primary Terminal Proxy Server Select an administered Terminal Proxy
Server. This field is a required field.
Secondary Terminal Proxy Server Select an administered Terminal Proxy
Server.
Survivable Terminal Proxy Server Select an administered Terminal Proxy
Server.
Button Description
Commit Saves the changes made to the NRS Proxy
User Rule.
Cancel Cancels the changes made to the NRS Proxy
User Rule.
System Status
SIP Entity Monitoring
Session Manager SIP Entity Monitoring
SIP Entity Monitoring provides background detection for monitored connections to improve
alternative routing and minimize the call setup time due to SIP link failures. The SIP Monitor
periodically tests the status of the SIP proxy servers. If a proxy fails to reply, SIP messages
are no longer routed to that proxy. As a result, call delays are reduced since calls are not routed
to the failed servers. The SIP Monitor continues to monitor the failed SIP entity. When the proxy
replies, SIP messages are again be routed over that link.
SIP monitoring sends OPTIONS requests to SIP entities to determine whether they are up,
partially up, or down. An entity is considered up if all of the addresses associated with it are
System Status
Administering Avaya Aura® Session Manager November 2010 421

up. An entity is down if all of its addresses are down. An entity is partially up if some, but not
all, of its addresses are up. An address is considered down if its response to OPTIONS is:
• 408 Request Timeout
• 503 Service Unavailable (with no parenthetical text)
• 503 Service Unavailable (LSP is inactive)
• 503 Service Unavailable - System Busy
• 504 Server Timeout
All other responses (including "503 Service Unavailable" with other parenthetical text, such as
"503 Service Unavailable (Signaling Resources Unavailable)" results in the address to be
considered up.
You can turn monitoring on or off for a given SIP entity. If monitoring is turned off, the SIP entity
is not monitored by any instance.
You can also turn monitoring on or off for an entire instance. If monitoring is turned off, none
of the SIP entities are monitored by that instance. If monitoring for the instance is turned on,
only those SIP entities for which monitoring is turned on are monitored.
SIP Monitoring can only report problems if the Security Module is functional.
SIP Monitoring setup is administered through the Routing Policy screens on the System
Manager.
Viewing the SIP Monitoring Status Summary page
About this task
The SIP Entity Link Monitoring Status Summary page displays the status of the entity links for
all administered Session Manager instances. An entity link consists of one or more physical
connections between a Session Manager and a SIP entity.
If all of the connections are up, then the entity link status is up. If one or more connections are
down but there is at least one connection up, the link status is partially down. If all of the
connections are down, the entity link status is down.
Procedure
1. On the System Manager console, under Elements, select Session Manager
2. Select System Status > SIP Entity Monitoring
3. The SIP Entity Link Monitoring Status Summary page displays the SIP Entity
Link monitoring status for all Session Manager instances.
4. If the status for a Session Manager is not up, see Troubleshooting Entity links.
Configuring and monitoring Session Manager instances
422 Administering Avaya Aura ® Session Manager November 2010
Comments? infodev@avaya.com

SIP Entity Link Monitoring Status Summary page field descriptions
Button Description
Entity Link Status for All Session
Manager Instances: Run Monitor Starts asynchronous demand monitor test
for the selected Session Manager instances.
Refresh link refreshes the status of the entity
links for all administered Session Manager
instances. The status displays the following
details:
• Name of the Session Manager instance
• Entity links for the Session Manager that
are totally down out of the total number of
entity links for the Session Manager
• Entity links for the Session Manager that
are partially down
• SIP entities for which monitoring has not
yet started (because it is still being
initialized by the Session Manager)
• SIP entities that are not monitored
(because they are not administered to be
monitored by the Session Manager)
Clicking any of the Session Managers in the
list opens the Session Manager Entity Link
Connection Status page that displays
detailed connection status for all entity links
from a Session Manager where at least one
connection is currently down.
Note:
An entity link consists of one or more
physical connections between a Session
Manager and a SIP entity. If all of these
connections are up, then the entity link
status is “up”. If one or more connections
are down, but there is at least one
connection up, then the entity link status
is “partially down”. If all the connections
are down, the entity link status is “down”.
All Monitored SIP Entities: Run Monitor Starts asynchronous demand monitor test
for the selected SIP entities. Clicking any of
the entities in the list opens the SIP Entity,
Entity Link Connection Status page that
displays detailed connection status for all
System Status
Administering Avaya Aura® Session Manager November 2010 423

Button Description
entity links from all Session Manager
instances to a single SIP entity.
SIP Entity, Entity Link Connection Status page field descriptions
Link Description
Refresh Refreshes and displays the detailed
connection status for all entity links from the
selected Session Manager instance to a
single SIP entity. The status displays the
following details:
• Name of the Session Manager instance
• Resolved IP address of the SIP entity
• Port used for the connection
• Protocol used
• Connection status
• Reason for the failure. This field explains
how the status of a connection is
determined irrespective of whether the
status is “up” or “down”.
• Status of the entity link
Details column provides the following
information:
• Time when the entity link was last down
• Time when the entity link was last up
• Time when the last message was sent
• Duration of the last response latency (ms)
Button Description
Summary View Returns to the SIP Entity Link Monitoring
Status Summary page.
Configuring and monitoring Session Manager instances
424 Administering Avaya Aura ® Session Manager November 2010
Comments? infodev@avaya.com

Session Manager Entity Link Connection Status page field descriptions
Link Description
Refresh Refreshes and displays all entity links for a
connection that is down for the selected
Session Manager. The status displays the
following details:
• Name of the SIP entity. Clicking the name
field for a SIP entity opens the SIP Entity,
Entity Link Connection Status page for that
SIP entity.
• Resolved IP address of the SIP entity
• Port that is used for connecting with the
SIP entity
• Protocol used
• Connection status
• Reason for connection failure. This field
explains how the status of a connection
was determined, even if the status is “up”
or “down”.
• Status of the entity link
Details column provides the following
information:
• Time when the entity link was last down
• Time when the entity link was last up
• Time when the last message was sent
• Duration of the last response latency (ms)
Button Description
Summary View Returns to the SIP Entity Link Monitoring
Status Summary page.
System Status
Administering Avaya Aura® Session Manager November 2010 425

Managed Bandwidth Usage
About Managed Bandwidth
The Managed Bandwidth Usage displays Managed Bandwidth (Call Admission Control) real-
time data. Measurement of bandwidth usage helps administrators to manage networks with
multimedia calls. It displays a read-only table containing one row for each administered location
and provides details on actual call counts and bandwidth usage for audio and video calls
respectively.
You can also expand each row to display a breakdown of usage and capacity by Session
Manager, which can be helpful in debugging network utilization or the distribution algorithm. If
no bandwidth management is administered, this table contains no data.
Viewing Managed Bandwidth Usage
Procedure
1. On the System Manager console, under Elements, click Session Manager.
2. Click System Status > Managed Bandwidth Usage.
The Managed Bandwidth Usage screen displays system-wide bandwidth usage
information for locations where usage is managed. If the Managed Bandwidth field
on the location form is blank, this table has no information for that location.
3. Click Show under Details column to view the bandwidth usage information per
Session Manager in that location. You can click Hide to close this table.
4. On the Managed Bandwidth Usage screen, click Refresh to refresh the data.
Managed Bandwidth Usage page field descriptions
This page displays system-wide bandwidth usage information for locations where usage is
managed. If there is no bandwidth management implemented, this table has no information.
Button Description
Refresh Refreshes the data in the table for the
following columns:
•Details : Shows the breakdown of usage
among the administered Session
Managers in the enterprise. You can click
the Show or Hide arrow on any row under
Configuring and monitoring Session Manager instances
426 Administering Avaya Aura ® Session Manager November 2010
Comments? infodev@avaya.com

Button Description
Details to show or hide the detailed usage
for that location.
•Location : Locations that you have
administered in Routing Policy.
•Audio Call Count : Sum of audio calls of
Session Manager in a given location.
•Audio BW Used : Sum of bandwidth used
for audio calls of Session Managers in a
given location.
•Multimedia Call Count : Sum of
multimedia calls of Session Managers in a
given location.
•Multimedia BW Used : Sum of bandwidth
used for multimedia calls of Session
Managers in given location.
•Multimedia BW Allow : Administered
value (if any) of "multimedia Bandwidth" for
a given location.
•Multimedia BW %Used : Sum of
bandwidth used for multimedia calls into or
out of a given location divided by the value
in the "Multimedia BW Allow" column.
•Total BW Used : Sum of audio and
multimedia bandwidth into or out of a given
location.
•Total BW Allow : Administered value (if
any) of "Total Bandwidth" for a given
location.
•Total BW %Used : Sum of audio and
multimedia bandwidth for calls into or out
of a given location divided by the value in
the "Total BW Allow" column.
The information in the Details column per
Session Manager of the given location is as
follows:
•Session Manager : Name of the
instance.
•Audio Call Count : Number of audio calls
terminated by the selected Session
Manager for the given location.
System Status
Administering Avaya Aura® Session Manager November 2010 427

Button Description
•Audio BW Used : Sum of bandwidth used
by audio calls terminated by the selected
Session Manager for the given location.
•Multimedia Call Count : Number of
multimedia calls terminated by the
selected Session Manager for the given
location.
•Multimedia BW Used : Sum of bandwidth
used by multimedia calls terminated by the
selected Session Manager for the given
location.
Security Module Status
About Security Module Status
The Security Module Status page allows you to view the status of the security module for each
administered Session Manager and to perform certain actions on the security module.
You can view the status of the security module such as its IP address, default gateway, the
interface that it uses, the VLAN that it is associated with, the QOS priority, trusted hosts
configured for that security module, and the certificate authority.
You can also reset and synchronize the security module, or assign a certificate authority.
Security Module Status actions
The following actions can be performed on the Security Module Status page:
•Refresh – refreshes the statistics for all of the administered Session Manager
instances..
•Reset – resets the security module for the selected Session Manager. You may choose
to reset the security module when a connection cannot be made to the security module.
Warning:
The Session Manager cannot process calls while the security module is being reset.
Refer to Administrating Avaya Aura® Session Manager, 03–603324 for details on how
to disable the Session Manager prior to resetting the security module.
Configuring and monitoring Session Manager instances
428 Administering Avaya Aura ® Session Manager November 2010
Comments? infodev@avaya.com
•Synchronize – verifies that the administered configuration matches the actual
configuration stored on the security module. This action should be performed anytime the
values in the security module statistics table do not match the administered data.
•Update Installed Certificates – provides the capability of switching the active certificate
being used by the security module to the default certificate. Additionally, refer to Security
Design in Administrating Avaya Aura® Session Manager, 03–603324 to understand the
implications of doing this operation.
•Connection Status — allows you to view the current status of inbound and outbound
links between the Session Manager security module and external hosts. It enables
general-purpose monitoring and debugging activities such as:
- identifying if Session Manager is required to be taken out of service
- determining if links are secured or not
- viewing link details and statistics
Investigating Security Module “Down” status
About this task
Possible causes for the Security Module status to be Down include:
• The security module may have recently been reset. A reset can take several minutes to
complete.
• The security module may not have received its configuration information from System
Manager.
Procedure
1. On the System Manager console, under Services, select Replication.
2. The Replica Group associated with the Session Manager should display
Synchronized for the Synchronization Status.
3. If the Synchronization Status is not Synchronized:
a. Check the box in front of the affected Replica Group.
b. Click View Details.
c. Check the box in front of the affected Session Manager.
d. Click View Details.
e. Make sure the Replica Node Host Name is correct.
f. Click on Done.
g. Click on Repair.
4. Click the Refresh button to see the latest status.
5. If the status is Down, synchronize the security module to trigger an update:
a. Click on the button in front of the appropriate Session Manager instance in the
Session Manager list.
System Status
Administering Avaya Aura® Session Manager November 2010 429

b. Click the Synchronize button.
c. Click the Refresh button to see the latest status.
6. If the status is still Down, reset the security module:
a. Select the appropriate Session Manager instance in the Session Manager
list.
b. Select the Reset button.
Warning:
The Session Manager cannot process calls while the security module is being
reset .
7. Select the Refresh button to see the latest status.
Security Module Status page field descriptions
Button Description
Refresh Refreshes the following statistics for all the
administered Session Manager instances:
• Session Manager—Session Manager
instance.
• Type—Shows the type of Session
Manager instance, either as Core or
Branch Session Manager.
• Status—Status of the Security Module
deployed for the Session Manager (up or
down).
• Connections—Total count of connections
for the Security Module.
• IP Address—IP address of the security
module used for SIP traffic. This field
should match the address administered on
the SIP Entity form for the Session
Manager instance.
• VLAN—The VLAN ID that the security
module is associated with. This field should
match the VLAN ID administered on the
Session Manager instance form.
• Default Gateway—Default Gateway used
by the security module. This value should
match the default gateway administered on
the Session Manager instance form.
Configuring and monitoring Session Manager instances
430 Administering Avaya Aura ® Session Manager November 2010
Comments? infodev@avaya.com

Button Description
• NIC Bonding—Shows whether NIC
bonding is “enabled” or “disabled”.
• Entity Links (expected / actual)—The
expected value is the number of SIP
Entities configured in Routing Policy which
have Entity Links to the Session Manager.
The actual value is the number of Entity
Links currently configured on the security
module. If these values do not match, then
the Synchronize action should be
performed.
Reset Opens the Security Module Reset
Confirmation page.
Synchronize Synchronizes the security module of the
selected Session Manager and opens the
Confirm Security Module Synchronize
page.
Update Installed Certificate Updates already installed certificates.
Connections Status Enables you to monitor connection links for
selected Session Manager instances.
Confirm Security Module Reset page field descriptions
Button Description
Confirm Resets the security module for the selected
Session Manager instance. Please note that
while the security module is being reset, the
Session Manager cannot process the calls.
Cancel Cancels the resetting of the security module
for the selected Session Manager
About Connection Status
Connection Status allows administrator to view current status of inbound and outbound links
between Session Manager security module and external hosts. It enables general-purpose
monitoring and debugging activities such as-
System Status
Administering Avaya Aura® Session Manager November 2010 431

• identification of whether Session Manager is required to be taken out of service
• determination of whether links are secured or not
• viewing of link details and statistics
Monitoring Connection Links
Procedure
1. On the System Manager console, under Elements, click Session Manager.
2. Click System Status > Security Module Status to open the Security Module
Status page.
3. Select a system and click Connections Status to open the Connections Status
page.
Summary section shows the count for connection types such as SIP, PPM and
Others. The information is categorized as follows:
• Active Connections
• Incoming
• Outgoing
• TCP
• TLS
4. Apply the required filters using Collect Filters section.
5. Under Connection List, click Collect Connections to display the list of connection
links.
6. Select a row and click Show check-box to view the detailed information about the
selected connection.
7. Click Return to return to the Security Module Status page.
Connections Status field descriptions
Summary section
This section shows counters for the number of incoming, outgoing, TCP and TLS
connections.
Collect Filters section
This section enables you to define a filter (FQDN or IP Address and mask) and accordingly
display the connection list based on the defined filters.
Configuring and monitoring Session Manager instances
432 Administering Avaya Aura ® Session Manager November 2010
Comments? infodev@avaya.com

Connection List section
This section shows basic information of all the active connections.
Name Description
Details Shows detailed information about the
selected connection link in the Connection
Details section.
Type Link type.
Local IP Local IP address.
Local Port Local SM100 port.
Remote IP Remote IP address.
Remote Port Remote port.
Remote FQDN Remote FQDN.
Transport Transport protocol (UDP, TCP, TLS).
Policy Security Policy.
Connection Details section
This section shows detailed information for the selected connection.
Name Description
Direction Link direction
Creation time Link creation time
Last message received Last message received time
Last message sent Last message sent time
Messages/Bytes Received Received message count, byte count
Messages/Bytes Transmitted Transmitted message count, byte count
Messages/Bytes Dropped Dropped message count, byte count
System Status
Administering Avaya Aura® Session Manager November 2010 433

Registration Summary
Registration Summary
This module enables you to view the registration status for all AST devices registered to the
selected Session Manager Instance. These AST devices are reloaded or rebooted based on
the following actions:
• Reset of endpoints
• Full reload of endpoints
• Partial reload of endpoints
• Failback of endpoints to the primary controller
Related topics:
Viewing Registration Summary on page 434
Rebooting of selected AST devices on page 435
Reloading of selected AST devices on page 435
Viewing Registration Summary
About this task
This module provides the ability to view the basic registration information for a particular
device.
Procedure
1. On the System Manager console, under Elements, click Session Manager.
2. Click System Status > Registration Summary to open Registration Summary
page. The Registration Summary page displays the list of registered devices per
Session Manager.
3. Click Refresh to retrieve the latest Device Summary results.
Related topics:
Registration Summary on page 434
Configuring and monitoring Session Manager instances
434 Administering Avaya Aura ® Session Manager November 2010
Comments? infodev@avaya.com

Rebooting of selected AST devices
Procedure
1. On the System Manager console, under Elements, click Session Manager.
2. Click System Status > Registration Summary to open Registration Summary
page. The Registration Summary page displays the list of registered devices.
3. Select the AST Device and click Reboot. The Confirm Reboot Notification page
appears.
4. On the Confirm Reboot Notification page, click Confirm.
5. After user confirmation, a status page appears showing the detailed information
regarding the current state of scheduled and running endpoint actions
Related topics:
Registration Summary on page 434
Reloading of selected AST devices
Procedure
1. On the System Manager console, under Elements, click Session Manager.
2. Click System Status > Registration Summary to open Registration Summary
page.
3. Click the rows to select the SIP AST devices and do one of the following:
a. Click Reload > Reload Complete to force complete reload of selected SIP AST
devices which includes maintenance data, configuration data, and a complete
data reload.
On the Confirm Reload Complete Notification page, click Confirm.
After user confirmation a status page appears showing the detailed information
regarding the current state of scheduled and running endpoint actions.
b. Click Reload > Reload Config to reload only configuration details of selected
SIP AST subscribed devices.
On the Confirm Reload Config Notification page, click Confirm.
After user confirmation a status page appears showing the detailed information
regarding the current state of scheduled and running endpoint actions.
c. Click Reload > Reload Contacts to reload only contact details of selected SIP
AST subscribed devices.
On the Confirm Reload Contacts Notification page, click Confirm.
System Status
Administering Avaya Aura® Session Manager November 2010 435

After user confirmation a status page appears showing the detailed information
regarding the current state of scheduled and running endpoint actions.
Related topics:
Registration Summary on page 434
Failback of selected AST devices
Procedure
1. On the System Manager console, under Elements, click Session Manager.
2. Click System Status > Registration Summary to open Registration Summary
page. The Registration Summary page displays the list of registered devices.
3. Click to select the AST Devices and click Failback. The Confirm Failback
Notification page appears.
4. On the Confirm Failback Notification page, click Confirm.
Result
This enables failback to the primary Session Manager.
Advanced Searching
Procedure
Click Advanced Search to view this section. You can find the Advanced Search link
at the at the upper-right corner of the page.
Name Description
Advanced Search
Criteria Displays the following three fields:
• Drop-down 1 - The list of criteria for the search.
• Drop-down 2 – The operators for evaluating the
expression. The operators displayed depends on the type
of criterion that you have selected in the first drop-down
field.
• Field 3 – The value for the search criterion.
Configuring and monitoring Session Manager instances
436 Administering Avaya Aura ® Session Manager November 2010
Comments? infodev@avaya.com

Registration Summary field descriptions
Button Description
Reboot Reboots selected AST devices.
Reload Complete Forces complete reload of selected AST
devices.
Reload Config Reloads only configurations of selected AST
devices.
Reload Contacts Reloads only contacts of selected AST
devices.
Failback Enable devices to failback to Primary
Session Manager.
Name Description
Session Manager Shows the name of the Session Manager
Instance.
Type Either as Session Manager (SM) or Branch
Session Manager (BSM).
Primary Registered Show the count of primary registrations for
this Session Manager.
Primary AST Show the count of primary registrations
which are “Active Controller” registrations for
this Session Manager.
Primary Admin Show the count of Communication Profiles
what are administered to this Session
Manager.
Secondary Registered Show the count of secondary registrations
for this Session Manager or for survivable
Branch Session Manager.
Secondary AST Failover Show the count of secondary registrations
which are “Active Controller” registrations for
this Session Manager or for survivable
Branch Session Manager.
Secondary Admin Show the count of Communication Profiles
what are administered to this Session
Manager or for survivable Branch Session
Manager.
System Status
Administering Avaya Aura® Session Manager November 2010 437

Name Description
Total Registered Show the total count of registrations for this
Session Manager or for Branch Session
Manager.
Total AST Show the total count of registrations which
are “Active Controller” registrations for this
Session Manager or for Branch Session
Manager.
Total Admin Show the total count of Communication
Profiles what are administered to this
Session Manager or for Branch Session
Manager.
User Registrations
User Registrations
This module sends notification to selected SIP AST devices and displays the summary of the
user registration status for the SIP AST Device based on the following actions:
• Reset of endpoints
• Full reload of endpoints
• Partial reload of endpoints
• Failback of endpoints to the primary controller
Viewing User Registrations
About this task
This module provides the ability to view the basic registration information for a particular user
(or groups of users).
Procedure
1. On the System Manager console, under Elements, click Session Manager.
2. Click System Status > User Registrations to open User Registrations page. The
User Registrations page displays the list of registered users.
3. Click the Show or Hide link under Details column to display or hide the details for
that registration in the Registration Detail section.
Configuring and monitoring Session Manager instances
438 Administering Avaya Aura ® Session Manager November 2010
Comments? infodev@avaya.com

4. Click Refresh to retrieve the latest user registration summary results.
Related topics:
User Registrations field descriptions on page 442
Customizing column display
About this task
This topic explains the customizing of column display of the User Registrations page by using
one of the following methods:
• Selecting which columns to appear in the table
• Ordering the appearance of the columns
• Resetting the column appearance to the default columns
Note:
The customization settings are valid for the current user session, that is, after the user logs
out, the customization settings revert back to the default appearance.
Procedure
1. On the System Manager console, under Elements, click Session Manager.
2. Click System Status > User Registrations to open User Registrations page.
3. Click Customize link to view this section.
4. Select columns under Available Columns and click the Move link to move the
selected columns to Display Columns list. Click Move All link to move all columns
to be displayed.
5. Click Remove and Remove All links to remove selected or all columns from
displayed columns.
6. To rearrange the selected columns under Display Columns, do the following-
a. Click the Top link to move the selected column to the top of the list.
b. Click the Up link to move the selected column one position up on the list.
c. Click the Down link to move the selected column one position down on the
list.
d. Click the Up link to move the selected column to the bottom of the list.
7. Click Default to restore the default settings.
8. Click Apply to save the changed settings.
9. Click Close to close the customization section.
System Status
Administering Avaya Aura® Session Manager November 2010 439

Rebooting of selected AST devices
Procedure
1. On the System Manager console, under Elements, click Session Manager.
2. Click System Status > User Registrations to open User Registrations page. The
User Registrations page displays the list of registered users.
3. Click to select the AST Devices and click Reboot. The Confirm Reboot Notification
page appears.
4. On the Confirm Reboot Notification page, click Confirm.
5. After user confirmation, a status page appears showing the detailed information
regarding the current state of scheduled and running endpoint actions
Related topics:
User Registrations field descriptions on page 442
Reloading of selected AST devices
Procedure
1. On the System Manager console, under Elements, click Session Manager.
2. Click System Status > User Registrations to open User Registrations page.
3. Click the rows to select the SIP AST Devices and do one of the following:
a. Click Reload > Reload Complete to force complete reload of selected SIP AST
Devices which includes maintenance data, configuration data, and a complete
data reload.
On the Confirm Reload Complete Notification page, click Confirm.
After user confirmation a status page appears showing the detailed information
regarding the current state of scheduled and running endpoint actions.
b. Click Reload > Reload Config to reload only configuration details of selected
SIP AST subscribed devices.
On the Confirm Reload Config Notification page, click Confirm.
After user confirmation a status page appears showing the detailed information
regarding the current state of scheduled and running endpoint actions.
c. Click Reload > Reload Contacts to reload only contact details of selected SIP
AST subscribed devices.
On the Confirm Reload Contacts Notification page, click Confirm.
Configuring and monitoring Session Manager instances
440 Administering Avaya Aura ® Session Manager November 2010
Comments? infodev@avaya.com

After user confirmation a status page appears showing the detailed information
regarding the current state of scheduled and running endpoint actions.
Related topics:
User Registrations field descriptions on page 442
Failback of selected AST devices
Procedure
1. On the System Manager console, under Elements, click Session Manager.
2. Click System Status > User Registrations to open User Registrations screen. The
User Registrations screen displays the list of registered users.
3. Click to select the AST Devices and click Failback. The Confirm Failback
Notification page appears.
4. On the Confirm Failback Notification page, click Confirm.
Result
This enables failback to the primary Session Manager.
Advanced Searching
Procedure
Click Advanced Search to view this section. You can find the Advanced Search link
at the at the upper-right corner of the page.
Name Description
Advanced Search
Criteria Displays the following three fields:
• Drop-down 1 - The list of criteria for the search.
• Drop-down 2 – The operators for evaluating the
expression. The operators displayed depends on the type
of criterion that you have selected in the first drop-down
field.
• Field 3 – The value for the search criterion.
System Status
Administering Avaya Aura® Session Manager November 2010 441

User Registrations field descriptions
Customize Column Display section
List Description
Available Columns Shows list of available columns.
Display Columns Shows list of selected columns.
Link Description
Customize Expands Customize Column Display
section.
Move Moves selected items from Available
Columns list to the Display Columns list.
Move All Moves all items from Available Columns list
to the Display Columns list.
Remove Removes selected items from the Display
Columns list.
Remove All Moves all items from the Display Columns
list.
Top Moves the selected items of Display
Columns list to the top of the list.
Up Moves the selected items of Display
Columns list to one position up in the list.
Down Moves the selected items of Display
Columns list to one position down in the
list.
Bottom Moves the selected items of Display
Columns list to the bottom of the list.
Button Description
Default Reverts back to the default column settings
of Available Columns and Display
Columns lists.
Apply Applies the changes made in the column
customizing lists to the AST Device
Notifications section.
Close Collapses Customize Column Display
section.
Configuring and monitoring Session Manager instances
442 Administering Avaya Aura ® Session Manager November 2010
Comments? infodev@avaya.com

AST Device Notifications: section
The label As of (time) indicates the time of the last update of information for the AST Device
Notifications section.
Button Description
Reboot Reboots selected AST devices.
Reload Complete Forces complete reload of selected AST
devices.
Reload Config Reloads only configurations of selected AST
devices.
Reload Contacts Reloads only contacts of selected AST
devices.
Failback Enable devices to failback to Primary
Session Manager.
Name Description
Details Shows the options for viewing the
Registration Detailed section.
Address Shows the SIP registration address.
Login Name Shows the administered user login name.
First Name Shows the administered first login name.
Last Name Shows the administered last login name.
Location Name of the home location as assigned to
the user in Session Manager
Communication Profile.
IP Address Indicates numeric IP address of the end
point.
AST Device Indicates as AST device.
Registered Prim Indicates as primary registration.
Registered Sec Indicates as secondary registration.
Registered Surv Indicates as survivable registration.
Registration Detailed section
Name Description
First Name Shows the administered first login name.
Last Name Shows the administered last login name.
Login Name Shows the administered user login name.
System Status
Administering Avaya Aura® Session Manager November 2010 443

Name Description
Registration Address The Communication Address/handle user
logged in with.
All Addresses All of the SIP Communication Addresses the
user has administered.
Primary SM Indicates administered primary Session
Manager in the user's Communication
Profile.
Secondary SM Indicates administered secondary Session
Manager in the user's Communication
Profile.
Survivable SM Indicates administered survivable Session
Manager in the user's Communication
Profile.
Active Controller Session Manager currently serving the
endpoint SIP signaling and event
subscriptions.
Registration Time Shows the initial or re-registration time.
Event Subscriptions Shows all subscriptions for the registered
endpoint.
IP Address Indicates numeric IP address of the end
point.
MAC Address MAC address of endpoint.
Device Vendor Device information from PPM.
Device Type Device information from PPM.
Device Model Device information from PPM.
Device Version Device information from PPM.
Related topics:
Viewing User Registrations on page 438
Rebooting of selected AST devices on page 440
Reloading of selected AST devices on page 440
Configuring and monitoring Session Manager instances
444 Administering Avaya Aura ® Session Manager November 2010
Comments? infodev@avaya.com
System Tools
Maintenance Tests
About Maintenance Tests
The Maintenance Tests page allows you to perform maintenance tests on the System Manager
server and administered Session Manager instances. These maintenance tests test
functionality of the System Manager and Session Manager servers. Tested functionality
includes data replication and network connectivity to Session Manager instances, database
functionality, the Secure Access Link (SAL) component, as well as the security module of each
Session Manager.
Maintenance Tests page field descriptions
Name Description
Select System Manager or Session
Manager to test: Select a System Manager or a Session
Manager from the pulldown list on which to
perform maintenance tests
Button Description
Execute Selected Tests Runs the selected maintenance tests on the
selected System Manager or Session
Manager
You can run the following maintenance tests
for a System Manager:
• Test connections for all Session Manager
instances
• Test replication to each Session Manager
local database
• Test sanity of Secure Access Link (SAL)
agent
• Test postgres database sanity
System Tools
Administering Avaya Aura® Session Manager November 2010 445

Button Description
You can run the following maintenance tests
for a Session Manager:
•Test replication to System Manager Status
• Test Call Processing status
• Test Service Hosts status
• Test Service Director Status
• Test Management Server
• Test sanity of Secure Access Link (SAL)
agent
• Test management link functionality
• Test Security Module Status
• Test postgres database sanity
Execute All Tests Runs all the maintenance tests on the
selected System Manager or Session
Manager. See the list of tests that can be
performed in the above row.
Related topics:
Test network connections to each Session Manager on page 446
Test data distribution and redundancy link on page 447
Test Call Processing status on page 447
Test Service Host status on page 447
Test Service Director Status on page 447
Test SIP A/S Management Server Status on page 447
Test sanity of Secure Access Link (SAL) agent on page 448
Test management link functionality on page 448
Test Security Module Status on page 448
Test Postgres database sanity on page 448
Running maintenance tests on page 448
Test network connections to each Session Manager
This test only runs on the System Manager. It tests the connectivity to each administered
Session Manager.
If connectivity is up for each Session Manager, the test passes. Otherwise, the test fails. Check
for the following possible causes:
Configuring and monitoring Session Manager instances
446 Administering Avaya Aura ® Session Manager November 2010
Comments? infodev@avaya.com

1. An upgrade or install is in progress.
2. The server could be down. Check the log, then check Log Event Codesfor the
appropriate troubleshooting action.
3. There is a network outage. Run a ping test between the System Manager and the
failing Session Manager to verify network connectivity.
Test data distribution and redundancy link
This test only runs on the Session Manager. It tests if the mechanism by which Session
Managers share data is functioning properly by sending a test string to each administered
Session Manager. The test string is saved by each Session Manager within its respective
database. After a short wait, each Session Manager is queried for the test string value.
A test failure indicates a potential failure of all link redundancy behaviors and Call Admission
Control.
The test is not run for a Session Manager if the current state of the Session Manager is set to
Deny New Service.
Test Call Processing status
This is a call processing sanity test for a specified Session Manager. If call processing is
working properly, the test passes. If the test fails, contact Avaya Technical Support.
Test Service Host status
This test determines the running status (up/down) of a specified Session Manager. The test
passes if the service host is up. The test fails if the service host has an invalid status.
If the test fails, run the statapp command and other corrective actions for associated alarms
on the Session Manager before escalating to Avaya Technical Support.
Test Service Director Status
This test checks the status of the SIP A/S Service Director using a connection to SIP A/S. This
test runs on a specified Session Manager. The test passes if the status of the service director
is valid.
If the test fails, run the statapp command and other corrective actions for associated alarms
on the Session Manager before escalating to Avaya Technical Support.
Test SIP A/S Management Server Status
This test runs on a specified Session Manager. It checks the status of the SIP A/S Management
Server using a connection to SIP A/S. The test passes if the status of the management server
is valid or a particular SIP A/S service is running.
If the test fails, run the statapp command and other corrective actions for associated alarms
on the Session Manager before escalating to Avaya Technical Support.
System Tools
Administering Avaya Aura® Session Manager November 2010 447

Test sanity of Secure Access Link (SAL) agent
This test can run on either System Manager or Session Manager. It checks if the Security
Access Link agent is running or not on the server. If the link is up and running, the test
passes.
If the test fails, run the statapp command and other corrective actions for associated alarms
on the Session Manager before escalating to Avaya Technical Support.
Test management link functionality
This test checks the administrative link to a Session Manager. If this test fails, administrative
changes will not take effect on Session Manager. Otherwise, the test passes.
Test Security Module Status
This test queries the basic status of the Security Module on a specified Session Manager. If
the query is successful, the test passes. Otherwise, it fails.
Test Postgres database sanity
This test runs on either System Manager or Session Manager. System Manager tests the sanity
of the master database. Session Manager tests the sanity of its local instance database.
If the test fails, contact Avaya Technical Support.
Running maintenance tests
About this task
The Maintenance Tests page allows you to run maintenance tests on the System Manager or
any administered Session Manager in the enterprise.
Procedure
1. On the System Manager console, under Elements, select Session Manager >
System Tools > Maintenance Tests.
2. Select System Manager or a Session Manager to test from the drop-down list.
3. To run all of the tests, select Execute All Tests.
4. To run only certain tests:
a. Select the test(s) to run from the test list.
b. Click on Execute Selected Tests.
Configuring and monitoring Session Manager instances
448 Administering Avaya Aura ® Session Manager November 2010
Comments? infodev@avaya.com

SIP Tracer Configuration
About Tracer Configuration
You can use the Tracer Configuration page to configure the tracing of SIP messages incoming
through the security module, SIP messages outgoing from the security module, and also
messages dropped by ASSET proxy or by the SIP firewall.
You can also filter these messages based on the user or the call. Session Manager logs all the
traced messages to a file based on the configuration.
Tracer Configuration page field descriptions
Tracer Configuration
Name Description
Tracer Enabled SIP message tracing is enabled by default.
Trace All Messages SIP message tracing is enabled for all SIP
messages. In this case, other fields get
disabled.
From Network to Security Module SIP message tracing is enabled for ingress
calls sent to the Session Manager instance
from the network.
From Security Module to Network SIP message tracing is enabled for egress
calls originating from the Session Manager
instance and sent to the network.
From Server to Security Module Local SIP messages originating from the
Session Manager.
From Security Module to Server Local SIP messages originating from the
security module.
Trace Dropped Messages SIP message tracing is enabled to trace
messages ffrom calls dropped by the SIP
firewall as well as by the SM100 proxy.
Max Dropped Message Count Shows the value for the maximum number of
traced dropped messages, if Dropped check
box is activated.
Send Trace to a Remote Server Enables or disables SIP Tracing to an
external host . This enables Session
Manager to send all the (decrypted) SIP
traffic out to an external host. Session
System Tools
Administering Avaya Aura® Session Manager November 2010 449

Name Description
Manager uses Syslog protocol for sending
the SIP traffic (as used currently for SIP
Tracing).
Remote Server FQDN or IP Address FQDN or IP address of the remote syslog
server.
Send Trace Method Method used to transfer syslogs either using
Stunnel (encrypted TCP) or Syslog
(unsecure UDP) as mentioned below:
•Syslog (unsecured UDP) — Traffic is send
without being encrypted to remote server
as specified in the “Remote Server FQDN
or IP Address” to default syslog port.
•Stunnel (encrypted TCP) — Traffic is send
as encrypted (using stunnel) to remote
server which is specified in the “Remote
Server FQDN or IP Address” to the port
specified in the input field ”Stunnel Port”.
Stunnel Port Port number that remote server's stunnel is
listening on. Stunnel provides several modes
for far end certificate validation.
User Filter
Button Description
New Create a new filter for filtering SIP messages
based on the users. You can define a
maximum of three user filters.
Delete Delete a selected user filter or filters.
Name Description
From Filter SIP messages based on the user from
whom the message is sent. Type the user
string.
For example, a rule to trace all messages
from user “pqr”:
to=”” from=”pqr” stop-count=50
To Filter SIP messages based on the user to
whom the message is sent. Type the user
string.
For example, a rule to trace all messages to
user “xyz”:
to=”xyz” from=”” stop-count=50
Configuring and monitoring Session Manager instances
450 Administering Avaya Aura ® Session Manager November 2010
Comments? infodev@avaya.com

Name Description
Source Filter SIP messages based on the source
address.
Destination Filter SIP messages based on the
destination address.
Max Message Count Value for maximum number of messages
matching the filter that Session Manager
should trace. Default is 25 messages.
Call Filter
Button Description
New Create a new filter for filtering all SIP
messages that start a new call. You can
define a maximum of three call filters.
Delete Delete a selected call filter or filters.
Name Description
From Filter SIP messages from a specific user. Call
tracing identifies a call by capturing the Call
ID from the first message that matches the
From filter, thereafter tracing all the
messages that have the matching call ID.
For example, a rule to trace all messages
related to a CALL from user “pqr”:
to=”” from=”pqr” request-uri=”” stop-
count=50
To Filter SIP messages based on the user to
whom the message is sent. Call tracing
identifies a call by capturing the Call ID from
the first message that matches the To filter,
thereafter tracing all the messages that have
the matching call ID.
For example, a rule to trace all messages
related to a CALL to user “xyz”:
to=”xyz” from=”” request-uri=”” stop-
count=50
Source Filter SIP messages based on the source
address.
Destination Filter SIP messages based on the
destination address.
Max Call Count Value for maximum number of messages
matching the filter that Session Manager
should trace. Default is 25 messages.
System Tools
Administering Avaya Aura® Session Manager November 2010 451

Name Description
Request URI Filter calls based on the called party (URI
address).
A valid Request URI format, for example,
is .@192.111.11.111.
Session Manager Instances
Name Description
Name Select one or more configured Session
Managers for which the specific filters should
be used.
Note:
If you select only one Session Manager
from this list, the Read button is activated.
Click this button to retrieve the current
Trace Configuration details for the
selected Session Manager and display
that within the Trace Configuration page.
After displaying the configuration, Session
Manager closes the display so that no
older configuration data is displayed.
Button Description
Commit Save the configuration changes.
SIP Trace Viewer
About SIP Tracing
The SIP tracer allows tracing of SIP messages exchanged between the Session Manager
server and remote SIP entities. SIP messages which are dropped by any of the SM100
components such as SIP Firewall are also logged by the SIP tracer. You can trace all the
messages belonging to a user, for a call, or for a selected Session Manager instance. The SIP
tracer provides statistics of SIP messages within the SM100 framework. SIP tracer is located
under Session Manager on the System Manager Common Console navigation pane. SIP
tracer user interface has the following components:
• Tracer Configuration defines the characteristics of messages to be traced for the
capturing engine in the security module.
• Trace Viewer displays the captured SIP messages.
Configuring and monitoring Session Manager instances
452 Administering Avaya Aura ® Session Manager November 2010
Comments? infodev@avaya.com
For details, refer to the section Tracing in Maintaining and Troubleshooting Avaya Aura®™
Session Manager (03-603325)
Trace Viewer page field descriptions
Use the From and To fields to specify a range of days or time as follows:
Filter
Name Description
From: Date Date from which you want to filter the trace
logs
From: Time Time from which you want to filter the trace
logs
From: Time Zone Time Zone for the From date that you want
to use for filtering trace logs
To: Date Date up to which you want to filter the trace
logs
To: Time Time up to which you want to filter the trace
logs
To: Time Zone Time Zone for the To date that you want to
use for filtering trace logs
Name Name of the Session Manager
Trace Viewer
Button Description
Dialog Filter Allows you to filter trace log entries. Select a
trace log and click Dialog Filter. This option
filters trace log entries and displays entries
for the same Call ID, From, and To fields as
the trace log that you select.
Note:
You can also click Filter: Enable to filter
log entries based on a value or to sort
them based on selected columns.
Cancel Cancels the filtering of the trace using Dialog
Filter and displays all trace log entries
Hide dropped messages Hides dropped messages from the trace log
entries
System Tools
Administering Avaya Aura® Session Manager November 2010 453

Button Description
Show dropped messages Displays dropped message in the trace log
entries
More Actions > Export Trace Viewer
Overview Creates a tabulator-separated plain text file
with all of the overview columns of the Trace
Viewer page. You can open this file with
editors such as Wordpad and Excel. The
More Actions button is active only if trace
records are listed. The retrieved Trace
Viewer list can be saved into a file at the client
side.
More Actions > Export Trace Viewer
Details Creates a plain text file with the details of the
Trace View records. The More Actions
button is active only if trace records are
listed. The retrieved Trace Viewer list can be
saved into a file at the client side.
Name Description
Details Click the Show arrow to see the complete
message.
Time Timestamp when the trace record was
written. This timestamp entry also displays
the date and time zone.
Tracing Entity Host name of the system where Security
Module logged the trace.
From URI from where the traced SIP message
originated.
Action Action of the traced SIP message such as
INVITE, ACK, or BYE. The SIP message
action is surrounded by an arrow to indicate
the direction of the action. For example, --
INVITE -> or <- BYE --. Dropped messages
have a leading DROPPED, for example, --
DROPPED ACK ->
To URI to which the traced SIP message was
sent.
Protocol Protocol that was used by the traced SIP
message such as TCP, UDP, or TLS.
Call ID Call ID of the traced SIP message
Button Description
Commit Generates the trace log output for the
selected Session Managers from the
Configuring and monitoring Session Manager instances
454 Administering Avaya Aura ® Session Manager November 2010
Comments? infodev@avaya.com
Button Description
Session Manager list for the selected date
range. This output displays the following
details:
Note:
Number of retrieved records shows the
number of records that matched the filter
criteria. If Session Manager displays
fewer records than this number, it means
that not all the matching records are
displayed. Usually this is done to avoid
problems caused by running out of
memory. In such cases, you can further
configure or refine the filter criteria in such
a way that all the log entries are
displayed.
Call Routing Test
About Call Routing Testing
Call routing tests are used to test routing of a SIP INVITE based on the current Session
Manager administration options that you select. You can use it to verify that you have
administered the Session Manager as intended before placing it into service, or to get feedback
on why a certain type of call is not being routed as expected. The testing of call routing using
Session Manager does not send any “real” SIP messages. It invokes call processing in the
debug mode to test routing.
Call Routing Test page field descriptions
Name Description
Calling Party URI The SIP URI of the calling party. You must
specify a handle and a domain, for example,
5552000@domain.com. You can also
specify a full URI such as sip:
5555555@domain.com:
5060;sometag=3;othertag=4. You can also
copy a URI recorded in a SIP trace and use
it.
Calling Party Address The IP address or host name from which the
INVITE is received. For routing, this is the IP
System Tools
Administering Avaya Aura® Session Manager November 2010 455
Name Description
address of a SIP Entity. You can enter any IP
address that you require, but make sure that
it is recognized by Session Manager. If it is
not, Session Manager considers it to have
come from a non-trusted host and rejects it.
Called Party URI The SIP URI of the called party. You must
specify a handle and a domain, for example,
sip:5551000@companydomain.com. You
can also specify a full URI such as sip:
5555555@domain.com:
5060;sometag=3;othertag=4. You can also
copy a URI recorded in a SIP trace and use
it.
Session Manager Listen Port The port on which the called Session
Manager Instance receives the INVITE.
Day of Week Day of the week. This is used for testing time
of the day routing.
Time (UTC) Time. This is used for testing time of the day
based routing.
Transport Protocol Protocol used for transportation of the call.
This is used in testing the routing based on
entity links.
Called Session Manager Instance The Session Manager instance that receives
the INVITE sent for testing routing. This is
used in testing the routing based on entity
links.
Note:
These are only core Session Manager
instances.
Button Description
Execute Test Carries out the routing test based on the
parameters that you provide.
The Routing Decisions box displays the
result of the routing test. This result displays
one line per destination choice. For a
destination that has alternate routing choices
available, the result displays one line per
alternate routing choice and the lines are in
the same order that the test attempted the
destinations.
Configuring and monitoring Session Manager instances
456 Administering Avaya Aura ® Session Manager November 2010
Comments? infodev@avaya.com

Button Description
Each line displays not only where the INVITE
would be routed, but also what the adapted
digits and domain would be.
The Routing Decision Process box contains
details about how Session Manager made
the routing decisions. This gives you a tool to
check your routing algorithms.
System Tools
Administering Avaya Aura® Session Manager November 2010 457


Chapter 7: Managing events
Managing alarms
Alarming
The Alarming service provides an interface for monitoring alarms generated by System
Manager and other components. You can:
• View an alarm.
• Change the status of an alarm.
• Export alarms to a Comma Separated Values (.csv) file through the Alarming service.
System Manager generates alarms to notify users of system events. Alarms are classified by
their effect on system operation and they identify the system component which generated the
alarm. You can configure System Manager to forward alarms to Avaya Services. You can also
configure alarms to send SNMP traps to a customer Network Management System (NMS).
Viewing alarms
Procedure
1. On the System Manager console, under Services, click Events.
2. Click Alarms in the left navigation pane.
3. On the Alarming page, select an alarm from the Alarm List. You can select multiple
alarms.
4. Click View.
Result
The Alarm - View Alarm Detail page displays the alarm details.
Administering Avaya Aura® Session Manager November 2010 459

Changing status of an alarm
The status of an alarm can be:
•Acknowledged: Maintenance support must manually set the alarm to this state,
indicating the alarm is under investigation.
•Cleared: Maintenance support must manually set the alarm to this state, indicating that
the error condition has been resolved.
Procedure
1. On the System Manager console, under Services, click Events.
2. Click Alarms in the left navigation pane.
3. On the Alarming page, select an alarm and click Change Status.
You can select multiple alarms.
4. Click on the status that you want to apply to the selected alarms.
Exporting alarms
Alarms can be exported to a Comma Separated Values (.csv) file. You can open the CSV file
using a text editor such as Wordpad or a spreadsheet application such as Microsoft Excel.
Procedure
1. On the System Manager console, under Services, click Events.
2. Click Alarms in the left navigation pane.
3. On the Alarming page, perform one of the following steps:
• To export an alarm to a CSV file, select an alarm and click More Actions >
Export Selected.
• To export all the alarms to a CSV file, click More Actions > Export All.
4. Click Save to save the exported file to the local disk.
Filtering alarms
The criteria for filtering the alarms are Severity, Status, Host Name, Message, Identifier, and
M/E Ref Number. You can use more than one filter criterion on the selected alarms.
Managing events
460 Administering Avaya Aura ® Session Manager November 2010
Comments? infodev@avaya.com

Procedure
1. On the System Manager console, under Services, click Events.
2. On the Alarming page, select the alarms you want to filter.
3. Click Filter: Enable at the top right corner of the Alarm List table.
4. Select the filter criteria you want to apply to the selected alarms.
The Status and Severity fields have drop-down menus.
You can enter the alarm code in the Message field to find all alarms which contain
a particular alarm code.
5. Click Filter: Apply.
Note:
A message will be displayed if no records are found which match the specified filter
criteria.
Result
The page displays the alarms matching the filter criteria.
Searching for alarms
Use the Advanced Search function to find alarms based on certain specified conditions. The
system displays only those alarms which satisfy the search conditions. Multiple search
conditions can be specified.
Procedure
1. On the System Manager console, under Services, click Events.
2. On the Alarming page, click Advanced Search.
3. In the Criteria section, from the first and second drop-down fields, select the search
criterion and the operator.
The default value in the first drop-down field is Time Stamp.
4. Select or enter the search value in the third field.
5. If you want to add another search condition, click + and do the following:
a. Select the AND or OR operator from the drop-down field.
b. Repeat steps 3 and 4.
Click - to delete a search condition. You can delete a search condition only if you
have added more than one search condition.
Managing alarms
Administering Avaya Aura® Session Manager November 2010 461

6. Click Search to find alarms for the given search conditions.
Alarming field descriptions
The Alarming page displays a list of alarms. Use this page to view the alarms in the Auto-
Refresh mode. In this mode, the page updates the alarm information automatically.
Field Description
Time Stamp Specifies the date and time when the alarm
is generated.
Severity Specifies the severity of the alarm.
Status Specifies the current status of the alarms.
Host Name Specifies the name of the host computer that
generated the alarm.
Message A short description of the problem that
generated the alarm.
Identifier Specifies the unique identifier for an alarm.
M/E Ref Number Specifies the unique identification number
assigned to the product, also called the
product ID. This number helps in identifying
the component that generated the alarm.
Button Description
Alarm landing Page Changes the mode from Auto-Refresh to
Manual refresh and displays the Alarming
home page. This is a toggle button.
Alarming field descriptions
The Alarming home page has two sections— upper and lower. The upper section has buttons
that you can use to view the details of the selected alarms, change the status of alarms, search
for alarms , and set filters to view specific alarms. The lower section displays alarms in a table.
The table provides information about the status of the alarms along with their severity. You can
click a column title to sort the information in the table in ascending or descending order.
Field Description
Time Stamp Specifies the date and time when the alarm
is generated.
Managing events
462 Administering Avaya Aura ® Session Manager November 2010
Comments? infodev@avaya.com

Field Description
Severity Specifies the severity of the alarm.
Status Specifies the current status of the alarms.
Host Name / SysName Specifies the name of the host server that
generated the alarm.
In case of trap listener, this column specifies
the system name.
Source IP Address Specifies the IP address of the system that
generated the alarm.
Message A short description of the problem that
generated the alarm.
M/E Ref Number / SysOID Specifies the unique identification number
assigned to the product, also called the
product ID. This number helps in identifying
the component that generated the alarm.
For alarms that are generated from trap
listener, the system displays the System
OID.
Identifier Specifies the unique identifier for an alarm.
Event ID Specifies the log event ID if the alarm is
generated from logs, or the Event OID if the
alarm is generated from the trap listener
service.
Button Description
View Displays the details of the selected alarms.
Change Status Changes the status of the selected alarm.
The options are:
•Acknowledged
•Cleared
Auto-Refresh Mode Changes over to the Auto-Refresh mode.
When the Alarming page is set in this mode,
it automatically updates the alarms in the
table. This is a toggle button.
More Actions > Export Selected Exports the selected alarms to a CSV file,
which can be viewed with Wordpad or
Excel.
More Actions > Export All Exports all the alarms to a CSV file, which
can be viewed with Wordpad or Excel.
Advanced Search Displays fields that you can use to specify the
search criteria for searching an alarm.
Managing alarms
Administering Avaya Aura® Session Manager November 2010 463

Button Description
Refresh Refreshes the log information in the table.
Filter: Enable Displays fields under select columns that you
can use to set filter criteria. This is a toggle
button.
Filter: Disable Hides the column filter fields without
resetting the filter criteria. This is a toggle
button.
Filter: Clear Clears the filter criteria.
Filter: Apply Filters alarms based on the filter criteria.
All Selects all the alarms in the table.
None Clears the check box selections.
Previous Displays the logs in the previous page. This
button is not available if you are on the first
page.
Next Displays the logs in the next page. This
button is not available if you are on the last
page.
Criteria section
This section appears when you click Advanced Search on the upper right corner of page.
Name Description
Criteria Use this section to specify search conditions.
Select the search criteria from the first drop-
down list. Select the operator from the
second drop-down field. Enter the search
value in the text field.
Select following search criteria from the first
drop-down list:
• Time Stamp: Searches all of the alarms
that match the specified date and time. The
valid format for entering the date is MM/
DD/YYYY. The valid format for entering the
time is HH:MM.
• Severity: Searches all of the alarms that
match the specified severity level.
• Status: Searches all of the alarms that
match the specified status.
•Host Name: Searches all of the alarms that
are generated from the specified host.
Managing events
464 Administering Avaya Aura ® Session Manager November 2010
Comments? infodev@avaya.com
Name Description
• Identifier: Searches all of the alarms that
match the specified identifier.
• Message: Searches all of the alarms that
match the specified message.
• M/E Ref Number: Searches all of the
alarms that match the specified M/E Ref
Number.
The operators available are based on the
search criterion that you select in the first
drop-down field. The following table list the
operators that are available for a search
criterion:
Criteri
on Operators
Time
Stamp =, >, <, >=, <=, >=, !=
Severit
yEquals, Not Equals
Status Equals, Not Equals
Host
Name Equals, Not Equals, Starts
With, Ends With, and
Contains
Identifi
er =, >, <, >=, <=, >=, !=
Messa
ge Equals, Not Equals, Starts
With, Ends With, and
Contains
M/E
Ref
Numb
er
Equals, Not Equals, Starts
With, Ends With, and
Contains
When you select Begin Date and End Date
from the first drop-down list, you are
prompted to enter the date in the third field.
Button Description
Clear Clears the entered search criteria and sets
the default search criteria.
Managing alarms
Administering Avaya Aura® Session Manager November 2010 465
Button Description
Search Searches the alarms based on the search
conditions.
Close/Advanced Search Hides the search fields.
+Adds a search condition.
-Deletes a search condition.
Managing logs
Logging
The logging service provides an interface for viewing logs and their details generated by
System Manager or other components. The System Manager console allows you to monitor
log messages. The log viewer displays a list of logs. You can view details of each log, perform
a search for logs, and filter specific logs. Log detail includes information about the event which
generated the log, the severity level of the log, and other relevant information. You can search
logs based on search conditions and set filters to view logs that match the filter criteria. Log
viewer displays only logs that are of type Audit.
Log Types
Following are some of the log types that you may come across when viewing logs on the
System Manager console. You can view the stations specific logs in the/var/log/Avaya/
mgmt/iptcm directory.
Security
Security loggers gather security logs.
Audit
Audit loggers gather audit logs.
Operation
Operational loggers gather operational logs.
Debug
Debug loggers collect debug information to troubleshoot issues at the customer site. These
loggers have been categorized based on the Communication System Management
components.
Managing events
466 Administering Avaya Aura ® Session Manager November 2010
Comments? infodev@avaya.com

Debug.Station
Debug Station loggers gather debug information for station management related operations.
Debug.Template
Template Debug loggers gather debug information for template management related
operations.
Debug.CM
CM debug loggers gather debug information for communication between Communication
Manager and the Communication System Management server.
Debug.NCM
NCM debug logger gathers debug information related to Element Cut Through.
Debug.Synch
Synch debug logger gathers debug information for synchronization operations.
Debug.Model
Model debug logger gathers debug information for database operations.
Debug
Debug logger gathers debug information other than that gathered for the debug types
mentioned above.
Viewing log details
Procedure
1. On the System Manager console, under Services, click Events.
2. Click Logs > Log Viewer in the left navigation pane.
3. On the Logging page, select a log.
4. Click View.
Searching for logs
Use the advanced search function to find logs based on certain specified conditions. The
system displays only those logs which satisfy the search conditions. You can specify multiple
search conditions.
Procedure
1. On the System Manager console, under Services, click Events.
Managing logs
Administering Avaya Aura® Session Manager November 2010 467

2. Click Logs > Log Viewer in the left navigation pane.
3. On the Logging page, click Advanced Search.
4. In the Criteria section, from the first and second drop-down fields, select the search
criterion and the operator.
5. Select or enter the search value in the third field.
6. If you want to add another search condition, click + and repeat the steps 4 through
6.
Click - to delete a search condition. You can delete a search condition only if you
have more than one search condition.
7. Select the AND or OR operator from the drop-down field.
This page displays this drop-down field when you specify more than one search
condition.
8. Click Search to find the logs for the given search conditions.
Filtering logs
You can filter and view logs that meet the specified filter criteria. To apply the filters, you need
to specify the filter criteria in the fields provided under select columns in the table displaying
the logs. The column titles are the filter criteria. You can filter logs on multiple filter criteria.
Procedure
1. On the System Manager console, under Services, click Events.
2. Click Logs > Log Viewer in the left navigation pane.
3. On the Logging page, click Filter: Enable.
You can find this button on the top right corner in the table displaying logs.
4. Enter or select the filter criteria.
5. Click Filter: Apply.
Note:
If no records matching the filter criteria are found, the Management Console
application displays a message that no records matching the search criteria are
found.
The page displays the logs that matches the specified filter criteria.
Managing events
468 Administering Avaya Aura ® Session Manager November 2010
Comments? infodev@avaya.com
Logging field descriptions
The Logging page has two sections. The upper section contains buttons that allow you to view
the details of the selected logs, search for logs, and set filters. The lower section displays logs
in a table. The table provides information about the logs. You can click the title of the column
to sort the data of the column in ascending or descending order.
Name Description
Select check box Use this check box to select a log.
Log ID Unique identification number that identifies
the log.
Time Stamp Date and time of the log generation.
Host Name Name of the system from which the log is
generated.
Product Type A code which uniquely identifies the
component which generated the log. For
example, product, device, application,
service and so on. GW600, which is a
product type code identifier is an example of
the log product type.
Severity Severity level of the log. The following are the
type of severities:
• Emergency : System is unusable
• Alert : Action must be taken immediately
• Critical : Critical conditions
• Error : Error conditions
• Warning : Warning conditions
• Notice: Normal but significant condition
• Informational : Informational messages
• Debug: Debug-level messages
Note:
The colors of severities do not indicate
logging severities.
Event ID Unique identification number assigned to the
event that has generated the log.
Message Brief description about the log. The message
is generated based on the severity level of
Managing logs
Administering Avaya Aura® Session Manager November 2010 469

Name Description
the log. For a log with severity level debug,
the message contains information about
debugging an error.
Process Name Process on the device that has generated the
message. This is usually the process name
and process ID.
Facility The operating system, processes, and
applications quantify messages into one of
the several categories. These categories
generally consist of the facility that generated
them, along with the severity of the message.
The following are the types of supported
facilities:
• User-Level Messages
• Security/authorization
• Log Audit
Button Description
View Opens the Log - View Log Detail page. Use
this page to view the details of a selected
log.
Auto-Refresh Mode Switches to the Auto-Refresh mode. When
the Logging page is set in this mode, it
automatically updates the logs in the table.
This is a toggle button.
Advanced Search Displays fields that you can use to specify the
search criteria for searching a log.
Refresh Refreshes the log information in the table.
Filter: Enable Displays fields under select columns that you
can use to set filter criteria. This is a toggle
button.
Filter: Disable Hides the column filter fields without
resetting the filter criteria. This is a toggle
button.
Filter: Clear Clears the filter criteria.
Filter: Apply Filters logs based on the filter criteria.
Select: All Selects all the logs in the table.
Select: None Clears the selections.
Managing events
470 Administering Avaya Aura ® Session Manager November 2010
Comments? infodev@avaya.com

Button Description
Previous Displays logs in the previous page. This
button is not available if you are on the first
page.
Next Displays logs in the next page. This button is
not available if you are on the last page.
Criteria section
This section appears when you click Advanced Search on the top right corner.
Name Description
Criteria Use this section to specify search conditions.
Select the search criteria from the first drop-
down field. Select the operator from the
second drop-down field. Enter the search
value in the text field.
Select following search criteria from the first
drop-down field:
• Log ID: The unique identification number
assigned to the log.
•Host Name: Name of the system for which
log is generated.
• Product type: A code which uniquely
identifies the component which generated
the log. For example, product, device,
application, service, and so on.
• Severity: Severity level of the log.
• Message: Brief description about the log.
• Event ID: Unique identification number
assigned to the event.
•Process Name: Process on the device that
has generated the message
• Time Stamp: Date and time of the log
generation.
• Facility: The operating systems,
processes, and applications quantify
messages into one of several categories.
These categories generally consist of the
facility that generated them, along with the
severity of the message.
The second drop-down field displays
operators. Based on the search criterion that
you select in the first drop-down field, only
those operators that are applicable for the
Managing logs
Administering Avaya Aura® Session Manager November 2010 471
Name Description
selected criterion are displayed in the second
drop-down field. The following are the list of
operators:
• Equals
• Not Equals
• Starts With
• Ends With
• Contains
The operators for Time Stamp are: =, >, <,
>=, <=, and !=.
When you select Time Stamp from the first
drop-down field, the page provides date and
time fields for entering the date and time in
the respective fields. Enter the date in MM/
DD/YYYY format . You can select the date
from the calender. You need to enter the time
in one of the following format:
• 24Hr
• AM
• PM
Button Description
Clear Clears the search criterion and set it to the
default search criteria.
Search Searches the logs based on the search
conditions.
Close/Advanced Search Hides the search fields.
+Adds a search condition.
-Deletes a search condition
Logging field descriptions
Use this page to view logs in the Auto-Refresh mode. In this mode, the page updates the log
information automatically.
Managing events
472 Administering Avaya Aura ® Session Manager November 2010
Comments? infodev@avaya.com

Name Description
Log ID Unique identification number that identifies
the log.
Time Stamp Date and time of the log generation.
Host Name Name of the system from which the log is
generated.
Product Type A code which uniquely identifies the
component which generated the log. For
example, product, device, application,
service and so on. GW600, which is a
product type code identifier is an example of
the log product type.
Severity Severity level of the log. The following are the
type of severities:
• Emergency : System is unusable
• Alert : Action must be taken immediately
• Critical : Critical conditions
• Error : Error conditions
• Warning : Warning conditions
• Notice: Normal but significant condition
• Informational : Informational messages
• Debug: Debug-level messages
Note:
The colors of severities do not indicate
logging severities.
Event ID Unique identification number assigned to the
event that has generated the log.
Message Brief description about the log. The message
is generated based on the severity level of
the log. For a log with severity level debug,
the message contains information about
debugging an error.
Process Name Process on the device that has generated the
message. This is usually the process name
and process ID.
Facility The operating system, processes, and
applications quantify messages into one of
the several categories. These categories
generally consist of the facility that generated
Managing logs
Administering Avaya Aura® Session Manager November 2010 473

Name Description
them, along with the severity of the message.
The following are the types of supported
facilities:
• User-Level Messages
• Security/authorization
• Log Audit
Button Description
Logging Landing Page Switches the mode from Auto-Refresh to
manual refresh and displays the Logging
Home page. This is a toggle button.
Managing events
474 Administering Avaya Aura ® Session Manager November 2010
Comments? infodev@avaya.com

Chapter 8: Managing system data
Administering backup and restore
Backup and Restore
The backup and restore functions are executed through System Manager. With these
functions, you can back up and restore configuration data for System Manager and all of the
Session Manager instances. All of the configuration data for the entire system is kept centrally
on System Manager. This means that individual backups of the Session Manager instances
are not needed. After a restore operation, the restored configuration data is automatically
propagated to the Session Manager instances.
Associated actions include configuring data retention rules for specifying how long the backup
files should remain on the system, and modifying logger and appender information.
Creating a data backup on a local server
Procedure
1. On the System Manager console, under Services, click Backup and Restore.
2. On the Backup and Restore page, click Backup.
3. On the Backup page, click Local.
4. In the File name field, enter the file path and the name of the backup file that you
want to create.
5. Click Now.
If the backup is successful, the Backup and Restore page displays this message:
Backup created successfully!!
Administering Avaya Aura® Session Manager November 2010 475

Scheduling a data backup on a local server
Procedure
1. On the System Manager console, under Services, click Backup and Restore.
2. On the Backup and Restore page, click Backup.
3. On the Backup page, Click Local option.
4. In the File name field, enter the name of the backup file that you want to create.
5. Click Schedule.
6. Click Commit.
Restoring a data backup from a local server
Procedure
1. On the System Manager console, under Services, click Backup and Restore.
2. On the Backup and Restore page, click Restore.
3. On the Restore page, click Local.
4. In the File name field, type the file name that you want to restore.
5. Click Restore.
6. On the Restore Confirmation page, click Continue.
After the backup data is successfully restored, the system logs you out of the
System Manager console.
Viewing data retention rules
Procedure
1. On the System Manager console, under Services, click Configurations.
2. Click Data Retention in the left navigation pane.
The system displays the Data Retention page with the Rule list.
Managing system data
476 Administering Avaya Aura ® Session Manager November 2010
Comments? infodev@avaya.com

Modifying data retention rules
Procedure
1. On the System Manager console, under Services, click Configurations.
2. Click Data Retention in the left navigation pane.
The system displays the Data Retention page with the Rule list.
3. Select a rule from the Rule list.
4. Click Edit.
5. Modify the value in the Retention Interval (Days) field.
6. Click Update to save the value.
Accessing the Data Retention Rules service
Procedure
1. On the System Manager console, under Services, click Configurations.
2. Click Data Retention in the left navigation pane.
The system displays the Data Retention page with the Rule list.
Result
The system displays the Data Retention page.
Viewing loggers for a log file
Procedure
1. On the System Manager console, under Events, click Logs.
2. Click Log Settings in the left navigation pane.
3. On the Logging Configuration page, click a log file from the Select Log File field.
You can view the loggers in the Logger List.
Administering backup and restore
Administering Avaya Aura® Session Manager November 2010 477

Assigning an appender to a logger
About this task
The appender where logger logs the log messages.
Procedure
1. On the System Manager console, under Events, click Logs.
2. Click Log Settings in the left navigation pane.
3. On the Log Settings page, select a log file from the Select Log File field.
4. Click a logger in the Logger List section.
5. Click Edit.
6. On the Edit logger page, click Attach in the Attached Appenders section.
7. On the Attach Appender page, click an appender in the Select Appender field.
8. Click Commit.
The appender is added to the selected logger and you can view the appender on
the Log Settings page.
Editing a logger in a log file
About this task
You can set log levels for loggers which define as to what level of logging the logger logs.
Procedure
1. On the System Manager console, under Events, click Logs.
2. Click Log Settings in the left navigation pane.
3. On the Log Settings page, select a log file from the Select Log File field.
4. Click a logger in the Logger List section.
5. Click Edit .
6. On the Edit logger page, in the Log Level field select a log level.
7. Click Commit .
The log level is set for the selected logger.
Managing system data
478 Administering Avaya Aura ® Session Manager November 2010
Comments? infodev@avaya.com

Modifying an appender
Procedure
1. On the System Manager console, under Events, click Logs.
2. Click Log Settings in the left navigation pane.
3. On the Logging Configuration page, click a log file from the Select Log File field.
4. Click a logger in the Logger List section.
5. Click Edit.
6. On the Edit logger page, click an appender in the Attached Appenderssection.
7. Click Edit.
8. On the Edit Appender page modify the appender information.
You can modify information in the Threshold Log Level, Max File Size, File
Path, and Number Of Backup Files fields
9. Click Commit.
Removing an appender from a logger
Procedure
1. On the System Manager console, under Events, click Logs.
2. Click Log Settings in the left navigation pane.
3. On the Log Settings page, click a log file from the Select Log File field.
4. Click a logger in the Logger List section.
5. Click Edit.
6. On the Edit logger page, click an appender in the Attached Appenders section.
7. Click Detach.
Backup and Restore field descriptions
Use this page to view the details of backup files.
Administering backup and restore
Administering Avaya Aura® Session Manager November 2010 479

Name Description
File Name Specifies the name of the backup file.
Path Specifies the path of the backup file.
Status Indicates the status of the backup. The
values are:
• SUCCESS
• FAILED
Backup Time Specifies the time of backup.
Backup Mode The mode defines whether the backup is
manual or automatic.
Backup Type The type defines whether the backup is a
local or remote backup.
User The user who has performed the backup.
Button Description
Backup Opens the Backup page. Use this page to
back up data on a specified local or remote
location.
Restore Opens the Restore page. Use this page to
restore data to a specified local or remote
location.
Backup field descriptions
Use this page to backup the System Manager data on a local or a remote location. You can
also use this page to schedule a backup job.
Name Description
Type Specifies the type of computer on which you
want to back up the application data. The
options are:
•Local: The data is backed up on a local
computer.
•Remote: The data is backed up on a
remote computer.
The page displays the following fields when you choose to create a backup of System Manager
data on a local computer.
Managing system data
480 Administering Avaya Aura ® Session Manager November 2010
Comments? infodev@avaya.com
Name Description
File Name Specifies the name of the file that identifies
the backup. If you specify only the file name,
System Manager creates a backup file in the
home directory of the specified user. If you
want to create the backup file in a directory
other than the home directory, specify a
complete path including the file name.
The page displays the following fields when you choose to create a backup of System Manager
data on a remote computer.
Name Description
Remote Server IP Specifies the IP address of the remote
server.
Remote Server Port Specifies the port of the remote server.
User Name Specifies the user name for logging into the
remote server.
Password Password for logging on to the remote
server.
File Name Specifies the path and name of the backup
file.
Use Default Select this check box to use the default
configured values.
Button Description
Now Backs up the data to the specified location
immediately.
Schedule Opens the Schedule Backup page. Use this
page to schedule a back up.
Cancel Closes the Backup page and takes you back
to the Backup and Restore page.
Schedule Backup field descriptions
Use this page to schedule a job for backing up data by specifying the date and time of running
the job.
Administering backup and restore
Administering Avaya Aura® Session Manager November 2010 481

Job Details
Name Description
Job Name Specifies the name of the job.
Job Frequency
Name Description
Task Time Specifies the date and time of running the
job.
Recurrence The settings define whether the execution of
the jobs is a recurring activity or a one time
activity. In case of a recurring job, the field
also displays the time interval of recurrence.
The options are:
• Execute task one time only.
• Task are repeated.
Range The settings define the number of
recurrences or date after which the job stops
to recur. The options are:
• No End Date
• End After occurrences
• End By Date
Button Description
Commit Schedules the backup job.
Cancel Closes the Schedule Backup page and takes
you back to the Backup Restore page.
Restore field descriptions
Use this page to restore application data from a local or a remote location.
Managing system data
482 Administering Avaya Aura ® Session Manager November 2010
Comments? infodev@avaya.com
Name Description
Type Specifies the type of computer from which
you want to restore the application data. The
options are:
•Local: The data is restored from a local
machine.
•Remote: The data is restored from a
remote machine.
The page displays the following fields, when you select Local as Type.
Name Description
File Name Specifies the name of the backup file that you
want to restore.
Select File Name Lists the name of the backup file that you
want to restore.
The page displays the following fields, when you select Remote as Type.
Name Description
Remote Server IP Specifies the IP address of the SCP server.
Remote Server Port Specifies the port of the SCP server.
User Name Specifies the user name for logging in to the
SCP server.
Password Password for logging in to the SCP server.
File Name Specifies the name of the backup file that you
want to restore.
Use Default Select this check box to use the default
configured values.
Button Description
Restore Restores the data from the specified backup
file.
Cancel Closes the Restore page and takes you back
to the Backup and Restore page.
Data Retention field descriptions
Use this page to view and edit data retention rules.
Administering backup and restore
Administering Avaya Aura® Session Manager November 2010 483
Name Description
Option button Provides the option to select a data retention
rule.
Rule Name Specifies the name of the rule.
Rule Description A brief description about the data retention
rule.
Retention Interval (Days) Specifies the number of days the data is
retained.
Button Description
Edit Modifies the selected rule.
Update Updates the rule with changes made to the
rule.
Cancel Cancels the editing operation.
Apply Applies the selected rule.
Logging Settings field descriptions
Use this page to view and edit loggers defined in a log file.
Log Configuration
Name Description
Select Log File The field lists the log files that you can
configure.
Logger List
Name Description
Logger The loggers in the selected log files.
Log level Log level defines as to what level of logging
is set for the corresponding logger.
Attached Appenders > Name Name of the appender.
Attached Appenders > File Path The path of the file to which the appender
logs the information.
Attached Appenders >Facility The process running on the machine that
created the log message.
Managing system data
484 Administering Avaya Aura ® Session Manager November 2010
Comments? infodev@avaya.com
Name Description
Attached Appenders > host The name of the syslog host where the log
output is stored.
Show All Provides you an option to select the
maximum number of logger records that you
can view at a time.
Button Description
Edit Opens the Edit Logger page that you can use
to edit loggers.
Edit Logger field descriptions
Use this page to edit logger and appender information. You can also add and remove
appenders from the loggers.
Logger
Name Description
Logger The name of the logger.
Log level The level of logging for which the logger logs
the information.
Attached Appender
Name Description
Appender The name of the appender.
Threshold Log Level The threshold log level set for the appender.
Appender logs only information of log type
that is set in the threshold log level .
File Path The path of the file where the appender logs
the information.
Max File Size The maximum size in KB, MB, and GB
reserved for the appender file.
# Backup Files The number of log files that an appender can
use to store log information if one log file
becomes full. If all the backup files are full,
the appender overwrites the previous
backup files in the order the files are
created.
Administering backup and restore
Administering Avaya Aura® Session Manager November 2010 485
Name Description
Facility The process running on the machine for
which log messages are created.
Host The name of the syslog host that stores the
log output.
Header The header part of the syslog packet. The
header part contains timestamp and host
name information.
Facility Printing The printed message includes the facility
name of the application.
Button Description
Edit Opens the Edit Appender page. Use this
page to modify the appender information.
Attach Opens the Attach Appender page. Use this
page to add an appender to the logger.
Detach Removes the selected appender from the
logger.
Commit Saves the changes in the logger information
to the database.
Cancel Closes the Edit Logger page and takes you
back to the Logging Configuration page.
Edit Appender field descriptions
Use this page to edit information of an appender.
Name Description
Logger The name of the logger.
Note:
You can only view this information.
Appender The name of the appender.
Note:
You can only view this information.
Threshold Log Level The threshold log level set for the appender.
Appender logs only information of log type
that is set in the threshold log level .
Managing system data
486 Administering Avaya Aura ® Session Manager November 2010
Comments? infodev@avaya.com

Name Description
File Path The path of the file where the appender logs
the information.
Max File Size The maximum KB, MB, and GB reserved for
the appender file.
# Backup Files The number of log files that an appender can
use to store log information if one log file
becomes full. If all the backup files are full,
the appender overwrites the previous
backup files in the order the files are
created.
Button Description
Commit Saves the changes to the database.
Cancel Closes Edit Appender page and takes you
back to the Edit Logger page.
Attach Appender field descriptions
Use this page to assign an appender to the logger.
Name Description
Logger The name of the logger.
Log Level The level of logging for which the logger logs
the information.
Select Appender The list of appenders that you can assign to
the logger.
Button Description
Commit Assigns the appender to the logger.
Cancel Closes the Attach Appender page and
takes you back to the Edit Logger page.
Administering backup and restore
Administering Avaya Aura® Session Manager November 2010 487

Data Replication Service
Data Replication Service
The Data Replication Service replicates data from the master database residing on the
server.
The Data Replication Service supports the following two modes of replication:
•Replication in Repair mode: In repair mode, the Data Replication Service replicates all of
the requested data from the master database to the database of the replica node. Repair
should only be necessary if there is a post-install failure of the Data Replication
Service.
• Automatic synchronization mode: After the database of the replica node is loaded with
the requested data, the subsequent synchronizations of the master database and the
replica database occur automatically. The Data Replication service replicates only the
data that has been updated since the last replication. Automatic synchronization is a
scheduled activity and occurs after each fixed interval of time as set in the configuration
files.
The data from the master database is sent to the replica node in batches. Data Replication
Service creates replication batches whenever the data in the master database is added,
modified, and deleted.
You can perform the following activities using the Data Replication service:
• View replica nodes in a replica group.
•Replicate requested data from the System Manager master database to the database of
the replica nodes if the databases are not synchronized
Viewing replica groups
Procedure
On the System Manager console, under Services, click Replication.
The system displays the Replica Groups page.
Result
The system displays the Replica Groups page with the groups in a table.
Related topics:
Replica Groups field descriptions on page 491
Managing system data
488 Administering Avaya Aura ® Session Manager November 2010
Comments? infodev@avaya.com

Viewing replica nodes in a replica group
You can view the replica nodes in a group.
Procedure
1. On the System Manager console, under Services, click Replication.
The system displays the Replica Groups page.
2. Select a replica group and click View Replica Nodes.
Alternatively, you can click a replica group name displayed under the Replica
Group column to view the replica nodes for that replica group.
The Replica Nodes page displays the replica nodes for the select group.
Related topics:
Replica Nodes field descriptions on page 492
Repairing a replica node
You can replicate data for a replica node whose database is not synchronized with the System
Manager database. Repair is necessary if there is a post-install failure of the Data Replication
Service.
Procedure
1. On the System Manager console, under Services, click Replication.
The system displays the Replica Groups page.
2. Select a replica group for which you want repair the replica nodes from the table
displaying replica groups and click View Replica Nodes or click the name of the
replica node displayed in the Replica Group column.
3. On the Replica Nodes page, select a replica node and click Repair.
The Synchronization Status column displays the data replication status for the
repairing replica node.
Related topics:
Replica Nodes field descriptions on page 492
Data Replication Service
Administering Avaya Aura® Session Manager November 2010 489

Repairing all replica nodes in a replica group
You can replicate data for all the replica nodes that are in a group. You can perform this
operation if replica nodes in a group are not synchronized with the System Manager
database.
Procedure
1. On the System Manager console, under Services, click Replication.
The system displays the Replica Groups page.
2. Select a replica group for which you want repair the replica nodes from the table
displaying replica groups.
3. Click Repair.
The Synchronization Status column displays the data replication status for the
replica group.
Viewing replication details for a replica node
You can view the batch related information such as total number of batches received,
processed, and skipped for a replica node. The master database sends the requested data in
batches to the replica node.
Procedure
1. On the System Manager console, under Services, click Replication.
The system displays the Replica Groups page.
2. Select a replica group and click View Replica Nodes.
The Replica Nodes page displays the replica nodes for the selected replica group
in a table.
3. Select a replica node and click View Details.
The Data Replication page displays the replication details for the selected replica
node.
Related topics:
Data Replication field descriptions on page 494
Managing system data
490 Administering Avaya Aura ® Session Manager November 2010
Comments? infodev@avaya.com

Removing a replica node
Procedure
1. On the System Manager console, under Services, click Replication.
The system displays the Replica Groups page.
2. Select a replica group in which you want to remove a node.
3. On the Replica Node page, click Remove.
Removing a replica node from queue
Procedure
1. On the System Manager console, under Services, click Replication.
The system displays the Replica Groups page.
2. Select the replica group for which you want to remove the node from queue.
3. On the Replica Node page, click Remove from Queue.
Replica Groups field descriptions
You can use this page to:
•view all the replica groups in the enterprise. These replica groups are logical grouping of
the replica nodes.
• replicate data requested by the replica node from the master database to the database
of the replica nodes
• view the replication status of the replica groups
The page displays these fields when you All from the Replica Group field.
Name Description
Select check box You can use this check box to select a
group.
Replica Group Name of the replica group. This is a
hyperlink. When you click a group, the
Replica Nodes page opens and displays the
replica nodes for that group.
Data Replication Service
Administering Avaya Aura® Session Manager November 2010 491
Name Description
Synchronization Status Replication status of the replica group. The
system displays the out of sync status if any
one of the group replica databases is not
synchronized with the master database.
Button Description
View Replica Nodes Opens the Replica Nodes page. You can use
this page to view replica nodes for a selected
group.
Repair Replicates data for a selected replica node
that is not synchronized with the master
nodes.
Replica Nodes field descriptions
You can use this page to:
• View the replica nodes in a selected replica group which has requested data replication
from the master database of System Manager
• View the replication status of replica nodes in a group
Name Description
Select check box You can use this check box to select a replica
node.
Replica Node Host Name The IP address of the replica node
Product Name of the product running on the replica
node
Synchronization Status The synchronization status of the replica
node. The following are the status for when
you click the Repair button on the page to
perform a data replication for a replica node:
•Ready for Repair: This status indicates that
database of the replica node is not
synchronized with the master database.
• Queued for Repair: This status indicates
that replication request of the replica server
is in queue with other data replication
requests. The color code of the status is
yellow.
Managing system data
492 Administering Avaya Aura ® Session Manager November 2010
Comments? infodev@avaya.com

Name Description
• Repairing: This status indicates that the
data replication process is in progress. The
color code of the status is yellow.
• Synchronized: This status indicates that
the data requested by the replica node is
successfully replicated from the master
database to the database of the replica
node. The color code of the status is
green.
• Synchronization Failure: This status
indicates an error in data replication for the
initial load. Resolving this issue requires
manual intervention from the
administrator.
The system displays the following status
during automatic replication of data from the
master to the replica node:
• Synchronizing: This status indicates that
the data replication is in progress for the
replica node. The color code of the status
is yellow.
• Synchronized: This status indicates that
the data requested by the replica node is
successfully replicated from the master
database to the database of the replica
node. The color code of the status is
green.
Last Synchronization time The last time when the data synchronization
or replication happened for the replica
node.
Button Description
View Details Opens the Data Replication page. You can
use this page to view the synchronization
details for a replica node.
Repair Replicates or synchronizes data from
themaster node to a selected replica node.
Remove Removes the selected nodes from the
group.
Show All Replica Groups Takes you back to the Replica Groups
page.
Data Replication Service
Administering Avaya Aura® Session Manager November 2010 493
Data Replication field descriptions
General
Name Description
Replica Node Group Name of the group of the replica server.
Replica Node Host Name The IP address of the replica server.
Last Synchronization Time The last time and date when the data
synchronization or replication happened for
the replica node.
Synchronization Status The synchronization status of the replica
server.
Synchronization Status
Name Description
Pending Batches The batches for which data replication is
pending.
Statistics
Name Description
Cause of Error A brief description of reason for failure to
replicate or synchronize data
Time of Error The time when the error occurred.
Managing system data
494 Administering Avaya Aura ® Session Manager November 2010
Comments? infodev@avaya.com

Managing scheduled jobs
Scheduler
Scheduler is a schedule management service that provides the ability to monitor the tasks that
are scheduled for execution. The scheduled tasks are of three types:
• System scheduled: The job scheduled for the normal operation of the application. The
system administrator can reschedule and stop a system schedule job, but cannot delete
the job.
• Admin scheduled job: The job that the administrator schedules for administering the
application.
• On-demand job: The periodic jobs that the administrator may schedule to perform non-
routine tasks.
You can browse the history of completed jobs. Using the Disable functionality, you can cancel
all the executions scheduled for a task. The following are the important operations that you
can perform using the Scheduler:
• View the pending and completed scheduled tasks
• Modify a task scheduled by an administrator or an On Demand Job
• Delete a scheduled task
• Schedule an On Demand Job
• Stop a running task
• Enable or Disable a task
• Search a scheduled task
Accessing scheduler
Procedure
On the System Manager console, under Services, click Scheduler.
Managing scheduled jobs
Administering Avaya Aura® Session Manager November 2010 495

Viewing pending jobs
Procedure
1. On the System Manager console, under Services, click Scheduler.
2. Click Pending Jobs in the left navigation pane.
Related topics:
Pending Jobs field descriptions on page 502
Viewing completed jobs
Procedure
1. On the System Manager console, under Services, click Scheduler.
2. Click Completed Jobs in the left navigation pane.
The Completed Jobs page displays completed jobs.
Related topics:
Completed Jobs field descriptions on page 505
Viewing details of a pending job
Procedure
1. On the System Manager console, under Services, click Scheduler.
2. Click Pending Jobs in the left navigation pane.
3. On the Pending Jobs page, select a pending job and click View.
The Job Scheduling-View Job page displays the details of the selected job.
Managing system data
496 Administering Avaya Aura ® Session Manager November 2010
Comments? infodev@avaya.com

Viewing details of a completed job
Procedure
1. On the System Manager console, under Services, click Scheduler.
2. Click Completed Jobs in the left navigation pane.
3. On the Completed Jobs page, select a completed job and click View.
The Job Scheduling-View Job page displays the details of the selected job.
Viewing details of a pending job
Procedure
1. On the System Manager console, under Services, click Scheduler.
2. Click Pending Jobs in the left navigation pane.
3. On the Pending Jobs page, select a pending job and click View.
The Job Scheduling-View Job page displays the details of the selected job.
Viewing logs for a job
About this task
Use this functionality to view logs for a pending and completed job.
Procedure
1. On the System Manager console, under Services, click Scheduler.
2. Perform one of the following steps:
• To view logs for a pending job, perform the following steps:
i. Click Pending Jobs in the left navigation pane.
ii. On the Pending Jobs page, select a pending job and click More
Actions > View Log.
• To view logs for a competed job, perform the following steps:
i. Click Completed Jobs in the left navigation pane.
Managing scheduled jobs
Administering Avaya Aura® Session Manager November 2010 497

ii. On the Completed Jobs page, select a completed job and click
More Actions > View Log.
Result
The log viewer displays the log details for the selected job.
Viewing completed jobs
Procedure
1. On the System Manager console, under Services, click Scheduler.
2. Click Completed Jobs in the left navigation pane.
The Completed Jobs page displays completed jobs.
Related topics:
Completed Jobs field descriptions on page 505
Filtering Jobs
Procedure
1. On the System Manager console, under Services, click Scheduler.
2. Perform one of the following steps:
•Click Pending Jobs in the left navigation pane and click Filter: Enable on the
Pending Jobs page.
• Click Completed Jobs in the left navigation pane and click Filter: Enable on
the Completed Jobs page.
The system displays the Filter: Enable option at the upper-right corner of the
page.
3. Select type of the job from the field under the Job Type column.
4. Enter the name of job in the field under the Job Name field.
5. Select the status of the job from the field under the Job Status field.
6. Select the state of the job from the field under the State field.
7. Select the frequency of execution of the job from the field under the Frequency
field.
8. Enter the scheduler of the job in the field under the Scheduled By column.
Managing system data
498 Administering Avaya Aura ® Session Manager November 2010
Comments? infodev@avaya.com
Note:
The system displays this field only for the completed jobs.
9. Click Apply.
The system displays jobs that match the filter criteria.
Result
Editing a job
Procedure
1. On the System Manager console, under Services, click Scheduler.
2. Perform one of the following steps:
• To edit a pending job, perform the following steps:
i. Click Pending Jobs in the left navigation pane.
ii. On the Pending Jobs page, select a pending job and click Edit.
Note:
Alternatively, you can also click View > Edit to access the Job
Scheduling-Edit Job page.
• To edit a competed job, perform the following steps:
i. Click Completed Jobs in the left navigation pane.
ii. On the Completed Jobs page, select a completed job and click
Edit.
Note:
Alternatively, you can also click View > Edit to access the Job
Scheduling-Edit Job pagepage.
3. On the Job Scheduling-Edit Job page, modify the appropriate information and click
Commit to save the changes.
Note:
You can modify information in the following fields: Job Name, Job State in the
Job Details sections, and Task Time, Recurrence, Range in the Job
Frequency section.
Managing scheduled jobs
Administering Avaya Aura® Session Manager November 2010 499

Deleting a job
Before you begin
You must log in as an administrator to delete an administrator scheduled job.
About this task
Use this functionality to delete an obsolete job. You can delete an On demand and an
administrator scheduled job.
Note:
You can remove only jobs that are of type Schedule On Demand.
Procedure
1. On the System Manager console, under Services, click Scheduler.
2. Perform one of the following steps:
• To remove a pending job, perform the following steps:
i. Click Pending Jobs in the left navigation pane.
ii. On the Pending Jobs page, select a pending job.
If the job that you want to delete is currently running then you must
stop the job. To stop the job, click More Actions > Stop.
Note:
If the job that you want to delete is in the enabled state, disable
the job.
iii. Click Delete.
• To remove a competed job, perform the following steps:
i. Click Completed Jobs in the left navigation pane.
ii. On the Completed Jobs page, select a completed job .
Note:
If the job that you want to delete is in the enabled state, disable
the job.
iii. Click Delete.
3. On the Delete Confirmation page, click OK.
System Manager deletes the job you select from the database.
Managing system data
500 Administering Avaya Aura ® Session Manager November 2010
Comments? infodev@avaya.com

Disabling a job
About this task
Use this functionality to make a job inactive.
Procedure
1. On the System Manager console, under Services, click Scheduler.
2. Perform one of the following steps:
• To disable a pending job, perform the following steps:
i. Click Pending Jobs in the left navigation pane.
ii. On the Pending Jobs page, select a pending job and click More
Actions > Disable.
• To disable a competed job, perform the following steps:
i. Click Completed Jobs in the left navigation pane.
ii. On the Completed Jobs page, select a completed job and click
More Actions > Disable.
3. On the Disable Confirmation page, click Continue.
The State of the selected job is changed to Disabled.
Enabling a job
About this task
Use this functionality to make a job active.
Procedure
1. On the System Manager console, under Services, click Scheduler.
2. Perform one of the following steps:
• To enable a pending job, perform the following steps:
i. Click Pending Jobs in the left navigation pane.
ii. On the Pending Jobs page, select a pending job and click More
Actions > Enable.
• To enable a competed job, perform the following steps:
i. Click Completed Jobs in the left navigation pane.
Managing scheduled jobs
Administering Avaya Aura® Session Manager November 2010 501

ii. On the Completed Jobs page, select a completed job and click
More Actions > Enable.
The State of the selected job is changed to Enabled.
Result
Stopping a Job
Procedure
1. On the System Manager console, under Services, click Scheduler.
2. Click Pending Jobs in the left navigation pane.
3. On the Pending Jobs page, select a pending job in the running state and click More
Actions > Stop.
4. Click Continue on the Stop Confirmation page.
Scheduler stops the selected job.
Pending Jobs field descriptions
Use this page to view, edit and delete the scheduled jobs that are pending for execution.
Name Description
Job Type The type of job represented by an icon that
corresponds to its type. The application uses
different icons to represent the Job types.
Following are the job types:
1. System scheduled Job — The job
scheduled for the normal operation of
the application. The System
Administrator can reschedule and stop
a system schedule job, but can not
delete the job.
2. Admin scheduled job — The job that the
administrator schedules for
administering the application.
3. On-demand job — The periodic jobs that
the administrator may schedule to
perform non-routine tasks.
Managing system data
502 Administering Avaya Aura ® Session Manager November 2010
Comments? infodev@avaya.com

Name Description
Job Name The name of the scheduled job.
Job Status The current status of the pending job. The
options are:
1. Pending Execution
2. Running
State The state of a job indicates if the job is an
active job. The options are:
• Enabled
• Disabled
Frequency The time interval between two consecutive
executions of the job.
Scheduled By The scheduler of the job.
Button Description
View Opens the Job Scheduling-View Job page
that displays the details of the selected
pending job.
Edit Opens the Job Scheduling-Edit Job page
that you can use to modify the information of
a selected pending job.
Delete Opens the Delete Confirmation page that
prompts you to confirm the deletion of the
selected Jobs.
More Actions > View Log Opens the Logging page that displays the
logs for the selected pending jobs.
More Actions > Stop Stops the selected job which is currently in
running state.
More Actions > Enable Changes the state of the selected pending
job from inactive to active.
More Actions > Disable Opens the Disable Confirmation page that
prompts you to confirm the disabling of the
selected pending job.
More Actions > Schedule On Demand Job Opens the Job Scheduling-On Demand Job
page that you can use to schedule the
selected pending job of type On Demand.
Advanced Search Displays fields that you can use to specify the
search criteria for searching a pending job.
Managing scheduled jobs
Administering Avaya Aura® Session Manager November 2010 503

Button Description
Filter: Enable Displays fields under select columns that you
can use to set filter criteria. This is a toggle
button.
Filter: Disable Hides the column filter fields without
resetting the filter criteria. This is a toggle
button.
Filter: Apply Filters pending jobs based on the filter
criteria.
Select: All Selects all the pending jobs in the table
displayed in the Job List section.
Select: None Clears the selection for the pending jobs that
you have selected.
Refresh Refreshes the pending job information.
Criteria section
Click Advanced Search to view this section. You can find the Advanced Search link at the
at the upper-right corner of the page.
Name Description
Criteria Displays the following three fields:
• Drop-down 1 - The list of criteria that you
can use to search the pending jobs.
• Drop-down 2 – The operators for
evaluating the expression. The operators
displayed depends on the type of criterion
that you have selected in the first drop-
down field.
• Field 3 – The value corresponding to the
search criteria.
Button Description
Clear Clears the search value that you entered in
the third field.
Search Searches the pending jobs based on the
specified search conditions and displays the
search results in the Groups section.
Close Cancels the search operation and hides the
Criteria section.
Related topics:
Viewing pending jobs on page 496
Managing system data
504 Administering Avaya Aura ® Session Manager November 2010
Comments? infodev@avaya.com

Completed Jobs field descriptions
Use this page to view and edit the completed jobs. In addition, you can also perform the
following operations:
• Disable or Enable a job
• View a log
• Schedule and delete an on demand job
Name Description
Job Type The type of job represented by an icon that
corresponds to its type. The application uses
different icons to represent the job types.
Following are the job types:
1. System scheduled Job — The job
scheduled for the normal operation of
the application. The System
Administrator can reschedule and stop
a system schedule job, but can not
delete the job.
2. Admin scheduled job — The job that the
administrator schedules for
administering the application.
3. On-demand job — The periodic jobs that
the administrator may schedule to
perform non-routine tasks.
Job Name The name of the scheduled job.
Job Status The current status of the pending job. The
options are:
1. Status Unknown
2. Interrupted
3. Failed
4. Successful
5. Not Authorized
Last Run The date and time when the job was last
run.
State The state of a job indicates if the job is an
active. The options are:
• Enabled: An active job.
• Disabled: An inactive job.
Managing scheduled jobs
Administering Avaya Aura® Session Manager November 2010 505

Name Description
Frequency The time interval between two consecutive
executions of the job.
Scheduled By The scheduler of the job.
Button Description
View Opens the Job Scheduling-View Job page
that displays the details and of the selected
completed job.
Edit Opens the Job Scheduling-Edit Job page
that you can use to modify the information of
a selected completed job.
Delete Opens the Delete Confirmation page that
prompts you to confirm the deletion of the
selected Jobs.
More Actions > View Log Opens the Logging page that displays the
logs for the selected completed jobs.
More Actions > Enable Changes the state of the selected completed
job from inactive to active.
More Actions > Disable Opens the Disable Confirmation page that
prompts you to confirm the disabling of the
selected completed job.
More Actions > Schedule On Demand Job Opens the Job Scheduling-On Demand Job
page that you can use to schedule a On
Demand job.
Advanced Search Displays fields that you can use to specify the
search criteria for searching a completed
job.
Filter: Enable Displays fields under select columns that you
can use to set filter criteria. This is a toggle
button.
Filter: Disable Hides the column filter fields without
resetting the filter criteria. This is a toggle
button.
Filter: Apply Filters pending jobs based on the filter
criteria.
Select: All Selects all the completed jobs in the table
displayed in the Job List section.
Select: None Clears the selection for the completed jobs
that you have selected.
Refresh Refreshes the completed job information.
Managing system data
506 Administering Avaya Aura ® Session Manager November 2010
Comments? infodev@avaya.com

Criteria section
Click Advanced Search to view this section. You can find the Advanced Search link at the
at the upper-right corner of the page.
Name Description
Criteria Displays the following three fields:
• Drop-down 1 - The list of criteria that you
can use to search the completed jobs.
• Drop-down 2 – The operators for
evaluating the expression. The operators
displayed depends on the type of criterion
that you have selected in the first drop-
down field.
• Field 3 – The value corresponding to the
search criteria.
Button Description
Clear Clears the search value that you entered in
the third field.
Search Searches the completed jobs based on the
specified search conditions and displays the
search results in the Groups section.
Close Cancels the search operation and hides the
Criteria section.
Related topics:
Viewing completed jobs on page 496
Job Scheduling-View Job field descriptions
Use this page to view the details and frequency of a job.
Job Details
Name Description
Job Name The name of the job.
Job Type The type of job represented by an icon that
corresponds to its type. The application uses
different icons to represent the Job types.
Following are the job types:
1. System scheduled Job — The job
scheduled for the normal operation of
Managing scheduled jobs
Administering Avaya Aura® Session Manager November 2010 507

Name Description
the application. The System
Administrator can reschedule and stop
a system schedule job, but can not
delete the job.
2. Admin scheduled job — The job that the
administrator schedules for
administering the application.
3. On-demand job — The periodic jobs that
the administrator may schedule to
perform non-routine tasks.
Job Status The current status of the job. The options are:
1. Running
2. Pending
3. Status Unknown
4. Interrupted
5. Failed
6. Successful
7. Not Authorized
Job State The state of a job indicates whether the job
is an active job or not. The options are:
• Enabled
• Disabled
Job Frequency
Name Description
Task Time The date and time of running the job.
Recurrence The settings define whether the execution of
the jobs is a recurring activity or a one time
activity. In case of a recurring job, the field
also displays the frequency of recurrence.
Range The number of recurrences or a date after
which the job stops to recur.
Button Description
View Log Opens the Logging page that you can use to
view the logs for the selected job.
Managing system data
508 Administering Avaya Aura ® Session Manager November 2010
Comments? infodev@avaya.com
Button Description
Edit Opens the Job Scheduling-Edit Job page
that you can use to edit the pending job
information.
Cancel Closes the Job Scheduling-View Job page
and returns to the Pending or Completed
Jobs page.
Job Scheduling-Edit Job field descriptions
Use this page to modify job details and frequency related information of a selected job.
Job Details
Name Description
Job Name The name of the job.
Job Type The type of job represented by an icon that
corresponds to its type. The application uses
different icons to represent the Job types.
Following are the job types:
1. System scheduled Job — The job
scheduled for the normal operation of
the application. The System
Administrator can reschedule and stop
a system schedule job, but can not
delete the job.
2. Admin scheduled job — The job that the
administrator schedules for
administering the application.
3. On-demand job — The periodic jobs that
the administrator may schedule to
perform non-routine tasks.
Note:
You can only view the information in this
field.
Job Status The current status of the job. The options are:
1. Running
2. Pending
3. Status Unknown
4. Interrupted
Managing scheduled jobs
Administering Avaya Aura® Session Manager November 2010 509
Name Description
5. Failed
6. Successful
7. Not Authorized
Note:
You can only view the information in this
field.
Job State The state of a job indicates whether the job
is an active job or not. The options are:
• Enabled
• Disabled
Scheduled By The scheduler of the job.
Note:
You can only view the information in this
field.
Job Frequency
Name Description
Task Time The date and time of running the job. Use the
calendar icon to select a date. The time is in
the HH:MM:SS format followed by PM and
AM.
Recurrence The settings define whether the execution of
the jobs is a recurring activity or a one time
activity. In case of a recurring job, the field
displays the frequency of recurrence.
Range The number of recurrences or the date after
which the job stops to recur.
Button Description
Commit Saves the changes to the database.
Cancel Closes the Job Scheduling-View Job page
and returns to the Pending or completed
Jobs page.
Managing system data
510 Administering Avaya Aura ® Session Manager November 2010
Comments? infodev@avaya.com

Job Scheduling-On Demand Job field descriptions
Use this page to schedule an on demand job.
Job Details
Name Description
Job Name The name of the job.
Job Frequency
Name Description
Task Time The date and time of running the job.
Recurrence The settings define whether the execution of
the jobs is a recurring activity or a one time
activity. In case of a recurring job, the field
also display the time interval of recurrence.
The options are:
• Execute task one time only.
• Task are repeated every day.
Range The settings define the number of
recurrences or date after which the job stops
recurring. The options are:
• No End Date
• End After occurrences
• End By Date
Button Description
Commit Schedules an On-Demand job.
Cancel Cancels the schedule an On Demand job
operation and takes you back to the Pending
or completed Jobs page.
Disable Confirmation field descriptions
Use this page to disable selected jobs.
Managing scheduled jobs
Administering Avaya Aura® Session Manager November 2010 511

Name Description
Job Type The type of job represented by an icon that
corresponds to its type. The application uses
different icons to represent the Job types.
Following are the job types:
1. System scheduled Job — The job
scheduled for the normal operation of
the application. The System
Administrator can reschedule and stop
a system schedule job, but can not
delete the job.
2. Admin scheduled job — The job that the
administrator schedules for
administering the application.
3. On-demand job — The periodic jobs that
the administrator may schedule to
perform non-routine tasks.
Job Name The name of the scheduled job.
Job Status The current status of the pending job. The
options are:
1. Running
2. Pending
3. Status Unknown
4. Interrupted
5. Failed
6. Successful
7. Not Authorized
State The state of a job indicates whether the job
is an active job or not. The options are:
• Enabled
• Disabled
Last Run The date and time when the job was last run
successfully.
Note:
The last run is applicable only for
completed jobs.
Frequency The time interval between two consecutive
executions of the job.
Scheduled By The scheduler of the job.
Managing system data
512 Administering Avaya Aura ® Session Manager November 2010
Comments? infodev@avaya.com
Button Description
Continue Disables the job and cancels the next
executions that are scheduled for the job.
Cancel Cancels the operation of disabling a job and
takes you back to the Pending or completed
Jobs page.
Stop Confirmation field descriptions
Use this page to stop a running job.
Name Description
Job Type The type of job represented by an icon that
corresponds to its type. The application uses
different icons to represent the Job types.
Following are the job types:
1. System scheduled Job — The job
scheduled for the normal operation of
the application. The System
Administrator can reschedule and stop
a system schedule job, but can not
delete the job.
2. Admin scheduled job — The job that the
administrator schedules for
administering the application.
3. On-demand job — The periodic jobs that
the administrator may schedule to
perform non-routine tasks.
Job Name The name of the scheduled job.
Job Status The current status of the pending job. The
jobs on this page have status Running.
State The state of a job indicates if the job is an
active job. All the jobs on this page are in the
Enabled state.
Last Run The date and time when the job was last run
successfully.
Note:
The last run is applicable only for
completed jobs.
Managing scheduled jobs
Administering Avaya Aura® Session Manager November 2010 513
Name Description
Frequency The time interval between two consecutive
executions of the job.
Scheduled By The scheduler of the job.
Button Description
Continue Stops the job.
Cancel Cancels the operation of stopping a job and
takes you back to the Pending Jobs page.
Delete Confirmation field descriptions
Name Description
Job Type The type of job represented by an icon that
corresponds to its type. The application uses
different icons to represent the Job types.
Following are the job types:
1. System scheduled Job — The job
scheduled for the normal operation of
the application. The System
Administrator can reschedule and stop
a system schedule job, but can not
delete the job.
2. Admin scheduled job — The job that the
administrator schedules for
administering the application.
3. On-demand job — The periodic jobs that
the administrator may schedule to
perform non-routine tasks.
Job Name The name of the scheduled job.
Job Status The current status of the job.
State The state of a job indicates if the job is an
active job. The jobs on this page are in the
disabled state.
Last Run The date and time when the job was last
run.
Note:
The last run is applicable only for
completed jobs.
Managing system data
514 Administering Avaya Aura ® Session Manager November 2010
Comments? infodev@avaya.com

Name Description
Frequency The time interval between two consecutive
executions of the job.
Scheduled By The scheduler of the job.
Button Description
Continue Deletes the selected job.
Cancel Cancels the operation of deleting a job and
takes you back to the Pending or completed
Jobs page.
Managing scheduled jobs
Administering Avaya Aura® Session Manager November 2010 515


Appendix A: Default certificates used for
SIP-TLS
The Trusted/CA certificate of the issuer that follows is used to generate the default Identity Certificate for
SIP-TLS.
Certificate:
Data:
Version: 3 (0x2)
Serial Number: 0 (0x0)
Signature Algorithm: sha1WithRSAEncryption
Issuer: C=US, O=Avaya Inc., OU=SIP Product Certificate Authority, CN=SIP Product
Certificate Authority
Validity
Not Before: Jul 25 00:33:17 2003 GMT
Not After : Aug 17 05:19:39 2027 GMT
Subject: C=US, O=Avaya Inc., OU=SIP Product Certificate Authority, CN=SIP Product
Certificate Authority
Subject Public Key Info:
Public Key Algorithm: rsaEncryption
RSA Public Key: (2048 bit)
Modulus (2048 bit):
00:dc:3b:2b:72:c7:b6:11:cd:3e:d5:60:9a:2f:f0:
51:9e:ea:0d:46:27:48:7e:e1:8e:d8:67:3c:e6:80:
73:ea:a6:09:fe:da:39:6e:42:2d:4d:34:79:62:30:
b6:d8:2e:7a:ef:7f:ab:37:f9:7f:f3:87:b6:4d:0f:
6b:72:ac:a6:4c:09:86:88:f0:55:fa:5f:7b:58:4c:
e3:59:f4:4a:d3:62:78:12:24:2a:4b:78:2b:a3:73:
ea:a0:b7:54:a6:46:cc:9a:d7:ed:45:f6:2e:63:be:
b1:71:a0:eb:91:6f:93:74:e5:8b:f7:70:8f:39:48:
52:f0:ee:41:2b:e3:57:10:0e:fb:21:44:15:99:7e:
8e:ab:7f:76:c1:26:39:6a:45:31:dc:e7:21:9b:5d:
77:84:b3:e2:6b:b4:8b:de:10:21:41:d9:0f:f0:dc:
48:3f:19:b7:16:1a:13:f5:ba:a1:ea:38:f1:fb:e9:
a3:4c:63:24:0f:18:cc:c3:06:da:42:7c:68:7b:1e:
40:fb:8e:44:f6:12:5f:80:88:12:89:cb:47:0e:72:
3d:b6:f8:02:9b:2e:f8:79:6d:f7:c9:31:37:02:3d:
7d:81:6b:1d:82:0f:62:35:ba:c4:3e:a2:c4:c6:f8:
57:6f:ba:14:41:c7:e5:8f:a8:13:96:b1:0d:30:44:
a1:8d
Exponent: 65537 (0x10001)
X509v3 extensions:
X509v3 Certificate Policies:
Policy: 2.16.840.1.114187.7.2.1.1
CPS: mailto:sipca@avaya.com;
X509v3 Subject Key Identifier:
A0:82:07:29:5C:3A:A0:C4:29:B8:3D:C3:1D:B9:06:55:13:BE:56:2A
X509v3 Basic Constraints: critical
CA:TRUE, pathlen:1
X509v3 Key Usage:
Certificate Sign, CRL Sign
X509v3 Authority Key Identifier:
keyid:A0:82:07:29:5C:3A:A0:C4:29:B8:3D:C3:1D:B9:06:55:13:BE:56:2A
DirName:/C=US/O=Avaya Inc./OU=SIP Product Certificate Authority/CN=SIP Product
Administering Avaya Aura® Session Manager November 2010 517

Certificate Authority
serial:00
Signature Algorithm: sha1WithRSAEncryption
60:3e:b6:92:b6:8f:be:f8:a0:05:32:d5:12:19:59:b8:8e:c6:
e4:9d:6c:1a:cd:1e:72:17:19:6d:5a:b8:28:a2:c3:0d:fb:5b:
77:e7:50:04:25:e7:75:0c:2b:d4:5a:26:db:7d:2c:a5:87:5d:
cf:37:36:0b:85:22:25:98:a3:d1:f7:c2:d5:43:83:f9:97:6e:
82:da:cb:89:3d:ac:9e:11:45:fc:ef:00:c2:1d:ef:1e:34:d1:
bd:de:f9:79:e1:4e:1a:40:3b:a6:f7:c1:52:4d:19:58:8d:d4:
a2:2f:d4:77:b6:b2:8b:3a:28:98:94:b0:44:d6:82:47:04:63:
e2:17:34:57:81:cd:17:54:65:97:31:f0:2a:b8:d4:34:d6:9c:
ca:aa:ee:c4:4f:4f:40:5a:c6:1b:51:2e:1c:f8:9e:6d:75:89:
3d:9d:89:37:e5:8d:56:b4:ac:0e:cf:c3:12:83:09:01:da:77:
32:d6:b2:3a:22:e5:af:2c:05:1d:77:d0:4a:70:16:06:2d:23:
15:ba:55:46:8e:5d:ce:8b:45:77:e7:1c:4d:a3:22:0a:43:df:
11:3c:86:fd:45:c3:04:ce:18:88:92:15:0e:92:d9:9e:60:77:
bd:05:89:fc:12:7e:fa:ab:9a:0e:5c:7d:02:68:84:0e:95:df:
55:a2:87:7f
-----BEGIN CERTIFICATE-----
MIIEnTCCA4WgAwIBAgIBADANBgkqhkiG9w0BAQUFADB6MQswCQYDVQQGEwJVUzET
MBEGA1UEChMKQXZheWEgSW5jLjEqMCgGA1UECxMhU0lQIFByb2R1Y3QgQ2VydGlm
aWNhdGUgQXV0aG9yaXR5MSowKAYDVQQDEyFTSVAgUHJvZHVjdCBDZXJ0aWZpY2F0
ZSBBdXRob3JpdHkwHhcNMDMwNzI1MDAzMzE3WhcNMjcwODE3MDUxOTM5WjB6MQsw
CQYDVQQGEwJVUzETMBEGA1UEChMKQXZheWEgSW5jLjEqMCgGA1UECxMhU0lQIFBy
b2R1Y3QgQ2VydGlmaWNhdGUgQXV0aG9yaXR5MSowKAYDVQQDEyFTSVAgUHJvZHVj
dCBDZXJ0aWZpY2F0ZSBBdXRob3JpdHkwggEiMA0GCSqGSIb3DQEBAQUAA4IBDwAw
ggEKAoIBAQDcOytyx7YRzT7VYJov8FGe6g1GJ0h+4Y7YZzzmgHPqpgn+2jluQi1N
NHliMLbYLnrvf6s3+X/zh7ZND2tyrKZMCYaI8FX6X3tYTONZ9ErTYngSJCpLeCuj
c+qgt1SmRsya1+1F9i5jvrFxoOuRb5N05Yv3cI85SFLw7kEr41cQDvshRBWZfo6r
f3bBJjlqRTHc5yGbXXeEs+JrtIveECFB2Q/w3Eg/GbcWGhP1uqHqOPH76aNMYyQP
GMzDBtpCfGh7HkD7jkT2El+AiBKJy0cOcj22+AKbLvh5bffJMTcCPX2Bax2CD2I1
usQ+osTG+FdvuhRBx+WPqBOWsQ0wRKGNAgMBAAGjggEsMIIBKDA/BgNVHSAEODA2
MDQGC2CGSAGG/AsHAgEBMCUwIwYIKwYBBQUHAgEWF21haWx0bzpzaXBjYUBhdmF5
YS5jb207MB0GA1UdDgQWBBSgggcpXDqgxCm4PcMduQZVE75WKjASBgNVHRMBAf8E
CDAGAQH/AgEBMAsGA1UdDwQEAwIBBjCBpAYDVR0jBIGcMIGZgBSgggcpXDqgxCm4
PcMduQZVE75WKqF+pHwwejELMAkGA1UEBhMCVVMxEzARBgNVBAoTCkF2YXlhIElu
Yy4xKjAoBgNVBAsTIVNJUCBQcm9kdWN0IENlcnRpZmljYXRlIEF1dGhvcml0eTEq
MCgGA1UEAxMhU0lQIFByb2R1Y3QgQ2VydGlmaWNhdGUgQXV0aG9yaXR5ggEAMA0G
CSqGSIb3DQEBBQUAA4IBAQBgPraSto+++KAFMtUSGVm4jsbknWwazR5yFxltWrgo
osMN+1t351AEJed1DCvUWibbfSylh13PNzYLhSIlmKPR98LVQ4P5l26C2suJPaye
EUX87wDCHe8eNNG93vl54U4aQDum98FSTRlYjdSiL9R3trKLOiiYlLBE1oJHBGPi
FzRXgc0XVGWXMfAquNQ01pzKqu7ET09AWsYbUS4c+J5tdYk9nYk35Y1WtKwOz8MS
gwkB2ncy1rI6IuWvLAUdd9BKcBYGLSMVulVGjl3Oi0V35xxNoyIKQ98RPIb9RcME
zhiIkhUOktmeYHe9BYn8En76q5oOXH0CaIQOld9Vood/
-----END CERTIFICATE-----
The following set of default certificates (in PEM format) are trusted by the Session Manager Security
module for SIP-TLS.
-----BEGIN CERTIFICATE-----
MIICaDCCAdECBEgQqykwDQYJKoZIhvcNAQEEBQAwezELMAkGA1UEBhMCVUsxEDAO
BgNVBAgTB1MgV2FsZXMxEDAOBgNVBAcTB0NhcmRpZmYxDjAMBgNVBAoTBWF2YXlh MRcwFQYDVQQ
LEw5VSyBFbmdpbmVlcmluZzEfMB0GA1UEAxMWYXZheWEgZGV2ZWxv
cG1lbnQgdGVhbTAeFw0wODA0MjQxNTQ1NDVaFw0xODAzMDMxNTQ1NDVaMHsxCzAJ
BgNVBAYTAlVLMRAwDgYDVQQIEwdTIFdhbGVzMRAwDgYDVQQHEwdD
YXJkaWZmMQ4w DAYDVQQKEwVhdmF5YTEXMBUGA1UECxMOVUsgRW5naW5lZXJpbmcxHzAdBgNVBAMT
FmF2YXlhIGRldmVsb3BtZW50IHRlYW0wgZ8wDQYJKoZIhvcNAQEBBQADgY0AMIGJ AoGBALpOPDPCHq8jpMs+Guaam66i
BPOeFBB0SNrLu5Ua1K7fkqEmjG6O+xvnb0Dm
2keo87gZkgSnktazUHfqSQmK9UC12GpomBuJPTZPlSrhcovtadTvjBpnYylp7tVZ
cvsuQxVlaICqr067w6uq0woP4cGSG9kyuhzqvtLCmIiZOFKHAgMBAAEwDQYJKoZI hvcN
AQEEBQADgYEAnLwTrvc4WZsDWw3cuCZlTLYEEIoY9oebhx4EEgOKBz/HXjr5 yA0JiSd
+KWdWdfGryhc7YYSbTruO6Hclmq7uJeaFqexdfEYtWQ0ZE1UFAZwLcz5c Vast/vxri4NVsM
+HZ4caayKPAio8csWhiQkfFDp783ho8
Default certificates used for SIP-TLS
518 Administering Avaya Aura ® Session Manager November 2010
Comments? infodev@avaya.com

dBW9uKQkImd8KU= -----END CERTIFICATE-----
-----BEGIN CERTIFICATE----- MIIE3zCCA8egAwIBAgIBWzANBgkqhkiG9w0BAQUFADBeMQswCQYDVQQGEwJVUzET
MBEGA1UEChMKQXZheWEgSW5jLjEaMBgGA1UECxMRQXZheWEgUHJvZHVjdCBQS0kx HjAcBgNVBAMTF
UF2YXlhIFByb2R1Y3QgUm9vdCBDQTAeFw0wNzEyMjExMTU0NDBa
Fw0yNzEyMDIxMTU0NDBaMGsxCzAJBgNVBAYTAlVTMRMwEQYDVQQKEwpBdmF5YSBJ
bmMuMRowGAYDVQQLExFBdmF5YSBQcm9kdWN0IFBLSTErMCkGA1UEAx
MiQXZheWEg TWFudWZhY3R1cmluZyBTdWJvcmRpbmF0ZSBDQTCCASAwDQYJKoZIhvcNAQEBBQAD
ggENADCCAQgCggEBAMNFdBihMGWSsTAx24rWE5sbjMVkHe0ybSAoZZliLrow9Jau
UfasJ7dm49GQAbeVWqYZ15kFjR9vxU
j4ExGt/TcEbBcTau4wkG1tGrf9IsFLzJ9J dWuC3EWuXcUr4N3UTuSuARh+Q/J31AsXOkSY
+N0Tt2QhNedSeqCAXhUKhDp9FySS ICcobqJgS70W34wXvbgXTrWvlWRanphiADN7lUoUtFpqS
+qIfnpTABDG0TUGu9pk ej3/ft
zmfsACdPw5CzLUklglW5c8l6iJYH1stwkTPrrJkLPaCV1NOLZnpiSgQ9ru 3IbVXAn8MUPkiVU91bitZoB1bCS1WgkF
+Q4tiM0CAQOjggGbMIIBlzAdBgNVHQ4E FgQUbuW8D4RGjxrxDTFJElm8Mf7Bz+wwgYYGA1UdIwR/MH2
AFMKatvFzIYImbROw /v5R9l6b3DV7oWKkYDBeMQswCQYDVQQGEwJVUzETMBEGA1UEChMKQXZheWEgSW5j
LjEaMBgGA1UECxMRQXZheWEgUHJvZHVjdCBQS0kxHjAcBgNVBAMTFUF2YXlhIFBy b2R1Y3QgUm9vdCBDQYIBADA
MBgNVHRMEBTADAQH/MAsGA1UdDwQEAwIBBjCB0QYD
VR0gBIHJMIHGMIHDBgtghkgBhvwLBwEBATCBszAqBggrBgEFBQcCARYeaHR0cHM6
Ly93d3cuYXZheWEuY29tL3BraS9DUFM7MIGEBggrBgEFBQcCAjB4MBcWEEF2YXlh
IFByb2R1Y3QgQ0EwAwIBARpdQXZheWEgSW5jLiBMaW1pdGVkIExpYWJpbGl0eSBQ
S0kgQ0EuICBQbGVhc2UgdmlzaXQgaHR0cDovL3d3dy5hdmF5YS5jb20vcGtpL0NQ
UyBmb3IgZGV0YWlscy47MA0GCSqGSIb3DQEBBQUA
A4IBAQBv40OigRG3iXiqmVwX WUdK1DaNQ7wDYCVPteNa9smLrdswAohdqMpyBS0Fut+QfqWQkn2p4eL90ZICeqlr
hPYWUFKSmlpKhf93WH+0jsfvuzWefFg4JtlNsWgbVdi1wPdG9wddkgs4Bt6GzwOL r0iUuZwnHyUahR8K
EvFnab0+KA5gTIOqNnF0dGzaePzPzIJ2Tp8ybpSYQTjBVZmP /YwkociqOMjUwbuUqDKlsARbeZMAUxmLx6V8fv96G
+OPf3MUuvclTTVCP7+6i35y dV5DG/qP4OpAZcFO/HNdtzreIYjDnlbplw2Fy9LClBZmUwHTmSzp1nJjk
6Wg3OAD DVSH -----END CERTIFICATE-----
-----BEGIN CERTIFICATE----- MIIE1DCCA7ygAwIBAgIBADANBgkqhkiG9w0BAQUFADBeMQswCQYDVQQGEwJVUzET
MBEGA1UEChMKQXZheWEgSW5jLjEaMBgGA1UECxMRQXZheWEgUHJvZHVjdCBQS0kx HjAcBgNVBAMTF
UF2YXlhIFByb2R1Y3QgUm9vdCBDQTAeFw0wMzA4MjIxMTI1MzZa
Fw0zMzA4MTQxMTI1MzZaMF4xCzAJBgNVBAYTAlVTMRMwEQYDVQQKEwpBdmF5YSBJ
bmMuMRowGAYDVQQLExFBdmF5YSBQcm9kdWN0IFBLSTEeMBwGA1UEAx
MVQXZheWEg UHJvZHVjdCBSb290IENBMIIBIjANBgkqhkiG9w0BAQEFAAOCAQ8AMIIBCgKCAQEA
+EpellesygWvwACRNRh/6FbkPYDGrf5jpqIzgd3KG1w7gvvQ/ID953REm2DS7DEI 4y7l+zY0MLtNv
+I3rASpdxufsFwkHa
5zR1FjpkiaP7XhMKXNpSY7No78rko9uiGt xCx9VdW20kcP4IiEN23jQWfKjGFzkZItCl/
aOf2+peh8bSS2MIprGx4rnCMZN1dU Nnw8nJFGu7IxRlGDA2XqJ7BWBn/
pvPMLdaVU60oI1/4IT9lHPUCaRVAC56jJdtxq F9sNW0
ZsBy05/vtopUiStfq8aMtMWCqGkSwjWB2VDWhWj6HTuGk27YsTsFIREJuT
i7rXYBQqRJN0o15aERM6BwIDAQABo4IBmzCCAZcwHQYDVR0OBBYEFMKatvFzIYIm bROw/
v5R9l6b3DV7MIGGBgNVHSMEfzB9gBTCmrbxcyGCJm0
TsP7+UfZem9w1e6Fi pGAwXjELMAkGA1UEBhMCVVMxEzARBgNVBAoTCkF2YXlhIEluYy4xGjAYBgNVBAsT
EUF2YXlhIFByb2R1Y3QgUEtJMR4wHAYDVQQDExVBdmF5YSBQcm9kdWN0IFJvb3Qg Q0GCAQAwDAYDVR0TBAUwAwE
B/zALBgNVHQ8EBAMCAQYwgdEGA1UdIASByTCBxjCB
wwYLYIZIAYb8CwcBAQEwgbMwKgYIKwYBBQUHAgEWHmh0dHBzOi8vd3d3LmF2YXlh
LmNvbS9wa2kvQ1BTOzCBhAYIKwYBBQUHAgIweDAXFhBBdmF5YSBQcm9kdWN0IENB
MAMCAQEaXUF2YXlhIEluYy4gTGltaXRlZCBMaWFiaWxpdHkgUEtJIENBLiAgUGxl
YXNlIHZpc2l0IGh0dHA6Ly93d3cuYXZheWEuY29tL3BraS9DUFMgZm9yIGRldGFp
bHMuOzANBgkqhkiG9w0BAQUFAAOCAQEAQYNqOpJS
kAn6tZOAbp7IW2RMFQO2rwNe UFdyWywqWKdoCNv/+9dAkHXp8wSEwRGPuXRJLuSZloRlK7OnT4GBH+YaFMarHpUr
rChkrmcR9smgN1WvSjvTk1HiFXEyurvpRarLRem3spDdN6Cyu/fhroJJEHc0j97O U2HTNgz0papOAFxY
N497y3teENVmRBGNKoUo6NxayOCjv55JBxegvd6bOtabRv1L
OCNK8yeomL5ri9jiTLUgEEZIn3aFXetuKxTjhQqbxcpy16t70SQctIzLXqdp9ZZu xz27CykJXlmexi5qREs
+MLV0jrduRE50nTHMhkHKZBX7yKIgEb9GwQ==
-----END CERTIFICATE-----
-----BEGIN CERTIFICATE----- MIIDvDCCAqSgAwIBAgIBADANBgkqhkiG9w0BAQUFADCBgDELMAkGA1UEBhMCVVMx
FzAVBgNVBAoTDk1vdG9yb2xhLCBJbmMuMTkwNwYDVQQLEzBTZWFtbGVzcyBDb252 ZXJnZWQgQ29tb
XVuaWNhdGlvbiBBY3Jvc3MgTmV0d29ya3MxHTAbBgNVBAMTFFND
Q0FOIFNlcnZlciBSb290IENBMB4XDTAzMTIwNTIxMjg0M1oXDTMzMTIwNDIxMjg0
M1owgYAxCzAJBgNVBAYTAlVTMRcwFQYDVQQKEw5Nb3Rvcm9sYSwgSW
5jLjE5MDcG A1UECxMwU2VhbWxlc3MgQ29udmVyZ2VkIENvbW11bmljYXRpb24gQWNyb3NzIE5l
dHdvcmtzMR0wGwYDVQQDExRTQ0NBTiBTZXJ2ZXIgUm9vdCBDQTCCASIwDQYJKoZI
Administering Avaya Aura® Session Manager November 2010 519

hvcNAQEBBQADggEPADCCAQoCggEBAN
HrAz5BUuNXL3cH9eAodevZY+5C1IaBtmxe K7+TweCWSljAeX/
e2EKMQatNIOFHO3cXqV7ERBUp0ymmrnnmLeqVfbS9anWOzoGr
MCZ3grohkFWh41uBzxlgYhDoGhGc1H8RZJBEE3Rmo5djZrTzAutSuOi7iAO7S9IC a9RBZF
/db3Z8jkc0ucSi3pDTolIJvjVx5ccztRd133uUyvHSAoXAwyFVx/9trZHp rQr76xUC/
8nOAhXlUlt8Vnp5C30X5WywCOXWelIUaLldH55fxDVcGL5h7Yu8SLb9 iynrlJ6XeDKp
+fDtWCVySIZBCLx0Ho29f8hOmLpg5/vb691
Q6mUCAwEAAaM/MD0w DwYDVR0TAQH/BAUwAwEB/zAdBgNVHQ4EFgQUc50Q0MwSbfz43CTFP6gsFsrWv+Uw
CwYDVR0PBAQDAgEGMA0GCSqGSIb3DQEBBQUAA4IBAQA956Nf5ldsVXTLbRMRBMuS y1mdFnbtFN3hd8j8PcqDH9d
u+411JR1DL7cOJEJWDJwO1qlG44A6Mj/JnvwIA0M4 s3AAKV+EBj1du+TBLhZluuEcvgpX1xiQehIFqTS6fp
+CBLL2NYEeze0x1d/IHNNA eBhYfGBNnhbU0YGOlNERYyT+nTgPgVVwuNaagJPyxHkZKWE2BmMT3OBt3vsdJS7S
c+8Xiivl/KSfF3003/hQrzFH6mDtqSwLgFzKadZ2QE3HVdcajt/fW9sGyaq5PfWO mwyOTwtrcuo2/
EQqX03XHeTEohEoqMTTiNXxTLOwaPgAf/dkwmqPDjuZohtAUphg -----END CERTIFICATE-----
-----BEGIN CERTIFICATE----- MIIC0DCCAjmgAwIBAgIBADANBgkqhkiG9w0BAQQFADBVMQswCQYDVQQGEwJVUzET
MBEGA1UEChMKQXZheWEgSW5jLjEVMBMGA1UECxMMTWVkaWEgU2VydmVyMRowGAYD VQQDExFBdmF5Y
SBDYWxsIFNlcnZlcjAeFw0wMjAxMTAwMzQwNDdaFw0zMjAxMDMw
MzQwNDdaMFUxCzAJBgNVBAYTAlVTMRMwEQYDVQQKEwpBdmF5YSBJbmMuMRUwEwYD
VQQLEwxNZWRpYSBTZXJ2ZXIxGjAYBgNVBAMTEUF2YXlhIENhbGwgU2
VydmVyMIGf MA0GCSqGSIb3DQEBAQUAA4GNADCBiQKBgQDABs8TR5L3cDQNZTsA+t1HJZDOM/Sr
Ngq6TRWf3r8KdzUpYZVAxecODQ2gu9ccfLraxhi8Vn1X6DD/uBT90WdqkhpZs0+f
o6WE7fZZqGFJyVHhtqrN58IOOdQTfj
Kywhi0w+GTKfEvS/IHXLNM7Rr55KN4Jqa7 3GzklP0d//it4QIDAQABo4GvMIGsMB0GA1UdDgQWBBQ7f
+X4y7uDnQ2lkDsVYuFr ESzohDB9BgNVHSMEdjB0gBQ7f+X4y7uDnQ2lkDsVYuFrESzohKFZpFcwVTELMAkG A1UEBh
MCVVMxEzARBgNVBAoTCkF2YXlhIEluYy4xFTATBgNVBAsTDE1lZGlhIFNl
cnZlcjEaMBgGA1UEAxMRQXZheWEgQ2FsbCBTZXJ2ZXKCAQAwDAYDVR0TBAUwAwEB /
zANBgkqhkiG9w0BAQQFAAOBgQAa1P7y67oAqwsnM268fXW
KTjhqixG2N2+BVkkk 2CEgKzFIjUuwV0kllR+RkyijKXsEnFBvXDdDDbuK+K9O2KO//i3I1eRIsMeVJ4Jj
wE9iYt8+Fniir4moMidQW9KT7SK0Db4ARY4GWezJQPFVoPng7Ny6rDooUIcNmZc4 YK9Wbw==
-----END CERTIFICATE-----
-----BEGIN CERTIFICATE----- MIIEnTCCA4WgAwIBAgIBADANBgkqhkiG9w0BAQUFADB6MQswCQYDVQQGEwJVUzET
MBEGA1UEChMKQXZheWEgSW5jLjEqMCgGA1UECxMhU0lQIFByb2R1Y3QgQ2VydGlm aWNhdGUgQXV0a
G9yaXR5MSowKAYDVQQDEyFTSVAgUHJvZHVjdCBDZXJ0aWZpY2F0
ZSBBdXRob3JpdHkwHhcNMDMwNzI1MDAzMzE3WhcNMjcwODE3MDUxOTM5WjB6MQsw
CQYDVQQGEwJVUzETMBEGA1UEChMKQXZheWEgSW5jLjEqMCgGA1UECx
MhU0lQIFBy b2R1Y3QgQ2VydGlmaWNhdGUgQXV0aG9yaXR5MSowKAYDVQQDEyFTSVAgUHJvZHVj
dCBDZXJ0aWZpY2F0ZSBBdXRob3JpdHkwggEiMA0GCSqGSIb3DQEBAQUAA4IBDwAw
ggEKAoIBAQDcOytyx7YRzT7VYJov8F
Ge6g1GJ0h+4Y7YZzzmgHPqpgn+2jluQi1N NHliMLbYLnrvf6s3+X/
zh7ZND2tyrKZMCYaI8FX6X3tYTONZ9ErTYngSJCpLeCuj c
+qgt1SmRsya1+1F9i5jvrFxoOuRb5N05Yv3cI85SFLw7kEr41cQDvshRBWZfo6r f3bBJj
lqRTHc5yGbXXeEs+JrtIveECFB2Q/w3Eg/GbcWGhP1uqHqOPH76aNMYyQP GMzDBtpCfGh7HkD7jkT2El
+AiBKJy0cOcj22+AKbLvh5bffJMTcCPX2Bax2CD2I1 usQ+osTG+FdvuhRBx+WPqBOWsQ0wRKGNAgMBAAGjggEsMII
BKDA/BgNVHSAEODA2 MDQGC2CGSAGG/AsHAgEBMCUwIwYIKwYBBQUHAgEWF21haWx0bzpzaXBjYUBhdmF5
YS5jb207MB0GA1UdDgQWBBSgggcpXDqgxCm4PcMduQZVE75WKjASBgNVHRMBAf8E CDAGAQH/AgEBMAsGA1UdDwQ
EAwIBBjCBpAYDVR0jBIGcMIGZgBSgggcpXDqgxCm4 PcMduQZVE75WKqF
+pHwwejELMAkGA1UEBhMCVVMxEzARBgNVBAoTCkF2YXlhIElu
Yy4xKjAoBgNVBAsTIVNJUCBQcm9kdWN0IENlcnRpZmljYXRlIEF1dGhvcml0eTEq
MCgGA1UEAxMhU0lQIFByb2R1Y3QgQ2VydGlmaWNhdGUgQXV0aG9yaXR5ggEAMA0G
CSqGSIb3DQEBBQUAA4IBAQBgPraSto+++KAFMtUSGVm4jsbknWwazR5yFxltWrgo osMN
+1t351AEJed1DCvUWibbfSylh13PNzYLhSIl
mKPR98LVQ4P5l26C2suJPaye EUX87wDCHe8eNNG93vl54U4aQDum98FSTRlYjdSiL9R3trKLOiiYlLBE1oJHBGPi
FzRXgc0XVGWXMfAquNQ01pzKqu7ET09AWsYbUS4c+J5tdYk9nYk35Y1WtKwOz8MS gwkB2ncy1rI6IuWv
LAUdd9BKcBYGLSMVulVGjl3Oi0V35xxNoyIKQ98RPIb9RcME
zhiIkhUOktmeYHe9BYn8En76q5oOXH0CaIQOld9Vood/ -----END CERTIFICATE-----
-----BEGIN CERTIFICATE----- MIIDITCCAoqgAwIBAgIBADANBgkqhkiG9w0BAQQFADBvMQswCQYDVQQGEwJVUzEL
MAkGA1UECBMCTUExEDAOBgNVBAcTB0FuZG92ZXIxDjAMBgNVBAoTBUFWQVlBMQ0w CwYDVQQLEwRFT
U1DMSIwIAYJKoZIhvcNAQkBFhNpZ29uemFsZXNAYXZheWEuY29t
MB4XDTA0MTAxMzE1Mzc1N1oXDTMyMDIyOTE1Mzc1N1owbzELMAkGA1UEBhMCVVMx
CzAJBgNVBAgTAk1BMRAwDgYDVQQHEwdBbmRvdmVyMQ4wDAYDVQQKEw
VBVkFZQTEN MAsGA1UECxMERU1NQzEiMCAGCSqGSIb3DQEJARYTaWdvbnphbGVzQGF2YXlhLmNv
bTCBnzANBgkqhkiG9w0BAQEFAAOBjQAwgYkCgYEA3+P7zLbpBTyyvhYUsrAuh3x6 emQRxA6QtJlNOMWZKLtLSWuap
+KFYO
Default certificates used for SIP-TLS
520 Administering Avaya Aura ® Session Manager November 2010
Comments? infodev@avaya.com

LtNd36MZl/KavEn6wCChR5IM1GAPwCIvZV
pG907FRxPoxdZOAZZRqgWzG7L9mC30NxBiBwA3DO9GbFqOdeW8zupf5SBZqpQ7k/
DZO7oAuYZE8GFhNkUVECAwEAAaOBzDCByTAdBgNVHQ4EFgQUixd7HNzpgfqPlLcc uhqhDY
ZUX6QwgZkGA1UdIwSBkTCBjoAUixd7HNzpgfqPlLccuhqhDYZUX6Shc6Rx
MG8xCzAJBgNVBAYTAlVTMQswCQYDVQQIEwJNQTEQMA4GA1UEBxMHQW5kb3ZlcjEO
MAwGA1UEChMFQVZBWUExDTALBgNVBAsTBEVNTUMxIjAgBgk
qhkiG9w0BCQEWE2ln b256YWxlc0BhdmF5YS5jb22CAQAwDAYDVR0TBAUwAwEB/zANBgkqhkiG9w0BAQQF
AAOBgQCLiZfxwyTbfC5C5KRnz9tbDLLEzCHoHqZASlUtIK/cY6fzmEtkNb/k6pdM 0CwYeY5u7rBMhj9UmnhvgGS
qQKAMZHsFDIYZU6H3HmV6P+l7kKiWYvSag+adwYH4 T0m2+rzTOu/lYioczR5MIrxT3Txrovs8cEYgJNzewPm2/
jQeXw== -----END CERTIFICATE-----
Administering Avaya Aura® Session Manager November 2010 521


Appendix B: Regular Expression constructs
Construct Matches
Characters
x The character x
\\ The backslash character
Character classes
[abc] a, b, or c (simple class)
[^abc] Any character except a, b, or c (negation)
[a-zA-Z] a through z or A through Z, inclusive (range)
[a-d[m-p]] a through d, or m through p: [a-dm-p] (union)
[a-z&&[def]] d, e, or f (intersection)
[a-z&&[^bc]] a through z, except for b and c: [ad-z] (subtraction)
[a-z&&[^m-p]] a through z, and not m through p: [a-lq-z](subtraction)
Predefined character classes
. Any character (may or may not match line terminators)
\d A digit: [0-9]
\D A non-digit: [^0-9]
\s A whitespace character: [ \t\n\x0B\f\r]
\S A non-whitespace character: [^\s]
\w A word character: [a-zA-Z_0-9]
\W A non-word character: [^\w]
java.lang.Character classes (simple java character type)
\p{javaLowerCase} Equivalent to java.lang.Character.isLowerCase()
\p{javaUpperCase} Equivalent to java.lang.Character.isUpperCase()
\p{javaWhitespace} Equivalent to java.lang.Character.isWhitespace()
\p{javaMirrored} Equivalent to java.lang.Character.isMirrored()
Classes for Unicode blocks and categories
\p{InGreek} A character in the Greek block (simple block)
Administering Avaya Aura® Session Manager November 2010 523
\p{Lu} An uppercase letter (simple category)
\p{Sc} A currency symbol
\P{InGreek} Any character except one in the Greek block (negation)
[\p{L}&&[^\p{Lu}]] Any letter except an uppercase letter (subtraction)
Boundary matchers
^ The beginning of a line
$ The end of a line
Greedy quantifiers
X? X, once or not at all
X* X, zero or more times
X+ X, one or more times
X{n} X, exactly n times
X{n,} X, at least n times
X{n,m} X, at least n but not more than m times
Logical operators
XY X followed by Y
X|Y Either X or Y
Note:
Refer to the full documentation at http://download.oracle.com/javase/6/docs/api/java/util/regex/
Pattern.html for details.
Regular Expression constructs
524 Administering Avaya Aura ® Session Manager November 2010
Comments? infodev@avaya.com

Index
A
aborting a user import job .........................................114
about Adaptations .....................................................258
about Administering Certificates for Session Manager
Instances .......................................................43
about Applications ....................................................404
about Branch Session Manager ...............................349
about CAC Administration ........................................249
about CAC Overview ................................................249
about Call Routing Testing ........................................455
about Communication Profile Editor .........................361
about Connection Status ..........................................431
about dial patterns ....................................................307
about Domains .........................................................242
about E911 Services .................................................333
about entity links .......................................................290
about locations .........................................................246
about Maintenance Tests ..........................................445
about Managed Bandwidth .......................................426
about New User Setup ...............................................63
about NIC Bonding ...................................................333
About regular expressions ........................................317
about routing policies ................................................299
about Security Module Status ...................................428
about Session Manager Administration ....................332
about Session Manager Dashboard .........................327
about SIP Application Server Management Console . 24
about SIP entities .....................................................276
about SIP entity references ......................................289
about SIP Firewall Configuration ..............................374
about SIP Tracing .....................................................452
about Synchronizing Communication Manager and
Messaging Data with System Manager .........31
About the time ranges ..............................................294
about Tracer Configuration .......................................449
access ...............................................................477, 495
accessing scheduler .................................................495
accessing the Data Retention Rules service ............477
Active SIP Application Sessions .................................29
adaptation deletion ...................................................267
adaptation details .....................................................272
adaptation example ..................................................263
adaptation Module administration .............................259
adaptations ...............................................................271
adapters ............................................................268, 269
AT&T Adapter (AttAdapter) ................................269
Cisco Adapter (CiscoAdapter) ............................268
Verizon Adapter (VerizonAdapter) ......................269
Add Trusted Certificate page ......................................57
adding a messaging profile ........................................71
adding a Session Manager application ......................44
adding an endpoint profile ..........................................74
adding Applications in an existing Application Sequence
......................................................................411
adding trusted certificates ..........................................45
adding users ...............................................................64
admin ..........................................................................16
administering ............................................................237
initial setup of the Session Manager ..................237
administering Branch Session Manager ...................350
administering ELIN Server ........................................340
Administrator Port .................................................25, 27
advanced Searching .........................................436, 441
Alarm List page .........................................................462
Alarming ...................................................................459
alarms .......................................................................460
appender ..................................................................479
Application Editor field descriptions ..........................407
application management page ..............................34, 49
Application Sequence Editor field descriptions .........412
application Sequences .............................................408
Application Sequences field description ...................411
Applications field descriptions ..................................406
assigning an appender to a logger ...........................478
AT&T Adapter (AttAdapter) .......................................269
Attach Appender page ..............................................487
attribute details defined in Delete user XSD .............181
attribute details defined in Import User XSD ............172
attribute details defined in the Endpoint profile XSD 183
attribute details defined in the Messaging communication
profile XSD ..................................................210
attribute details defined in the Session Manager
communication profile XSD .........................219
auto-refresh log list page ..........................................473
AutoRefresh Alarm List page ....................................462
Average ......................................................................27
B
backup ......................................................................475
backup and restore ...................................................475
Backup And Restore page ........................................479
Administering Avaya Aura® Session Manager November 2010 525

Backup Hostname ......................................................24
Backup page .............................................................480
Backup Port ................................................................24
Bounced Requests Count ..........................................26
Branch Session Manager ..........................351, 354, 357
adding SIP entities as Branch Session Manager 351
deleting a Branch Session Manager ..................357
modifying administration settings .......................354
viewing administration settings ..........................354
Branch Session Manager Administration page field
descriptions .................................................341
Branch Session Manager page field descriptions ....358
Bulk Import example for Adaptations ........................275
Bulk Import example for Dial Patterns ......................316
Bulk Import example for Domains ............................246
Bulk Import example for Entity Links ........................294
Bulk Import example for Locations ...........................257
Bulk Import example for Regular Expressions .........322
Bulk Import example for Routing Policies .................307
Bulk Import example for SIP Entities ........................286
Bulk Import example for Time Ranges .....................298
bulk import XML for users with SIP phone ...............230
bulk importing users ..................................................111
C
Call Routing Test page field descriptions ..................455
canceling a user import job .......................................114
changing alarm status ..............................................460
Cisco Adapter (CiscoAdapter) ..................................268
Communication Profile Edit Confirmation page field
descriptions .................................................366
Communication Profile Editor field descriptions .......364
communication profiles for a user ..............................70
Completed Jobs Page ..............................................505
Confirm Accept New Service Confirmation for Session
Managers page field descriptions ................329
Confirm Deny New Service for Session Managers page
field descriptions ..........................................330
Confirm Reboot for Session Managers page field
descriptions .................................................331
Confirm Shutdown for Session Managers page field
descriptions .................................................331
Connect ......................................................................24
Connections Status field description ........................432
creating a Communication Manager instance ............31
creating a Device Settings Group - Location Group .391
creating a Device Settings Group - Terminal Group . 393
creating a new communication address for a profile ..68
creating a new communication profile ........................67
creating a system data backup on a local server .....475
creating Adaptations .................................................261
creating an application ..............................................405
creating an Application Sequence ............................408
creating an Implicit User Rule ...................................414
creating an messaging instance .................................32
creating an NRS Proxy User Rule ............................418
creating dial patterns ................................................309
creating domains ......................................................243
creating duplicate users .............................................79
creating Entity Links .................................................291
creating locations ......................................................247
creating regular expressions ....................................317
creating routing policies ............................................300
creating SIP entities ..................................................278
creating time ranges .................................................295
creating TPS instance ..............................................418
CS1000 Adapter .......................................................270
customizing column display ......................................439
D
data backup ..............................................................476
data backup from local server ..................................476
Data Replication page ..............................................494
data replication service .............................................488
Data Retention page .................................................483
data retention rules ...........................................476, 477
data retention rules service ......................................477
Deep inspection filtering ...........................................389
default settings .........................................................324
Delete Confirmation Page ........................................514
Delete Confirmation page field descriptions .............341
Delete Local Host Name Entries Confirmation page field
descriptions .................................................374
Delete NRS Proxy User rule Confirmation page field
descriptions .................................................419
delete Session Confirmation page field descriptions 357
Deleted Trusted Certificate Confirmation page ..........60
deleting ......................................................340, 357, 419
Branch Session Manager instance ....................357
NRS Proxy User rule ..........................................419
Session Manager instance .................................340
deleting a communication address .............................69
deleting a communication profile ................................67
deleting a station profile .............................................73
deleting Adaptations .................................................267
deleting an endpoint profile ........................................76
deleting an Import Job ..............................................115
deleting completed jobs ............................................500
deleting dial patterns .................................................311
deleting domains ......................................................244
deleting Entity Links ..................................................292
deleting jobs .............................................................500
526 Administering Avaya Aura® Session Manager November 2010

deleting Locations .....................................................248
deleting pending jobs ................................................500
deleting regular expressions .....................................319
deleting routing policies ............................................302
deleting SIP entities ..................................................282
deleting time ranges .................................................296
Denial of Service protection ......................................389
denied locations for dial patterns ..............................315
Device Settings Group - Location Group field description
......................................................................399
Device Settings Group — Default Group field
descriptions .................................................397
Device Settings Group — Terminal Group field
descriptions .................................................400
Device Settings Groups ............................................390
Device Settings Groups field description ..................395
dial pattern deletion ..................................................311
dial pattern details ....................................................313
dial patterns .......................................................307, 312
Disable Confirmation page .......................................511
Disabling ...................................................................501
pending jobs .......................................................501
completed jobs ............................................501
displaying SIP entity references ...............................289
domain deletion confirmation ....................................244
domain Details ..........................................................245
domain Management ................................................244
Down, Security Module Deployment ........................429
Dropped Requests Count ...........................................26
duplicating routing entity data ...................................242
E
edit .........................................................19, 20, 477, 478
Edit Appender page ..................................................486
Edit Application Instance page .............................35, 50
Edit Local Host Name Entries page field descriptions 373
Edit Logger page ......................................................485
edit password policies ................................................20
Editing .......................................................................499
pending jobs .......................................................499
completed jobs ............................................499
editing a logger in a log file .......................................478
editing logger ............................................................478
editing password policies ...........................................19
editing session properties .....................................19, 22
editing the logon warning banner ...............................20
element links .............................................................291
modifying ............................................................291
Enabling ....................................................................501
pending jobs .......................................................501
completed jobs ............................................501
enrollment password ..................................................43
Enrollment Password page ........................................48
entity links .................................................................292
export ........................................................................460
exporting ...................................................................240
routing element data ..........................................240
exporting alarms .......................................................460
exporting the Session Manager Certificate ................46
F
failback of selected AST devices for Device Registration
......................................................................436
failback of selected AST devices for User Registration ..
441
field description .....................................................20, 22
filtering alarms ..........................................................461
filtering jobs ..............................................................498
filtering logs ..............................................................468
filtering users ..............................................................79
Firewall Configuration page field descriptions ..........377
G
global Settings ..........................................................341
H
Host Name ............................................................25, 27
I
Id ...........................................................................25, 27
Identity Certificates page ............................................61
Implicit User Rule Editor field description .................416
Implicit User Rules field description ..........................415
Implicit Users ............................................................413
Import Users .............................................................222
Inactive session termination policy .............................18
initial setup of the Session Manager .........................237
initializing synchronization ..........................................33
synchonizing Communication Manager data .......33
Introduction .................................................................13
J
Job Details page ...............................................225, 226
Job Scheduling -Edit Job page .................................509
Job Scheduling -On Demand Job page ....................511
Job Scheduling -View Job page ...............................507
Administering Avaya Aura® Session Manager November 2010 527

L
legal notice ...................................................................2
list of XML Schema Definitions and Sample XMLs for
bulk Import ...................................................116
Local Host Name Resolution page field descriptions 371
location .....................................................................254
location deletion ........................................................249
location details ..........................................................254
location Settings .......................................................403
Location Settings field description ............................403
log details .................................................................467
log on to System Manager .........................................15
log types ...................................................................466
logger ........................................................................478
logging ......................................................................466
Logging Configuration page .....................................484
logging into System Manager .....................................16
Logging page ............................................................469
login for admin ............................................................16
login information .........................................................16
logon warning banner ...........................................18, 20
logs ...........................................................................467
M
maintenace tests ......................................................448
Test Postgres database sanity ...........................448
maintenance tests .............................................446–448
running ...............................................................448
Test Call Processing status ................................447
Test data distribution and redundancy link .........447
Test management link functionality ....................448
Test network connections ...................................446
Test sanity of Secure Access Link (SAL) agent . 448
Test Security Module Status ...............................448
Test Service Director Status ...............................447
Test Service Host status .....................................447
Test SIP A/S Management Server Status ..........447
Maintenance Tests page field descriptions ...............445
managed bandwidth .................................................426
viewing usage ....................................................426
Managed Bandwidth Usage page field descriptions .426
modify ................................................................477, 479
modify appender .......................................................479
modifying ...........................................................336, 354
Branch Session Manager administration settings 354
Session Manager administration settings ..........336
modifying a communication address ..........................69
modifying a Device Settings Group - Location Group 392
modifying a Device Settings Group - Terminal Group 394
modifying a endpoint profile .......................................75
modifying a messaging profile ....................................72
modifying Adaptations ..............................................265
modifying an appender .............................................479
modifying an application ...........................................405
modifying an Application Sequence .........................409
modifying an existing Implicit User Rule ...................414
modifying an NRS Proxy User Rule .........................419
modifying Communication Profiles ...........................362
modifying Connection Links ......................................432
modifying data retention rules ..................................477
modifying dial patterns ..............................................310
modifying domains ....................................................243
modifying Location Settings ......................................403
modifying locations ...................................................248
modifying regular expressions ..................................318
modifying routing policies .........................................301
modifying SIP entities ...............................................280
modifying the default settings ...................................323
modifying time ranges ..............................................295
modifying user account ..............................................77
N
NCS ..........................................................................416
New Application Instance page ............................35, 50
New Local Host Name Entries page field descriptions 372
New User Profile page ...............................................82
nodes ........................................................................491
NRS Proxy User Rule Editor field description ..........420
NRS Proxy Users .....................................................416
NRS Proxy Users field description ...........................420
O
overview ...................................................................235
Session Manager routing ...................................235
overview of SIP Application Server ............................23
overview of SIP entity references .............................289
overview of System Manager .....................................13
P
Password aging policy enforcement ...........................17
password history enforcement policy .........................18
password lockout policy enforcement ........................18
password policies .......................................................19
password policies field description .............................20
password policy ..........................................................18
password strength policy enforcement .......................17
528 Administering Avaya Aura® Session Manager November 2010

pattern list .................................................................315
Peak (Cross-Cluster Total) .........................................27
Peak (Individual) .........................................................27
pending jobs ......................................................496, 502
Pending Jobs page ...................................................502
Primary Hostname ......................................................24
Primary Port ...............................................................24
provisioning Session Manager and Communication
Manager CAC together ................................251
Purpose and usage of SIP subscriptions ..................395
Q
quick start to importing users ....................................228
R
rearranging Applications in an Application Sequence 410
rebooting of selected AST devices for Device
Registration .................................................435
rebooting of selected AST devices for User Registration
......................................................................440
Received Request Count ...........................................26
recommended modifications for location based settings
......................................................................251
redirecting UNIStim Phone .......................................417
Refreshing CA Certificate List ....................................47
registration Summary ...............................................434
Registration Summary field description ....................437
Regular Expression constructs .................................523
regular expression deletion ......................................319
regular expression details .........................................321
regular expression list ...............................................322
regular expressions ..................................................320
Reloading of selected AST devices for device
registration ...................................................435
Reloading of selected AST devices for User Registration
......................................................................440
remove ......................................................................491
remove nodes ...........................................................491
removing a node .......................................................491
removing an appender from a logger .......................479
removing an association between a subscriber and a
user ...............................................................73
Removing Application Sequences ............................409
Removing applications .............................................406
removing association between a endpoint and a user 76
Removing Device Settings Group - Terminal Group .394
Removing Device Settings Groups - Location Groups 393
removing existing Implicit User Rules .......................414
removing replica node from queue ...........................491
removing trusted certificates ......................................47
removing user account ...............................................78
repairing a replica node ............................................489
replica group .............................................................491
replica groups ...........................................................488
Replica Groups page ................................................491
Replica Nodes page .................................................492
resolving ...................................................................368
local host name ..................................................368
Restart Req? ..............................................................25
restore ......................................................................475
Restore page ............................................................482
restoring a system backup from a local server .........476
restoring data backup ...............................................476
restoring deleted user .................................................81
routing ...............................................................235–237
of a call using routing policy data .......................237
overview .............................................................235
prerequisites for Routing Setup ..........................236
Routing overview ................................................236
Routing ...............................................236, 238, 241, 291
about ..................................................................236
element links modifying ......................................291
exporting and importing element data about ......238
importing element data about .............................241
routing element data .................................................240
exporting ............................................................240
routing policies ..........................................................303
routing policy deletion ...............................................302
routing policy details .................................................303
routing policy list .......................................................306
Rule page field descriptions .....................................385
rule precedence and traversal ..................................390
running ......................................................................448
maintenance tests ..............................................448
Running ......................................................................29
S
sample XML file for a user with SIP Communication
Profile ..........................................................232
sample XML with a single user profile ......................228
saving Global Session Manager Settings .................348
saving, committing, and synchronizing configuration
changes .......................................................242
schedule ...................................................................476
Schedule Backup page .............................................482
scheduler ..................................................................495
scheduler overview ...................................................495
scheduling a data backup on a local server .............476
scheduling a user import job .....................................113
search .......................................................................467
Administering Avaya Aura® Session Manager November 2010 529

searching for alarms .................................................461
searching for logs .....................................................467
searching logs ..........................................................467
searching users ..........................................................80
security module page actions ...................................428
Security Module Reset Confirmation page field
descriptions .................................................431
Security Module Status page field descriptions ........430
security settings ..........................................................20
Select .........................................................................27
Sent Response Count ................................................26
Session Manager ........................334, 336, 340, 368, 426
adding SIP entities as Session Manager ...........334
deleting a Session Manager instance ................340
local host name resolving ...................................368
managed bandwidth viewing usage ...................426
modifying administration settings .......................336
viewing administration settings ..........................336
Session Manager Administration page field descriptions
......................................................................341
Session Manager Communication profile administration
.......................................................................70
Session Manager Dashboard field descriptions .......327
Session Manager Entity Link Connection Status page
field descriptions ..........................................425
Session Manager page field descriptions .................344
session properties ......................................................19
session properties field descriptions ..........................22
set ...............................................................................43
setting enrollment password .......................................43
SIP Application Sessions ...........................................29
SIP elements ............................................................277
authentication .....................................................277
TLS layer validation ............................................277
SIP entities ...............................................................277
IP and transport layer validation .........................277
SIP entity ..................................................................283
SIP entity deletion .....................................................282
SIP entity details .......................................................284
SIP entity link deletion ..............................................292
SIP Entity Link Monitoring Status Summary page field
descriptions .................................................423
SIP entity list .............................................................286
SIP Entity, Entity Link Connection Status page field
descriptions .................................................424
SIP firewall .........................................375, 381, 382, 390
blacklist ..............................................................381
configuring ..........................................................375
default rule set ....................................................390
rules ...................................................................381
specifying a new rule ..........................................382
whitelist ..............................................................381
SIP monitoring ..........................................................422
viewing the SIP Monitoring Status Summary page ..
422
SIP Monitoring ..........................................................421
SIP Protocol Version ..................................................29
Statistic .......................................................................27
Status ..............................................................25–27, 29
stop ...........................................................................502
Stop Confirmation page ............................................513
stopping pending jobs ...............................................502
synchronizing messaging data ...................................33
synchronizing data ...............................................33
synchronizing System Manager master database and
replica computer database ...................489, 490
T
time range deletion ...................................................296
time range list ...........................................................297
time ranges ...............................................................296
Trace Viewer page field descriptions ........................453
Tracer Configuration page field descriptions ............449
Trusted Certificates page ...........................................56
U
Up Time ................................................................26, 29
User Delete Confirmation page .................................111
User Profile Edit page ................................................93
User Profile View page .............................................103
User Registrations ....................................................438
User Registrations field description ..........................442
users, adding ..............................................................64
V
Verizon Adapter (VerizonAdapter) ............................269
Version ..................................................................25, 27
view ....................................................467, 476, 488, 496
View ......................................................................25, 27
View Application Instance page ............................35, 50
view log details .........................................................467
view loggers ..............................................................477
view replica groups ...................................................488
View Trust Certificate page ........................................59
viewing ......................................................................422
SIP Monitoring Status Summary page ...............422
viewing a user importing job in Scheduler ................115
viewing alarms ..........................................................459
viewing application sequences .................................408
530 Administering Avaya Aura® Session Manager November 2010

viewing applications ..................................................404
viewing background edit job status ...........................363
viewing Communication Profile edit failures .............363
viewing Communication Profiles ...............................362
viewing completed jobs .....................................496, 498
viewing data retention rules ......................................476
viewing deleted users .................................................81
view deleted users ...............................................81
viewing details of a completed job ............................497
viewing details of a pending job ........................496, 497
viewing details of a user .............................................78
viewing details of a user importing job ......................115
viewing Device Settings Groups ...............................391
viewing identity certificates .........................................48
viewing Implicit User Rules .......................................413
viewing location settings ...........................................403
viewing log details ....................................................467
viewing loggers for a log file .....................................477
viewing logs ..............................................................497
pending jobs .......................................................497
completed jobs ............................................497
viewing pending jobs ................................................496
viewing Registration Summary .................................434
viewing replica groups ..............................................488
viewing replica node details ......................................490
viewing replica nodes in a replica group ...................489
viewing replication details for a replica node ............490
viewing Service Director Statistics .............................25
viewing Service Host Instance Statistics ....................27
viewing trusted certificates .........................................44
viewing User Registrations .......................................438
X
XML for user with core attributes ..............................228
Administering Avaya Aura® Session Manager November 2010 531
