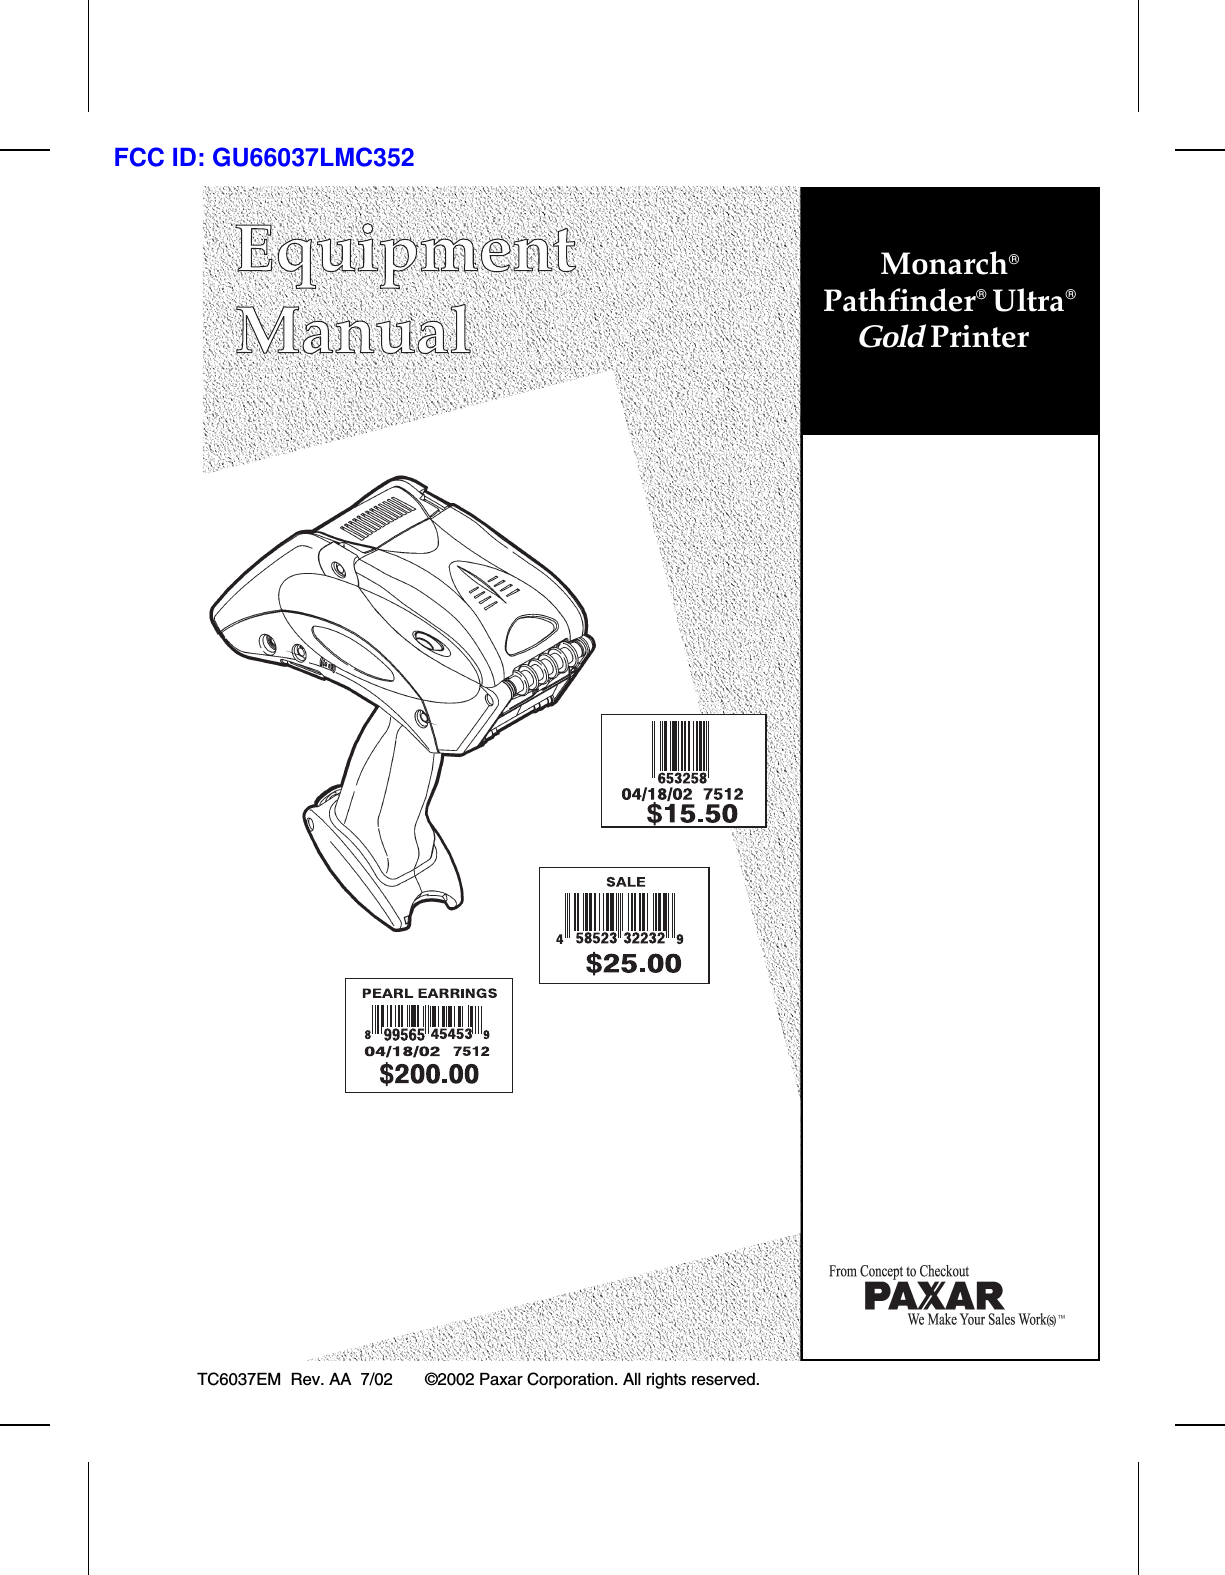
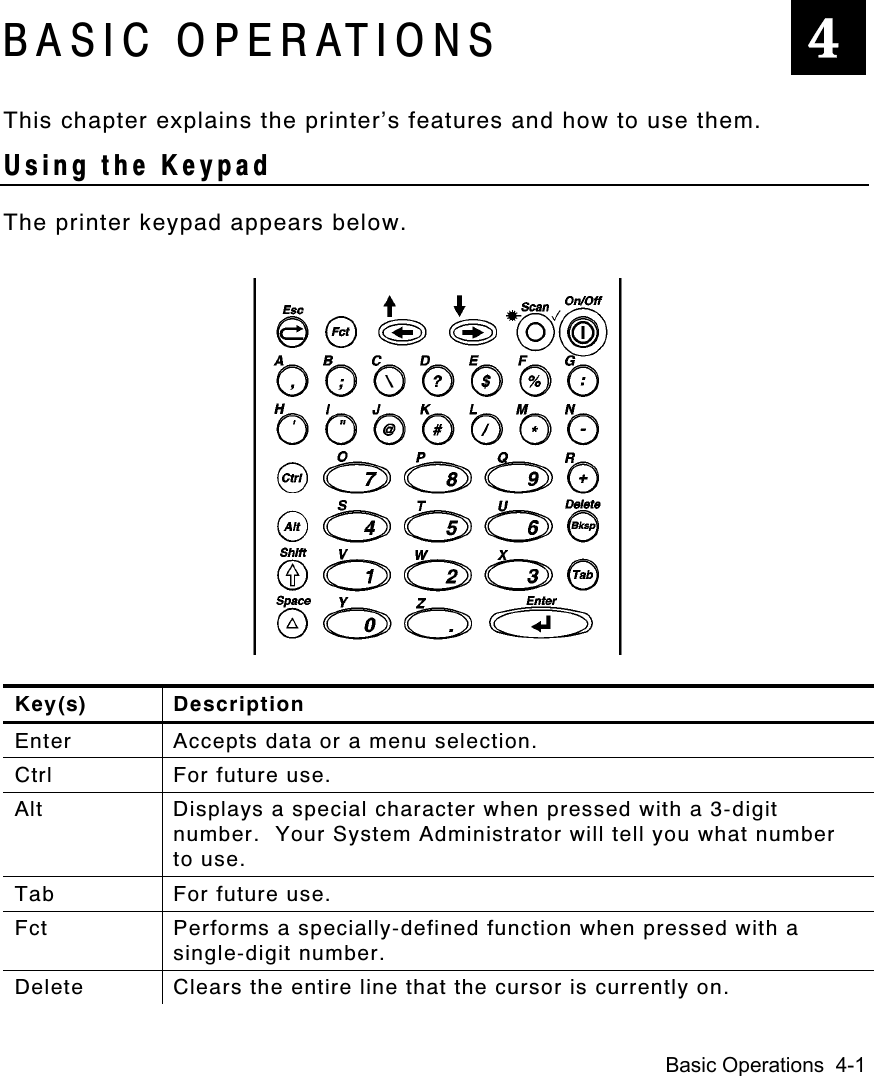
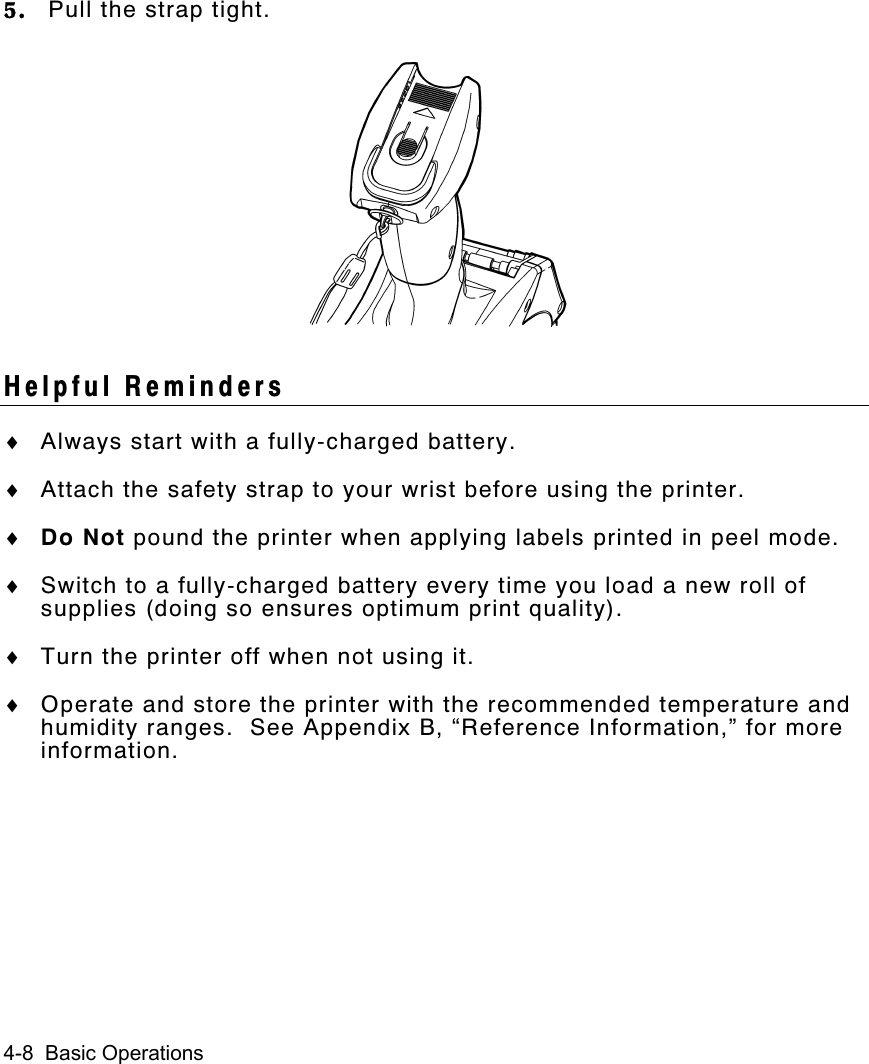
Avery Dennison Retail Information Services 6037LMC352 2.4 GHz Wireless Scanner (FHSS) User Manual Corel Ventura 6032EMCV CHP
Avery Dennison Retail Information Services, LLC 2.4 GHz Wireless Scanner (FHSS) Corel Ventura 6032EMCV CHP
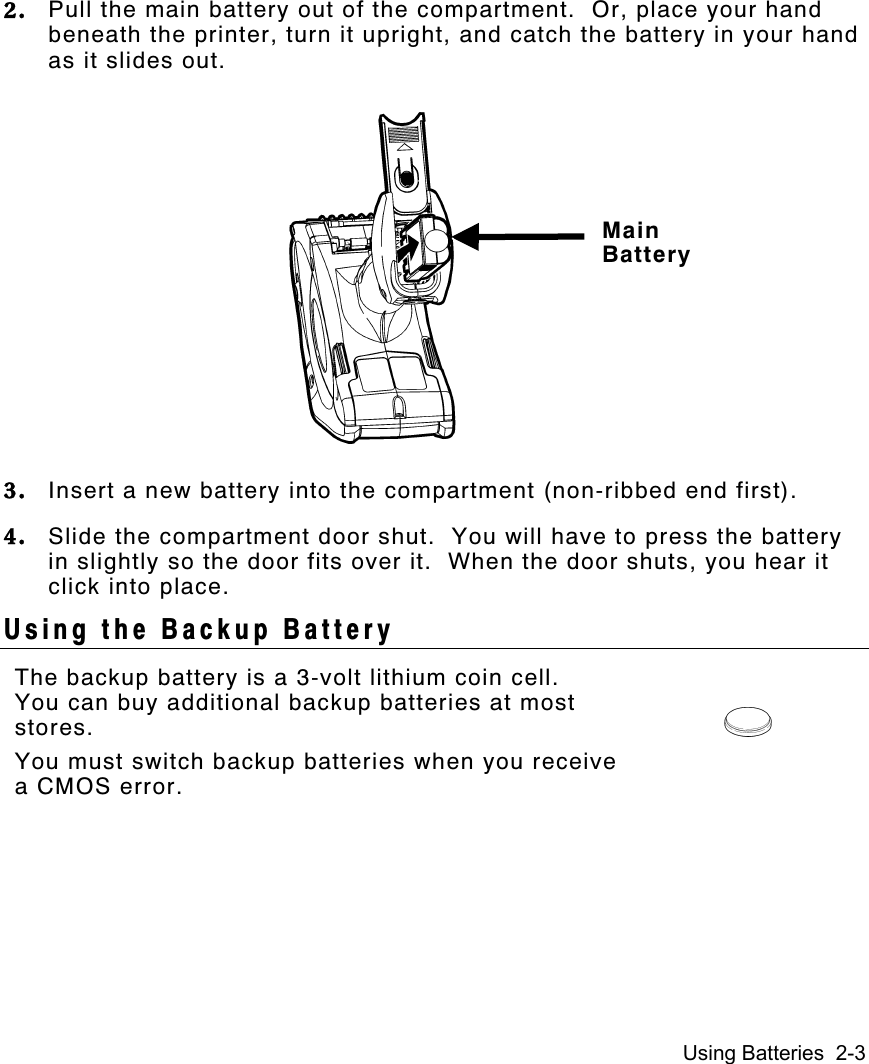
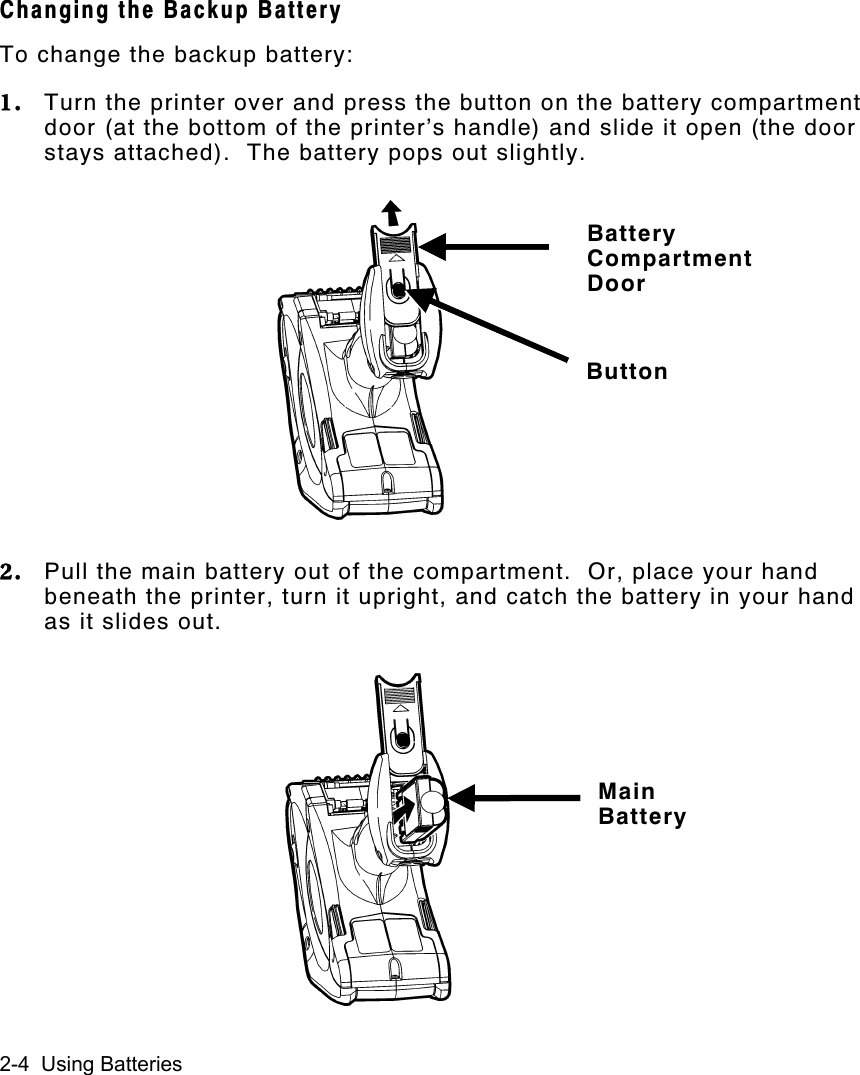
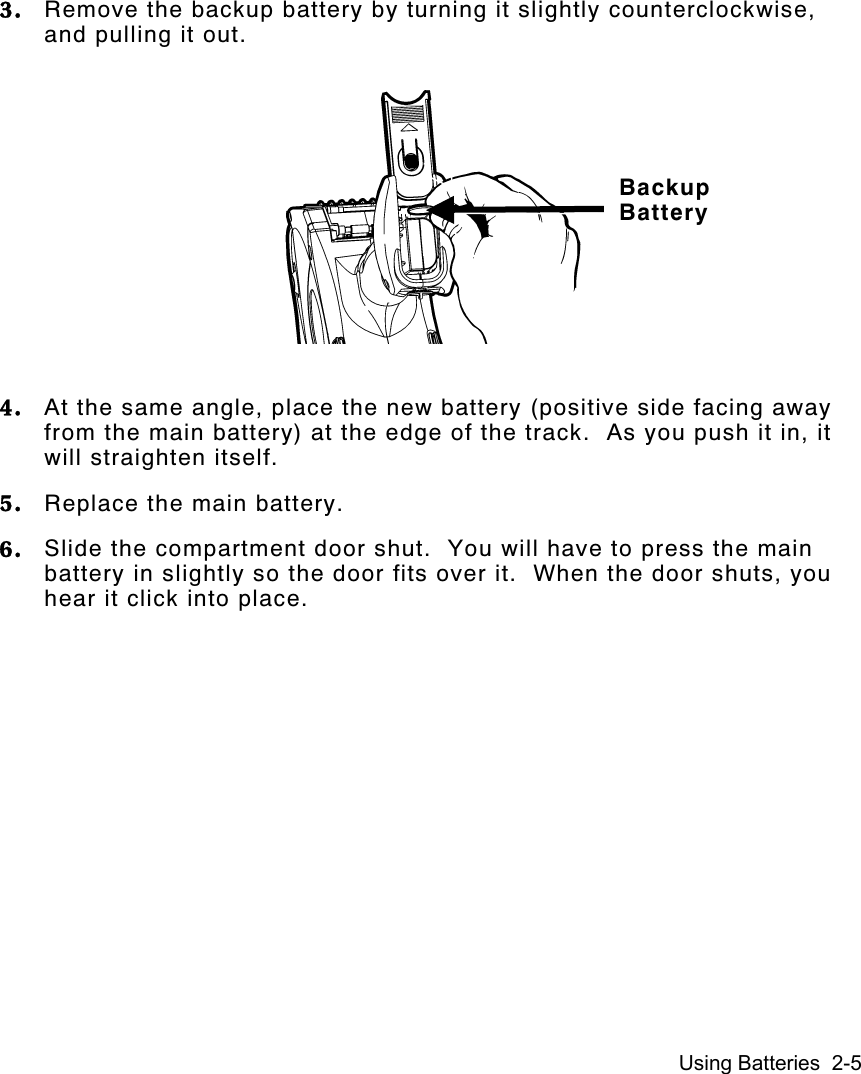
UserManual.wiki
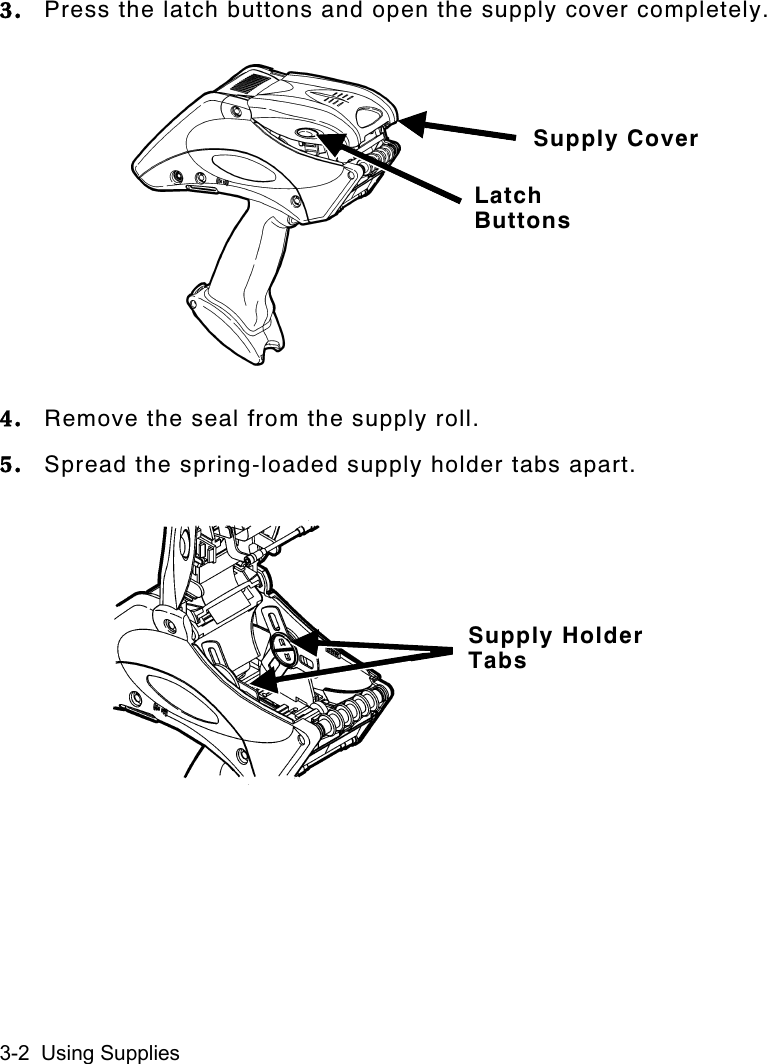
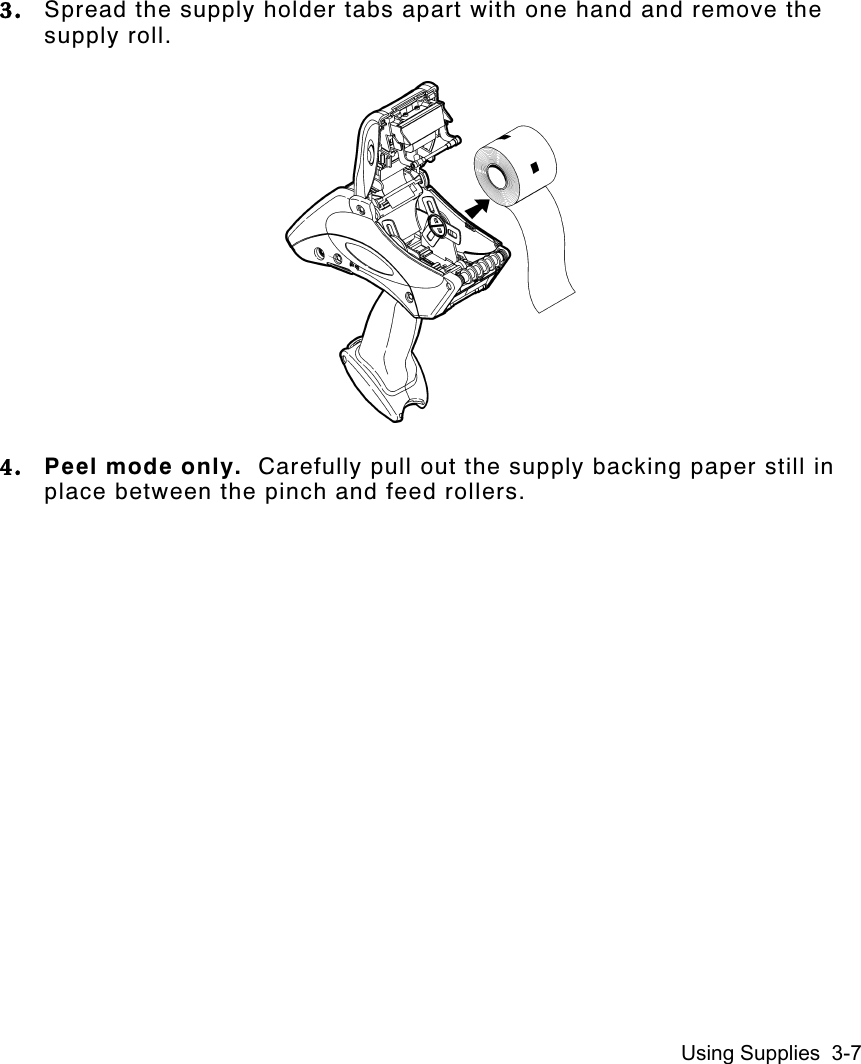
>
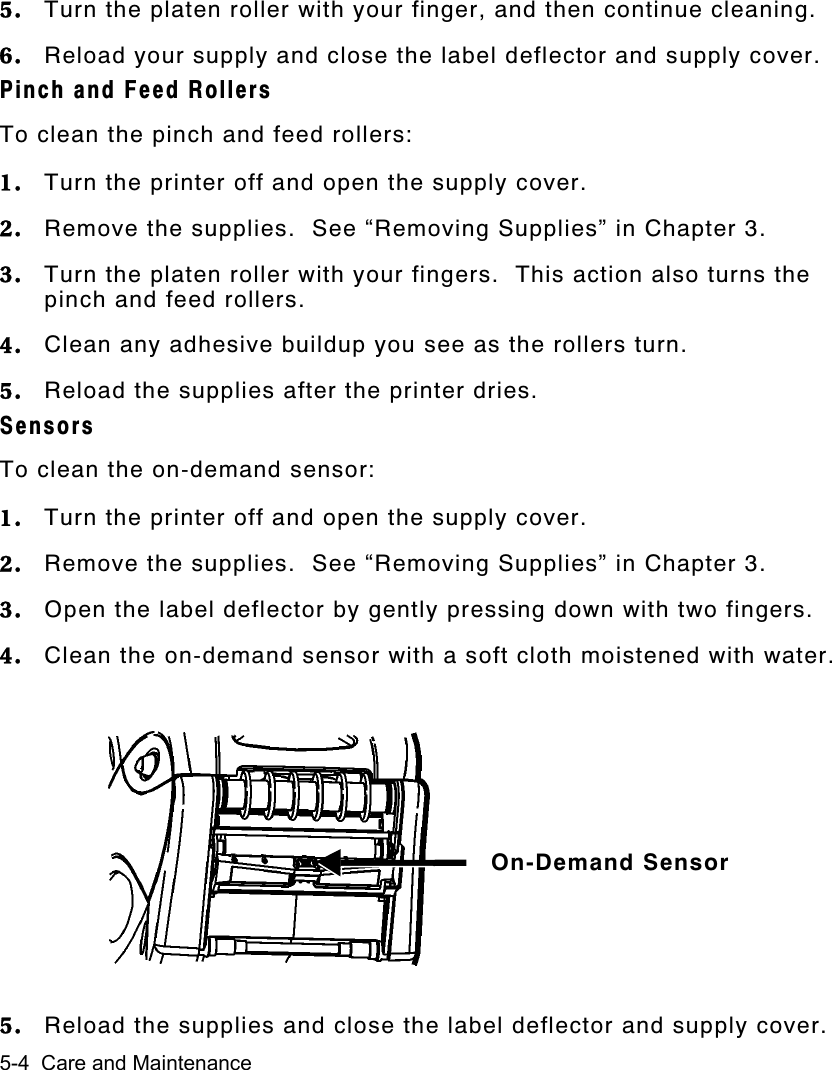
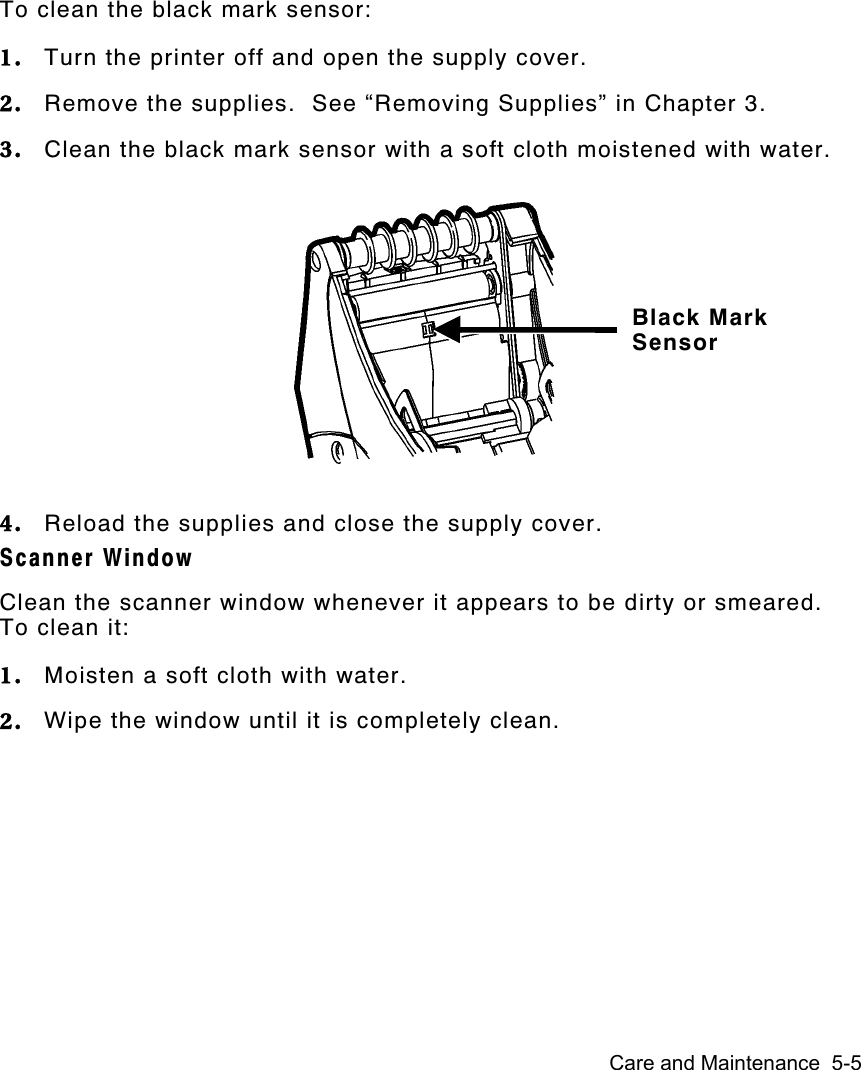
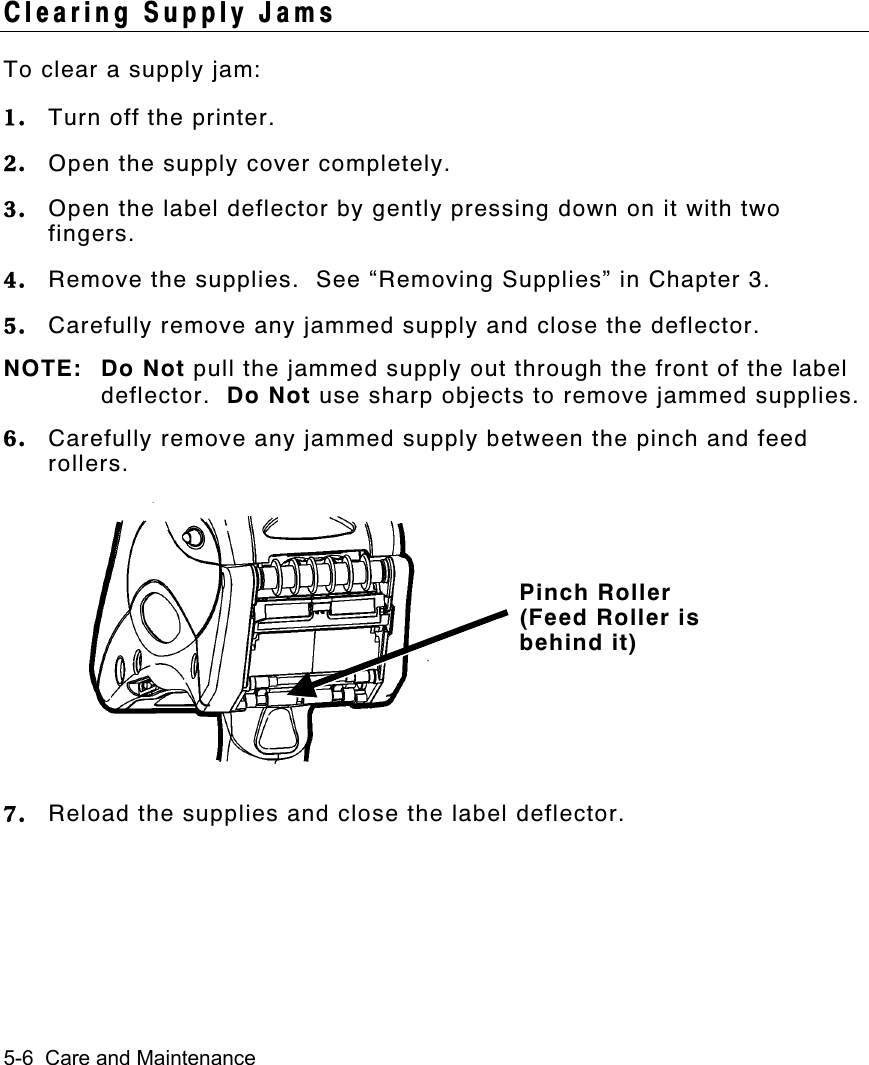
Avery Dennison Retail Information Services
>
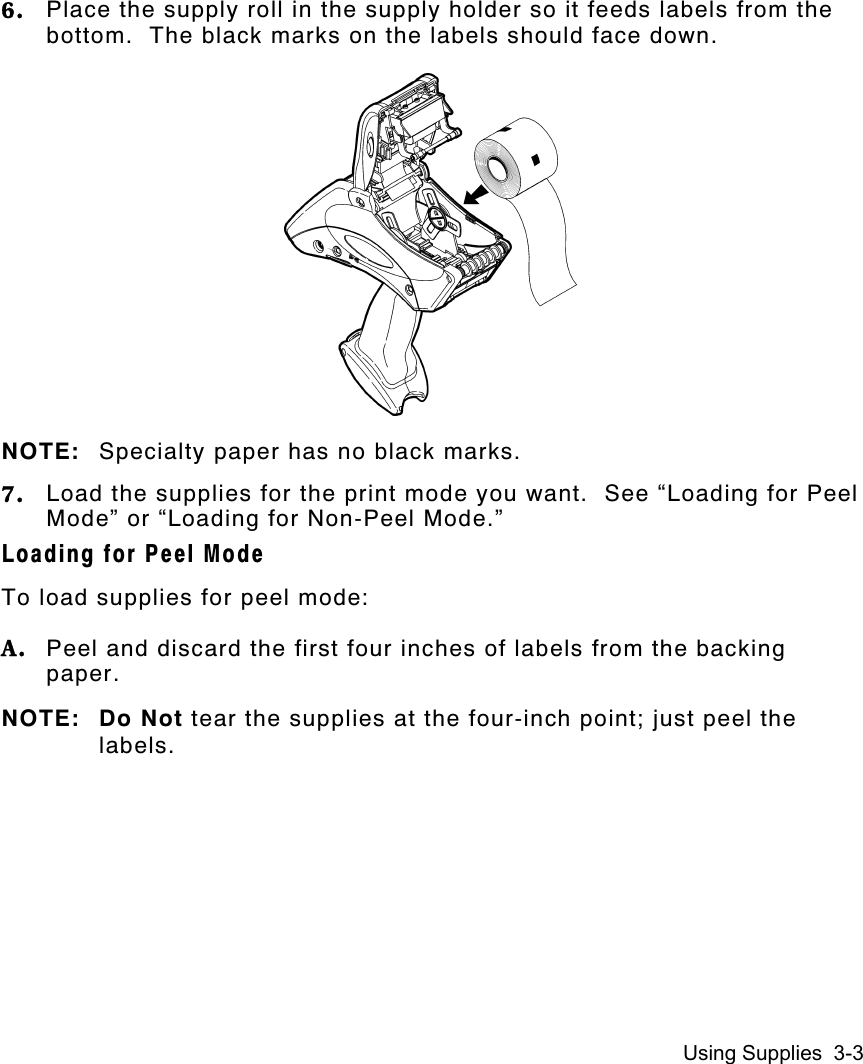
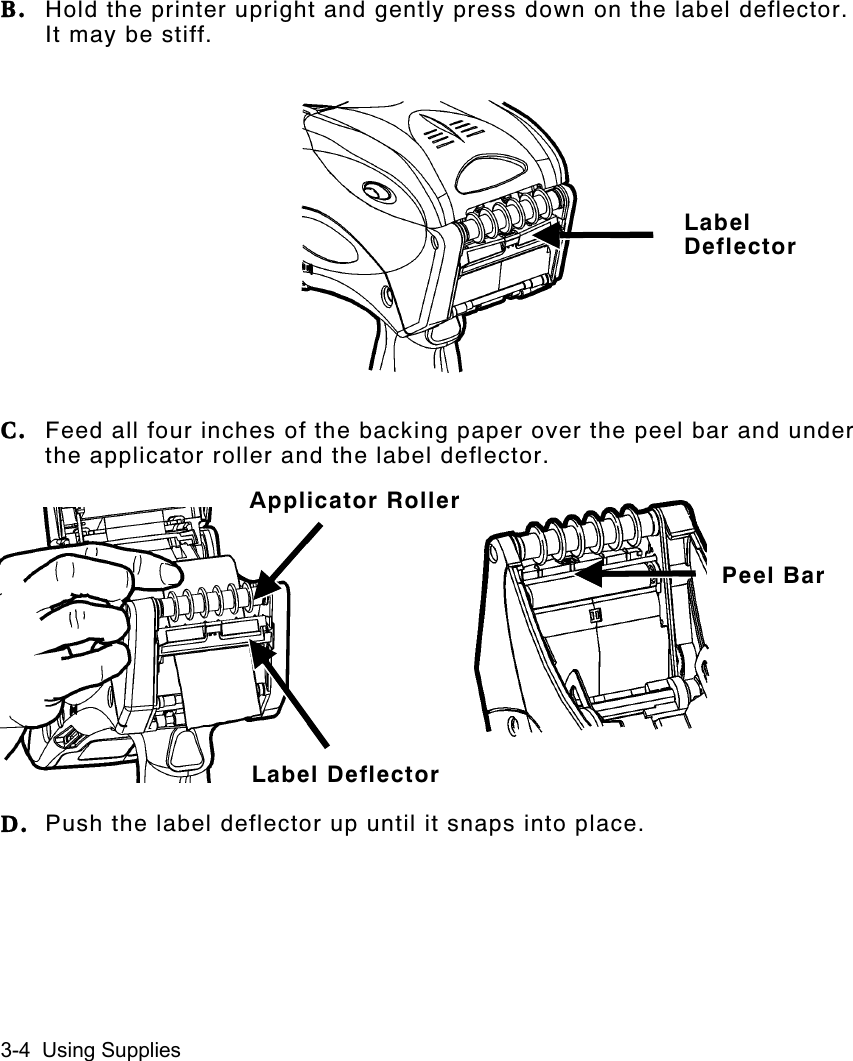
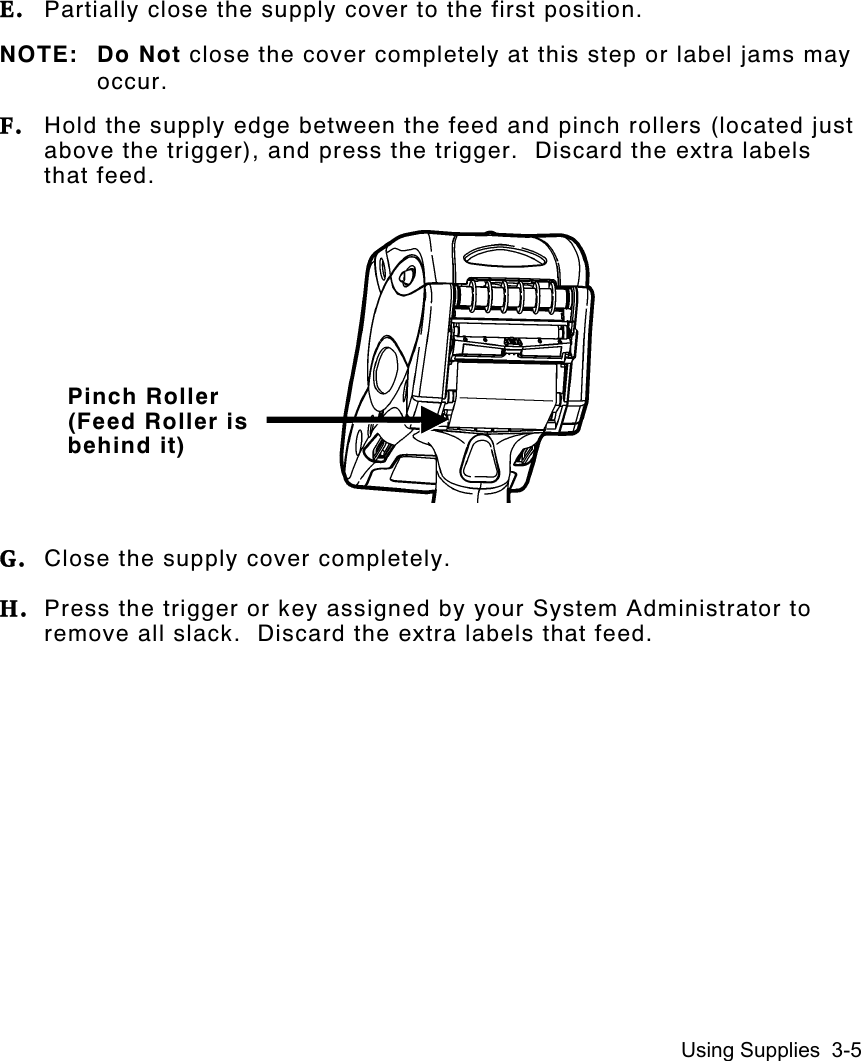
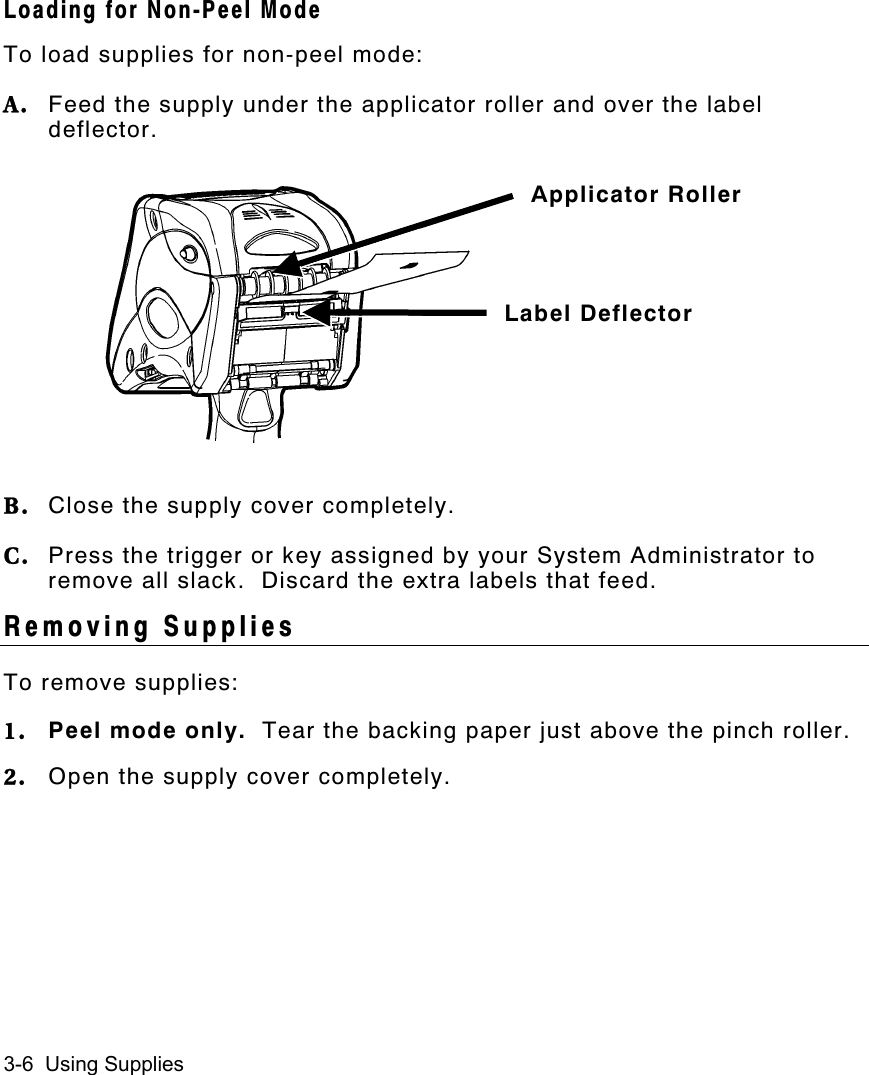
6037LMC352 User Manual
Users Manual
Navigation menu
Upload a User Manual
Namespaces
Wiki Guide
HTML
PDF
Info
Views
User Manual
Discussion / Help
Navigation