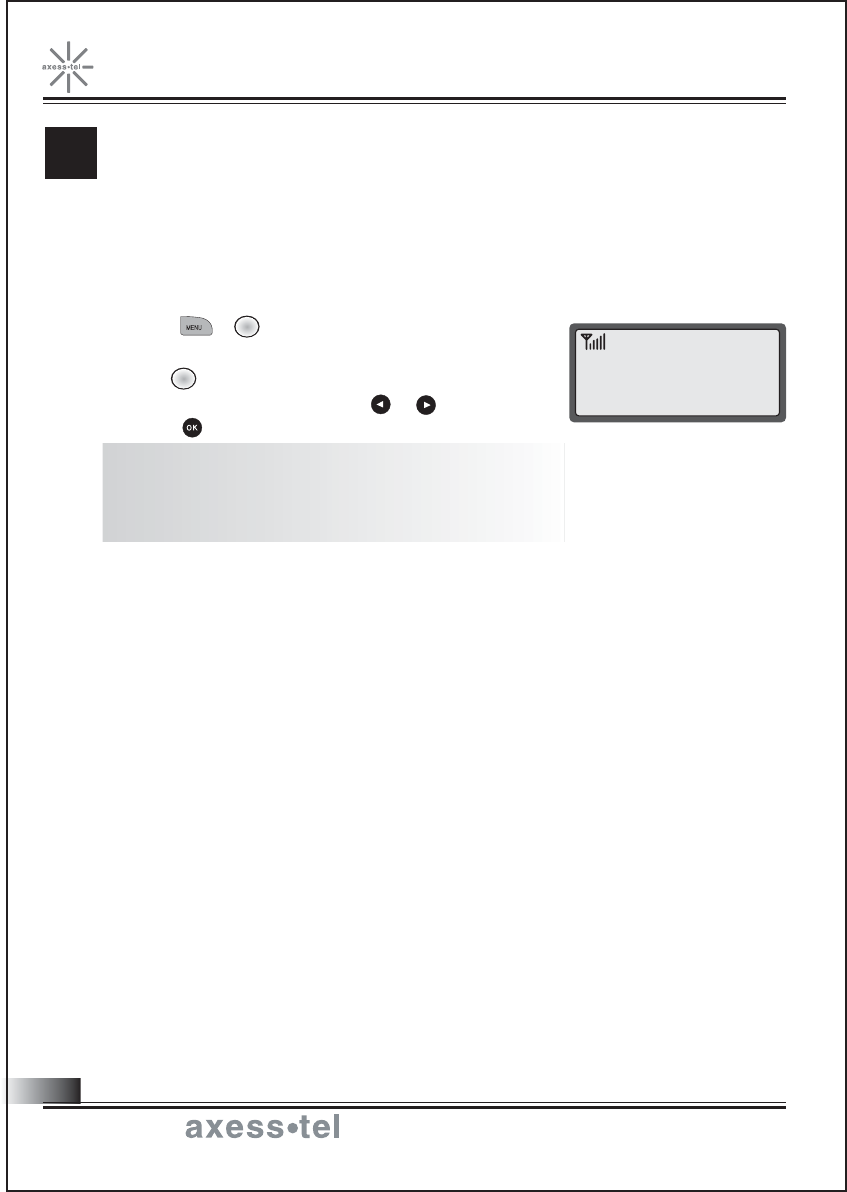
Axesstel AXWP830 Fixed WLL Telephone (CDMA) User Manual 0 9 ai
Axesstel Inc Fixed WLL Telephone (CDMA) 0 9 ai
Axesstel >
Users Manual
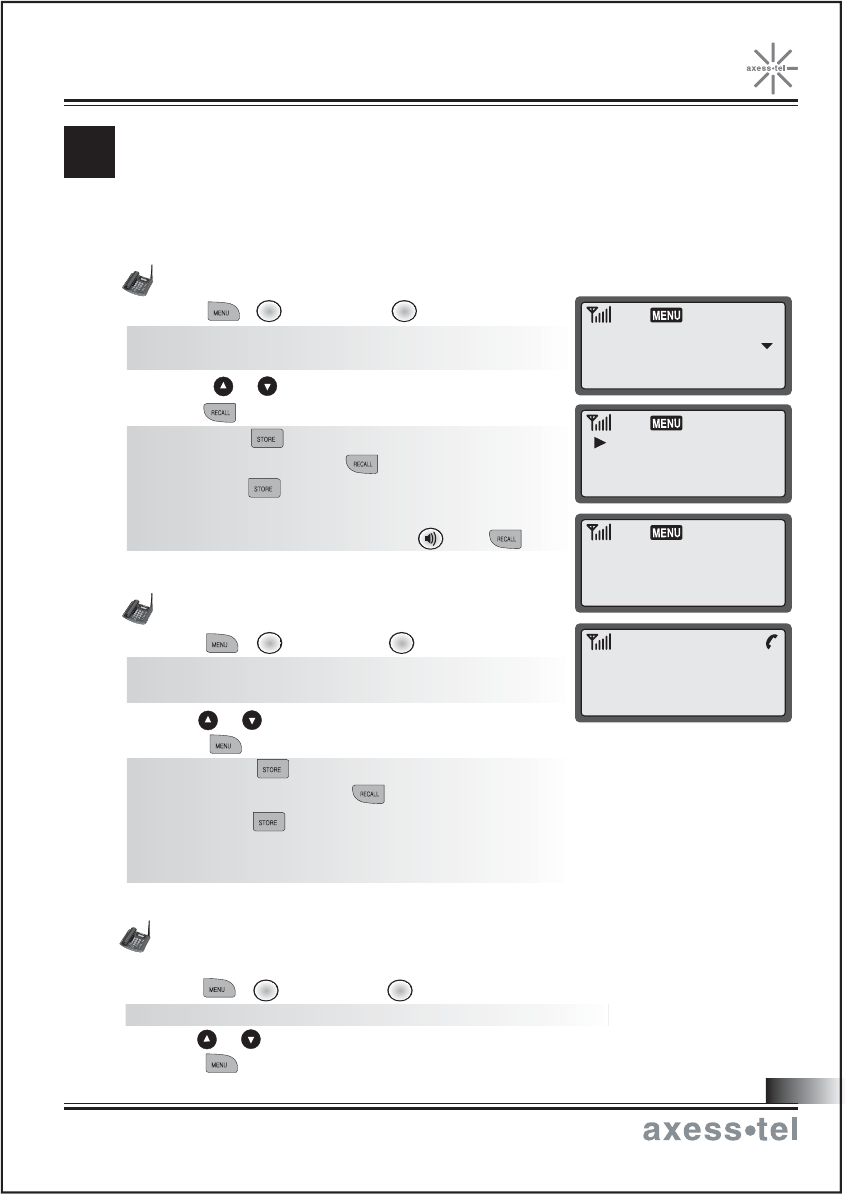
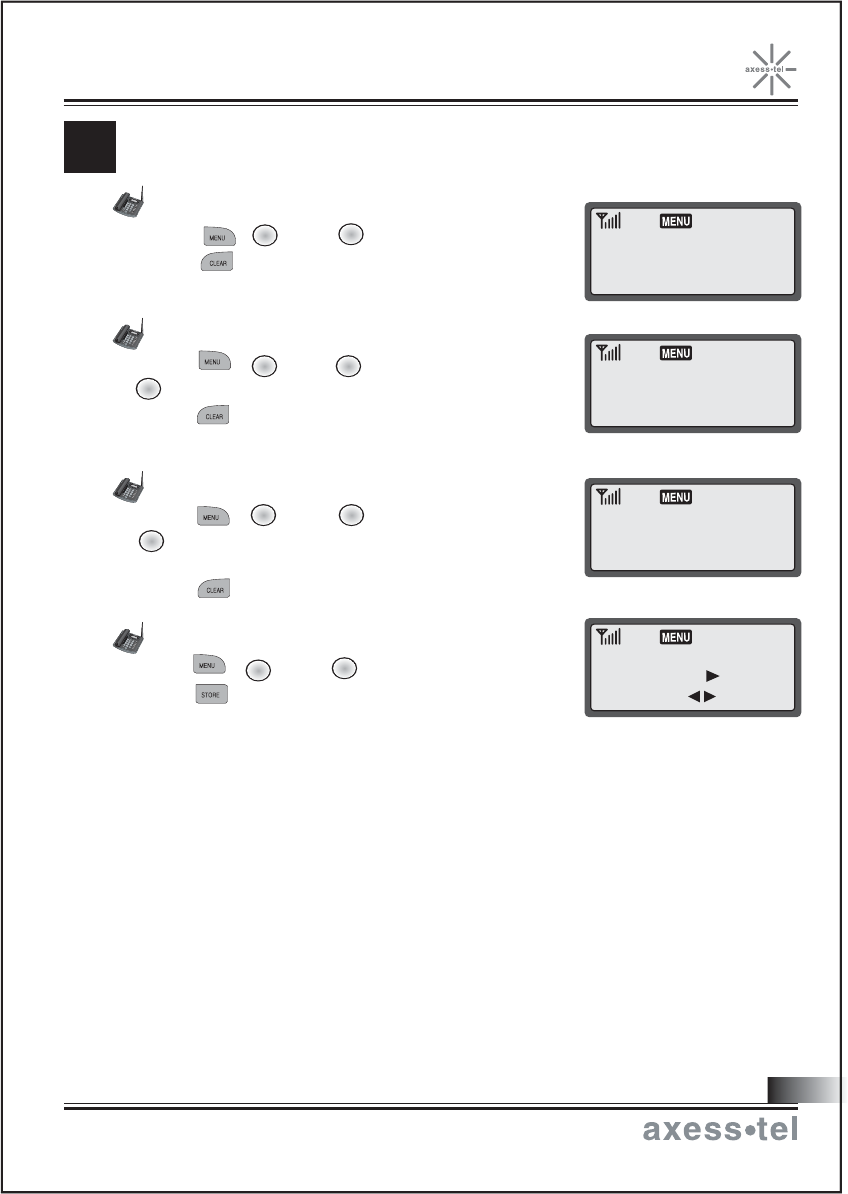
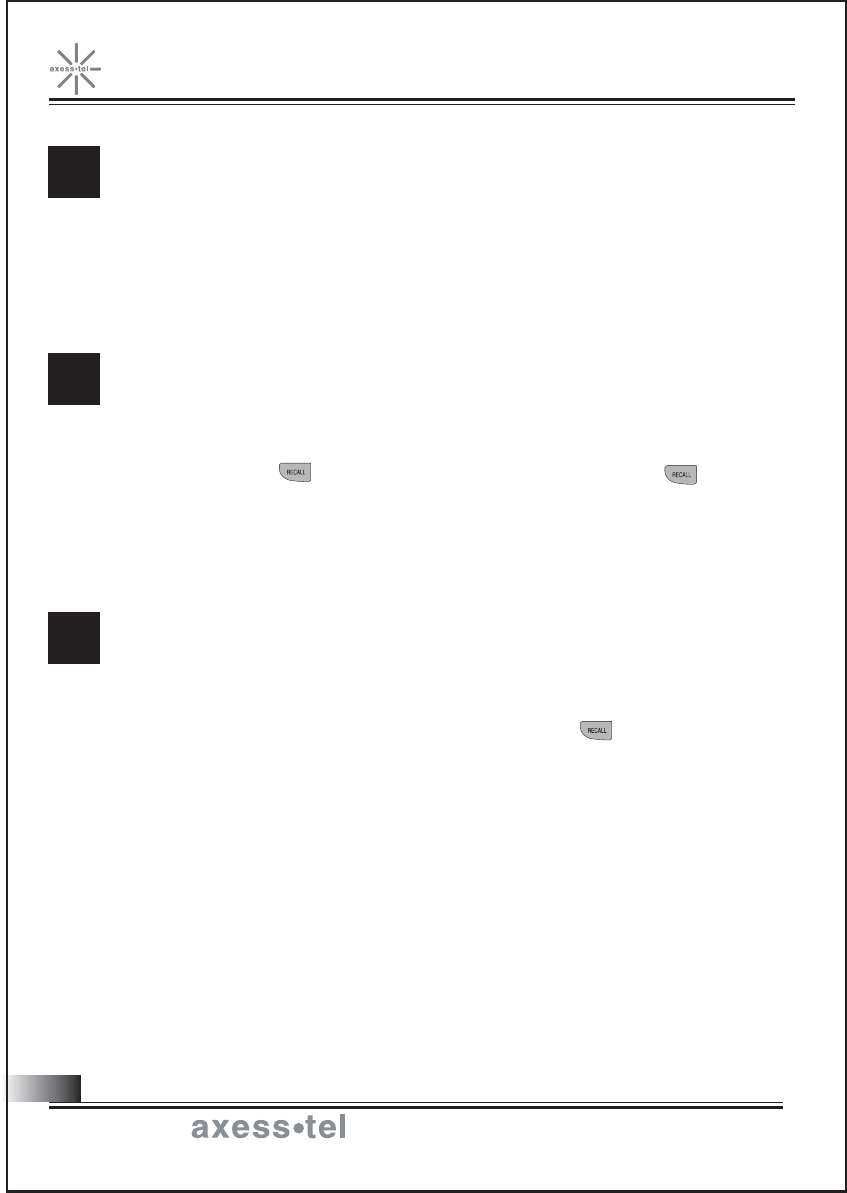
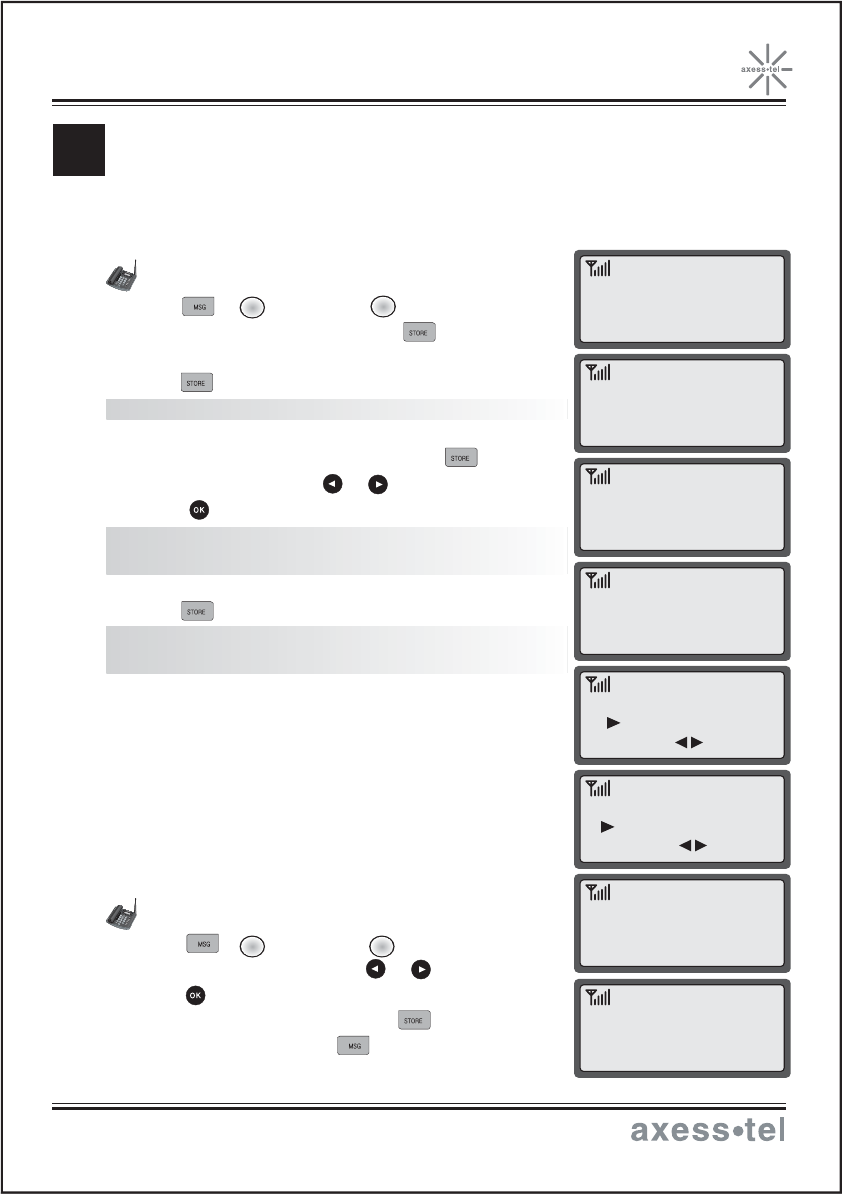
Redialing missed Calls
To display a list of missed received calls.
1. Press , (Call History), (Missed).
NOTE: If there's no missed call record, 'MISSED CALL MEMORY EMPTY!' displays..
2. Press or to select number to redial.
3. Press to call back the number.
Redialing Outgoing Calls
1. Press , (Call History), (Outgoing).
NOTE: If there's no outgoing call history,
"OUTGOING CALL MEMORY EMPTY!" displays.
2. Press or to select number to redial.
3. Press to redial the number.
NOTE1: Press to see time and date of the call
made. Then press to redial the number or
press again to save the number in memory.
NOTE2: To redial the last number called, just
pick up the handset or press and .
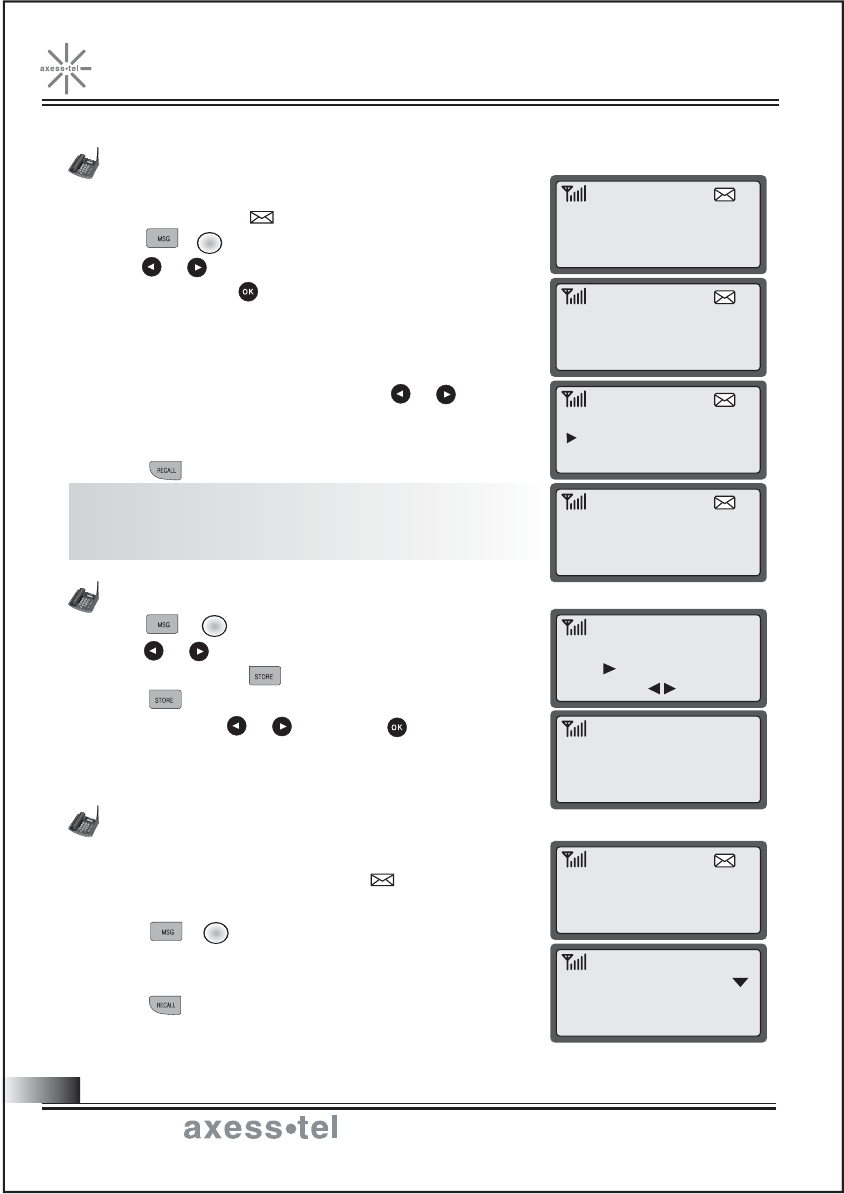
Returning Incoming Calls
1. Press , (Call History), (Incoming).
NOTE: If there's no incoming call record,
"INCOMING CALL MEMORY EMPTY!" displays.
2. Press or to select number to redial.
3. Press to call back the number.
NOTE1: Press to see time and date of the call
arrival. Then press to redial the number or
press again to save the number in memory.
NOTE2: Incoming history is available only when
caller ID is activated.
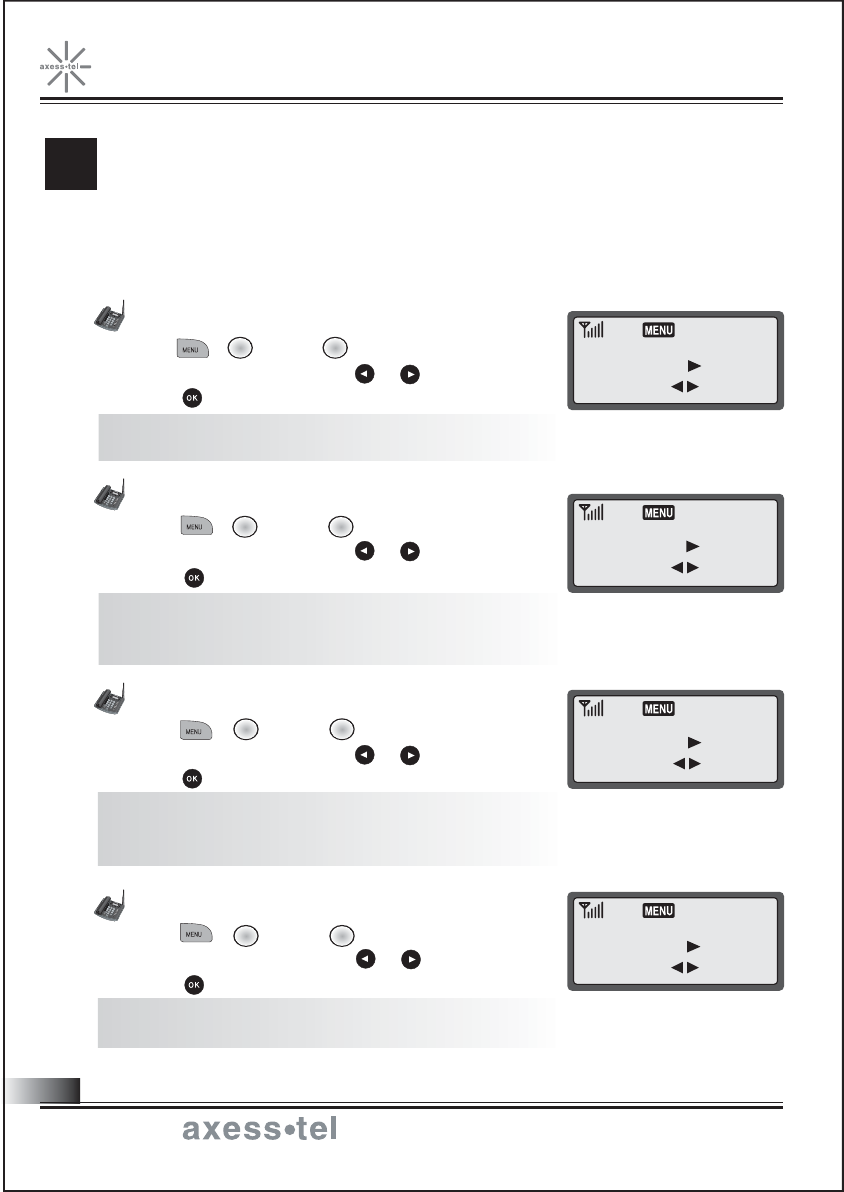
ALL HISTORY
C
Your phone stores the last 10 outgoing calls and the last 10
incoming calls (only when Caller ID function is activated).
You can display and redial these numbers.
2
3
1
1
1 1
01 : OUTGOING
02 : INCOMING
03 : MISSED
01 :
JOHN
02 : DANIEL
03 : MICHAEL
FRI 10/09 9:45P
123-456-7890
CALLING...
123-456-7890
23
Fixed Wireless Phone
Connecting the World Now
NOTE1: Press to see time and date of the call arrival. Then press to
redial the number or press again to save the number in memory.
NOTE2: Missed history is available only when caller ID is activated.
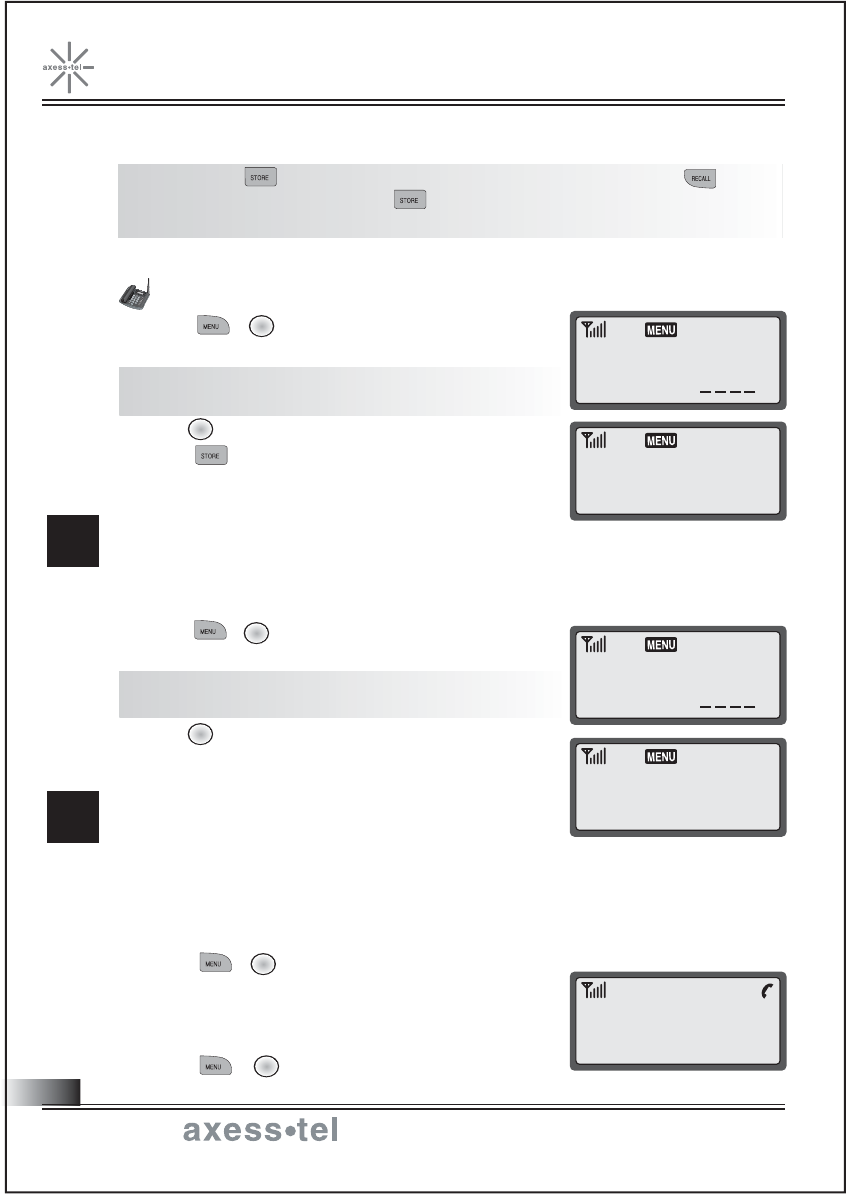
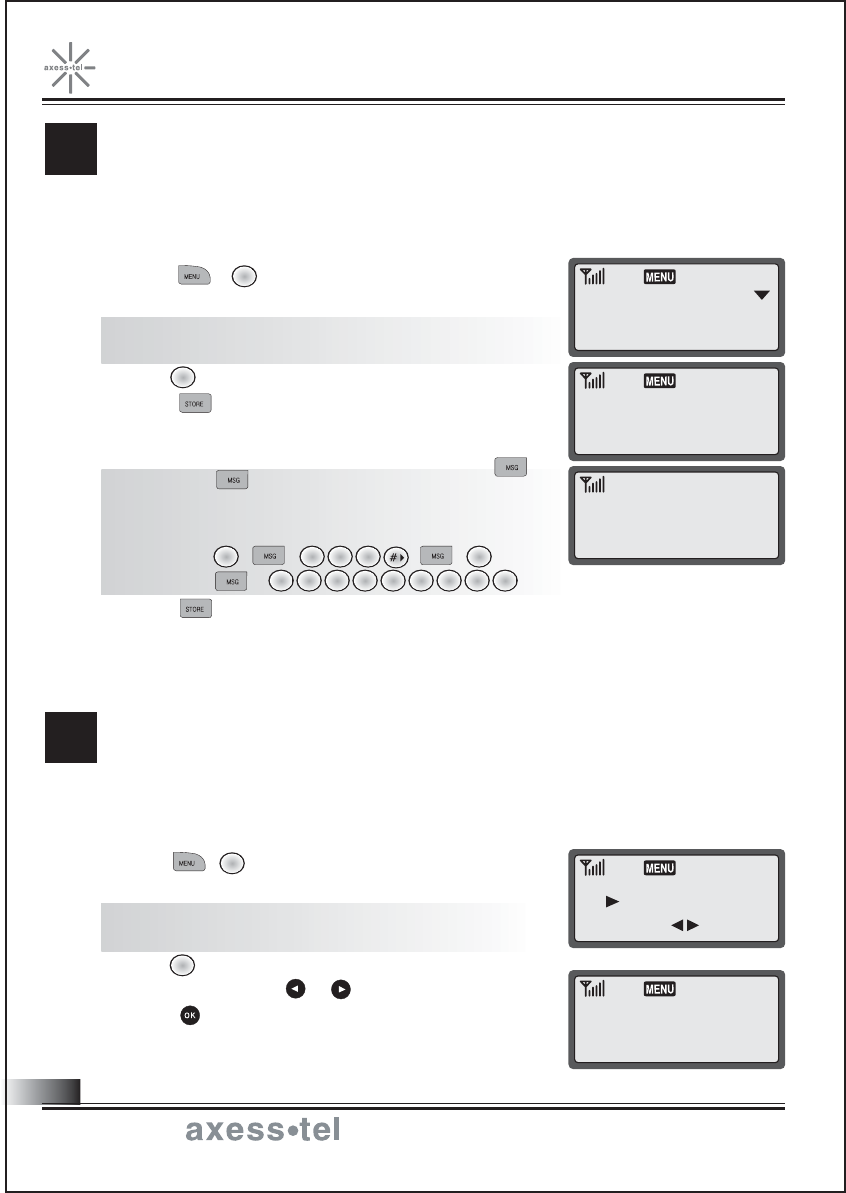
Erasing All Numbers in Call History
1. Press , (Security).
2. Enter lock code.
NOTE: Lock code is set as 0000 from the factory.
To change lock code, see page 33.
3. Press (Erase Logs).
4. Press to confirm.
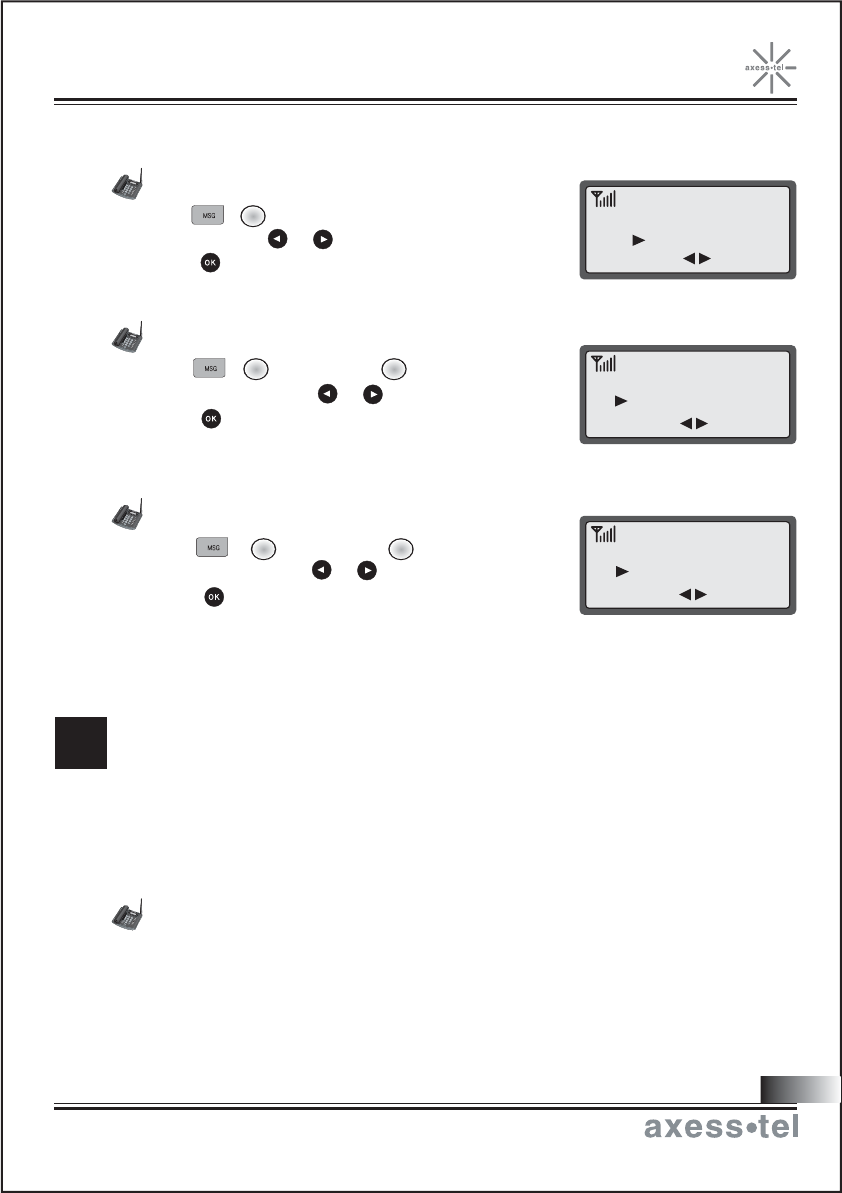
Displaying Your Phone Number
1. Press , (Security).
2. Enter lock code.
NOTE: Lock code is set as 0000 from the factory.
To change lock code, see page 33.
3. Press (My Phone Number).
This feature lets you mute the microphone, so that the other
party cannot hear your voice or the sound of your surroundings.
This function is available only during conversation.
1. Press , (Mute) during conversation.
The message 'MUTE' blinks to indicate the function
Is working. The other party can no longer
hear you, but you can hear them.
2. Press , again to resume the conversation.
ISPLAYING YOUR PHONE NUMBER
D
UTE
M
7
8
6
1
6
YES?
EARSE CALL LOGS
2223334444
MY PHONE NUMBER
123-456-7890
MUTE
ENTER LOCK CODE
ENTER LOCK CODE
24
1
Fixed Wireless Phone
Connecting the World Now
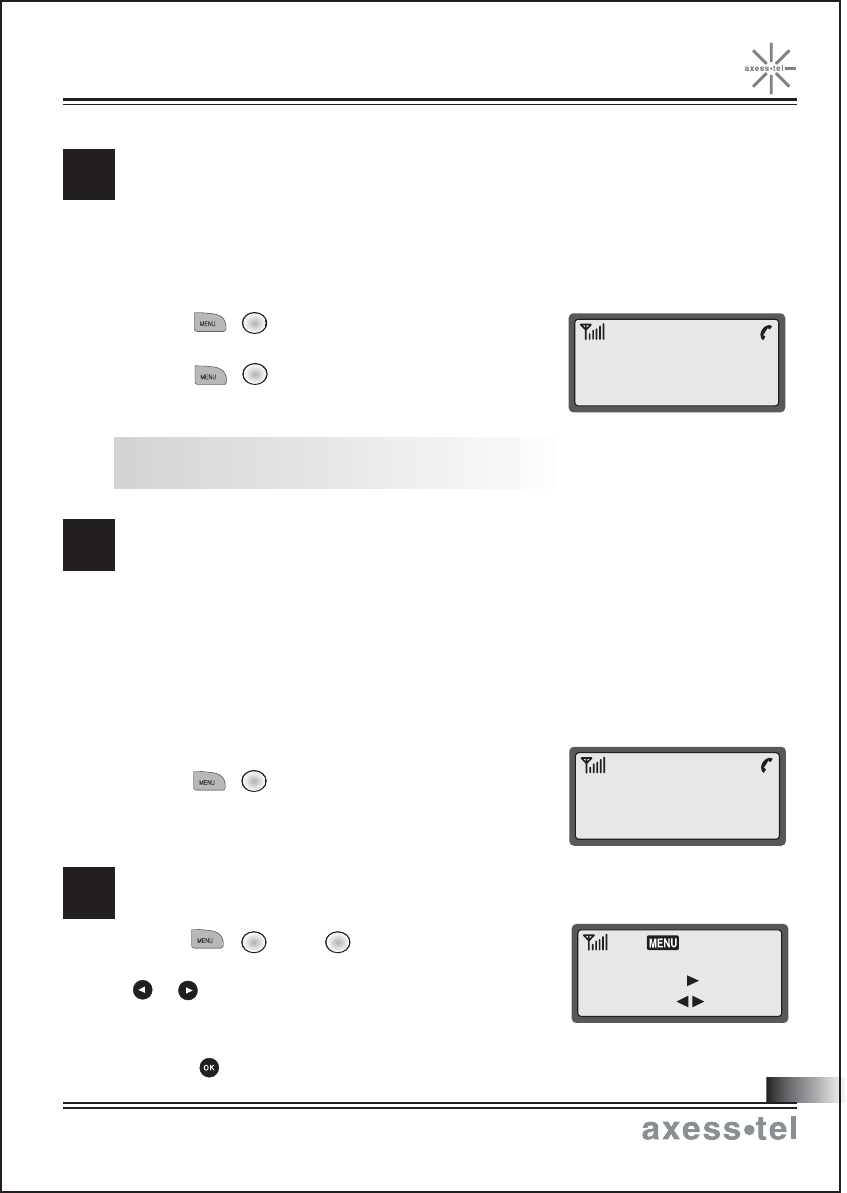
1. Press , (Time), (Time Mode).
2. Select the time display mode by pressing
or .
AM/PM: Display 0~12 hours with A or P indicator
24 Hour: Display 00~24 hours
3. Press to save the change.
You can check your own phone number or save a number during a
conversation without transmitting the dial tones to the other party.
This function is available only during a telephone conversation.
1. Press , (Silent Key) during conversation.
'SILENT KEY' blinks to indicate the function is working.
2. Press , again to disable the feature.
NOTE: With SILENT KEY function on, you cannot send responses to an ARS
(Automatic Response System).
When you're prompted to enter your phone number by ARS,
you can conveniently transmit your number by pressing two keys
instead of the entire number.
If 'SILENT KEY' is set, you cannot use this feature. This function
is available only during a telephone conversation.
1. When you're prompted to enter your phone number
press , (Send My #).
2. Your phone number is transmitted automatically.
ILENT KEYPAD
S
ENDING YOUR PHONE NUMBER
S
3
2
2
123-456-7890
SILENT KEY
2223334444
SEND MY NUMBER !
25
ELECTING TIME MODE
S
3 5
AM/PM
TIME MODE
Fixed Wireless Phone
Connecting the World Now
CHANGE: SEL:OK
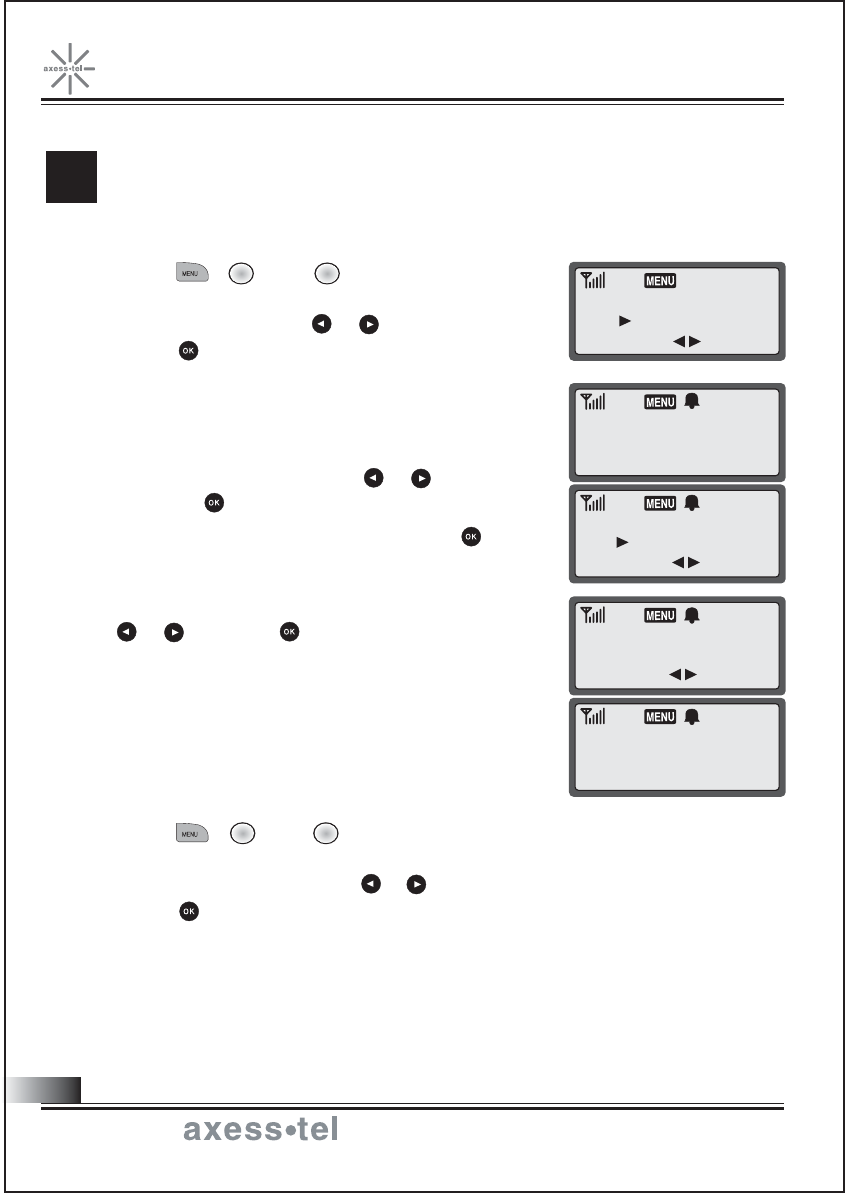
You can set the alarm sound daily or one time only.
1. Press , (Time), (Alarm).
2. Select "SET" by pressing or and
press .
3. Enter alarm time and press .
4. Select alarm mode by pressing or
and press .
Daily: Alarm sounds daily.
One time: Alarm sounds once.
5. Enter the duration of the alarm by pressing
or and press .
A bell icon (alarm) appears in icon line.
On alarm time, the icon and "ALARM TIME"
message blinks and alarm goes off.
Press any key to stop the alarm.
Canceling the Alarm Time
1. Press , (Time), (Alarm).
2. Select "RELEASE" by pressing or and
press to store the setting.
ETTING THE ALARM
S
3 1
3 1
ALARM
07 : 00am
22 : 32pm
ALARM SOUND TIME
SET
1 MINUTE
ALARM MODE
ALARM TIME
DAILY
26
Fixed Wireless Phone
Connecting the World Now
CHANGE: SEL:OK
CHANGE: SEL:OK
CHANGE: SEL:OK
Checking the Last Call Time
1. Press , (Time), (Last Call).
2. Press to clear the display.
Checking Accumulated Incoming Call Time
1. Press , (Time), (Total Time),
(Incoming).
2. Press to clear the display.
Checking Accumulated Outgoing Call Air Time
1. Press , (Time), (Total Time),
(Outgoing).
2. Press to clear the display.
Reset Accumulated Call Time
1. Press , (Time), (Clr Call Time).
2. Press .
HECKING AND CLEARING CALL TIMES
C
34
2
3 3
1
3 3
32
3:25
LAST CALL TIME
INCOMING CALL
OUTGOING CALL
CLEAR CALL TIME
3:25
12:26:32
YES ?
27
Fixed Wireless Phone
Connecting the World Now
CHANGE: SEL:OK
You can set your phone to sound warning beeps that indicate:
- each minute you are on a phone call
- when you are out of the service area
Setting/Releasing 1 Minute Alert
1. Press , (Sound), (1 Min Alert).
2. Select ON or OFF by pressing or .
3. Press .
NOTE: When 1 minute alert is set, the phone gives alert
sound each minute while you are on a phone call.
Setting/Releasing Service Alert
1. Press , (Sound), (SVC Alert).
2. Select ON or OFF by pressing or .
3. Press .
NOTE: When service alert is set, the phone gives alert
sound when the phone is acquiring or loses the
service signal.
Setting/Releasing Connection Alert
1. Press , (Sound), (Connect Alert).
2. Select ON or OFF by pressing or .
3. Press .
NOTE: When connection alert is set, the phone gives
alert sound when the call has been connected to the
number dialed.
Setting/Releasing Voice Privacy Alert
1. Press , (Sound), (VP Alert).
2. Select ON or OFF by pressing or .
3. Press .
NOTE: When voice privacy alert is set, the phone gives
alert sound when the voice privacy is on.
ETTING WARNING ALERTS
S
4 5
4 4
1 MINUTE ALERT
OFF
SERVICE ALERT
OFF
CONNECT ALERT
ON
VP ALERT
ON
28
47
48
Fixed Wireless Phone
Connecting the World Now
CHANGE: SEL:OK
CHANGE: SEL:OK
CHANGE: SEL:OK
CHANGE: SEL:OK

Advanced Features
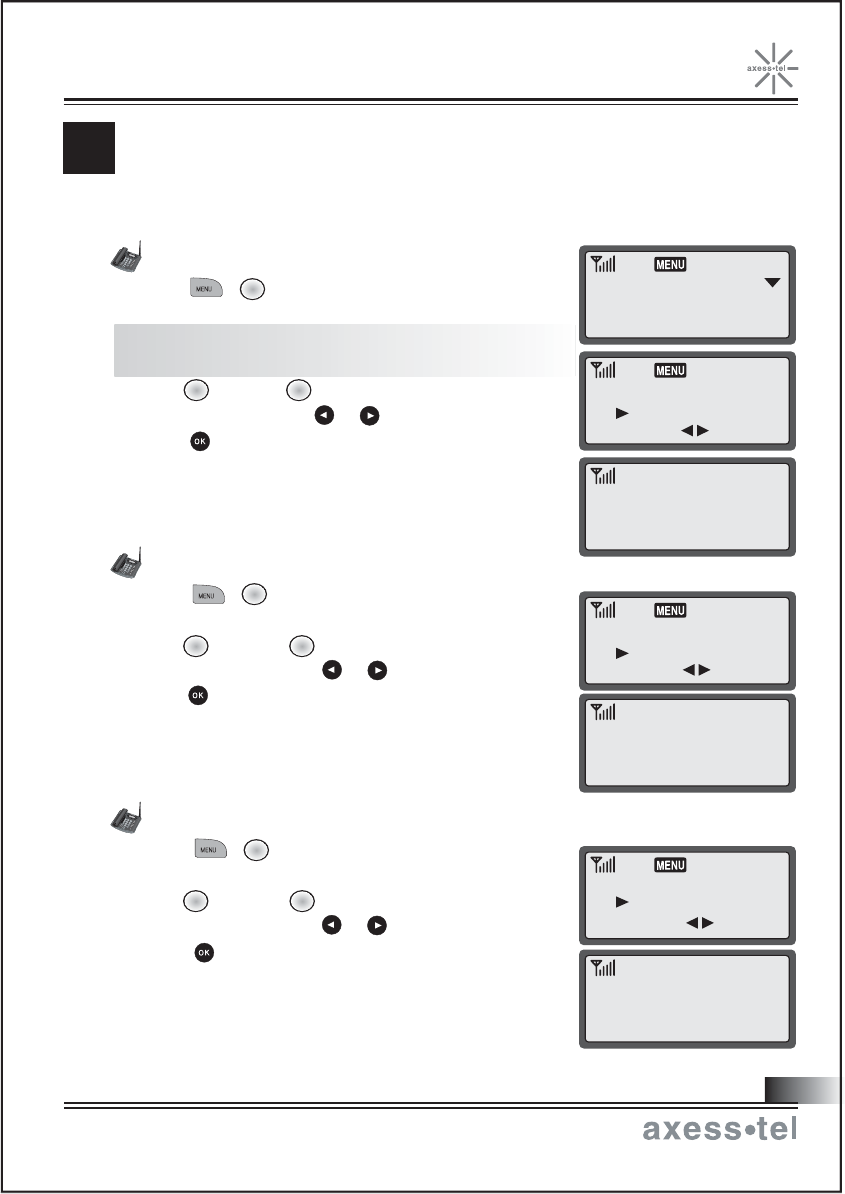
Changing Greeting Message
System Reset
Restricting Use of the Phone
Locking / Unlocking the Phone
Changing the Lock Code
Tone Length and Back Light
This feature lets you change the greeting message that the
phone displays during standby mode.
1. Press , (Security).
2. Enter your lock code.
NOTE: Lock code is set as 0000 from the factory.
To change lock code, see page 33.
3. Press (Greeting). Current greeting displays.
4. Press to change greeting.
5. Enter your new greeting message with alphanumeric
keys.
NOTE: Press to switch between capital and
lower case letters.
Example) To enter "My Phone",
Press
6. Press to save change.
To reset your phone to the manufacturer's defaults, follow
these steps:
1. Press , (Security).
2. Enter lock code.
NOTE: Lock code is set as 0000 from the factory.
To change lock code, see page 33.
3. Press (Reset Phone).
4. Select 'YES' by press or .
5. Press .
6. "PHONE INITIALIZATION" blinks while the phone is
reseting.
HANGING GREETING MESSAGE
C
YSTEM RESET
S
5
6 9 9 9
4466666
6
3 3
7
6
1
1: GREETING
2: CHANGE CODE
3: RESTRICT
My Phon_
My Phone
FRI 10/10 1:24A
RESET PHONE
PHONE
INITIALIZATION
YES
30
Fixed Wireless Phone
Connecting the World Now
CHANGE: SEL:OK
ESTRICTING USE OF THE PHONE
R
You can restrict the use of the phone by unauthorized persons.
Restricting Outgoing Calls
1. Press , (Security).
2. Enter lock code.
NOTE: Lock code is set as 0000 from the factory.
To change lock code, see page 33.
3. Press (Restrict), (Outgoing).
4. Select 'ON' by pressing or .
5. Press to save change.
In this mode, when you try to call,"OUTGOING
CALL RESTRICTED" displays and no outgoing call
goes through.
Restricting International Calls
1. Press , (Security).
2. Enter lock code.
3. Press (Restrict), (International).
4. Select 'ON' by pressing or .
5. Press to save change.
In this mode, when you try to make an international
call (headed by 00), "INTERNATIONAL RESTRICTED"
displays and no international call goes through.
Restricting Long Distance Calls
1. Press , (Security).
2. Enter lock code.
3. Press (Restrict), (Long Distance).
4. Select 'ON' by pressing or .
5. Press to save change.
In this mode, when you try to make a long distance
call (headed by 0), "LONG DISTANCE RESTRICTED"
displays and no long distance call goes through.
3 3
6
3 2
6
3 1
6
1. OUTGOING
2. INTERNATIONAL
OUTGOING CALL
ON
INTENATIONAL
ON
LONG DISTANCE
ON
OUTGOING CALL
RESTRICTED
INTERNATIONAL
RESTRICTED
LONG DISTANCE
RESTRICTED
31
Fixed Wireless Phone
Connecting the World Now
CHANGE: SEL:OK
CHANGE: SEL:OK
CHANGE: SEL:OK
You can lock your phone so that calls cannot be made by unauthorized
persons. You can still receive incoming calls. Turning the phone off does
not unlock the phone; the phone stays in locked mode until you
change it.
1. Press , (Security).
2. Enter lock code.
3. Press (Auto Lock).
4. Select 'ON' or 'OFF' by pressing or .
5. Press to save the change.
NOTE1: When locked, the phone displays "LOCKED".
NOTE2: When locked, you have to enter the lock code
to make a call.
NOTE3: You can still receive incoming calls.
OCKING / UNLOCKING THE PHONE
L
6
6
- LOCKED -
FRI 10/11 2:44P
32
Fixed Wireless Phone
Connecting the World Now
33
The lock code is preset to 0000 from the factory. You can
change the lock code to any 4 digit number.
1. Press , (Security).
2. Enter lock code.
3. Press (Change Code).
4. Enter your new lock code.
NOTE: The lock code must be four numeric digits.
5. Press .
6. Re-enter new lock code for verification.
7. Press to confirm.
NOTE: "CODE NOT MATCHED TRY AGAIN!"
displays if the second entry does not match the
first entry.
HANGING THE LOCK CODE
C
2
6
ENTER NEW CODE
CONFIRM NEW CODE
Fixed Wireless Phone
Connecting the World Now
You can select language if available.
1. Press , (Configuration), (Language)
2. Select "language" by pressing or .
Some ARS systems may be able to recognize only long tones.
You may have to change the tone length to LONG.
1. Press , (Configuration), (Tone Length).
2. Select 'NORMAL' or 'LONG' by pressing or .
3. Press to save the change.
You can control the length of back lighting of the display and the keypad.
1. Press , (Configuration), (Back light)
2. Select "8 SECONDS" or "ALWAYS OFF" by
pressing or .
3. Press to save the change.
8 SECONDS: The light goes off automatically 8 seconds
after no key press,calling, or no other
activity occurs.
Always OFF: The light never comes on.
NOTE: This setting is in effective only when the phone is operating with battery power only.
When power adaptor is connected, the back light is always on.
T
2
3
5
5
51
TONE LENGTH
NORMAL
BACK LIGHT
8 SECONDS
LANGUAGE
ENGLISH
ONE LENGTH
BACK LIGHT
LANGUAGE
34
Fixed Wireless Phone
Connecting the World Now
CHANGE: SEL:OK
CHANGE: SEL:OK
CHANGE: SEL:OK

Optional Features
Call Forwarding
Call Waiting
Three-way Calling
Message Service
Data call service
36
Call Forwarding is a feature that lets you forward your incoming calls to another phone
number, even if your phone is turned off or is in no service area. Contact your service
provider to activate Call Forwarding.
Call Waiting alerts you to a second incoming call while you are on the conversation .
When there's another incoming call, you will hear warning beep. To respond to
the call waiting, press or hit shortly the hook switch once. Pressing
again or hitting the hook again will let you go back to the first call.Contact your
service provider to activate Call Waiting.
Three-Way Calling is a feature that lets you set up a three-way conversation
with two different parties. While you're in conversation with a party, hit or the hook
switch and place another call with the third party. Then press or hit the hook
switch again to connect the three parties together. Contact your service provider
to activate Three-Way Calling.
all Forwarding
C
all Waiting
C
hree-Way Calling
T
Fixed Wireless Phone
Connecting the World Now
RECALL
Message Service is network dependent feature and is available only when your
service provider supports it. Check your service provider is providing message
service before using this function.
Sending New Text Messages
1. Press , (Send MSG), (Send new).
2. Enter destination number and press .
3. Write message using the alphanumeric keypad and
press .
NOTE: See page 17 to see how to edit text.
4. Your phone number is displayed as call back number.
You can change call back number. Press .
5. Select message type with or and
press .
NOTE: Urgent type is available only when
your service provider supports it.
6. Select 'YES' save message or 'NO' to not save.
7. Press to send the message.
NOTE: Sent messages are automatically saved for
retransmission later.
Sending Saved Text Messages
1. Press , (Send MSG), (Saved MSG).
2. Select message to resend with or and
press .
3. To send the message again, press .
To edit the message press .
ESSAGE SERVICE
M
3 2
1
3
1: NEW
2: MULTI SEND
3: SAVED MSG
PHONE NUMBER
123_
HELLO_
CALL BACK NUMBER
123-456-7890
SAVE MESSAGE ?
YES
[ MESSAGE SEND ]
SEND & SAVE
MESSAGE TYPE
NORMAL
SENDING...
PLEASE WAIT...
Fixed Wireless Phone
Connecting the World Now
CHANGE: SEL:OK
CHANGE: SEL:OK
Received Text Message
1. When text message arrives, 'MESSAGE! 10/12 4:04 PM'
displays shortly and appears in the icon line.
2. Press , (Text Mail).
3. Press or to select message you want
to see and press .
4. The message, arrival time and call back number (if
available) display. If the message is long, it will be
scrolled down in 3 seconds automatically.
To scroll up and down manually, press or .
5. If the message contains call back number and you want to
make a call to that number.
Press if you want to call back.
NOTE: If the call back number is stored in the phonebook
with a name, the name will display instead of the
phone number.
Delete Selected Text Message
1. Press , (Text Mail).
2. Press or to select message you want
to delete and press .
3. Press again.
4. Select 'YES' with or and press .
Retrieving Voice Messages
1. When voice messages arrive, "VOICE MAIL
10/12 4:04 PM" shortly appears and appears
in the icon line.
2. Press , (Voice Mail).
The number of unheard messages and the last
message arrival time and date shows.
3. Press to dial voice mail service center.
1
2
2
MESSAGE!
10/12 4:04 P
1: VOICE MAIL [00
2: TEXT MAIL <02>
3: SEND MESSAGE
1: SUNNY
2: 1234567890
10/12 4 : 04 PM
FROM : 8589455421
ERASE MSG?
YES
THE MESSAGE
IS ERASED
VOICE MAIL
10/12 4:05A
1: VOICE MAIL [01]
2: TEXT MAIL [02]
3: SEND MESSAGE
38
Fixed Wireless Phone
Connecting the World Now
CHANGE: SEL:OK
Erasing All Messaged
1. Press (MSG Erase) .
2. Select 'YES' with or .
3. Press .
Setting/Releasing Message Lock
1. Press , (MSG Option), (MSG Lock).
2. Select 'ON or OFF' with or .
3. Press .
If message lock is set, the phone will ask for the lock
code whenever you try to retrieve message.
Setting/Releasing Message Alert
1. Press , (MSG Option) (MSG Alert).
2. Select ON or OFF with or .
3. Press .
While the message alert is set, the phone will alert the
user when messages arrive.
5 2
5 1
4
Data Call Service is a network dependent feature and is available only
when your service provider supports it. Check with your service
provider for availability.
Connecting your PC requires optional cable, available separately.
1. Connect the phone to your PC with the optional Axesstel serial or USB data cable.
2. Please refer to the manual provided with the cable for setting up a connection on
your PC.
ATA Call Service
D
ERASE ALL?
YES
MESSAGE LOCK
ON
MESSAGE ALERT
ON
39
Fixed Wireless Phone
Connecting the World Now
CHANGE: SEL:OK
CHANGE: SEL:OK
CHANGE: SEL:OK

Miscellaneous
Menu Table
Conversation and Message Menu
Specification
MENU OPTION TABLE
Fixed Wireless Phone
Connecting the World Now
Conversation Menu
1: MUTE
2: SILENT KEY
3: SEND MY #
Message Menu
1: VOICE MAIL
2: TEXT MAIL
3: SEND MESSAGE
4: MESSAGE ERASE
5: MESSAGE OPTION
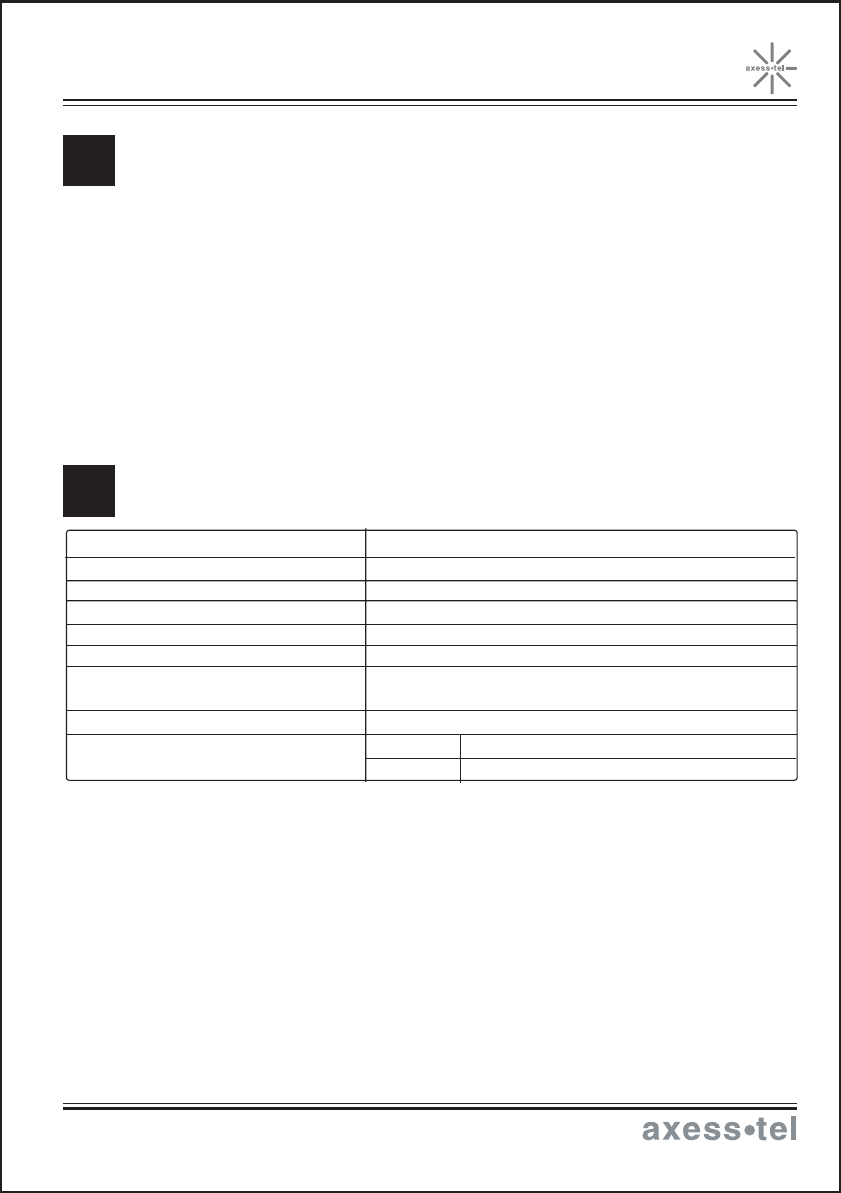
Channel Bandwidth CDMA 1.25 MHz
Stability of frequency 0.4 ppm
External appearance(mm) TBD
Weight TBD (without battery)
Sending output maximum 0.23W E.R.P
Adapter Input: AC 100~240V 50~60Hz Output: DC 9V/1A
Battery Standby 16mA (Slot Cycle Index: 2) 72 hours
Talk 405mA (at +10dBm) 2 hours
Temperature of operation
Relative humidity
-20 ~ +50 degrees Celcius
5% ~ 90%
Frequency Range
ONVERSATION AND MESSAGE MENU
C
PECIFICATIONS
S
Tx: 824 ~ 849 MHz Rx: 869 ~ 894 MHz
Fixed Wireless Phone
Connecting the World Now

SAR INFORMATION
THIS MODEL PHONE MEETS THE GOVERNMENT ’S REQUIREMENTS FOR
EXPOSURE TO RADIO WAVES.
Your wireless phone is a radio transmitter and receiver. It is designed and
manufactured not to exceed the emission limits for exposure to radio frequency
(RF)energy set by the Federal Communications Commission of the
U.S.Government.These limits are part of comprehensive guidelines and establish
permitted levels of RF energy for the general population. The guidelines are based on
standards that were developed by independent scientific organizations through
periodic and thorough evaluate on of scientific studies. The standards include a
substantial safety margin designed to assure the safety of all persons, regardless of
age and health.
The exposure standard for wireless mobile phones employs a unit of measurement
known as the Specific Absorption Rate, or SAR. The SAR limit set by the FCC is 1.6
W/kg.*Tests for SAR are conducted with the phone transmitting at its highest certified
power level in all tested frequency bands. Although the SAR is determined at the
highest certified power level, the actual SAR level of the phone while operating can be
well below the maximum value. This is because the phone is designed to operate at
multiple power levels so as to use only the power required to reach the network. In
general, the closer you are to a wireless base station antenna, the lower the power
output. Before a phone model is available for sale to the public, it must be tested and
certified to the FCC that it does not exceed the limit established by the government-
adopted requirement for safe exposure.
The tests are performed in positions and locations
(e.g., at the ear and worn on the body) as required by the FCC for each model. The
highest SAR value for this model phone when worn on the body, as described in this
user guide, is 0.939W/kg . (Body worn measurements differ among phone models,
depending upon available accessories and FCC requirements). While there may be
differences between the SAR levels of various phones and at various positions, they
all meet the government requirement for safe exposure. The FCC has granted an
Equipment Authorization for this model phone with all reported SAR levels evaluated
as in compliance with the FCC RF exposure guidelines. SAR information on this model
phone is on file with the FCC and can be found under the Display Grant section of
http://www.fcc.gov / oet / fccid after searching on FCC ID : PH7AXWP830.
Additional information on Specific Absorption Rates (SAR)can be found on the Cellular
Telecommunications &Internet Association (CTIA)web-site at http://phonefacts.net.*In the
United States and Canada, the SAR limit for mobile phones used by the public is 1.6watts/kg
(W/kg)averaged over one gram of tissue. The standard incorporates a substantial margin of safety
to give additional protection for the public and to account for any agitations in measurements.
FCC Compliance Information
This device complies with Part 15 of FCC Rules.
Operation is subject to the following two conditions:
(1) This device may not cause harmful interference, and
(2) This device must accept any interference received.
Including interference that may cause undesired operation.
Information to User
This equipment has been tested and found to comply with the limits for a Class B digital
device, pursuant to part 15 of the FCC Rules. These limits are designed to provide
reasonable protection against harmful interference in a residential installation. This
equipment generates, uses and can radiate radio frequency energy and, if not installed
and used in accordance with the instructions,
may cause harmful interference to radio communications. However, there is no guarantee
that interference will not occur in a particular installation. If this equipment does cause
harmful interference to radio or television reception, which can be determined by turning
the equipment off and on, the user is encouraged to try to correct the interference by one
or more of the following measures:
- Reorient or relocate the receiving antenna.
- Increase the separation between the equipment and receiver.
- Connect the equipment into an outlet on a circuit different from that to which the receiver
is connected.
- Consult the dealer or an experienced radio/ tv technician for help.
Safety Information
1 . SAFETY INFORMATION FOR FIXED WIRELESS TERMINALS
.POTE NTIALLY EXPLOSIVE ATMOSPHERES
Turn your phone OFF when in any area with a potentially explosive atmosphere and
obey all signs and instructions. Sparks in such areas could cauls e an explosion or fire
resulting in bodily injury or even death.
INTERFERENCE TO MEDICAL DIVICES
Certain electronic equipment may be shielded against RF signal from you wireless
phone. (pacemakers, Hearing Aids, and so on) Turn your phone OFF in health c are
facilities when any regulations posted in these areas instruct you to do so. RF signals
may affect improperly installed or inadequately shielded electronic system in motor
vehicles.
.EXPOSURE TO RF ENERGY
Use only the supplied or an approved replacement antenna. Do not touch the antenna
unnecessarily when the phone is in use. Do not move the antenna close to, or
couching any exposed part of the body when making a call.
SAFETY INFORMATION FOR RF EXPOSURE
Body worn operation
This device was tested for typical body-worn operations with the back of the phone
kept 25 mm. from the body. To maintain compliance with FCC RF exposure
requirements, use only belt-clips, holsters or similar accessories that maintain a 25
mm. separation distance between the user’s body and the back of the phone, including
the antenna. The use of belt-clips, holsters and similar accessories should not contain
metallic components in its assembly. The use of accessories that do not satisfy these
requirements may not comply with FCC RF exposure requirements, and should be
avoided.