Axesstel PG110 WLL Telephone DUAL-BAND GSM User Manual INRTDUCTION
Axesstel Inc WLL Telephone DUAL-BAND GSM INRTDUCTION
Axesstel >
Contents
- 1. Annex to User Manual
- 2. USer Manual
USer Manual
-0-

-1-
INTRODUCTION
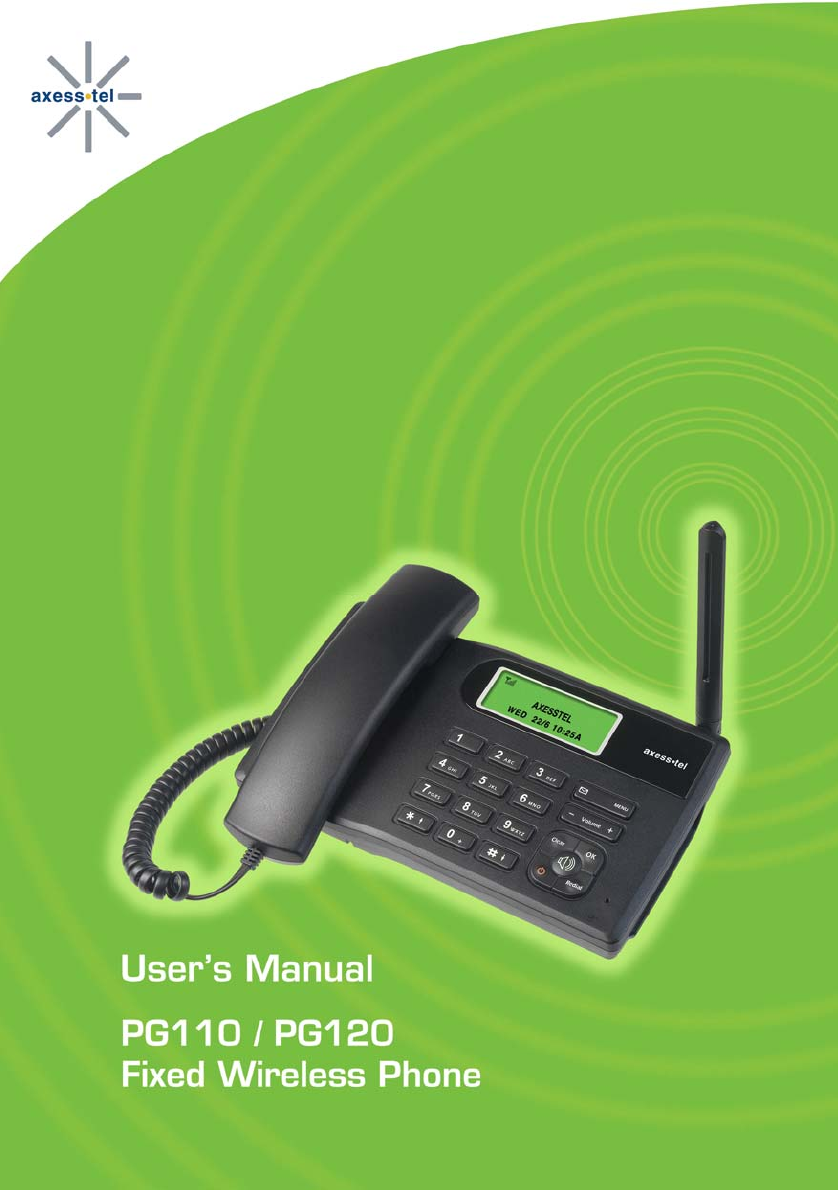
The PG110 and PG120 Fixed Wireless phones operate through a wireless connection
instead of a landline phone cable, enabling the subscriber to set up the phone anywhere
wireless service is available.
Axesstel GSM Fixed Wireless Phones provides high quality and superior performance
with many features such as superior voice quality, caller ID, three-way calling, call
waiting, short message service, etc. A large 3-line dot matrix liquid crystal display
provides a user-friendly interface for quick and easy information display.
FEATURES
1. Speaker Phone
2. Signal Strength Indicator
3. Redial
4. Volume Control
5. Backlight Keypad
6. Battery Power Backup
7. Backlight LCD Screen
8. One-touch Dialing
9. Automatic Sending
10. Phone Book
11. Text Messaging

-2-
TABLES OF CONTENTS
Safety Precautions……………………….….........……….…..........3
Checking Parts………. …………………….……………………..….…4
Setting up Your Phone…………….……….……………………......…7
Getting to Know Your Phone……………….……………….…………...9
Display Icons………………………..…. ……………………..…….…..10
Function Keys……....……………..……... ……………………. ………11
Basic Operation
Making Calls …………..……………....…….……………...…….. 13
Redial……………………………….…………………...…………. 14
Receiving Calls ……………………….……………..….……….. 14
Adjusting Volumes ……………………….…………..….………. 15
Choosing the Ring Tone ………….…………….…………...…... 15
Message Service………………………….....……………………16
Useful Features
Call History.... …………………….......................................19
Phone book……………………………….…………………………..…20
Time…………………………….……………………………………21
Sound……………..……………….………………………………...22
Configuration…….…………………….………………….......23
Security…………………………….…………………………………24
Miscellaneous
Menu Option Table……………………………….…………………….26
Specifications…………………………………………………………27

-3-
SAFETY PRECAUTIONS
1. Avoid placing the phone in a dusty location, or near a source of gas or fire.
2. Don't shake, hit, or drop the phone.
3. If you clean the outside of the phone, use only a soft, dry cloth. The chemicals in
alcohol, benzine or acetone can damage the surface of the phone.
4. Do not twist or pull the cord out of the phone.
5. Do not disassemble the phone.
6. Do NOT use the power adaptor if:
- The power cord is damaged.
- The phone has been dropped or damaged in any way.
7. Use only the AXESSTEL provided adaptor. Do not use the AXESSTEL adaptor for
any other purpose.
8. Use only the AXESSTEL provided antenna. Do not use the antenna for any other
purpose.
9. Frequency and length of use can affect the life of the self-charging battery. Contact
your customer service if the battery is not operating properly.
10. Use only the designated self-charging battery. Dispose of exhausted
batteries properly. Never discard a battery in or near fire or flame.
11. Do not place the telephone near water, for example, near a bathtub, sink,
wet basement, or swimming pool.
NOTE: The input and output voltages are indicated on the adapter.
(Input: AC 240V, 50~60 Hz, Output: DC 5V, 2A)
NOTE: Do not insert or remove SIM card while the phone is powered on.
-4-
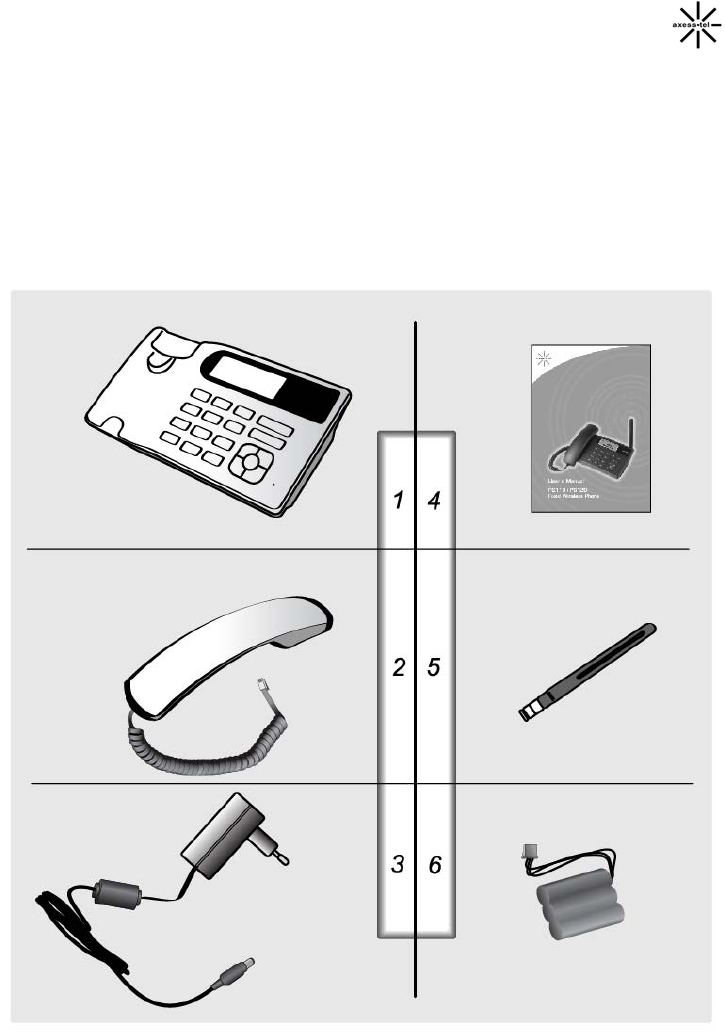
CHECKING THE PARTS
After unpacking your phone, make sure that you have all the parts shown below.
If any piece is missing or broken, please call your customer service center.
1. Main Unit 4. User Manual
2. Handset 5. Antenna
3. Power Adaptor 6. Battery
-5-
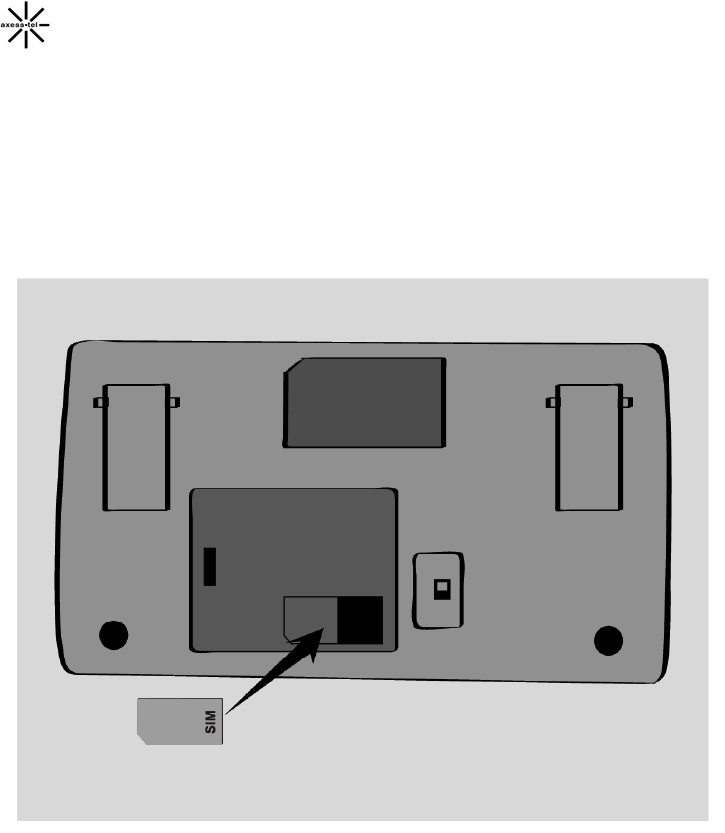
SETTING UP YOUR PHONE
Installing SIM card
1. Remove SIM bracket cover.
2. Lift SIM bracket by pulling.
3. Insert proper SIM card.
4. Put the bracket back in place.
5. Close the cover.
-6-
USING SIM CARD FOR THE FIRST TIME
1. Entering PIN code.
ENTER PIN
NOTE1: The function of pin feature can be set on/off in
PIN setup menu.
NOTE2: PIN code can be changed in PIN setup menu.
2. If an incorrect PIN code is entered, an error message
PIN FAILED
2 TRY LEFT
displays.
NOTE: There are 3 chances to enter the correct
PIN code. If incorrect PIN codes are entered
3 times, the SIM card will be locked.
3. The phone is ready to use after entering the correct
AXESSTEL
THU 10/09 2:32P
PIN code.
* Default PIN code is provided by your service provider.
-7-
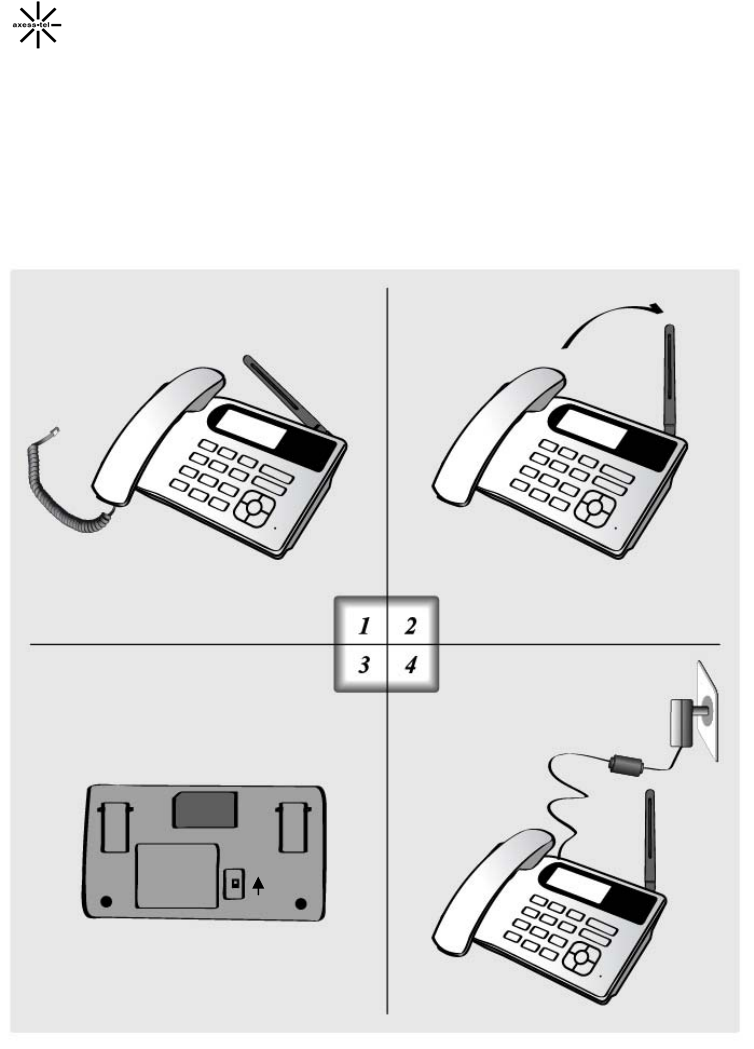
SETTING UP YOUR PHONE
Installing the phone
This phone operates by receiving DC power from the AXESSTEL power adaptor,
which connects to an electrical outlet. The phone is equipped with a rechargeable
battery as a back up in case of an AC power failure.
Desktop installation
Connect the antenna Attach the handset
ON/OFF power switch is located
on the bottom side of the phone.
Please turn on the power switch to
"ON" for operation
Plug the power adaptor into an
appropriate wall outlet
-8-
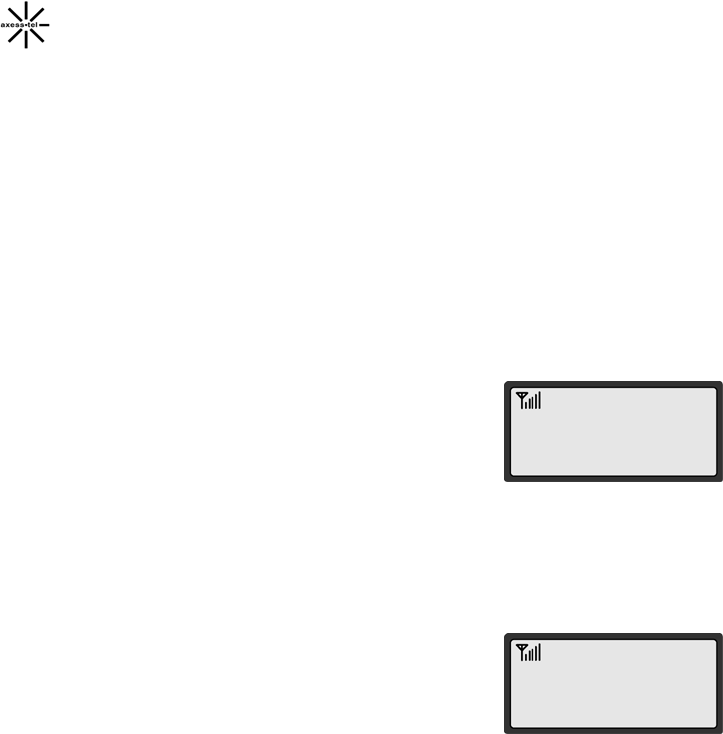
SETTING UP YOUR PHONE
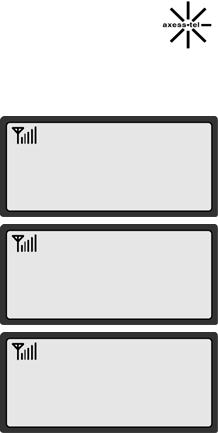
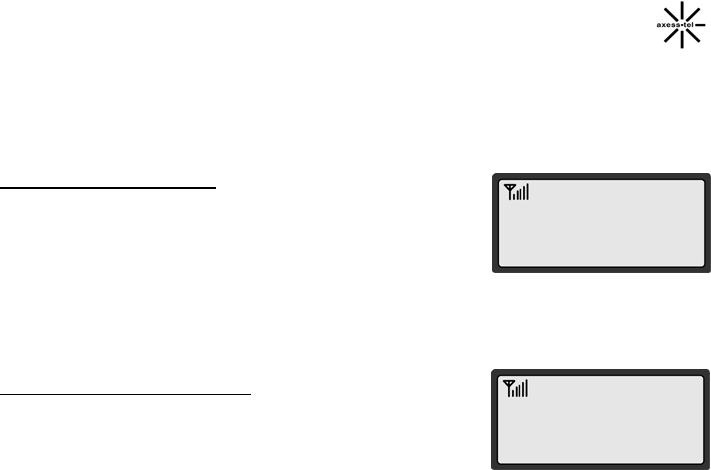
Service Status Check
Display in the Service Area
AXESSTEL
THU 10/09 5:24P
When the phone’s power is turned on, LCD will display
“Initializing” while the phone loads information from the SIM
card. After the loading is finished, LCD will display greeting
with date and time. The number of bars of signal strength
indicator (antenna icon) indicates the strength of service
signal in the area.
Display in Area with No Service
When there is no service signal detected in your area,
no antenna bar appears. First, check if the antenna is
firmly connected. If no service is detected, contact your
service provider for the coverage area information.
AXESSTEL
-9-
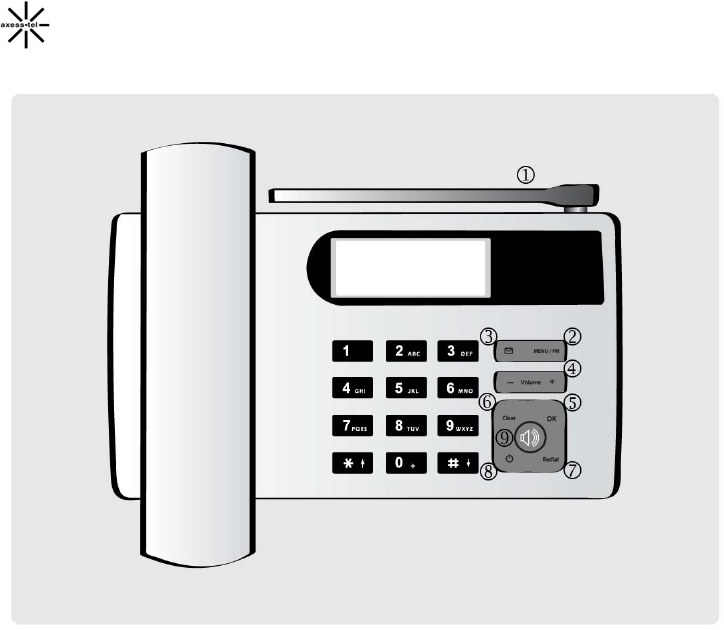
GETTING TO KNOW YOUR PHONE
1. Antenna: Adjusting the position of antenna improves the sound quality of the call.
2. Menu: Press to access the phone menus.
3. Message: Press to retrieve messages.
4. Volume Key(-, +): Lets you adjust sound levels and scroll through the menu options
and displays.
5. OK: Stores phone numbers and any settings you select in the menu within the
phone memory
6. Clear: Lets you clear your last entry.
7. Redial: Allows you to redial the last number
8. Power On/Off: Press and hold the key for a few seconds to turn on or off your phone
9. Speaker Phone: Turn on or off the speaker phone feature
-10-
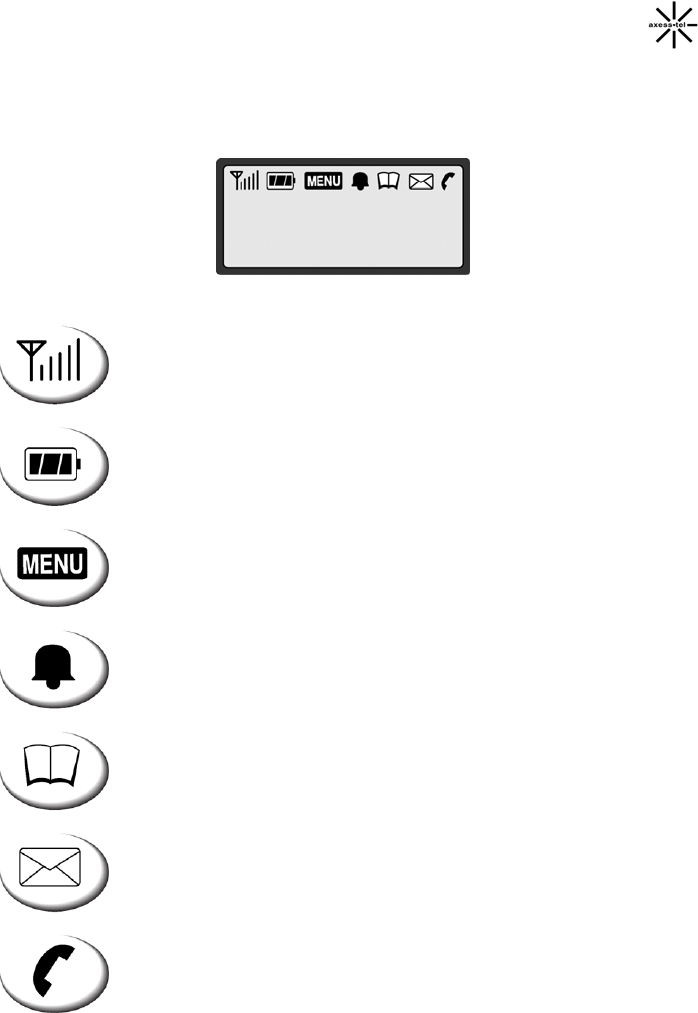
DISPLAY ICONS
Icons display on the screen to indicate what features you are using, signal strength
and battery status etc...
AXESSTEL
THU 10/09 5:24P
Indicates the strength of the signal. More bars indicates stronger
signal.
Indicates the level of battery power. The more bars, the more
power. When the battery is low, the icon blinks, and an alert
tone sounds.
Indicates that you are using the phone menu.
Indicates that the alarm has been set.
Indicates that you are in the phone book menu.
Indicates that you have a text message or a voice mail
message.
Indicates that a voice or data call is in progress.

-11-
FUNCTION KEYS
Press this key to retrieve messages.
Press this key to display the phone's main menu.
Press and Hold this key to turn on or off the FM radio.
If there is an incoming call or if the user attempts to make
an outgoing call while the FM radio is on, the FM radio turns off
automatically
Press this key to control the volume of keypad, earpiece
and speaker. In the menu mode, use this key to scroll through
the menu items.
Clears information from display screen.
- To erase one character from the display screen, press it once.
- To erase all characters on the screen, press and hold.
- To go back one step in the menu mode, press it once
G - During communication, press this key, you can select mute, the
other side can’t hear your voice.
Press this key to store a phone number in the phone book or to save
menu settings.
The speaker button is used to place or receive a call without
using the handset. The integrated microphone and speaker on the
main unit allows hands free conversation.
Press and hold this key for a few seconds to turn on or off your phone
Press this key to redial the last number called or to connect a
call right after dialing the number without waiting until the call
is connected automatically.

-12-
Basic Operation
Making Calls
Redial
Receiving Calls
Adjusting Volumes
Choosing the Ring Tones
Message Service

-13-
MAKING CALLS
1. Make sure your phone is turned on.
2. Pick up the handset to hear a dial tone.
When the phone fails to acquire service signal, you
will hear "No Service" tone (intermittent tone).
3. Dial the number to call. The LCD window displays
the number.
4. Wait for a moment for auto calling or press <REDIAL>.
5. When the other person answers, begin conversation.
6. To end the call, replace the handset on the main unit.
NOTE1: Modifying a phone number while dialing.
- To erase the last digit entered: Press <CLEAR>.
- To erase the entire number: Press <CLEAR> and hold.
NOTE2: Automatic calling
The phone was set to places a call automatically 3~8 seconds
after last digit entry. To disable automatic calling or change time.
setting, access “Auto Send Time” menu to change settings.
1. Press <MENU>, <6> (Security) , <8> (Auto Call).

-14-
REDIAL
Redial the last number you dialed.
1. Pick up the handset or press <SPEACKER>.
2. Press <REDIAL>.
3. Press <*>, <#> to select number to redial.
4. Press <REDIAL>
NOTE: You may not redial when there is no last number dialed stored
in the memory. "EMPTY LIST!" message is displayed on the LCD.
RECEIVING CALLS
INCOMING CALL
When there is an incoming call, the phone rings and
blinks "Incoming Call" message on the display.
1. Simply pick up the handset or press <SPEAKER> to
answer the call.
2. To disconnect, replace the handset or press <SPEACKER>.
NOTE: When the ringer volume is set to 'Silent', the phone does not ring. Only the
"Incoming Call“ message blinks.
When the Caller ID service is activated.
Call ID Display
INCOMING CALL
ALEX
The Caller ID feature displays the caller's number when the
phone receives a call. If the caller's name and number are
stored together in the phone book, the caller's name is
displayed. Contact your service provider to activate this
feature.
MISSED 1CALL
THU 10/09 2:56P
NOTE: If the call is not answered, the phone displays the
“Missed Call" message with the call arrival date and
time.
-15-
ADJUSTING VOLUMES
You can control the sound volumes including the key tone,
Earpiece, speaker and the ringer
Adjusting earpiece volume
Pick up the handset and press <volume key> repeatedly during
a phone call to adjust earpiece volume.
Adjusting ring volume
A
djust volume
>>>>
1. Press <MENU>, <4> (Sound), <3> (Ring Volume)
2. Press <*>, <#> to adjust ringer volume.
3. The phone will store the setting automatically with
several seconds.
NOTE: If 'Silent' is selected, the phone does not ring
when an incoming call comes in. Only the
"INCOMING CALL" message blinks on the
display.
CHOOSING THE RING TONES
Ring tone 1
Ring tone 2
You can choose from twelve different ring tones.
1. Press <MENU>, <4> (Sound), <2> (Ringing Tone).
2. Press <volume key> (or <*>, <#>) to select ring type.
A total of 12 levels are available.
3. Press <OK> to save.

-16-
MESSAGE SERVICE
You can enter short message menu by pressing key “SMS” in the idle screen.
This function provides text short message service, it can receive and send message. While
a new message arrived, the phone will remind you with “1 New Message”. If the ring of
SMS is open, you will hear the ring tone at the same time.
If the box is full, you will not receive a new message. The icon will coruscate on the
screen, and remind you that the box is full, please delete some messages, and then you
can receive a new message again.
Voice Mail
Enter the menu of Voice mail, it will display the following list:
Listen to Voice Mail message:If the user has applied this function, he can use this menu
to listen to voice mail messages.
Voice mailbox number:This menu can save the number of voice mailbox. The user must
apply the voice mail firstly.
Inbox
This function is used to consult the SMS.
Press <OK> key, the messages are displayed in chronological order with the most recent
on top of the list. If there is no message, it will remind you “No message!”.
Press 【+】【-】 to select the message you want to read. Then press the left soft key to
read the message, and press the left soft key again, to enter the option menu: Delete,
Reply, Forward, Edit, Dial back, and Save number.
Delete:Allows you to delete the message you selected.
Reply:Allows you to reply message to the sender. Edit a new message, then press the
left soft key to send message in two modes: Only send, Only save:
1.Only send:Send the message to the other people without saving.
2.Only save:Save the message into the draft box without sending it.
Forward:Allows you to forward the message you received to the other people.
Edit:Allows you to edit the message you received, and then send it to the other people.

-17-
Dial back:Allows you to dial back the sender.
Save number:Allows you to save the phone number of the sender into the phone or the
SIM card.
Outbox
This function is used to display the messages which have been sent and saved. It also can
operate the message with Delete, Forward, Edit, Dial back,and Save number option.
These options are the same with Read messages.
Draftbox
This function is used to display the messages which have been unsent. You can also
Delete, Forward, Edit, Dial back and Save number the message. These options are the
same as Read messages.
Service Center
This function is used to save the SMS center number (this number can be obtained from
the network operator).The messages can be sent successfully only by saving the center
number correctly.
Send Message
This function is used to write a new message (see Text input for detail). After edit it, you
can send or save or send and save it.
Erase All
This function is used to delete all the messages of the inbox or outbox or draft box. You
can delete them separately or together.
Setting
Allows you to set all kinds of parameters of the SMS.
SMS Alert
This menu allows you to change alert volume and tone. And you can select alert mode.
Status Report
You can activate or deactivate this option which informs you via a written message whether
your SMS was received or not.

-18-
Storage status
The total capacity of inbox and draft box depends on the capacity of SIM card. Enter this
menu, the total numbers of the messages and the remained numbers will be displayed.
Useful Features
CALL HISTORY
PHONE BOOK
TIME
SOUND
CONFIGURATION
SECURITY

-19-

-20-
CALL HISTORY
Your phone stores the last 10 outgoing calls, incoming, and missed
Calls combined (only when Caller ID function is activated).
You can display and redial these numbers.
Incoming Call
This function is used to display the latest 10 numbers you answered, and you can operate
it with the operations of Dial to, Send message to, Delete, Save Number, Erase all, and
Show Number.
Press “OK” to enter. It will display the numbers in sequence.
Press【+】【-】to select the phone number.
Press “Option” to operate the number with Dial to, Send message to, Delete,
Save Number, Delete all, and Show Number.
Press “OK” to accept it.
Outgoing Call
This function is used to display the latest 10 numbers you dialed, other operation the same
as Incoming Call.
Missed Call
This function is used to display the latest 10 numbers you missed. Other operations are the
same as Incoming Call.
Delete All
This function is used to delete all call history

-21-
Phone Book
This function can save the phone numbers and names into the SIM card or
phone, and you can also browse, add, or delete them.
Browse
Enter this menu, you can browse the phone number which saved in the SIM card or the
phone:
z press 【+】【-】 to browse records of the phonebook.
z Input the first letter of the name, you can jump to the position of the name with
the same first letter. For example, Jack, you can press “5” key, and then you will
jump to the position of the names with “J” headed. Then press 【+】【-】 to
select the item you want.
Press <OK> key, you can select the following list:Send message, Detail/Edit, Search,
Copy to ME/SIM Phonebook, Delete, Send number, Create.
Create
Allows you to create a new entry and save it into the ME/SIM Phonebook.
z In the idle screen, input the phone number, and press “OK” key to save or edit it.
To every item, you can press the number keys directly to edit it. After that you
can press “OK” to select the save mode (ME or SIM). Then press “OK” again to
complete it.
Enter the phonebook menu, select “Create”,then you can create a new record. And follow
the instructions above for the other operations.
Speed dial
You can view and edit speed dial number in this submenu.
Storage status
You could check the store information about the SIM card and phone.
Copy
You could copy the phone book in SIM or Phone to Phone or SIM.
Delete All
You could delete the phone book in SIM or Phone or SIM and Phone.

-22-
TIME
Alarm
This menu enables you to set alarm clock. If the alarm time is reached while the device is
switched off, the device switches itself on and starts sounding the alarm tone.
Last Call
This menu display the last call information.
Total Time
This menu display the total time of calls
Outgoing
The menu display the total outgoing time of calls
Incoming
The menu display the total incoming time of calls
Clr Call Time
The menu clear all the history time of calls
Clock Settings
Date & Time Settings:Press number keys to input the time and date.
Date display format:It contains 12 hours and 24hours.
Time display format:It contains YYYY-MM-DD, MM-DD-YYYY, and DD-MM-YYYY.

-23-
SOUND
Ring Mode
This menu allows you to select ring alert for call or mute for call.
Ringing Tone
This menu allows you to change ring tone for call alert.
Ringing Volume
This menu allows you to change ring volume for call alert.
Keypad Tone
This menu allows you to open or close keypad tone
Connect Alert
This menu allows you to enable or disable call connect alert.
On/Off Alert
This menu allows you to enable or disable on/off alert.

-24-
CONFIGURATION
Language
This menu allows you to select different language.
Call Divert
Divert the incoming call to the voice mailbox or other number. The divert includes the
following modes and each can be set to Activate, Deactivate, and Interrogate. When the
Call forwarding is set to Activate, you can input the phone number to be diverted to
according to the prompt on the screen.
Unconditional divert:
No matter in what situation, divert all incoming calls to the specified phone number.
Busy divert:
When you are on the phone, divert the incoming calls to the specified phone number.
No answer divert:
Divert the incoming calls to the specified phone number after you have not answered
the incoming calls for a period of time.
No service divert:
If an incoming call fails to arrive since the phone is powered off or outside the network
coverage, divert the incoming call to the specified phone number.
Call Waiting
Turn on, turn off or get status of the call waiting function. If the call waiting function is
turned on and you are on the phone, when where is a new incoming call, the alert will
sound and the screen will display the phone number of the caller.

-25-
SECURITY
Greeting Note
Set the Greeting note open or closed, and edit the note at the same time.
Call Barring
Set to call barring or dialing in the various situations. You must subscribe the international
long distance calling function with the network operator and get the call barring password
before you can set the individual restriction functions.
Each item of call barring can be set to Activate, Deactivate, and Interrogate. Call barring
includes the following options:
- All Outgoing Calls:
Restrict all the outgoing calls.
- All Int’l call:
Restrict dialing international long distance phone numbers
- Int’l except to home:
Restrict dialing international long distance phone numbers except to home.
- All incoming call:
Restrict all the incoming calls and incoming calls when roaming. When this is turned
on, you will be restricted by the network operator and can not receive any incoming
call.
- Incoming while roam:
Restrict international incoming calls when roaming. When this is activated, you will
be restrict by the network operator and can not receive any international incoming
call when roaming.
Phone Code
This function can lock/unlock the phone. If you select on, you can select Verify when
power-on or Verify with new SIM. It also can be set to on, off, and change the default
phone lock code is “0000”.
Factory Reset
Reset some functions of the phone to the default value. Press “OK’ to reset, but you should
input the phone code firstly.

-26-
Own Number
It can edit or delete the own number.
Set PIN1
The PIN1 code can protect your SIM card and prevent your SIM card being used illegally.
You can set the following:
On
If currently the PIN1 code is set to off, select on. Input the correct PIN1 code and this
function will work. Next time when you power on the phone, you need to input the
correct PIN1 code before you can enter. The SIM card is protected by the PIN1 code.
Off
If currently the PIN1 code is set to on, select off. Input the correct PIN1 code and you
can turn off the PIN1 code protection.
Change PIN1
If you want to change the initial PIN1 code, Select Change PIN1, and input the
correct initial PIN1 code. The phone will prompt the new PIN1 code for two times.
Finally, it will prompt whether the change is successful. You can change the PIN1
code only when PIN1 code is set to on. If it is set to off, this function is ineffective.
Attention: If you have input a wrong PIN1 code for three times in sequence, the SIM
card will be locked. At this moment, you need a PUK code to unlock the SIM card.
The PIN1 code and the PUK code may be provided to you with the SIM card. If none,
please contact your network operator.
Auto Call
This function allows you to select whether dial the number automatically after input the
number in idle screen. The default setting is Off, which will not dial the number
automatically. If you allow the function, three periods which are 3, 5, and 8 seconds can be
selected.

-27-
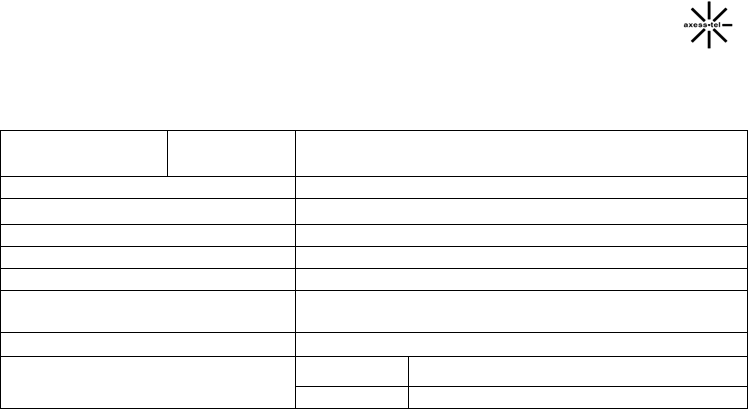
MENU OPTION TABLE
Clr Call
Ringing Tone
Rin
g
in
g
Volume
6.7 Auto Call
-28-
SPECIFICATIONS
Frequency Range PG110 1900: TX 1850 ~ 1910 , RX 1930 ~ 1990
850 : TX 824 ~ 849 , RX 869 ~ 894
Channel Bandwidth 850 / 1900 Dual Band
Stability of frequency 0.4 ppm
External appearance (mm) 173 x 196 x 70 mm
Weight 600 g
Sending output maximum 0.23W E.R.P
Temperature of operation
Relative humidity
-20 ~ +50 degrees Celcius
5% ~ 90%
Adapter Input: AC 100~240V 50~60Hz Output: DC 5V/2A
Standby 500 hours
Battery Talk 3 Hours
AXT v1.0

SAR INFORMATION
THIS MODEL PHONE MEETS THE GOVERNMENT’S
REQUIREMENTS FOR EXPOSURE TO RADIO WAVES.
Your wireless phone is a radio transmitter and receiver. It is designed and
manufactured not to exceed the emission limits for exposure to radiofrequency
(RF) energy set by the Federal Communications Commission of the U.S.
Government. These limits are part of comprehensive guidelines and establish
permitted levels of RF energy for the general population. The guidelines are
based on standards that were developed by independent scientific organizations
through periodic and thorough evaluation of scientific studies. The standards
include a substantial safety margin designed to assure the safety of all persons,
regardless of age and health. The exposure standard for wireless mobile phones
employs a unit of measurement known as the Specific Absorption Rate, or SAR.
The SAR limit set by the FCC is 1.6 W/kg. *
Tests for SAR are conducted with the phone transmitting at its highest certified
power level in all tested frequency bands. Although the SAR is determined at the
highest certified power level, the actual SAR level of the phone while operating
can be well below the maximum value. This is because the phone is designed to
operate at multiple power levels so as to use only the power required to reach the
network. In general, the closer you are to a wireless base station antenna, the
lower the power output. Before a phone model is available for sale to the public, it
must be tested and certified to the FCC that it does not exceed the limit
established by the government adopted requirement for safe exposure. The tests
are performed in positions and locations (e.g., at the ear and worn on the body)
as required by the FCC for each model. The highest SAR value for this model
phone when tested for use at the when worn on the body , as described in this
user guide, is 0.169 W/Kg. (Body-worn measurements differ among phone
models, depending upon available accessories and FCC requirements). While
there may be differences between the SAR levels of various phones and at
various positions, they all meet the government requirement for safe exposure.
The FCC has granted an Equipment Authorization for this model phone with all
reported SAR levels evaluated as in compliance with the FCC RF exposure
guidelines. SAR information on this model phone is on file with the FCC and can

be found under the Display Grant section of http://www.fcc.gov/ oet/fccid after
searching on FCC ID: PH7PG110.
Additional information on Specific Absorption Rates (SAR) can be found on the
Cellular Telecommunications Industry Asso-ciation (CTIA) web-site at
http://www.wow-com.com. * In the United States and Canada, the SAR limit for
mobile phones used by the public is 1.6 watts/kg (W/kg) averaged over one gram
of tissue. The standard incorporates a sub-stantial margin of safety to give
additional protection for the public and to account for any variations in
measurements.
SAFETY INFORMATION FOR RF EXPOSURE
Body worm operation
This device was tested for typical body-worn operations with the back of the
phone kept 20 mm. from the body. To maintain compliance with FCC RF
exposure requirements, use similar accessories that maintain a 20 mm.
separation distance between the user's body and the back of the phone, including
the antenna. The use similar accessories should not contain metallic compon-
ents in its assembly. The use of accessories that do not satisfy these requirements
may not comply with FCC RF exposure requirements, and should be avoided.
Safety Information
1 . SAFETY INFORMATION FOR FIXED WIRELESS TERMINALS
.POTE NTIALLY EXPLOSIVE ATMOSPHERES
Turn your phone OFF when in any area with a potentially explosive atmosphere
and obey all signs and instructions. Sparks in such areas could cauls e an
explosion or fire resulting in bodily injury or even death.
INTERFERENCE TO MEDICAL DIVICES
Certain electronic equipment may be shielded against RF signal from you
wireless phone. (pacemakers, Hearing Aids, and so on) Turn your phone OFF in
health c are facilities when any regulations posted in these areas instruct you to
do so. RF signals may affect improperly installed or inadequately shielded
electronic system in motor vehicles.
.EXPOSURE TO RF ENERGY
Use only the supplied or an approved replacement antenna. Do not touch the
antenna unnecessarily when the phone is in use. Do not move the antenna close
to, or couching any exposed part of the body when making a call.
FCC Compliance Information
This device complies with Part 15 of FCC Rules.
Operation is subject to the following two conditions:
(1) This device may not cause harmful interference, and
(2) This device must accept any interference received.
Including interference that may cause undesired operation.
U.S.A.
U.S.FEDERAL COMMUNICATIONS COMMISSION
RADIO FREQUENCY INTERFERENCE STATEMENT
INFORMATION TO THE USER
NOTE : This equipment has been tested and found to comply with the limits for a
Class B digital device pursuant to Part 15 of the FCC Rules. These limits are
designed to provide reasonable protection against harmful Interference in a
residential installation This equipment generates, uses, and can radiate radio
frequency energy and, if Not installed and used in accordance with the
instructions, may cause harmful Interference to radio communications. However,
there is no guarantee that interference will not occur in a particular Installation. If
this equipment does cause harmful interference to radio or television reception,
which can be determined by turning the equipment off and on, the user is
encouraged to try to correct the interference by one or more of the following
measures:
*- Reorient or relocate the receiving antenna.
Increase the separation between the equipment and receiver.
*- Connect the equipment into an outlet of a circuit different from that to which the
receiver is connected.
*- Consult the dealer or an experienced radio/TV technician for assistance.
Changes or modification not expressly approved by the party responsible for
Compliance could void the user’s authority to operate the equipment. Connecting
of peripherals requires the use of grounded shielded signal cables.