Axesstel PG130 GSM/GPRS Quad Band Fixed Wireless Phone User Manual PH7PG130
Axesstel Inc GSM/GPRS Quad Band Fixed Wireless Phone PH7PG130
UserManual.wiki
>
Axesstel
>
PG130 User Manual
User Manual
Navigation menu
Upload a User Manual
Namespaces
Wiki Guide
HTML
PDF
Info
Views
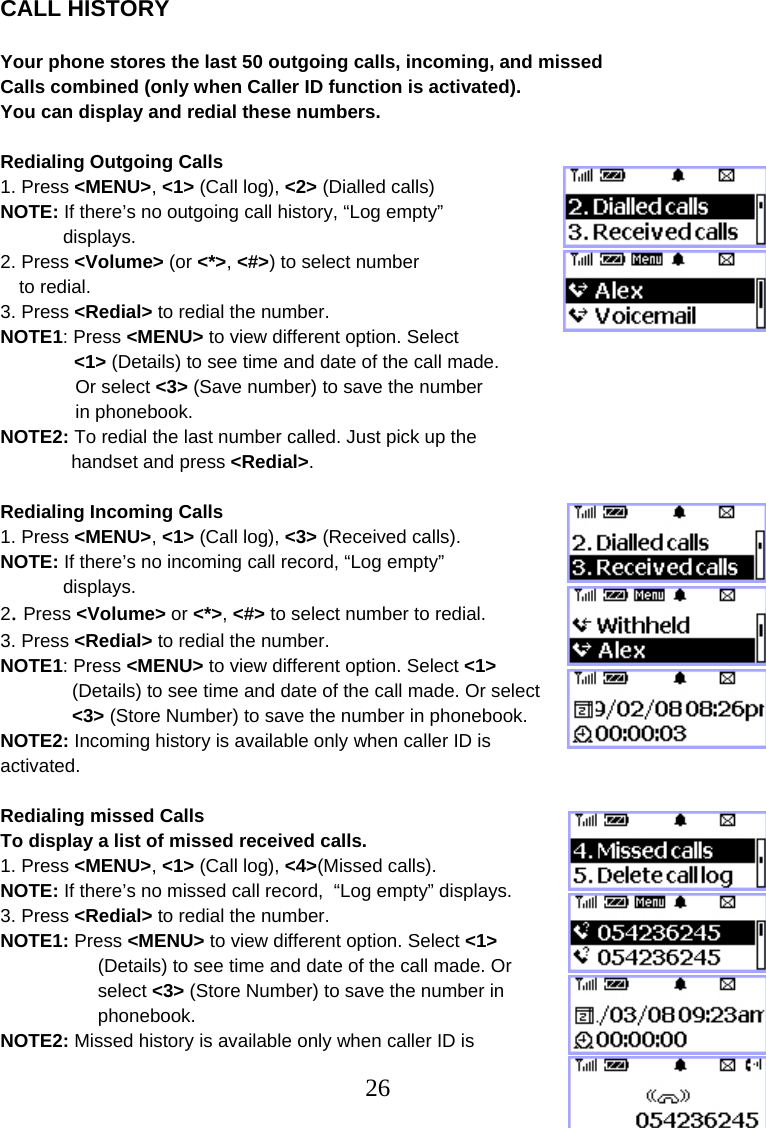
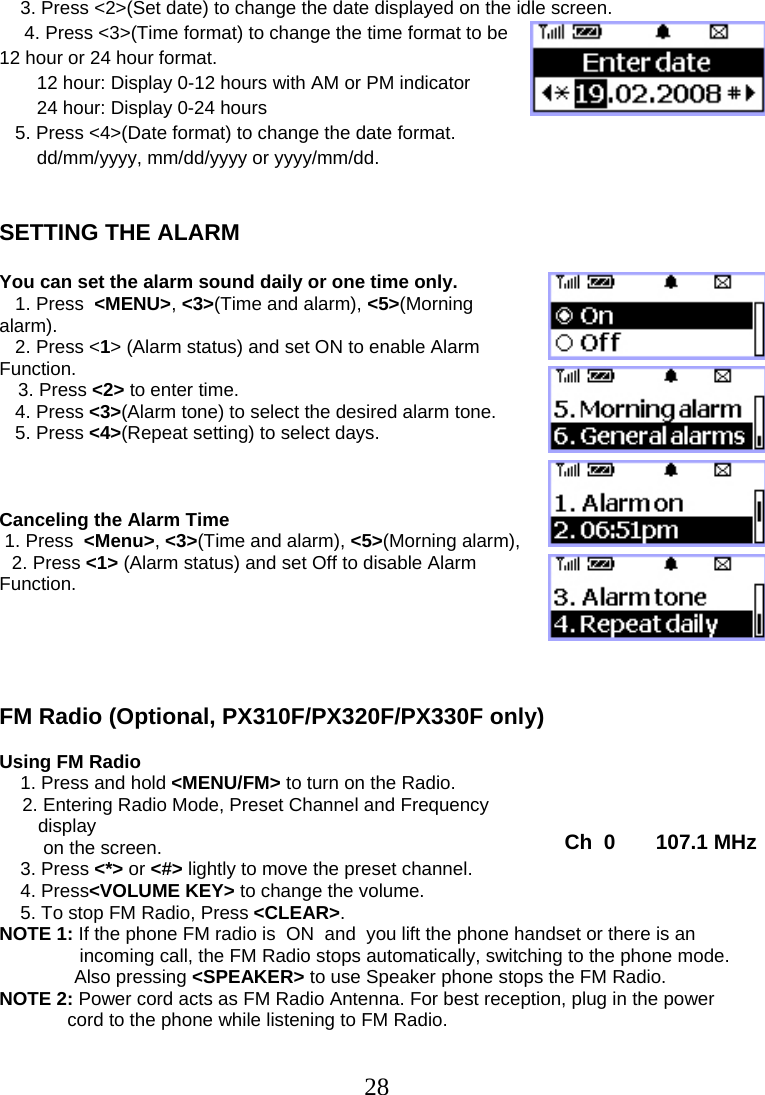
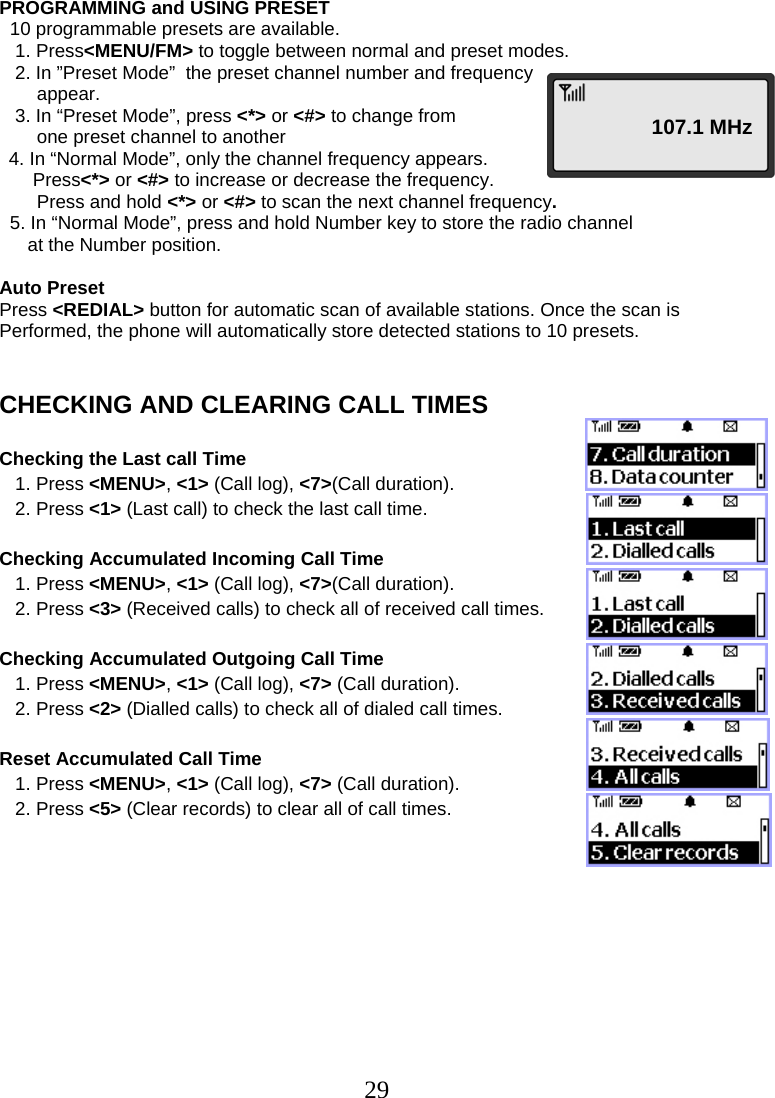
User Manual
Discussion / Help
Navigation


![44Select “[Standard Modem Types]” and “Standard 19200 bps Modem”. And press the Next button. Select a appropriate port that you have selected. This may take several minutes.](https://usermanual.wiki/Axesstel/PG130/User-Guide-924441-Page-44.png)