Axesstel PG530 WLL Telephone DUAL-BAND GSM User Manual PG530 MANUAL v1 1
Axesstel Inc WLL Telephone DUAL-BAND GSM PG530 MANUAL v1 1
UserManual.wiki
>
Axesstel
>
PG530 User Manual
>
User Manual
Contents
1.
Annex To User Manual
2.
User Manual
User Manual
Navigation menu
Upload a User Manual
Namespaces
Wiki Guide
HTML
PDF
Info
Views
User Manual
Discussion / Help
Navigation
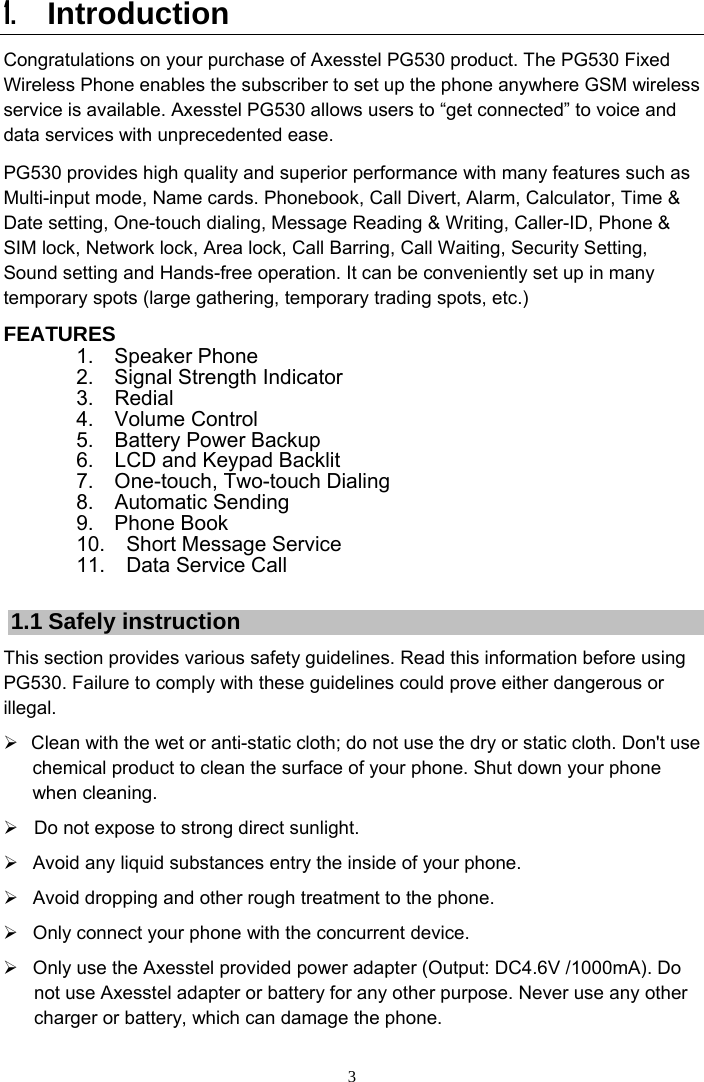
![8 Keys explanation 1. The left soft key ¾ In Standby mode, enter the main menu by pressing this key. ¾ At Menu state, enter sub-menu or the interface of menu. ¾ At Edit state, confirm your operation by pressing this key. ¾ At Off-hook state, after dialing the number, begin connect to the GSM network by pressing this key. 2. The right soft key ¾ In Standby mode, press this key to view phone book list. ¾ At Sub-menu state, press this key to return to the previous menu (current operation cancelled). ¾ At Main-menu state, return to the waiting mode by pressing this key. ¾ Enter the name card at standby mode. ¾ At Edit mode, press this key allow you to return to previous menu. 3. MUTE ¾ Access, search through, amend and save records when browsing the phonebook. ¾ During calls, press this key to adjust volume; hold/retrieve; end current (call); mute (if active, the other side can’t hear your voice.); main menu (enter the main menu) ¾ If you build more than two side communication, you could see another submenu when press “MUTE” key that is multiparty/join all (build the conference telephone) ¾ To prevent the person you are speaking from hearing you during conversation, but you can hear the other side speaking. Press “MUTE” key, LCD display “ ” on the top left corner. It means the phone is now on mute mode. Press “MUTE” key again to cancel mute mode. 4. [0-9] ¾ At off-hook or HAND-FREE state, input the calling numbers. ¾ You can input the corresponding character for all kinds of input mode and select the character you want to input. In the English mode, press '1' you can input special character. ¾ You can press this number key as a speed dial number in the standby mode.](https://usermanual.wiki/Axesstel/PG530.User-Manual/User-Guide-872823-Page-9.png)
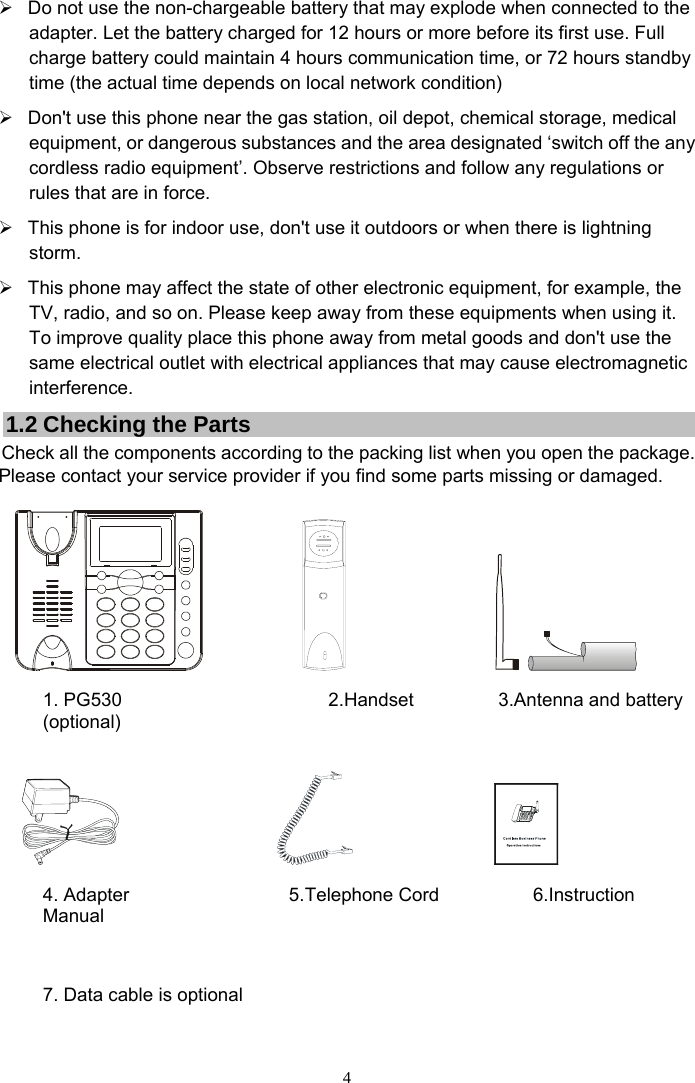
![12 At the all input state, press * to get special characters as follows: └┘, 。:; ?! “ ” 、… - $ ( ) ¥ « » #‘’£〈〉 + - * / = % ~ ¯ @ [ ] Use ▲ or ▼key to scroll through the character list, please pressing the figure about relative to the bottom of the character. Press 0 to get a blank space. 4.3 Input Mode At the input state, press # to switch to different input mode in order, press “CLEAR” key to delete the character before the cursor while press this key long enough to delete all the character you input. ▲key is used to make cursor right shift and ▼ key is used to make cursor left shift. When you add new phonebook names or view the names in the phone Book, the input mode automatically switches to the ABC mode and displays the ABC icon. 4.3.1 Write with standard text input “ABC”. “ABC” text input is the default mode for text entry. When you use standard text input, the icon ABC appears in the upper right corner of your phone’s screen. 1. Press the key that is below the letter you want to enter. 2. Press it several times until the desire letter appears on the screen. For each key have several letter. Press a key once or several times to enter the letter(s) you want. For example, press the “2” key three time to enter the letter C. 4.3.2 Write with text input "abc" Press # until the symbol "abc" appears on the right corner of phone screen then you could write with "abc" input mode. The use of this input mode is the same as "ABC" input mode. The only difference between them is "ABC" input mode use for upper case input while "abc" for lower-case input! Other functions remain the same. 4.3.3 Write with T9ENGLISH Text Input “ABC”/”abc” With predictive text input, you need to press each number key only once for each letter, since the word changes after stroke a key, try to disregard the word until you have finished all the characters. Then you could press ▲ and ▼ key to select a desired word! Press ▲and ▼ key to view the next matching word if the word is not the desire word. Once found the correct word, press the left soft key to confirm it. You can change “ABC” to “abc” in turn by press 1 key when you with this text input. 4.3.4 Write with T9SPANISH Text Input “ABC”/”abc” With predictive text input, you need to press each number key only once for each letter, since the word changes after stroke a key, try to disregard the word until you have finished all the characters. Then you could press ▲ and ▼ key to select a](https://usermanual.wiki/Axesstel/PG530.User-Manual/User-Guide-872823-Page-13.png)