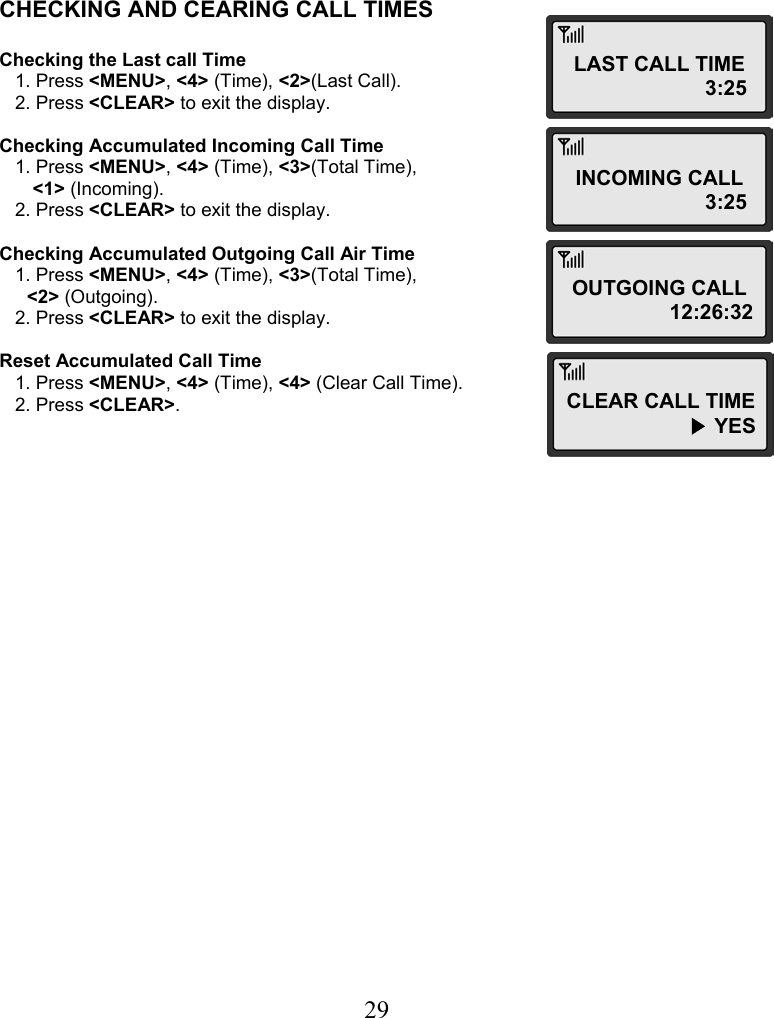
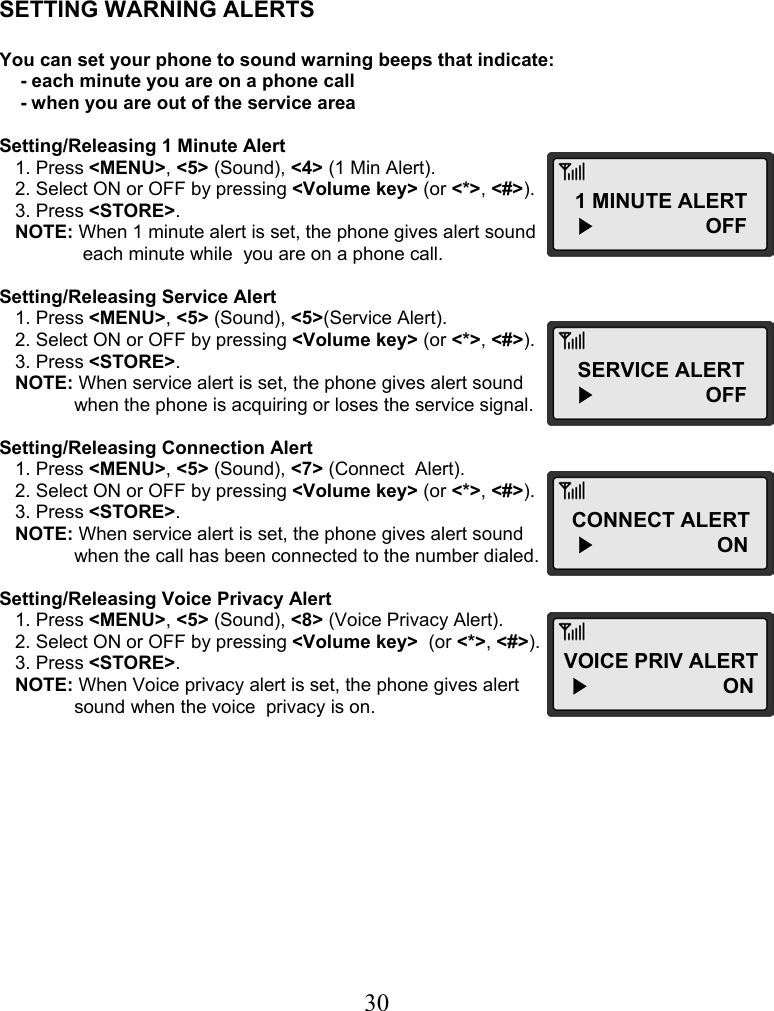
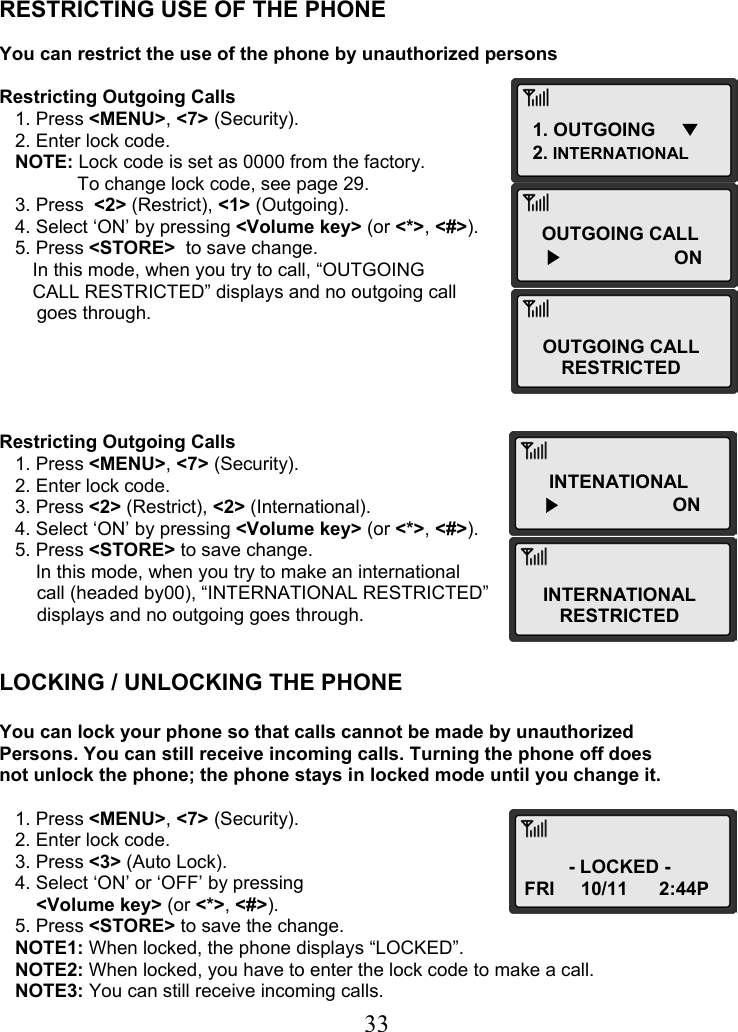
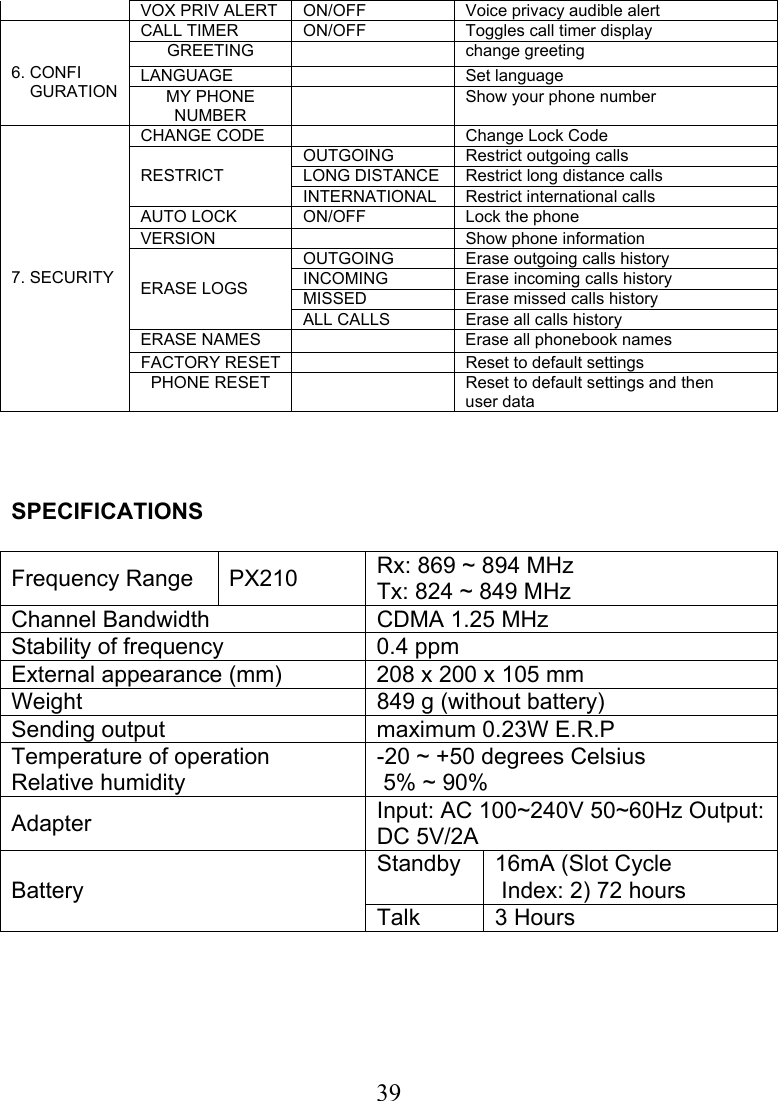
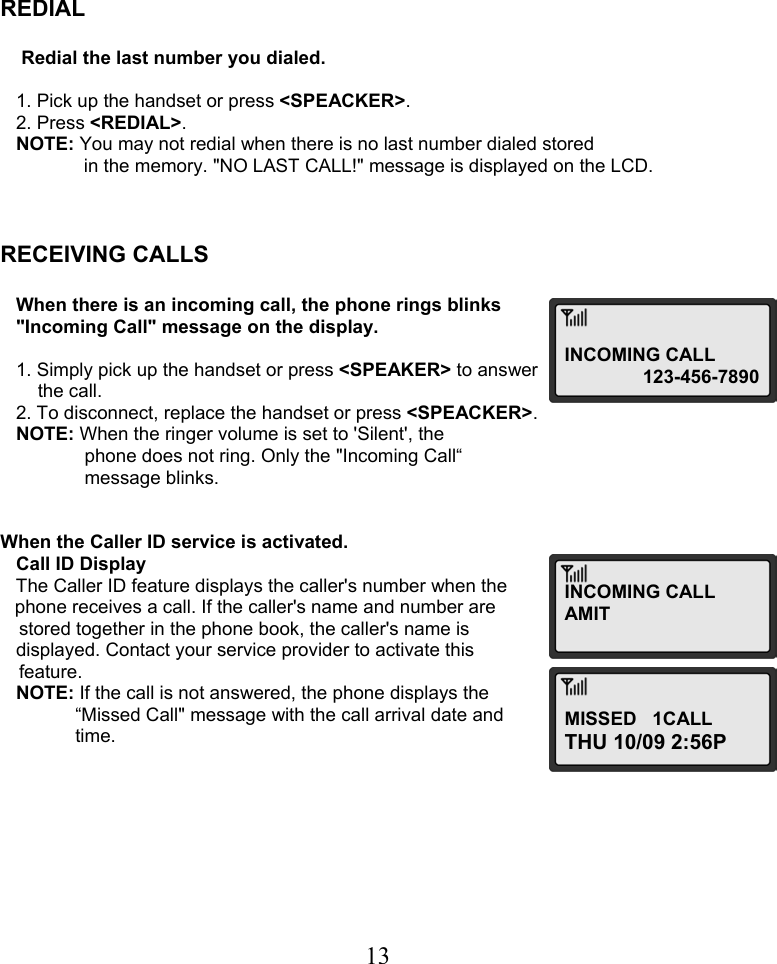
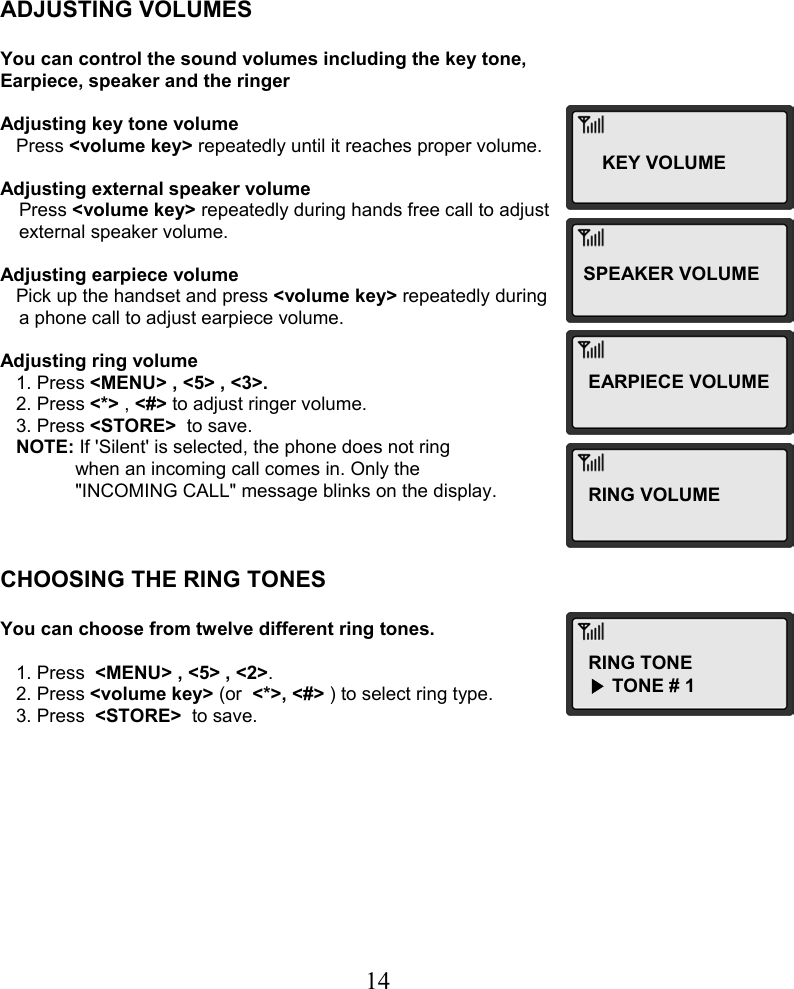
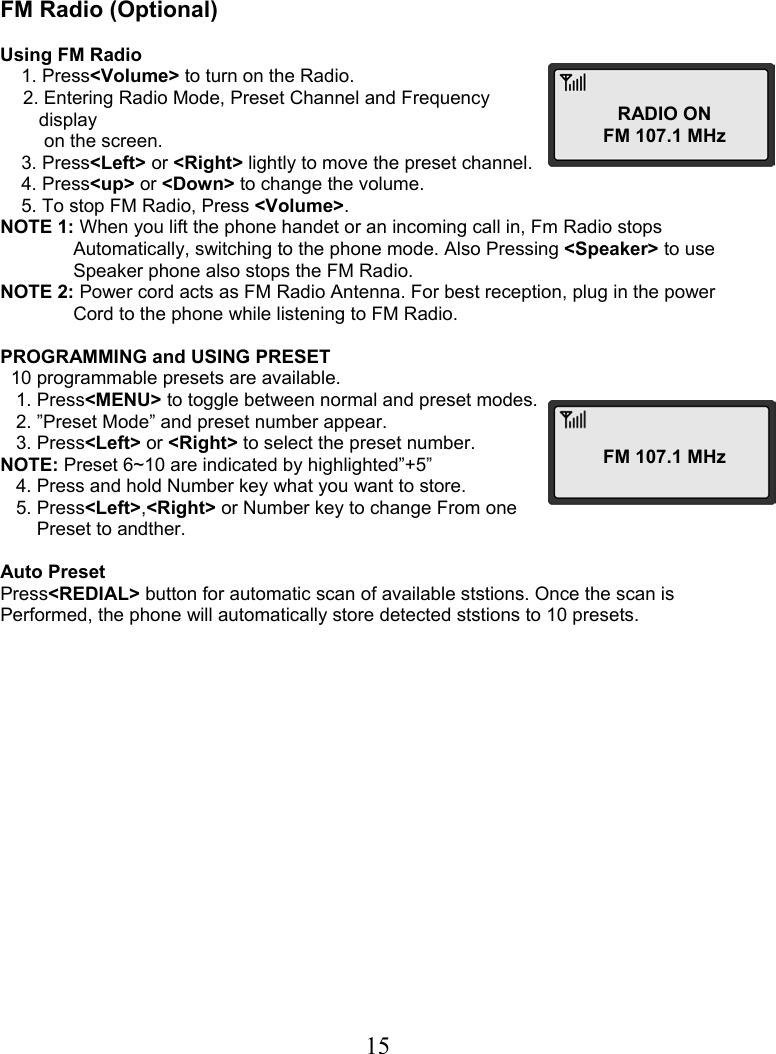
Axesstel PX230 Fixed WLL Telephone (PCS CDMA) User Manual PX200 Manual v0 1
Axesstel Inc Fixed WLL Telephone (PCS CDMA) PX200 Manual v0 1
UserManual.wiki
>
Axesstel
>
PX230 User Manual
Users Manual
Navigation menu
Upload a User Manual
Namespaces
Wiki Guide
HTML
PDF
Info
Views
User Manual
Discussion / Help
Navigation
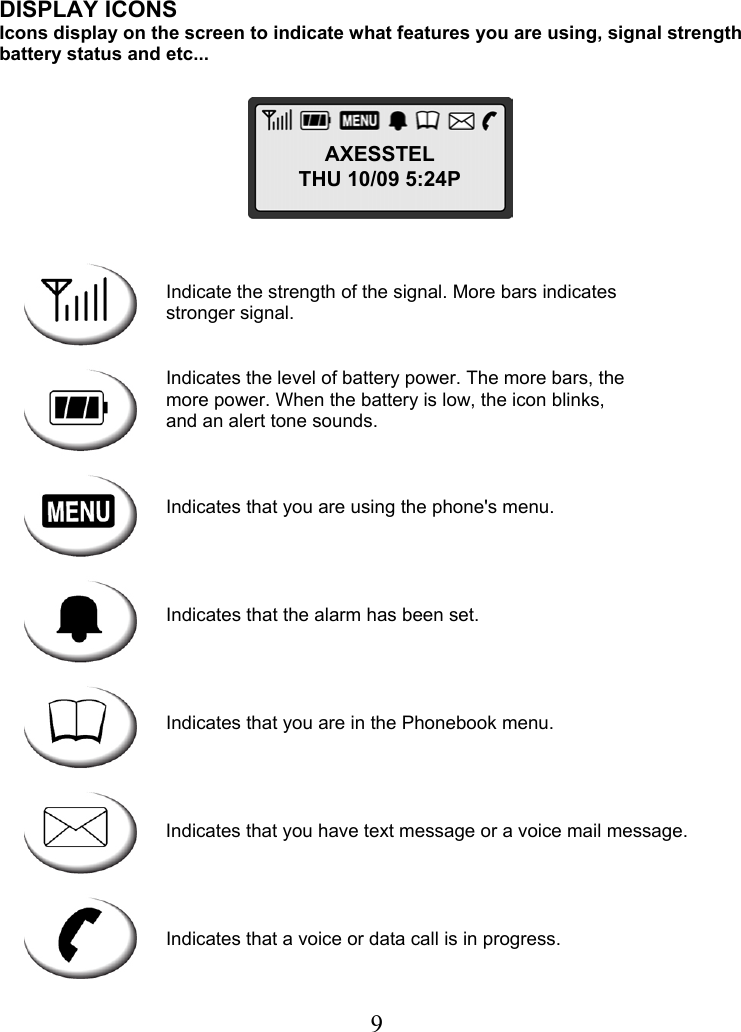
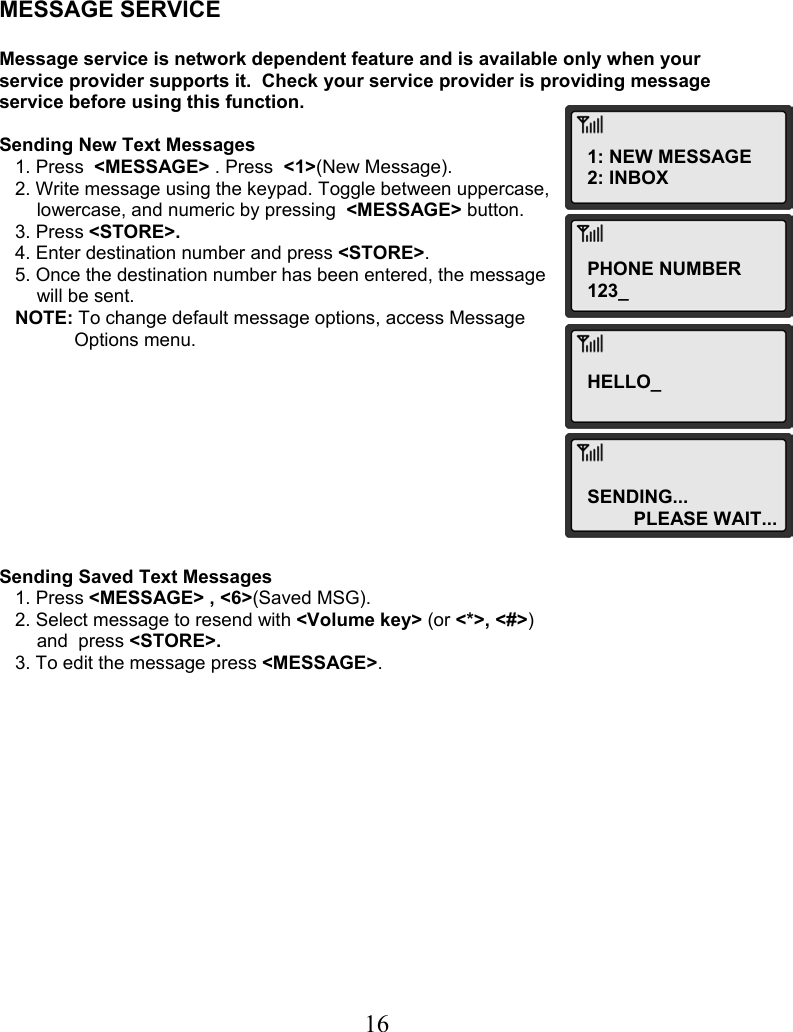
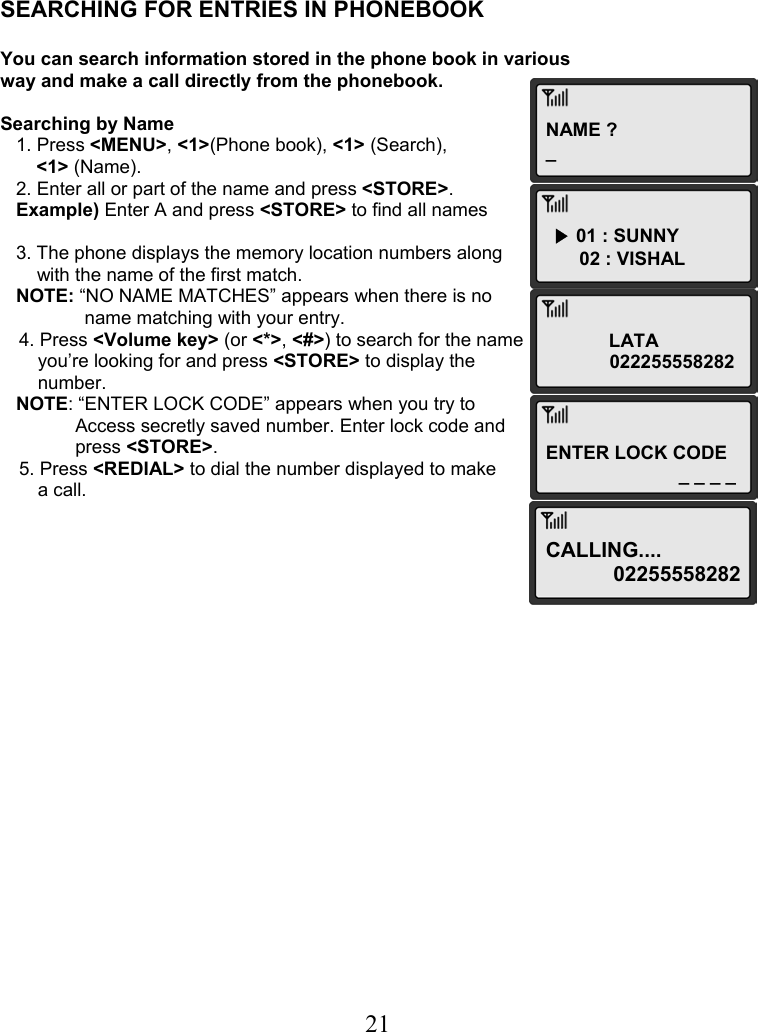
![20NAME ?_ PHONE NUMBER ? _ MEMORY LOCATION SPEED DIAL : [01] OVERWRITE ? 01 : SUNNY CONFIDENTIAL ? NO INTERNAL PHONE BOOK Your phone has an internal "Phone Book" in which you can store up to 99 frequently used names and numbers. STORING IN THE MEMORY PHONEBOOK 1. Press <MENU> , <1> . 2. Enter the name by pressing the alphanumeric keypad and pressing <STORE> after completed. NOTE1: If you do not want to enter a name. just press <STORE> here. The number will be saved as "No Name". NOTE2: Name entry is limited to maximum of 16 letters. How to Enter &Edit Texts You can enter letters using the alphanumeric keypad. Each button has 3 to 4 letters assigned. Each stroke on the button scrolls the assigned alphabet letters and the numeric value. Stop pressing when the letter you want appears. You can switch between uppercase, lowercase, and numeric characters by pressing <MESSAGE> . To enter special characters. Press <1> repeatedly. For space, press <#> . To go back, press <*> . A single stoke on <CLEAR> will erase the last letter in line. 3. Enter the telephone number and press <STORE>. Up to 32 digits can be saved. 4. An empty location displays automatically. Press <STORE> to save the number in the location. 5. To assign a different location, enter 2 digit location number and press <STORE>. NOTE: If you select the location in which a number has already been stored, “OVERWRITE?” will be displayed. Press <STORE> to overwrite or press to go back to automatic location. 6. “CONFIDENTIAL?” will be displays. Press <STORE> if no secret feature is necessary. To store the number in secret, select ’YES’ by pressing (or <*>, <#>)and press <STORE> . NOTE: Secretly saved number will not be displayed unless the lock code is entered. One or two touch-dialing secretly saved number will prompt lock code entry.](https://usermanual.wiki/Axesstel/PX230/User-Guide-703424-Page-20.png)